

Page 1

Manuel d’utilisation
Bedienungsanleitung
Manuale di utilizzazione
User manual
Manual de utilización
Manual de utilização
Gebruiksaanwijzing
Bruksanvisning
Page 2

Page 3

FR
Modèles 27” et 32” : une interface est disponible en option pour la
fixation du support mural.
DE
27” und 32” LCD TV Modellen: für die Montage der Wandhalterung ist
einer Zwischenteil als Option erhältlich.
IT
Modelli 27” i 32”: una interfaccia è disponibile su richiesta per il
fissaggio del supporto a muro.
EN
27” and 32” models: a cover is available separately for the installation
of the set on the wall mount.
ES
Modelos 27” y 32”: una interfaz e disponible opcionalmente para la
fijación del soporte mural.
PT
Modelos 27” e 32”: um acessório opcional está disponível para a
instalação sobre o suporte mural.
NL
27” en 32” modellen: een scheidingselement is optionel voor
installatie op de muurbevestiging.
SV
27” och 32” modeller: det finns ett koppling att köpa som tillval för
montering av väggstativ.
27” 32” 37”
ADA594 ADA595 -
VESA 200x100 VESA 200x100 VESA 600x200
Page 4

FR
Votre téléviseur est un appareil de la gamme Intuiva.
Sur les appareils de cette gamme, l’écran n’est pas équipé d’une vitre de protection.
DE
Ihr Fernseher ist ein Gerät der Produktfamilie Intuiva.
Die Bildschirme dieser Geräteproduktfamilie sind nicht mit einer Schutzscheibe versehen.
IT
Il vostro televisore appartiene alla gamma Intuiva.
Negli apparecchi di questa gamma lo schermo non è dotato di vetro protettivo.
EN
Your TV set belongs to the Intuiva product range.
On TV sets of this range, there is no glass shield on the screen.
ES
Su televisor es un aparato de la gama Intuiva.
La pantalla de los aparatos de esta gama no están equipados con cristal de protección.
PT
O seu televisor é um aparelho da gama Intuiva.
Nos aparelhos desta gama, o ecrã não possui vidro de protecção.
NL
Uw televisie is een toestel uit het Intuiva gamma.
De toestellen uit dit gamma zijn niet voorzien van een glazen schild.
SW
Din TV är en apparat inom gruppen Intuiva.
På apparater inom denna grupp är skärmen inte utrustad med ett skyddsglas.
Addendum
35993600
Page 5

1
Contents
EN
This manual applies to several TV set models. Some features may
not be available on the model you purchased. Refer to the
feature table provided with this manual to find out the main
features of the relevant model.
Optional functions are indicated by the following symbol:
The model number of your TV set is on a label at the back of
the set and on the cover of this manual.
In the interest of improving the quality of our products, we
reserve the right to modify their features.The information in this
manual is, therefore, subject to change and does not represent
any kind of contract.
Getting started
Important information ....................................................................2
Safety ....................................................................................................2
LCD panel............................................................................................2
Care ....................................................................................................2
Hanging the TV set on the wall ......................................................2
Switching on ......................................................................................3
Remote control TV functions ..........................................................4
Playing files from memory cards ....................................................4
Using the remote control for other equipment ............................4
Programming the remote control..................................................4
Programming the volume control function..................................5
Channel set-up
Initial set-up ......................................................................................6
Manual channel set-up ......................................................................7
General operation
Switching the TV set on and off ......................................................8
Accessing channels............................................................................8
Accessing your favourite channels ..................................................8
Accessing AV programmes ..............................................................8
Volume ..............................................................................................8
Displaying status information ..........................................................8
Zoom..................................................................................................9
List of channels..................................................................................9
Freezing a picture ............................................................................9
Flat batteries ....................................................................................9
Product information ........................................................................9
Advanced functions
Adjusting the sound ........................................................................10
Tone control ....................................................................................10
Headphone settings ........................................................................11
Adjusting the picture......................................................................11
Other settings ................................................................................12
Setting the time ..............................................................................13
Setting the time and date ..............................................................13
Using the calendar ..........................................................................13
Programming the sleep timer........................................................13
Programming the wake-up timer ................................................14
Parental control ..............................................................................14
Definign a PIN code........................................................................14
Locking a channel or AV programme ..........................................15
Locking the buttons on the TV set..............................................15
Locking the Time menu..................................................................15
Locking the Installation menu ......................................................15
Operation (TV mode) ....................................................................15
Customising your television ..........................................................16
Preferences........................................................................................16
Configuring AV sockets ..................................................................16
Playing files from memory cards ..................................................17
Other functions................................................................................18
Te letext ............................................................................................19
Accessing Teletext............................................................................19
Navigator ..........................................................................................19
Other Teletext functions................................................................19
Other information
Sockets ............................................................................................20
Connecting active speakers or an amplifier ................................21
Connecting headphones ................................................................21
Connecting a video recorder ........................................................21
This publication is printed on recycled paper.
This symbol means that your inoperative electronic
appliance must be collected separately and not
mixed with the household waste.The European
Union has a implemented a specific collection and
recycling system for which producers' are
responsible.
This appliance has been designed and manufactured with high
quality materials and components that can be recycled and
reused. Electrical and electronic appliances are liable to contain
parts that are necessary in order for the system to work
properly but which can become a health and environmental
hazard if they are not handled or disposed of in the proper way.
Consequently, please do not throw out your inoperative appliance
with the household waste.
If you are the owner of the appliance, you must deposit it at the
appropriate local collection point or leave it with the vendor
when buying a new appliance.
- If you are a professional user, please follow your supplier's
instructions.
- If the appliance is rented to you or left in your care, please
contact your service provider.
Help us protect the environment in which we live !
Page 6

2
Getting started
EN
Important information
Safety
Ensure that your domestic mains supply voltage matches the
voltage indicated on the identification sticker located at the
back of your set.This TV set is a class 1 appliance. It must be
connected to an electrical wall socket with an earth.
The TV set's components are sensitive to heat.The maximum
ambient temperature should not exceed 35° Celsius.Do
not cover the vents at the back or sides of the TV set. Leave
sufficient space around it to allow adequate ventilation. Install
the appliance away from any source of heat (fireplace, ...) or
appliances creating strong magnetic or electric fields.
Moisture in rooms where the set is installed should not
exceed 85% humidity. If you have to use the TV set outdoors,
do not expose it to rain or splashing water. Do not
place any object containing a liquid (vase, glass,bottle,
etc.) on or near the set. Moving the set from a cold place to a
warm one can cause condensation on the screen (and on some
components inside the TV set). Let the condensation evaporate
before switching the TV set on again.
The button at the side of the TV set can be used to
switch it on and put it into standby mode. If you are not
going to be watching the TV for a lengthy period of
time,switch it off completely by removing the plug from the
mains power socket.
During thunderstorms,we recommend that you disconnect
the TV set from the mains and aerial so that it is not affected
by electrical or electromagnetic surges that could damage it.
For this reason, keep the mains and aerial sockets
accessible so they can be disconnected, if necessary.
Unplug the TV set immediately if you notice it giving off a
smell of burning or smoke.You must never, under any
circumstances, open the TV set yourself, as you run the risk of
an electric shock in doing so.
LCD panel
The LCD panel used in this product is made of glass.
Therefore, it can break when the product is dropped or
impacted upon by other objects.
The LCD panel is a very high technology product, giving you
finely detailed pictures. Occasionally, a few non-active pixels
may appear on the screen as a fixed point of blue, green or
red.This does not affect the performance of your product.
Care
Use a glass-cleaning product to clean the screen and a soft
cloth and mild detergent to clean the rest of the set.
Important: Using strong detergents,alcohol-based and
abrasive products may damage the screen.
Dust the vents at the back and sides regularly. Using solvents,
abrasive or alcohol-based products could damage the TV set.
If an object or liquid enters inside the appliance, unplug it
immediately and have it checked by an authorised engineer.
Never open the appliance yourself since this may put you at
risk or damage the appliance.
Hanging the TV set on the wall
Warning:This operation requires two people.
THOMSON disclaims any liability for damages
caused by the TV set being installed inappropriately.
Please observe the following safety instructions to make sure that
the TV set is hung on the wall safely.
Check that the wall can support the weight of the TV set and
wall mount.
Follow the fitting instructions supplied with the wall mount.
Hang the TV set on a vertical wall.
Use screws that are suitable for the material the wall is made
of.
Arrange the TV set's connection cables so that they don't pose
a risk of anyone falling over them.
In the case of certain models, an adapter is required, which is
available as an option, for fitting the TV set on a VESA wall
mount. Fit the adapter using the screws supplied.
In addition, all the other safety instructions concerning the use of
our TV sets remain completely valid
THOMSON disclaims any liability if the TV set is not used
in accordance with this manual.
Before setting up your television set,make sure
that the surface you want to put the set on can
support its weight (see the list of specifications
provided with the booklet).
Don’t place the set on an unstable surface (e.g.
moving shelf, very edge of a unit) and make sure
that the front of the television set does not
overhang the surface it is sitting on.
Page 7

3
Getting started
EN
Switching on
Follow the instructions on this page on how to switch on your TV set and the remote
control before going on to following pages describing how to use the remote control and
the channel set-up procedure.
1. Insert two LR06 or AA batteries in the remote control.
Precautions on using batteries:
- Only use the battery types specified.
- Make sure you use the correct polarity.
- Do not mix new and used batteries.
- Do not use rechargeable batteries.
- Do not expose batteries to excessive heat, throw them in a fire, recharge them or try to open
them, as this could cause them to leak or explode.
- Remove the batteries from the remote control if you are not using it for a long period of time
(several weeks).
2. Connect the power cable FIRST to the television, THEN to a mains socket.
Your TV set should only be connected to a 220 - 240 V ~ 50/60 Hz AC supply.
It must not be connected to a DC supply. If the plug is detached from the cable, do not, under
any circumstances, connect it to a mains socket, as there is a risk of electric shock.
Equipment for the UK and Ireland is supplied with a mains cable fitted with a moulded
plug.
This plug contains safety components and must not be replaced by one sold by general
retailers. It is fitted with a fuse that protects your television. If your set has stopped
working, the fuse may have blown. If it has, replace it with an identical ASTA or BSI
certified (BS1362) 5-amp fuse.
3. Connect the outside aerial or cable network to the TV Antenna socket at the back
of the TV set.
The aerial socket (75 Ohms - VHF / UHF / cable) can be used for connecting an external aerial
or other equipment fitted with a modulator (video recorder, satellite receiver, etc.).
We recommend that you do not connect other equipment (video recorder, satellite receiver, etc.)
to your TV set to begin with, so as not to complicate the set-up procedure with the additional
steps involved. Connect them when you have finished setting up the channels by referring to
page 20 of this manual.
4. Switch the TV on by pressing the button located on the side.
Note:The first time you switch on the television, the language selection menu appears.
You will find a description of how to use the remote control on page 4.Then go to page 6
for information on the initial set-up, or to page 7 for information on manual set-up (if the
channels have already been set up on your TV).
Note: Before connecting other devices to the AV sockets, carry out the initial channel set-up
(described on page 6) in order to avoid any problems with equipment selection.
220 - 240 V ~ 50/60 Hz
Mains socket
in continental
Europe
5A
Please respect the environment and the relevant regulations. Before you dispose of
batteries (or accumulators), ask your dealer whether they require special recycling and if
he is able to take them back.
Page 8

Getting started
4
EN
Using the remote control for other
equipment
This remote control can be used to control other appliances using
the programmable buttons
VCR, DVD, SAT, AMP and AUX.
For each button you can control the following appliances:
VCR: video recorder
DVD :DVD player
SAT: satellite receiver, cable network
AMP: hi-fi system,Home Cinema amplifier
AUX: decoder for terrestrial digital TV set and any other
appliance. For instance, if you have two video recorders, you can
program the
VCR button to control one video recorder, and
program the
AUX button to control the other one.
Note:The TV button is not programmable.
Remote control TV functions
Most of your television’s functions are available via the menus that
appear on the screen.The remote control supplied with your set
can be used to navigate through the menus and to configure all the
general settings.
Standby / quit standby.
TV To access TV mode. Press this button to control the
television.
VCR To access VCR mode .
DVD To access DVD mode.
SAT To access SAT mode.
AUX To access AUX mode.
AMP To access AMP mode.
PRESETS (red button) preset settings menu.
LIST (green button) list of channels (see page 9).
INFO (yellow button) status information (see page 8).
GUIDE (blue button) programme information (see page 8).
TEXT (purple button) Teletext (see page 19).
The coloured buttons can also be used for operating Teletext.
To select menu options.
To set functions, change values, enable and disable
functions (checkbox) in menus.
To select the picture format or zoom.
OK To confirm a selection, enable and disable functions
(checkbox) in menus.
To freeze the picture (see page 9).
MENU To access the
OVERVIEW
menu.
EXIT To exit the menu structure.
+/- To control the volume.
MUTE To s witch the sound off and back on again.
RETURN To r eturn to the previous channel/AV programme.
PR+/PR- To change channels.
0-9 To select a channel by its number. In the case of channel
numbers with two digits:
- press the tens digit for a few seconds to display it on the
screen, then press the units digit or
- press
0/--
to display “--”, then enter the channel number.
To enter numeric values in menus.
In PC mode, the buttons
1-9
can be used to return to TV
mode and change channels.
AV To select an appliance connected to an AV socket.
DEMO (Disabled).
Playing files from memory cards
When playing mp3,WMA, JPEG, MPEG and DivX files, you can use
some of the buttons on the remote control to perform certain
functions, which vary according to the type of file.
INFO To display the Info menu.
REVERSE mp3 and WMA: to return to the previous file.
JPEG: to reduce the projection speed.
PLAY To play.
FORWARD mp3 and WMA: to go on to the next file.
JPEG: to increase the projection speed.
STOP To stop playing.
PAUSE To pause, stop at a particular picture.
MPEG and DivX: to change files.
0-9 MPEG and DivX: to select a file by its number.
Programming the remote control
Automatic code search
This method can be used to automatically find the most
appropriate code for your appliance.
1. Switch on the appliance you wish to use the remote control
with.
2. Press the relevant button for this appliance on the remote
control, and while holding this button down, press the
standby button until the appliance buttons of the remote
control come on. Release both buttons.
3. Point the remote control at the appliance and press PLAY.If
the appliance has not gone into standby mode, press the
PLAY button again to continue the search for the next set of
codes. Repeat this operation until the appliance goes into
standby mode.There are around 20 sets of codes.
4. When the appliance goes into standby mode, switch it on again
without using the remote control. Press the
REV button as
many times as is required to return the appliance to standby
mode.
5. Press the STOP button and hold it down until the appliance
buttons of the remote control go off.
Note:You can cancel the programming operation at any time by
pressing the
EXIT button.
Page 9

5
Getting started
EN
Manual programming
This method involves carrying out a manual search for the codes
to be used for controlling your other appliances.
1. Switch on the appliance you wish to use the remote control
with.
2. Press the relevant button for this appliance on the remote
control, and while holding this button down, enter one of the
codes relevant to your make of appliance (there is a list of
codes at the end of this manual). If the appliance buttons of the
remote control flash you have entered the wrong code or it is
not possible to program the remote control.
3. Point the remote control at the appliance and press the
relevant button (
VCR, DVD, etc). Press the standby
button. If the appliance does not go into standby mode, try
another code.
Depending on the year of manufacture and the type of appliance,
some functions may not be available. Certain codes may cover
more functions than others.Test the functions you can control and,
if appropriate, try other codes. Note here the code(s) which work
best.
When you change the remote control’s batteries,remember
to reprogram it.
Programming the volume control function
If you have programmed the TV remote control to use with other
appliances and these are connected to an amplifier you can also
programme the remote control to adjust the volume when you
are using one of these appliances.The example below describes
the procedure for programming a DVD player.
1. Programme the AMP button on the remote control to use
with the amplifier (refer to page 4).
2. Move the remote control away from the appliances. Press the
-
button and while holding it down, press the relevant
mode button (
DVD ,in this example), then the AMP button.
Release the
-
button.
3. Switch on the amplifier, then the DVD player.
4. Set the remote control to DVD, play a disc and adjust the
volume using the
+/-
buttons.
Repeat this operation for the other appliances.
To cancel the programmed function for any of the appliances, press
the
-
button, while holding it down and enter the code 000
using the numeric buttons.
VCR
DVD
SAT
AUX
AMP
Video recorder DVD player Satellite receiver Hi-fi system
Press the
VCR
button. Press the
DVD
button. Press the
SAT
button. Press the
AMP
button.
On/Standby On/Standby On/Standby On/Standby
MENU To display the main menu To display the main menu To display the main menu
Ve rtical scrolling in menus Vertical scrolling in menus Vertical scrolling in menus
Horizontal scrolling in menus Horizontal scrolling in menus Horizontal scrolling in menus
OK To confirm an action To confirm an action To confirm an action
EXIT To close a menu To close a menu To close a menu
0-9 To directly access channels To enter numeric values To directly access channels To select a station using
or enter numeric values or select options in menus or enter numeric values its number
PR+/PR- To change channels To change chapters To change channels To change stations
AV To select AV input To select AV input
REV Rewind Rewind
PLAY Play Play
FWD Fast forward Fast forward
STOP Stop Stop
PAUSE Pause picture Pause picture
REC Record
MUTE To s witch the sound off and
back on again
+/- To set the volume level
Important:
If the batteries in your remote control are run down you can use the
buttons on the front of your TV set. In TV mode, they have the same
functions as the corresponding buttons on the remote control.In the
menus they have the following functions:
PR
PR
VOL
or
OK
VOL
¦
or
OK
MENU
To confirm a selection
Page 10
6
Channel set-up
EN
Initial set-up
Initial set-up involves selecting all the settings required to be able to search for and store all
the channels you can receive. Make sure that the television is switched on and follow all the
steps in turn specified hereafter.
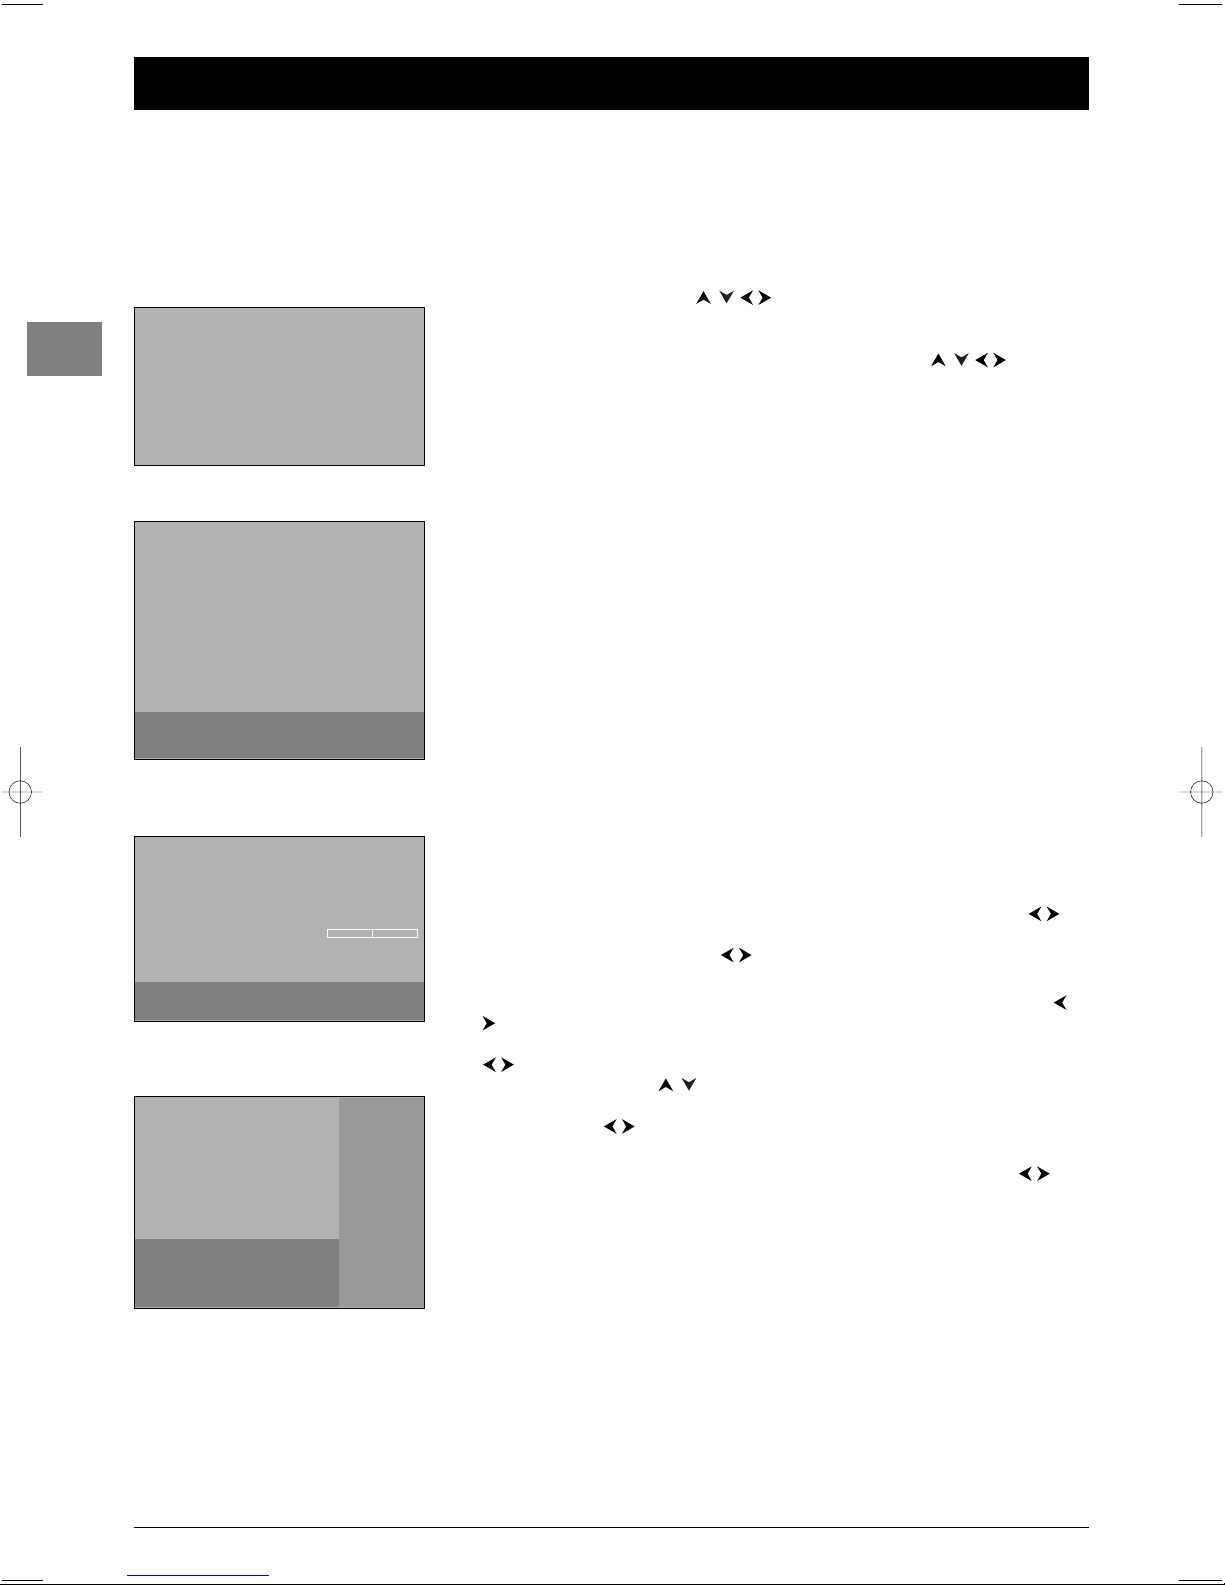
The first time you switch the television on, the language selection menu appears.
1. Select your language using the buttons and confirm by pressing OK.When
you select a language, it is applied to the menus immediately.
2. A list of countries appears. Select the relevant country using the buttons.
Press
OK to confirm.
Note:This is the country you are in, or the country whose channels you want to receive if you live
near its borders.
3. The Automatic installation menu appears.The Automatic search option is
selected. Start the automatic set-up by pressing
OK.The message Running appears
next to the
Automatic search option and the Progress and Channels found
options appear, informing you of the installation procedure’s progress.
Notes:
- The automatic set-up process can take up to 10 minutes.To prevent the channel set-up
process from being interrupted, wait for the message indicating that the set-up is complete
before closing the menu.
- The automatic set-up process deletes all the channels previously stored.
4. Channels are arranged in a pre-set order.
- To modify this order, name and rename channels or delete channels stored twice,
press OK and go to step 5.
- If you do not want to reorganise the channels, press
EXIT to close the menu.
5. The Organiser menu allows you to change the order of the channels as arranged
during the automatic set-up process, to name or rename channels, as well as delete
channels stored twice or with poor reception quality.You can also define certain
channels as your favourite channels so that you can access them more quickly by
pressing the
PR+/PR- buttons. Simply follow the instructions at the bottom of the
screen. Use a TV programme magazine to identify the channels.
• Organising channels: Select the Select channel option. Using the PR+/PR-,or
numeric buttons, display the number of the channel to be moved. Select the
Swap
with channel option. Using the or numeric buttons, enter the number you
want to assign this channel to. Press
OK.
• Changing a channel name: Select the
Select channel option. Using the PR+/PR-,
or numeric buttons, display the number of the channel whose name you want to
change. Select the
Channel name option and choose a name from the list using the
buttons. If none of the names available is suitable select ------.The cursor appears
at the first dash. Use the buttons to select a character from the list made up of
the letters in the standard alphabet, the numbers 0 to 9 and certain punctuation
symbols. Use the buttons to go to another character. A name can only have a
maximum of six characters. Press
OK to confirm.
• Deleting a channel: Select the
Select channel option. Using the PR+/PR-,or
numeric buttons, display the number of the channel to be deleted. Select the
Delete
channel option and press OK.
• Defining a favourite channel: Select the
Select channel option. Using the PR+/PR-
or numeric buttons, display the number of the channel you want to define as a
favourite. Select the
Favourite channel option and check the box by pressing OK.
You can define up to six favourite channels.
When you have finished press EXIT to close the menu.
To access the
Organiser menu another time, press the MENU button to display the
OVERVIEW menu, select Installation and press OK.Then select Organiser from
the
Installation menu.
English
Français
Deutsch
Italiano
Español
Nederlands
Português
Norsk
Svenska
Dansk
âe‰tina
Eλληνικα
Magyar
Polski
Русский
Suomi
1
Country
Return
UK
Germany
Italy
Belgium
Austria
Sweden
Switzerland
Other
France
Spain
Portugal
Netherlands
Denmark
Finland
Norway
Russia
Poland
Cz. Republic
Hungary
Luxembourg
Australia
New Zealand
2
To select your country, use the
direction keys and press OK.
Automatic installation
Return
Automatic search
Running
Automatic update ...
Progress
Channels found 05
3
Organiser
Return
Select channel
02
Swap with channel _ _
Channel name BBC2
Delete channel 02
Favourite channel
5
Enter the number of the channel
you want to move, delete or set as
favourite.
Auto installing in progress. Please wait.
To cancel, press EXIT.
01 BBC1
02 BBC2
03 ITV1
04 Channel 4
05 Channel 5
06 Sky One
07 Film Four
08 Sky Sports
09 MTV
10 Discovery
Page 11

7
Channel set-up
EN
Manual channel set-up
Follow the procedure given on this page if you find that some channels have not been
stored during the initial set-up.This can happen if you are setting up cable network
channels. Setting up channels manually requires every setting for a particular channel to be
entered, one at a time.
Display the
OVERVIEW menu by pressing the MENU button. Select the Installation
option and press OK to confirm. Select the Manual installation option from the
Installation menu and press OK to confirm.
1. Select the Standard option. Use the buttons to select the standard for your
country.
Note:The following standards are available to choose from: I for the UK and Ireland, France
for France and Luxembourg, DKK’ for Eastern Europe, the Middle East and Asia, EURO
BG
for Western Europe, Australia for Australia, and New Zealand for New Zealand.
2. Select the Reception option. Select the reception method for the channels (aerial or
cable network) using the buttons.
3. Select the Channel search option. Enter the number of the reception channel or
use the buttons to find the channels.When a channel has been found the picture
is displayed.
4. If the picture is not clear you can adjust the setting.You do this by selecting the Fine
tuning option and adjusting it with the buttons.
5. Select the Channel name option and choose a name from the list using the
buttons. If none of the names available is suitable select
CH____. Use the
buttons to select a character from the list made up of the letters in the standard
alphabet, the numbers 0 to 9 and certain punctuation symbols. Use the buttons to
go to another character. Press
OK to confirm.
6. If the channel is encoded and you want to connect a decoder to the AV1 socket, select
the
Decoder option and check the box by pressing OK.
7. Then select the Teletext char. set option and choose the character set that will be
used for Teletext on this channel using the buttons.The following character sets
are available:
1:Western Europe, Greek 4: Arabic
2: Eastern Europe 5: Ukrainian
3: Russian,Belarussian
8. Then select the Store on number option and enter the number to be assigned to
this channel using the numeric buttons (for instance, for BBC1 type 01). Press
OK.
Important: Whenever you change a value in the Manual Installation menu, the Store
on number
option starts flashing.To confirm your change you need to select the Store on
number
option and press OK. If you do not confirm the change it will be cancelled when you
change channels or put the TV set in standby.
Repeat this procedure to find other channels.
Notes:
- For cable networks, to search for missing channels, select
Other instead of a country, then
select
Automatic update in the Automatic installation menu.
- If you wish to go through the whole initial set-up process, put the TV in standby mode, then hold
down the
VOL ¦ button on the television and the MENU button on the remote control
until the menu displays. Proceed as for the initial set-up.
- Subsequent set-ups:
- The
Automatic update function allows you to set up channels just launched or any
channels that are missing or wrongly set up.
- The
Automatic search function is used for setting up channels after the initial set-up
(e.g. after moving house). This process deletes all channels previously stored.To set up a new
channel, it is better to use
Automatic update or Manual Installation.
Manual Installation
Return
Standard
I...
Reception Aerial...
Channel search CH 10
Fine tuning
Store on number 01
Channel name BBC1
Decoder
Teletext char. set 1...
Choose you standard, then select reception.
Page 12
8
General operation
EN
Switching the TV set on and off
To s witch the TV set on:
- press the button on the side of the TV set, the
or any numeric button on the remote control,or
- press the
TV, OK or PR+/PR- buttons to switch the
television on at the last channel or AV programme you were
watching, or
- press the AV button to switch the television on at the last AV
programme you were watching.
To put the TV set into standby mode, press the
button on the side of the TV set or the button on the
remote control.The TV set remains powered up,but with low
energy consumption.
To s witch off the TV set, unplug the mains socket from the
mains outlet.
Accessing channels
Using the numeric buttons:
for channels 1 to 9,press the corresponding numeric button;
for channels 10 to 99,
- press the tens digit for a few seconds to display it on the
screen, then press the units digit. For instance, for
programme 24, press and hold
2 to display 2-, then press
4; or
- press the
0/-- button to display “--”, then enter the two
digits.
Using the PR+/PR- buttons: scroll through the channels.AV
programmes are not included in the cycle unless you use the
buttons on the side of the TV set.
Using the list of programmes: refer to page 9.
To access the channel or AV programme previously being watched,
press the
RETURN button.
Accessing your favourite channels
You can define the channels you watch most often as your
favourite channels.This will allow you to create your own list of
channels which you can access more quickly using the
PR+/PR-
buttons on the remote control.
1. Follow the procedure described in point 5 on page 6 for
defining a channel as your favourite channel.
2. Press the PRESETS (red) button on the remote control.
3. Select the PR+/PR- keys option. Use the buttons to
select
Favourites.
When you change channels using the
PR+/PR- buttons on the
remote control only your favourite channels will be available.
To cancel this option, select
All channels under the PR+/PR-
keys option.
Note:The PR buttons on the TV set allow you to access all
the channels set up, even if the
Favourites option is selected
Accessing AV programmes
Press the AV button to display the last selected audio-visual
programme and scan through the other audio-visual programmes.
AV selection loop: AV1,AV2,AV3, CMP (= component,YPrPb or
YCrCb),VGA, HDMI.
Volume
Volume control: use the ¦ VOL buttons on the side of the
TV set or press the
+/- buttons on the remote control to
increase or decrease the volume.
Sound mute: press the button to temporarily mute the
sound. Press this button again or the
+ button to restore
it.
Headphone volume control: press the
+/- buttons on the
remote control to display the volume control bar.Then use the
buttons to switch to the headphone volume control bar.
Use the
+/- buttons to adjust the volume.
Displaying status information
In TV mode you can press the INFO (yellow) button on the
remote control to display the number and name of the
relevant channel, the time and date, the type of sound and
format or zoom. If the turn-off timer is set the relevant symbol
is displayed, along with the time remaining until the TV set is
switched off.
Press the
GUIDE (blue) button on the remote control to
display the name and the start time for the current programme
and the following programme. If this information is not
available you will receive a message to this effect.
In PC mode you can press the
INFO (yellow) button on the
remote control to display the time and date, the type of sound
and format, as well as the source of the signal being received
and the resolution.
When you switch the TV set on and change channels or exit
Teletext, the channel’s number and name are displayed.
Note: If you activate the Channel number function in the
Preferences menu, the channel number will be displayed
permanently (see page 16).
Page 13
9
General operation
EN
Zoom
In TV mode, you have the option of changing the display format and using the zoom
function via the buttons.The available formats and zoom functions are:
4/3 format - picture in centred 4:3 format
14/9 zoom - picture in centred letterbox 14:9 format
16/9 zoom - picture in centred letterbox 16:9 format
16/9 zoom up - picture in 16:9 format with subtitles.
Cinerama - picture in widescreen 4:3 format
16/9 format - picture in widescreen 16:9 format
In
14/9 zoom, 16/9 zoom, and 16/9 zoom up modes,you can temporarily shift the
picture up and down using the buttons.
In PC mode, only
4/3 format and 16/9 format are available.
List of channels
Press the ZZZ/LIST (green) button on the remote control to display the list of channels.
It contains a maximum of 11 pages and shows the name and number of every channel.The
last page lists units connected to the AV sockets.
The list appears on the page featuring the channel or AV programme which you are
currently watching.The channel or AV programme you are watching is indicated by a
symbol.Any channels and AV programmes which are locked are indicated by a closed
padlock and those temporarily unlocked are indicated by an open padlock.Favourite
channels are indicated by the letters
FAV next to them.
Note: For more information on locking channels, refer to the Parental control section.
To watch one of the channels on the displayed page, select it using the buttons and
press
OK, or use the PR+/PR- buttons.You can also enter the last digit of the channel
number (for example, 5 for 25).The selected channel is shown.
You can scroll through the pages using the buttons.
Press
EXIT to close the menu.
Freezing a picture
Press the OK button to freeze the picture. Press any button on the remote control or TV
set to cancel this function.
Flat batteries
When the batteries are flat a message appears on the screen when you press a button on
the remote control.
You should change the batteries and reprogram the remote control (see page 4).
Product information
Press the MENU button to open the OVERVIEW menu. Select the Contact us!
option and press OK to confirm.The relevant screen appears.This will give you the
Thomson Europe website address and the telephone number for the Helpline, if there is
one (see page 2), as well as your TV set’s serial number.
List
01 BBC1
02 BBC2
03 ITV1
FAV04 Channel 4
05 Channel 5
06 Sky One
FAV07TVFilm Four
08 Sky Sports
09 MTV
To tune to the channel selected: OK
To display previous/next page:
¦¦
Page 14

10
Advanced functions
EN
Adjusting the sound
Display the OVERVIEW menu by pressing the MENU button. Select the Sound
option and press OK to confirm.The Sound menu appears with the following options:
Tone control: this option gives you access to the Tone control menu (more details
below).
Note: In the case of AV sources, this option is not available if you have selected BBE ViVA
under Sound mode.
Sound type: select a sound type from the list using the buttons.
The default sound type is
Automatic for mono sources, Stereo for stereo sources and
Stereo for AV sources.
Note:The options offered depend on the programme you’re watching. Refer to the table 1
opposite.
Sound mode: use the buttons to choose a mode from the list. BBE ViVA is the
default mode.
Notes:
- The options available depend on the sound type selected. Refer to the table 2 opposite.
- BBE ViVA technology can be used to achieve a 3D sound effect using just two loudspeakers,
while preserving the quality of the sound transmitted by the main speaker, such as dialogue.
Balance: use the buttons to balance the sound between the left and right speakers.
Dynamic Bass: this function is used to strengthen the bass. Select an option from the
list using the buttons.
Note:This option is not available if you have selected BBE ViVA under the Sound mode
option.
Auto Volume Level: check the box by pressing the OK button, if you want to keep the
same sound level for all channels.
Sound effect: this function allows you to create sound effects. Select an option from the
list using the buttons.
Internal speakers: uncheck this box by pressing OK if you want to stop the sound
coming from the internal speakers and connect external speakers to the TV set.
If you unplug these external speakers, remember to check the box to reactivate the TV
set’s internal speakers (otherwise you will not get any sound).
Headphone: this option allows access to the headphone setting menu (see further
below).
Press
EXIT to close the menu. Select Return and press OK to return to the
OVERVIEW menu.
Tone control
Select the Tone control option from the Sound menu and press OK to display the
menu.The content of this menu depends on the options you have selected under
Sound
mode and Sound effect in the Sound menu.
If you have not selected
BBE ViVA under Sound mode and you have not selected
any effect under
Sound effect,the menu which is displayed allows you to select a
predefined setting and choose your own settings using the graphic equaliser. It offers the
following options:
Sound preset: use the buttons to select the appropriate setting for the
programme you are watching.
The
Personal setting stores your graphic equaliser settings.
Note:The Sound preset option is not available if you have selected a sound effect under the
Sound effect option.
You can access the list of preset sound settings directly by pressing the PRESETS button
(red) on the remote control,selecting the
Sound preset option and choosing one of the
preset settings from the list.Your selection is applied to all channels and AV programmes.
Frequency range: the graphic equaliser has seven frequency bands. Select each band in
turn using the buttons and make the necessary adjustments using the buttons.
Press
OK to confirm.
Note:When you are setting the graphical equaliser, Personal appears under the Sound
preset
option and your settings are stored as your new personal settings.
Sound
Return
Tone control ...
Sound type Stereo...
Sound mode Normal...
Balance
Dynamic Bass Maximum...
Auto Volume Level
Sound effect Off
Internal speakers
Headphone ...
Broadcast
Mono
Stereo
Dual
NICAM - 3
Analog AV
Sound types
Automatic - Mono
Mono - Stereo
Sound 1 - Sound 2
Sound 1 - Sound 2 - Sound 3
Stereo - Sound 1 - Sound 2
Sound type
Automatic
Mono
Stereo
Sound 1
Sound 2
Sound 3
Sound modes
Normal - Wide - BBE ViVA
Normal - Wide - BBE ViVA
Normal - Stereo wide
BBE ViVA
Normal - Wide - BBE ViVA
Normal - Wide - BBE ViVA
Normal - Wide - BBE ViVA
Tone control
Return
Sound preset Film...
Frequency range
12 kHz...
1
2
Page 15

11
Advanced functions
EN
In every other instance, the menu displayed offers the following options:
Bass, Tre b l e:you can adjust these settings to the level you want using the buttons.
Press
EXIT to close the menu.To return to the Sound menu, select Return and press
OK to confirm.
Headphone settings
Select the Headphone option from the Sound menu and press OK to display the
menu.The following options are available:
Headphone volume, Headphone bass, and Headphone treble:you can adjust
these settings to the level you want using the buttons.
Headphone sound: select a sound type from the list using the buttons.
The default sound type is
Automatic for mono sources, Stereo for stereo sources and
Stereo for AV sources.
Press
EXIT to close the menu.To return to the Sound menu, select Return and press
OK to confirm.
Adjusting the picture
The menus for adjusting the picture are used to obtain the best picture setting according to
your preference, the type of programme you are watching and the ambient lighting.When
you make an adjustment only the selected option remains displayed, allowing you to see the
changes taking place on screen.The entire menu is displayed again when you select another
option or the time for making an adjustment has elapsed.
Display the
OVERVIEW menu using the MENU button. Select the Picture option and
press
OK to confirm.The Picture menu appears with the following options:
Picture preset: use the buttons to select the appropriate setting for the
programme you are watching.
Personal contains the values you have defined for the settings Brightness, Colour,
Contrast, Black expand, Tone, Sharpness and Noise reduction.
You can access the list of preset picture settings directly by pressing the
PRESETS button
(red) on the remote control,selecting the
Picture preset option and choosing one of
the preset settings from the list.Your selection is applied to all channels.You must, however,
select a preset setting for each AV programme.
Note:This function is only available in TV mode.
Brightness, Colour,Contrast, Tone, Sharpness: adjust these settings as required
using the buttons.
Black expand: can be used to adjust the picture according to the ambient brightness.
Select an option from the list using the buttons.
Noise reduction: improves the quality of the picture in the case of poor reception.
Select an option from the list using the buttons.
Other settings: this option provides access to the Other settings menu (see further
below).
Press
EXIT to close the menu.To return to the OVERVIEW menu, select Return and
press
OK to confirm.
Headphone settings
Return
Headphone volume
Headphone bass
Headphone treble
Headphone sound Stereo...
Picture
Return
Picture preset Personal...
Brightness
Colour
Contrast
Black expand Medium...
Tone Neutral
Sharpness
Noise reduction Low...
Other settings ...
TV mode
Tone control
Return
Bass
Treble
BBE ViVA is a trademark of BBE Sound Inc.
Page 16
Advanced functions
12
EN
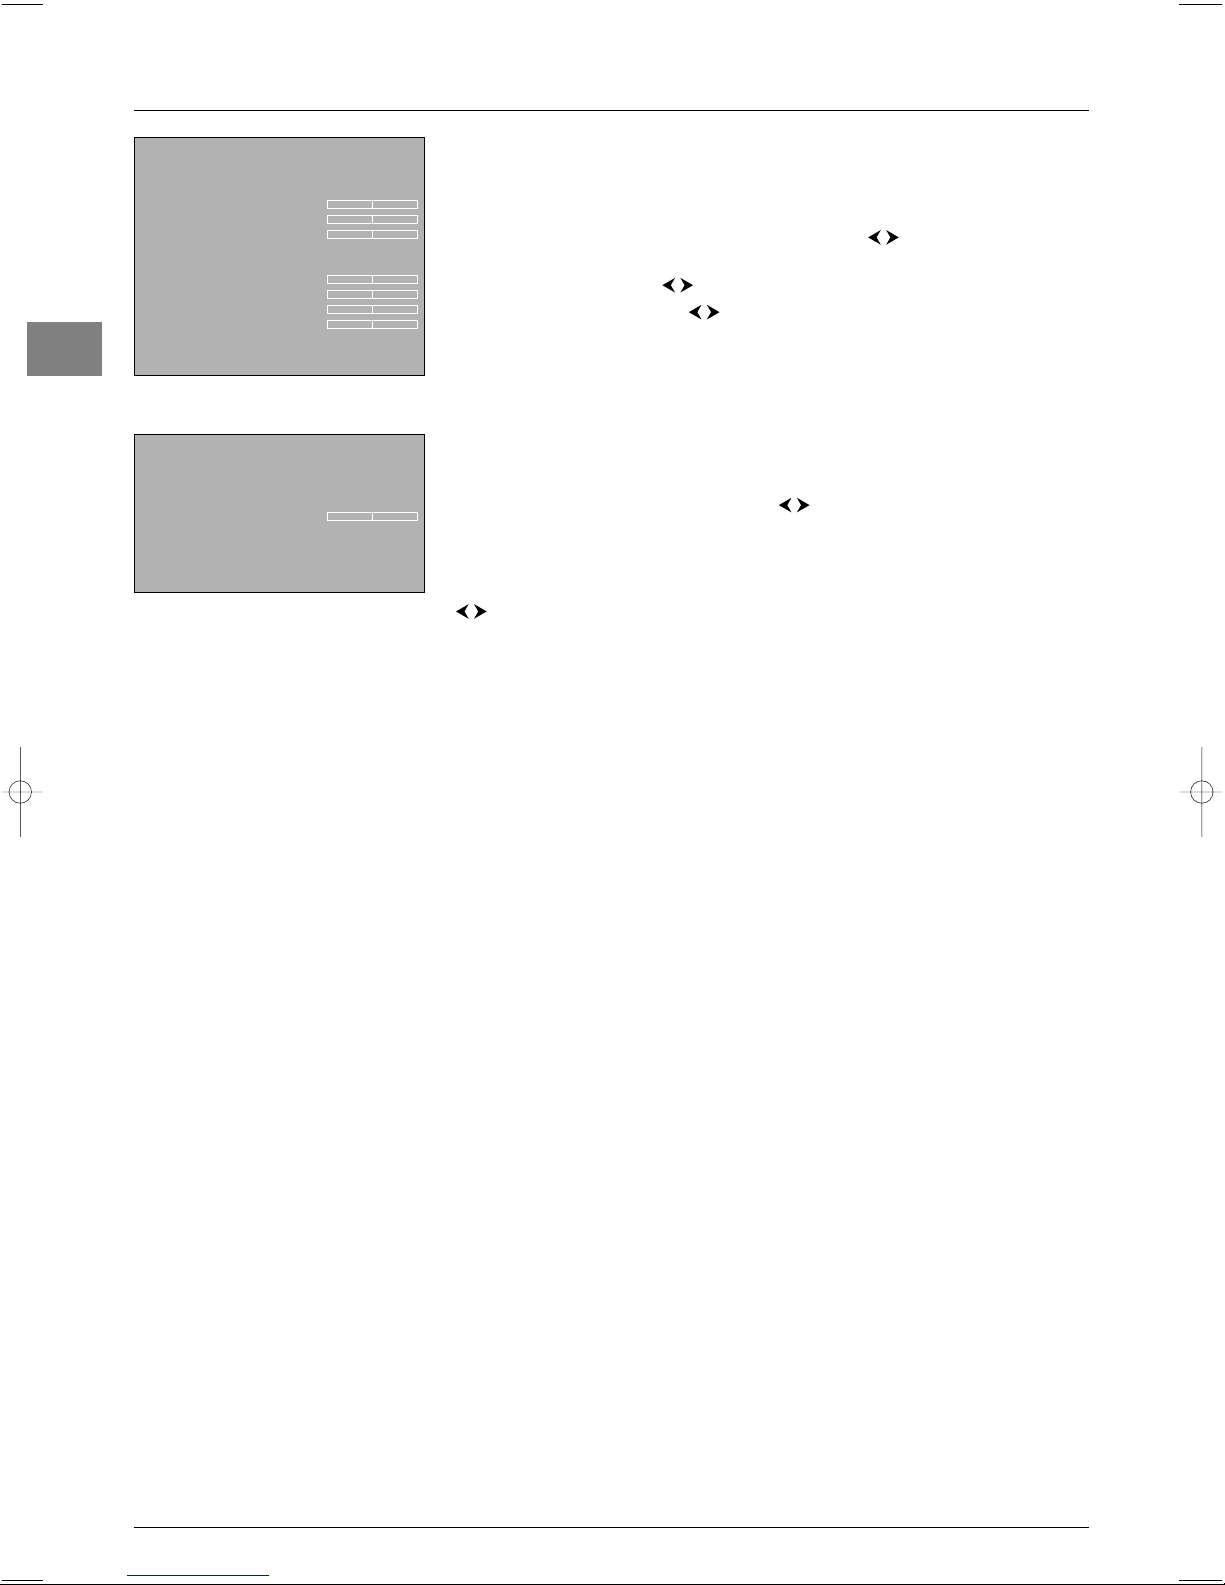
In PC mode you can access a number of specific functions:
Auto-adjustment: this option allows you to automatically adjust the following functions:
Phase, Clock,Ve rtical position and Horizontal position.Press OK until the
message
Running appears. Once the setting is implemented the message Done appears.
Phase, Clock: adjust these settings as required using the buttons in order to
enhance picture quality.
Ver tical position:use the buttons to move the picture vertically on the screen.
Horizontal position: use the buttons to move the picture horizontally on the
screen.
Other settings
Note:This menu is only available for TV channels and AV programmes.
Select the Other settings option from the Picture menu and press OK.The Other
settings menu appears with the following options:
Film mode: detects that the programme being broadcast is a film and enhances picture
quality. Select an option from the list using the buttons.
Notes:
- The
Advanced option is selected by default.
- This function is only available for certain audio-visual sources.
NTSC tint: is used to adjust the picture’s tint.Adjust these settings as required using the
buttons.
Note:This function is only available for NTSC audio-visual sources.
Automatic format: automatically applies the appropriate format to the picture. Check
the box by pressing
OK to enable this function.
Note:This function is only available for certain audio-visual sources.
Press EXIT to close the menu.To return to the Picture menu, select Return and press
OK to confirm.
Other settings
Return
Film mode On...
NTSC tint
Automatic format
Picture
Return
Brightness
Colour
Contrast
Tone Neutral
Auto-adjustment ...
Phase
Clock
Vertical position
Horizontal position
PC mode
Page 17

13
Advanced functions
EN
Setting the time
The Time menu allows you to set the time and date on your TV set, to programme an
automatic turn-off or wake-up timer and to view the calendar.
Display the
OVERVIEW menu by pressing the MENU button. Select the Time option
and press
OK to confirm.
Setting the time and date
1. Select the Time reference option.
2. Select a channel which displays Teletext so that the time and date from this can be used
as a reference, by using the buttons or entering a channel number using the
numeric buttons on the remote control.The time and date appear in a couple of
seconds if they are available on the channel that has been selected.
3. If the time and date are not supplied by Teletext they will not appear under the Time
and Date options.You will then have to enter them manually.
Select the
Time option and enter the time using the numeric buttons or the
buttons.The setting
-- appears under the Time reference option.
Select the
Date option and enter the date using the numeric buttons in the format:
DD/MM/YY.
Note: In the event of the power supply being cut off (the TV set is unplugged or there is an
electrical fault), the time and date will be lost, if they have been entered manually.You need to
enter them again. In this instance, we advise you to consult a channel which has this information
and to check that it is correct.
Using the calendar
This menu allows you to look for a particular date.
1. Select the Calendar option and press OK to confirm.The Calendar screen
appears.
2. Under Month select the month you want from the list using the buttons.
3. Under Year select the year you want from the list using the buttons.
The calendar displays the selected month.
To display the calendar for the current month, select the
Today option and press OK to
confirm.The current day is automatically selected if the date is available.
Programming a turn-off timer
You can programme the TV set’s turn-off timer by setting a period of time after which or a
specific time when the TV set goes into standby mode.
To set a period of time after which the TV set goes into standby mode:
1. Select the Sleep timer option.
2. Using the buttons, set the period after which the TV set automatically goes into
standby mode (4 hours maximum, at 5-minute intervals).To disable this function, select
Off.
To select a time for the TV set to go into standby:
1. Select the Turn off timer option.
2. Using the buttons, choose Once or Daily from the list. Select Off to disable
this function.
3. Select the Turn off time option. Using the numeric buttons or buttons, enter
the time at which you want the TV set to go into standby mode.
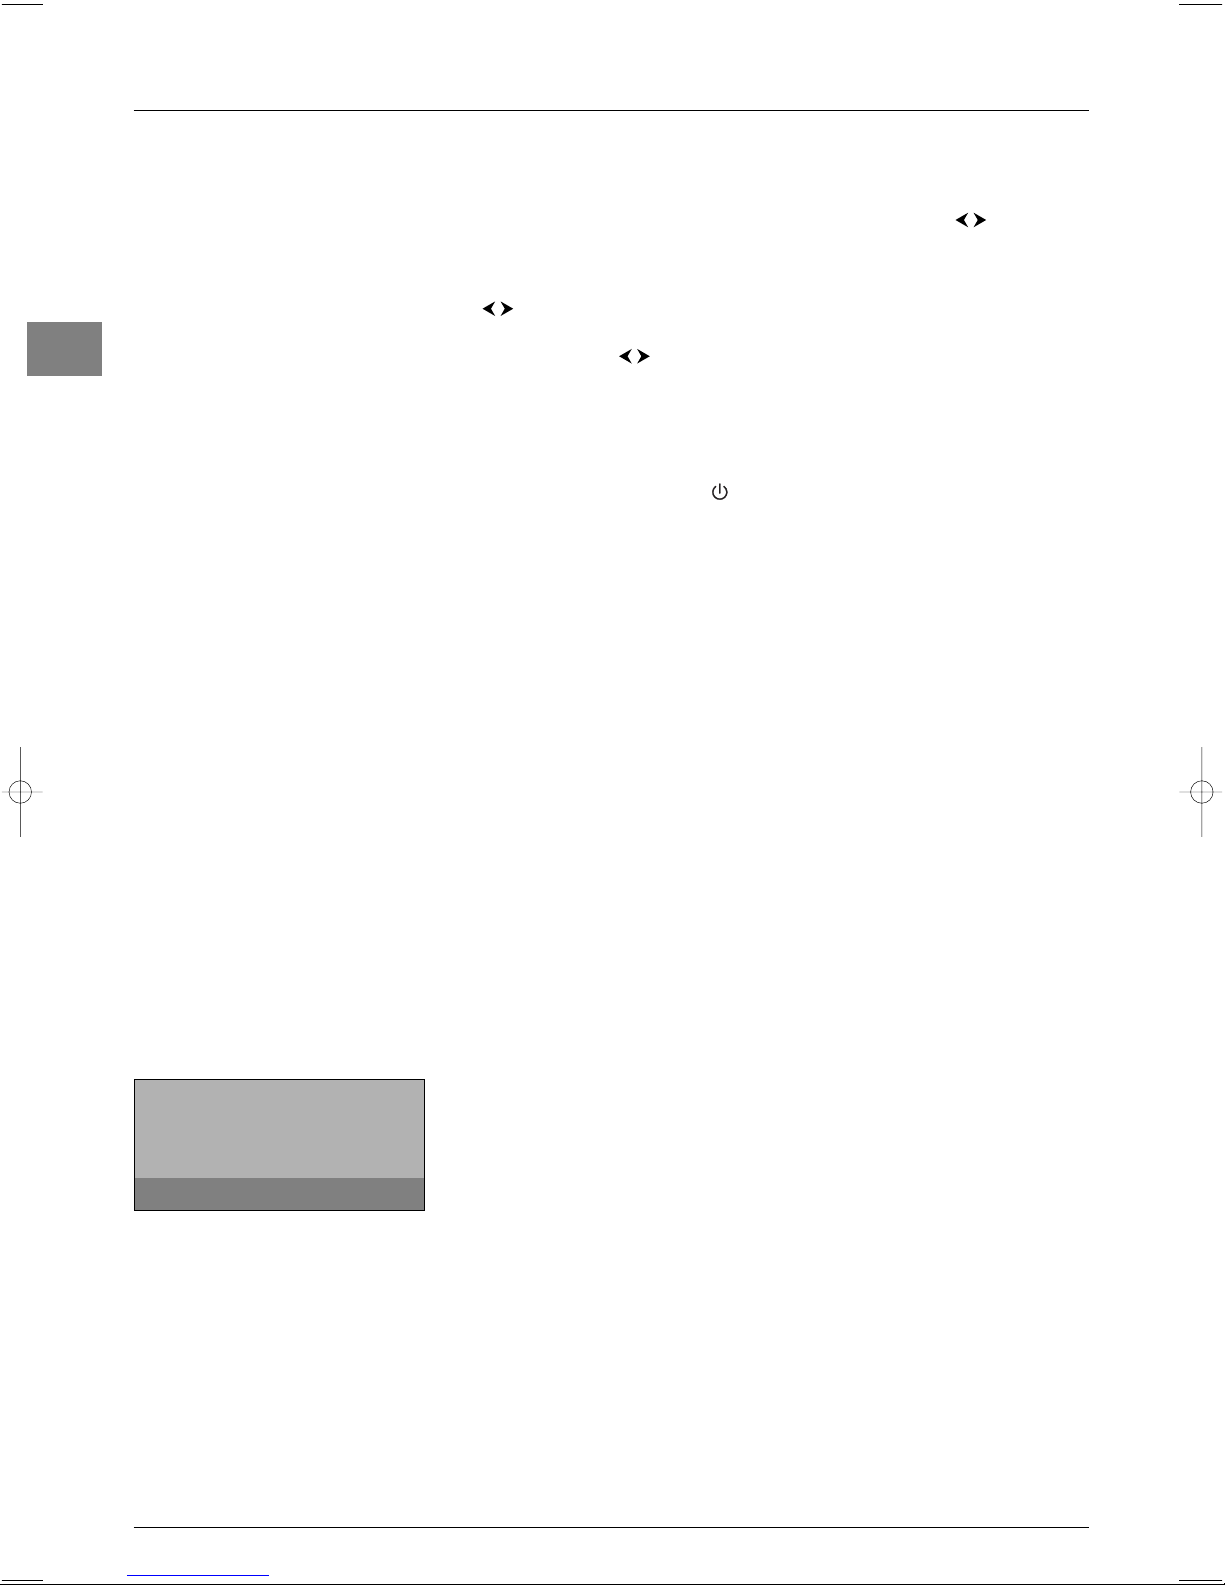
Time
Return
Sleep timer
Off
Time reference 04 BBC4
Time 12:34
Date 01/06/05
Calendar ...
Wake up timer Once
Wake up time 07:00
Wake up channel 10 CNN
Turn off timer Once
Turn off time 12:00
Calendar
Return
Month
September
Year 2005
Today ...
Mon Tue Wed Thu Fri Sat Sun
1234
567891011
12 13 14 15 16 17 18
19 20 21 22 23 24 25
26 27 28 29 30
Page 18
Advanced functions
14
EN
Programming the wake-up timer
This function can be used to set the time for the set to come on, for instance, for the
television to wake you up.
1. Select the Wake-up timer option. Using the numeric buttons or buttons,
choose
Once or Daily from the list to activate this function and access the relevant
options. Select
Off to disable this function.
2. Under the Wake-up time option enter the wake-up time using the numeric or
buttons.
3. Under the Wake-up channel option enter the number of the channel you want to
wake you using the or numeric buttons.You can also select an AV programme
using the
AV button. In this case, make sure you programme the equipment connected
to the AV socket to come on as well.
4. Press EXIT to close the menu.A message appears to say that the wake-up timer has
been programmed. Press any button on the remote control to make the message
disappear.
5. To enable the function, press the button on the remote control to put the TV set
into standby mode.
The TV set will automatically come on at the programmed time if you do not interrupt it
by using the remote control. Once the TV set is on:
- you can use all its functions as normal;
- you can put the TV into standby mode. In this case, the
Wake-up timer function is
disabled for the relevant day;
- if the channel or AV programme selected from the menu is locked you need to enter your
code to access it.
Parental control
The parental control functions allow you to restrict your children’s access to the television.
This means that you can lock the set’s buttons and prevent access to certain channels
and/or AV programmes.You can also lock the
Time menu to prevent any of the automatic
turn-off and wake-up timers you have programmed for your set from being modified.You
can also prevent access to the
Installation menu to prevent any channels from being set
up without your consent.All these functions are protected by a PIN code.
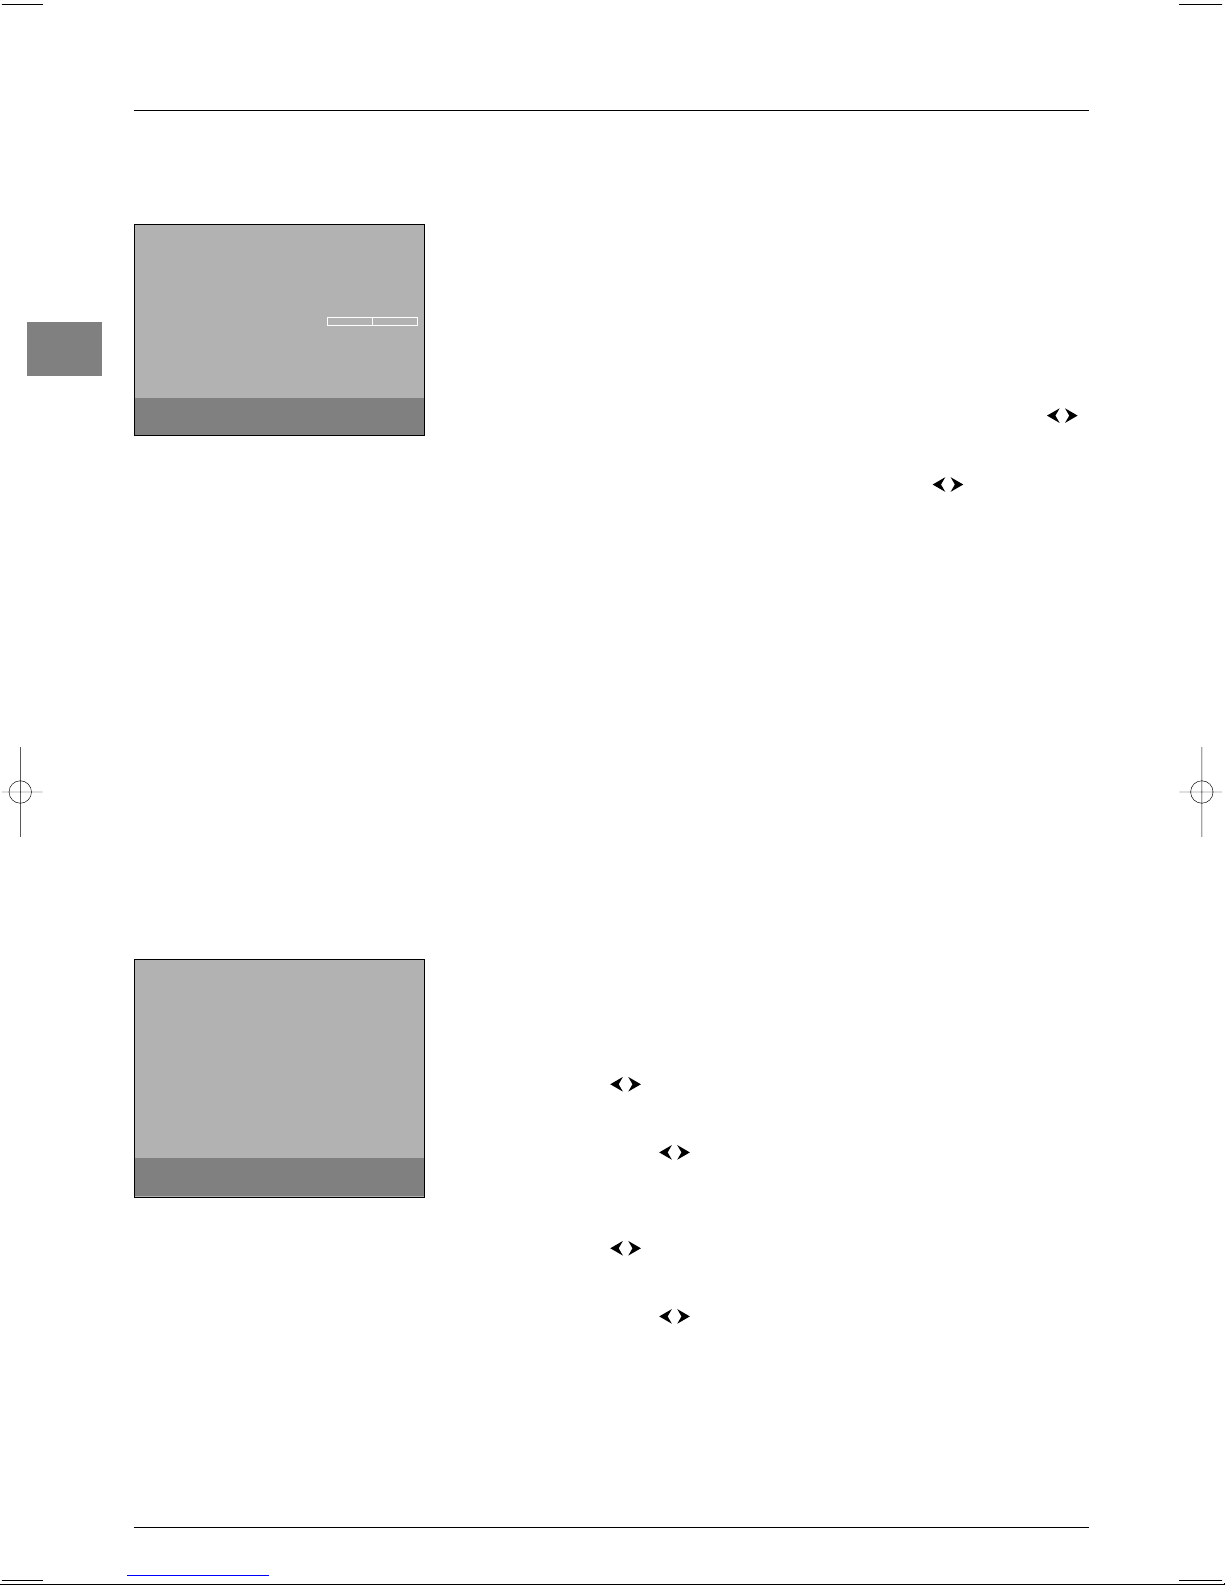
Display the OVERVIEW menu by pressing the MENU button. Select the Parental
control option and press OK to confirm. Follow the instructions on screen for displaying
the menu.
Defining a PIN code
To be able to use the functions in the Parental control menu,you need to first of all
define a 4-digit PIN code as follows:
1. Select the PIN code option from the Parental control menu. Enter your code
using the numeric buttons.The numbers are replaced by asterisks on screen.
2. Type your code in again to confirm it.
Note: Choose a code that you can easily remember.
You can now use the various parental control functions.
Note: Once a parental control function is enabled, you need to enter your PIN code to access the
Parental control menu.
To amend your PIN code, select the PIN code option. Enter your new code using the
numeric buttons.Type your code in again to confirm it.
PIN code
Return
PIN code
...
Enter PIN code.
Page 19

15
Advanced functions
EN
Locking a channel or AV programme
1. Select the Select channel option from the Parental control menu. Use the
or numeric buttons to select the channel to be locked. Use the buttons or
press the
AV button to access the AV programmes.
2. Check the box under the Lock channel option by pressing OK.
Note:This function is only available if a code has been defined.
To unlock the channel or AV programme, go to the Parental control menu by entering
your code, select the
Lock channel option and uncheck the box by pressing OK.Press
EXIT to close the menu.
Locking the buttons on the TV set
Select the Lock front panel option from the Parental control menu and check the
box by pressing
OK.
Notes:
- This function is only available if a code has been defined.
- The remote control is needed to be able to use the television.
To cancel the lock, go to the Parental control menu by entering your code, select the
Lock front panel option and uncheck the box by pressing OK.Press EXIT to close
the menu.
Locking the Time menu
Select the Lock TIME option from the Parental control menu and check the box by
pressing
OK.
Notes:
- This function is only available if a code has been defined.
- When this function is active you need to enter your PIN code to be able to access the
Time
menu.
To cancel the lock function, enter your PIN code to access the Parental control menu,
select the
Lock TIME option and uncheck the box by pressing OK.Press EXIT to close
the menu.
Locking the Installation menu
Select the Lock INSTALLATION option from the Parental control menu and
check the box by pressing
OK.
Notes:
- This function is only available if a code has been defined.
- When this function is active you need to enter your PIN code to be able to access the
Installation menu.
To cancel the lock function, enter your PIN code to access the Parental control menu,
select the
Lock INSTALLATION option and uncheck the box by pressing OK.Press
EXIT to close the menu.
Operation (TV mode)
-To watch a channel or AV programme which is locked, try accessing it and follow the
procedure on the screen.The lock will be applied again when you put the television in
standby.
In the list of programmes, channels and/or AV programmes which are temporarily
unlocked are indicated by an open padlock.
- If you have forgotten your PIN code you can cancel it:
Put your TV set into standby mode, then press the
VOL ¦ button on the TV set and
the
EXIT button on the remote control simultaneously for five seconds.This
procedure is possible, even if you have locked the buttons on the TV set.
Parental control
Return
Select channel 01 BBC1
Lock channel
Lock front panel
Lock TIME
Lock INSTALLATION
PIN code
_ _ _ _
Define a PIN code by using the digit keys.
Page 20
Advanced functions
16
EN
Customising your television
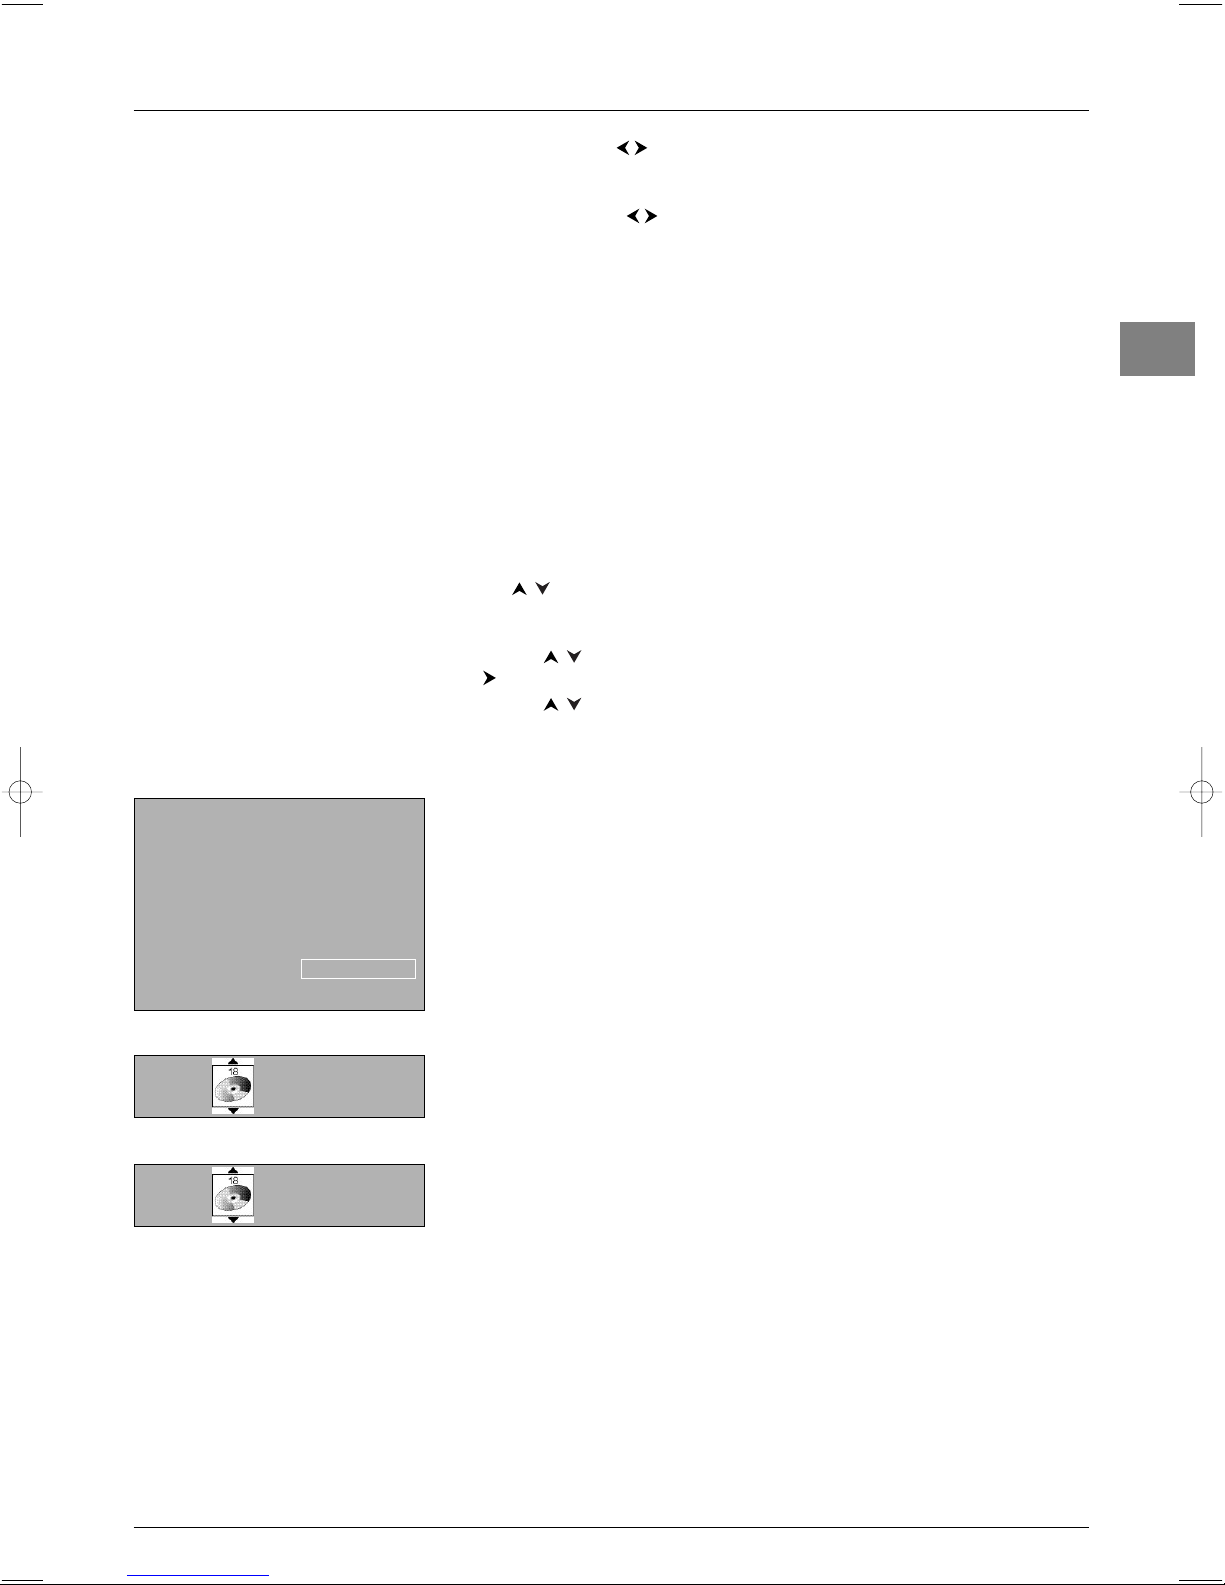
Preferences
You can set preferences for some features.These preferences remain in force as long as you
do not change them.
Display the OVERVIEW menu by pressing the MENU button. Select the Installation
option and confirm by pressing OK. Select the Preferences option from the
Installation menu and press OK to confirm.The Preferences menu offers the
following options:
Channel number: check this box using the OK button to permanently display the
number of the channel being watched.
Language: select from the list the language the menus will be displayed in using the
buttons.
Note:When you select a language, it is applied to the menus immediately.
Maximum TV volume: set the maximum volume level using the buttons.To hear
the level that you have just set, press the
OK button and hold it for a few seconds.
Programme info pages: if you have changed the reference page for the TV
programmes in Teletext you can restore the factory-set reference pages. Press
OK until the
message
Running appears. Once the setting is implemented the message Done appears.
Power Savings Mode: when this function is active the TV set automatically goes into
standby mode after five minutes if it does not receive any signal on the selected channel or
AV programme.To enable this function, check the box by pressing
OK.
Teletext adjustment: use this function if one of the following situations occurs:
- Some channel names are missing following auto installation. Check/uncheck the box by
pressing
OK and run autoinstallation again.
- Teletext subtitles are not visible or are frozen. Check/uncheck the box by pressing
OK
and access the Teletext page displaying the subtitles.
- Some Teletext lines never display. Check/uncheck the box by pressing
OK and access the
Teletext page again.
Press
EXIT to close the menu. Select the option Return and press OK to return to the
Installation menu.
Configuring AV sockets
You can configure your TV set according to the equipment you connect to it.
Display the
OVERVIEW menu by pressing the MENU button. Select the Installation
option and press OK to confirm.The Installation menu appears. Select the AV
settings
option and press OK to confirm. Follow the messages on screen and the
instructions below explaining how to configure the AV sockets.
AV1 name: use the buttons to select from the list the name of the equipment
connected to this socket. If the factory preset names do not suit you, select
AV1_ _ _ and
enter another one, following the screen messages.
AV1 video input: use the buttons to select from the list the type of video signal
transmitted by the equipment connected to the AV1 socket.
Note: Select RGB if no picture is displayed when you connect a games console.
Repeat the same procedure to configure the AV2 socket.
AV3 name: use the buttons to select from the list the name of the device
connected to the AV3 sockets. If none of the devices in the list is appropriate, select
AV3___and enter the name of the device following the instructions on the screen.
AV3 video input: use the buttons to select from the list the type of video signal
transmitted by the equipment connected to the AV3 sockets.
Preferences
Return
Channel number
Language
English...
Maximum TV volume
Programme info pages ...
Power Savings Mode
Teletext adjustment
Select your language using the ¦ keys.
AV settings
Return
AV1 name
DECOD.
AV1 video input RGB...
AV2 name VCR1
AV2 video input S-Video...
AV3 name CAMCOR
AV3 video input Video...
CMP name CMP _ _ _
HDMI name HDMI _ _
Select the name of the device connected
to AV1.
Page 21
17
Advanced functions
EN
CMP name: use the buttons to select from the list the name of the device
connected to this socket. If none of the devices in the list is appropriate, select
CMP_ _ _ and enter another one, following the instructions on the screen.
HDMI name: use the buttons to select from the list the name of the device
connected to this socket. If none of the devices in the list is appropriate, select
HDMI _ _
and enter the name of the device following the instructions on the screen.
Press
EXIT to close the menu. Select the option Return and press OK to return to the
Installation menu.
Playing files from memory cards
Insert a card in the relevant connector or plug the USB card reader into the relevant
socket on the side of the TV set.
Important: Make sure and insert the card in the connector facing the right way.
If necessary, display the
OVERVIEW menu by pressing the MENU button. Select the
Memory card option and press OK to confirm. Select the Memory Card option
from the main menu and press
OK to confirm.
1. Select from the list the option relevant for the file format that you want to play using
the buttons:
Music (mp3,WMA), Pictures (JPEG), or Video Clips (MPEG,
DivX). Press
OK to confirm.The relevant screen is displayed.The list of folders/files
appears on the left of the screen.
2. Use the buttons to select a folder/file and press OK to confirm.Then press the
button to access the play modes on the right of the screen.
3. Use the buttons to select the relevant play mode and press OK to confirm.The
following play modes are available:
Standard Play
- Folder: the device plays all the subfolders and files in this folder in the order they
were recorded on the card;
- File: the device starts playing from this file.
Play All
The device plays all the files in all the folders in the order they were recorded on the
card.
Random All
The device plays all the files in all the folders randomly.
Random Folder
- Folder: the device plays the files in the selected folder randomly.
- File: the device plays this file, then the other files in the selected folder randomly.
Repeat Folder/File
The device plays the selected folder or file again.
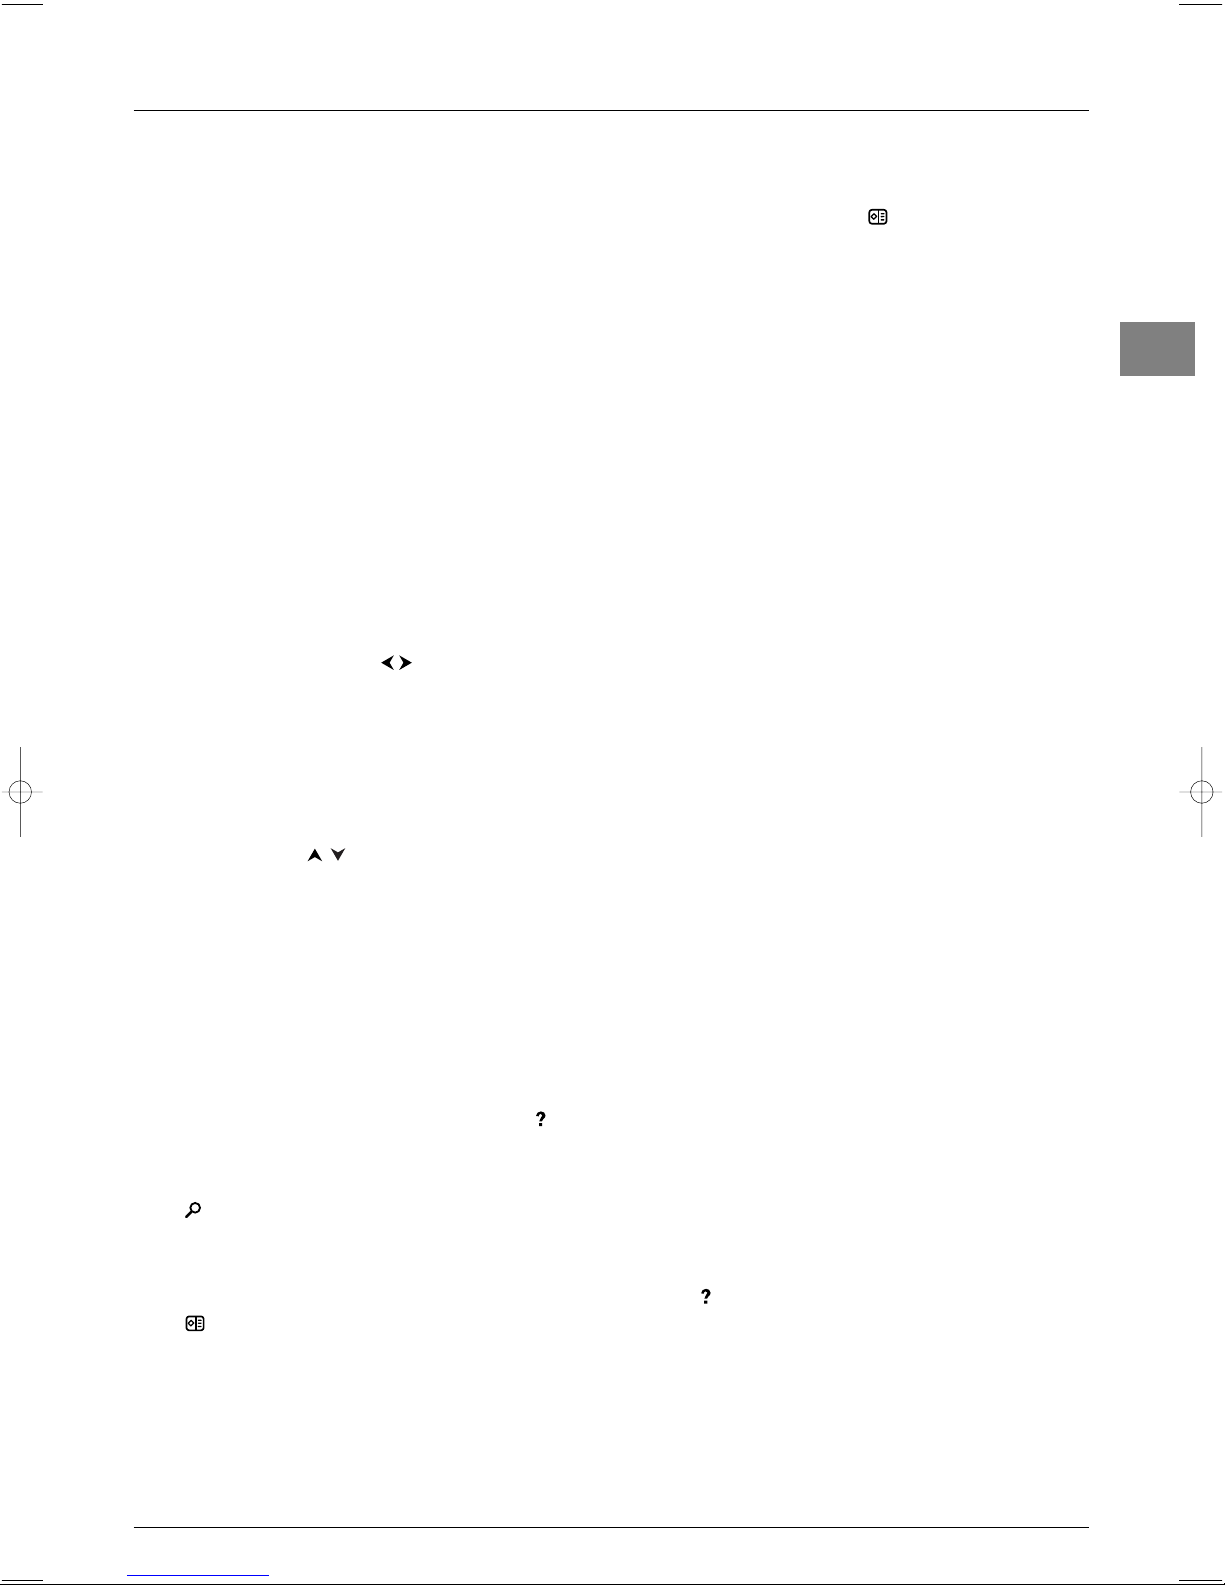
While playing, the screen displays information which varies according to the type of file (see
opposite).
Music
Rock 1
PLAY
Rock 2 Current folder
mp3 file 1 Current file
mp3 file 2 Artist
mp3 file 3 Title
mp3 file 4 Album
Standard Play
NORMAL File name
PLAY 18/124
JPEG
00:12 File name
PLAY 18/124
MPEG and DivX
mp3
Page 22

Advanced functions
18
EN
Other functions
The main menu offers other functions, which are described below. Select an option and
press
OK.
Lock
This function can be used to control access to files that can be read by this reader. Press
OK to display the relevant menu.
Lock Player.This is used to lock the reader.
Select
Lock Player from the Lock menu using the buttons and press OK to
confirm. Enter a 4-digit code in the screen that appears using the numeric buttons on
the remote control, then press
OK to confirm. Enter your code again to confirm it,
then press
OK.
Note: Choose a code that is easy for you to remember or make a note of it.
When the reader is locked, you need to enter the code to access the options in the
Lock menu.
Unlock Player.This is used to unlock the reader.
Select
Lock from the main menu using the buttons and press OK to confirm.
Enter your code in the screen that appears using the numeric buttons, then press
OK
to confirm.The Lock menu appears.Select Unlock Player and press OK to
confirm.The reader is unlocked.
Change Password.This is used to change your password.
Select
Change Password from the Lock menu using the buttons and press
OK to confirm. Enter a new 4-digit code and press OK to confirm. Enter your new
code again to confirm it, then press
OK.
Ratings Limits. Select Ratings Limits from the Lock menu using the
buttons and press
OK to confirm.You can then define the conditions for accessing
unrated titles (which don't contain any parental control information).
Press OK. Select Free Access if you don't want to set any limits, or Password
Required if you want to allow the files to be read only after a password has been
entered.
These limits are only enabled if you have locked the reader.
System Test. If requested by your reseller, you can select the System Test option
to access certain information.
Display
This can be used to enable the On-Screen Displays function. Press OK.The On-
Screen Displays option appears. Press OK. Enable or disable the function by pressing
OK.
Sound
This can be used to enable the Sound Logic function.You can use this function to
control the different sound levels via dynamic compression. It improves the quality of the
sound track at a low volume and quietens the loudest sounds. Press
OK.The Sound
Logic option appears. Enable or disable the function by pressing OK.
Languages
This can be used to select the language which the menus for the memory card reader are
displayed in. Press
OK.The Player Menus option appears. Press OK. Select a language
from the list using the buttons and press
OK to confirm.
Page 23
19
Advanced functions
EN
Teletext
The Teletext service is available in many countries under a variety
of names (TOP Text, Fastext, FLOF text,Videotext). It is provided
as a free service by television broadcasters.This service provides a
real wealth of information, available at any time, on weather, sports
results, news, games, etc.The information is presented in pages or
organised in topics specified in colour on the screen and you can
access this information by simply pressing the buttons of the
relevant colour on the remote control.
Accessing Teletext
Press the TEXT button (purple) on the remote control.Teletext
will display the last page selected, or if you have changed channel,
the index page (usually 100). If the particular programme does not
provide a Teletext service, a message will appear to this effect.
To display a page, enter its 3-digit number or use the
PR+/PR-
buttons.The page appears after a few moments.The entered
number appears:
- red if the page does not exist,
- white if the page has been found,
- green when a sub-page has also been found for this page,
- yellow when the page exists but has not been found yet.
If the current page includes subpages, the page number is displayed
in green. In this mode, pressing the buttons will allow you to
step through all the available subpages.
You can select a specific subpage number by pressing
0 to enter
subpage direct access mode.The display will look like this: 120 ----.
You can then enter the four digits of the sub-page number using
the numeric buttons (e.g. 0003).
Navigator
In the navigator use the buttons to select one of the
following functions:
Stop
Some information is spread over several subpages which will be
displayed one after the other.To stop subpage scrolling, select
and press
OK.Press OK to allow the information to move
again.
If you select and the symbol changes colour,this means that
there are no subpages.
Hidden answers
To reveal a hidden answer (for example, in games), select and
press
OK.Press OK once more to hide the answer again.
Zoom
Select and press OK: once to zoom in on the top part of the
screen, twice to zoom in on the bottom part of the screen and
three times to return to normal display.
Mixed display
Select and press the OK button to display Teletext in the
right half of the screen. Use the
TEXT button to toggle between
full screen and mixed display modes.
Other Teletext functions
Newsflash
When a newsflash is detected, the icon is replaced with a N
in the navigator. Select it and press OK to display the newsflash. In
the case of an update, the Teletext function is enabled and displays
the new information.
Subtitles
Some channels provide subtitles for some of their programmes.
The number of the relevant pages is specified on the Teletext
index page.
To display subtitles, enable the Teletext function, find the number of
the page displaying the subtitles and enter it. Once the relevant
page is found, the subtitles appear in the TV picture.The navigator
disappears after a couple of seconds.To display it again, press the
TEXT button (purple).
Alarm page
In some countries (Spain, Benelux, etc.), you can set a time to
display certain Teletext pages (alarm pages).
To do this, display the relevant alarm page and enter subpage
mode. Enter the time instead of the subpage number (e.g. 1705 for
17:05) and press
EXIT.The page will disappear and will appear
again at the set time, as long as you do not change channels or
switch off the TV beforehand.
Direct access
The yellow and blue buttons on the remote control allow you to
access directly those pages whose numbers are displayed in yellow
and blue at the bottom of the screen.
Fastext (FLOF)
There is a band displayed at the bottom of the screen in Fastext
teletext, which is divided into coloured sections, which represent
links to the topics which you can access by pressing the button of
the relevant colour. Other topics accessible in the same way can
also be displayed.
TOPtext
TOPtext displays a bar at the bottom of the page divided into two
coloured sections (yellow and blue).The blue section displays a
topic you can access directly by pressing the blue button.The next
topic will then appear in the blue section.The yellow section
displays an article you can access directly by pressing the yellow
button.The next article will then appear in the yellow section.
Storing the programme page
If the broadcasting company amends the pages of its Teletext you
need to save the new programme page to be able to obtain
information when you press the
GUIDE button (see page 8).
To do this, go to the programme page for the current day and
select the function in the navigator. Press the OK button until
the message “
Store for programme info: OK.Reset: 0”
appears at the bottom of the screen. Press
OK.
Press the
EXIT button to quit Teletext.
STOP
STOP
Page 24
20
Other information
EN
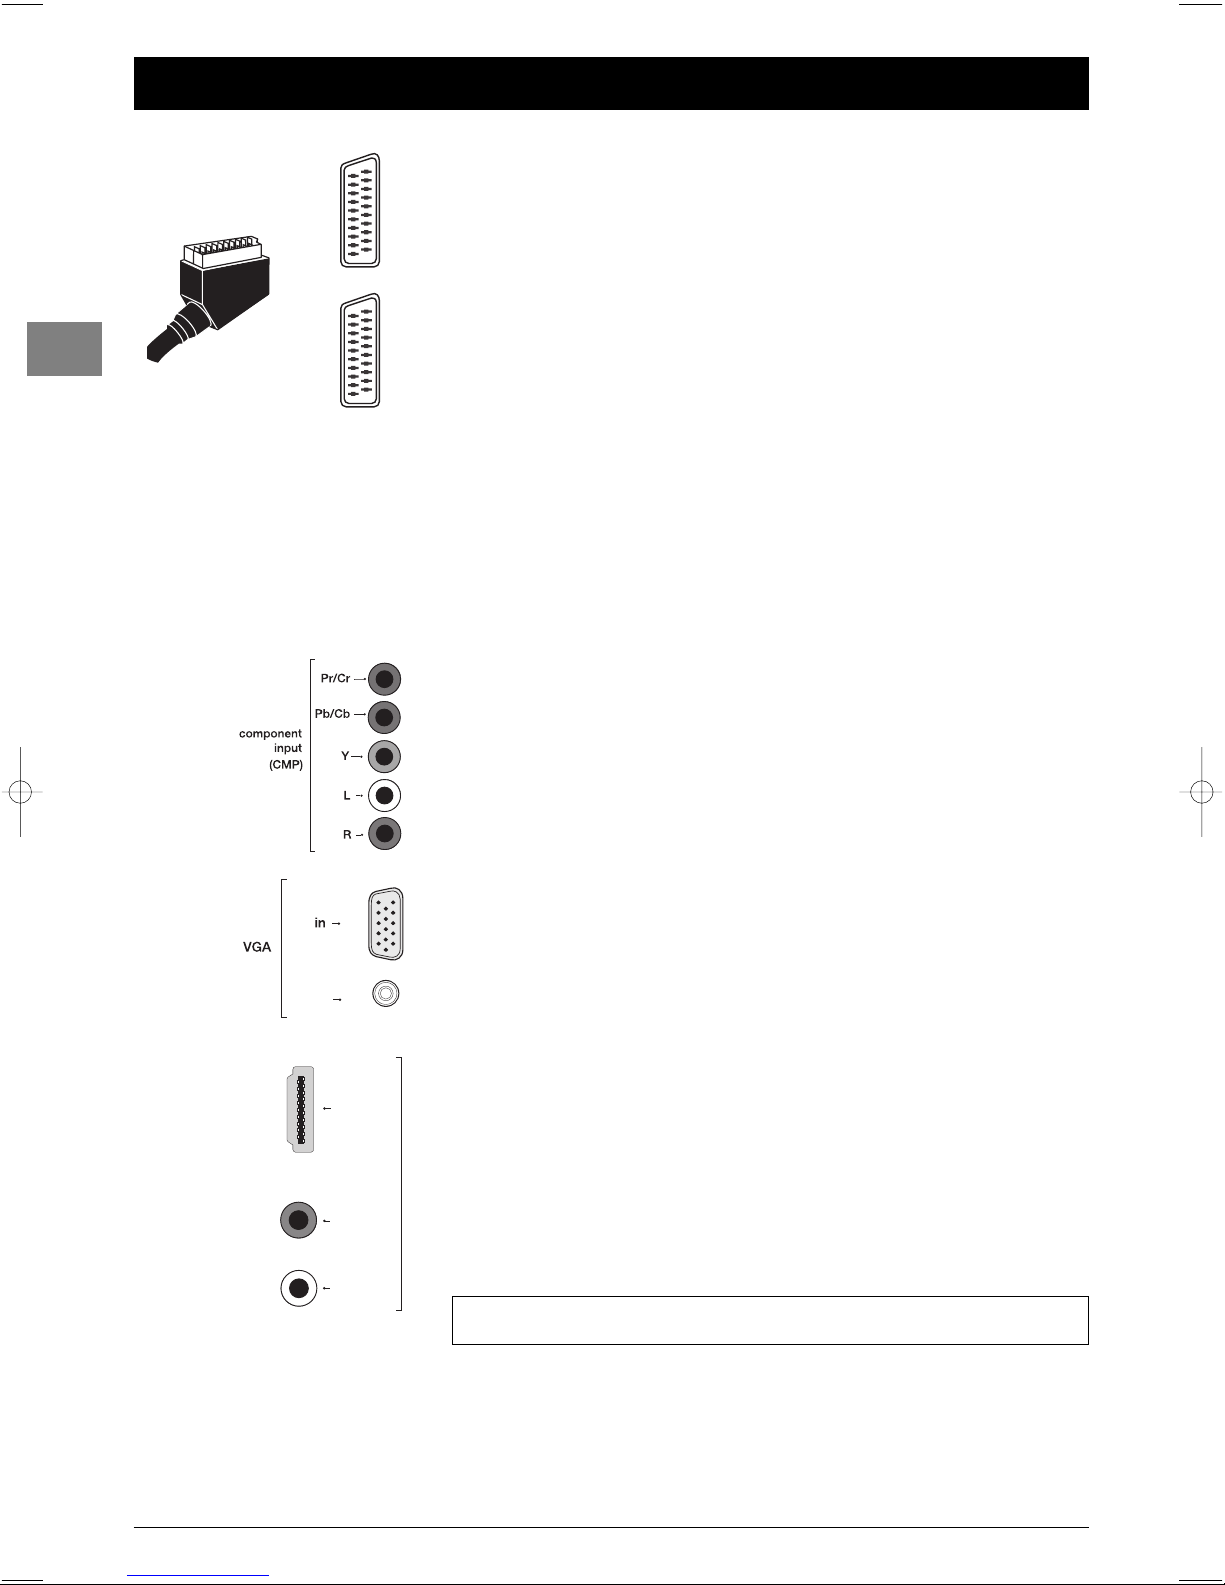
Sockets
AV1 SCART socket (input-output) at the back
This socket can be used to connect a range of equipment, including video recorders,
camcorders (VHS, S-VHS, 8 mm or Hi 8 format), decoders, satellite receivers, DVD players,
games consoles or devices producing an RGB signal.
AV2 SCART socket (input) at the back
This socket can be used to connect equipment, such as video recorders or camcorders
(VHS, S-VHS, 8 mm or Hi 8 format).
AV3 RCA audio + video sockets (input) on the side
These can be mainly used to connect camcorders (VHS or 8 mm format).
AV3 RCA audio + S sockets (input) on the side
These can be mainly used to connect camcorders (S-VHS or Hi 8 format).
CMP component sockets (Y Pb/Cb Pr/Cr) + RCA audio sockets
(input) at the back
These can be used to connect a DVD player.The component sockets automatically detect
the type of component signal received: interlaced component (YPrPb) or progressive
component (YCrCb).
VGA socket (15 pin) + audio socket (input) at the back
These can be used to connect a computer.
HDMI socket (or DVI socket + RCA audio sockets) (input) at
the back
This can be used to connect a PC with a compatible video card installed, certain DVD
players or a high-definition compatible digital satellite decoder.This socket allows a very
high transmission quality for the video and audio signals.To connect a device with a DVI
socket, you can use the HDMI socket and the RCA audio sockets. In this instance, the
HDMI socket is used for receiving the video signal and the RCA sockets for receiving the
audio signal.An HDMI-DVI cable is required.
Notes:
- Do not connect a device supplying analogue RGB signals to this socket.
- The HDMI socket is compatible with HDCP format.
To display images using the equipment connected, press the AV button on the remote
control: once to select AV1, twice to select AV2, etc. For some equipment (connected to
the SCART sockets), this selection is done automatically.
AV1
AV2
stereo
jack
R
L
audio (DVI)
HDMI
HDMI, the HDMI logo and High-Definition Multimedia Interface are trademarks or
registered trademarks of HDMI Licensing LLC.
Page 25

21
Other information
EN
RCA audio sockets (output) at the back
These can be used to connect a stereo amplifier, a hi-fi system or amplified speakers (see
further below).
RCA audio + video sockets (output) at the back
These can be used to connect a Home Cinema amplifier.
USB socket (input) at the side
This can be used to connect a memory card reader for cards containing mp3,WMA, JPEG,
MPEG, and/or DivX files.The following USB 1.1 and USB 2.0 Mass Storage Class devices are
recognised as compatible:
- flash memory card readers
- USB flash memory sticks
- mp3 players with flash memory
- mp3 players with hard disc, with their own power supply
- most digital cameras
- some mobile telephones
- hard disc drives with their own power supply, supporting FAT12 and FAT16 file systems.
The FAT8, FAT12 and FAT16 file systems are supported. NTFS systems are not supported.
Memory card sockets (input) on the side
These can be used to connect memory cards.
The following formats are supported: SM, SD, MMC, MS,MS Pro, XD, CF and MD.
Important: Make sure and insert the card in the connector facing the right way.
Connecting active speakers or an amplifier
The audio RCA sockets on the side of the set can be used to connect active speakers (with
a built-in amplifier) or an amplifier.
Connect the left speaker to the RCA L socket and the right speaker to the RCA R socket.
To connect an amplifier, you should connect the RCA left L and right R sockets to the
amplifier’s L and R inputs.
Connecting headphones
Use the relevant socket on the side of the TV set to connect headphones or stereo
earphones. Refer to page 11 on how to adjust the headphone volume.
Connecting a video recorder
You are recommended to connect a video recorder via the SCART socket to obtain
optimum picture and sound quality. However, you can also connect a video recorder to the
TV set only using the aerial socket.
If you select the latter option, switch the video recorder on and play a tape.Then use the
Automatic update option from the Automatic installation menu to search for
the appropriate channel for the video recorder (refer to the relevant section).You should
assign channel 99 to it to ensure enhanced picture quality when tapes are being played and
in pause mode.
Page 26

Codes
AIWA 2053, 2061, 2062,2065, 2072, 2074,2089,2094, 2095
AKAI 2021,2022,2033, 2034, 2049,2050, 2054, 2068, 2074,2090, 2095
AKURA 2074, 2081
ALBA 2009,2026, 2042, 2048,2051,2054, 2059, 2060,2062
2065, 2068, 2081,2087, 2090, 2092,2093,2094, 2095
AMBASSADOR 2009, 2068
AMSTRAD 2048, 2057, 2058,2065, 2081, 2087
ANITECH 2026, 2081
ANSONIC 2066
ASA 2012, 2028,2072
AUDIOSONIC 2087
AUDIOTON 2068
BAIRD 2031, 2065, 2074,2082, 2087
BLAUPUNKT 2002, 2004, 2008,2035, 2039, 2044
2045, 2067, 2071,2083, 2085
BRANDT 2037, 2055, 2074,2091, 2098
BUSH 2026, 2042, 2048,2051, 2059, 2060,2062,2065
2081, 2087, 2088,2090, 2092, 2093,2094,2095
CARREFOUR 2077
CASIO 2065
CATHAY 2087
CGE 2065, 2074
CIMLINE 2026, 2081
CLATRONIC 2009, 2068, 2081
CONDOR 2009, 2068, 2087
CROWN 2009, 2026, 2048,2068, 2081, 2087
CYRUS 2028
DAEWOO 2009, 2048,2068, 2077, 2087,2095
DANSAI 2026, 2081, 2087
DAYTRON 2087
DECCA 2028, 2065, 2074,2080
DENON 2015
DUAL 2065, 2074, 2087
DUMONT 2028, 2031, 2032,2065, 2082
ELBE 2013, 2073, 2087
ELCATECH 2026, 2081
ELIN 2086
ELTA 2081, 2087
EMERSON 2077, 2081
ESC 2047, 2048, 2068,2086, 2087
EUROPHON 2068
FERGUSON 2029, 2055, 2065,2074,2091, 2098
FIDELITY 2065, 2081
FINLANDIA 2028,2031, 2065, 2075,2079,2082
FINLUX 2015, 2028, 2031,2032, 2065, 2075,2082
FIRSTLINE 2012, 2016, 2017,2026, 2042, 2072
2075, 2076, 2077,2081, 2088, 2094
FISHER 2018, 2019, 2023,2031, 2068, 2073,2078,2082
FRONTECH 2009, 2068
FUJITSU 2065
FUNAI 2065
GBC 2068
GEC 2028
GENEXXA 2082
GOLDHAND 2026, 2081
GOLDSTAR 2012, 2043, 2065,2072
GOODMANS 2009, 2012, 2024,2026, 2048, 2065,2068
2072, 2081, 2086,2087, 2088, 2094
GRAETZ 2031, 2047, 2074,2082, 2086
GRANADA 2018, 2028, 2031,2065, 2067, 2072,2075,2079, 2082, 2086
GRANDIN 2012, 2026, 2065,2068, 2072, 2081,2087
GRUNDIG 2002, 2004, 2005,2008, 2026, 2028,2039
2041, 2044, 2051,2067, 2085, 2091
HANSEATIC 2012, 2072, 2087
HARWOOD 2081
HCM 2026, 2051, 2081
HINARI 2003,2026,2047, 2051, 2062,2066, 2074, 2081, 2087,2088, 2095
HISAWA 2095
HITACHI 2003, 2015,2032,2036, 2046, 2047
2065, 2066, 2074,2075, 2082, 2086
IMPERIAL 2065, 2086
INGERSOL 2003, 2066, 2086
INNO HIT 2068, 2081, 2086,2087
INTERBUY 2072, 2081
INTERFUNK 2028, 2082
INTERVISION 2065, 2072, 2087,2094
IRRADIO 2072, 2081
ITT 2009, 2012,2018, 2031, 2033,2047, 2048, 2063, 2074,2082, 2086
ITV 2068, 2072,2087
JVC 2006, 2025, 2029,2040, 2041, 2063,2074, 2080
KAISUI 2026, 2081
KENDO 2033, 2042, 2061,2072, 2081, 2090,2094
KENWOOD 2074
KNEISSEL 2094,2095
KUBA 2078
LENCO 2048
LG 2065, 2072
LOEWE 2003, 2004, 2012,2028, 2035
LOEWE OPTA 2066, 2067, 2072,2083, 2097
LOGIK 2003, 2047, 2066,2081, 2086
LUMATRON 2087
LUXOR 2016, 2018, 2020,2024, 2031, 2033
2076, 2078, 2079,2081, 2082
M ELECTRONIC 2013, 2065, 2072
MARANTZ 2002, 2004, 2024,2028, 2067, 2073
MATSUI 2003, 2011, 2030, 2038,2042,2061, 2062
2065, 2066, 2072,2086, 2094, 2095
MEDION 2094
M-ELECTRONIC 2065,2072, 2073
MEMOREX 2012, 2018,2031, 2065, 2072,2078,2079, 2082
METZ 2002,2004,2012, 2035, 2039,2045, 2067, 2083,2085,2097
MIGROS 2065
MINERVA 2004, 2008, 2039,2085
MITSUBISHI 2016, 2025, 2027,2028, 2076, 2080
MULTITECH 2026, 2065, 2068,2081, 2082
MURPHY 2065
NATIONAL 2083
NEC 2013, 2014,2025, 2073, 2074,2080
NECKERMANN 2028, 2067, 2074
NESCO 2026, 2065,2081, 2095
NIKKAI 2068, 2081, 2087
NOKIA 2018, 2031,2033,2047, 2074, 2075,2079, 2082, 2086,2087,2090
NORDMENDE 2052, 2055, 2063,2074, 2084, 2091,2099
OCEANIC 2065, 2074,2079, 2082
OKANO 2054, 2061, 2081, 2087, 2090,2094
ORION 2003, 2011, 2030,2042, 2059, 2060,2061
2062, 2066, 2092,2093, 2094, 2095
ORSON 2065
OSAKI 2012, 2026, 2065,2072,2081
OSUME 2088
OTAKE 2092,2093
OTTO VERSAND 2028
PALLADIUM 2004, 2012, 2026,2066,2067, 2072, 2074,2081, 2086, 2090
PANASONIC 2035, 2044, 2045, 2083,2097
PATHE CINEMA 2011, 2066, 2076
PATHE MARCONI 2074
PENTAX 2015, 2032
PERDIO 2065
PHILCO 2013, 2073,2081
PHILIPS 2028, 2063, 2067
PHONOLA 2028
PIONEER 2025, 2028, 2046,2075, 2080
PORTLAND 2009, 2068, 2087
PRINZ 2065
VCR
Page 27
Codes
PROFEX 2056
PROFI-TRONIC 2086
PROLINE 2051, 2065,2088
PYE 2028
QUELLE 2028, 2067
RADIOLA 2028
REX 2063, 2074
RFT 2068, 2081
ROADSTAR 2012, 2026,2047, 2048, 2072, 2081, 2086,2087
SABA 2040, 2041,2052, 2055, 2063, 2074, 2091
SAISHO 2003, 2011,2030,2038,2042, 2066, 2094
SALORA 2016, 2018,2033, 2076, 2082
SAMSUNG 2047,2064, 2086, 2096
SANSUI 2025
SANWA 2066
SANYO 2018, 2031, 2078, 2079,2082
SBR 2028
SCHAUB LORENZ 2031,2065,2074, 2082
SCHNEIDER 2026, 2028, 2065,2072, 2081, 2086, 2087
SEG 2047, 2056,2081, 2086, 2087
SEI 2003, 2028
SEI-SINUDYNE 2066
SELECO 2068, 2072,2074
SENTRA 2009, 2068, 2081, 2088
SHARP 2020, 2024,2079
SHINTOM 2026,2031, 2081, 2082
SHIVAKI 2072
SHORAI 2003, 2066
SIEMENS 2002, 2004,2008, 2012, 2023,2028
2031, 2039,2067, 2072, 2082, 2085
SINGER 2017
SINUDYNE 2003,2028,2066
SOLAVOX 2009
SONITRON 2078
SONOKO 2087
SONOLOR 2018, 2024, 2079
SONTEC 2012, 2072
SONY 2007, 2010,2069, 2070, 2071
STARLITE 2072, 2082
STERN 2087
SUNKAI 2061, 2094
SUNSTAR 2065
SUNTRONIC 2065
SUPRA 2072, 2086
SYMPHONIC 2065, 2081
TANDBERG 2087
TASHIKO 2065, 2072, 2079, 2086
TATUNG 2028, 2065, 2074,2076, 2079
TEAC 2065,2074, 2087
TEC 2009, 2068, 2081,2087
TECHNICS 2035, 2044
TELEAVIA 2074
TELEFUNKEN 2037, 2055,2063, 2074, 2091, 2098, 2100
TELETECH 2081, 2087
TENSAI 2056, 2065,2066, 2072, 2081
THOMSON 2000, 2001,2063,2074,2091, 2098, 2099
THORN 2011, 2029,2031, 2072, 2074, 2082
TOSHIBA 2016, 2017,2028, 2063, 2074, 2076, 2077
TOWA DA 2056, 2081
UHER 2047, 2072,2086
ULTRAVOX 2021, 2087
UNITECH 2086
UNIVERSUM 2004, 2008, 2012,2021, 2028, 2033, 2039, 2047
2057, 2065,2067, 2072, 2085, 2086, 2094
YOKO 2009, 2047, 2068,2072, 2081, 2086
ALCATEL 5025, 5026
BT CABLE 5004
CABLETIME 5007, 5010,5014, 5019, 5021, 5023
FILMNET CABLECRYPT 5022
FRANCE TELECOM 5024, 5027, 5029
GENERAL INSTRUMENT 5020
GRUNDIG 5013
JERROLD 5002, 5008,5017, 5020
MACAB 5024
M-NET 5022
NOKIA 5015
PHILIPS 5024,5028, 5029
PIONEER 5005
SAGEM 5016, 5024
SALORA 5011
SCIENTIFIC ATLANTA 5003, 5009
TELE+1 5012, 5022
TELEPIU 5022
UNITED CABLE 5002, 5017
VIDEOWAY 5006, 5018
VISIOPASS 5024, 5029
WESTMINISTER CABLE 5004
AKAI 3006
DENON 3002, 3009
JVC 3016
KENWOOD 3002,3005, 3014
MAGNAVOX 3010
MICROMEGA 3021
MITSUBISHI 3011
ONKYO 3010
OPTIMUS 3020
PANASONIC 3002, 3009
PHILIPS 3010, 3018, 3021
PIONEER 3020,3022
SAMSUNG 3017
SONY 3004, 3013
TECHNICS 3009
THOMSON 3000, 3012, 3015, 3019
TOSHIBA 3003, 3010
XBOX 3012
YAMAHA 3009
ZENITH 3010
DVD
Réseau câblé, Kabelnetz, rete via
cavo, cable network, red por cable
Page 28
Codes
AB SAT 5079
AKAI 5091
ALBA 5032, 5063,5093
ALLSAT 5037, 5043,5091
ALLTECH 5066
ALPHA 5091
ALTAI 5052
AMPERE 5052
AMSTRAD 5035, 5046,5052, 5067, 5069, 5073, 5080,5092
ANKARO 5044, 5047, 5094
ANTTRON 5032,5043,5063
APOLLO 5032
ARCON 5071
ARMSTRONG 5091
ASA 5053
ASAT 5091
AST 5048
ASTRA 5033, 5050,5057
ASTRO 5041,5063, 5094, 5095
AUDIOTON 5063
BEST 5094
BLAUPUNKT 5041
BRAIN WAVE 5049, 5071
BSKYB 5080
BT SATELLITE 5072
BUSH 5037, 5043, 5093
CAMBRIDGE 5031, 5068
CANAL SATELLITE 5088, 5096
CHANNEL MASTER 5093
CITYCOM 5077
CLATRONIC 5049
COMTEC 5047, 5051
CONDOR 5033, 5094
CONRAD 5033, 5060,5061, 5094
CONTEC 5051, 5061
DAEWOO 5032
DANSAT 5037, 5043
D-BOX 5083
DNR 5071
DNT 5052, 5091
ECHOSTAR 5052,5082, 5088, 5096
EINHELL 5032, 5046,5047
ELSAT 5069
ELTA 5032, 5091, 5094
EMME ESSE 5082, 5094
EUROPA 5044, 5061,5091
EUROSKY 5030, 5033,5094
EUROSTAR 5033, 5084
FERGUSON 5037, 5043, 5064
FIDELITY 5046, 5067
FINLUX 5031, 5055,5060
FRACARRO 5032, 5082
FREESAT 5066
FTE 5061, 5068, 5094
FUBA 5032, 5052,5094
GALAXIS 5047, 5051,5057,5081,5094
GRANDIN 5038
GRUNDIG 5035, 5040,5041, 5074, 5076, 5080, 5092
G-SAT 5043
HANSEATIC 5062
HINARI 5032, 5043,5093
HIRSCHMANN 5030, 5041,5052, 5053, 5054,5056, 5060
HISAWA 5049
HUTH 5033, 5044,5047,5049, 5050, 5051, 5061
INTERVISION 5033, 5065
ITT/NOKIA 5053, 5060,5083
JOHANSSON 5049
Récepteur satellite, Satellitenempfänger,
ricevitore satellite, satellite receiver,
receptor satélite
KATHREIN 5041, 5056,5063, 5077, 5086, 5091, 5095
KOLON 5032
KOSMOS 5056
KR 5063, 5066
KREISELMEYER 5041
KYOSTAR 5032, 5063
LASAT 5033,5051,5068, 5094
LEMON 5071
LENCO 5032, 5044,5057, 5071, 5094
LEXUS 5091
LORENZEN 5033, 5044,5071, 5073
LUXOR 5060, 5083, 5092
MANATA 5072
MANHATTAN 5072
MASCOM 5056
MASPRO 5039, 5041,5066,5071,5074
MATSUI 5031, 5041, 5072, 5093
MEDIABOX 5096
MEDIASAT 5057,5088, 5096
MEDION 5094
METRONIC 5032, 5038,5047,5063,5077
METZ 5041
MICRO TECHNOLOGY 5057
MORGAN'S 5061, 5068,5091
NEC 5042
NETWORK 5043
NEUHAUS 5033,5044, 5057, 5061, 5071
NEUSAT 5071
NOKIA 5053, 5060, 5083
NORDMENDE 5032, 5049,5064, 5093
NOVIS 5049
OCTAGON 5032, 5044,5051, 5063
ONDIGITAL 5045, 5089,5090
ORBITECH 5032, 5058,5059, 5061
PACE 5035, 5037,5043,5045, 5075, 5080
PALCOM 5093
PALLADIUM 5032
PANASONIC 5035, 5080
PANDA 5033, 5037
PHILIPS 5041, 5043,5044, 5061, 5063, 5072, 5074,5076
5077, 5086,5088, 5089, 5090, 5091, 5096
PHOENIX 5043, 5051
PHONOTREND 5047,5081
PIONEER 5087, 5088, 5096
PREDKI 5032, 5049
PREMIERE 5096
PROSAT 5047, 5065,5093
QUADRAL 5047, 5061, 5065, 5072,5093, 5094
QUELLE 5033, 5046
RADIOLA 5091
RADIX 5052, 5066, 5085
REDPOINT 5057
RFT 5044, 5047,5058,5091
ROVER 5065
SABA 5033,5043, 5064, 5070, 5071,5072
SAGEM 5034, 5078
SAKURA 5051
SAMSUNG 5030, 5032
SATCOM 5033, 5050,5062
SATELCO 5094
SATFORD 5050
SATLINE 5065
SATPARTNER 5032, 5049
SCHNEIDER 5076
SEDEA ELECTRONIQUE 5032
SEEMANN 5057, 5094
SEG 5032, 5049,5062, 5073, 5094
Page 29
Codes
SELECO 5082
SIEMENS 5041,5068
SKARDIN 5057
SKYMASTER 5047, 5062, 5065, 5084
SL 5071
SONY 5031,5035
STRONG 5032,5094
SUNNY SOUND 5094
SUNSTAR 5094
TECHNILAND 5050
TECHNISAT 5036, 5058,5059, 5091
TELASAT 5062
TELECIEL 5063
TELEFUNKEN 5032, 5072
TELEKA 5052, 5056, 5063, 5071, 5074
TELESAT 5062
TELETECH 5084
THOMSON 5000, 5033, 5064,5088
TONNA 5050
TRIAD 5048
TRIASAT 5055
TRIAX 5055
UNIDEN 5067
UNISAT 5051, 5091
UNIVERSUM 5033, 5041, 5053, 5067,5073
VARIOSAT 5041
VESTEL 5073
VISIOSAT 5070
VIVA 5044
VORTEC 5030, 5032,5045
WELA 5061
WINERSAT 5049
WISI 5041,5048,5052, 5061, 5070
WORLD 5049
ZAUNKONIG 5071
ZEHNDER 5048, 5073,5077,5094
AIWA 4014, 4026,4028, 4044, 4062, 4064, 4067,4073, 4086
AKAI 4025, 4046, 4050
ALBA 4069, 4079,4083, 4096
ARCAM 4068
AUDIO RESEARCH 4068
AUDIOTON 4068
BRANDT 4053
BUSH 4015, 4096
CARVER 4021, 4043
CLATRONIC 4051
CONDOR 4066
CYRUS 4068
DENON 4010, 4011, 4017, 4055, 4058
DUAL 4072
ECLIPSE 4097
ELTA 4051
FISHER 4021, 4043, 4070, 4084
GENEXXA 4030
GOLDSTAR 4035, 4094, 4095
GOODMANS 4046, 4050,4051, 4069, 4095, 4097
GRUNDIG 4031, 4033, 4035, 4036,4068
HARMAN KARDON 4024, 4031
HARWOOD 4051
HCM 4097
HITACHI 4080
INTERSOUND 4051
JVC 4022, 4047
KENWOOD 4019, 4030,4034, 4039, 4040, 4056, 4071,4093, 4098
KO DA K 4078
LG 4035
LINN 4068
M ELECTRONIC 4094
MARANTZ 4031,4033, 4061, 4065, 4068
MATSUI 4051, 4068,4079,4082,4095
MEMOREX 4018
MERIDIAN 4068
MICROMEGA 4031, 4068
MITSUBISHI 4046, 4062,4067
NAD 4041, 4054
NAIM 4068
NIKKO 4069
OKANO 4046
ONKYO 4027
PANASONIC 4012, 4020, 4038,4049, 4052, 4081, 4085
PHILIPS 4031, 4068,4077, 4078
PIONEER 4008, 4018,4023, 4030, 4037, 4057, 4088
QUAD 4068
QUASAR 4020
RADIOTONE 4096, 4097
REVOX 4030, 4031, 4068
ROADSTAR 4087, 4094
ROADSTER 4016
ROTE L 4068
SAISHO 4042
SAMSUNG 4036
SANSUI 4031, 4042,4050, 4074, 4091, 4097
SANYO 4021, 4033, 4043, 4070,4084
SCHNEIDER 4066,4096
SHARP 4030, 4060, 4076
SHERWOOD 4048, 4063, 4072
SIEMENS 4050,4092
SONY 4028, 4045,4054, 4090
SUPERTECH 4097
TEAC 4024, 4050, 4069
TECHNICS 4012, 4020,4032, 4038, 4049, 4052, 4075,4081
TELEFUNKEN 4053
THOMSON 4003, 4007
THORENS 4031, 4068
THORN 4051
TOSHIBA 4089, 4098
UHER 4042
UNIVERSUM 4035, 4036,4046, 4050, 4051, 4068
WATSON 4096
YA MAHA 4009, 4013, 4029, 4030,4059
Systèmes audio,Audiosysteme,
sistemi audio, audio systems,
sistemas audio
Page 30
IFC130 - TV LCD
Modèle et numéro de série
Modell und Seriennummer
Modello e numero di serie
Model and serial number
Modelo y número de serie
Modelo e número de série
Model en serienummer
Modell och serienummer
THOMSON Sales Europe
46, quai A. Le Gallo
92648 Boulogne Cedex
FRANCE
322 019 464 RCS NANTERRE
http://www.thomson-europe.com
25830030 © Copyright THOMSON 2005
Adresse du détaillant
Adresse des Fachhändlers
Indirizzo del rivenditore
Dealer's address
Dirección del distribuidor
Morada do negociante
Adres van de verkoper
Återförsäljarens adress
 Loading...