

Page 1
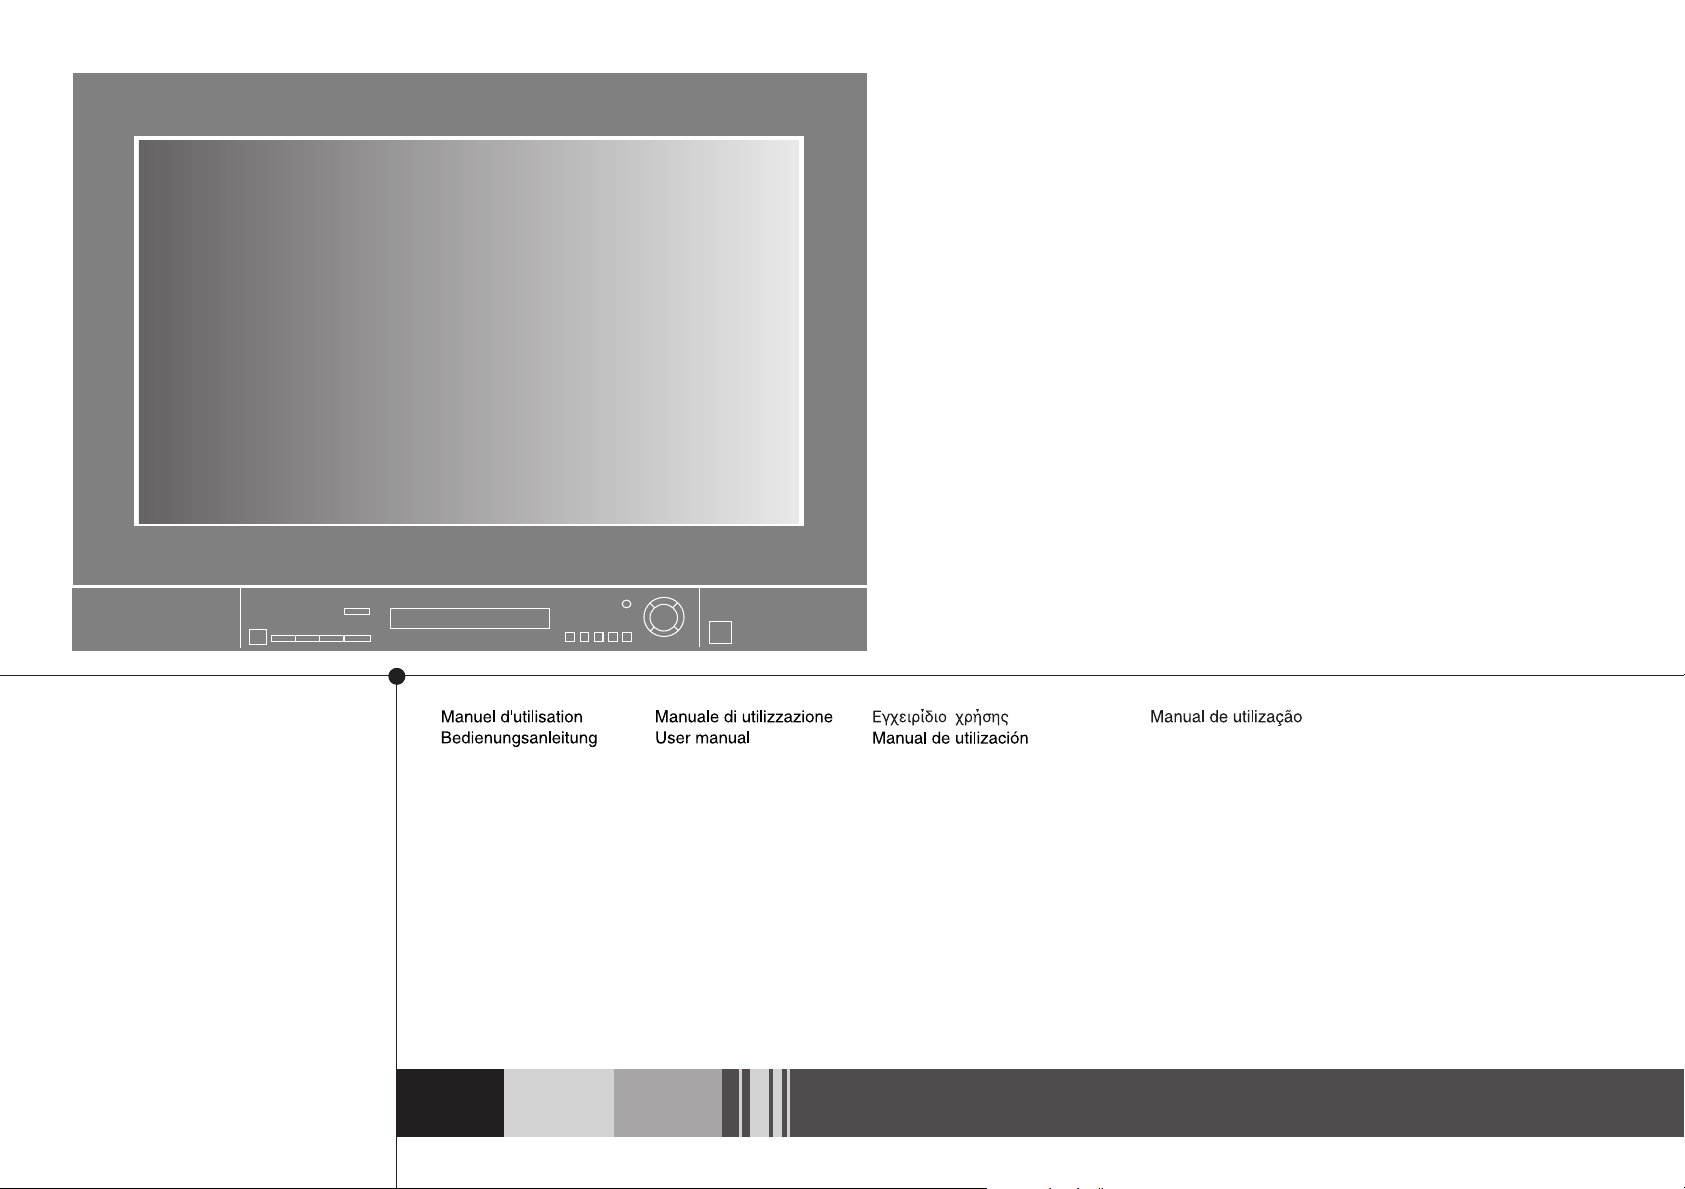
TV/DVD
Page 2

Votre garantie
_
Your guarantee _Ihre Garantie _La vostra garanzia
_
France, Belgique,Luxembourg, Suisse (F,B, L, CH)
Cher Client,
Vous avez choisi un produit THOMSON multimedia. Nous vous
remercions d’avoir fait confiance à notre marque. Votre appareil a été
soumis à tous les essais requis et remplit toutes les exigences de sécurité
applicables.
Si toutefois des défauts dus à un vice, soit de fabrication soit du matériau,
devaient apparaître, THOMSON multimedia prendrait en charge la
réparation (pièces et main d'oeuvre) de chaque produit THOMSON
multimedia (hormis accessoires et pièces consomptibles) ou, si le produit
n'est pas considéré comme réparable par THOMSON multimedia,
l’échange du produit ou sa pièce défectueuse, pendant un an à partir de la
date d’achat (date de facture originale) si le produit a été acheté dans un
des pays suivants : F, I, E, P, GB, IRL, D, CH, A, B, L, NL (Territoire) ou
dans un magasin Duty-free situé dans l’un des pays pré-cités.
Pour la mise en oeuvre de cette garantie, vous aurez à présenter votre
facture originale ou le bon de caisse précisant la date d’achat et le nom de
votre revendeur ainsi que la carte de garantie indiquant le type de produit
et numéro de série. La prise en charge de la garantie sera refusée en cas
de modification ou altération des documents ci-dessus ou s'ils ont été
rendus illisibles.
Cette garantie n’est pas exclusive de l’application de la garantie légale du
pays dans lequel vous avez effectué l’achat (c’est-à-dire pour la France
vis-à-vis de votre vendeur).
La garantie ne couvre pas les cas suivants:
1. Dommages causés par une cause extérieure à l’appareil et notamment
par une chute du produit, foudre, incendie, dégâts des eaux etc.
2. Frais d' acheminement aller et/ou retour ainsi que tout dommage en
cours de transport, directement ou indirectement liés à la mise en jeu
de cette garantie.
3. Dommages causés par négligence, utilisations impropres, contreindiquées ou non prévues dans la notice d’utilisation, installations
défectueuses, interventions impropres etc.
4. Modifications ou adaptations de l'appareil pour le mettre en
adéquation avec des normes techniques et/ou de sécurité, autres que
celles en vigueur dans le pays pour lequel l’appareil à été conçu et
fabriqué à l'origine ou si un dommage résulte d’une telle adaptation.
Merci de bien vouloir vous adresser à votre revendeur ou une Station
Technique Agréée en cas de dysfonctionnement. Avant toute demande,
nous vous conseillons toutefois de lire attentivement le mode d’emploi du
produit.
En cas de besoin de renseignements et / ou de services, notamment en
matière de garantie, dans un des pays du Territoire différent de celui dans
lequel vous avez acheté votre appareil, veuillez contacter le service
consommateurs THOMSON multimedia le plus proche.
Pour tout renseignement complémentaire, n’hésitez pas à appeler notre
service consommateurs :
THOMSON multimedia THOMSON multimedia
Marketing France (Suisse) S.A
Service Relations Seewenweg 5
Consommateurs 4153 Reinach
46 Quai Alphonse Le Gallo Suisse
92100 Boulogne Billancourt Tel. 061 716 96 50
Tel : 08 03 82 14 42 Fax. 061 716 96 55
Minitel : 3615 THOMSON TV
http://www.thomson.fr
http://www.thomson-europe.com
http://www.thomson-europe.com
UK and Ireland (GB + IRL)
Dear Customer,
Thank you for purchasing this THOMSON multimedia product and for
your confidence in our company. This product meets applicable safety
requirements and has undergone stringent testing during manufacture.
However, should there occur a defect, the product or its defective part(s)
(excluding accessories and consumables) will be repaired free of charge
(labor and parts) or, at THOMSON multimedia’s discretion, exchanged
for a similar item, provided that it has been returned within 12 (twelve)
months from the date of original purchase (date of receipt), is defective in
materials and/or workmanship and has been bought in any of the
following countries: F, I, E, P, GB, IRL, D, CH, A, B, L, NL (Territory)
or in a Duty-free shop in the named countries.
This guarantee will be granted only upon presentation of the original
invoice or cash receipt, indicating the date of purchase and dealer’s name,
and of this guarantee card with the product type and serial number. The
benefits of this guarantee may be refused if the invoice, cash receipt or
guarantee card has been altered in any way, deleted or made illegible after
the original purchase.
This guarantee does not apply to any of the following:
1. Damage caused by accidents including, but not limited to, lightning,
fire, water;
2. Transport costs between the home and place of service and other costs
and risks of transport relating directly or indirectly to this guarantee;
3. Damage to the product resulting from neglect, misuse, including but
not limited to, failure to use, repair and/or install the product for its
normal domestic purposes and/or in accordance with the operating
instructions on its proper installation and use;
4. Modifications, adaptations and alterations of the product to operate in
a country other than that for which it was originally designed and
manufactured, or any damage resulting from such modifications;
These statements do not affect your statutory rights as a consumer under
applicable national legislation in force, nor your consumer’s rights
against the dealer from whom you bought the product.
If you need service, whether or not under guarantee, please approach the
dealer who sold you the product.
In your own interest we advise you to read the instruction booklet for
your THOMSON multimedia product carefully before contacting your
dealer or service center.
If you need service while in a country (within the named Territory) other
than the one where you bought your product, please contact the nearest
THOMSON multimedia InfoCenter.
Should you have any questions which your dealer is unable to answer,
please contact:
THOMSON InfoCenter (UK,IRL)
THOMSON multimedia Sales UK Ltd.,
30 Tower View
Kings Hill
West Malling
Kent ME19 4NQ
tel. 44 (0) 173 252 0920
fax. 44 (0) 173 252 0921
http://www.thomson-europe.com
Deutschland, Österreich, Schweiz (D,A, CH)
Sehr geehrter Kunde,
Sie haben sich für den Kauf eines THOMSON multimedia - Gerätes
entschieden. Vielen Dank für das Vertrauen, das Sie uns damit
entgegengebracht haben.
Ihr Kauf ist eine gute Wahl gewesen. Sollte sich dennoch ausnahmsweise
ein Grund zur Beanstandung ergeben, wird THOMSON multimediaausdrücklich zusätzlich zu den Ihnen gesetzlich zustehenden
Gewährleistungsansprüchen - innerhalb von 12 Monaten ab Ersterwerb
(Datum des Kaufbeleges, siehe unten) alle von uns als garantiepflichtig
anerkannten Material- und Verarbeitungsfehler an THOMSON
multimedia-Geräten oder Geräteteilen (Zubehör ausgenommen), ohne
Berechnung von Lohn-und Materialkosten, entweder reparieren oder,
falls notwendig, das Gerät austauschen. Hierzu muß das Gerät in einem
der folgenden Länder: F, I, E, P, GB, IRL, D, CH, A, B, L, NL oder dort
in einem Duty-Free Shop gekauft worden sein.
Die genannten Garantieleistungen werden erbracht bei Vorlage der
Originalrechnung bzw. des Kassenbeleges, auf dem Kaufdatum, Name
und Anschrift des Händlers sowie Typen- und Seriennummer des Gerätes
vermerkt sind. Garantieleistungen können nicht erbracht werden, wenn
nach dem Ersterwerb des Gerätes diese Angaben entfernt oder geändert
worden sind.
Unsere Garantie deckt keinen der folgenden Punkte:
a. Ausseneinwirkungen auf das Gerät durch z. B. Feuer, Blitz Wasser
etc.
b. Transport-, Fahrtkosten und -risiken, die unmittelbar oder mittelbar
mit der Garantie zusammenhängen;
c. Schäden, die durch nicht bestimmungsgemässen Gebrauch,
fehlerhafte Installation, unsachgemäss durch-geführte Reparaturen
sowie allgemein infolge einer Nichtbeachtung
der Bedienungsanleitung entstanden sind;
d. Anpassungen und/oder Veränderungen des Gerätes an geltende
nationale technische und/oder sicherheitstechnische Anforderungen
eines Landes, für das das Gerät nicht ursprünglich entwickelt und
hergestellt worden ist.
Von dieser Garantie bleiben die gesetzlichen Bestimmungen zur
Gewährleistung im Land des Kaufes unberührt.
Durch eine Inanspruchnahme unserer Garantie wird die ursprüngliche
Garantiefrist weder verlängert noch wird eine neue Garantiefrist in Gang
gesetzt.
Sollten Sie also eine Beanstandung haben, wenden Sie sich bitte an Ihren
Händler oder an eine autorisierte Werkstatt oder Annahmestelle. In Ihrem
eigenen Interesse sollten Sie allerdings zuvor die Bedienungsanleitung
sorgfältig lesen.
Falls Ihr Händler eine Frage nicht beantworten kann oder Sie sich zur Zeit
der Beanstandung in anderen als den o. g. Ländern aufhalten sollten
können Sie sich, darüberhinaus selbstverständlich an Ihr nächstgelegenes
THOMSON multimedia InfoCenter wenden.
THOMSON InfoCenter (D) THOMSON multimedia(Schweiz) AG
THOMSON multimedia Seewenweg 5
Sales Germany GmbH & Co. OHG 4153 Reinach
Karl-Wiechert-allee 74 Schweiz
D - 30625 Hannover Tel. 061 716 96 50
Tel. 00-49-(0)1805 257486 Fax. 061 716 96 55
http://www.thomson.de http://www.thomson-europe.com
http://www.thomson-europe.com
Italia e Svizzera (I, CH)
Caro Cliente,
Vi ringraziamo di aver acquistato questo prodotto Thomson multimedia
e della fiducia riposta nella nostra azienda. Questo prodotto risponde alle
norme di sicurezza ed è stato sottoposto a severi controlli durante la
produzione.
Tuttavia, se dovesse presentarsi un difetto, entro 12 mesi dalla data
d’acquisto, il prodotto o la sua parte non funzionante (escluso accessori e
parti soggette a usura), verrà riparato gratuitamente (manodopera e
ricambi) o, a discrezione di THOMSON multimedia, sostituito con un
articolo simile, previa restituzione dell’apparecchio difettoso e a
condizione che sia stato acquistato in una delle seguenti nazioni: F, I, E,
P, GB, IRL, D, CH, A, B, L, NL (territorio) o in un Duty-free shop nei
paesi citati.
Questa garanzia è riconosciuta solo dietro presentazione della fattura o
della ricevuta fiscale originali, indicanti la data d’acquisto, il nome del
rivenditore e inoltre solo se la cartolina di garanzia riporta il modello e il
numero di serie del prodotto. La garanzia può essere rifiutata se la fattura,
la ricevuta fiscale o il certificato di garanzia sono stati alterati, cancellati
o resi illeggibili dopo l’acquisto.
Questa garanzia non copre:
1. Danni accidentali che includano, ma non limitati a: fulmine, fuoco,
acqua.
2. I costi di trasporto tra l’abitazione e il punto assistenza e altri costi e
rischi di trasporto riferiti direttamente o indirettamente a questa
garanzia.
3. Danni al prodotto risultanti da negligenza o uso scorretto, che
includano ma non limitati a riparazione e/o installazione del prodotto
per i normali fini domestici, secondo le istruzioni d’uso circa la sua
installazione e uso propri.
4. Modifiche, adattamenti e alterazioni del prodotto per operare in un
paese diverso da quello per il quale è stato originariamente concepito
e costruito, o qualunque danno risultante da tali modifiche.
Quanto sopra non incide nè sui Vostri diritti come consumatori in base
alla legislazione nazionale in vigore, nè sui diritti dei consumatori
rispetto al rivenditore, dal quale è stato acquistato il prodotto.
Se avete bisogno di assistenza tecnica, sia in garanzia sia fuori garanzia,
contattate il rivenditore che Vi ha venduto il prodotto, o meglio, il centro
assistenza autorizzato THOMSON multimedia ; se Vi trovate in un paese
tra quelli citati, diverso da quello in cui avete acquistato il prodotto,
contattate il centro informazioni THOMSON multimedia più vicino. Nel
Vostro interesse, Vi consigliamo di leggere attentamente il libretto
istruzioni del Vostro prodotto THOMSON multimedia prima di contattare
il rivenditore o il centro assistenza tecnica.
In caso di domande a cui il Vostro rivenditore non è in grado di
rispondere, contattate:
THOMSON multimedia THOMSON multimedia
Sales Italy S.p.A. (I) (Svizzera) AG (CH)
Via L. Da Vinci, 43 Seewenweg 5
20090 Trezzano sul Naviglio (MI) 4153 Reinach
Tel. 02/484141 Svizzera
http://www.thomson.it Tel. 061 716 96 50
http://www.thomson-europe.com Fax. 061 716 96 55
http://www.thomson-europe.com
Page 3

Su garantía _A sua garantia _Uw garantie _Warunki gwarancji
_
España (E)
Apreciado Cliente:
Nuestro agradecimiento por comprar este producto THOMSON
multimedia y por su confianza en nuestra marca. Este producto cumple
todas las normas de seguridad y ha superado rigurosas pruebas durante su
proceso de fabricación.
No obstante, si a pesar de ello apareciese algún defecto, el producto o la
pieza defectuosa (excluyendo accesorios y piezas con desgaste normal
por el uso), serán reparados gratuitamente (mano de obra y piezas) o, a
discreción de THOMSON multimedia, cambiado por otro artículo similar.
Para ello deberá ser verificado que está dentro de los 12 (doce) meses a
contar desde la fecha de compra original (fecha de la factura), que existe
una pieza defectuosa y/o anomalía en el proceso de fabricación y que ha
sido comprado en cualquiera de los siguientes países: F, I, E, P, GB, IRL,
D, CH, A, B, L, NL, o en las tiendas libres de impuestos en los citados
países.
Esta garantía solamente tendrá validez si va acompañada de la factura
original de compra o recibo de caja, indicando la fecha de compra y el
nombre del distribuidor, así como el modelo del producto y su número de
serie indicados en la propia tarjeta de garantía. La garantía puede ser
rechazada si la factura de compra, recibo de caja o tarjeta de garantía han
sido alteradas en cualquier sentido, borradas o hechas ilegibles.
Esta garantía no tendrá validez en cualquiera de los siguientes casos:
1. Daños provocados por accidentes incluyendo, aunque no limitando,
descargas eléctricas, fuego, agua.
2. Costes de desplazamiento y transporte entre el domicilio y el taller y
viceversa así como otros costes y riesgos de transporte relacionados
directa o indirectamente con esta garantía.
3. Daños en el producto resultantes de negligencia y/o mal uso,
incluyendo fallos de utilización, reparación o instalación del producto
para su uso doméstico normal, de acuerdo con lo indicado en su libro
de instrucciones.
4. Modificaciones, adaptaciones y alteraciones en el producto para
funcionar de un país a otro para el que originalmente fué diseñado y
fabricado, o cualquier daño resultante de tales modificaciones.
Estas declaraciones no afectan a sus derechos legales como usuario bajo
la legislación nacional vigente, ni a sus derechos como cliente ante el
distribuidor en el que Vd. compró el producto.
Si Vd. necesita de asistencia técnica, en garantía o fuera de ella, por favor
diríjase a la Red de Servicios Técnicos Oficiales THOMSON multimedia
o al distribuidor donde lo compró.
En su propio interés le recomendamos que lea detenidamente el libro de
instrucciones de manejo de su producto THOMSON multimedia antes de
contactar con el Servicio Técnico Oficial o Distribuidor.
Si Vd. necesita de asistencia técnica en un país (dentro de los citados)
distinto de aquél en el cual Vd. compró el producto, contacte por favor
con la oficina de THOMSON multimedia más próxima.
Si tiene Vd. preguntas que su distribuidor no sea capaz de responder, por
favor diríjase a :
THOMSON multimedia
Avenida de Burgos 8A
28036 - Madrid
http://www.thomson.es
http://www.thomson-europe.com
Portugal (P)
Estimado Cliente,
Agradecemos-lhe por ter adquirido este produto THOMSON multimedia
e pela sua confiança na nossa marca. Este produto está conforme com
todas as normas de segurança e foi submetido a testes rigorosos durante
o seu fabrico.
Contudo, no caso de ocorrer alguma avaria, o produto ou a(s) peça(s)
defeituosa(s), com excepção de acessórios ou peças de desgaste, será
reparado sem nenhum custo (peças e mão de obra), ou, se a THOMSON
multimedia assim o entender, eventualmente substituido por um produto
igual ou similar. Para isso dever-se-á verificar que esteja dentro dos 12
(doze) meses a contar da data de compra original, que exista uma peça
defeituosa e/ou uma anomalia no processo de fabrico e o produto tenha
sido adquirido num dos seguintes países: F, I, E, P, GB, IRL, D, CH, A,
B, L, NL (território) ou numa loja Duty-free em qualquer destes citados
países.
Esta garantia será exclusivamente dada contra a apresentação da factura
de compra ou recibo de caixa respectivo, indicando a data de compra e a
identificação da identidade vendedora, assim como, deste certificado de
garantia com o correspondente modelo e o número de série do aparelho.
A garantia poderá ser recusada no caso da factura, recibo de caixa ou
certificado de garantia tiverem sido de qualquer forma alterados,
apagados ou tornados não legível após a compra original.
Esta garantia não será válida nos seguintes casos:
1. Danos causados por acidentes incluindo mas não limitados a
descargas eléctricas, fogo ou danos causados por água;
2. Custos de transporte do local do domicilio para o centro de assistência
técnica e vice-versa, bem como outros custos ou riscos de transporte
relacionados directa ou indirectamente com esta garantia;
3. Danos ocasionados no produto resultantes de negligência, uso
indevido mas não limitado a falha de uso, reparação e/ou instalação do
produto, para os seus normais usos domésticos e/ou de acordo com o
manual de instruções e a sua instalação e uso adequados;
4. Modificações, adapatações e alterações efectuadas para funcionar
num país diferente daquele para o qual foi origináriamente desenhado
e fabricado ou qualquer dano resultante das referidas modificações.
Estas condições não alteram de forma alguma os seus direitos estatutários
como consumidor, sobre a legislação nacional aplicável em vigor, nem os
seus direitos como consumidor para com a empresa a quem adquiriu o
produto.
No caso de necessitar da prestação do serviço de assistência técnica quer
seja ao abrigo da garantia ou fora dela, por favor contacte com o agente
onde adquiriu o aparelho.
No seu próprio interesse aconselhamos a leitura atenta do manual de
intruções do seu aparelho THOMSON multimedia, antes de contactar o
agente ou o serviço técnico.
No caso de necessitar da prestação de um serviço de assistência técnica
num país (dos já mencionados atrás como território) que não aquele em
que adquiriu o seu aparelho, por favor contacte o THOMSON multimedia
InfoCenter mais próximo.
Se tem perguntas às quais o seu fornecedor não está habilitado a
responder por favor dirija-se à :
THOMSON multimedia
Av. da Boavista,
3521 - Porto
Telef. 618.76.41 / 618.76.59
Fax. 618.76.65
http://www.thomson-europe.com
Nederland (NL)
Geachte Klant,
Dank U voor het kopen van dit THOMSON multimedia produkt en voor het
vertrouwen dat U stelt in onze onderneming.
Het onderhavige produkt beantwoordt aan de van toepassing zijnde
veiligheidseisen en heeft tijdens het productieproces strikte tests
ondergaan.
Mocht er toch een gebrek optreden dan wordt het produkt of het (de)
defecte onderdeel (-delen) ervan (met uitzondering van accessoires en
verbruiksonderdelen) zonder kosten (i.h.b. arbeidskosten en/of kosten van
onderdelen) gerepareerd ofwel, op besluit van THOMSON multimedia,
geruild tegen een vergelijkbaar product. Dit laatste onder voorwaarde dat
het produkt is teruggebracht binnen 12 (twaalf) maanden vanaf de datum
van oor-spronkelijke aankoop, (datum van ontvangst), een produktie of
materiaalgebrek vertoont en is teruggebracht in een van de ondergenoemde
landen: F, I, E, P, GB, IRL, D, CH, A, B, L, NL (territorium) of een Duty
Free shop in een van de genoemde landen.
Deze garantie wordt uitsluitend verleend op vertoon van:
- de originele faktuur of een bewijs van contante betaling welke de datum
van aankoop en de naam van de dealer vermeldt, alsmede
- deze garantiekaart met daarop vermeld het produkt type alsmede het
serienummer.
De garantie kan worden geweigerd indien de faktuur, het bewijs van
contante betaling of het garantiebewijs op enigerlei wijze zijn vernietigd,
gewijzigd of onleesbaar gemaakt na de oorspronkelijke aankoop.
Deze garantie is niet van toepassing in de volgende gevallen:
1. Schade veroorzaakt door ongevallen, o.a.: blikseminslag, brand,
waterschade, etc.;
2. Kosten voor transport tussen het huisadres alsmede andere kosten en
risico’s van het transport welke direct of indirect verband houden met
de onderhavige garantie;
3. Productschade ten gevolge van verwaarlozing of verkeerd gebruik, o.a.:
nalaten het produkt te gebruiken te repareren en / of te installeren met
het oog op zijn normale huishoudelijke gebruik en / of overeenkomstig
de gebruiksaanwijzing betreffende zijn juiste installatie en gebruik;
4. Wijzigingen en / of aanpassingen van het produkt teneinde te worden
gebruikt in een ander land dan dat waarvoor het produkt oorspronkelijk
was ontworpen en gefabriceerd, of enige schade voortvloeiend uit
dergelijke wijzigingen.
Bovenstaande bepalingen raken noch aan Uw statutaire rechten als
consument onder de toepasselijke en van kracht zijnde nationale
wetgeving, noch aan de rechten welke U als consument geldend kunt
maken ten opzichte van de dealer van wie U het product heeft gekocht.
Indien U service, al dan niet gedekt door de onderhavige garantie behoeft,
gelieve contact op te nemen met de dealer welke U het produkt heeft
verkocht.
In Uw eigen belang adviseren wij U om de gebruiksaanwijzing bij Uw
THOMSON multimedia produkt zorgvuldig door te lezen alvorens contact
op te nemen met Uw dealer of het Service Centrum.
Indien U service behoeft tijdens verblijf in een ander land ( binnen het
genoemde territorium ) dan hetwelk waar U het produkt heeft gekocht,
gelieve dan contact op te nemen met het dichtstbijzijnde THOMSON
multimedia InfoCenter.
Mocht U nog vragen hebben waarop Uw dealer U niet kan antwoorden
neemt U dan contact op met:
THOMSON InfoCenter
Elesco Alkmaar
Robbenkoog 13
1822 BAAlkmaar
Tel. 072 562 85 37
Tel. 0800 - 022 67 61
http://www.thomson-europe.com
Poland (PL)
1. Niniejsza gwarancja dotyczy Produkt—w elektronicznych powszechnego
uýytku wyprodukowanych przez zak¸ady wchodzˆce w sk¸ad koncernu
THOMSON multimedia, zakupionych w sklepach na terytorium
Rzeczypospolitej Polskiej. TCE gwarantuje sprawne dzia¸anie tych
Produkt—w, zgodnie z warunkami technicznymi i eksploatacyjnymi opisanymi
w ich instrukcji obs¸ugi.
2. Okres gwarancji wynosi 24 miesiˆce gwarancji od daty zakupu Produktu
przez klienta dla odbiornik—w telewizyjnych i dwanaæcie miesi«cy dla
innych produkt—w. Wady ujawnione w tym okresie b«dˆ usuwane bezp¸atnie
przez Autoryzowane Jednostki Serwisowe THOMSON (ãAJS").
3. Warunkiem wykonania us¸ugi gwarancyjnej jest przedstawienie AJS przez klienta :
- czytelnie i poprawnie wype¸nionej Karty Gwarancyjnej
- dowodu zakupu wadliwego Produktu
- wadliwego Produktu
- opakowania fabrycznego
AJS moýe odm—wi• wykonania us¸ugi jeýeli przedstawiona Karta
Gwarancyjna nosi• b«dzie widoczne ælady przer—bek, jeýeli numery
Produktu okaýˆ si« inne od numer—w wpisanych w Karcie, jeýeli plomba
umieszczona na obudowie zostanie naruszona bˆd• zerwana, a takýe w
przypadku stwierdzenia dokonywania napraw lub zmian konstrukcyjnych
przez osoby nieuprawnione.
4. W przypadku odbiornik—w telewizyjnych o przekˆtnej ekranu co najmniej 20
cali nie jest konieczne dostarczenie odbiornika do AJS. Naprawa zostanie
wykonana u klienta po wczeæniejszym uzgodnieniu terminu.
W przypadku, gdy naprawa musi by• wykonana w AJS, zak¸ad us¸ugowy
odbierze Produkt i dostarczy po naprawie w¸asnym transportem. W
pozosta¸ych przypadkach warunkiem wykonania us¸ugi jest dostarczenie
Produktu do AJS. Ryzyko uszkodzenia w czasie transportu spoczywa w
takich przypadkach na Kliencie.
5. TCE Poland oraz AJS do¸oýˆ wszelkich staraÄ aby okres wykonywania
us¸ugi gwarancyjnej by¸ moýliwie jak najkr—tszy. Nie powinien on
przekroczy• 21 dni od daty przyj«cia Produktu do naprawy lub - w
przypadku wskazanym w punkcie poprzednim - od daty przyj«cia przez
AJS zg¸oszenia uszkodzenia Produktu. W razie gdyby naprawa wiˆza¸a si«
z koniecznoæciˆ sprowadzenia cz«æci z zagranicy, termin usuni«cia wady
moýe by• przed¸uýony do 30 dni. Okres gwarancji ulega przed¸uýeniu o
czas trwania naprawy.
6. Niniejsza gwarancja nie obejmuje :
- sznur—w przy¸ˆczeniowych, sieciowych, s¸uchawek, gniazd antenowych itd.
- uszkodzeÄ mechanicznych, termicznych, chemicznych, spowodowanych
wy¸adowaniem atmosferycznym,
przepi«ciem w sieci energetycznej, dzia¸aniem lub zaniechaniem
uýytkownika lub dzia¸aniem si¸y wyýszej
- celowego uszkodzenia produktu lub czynnoæci konserwacyjnych
- uszkodzeÄ powsta¸ych na skutek nadmiernej eksploatacji (uýywanie
sprz«tu w celach profesjonalnych)
- czynnoæci z zakresu bieýˆcej eksploatacji opisanych w instrukcji
obs¸ugi (instalacja, programowanie itp.)
7. Klientowi przys¸uguje prawo wymiany Produktu na nowy, jeýeli :
- w okresie gwarancji AJS dokona 4 napraw, a Produkt w dalszym ciˆgu
b«dzie wykazywa¸ wady (potwierdzone przez AJS) uniemoýliwiajˆce
uýywanie go zgodne z przeznaczeniem.
- AJS stwierdzi na piæmie, ýe usuni«cie wad jest niemoýliwe. Wymiana
Produktu moýe odby• si« wy¸ˆcznie w punkcie jego sprzedaýy.
8. Czynnoæci wykonywane przez punkt serwisowy polegajˆce na :
- wymianie bezpiecznik—w i zar—wek
- czyszczeniu g¸owic i rolek przesuwu taæmy (dla sprz«tu audio i video) nie
sˆ obj«te zakresem us¸ug gwarancyjnych i nie sˆ zaliczane do limitu napraw,
stanowiˆcych podstaw« do wymiany sprz«tu na nowy.
THOMSON CONSUMER ELECTRONICS POLAND
ul. Gen. L. Okulickiego 7/9, 05-500 Piaseczno
http://www.thomson-europe.com
Page 4

Podmínky záruky
_
Ваша Гарантия_Garanciális feltételek_Podmienky záruky
_
Czech (CZ)
1. Spole‹nost THOMSON multimedia Czech s.r.o. poskytuje v souladu s ¤ 620
- ¤ 627 z‡kona ‹. 40/1964 Sb. ve znžn’ pozdžjä’ch novel (Ob‹anskù
z‡kon’k) kupuj’c’mu, uvedenŽmu v tomto ãZ‡ru‹n’m listžÒ, z‡ruku za
podm’nek n’ìe uvedenùch.
2. Tato z‡ruka se vztahuje na vùrobky spotÞebn’ elektroniky zna‹ky
THOMSON, kterŽ byly vyrobeny v tov‡rn‡ch, kterŽ patÞ’ ke koncernu
THOMSON multimedia Group, za podm’nky, ìe vùäe uvedenŽ vùrobky
byly zakoupeny v obchodn’ s’ti na œzem’ ‰eskŽ republiky (d‡le jen
vùrobek). Spole‹nost THOMSON multimedia Czech s.r.o. ru‹’ za œ‹innù
provoz tžchto vùrobkó v souladu s technickùmi a provozn’mi podm’nkami,
uvedenùmi v n‡vodech pro obsluhu pÞedmžtnŽho vùrobku.
3. Z‡ru‹n’ doba ‹in’ 24 (dvacet ‹tyÞi) mžs’có u barevnùch televizn’ch
pÞij’ma‹ó a 12 (dvan‡ct) mžs’có pro ostatn’ vùrobky spotÞebn’ elektroniky
zna‹ky THOMSON multimedia. Opr‡vnžnŽ a v‹as uplatnžnŽ vady zjiätžnŽ
bžhem z‡ru‹n’ doby budou bezplatnž opraveny autorizovanùmi servisy
zna‹ky THOMSON multimedia (d‡le jen ãA S Ò).
4. Z‡ru‹n’ oprava bude poskytnuta ãASÒ pouze v tom pÞ’padž, pokud z‡kazn’k
osobnž pÞedloì’ ãASÒ Þ‡dnž a ‹itelnž vyplnžnù z‡ru‹n’ list, platnù prodejn’
doklad s vyzna‹enùm datem zakoupen’ vùrobku a vadnù vùrobek.
5. ãASÒ odm’tne poskytnout z‡ru‹n’ opravu, pokud na pÞedloìenŽm
ãZ‡ru‹n’m listžÒ byly provedeny zmžny œdajó, je- li na vùrobku uvedeno
jinŽ vùrobn’ ‹’slo neì v ãZ‡ru‹n’m listžÒ a tehdy, pokud je vùrobek nebo
kter‡koliv jeho ‹‡st opravov‡na, seÞizov‡na nebo vymžËov‡na jinùm
subjektem neì ãASÒ.
6. Seznam ãASÒ je pÞiloìen k vùrobku pÞi jeho zakoupen’, d‡le je moìnŽ tento
seznam obdrìet v prodejnž, kde byl vùrobek zakoupen nebo pÞ’mo u
spole‹nosti THOMSON multimedia Czech s.r.o.
7. Tato z‡ruka se nevztahuje na pÞedmžty kr‡tkodobŽ spotÞeby a na vady a
poruchy zpósobenŽ mimoÞ‡dnùmi ud‡lostmi, zejmŽna na:
- propojovac’ äËóry, s’éovŽ nap‡jec’ äËóry, sluch‡tka, antŽnn’ z‡suvky,
baterie, ì‡rovky, balen’, s‡‹ky a dalä’
pÞ’sluäenstv’ vùrobku, opotÞebenŽ bžìnùm uì’v‡n’m,
- mechanickŽ, tepelnŽ, chemickŽ a dalä’ poäkozen’ zpósobenŽ ‹innost’ uìivatele,
- vady zpósobenŽ ìivelnou katastrofou,
- vady zpósobenŽ opravou nebo zmžnami, kterŽ byly provedeny uìivatelem
nebo jinou nepovolanou osobou,
- œmyslnŽ poäkozen’ pÞ’stroje a nespr‡vnou œdrìbu,
- nadmžrnŽ pÞetžìov‡n’ pÞ’stroje (napÞ. pouìit’ vùrobku v profesion‡ln’m
provozu atd.)
- nespr‡vnou ‹innost vùrobku, kter‡ byla zpósobena ‹innost’, jeì nen’
uvedena v n‡vodž na obsluhu vùrobku (napÞ. instalace, programov‡n’ atd.)
- poäkozen’ zpósoben‡ bžhem pÞepravy vùrobku ke kupuj’c’mu a od kupuj’c’ho
- technickŽ parametry vùrobku, pokud jsou v souladu s technickùmi œdaji
vztahuj’c’mi se k pÞedmžtnŽmu vùrobku
8. Tato z‡ruka je nepÞenosn‡ a bude poskytnuta pouze kupuj’c’mu v
ÒZ‡ru‹n’m listžÒ uvedenŽm.
9. Nespln’- li kupuj’c’ nžkterou z podm’nek pro poskytnut’ z‡ruky vùäe
uvedenùch, bude tato z‡ruka zruäena.
10. Podm’nky pro poskytov‡n’ z‡ruky uvedenŽ v tomto ãZ‡ru‹n’m listžÒ plat’
takŽ pro dalä’ vùrobky koncernu THOMSON Group, a to zna‹ky Telefunken,
Saba a Nordmende.
11. Pokud nebyly vady vùrobku reklamov‡ny v souladu s vùäe uvedenùmi
podm’nkami pro poskytov‡n’ z‡ruky, nem‡ kupuj’c’ pr‡vo vùrobek vr‡tit.
THOMSON multimedia Czech s.r.o.
ul. Doprav‡kó 3
184 00 Praha 8
http://www.thomson-europe.com
Россия (RUS)
Уважаемый клиент!
Благодарим за покупку продукции THOMSON и доверие к нашей
компании. Эта продукция изготовлена в соответствии со
спецификациями THOMSON, отвечает действующим нормам
безопасности и прошла в процессе изготовления тщательные
испытания.
Eсли в приобретенной вами продукции окажется неисправность,
она или неисправные части (исключая принадлежности и
расходные материалы) будет бесплатно (без оплаты трудозатрат и
частей) отремонтирована, а если ремонт технически невозможен,
заменена аналогичным товаром (или заменены неисправные
части) при условии возврата в течение 12 (двенадцати) месяцев с
даты покупки (даты получения), если обнаружены дефекты
материалов и/или изготовления.
Данная гарантия действует только по предъявлении оригинала
счета-фактуры или кассового чека и настоящего гарантийного
талона с указанием даты покупки, названия дилера, типа и
серийного номера товара. B выполнении гарантийных
обязательств может быть отказано, если счет-фактура, кассовый
чек или гарантийный талон подвергся каким-либо изменениям,
стерся или стал неразборчивым со времени покупки.
Hастоящая гарантия не распространяется на:
1. Повреждения, вызванные несчастными случаями, включая, но
не ограничиваясь этим, нарушения энергоснабжения, молнию,
пожар, наводнение;
2. Pасходы на доставку от дома до места обслуживания и другие
транспортные расходы и риски, прямо или косвенно связанные
с настоящей гарантией;
3. Повреждения товара в результате небрежности,
неправильного использования, включая, но не ограничиваясь
этим, использование, ремонт и/или применение товара не в
обычных бытовых целях и/или не в соответствии с
инструкциями по его правильной установке и использованию;
4. Mодификации, адаптации и изменения товара для
эксплуатации в иной стране, нежели та, для которой он был
первоначально разработан и изготовлен, или повреждение в
результате таких модификаций.
5. Повреждения товара, вызванные попаданием внутрь изделия
посторонних предметов, насекомых, веществ, жидкостей.
Изложенные оговорки не ущемляют ваши законные права
потребителя по действующему государственному
законодательству, равно как ваши потребительские права в
отношении дилера, у которого приобретен товар.
Eсли вы нуждаетесь в гарантийном или ином обслуживании,
обращайтесь к дилеру, который продал вам товар или в один из
aвторизованных cервисных центров THOMSON.
Cоветуем вам внимательно прочесть инструкцию по эксплуатации
товара THOMSON, прежде чем обращаться к дилеру или в
сервисный центр.
По всем вопросам, на которые не может ответить ваш дилер,
обращайтесь письменно в информационный центр THOMSON
(Pоссия) по факсу No (095) 258-09-25.
http://www.thomson-europe.com
Hungary (H)
1. E garancia a THOMSON multimedia Csoporthoz tartozó üzemekben elõállított THOMSON
multimedia márkájú, a THOMSON multimédia Hungary Kft. által importált azon fogyasztói
elektronikai termékekre érvényes, amelyeket magyarországi üzletekben vásároltak. A
THOMSON multimédia Hungary Kft. jótáll e termékek mûködéséért, az azok
Felhasználói Útmutatóiban felsorolt mûszaki és üzemeltetési feltételeknek megfelõen.
2. A garancia idõszak a THOMSON multimedia fogasztói elektronikai termékekre általában tizenkét (12)
hónap, melyet a termék megvásárlásától számítanak. Az ezen idõszak folyamán felmerült hibákat a
THOMSON multimedia felhatalmazott szervízei térítésmentesen megjavítják. Színes televíziók esetében
a THOMSON multimédia Hungary Kft. további tizenkét (12) hónapra átvállalja a gyártó hibájából
elvégzett javítások során felmerült munka és alkatrész költségeket. Agaranciális szervízek listája a
garanciajegyhez van mellékelve.
3. A garanciális szolgáltatások nyújtására csak akkor kerülhet sor, ha a Vevõ bemutatja az
alábbi dokumentumokat:
- a helyesen és olvashatóan kitöltött garanciajegyet;
- a termék érvényes vásárlási blokkját, melyen fel van tüntetve a vásárlás idõpontja;
- a meghibásodott terméket.
4. E garancia nem terjed ki a következõkre:
- mechanikai, hõhatásra bekövetkezett és minden egyébb rendeltetésellenes használat
következménye, vagy mulasztás folytán elõállt hiba, vagy “vis major”;
- felhasználó vagy más, a THOMSON multimédia Hungary Kft. felhatalmazásával nem
rendelkezõ személy, vagy szervíz által végzett, a felhasználói útmutatóban leírtaktól eltérõ
beavatkozások és egyéb javítások esetében. Ebben az esetben a garancia azonnali hatállyal
megszûnik.
- a készülék szándékos rongálása és a karbantartás hiánya;
- túlzott igénybevétel (pl. a készülék professzionális célokra való használata).
5. Avevõ cserekészülékre (vagy vételár visszatérítésre) válik jogosulttá, ha a felhatalmazott szervíz írásban
tanúsítja, hogy a termék nem javítható meg, vagy a használó a terméket a hiba vagy annak
folyamatos ismétlõdése miatt nem tudja használni. Ebben az esetben a felhatalmazott
szervíz által kiállított tanúsítvány képezi a cserekészülékhez, vagy a vételár
visszatérítéshez szükséges csereutalványt. Acserét (vagy a vételár visszatérítését) az az eladószerv
teljesíti, amely az illetõ terméket eladta.
6. A garanciára vonatkozó jogszabályok: Polgári Törvénykönyv 306. és 307. cikkelye, valamint a
117/1991. (IX.10.) Kormányrendelet.
FONTOS FIGYELMEZTETÉS
Acsereigényt a kereskedõnél lehet bejelenteni a vásárlás idejétõl számított három (3) napon belül,
ha a termék ebben az idõszakban hibásodott meg (kivéve a beépített biztonsági elelmek hibáját,
pl. biztosíték). Ha a THOMSON multimedia garanciális feltételekben felsorolt kizáró okok
egyike sem áll fenn, a terméket a Vevõ kérésére egy másik, ugyanolyan típusú termékre kell
kicserélni. Ha a csere nem lehetséges, a vételárat vissza kell téríteni, vagy más típusú terméket kell
kiszolgálni a Vevõ választása szerint, a vételár különbözetének elszámolásával.
A vásárlás idõpontjától számított három (3) napot követõen a garanciális igényeket a
garanciajegyhez mellékelt listán szereplõ egyik szervízünknél lehet bejelenteni. A hivatkozott
jogszabályok szerint a Vevõ a következõ jogokkal rendelkezik:
- AVevõ jogosult a termék javítását, vagy a vételár arányos leszállítását igényelni
- Ha a Vevõ javítást igényel, e javítást a bejelentéstõl számított 15 napon belül kell elvégezni, úgy
hogy a termék értéke és használhatósága ne csökkenjen az ugyanilyen idõn át rendeltetésszerûen
használt termékhez képest
- Javítás esetén új alkatrészeket építenek be. Ha ezen alkatrészek fõdarabnak minõsülnek, a garancia
ezen fõdarabok tekintetében újra kezdõdik a javítás befejezésekor. Az új határidõt és a kicserélt
fõdarab megnevezését a garanciajegyen fel kell tüntetni.
- Ha a szervíz a javítás idejére cserekészüléket ad, a javítás határideje 30 napra hosszabodik.
- Ha a javítást a jelzett határidõn belül nem lehetséges elvégezni, vagy csak úgy, hogy az
értékcsökkenéssel vagy a Vevõ érdekeinek sérelmével jár, vagy ha a szervíz elutasítja vagy nem
végzi el a javítást a határidõn belül a terméket ki kell cserélni.
- A javítást az üzemeltetés helyén kell elvégezni, a fix bekötésû vagy 10 kg-nál nagyobb tömegû
készülékeknél. Ha a javítás a helyszínen nem végezhetõ el, a szervíz gondoskodik a
szállításról, valamint a termék fel és leszerelésérõl.
- A fenti bekezdés hatálya alá nem tartozó készülékeknél a Vevõnek kell a terméket a kijelölt
szervízbe beszállítania.
Ha vita merül fel a hiba jellegével kapcsolatban (pl. javítható, vagy nem, értékcsökkenés mértéke),
a garanciára kötelezettnek a jogszabályban erre felhatalmazást kapott független minõségvizsgálati
szerv szakvéleményét kell beszereznie. Ha a garanciára kötelezett e szakvéleményt nem szerzi be, a
Vevõ maga is jogosult e szervet megkeresni.
Aszakvélemény kiadása ingyenes. Aszakvélemény beszerzésekor a Vevõ és a szervíz véleményét
egyaránt meg kell adni, a hiba jellegére és okára vonatkozóan , valamint a Vevõ és a szervíz részérõl
e véleményt alá kell írni. A terméket a minõségellenõrzõ intézet számára az említett
nyilatkozattételt követõen három (3) napon belül el kell juttatni. A Vevõ a garanciára alapozott
jogainak érvényesítésére vonatkozó nyilatkozatát a kereskedõhöz, vagy a szervízhez intézheti. A
THOMSON multimédia Hungary Kft. a 74/1987. (XII.10.) MT. számú rendelettel módosított
35/1978. (VII.6.) MT. számú rendelet értelmében az általa kibocsájtott termékekhez biztosítja az
alkatrészeket, illetve gondoskodik a termékek javításáról. A termék kereskedelmi értékesítését
megelõzõ minõségvizsgálat e garanciális feltételekre is kiterjedt.
...........................................................................................................................
* A117/1991 (XI.10.) sz. Korm. rendelet szerint fõdarabnak minõsül a képcsõ és a szerelt alaplap.
THOMSON Multimédia Hungary Kft
1137 Budapest, Radnóti Miklós u. 2.
http://www.thomson-europe.co
Slovak (SK)
1. Firma THOMSON multimedia Czech s.r.o. poskytuje v sœlade s
ustanoveniami ¤ 619 a nasl. Ob‹ianskeho z‡konn’ka kupujœcemu,
uvedenŽmu v tomto Z‡ru‹nom liste, dodato‹nœ z‡ruku pod¾a a za
podmienok uvedenùch v “aläom.
2. T‡to z‡ruka sa vzéahuje na vùrobky spotrebnej elektroniky so zna‹kou
Thomson multimedia, vyrobenŽ v tov‡rËach, ktorŽ patria k Thomson
multimedia Group, a zakœpenŽ v obchodnej sieti na œzem’ Slovenskej
republiky. Firma Thomson multimedia Czech s.r.o. ru‹’ za œ‹innœ
prev‡dzku tùchto vùrobkov v sœlade s technickùmi a prev‡dzkovùmi
podmienkami, pop’sanùmi v n‡vodoch na obsluhu tùchto vùrobkov.
3. Z‡ru‹n‡ doba pokrùva obdobie 24 /dvadsaéätyri/ mesiacov prefarebnŽ
telev’zne prij’ma‹e a 12 /dvan‡sé/ mesiacov pre ostatnŽ vùrobky
spotrebnej elektroniky so zna‹kou Thomson multimedia. Z‡ru‹n‡
doba za‹’na dËom zakœpenia vùrobku z‡kazn’kom. Chyby zistenŽ
po‹as tohoto obdobia budœ bezplatne odstr‡nenŽ v autorizovanùch
servisoch /“alej len AS/ firmy Thomson multimedia.
4. Z‡ru‹n‡ oprava je poskytnut‡ len na z‡klade predloìenia nasledujœcich
dokladov z‡kazn’kom:
- Riadne a ‹itate¾ne vyplnenù Z‡ru‹nù list.
- Platnù predajnù doklad s vyzna‹enùm d‡tumom zakœpenia vùrobku.
- Vadnù vùrobok.
5. AS odmietne poskytnœé servisnŽ sluìby uvedenŽ v z‡ru‹nùch podmienkach
vtedy, ak predloìenù z‡ru‹nù list nesie zjavnŽ znaky prevedenia zmien
œdajov, ak je na vùrobku odliänŽ vùrobnŽ ‹’slo od uvedenŽho v
Z‡ru‹nom liste, a vtedy ak je vùrobok alebo ktor‡ko¾vek jeho ‹asé
opravovan‡, upravovan‡ alebo vymenen‡ inùm subjektom ako AS firmy
Thomson multimedia.
6. Chybnù vùrobok je treba dodaé najbližäiemu AS. Zoznam stred’sk AS
firmy Thomson multimedia je sœ‹aséou pr’sluäenstva vùrobku, alebo je
moìnŽ ho z’skaé v predajni kde bol vùrobok zakœpenù, alebo priamo od
firmy Thomson multimedia Czech s.r.o. Za pr’padnŽ poäkodenie
vùrobku nesie zodpovednosé z‡kazn’k.
7. T‡to z‡ruka sa nevzéahuje na :
- Prepojovacie k‡ble, sieéovŽ nap‡jacie k‡ble, sluch‡tka, antŽnne
z‡suvky, batŽrie, ìiarovky, balenie a “aläie pr’sluäenstvo opotrebovanŽ
beìnùm pouì’van’m.
- MechanickŽ, tepelnŽ, chemickŽ poäkodenie a väetky “aläie sp›sobenŽ
‹innoséou uì’vate¾a.
- Chyby sp›sobenŽ ìivelnou udaloséou /napr.poìiar, povodeË a pod./.
- Chyby sp›sobenŽ opravou, alebo zmenami prevedenùmi zo strany
uì’vate¾a, alebo inou nepovolanou osobou.
- ñmyselnŽ poäkodenie pr’stroja a nespr‡vnu œdrìbu.
- NadmernŽ preéaìovanie pr’stroja /napr. nasadenie pr’stroja do
profesion‡lnej prev‡dzky/.
Z‡ruka sa nevzéahuje na nespr‡vnu ‹innosé pr’stroja, sp›sobenœ
‹innoséou inou ako predp’sanou n‡vodom na obsluhu /napr. inätal‡cia a
pod./.
Z‡ruka sa nevzéahuje na poìiadavky na technickŽ parametre vùrobku za
predpokladu, ìe sœ v sœlade s œdajmi danùmi odpovedajœcim vùrobkom.
Z‡ruka sa nevzéahuje na poäkodenia sp›sobenŽ po‹as dopravy vùrobku
od a ku kupujœcemu.
8. V pr’pade, ìe nebude ktor‡ko¾vek z podmienok tu uvedenùch zo strany
kupujœceho riadne splnen‡, bude t‡to z‡ruka zruäen‡.
9. Podmienky z‡ruky sa vzéahujœ aj na ostatnŽ zna‹ky koncernu THOMSON
- Telefunken, Saba, Nordmende.
Pozn‡mka: Bez zjavnùch d›vodov, ktorŽ sœ v sœlade so z‡rukou, nem‡
uì’vate¾ pr‡vo vùrobok vr‡tié.
THOMSON multimedia Czech s.r.o.
ul. Doprav‡kó 3
184 00 Praha 8
http://www.thomson-europe.com
Page 5

Your guarantee
_
Danmark (DK)
Kære kunde!
Tak fordi De valgte dette THOMSON multimedia produkt. Produktet
opfylder gældende sikkkerhedskrav og har gennemgået udførlige test i
løbet af fremstillingsperioden.
Såfremt der alligevel viser sig fabrikationsfejl eller materialefejl ved produktet,
bedes De henvende Dem i den butik, hvor De har købt apparatet.
Medbring garantibevis med modelbetegnelse og serienummer samt original
fakturaen eller bonen, hvor købsdatoen er angivet.
Såfremt der forekommer rettelser i fakturaen, bonen eller på garantibeviset,
eller disse er uklare eller ulæselige, kan garantien afvises. Garantivilkår og
garantiens varighed gælder ifølge overenstemmelse med garantireglerne i
det land produktet er købt eller ifølge overenskomst med Deres
forhandler, såfremt en sådan er indgået.
Data zg¸oszenia usterki \
A javit‡si igŽny
bejelentŽsŽnek d‡tuma \
Datum pÞevzet’ do opravy \
Дата поступления в ремонт
Data wydania sprz«tu \
A megjav’tott termŽk elkŽszŸltŽnek Žs / vagy visszaad‡s‡nak
d‡tuma \ Datum opravy \
Дата окончания ремонта
A bejelentett hiba oka \
Bид неисправности и
замена запасных частей
A javit‡s m—dja,
KicserŽlt fÎdarabok
megnevezŽse,
Uj garanci‡lis hat‡ridÎ
Numer KIG \
Javit‡si munkalap
sz‡ma
Norway (N)
Kære kunde!
Takk for at du valgte å kjøpe dette THOMSON multimedia produktet.
Produktet oppfyller alle sikkerhetskrav og har gjennomgått inngående
tester under produksjonen. Om det på tross av dette skulle vise seg at
produktet har noen feil som følge av fabrikasjon eller materielle feil, ber
vi deg kontakte den butikken du har kjøpt produktet i.
Ta med dette garantiseddel, modellbetegnelse og serienummer sammen
med originalfaktura eller kassekvittering der innkjøpsdato fremgår.
Hvis faktura, kassekvittering eller garantibeviset på noen måte er
forandret eller gjort uleselig etter innkjøpet kan garanti nektes.
Garantivilkår og garantitid for ditt produkt gjelder lovstiftede
garantiregler i det land der innkjøpet er gjort, etter en overenskomst
med din handler.
Sverige (S)
Bäste kund!
Tack för att du har köpt denna THOMSON multimedia-produkt.
Produkten uppfyller tillämpliga säkerhetskrav och har genomgått ingående
tester under tillverkningen. Om det trots detta skulle uppträda fel på
produkten orsakade av fabrikations- eller materialfel ber vi dig kontakta
den butik där du har köpt produkten. Ta med denna garantisedel med
modellbeteckning och serienummer tillsammans med originalfaktura
eller kassakvitto där inköpsdatum framgår. Om fakturan, kassakvittot
eller garantisedeln har ändrats på något sätt eller har gjorts oläslig efter
inköpet kan garanti nekas. Garantivillkor och garantitid för din produkt
gäller enligt lagstadgade garantiregler i det land där inköpet har gjorts
och, om så skett, enligt överenskommelse med din handlare.
Ελληνικά (GR)
Αγαπητέ αγοραστή,
Ευχαριστούµε για την επιλογή και την εµπιστοσύνη που
δείχνετε στα προϊντα τησ THOMSON multimedia.
Τα προϊντα τησ εταιρείασ µασ πληρούν λεσ τισ απαιτήσεισ
ασφαλείασ και περνούν απ αυστηρούσ ποιοτικούσ ελέγχουσ
κατά την διάρκεια τησ κατασκευήσ τουσ στα εργοστάσια τησ
THOMSON multimedia. Ακµη µωσ και στην περίπτωση
εµφάνισησ βλάβησ που έχει προκληθεί απ εργοστασιακ
σφάλµα ή ελαττωµατικά υλικά παρακαλούµε να επικοινωνήσετε
µε το κατάσφει τον τύπο τησ συσκευήσ και να προσκοµίσετε
αυτή τη κάρτα που αναγράφει τον τύπο τησ συσκευήσ τον
σειριακ αριθµ κατασκευήσ τησ συσκευήσ, καθώσ επίσησ και
την απδειξη αγοράσ. Η εγγύηση µπορεί να µην ισχύσει αν η
απδειξη (τιµολγιο) ή η κάρτα τησ εγγύησησ έχουν
τροποποιηθεί ή αλλοιωθεί. Οι ροι και η περίοδοσ ισχύοσ τησ
εγγύησησ τησ συσκευήσ σασ διέπονται απ τισ ανάλογεσ
νοµοθετικέσ διατάξεισ που αφορούν εγγυήσεισ συσκευών, στην
χώρα που έγινε η αγορά και απ την συµφωνία που έγινε πριν
απ την αγορά µε το κατάστηµα (εισαγωγέα).
Others countries
Dear Customer,
Thank you for purchasing this THOMSON multimedia product and for
your confidence in our company.
This product meets the applicable safety requirements and has undergone
stringent testing during manufacture. However, in the event of defects
occurring as a result of faulty workmanship or materials, please approach
the dealer who sold you the product concerned and present this
guarantee card, with the product type and serial number, as well as the
original invoice or cash receipt indicating the date of purchase. The benefits
of this guarantee may be refused if the invoice, cash receipt or guarantee
card has been altered in any way, deleted or made illegible after the
original purchase. The guarantee terms and period for your product are
governed by the statutory guarantee regulations as effective in the
country where the purchase took place, and, as the case may be, by the
agreement reached with your dealer.
Piecz«• serwisu \
Szerviz bŽlyegzÎje \
Raz’tko servisn’ho
stÞediska \
Фамилия мастера и штамп
сервисного центра
Page 6
AV1
Page 7
10 cm
10 cm
5 cm
10 cm
Page 8

Contents
Precautions 2
Switching on 3
Initial set-up 4
Language - Country - Auto set-up
Programme organisation 4
Command - Name - Delete
Completing set-up 5
Manual or subsequent set-up
Personalised settings and preferences
TV Remote control 6
Everyday use 7
Selecting and scrolling channels
Selecting connected equipment (AV)
Adjusting volume and cutting off the sound
Zoom - Displaying information
Locking the TV/DVD set
Turning the TV/DVD set off - List of channels - Time
Program Info (TV guide) 10
DVD menus 11
DVD remote control 12
Playback 13
Playback modes 14
Display and Sound 15
Preferred languages 16
Locking 17
Info Menus 18
direct access, repeat play
markers, audio, sub-titles, angles 19
rating limits, playback mode,
introscan, audio channel
Remote control unit: other equipment 20
Connections 21
GB
1
TV
DVD
Stereo/Nicam/ Virtual Dolby sound 8
Teletext 9
This manual applies to several TV/DVD models. Some of the functions or settings may not be available on the model
that you have bought.Refer to the separate table to find out the main functions of the model that you have.
The
optional functions are signalled by the following symbol:
The model number of your TV/DVD is on a label at the back of the set, and on the cover of the user manual.
The pages of this publication are printed on recycled paper.
TV menus 22
DVD main menus 23
OO
Page 9
Precautions
V
i
d
e
o
D
i
s
c
T
h
o
m
s
o
n
D
i
g
i
t
a
l
GB
2
TV
DVD
• Safety
Ensure that the mains supply in your house complies with that
indicated on the identification sticker located at the back of your
set.
The TV/DVD’s components are sensitive to heat.The maximum
ambient temperature should not exceed 35° Celsius. Do not
cover the vents at the back or sides of the TV/DVD. Leave sufficient
space around it to allow adequate ventilation.
Moisture in rooms where the set is installed should not exceed
85% humidity. If you have to use the TV/DVD outdoors, do not
expose it to water from rain or splashing.
Moving it from a cold atmosphere into a warm one can cause
condensation on the screen (and on some components inside
the TV/DVD). Leave the condensation to evaporate before turning
the TV/DVD on again.
If you are away for a long period,switch the set off at the on/off
switch. Even when off, some components remain in contact with
the mains electricity supply.To completely isolate it you must
remove the plug from the mains supply socket.
During thunder storms, we recommend that you disconnect the
TV/DVD from the mains and aerial so that it is not affected by
electrical or electromagnetic surges that could damage it.For this
reason, keep the mains socket and aerial socket accessible so
they can be disconnected.
Immediately disconnect the TV/DVD if you notice it giving off a
smell of burning or smoke. You must never under any
circumstances open the TV/DVD yourself.You risk electrocution
if you do so.
Never open the player or any of its components. It can be
dangerous for you or for certain fragile components.You could
receive an electric shock or touch the laser beam.
Do not place your eyes close to the opening of the disc tray or any
other opening to look inside the player.
THOMSON multimedia is not liable if the TV/DVD is used
other than in accordance with this manual.
• Care
Clean the screen with a glass care cleaner and the rest of the set
with a soft cloth and neutral detergent. Regularly dust the vents at
the back and sides. Using solvents, abrasive or alcohol based
products risks damaging the TV/DVD.
If an object or liquid enters inside the appliance, unplug it
immediately and have it checked by an authorised technician.
• Demagnetization
Badly shielded loudspeakers or other strong magnetic fields near
the TV can cause patches of colour to appear on the screen.Move
any magnetised materials away from the TV, switch the set off and
switch it on fifteen minutes later.
• Discs
Always...
• handle your discs with care. Hold a disc with fingers on the
border or hole,
• place disc with the label facing upward (in case of a singlesided disc),
•
place the disc properly into the tray using the proper guide
area,
• use a soft cloth to clean discs if necessary,wipe from the
centre to the border,
• always put discs back into their cases after playing and store in
a vertical position.
Never...
• never close the tray with two discs on it or with a disc
slipping out of the guide area,
• never play cracked, chipped or deformed discs nor try to
repair them with adhesive tape or glue,
• never write on the disc,
•
never move the player during playback,
• never scratch discs or store them in places of direct
sunlight, high humidity or high temperature,
• never try to play a Photo CD or CD-R in this player,
•
never use record cleaning sprays, benzine, static electricity
liquids or any other solvent,if the disc surface is dirty.Wipe
gently with a soft damp (water only) cloth, never wipe the
disc in a circular motion, since circular scratches are likely to
occur and could cause noise during playback.
The set is provided with adequate shielding to avoid the emission
of X-rays. Work by unqualified persons, modifications to the
high voltage or replacement of the tube by a model not complying
with the manufacturer’s recommendations may cause a sharp
increase in X-ray emissions.A set modified in this way no
longer meets the original specifications and should not be used.
If you hear strange noises or vibrations coming out of the unit
once a disc has started to play, rapidly press the STOP key of the
remote control or front of player.
Page 10
Switching on
-
+
SIZE AAA 1,5 V 0%MERCURY
GREENELL
EXTRA HEAVY DUTY
-
+
SIZE AAA 1,5 V 0%MERCURY
GREENELL
EXTRA HEAVY DUTY
5A
1 3 2
+
+
–
–
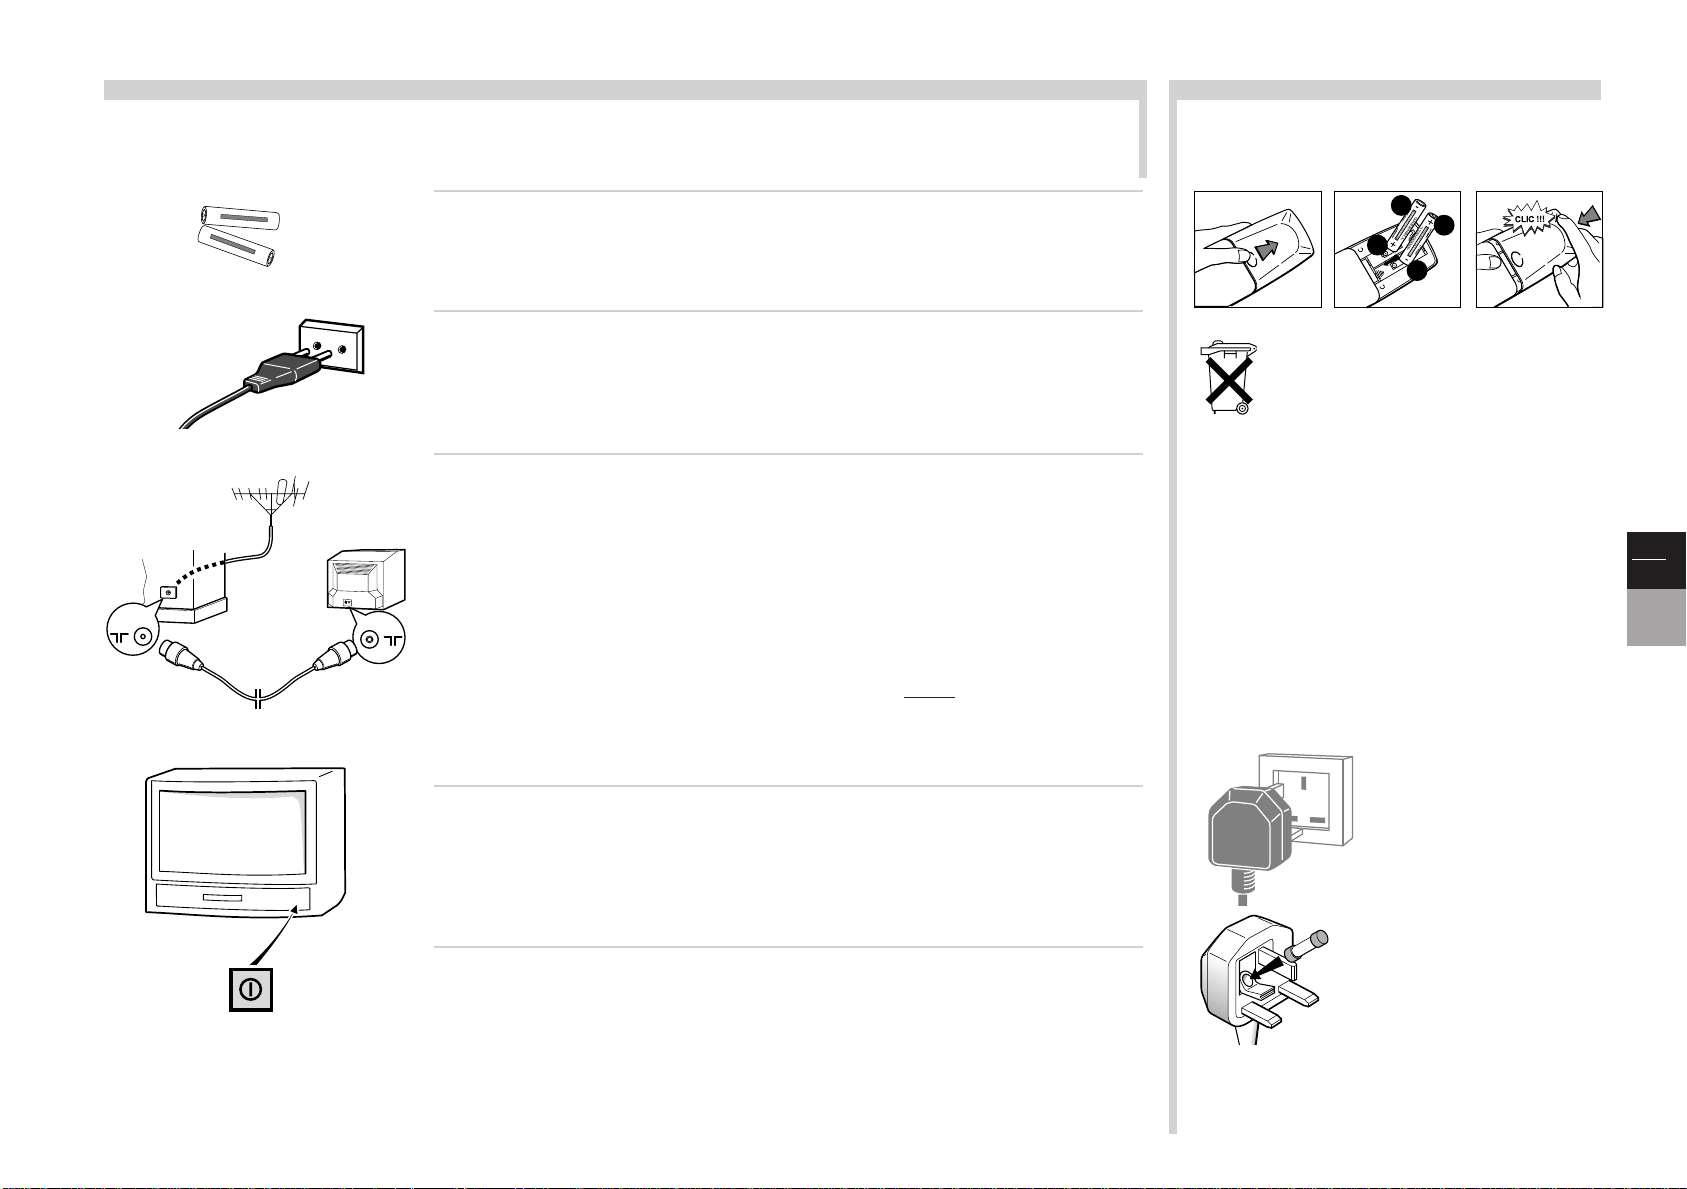
Follow the instructions on this page to use your TV/DVD set and the remote control unit before entering the channel set-up
procedure described on the next page.
More info...
INSERTING THE BATTERIES:
Insert two batteries of type LR06 or AA.
220 - 240 V ~ 50 Hz
Mains socket in
continental Europe
1
2
3
Put the batteries in the remote control unit.
Connect the TV/DVD to a mains socket.
Connect the outside aerial or cable network to the g socket at the
back of the TV/DVD set.
We recommend that you do not initially connect other equipment to your TV/DVD
(VCR, decoder, etc.) so as not to complicate the set-up procedure with additional factors.
Connect them up when you have finished setting up the channels by referring to page 21 of
the manual .
NexTView-Link video recorder (see diagram at the end of this user manual)
If you have a NexTView-Link video recorder, you must connect it to the AV1 socket of the
TV/DVD set by means of a SCART cable (21 pins, all wired) befor
e proceeding to the initial
Please respect the environment and prevailing
regulations. Before you dispose of batteries or
accumulators, ask your dealer whether they are subject
to special recycling and if he accepts to take them back.
AERIAL SOCKET: (75 Ohms - VHF / UHF / cable)
The aerial socket, located at the back of the TV/DVD set, enables the
connection of an external aerial or one from another item of equipment
fitted with a modulator (video recorder, satellite receiver, etc.).
MAINS PLUG:
The mains plug carries the power supply to your TV/DVD set. It
should only be connected to an AC supply at 220 - 240 V ~ 50 Hz.
It must not be connected to a DC supply. If the plug is detached
from the cable, do not under any circumstances connect it to a
mains socket as there is a danger of electrocution.
GB
3
TV
DVD
set-up described on page 4.
UK SOCKET
Equipment for the UK is supplied with a
4
Turn the TV/DVD on by pressing the on/off button AA.
The first time you turn the TV/DVD on, the language choice menu appears.
5
Continue on page 4 for a Initial set-up or on page 5 to update
mains cable fitted with a moulded plug.
The plug contains safety components
and must not be replaced by a type sold
in shops. It is fitted with a fuse that
protects your TV/DVD. If your set no
longer works, the fuse may have blown.
If it has, replace it with an identical
ASTA certified or BSI (BS 1362) 5 amp
fuse.
channels if the TV/DVD has already been set up.
Connecting other equipment to the AV (Audio Video) sockets is detailed on page 21. Before
referring to it, complete the initial set-up (next page) so as to avoid any problems with
selecting the equipment.
Page 11
GB
okokok
ok
4
TV
DVD
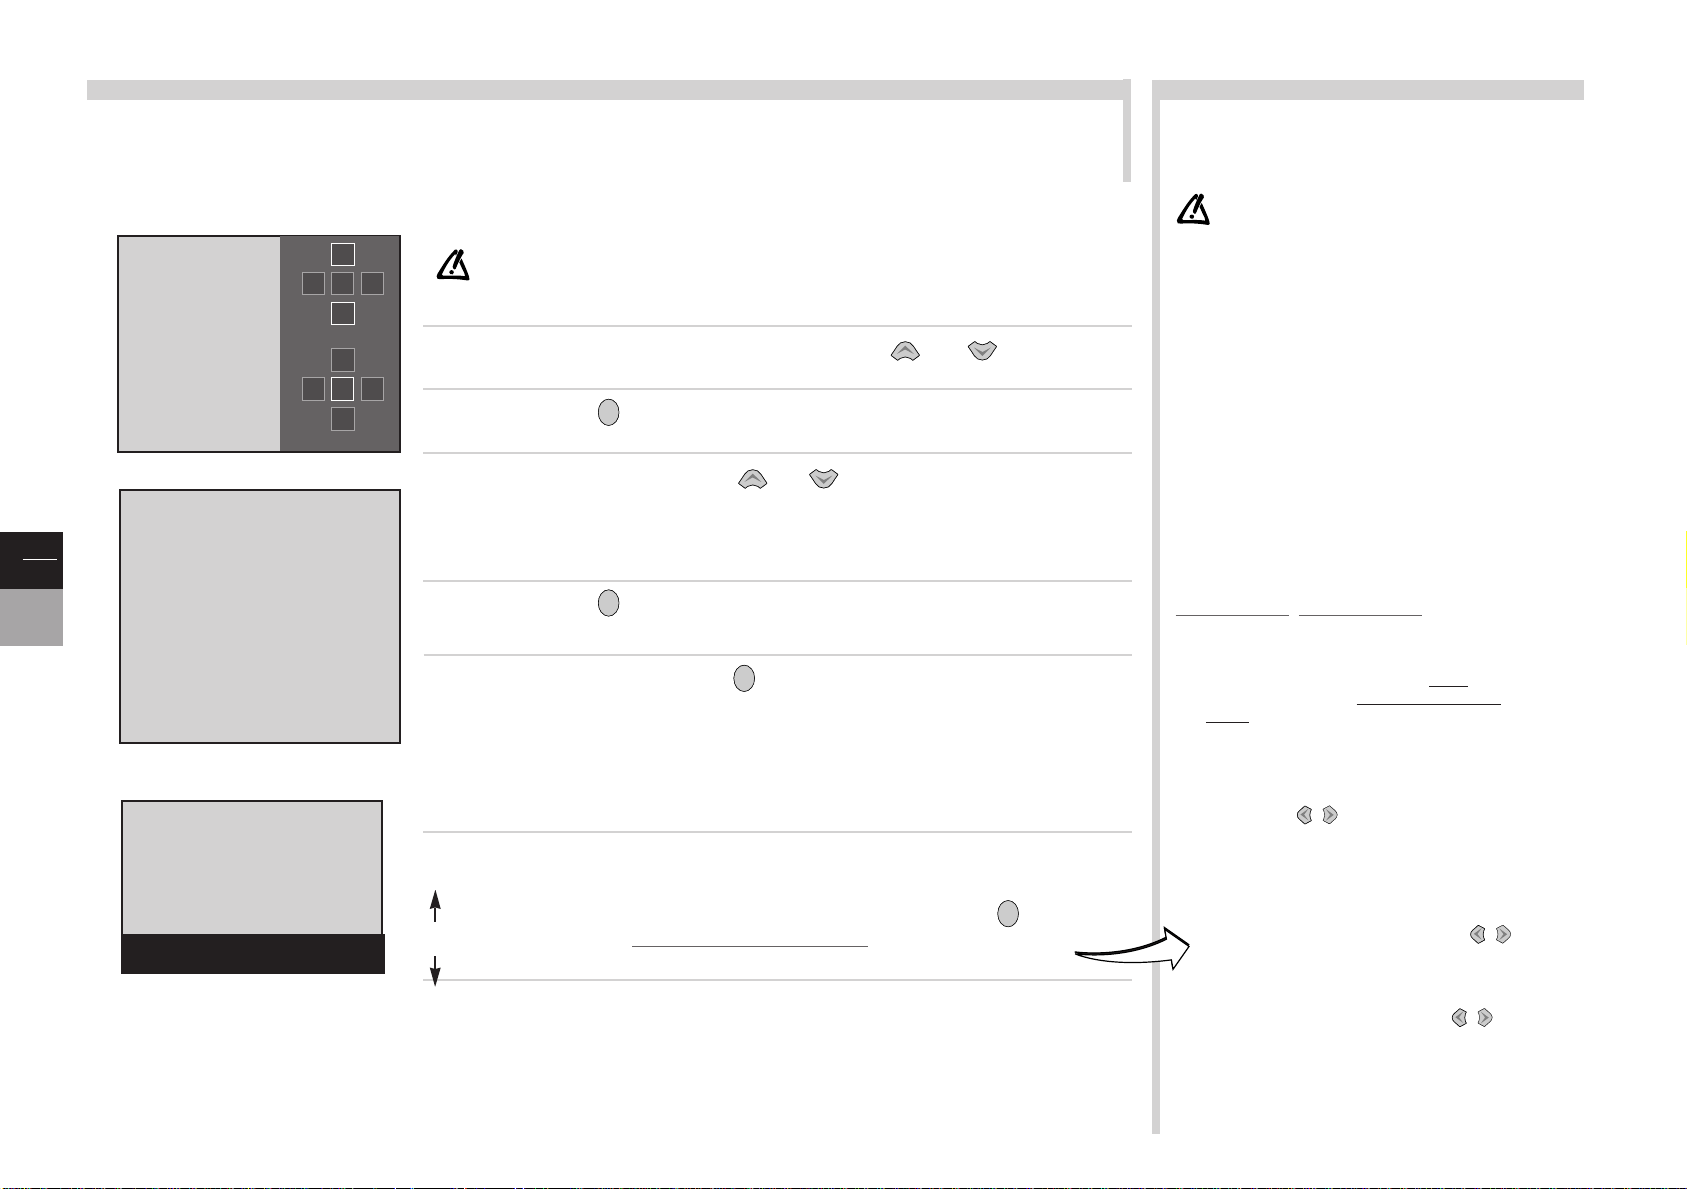
Initial set-up
The first setup consists in carrying out all the required settings to search and store all the channels you can receive in your
particular area. Power the TV/DVD set with the On/Off switch AAlocated at the front and scrupulously follow the steps 1 to 7 of
this page.
When your TV/DVD is first switched on, the language choice menu
1
BB
English
Fran•ais
Deutsch
Italiano
Espa–ol
Portugu•s
Nederlands
Svenska
Dansk
Norsk
ÉÉ
ÉÉ
2
5
COUNTRY SELECTION
Return
BB
United Kingdom
Eire
France
Germany
Italy
Spain
Portugal
Holland
Belgium and Luxembourg
Switzerland
Austria
ÉÉ
Other
SEARCHING
AUTO INSTALLATION
¥¥¥¥¥¥¥¥¥¥¥¥¥¥¥¥¥¥¥¥¥
03 STATIONS FOUND
Auto programming your TV set.
Please wait. To cancel press EXIT.
BB
OK
BB
BB
BB
BB
OK
BB
BB
1
BB
2
3
4
5
6
or
7
The language chosen during step 1 is automatically selected for the DVD part. Nonetheless, you may
customise the DVD part (menus, dialogues, or subtitles language - on-screen display - rating limit): see
pages 15 to 17.
appears (1). If it does not appear, put the TV/DVD into stand-by by
pressing the BBkey on the remote control unit. Press the pr - key of the
TV/DVD for several seconds until the menu appears.
Choose the language from the menus with the or keys.
Confirm with . A list of countries appears.
Choose the country with the or keys.
This is the country you are in, or the country whose channels you want to receive if you live near its
borders.
Confirm with . A welcoming message appears.
Start auto set-up by pressing .
The menu that appears tells you how set-up is progressing. Wait for the end of set-up message
before leaving the menu, otherwise the channels will not all be memorised. Depending on the
number of channels you want to receive, auto set-up can take up to 10 minutes.
According to the country you chose in step 3, the TV/DVD will scan
channels in a pre-set order. If you want to alter this list,to name or re-name
your channels or delete channels memorised twice, press and follow
the instructions in Pr
ogramme organisation.
If you do not want to reorganise your channels, leave the menu with the
exit key and refer to everyday use on page 6.
More info...
OO
Languages and countries: the list of languages
and countries depends on the model.
Decoder: If you have connected a decoder to the AV1
socket, after the initial set-up you should display the Manual
installation menu and confirm the Decoder option. Refer to
page 5.
Missing channels: channels are searched for according to the
country selected, refer to the Manual set-up chapter to set up
channels that have not been found.
For cable networks, if some channels have not been found, select
Other instead of the country and re-start an Auto update.
Subsequent set-ups: display the INSTALLATION SUMMARY (see
page 6) and choose Auto update or Auto installation as
appropriate.Then follow the instructions at the foot of the screen.
• Auto update enables you to set up channels just on-air or add
to your set-up if some channels are missing or wrongly set up.
• Auto installation is used for setting up after the initial
set-up (e.g. after moving house).
It deletes all channels previously memorised.To set up a new
channel, it is better to use Auto update or Manual
installation.
Programme organisation: at the Initial set-up,
your TV/DVD searched for channels, giving them a number
and name according to the country chosen. The
PROGRAMME ORGANISATION menu enables you to
alter these settings.You are able to name channels whose
name has not been found,change the sequence of channels
and delete channels that are duplicated or of poor quality.
Follow the instructions at the foot of the screen. Identify
channels with the help of a TV programme guide.
• Organising your channels: select the Select program.line.
Look for the channel that you want to assign the number 1 to with
the pr +,pr - or keys,using the channel logos to help you.
The number already assigned appears on the Select program.
line. Select the Swap with PR line, key in 01 and press ok.The
channel goes to first position: the two channels are switched.
Continue for the other channels.
• Deleting a channel: select the Select program. line and
scroll your channels with the pr + and pr - or keys.When
you get to a channel to be deleted, select Delete program., and
press ok.
• Changing the name: select the Change pr. name line and
choose the character to be altered with the keys. Scroll the
alphabet with the 1 and 2 keys.The name will be changed when
you change line or leave the menu.
Page 12

Completing set-up
The settings on this page will be useful if you find that some channels have not been memorised on initial set-up or auto update.
This can happen if you set channels up from a cable network. Setting up channels manually requires every setting for every
channel to be entered, one at a time.
Display the INSTALLATION SUMMARY (see page 6) and select the Manual
installation line. Confirm with ok. Alter each of the settings in turn for the channel that
you want to memorise. Follow the instructions at the foot of the screen.
Standard: choose the standard for your country.
1
The choice of standards varies according to the model of TV/DVD: France for France and
Luxembourg,DKK’ for Eastern Europe and the Middle East, UK for the United Kingdom and Eire,
Euro BG for Western Europe.
Reception: choose the channel reception method (terrestrial aerial or cable
MANUAL INSTALLATION
Return
Standard EURO BG
Reception Aerial
Autosearch <I
Fine tuning
Store on PR number: -Name ---Decoder
External sound path
>
CH--
þ
¨
2
network).
Some cable networks use the same frequencies as land based transmissions. If this is the case, select
Aerial instead of Cable.
Autosearch: key in the channel programme number or start a search with the
3
or keys.
Your TV/DVD will stop at the first channel found. If you want to memorise the
corresponding channel, select the Store on PR number line. Otherwise, continue
the search using the or keys.
Fine tuning: if the picture is not sharp, try to improve it with the or keys.
4
Store on PR number: to confirm your settings, key in the number that you want
5
to assign to the channel (e.g. 01 for BBC1). Memorise it with ok.
Name: if the channel is recognised, its name is detected automatically,otherwise
6
change the name suggested or enter a name. Select the character to be altered with
the or keys.
Scroll the alphabet with the 1 and 2 keys. Change character with the or keys
and start again from stage 5 above.
Decoder: if the channel is encrypted and if you want to connect a decoder to the
7
AV1 socket (see page 21),tick the box with the or keys and start again at
stage 5 above.
External sound path: turn your decoder on. If the sound is scrambled or if there
8
is no sound, change the setting (box ticked or not) with the or keys and start
again at stage 5 above.
Leave the menu with exit.
More info...
Personal settings: display the INSTALLATION SUMMARY by
holding down the tv menu key on the remote control unit. Select
Personal settings. Confirm with ok. Follow the instructions at the
foot of the screen to choose:
• Menu language: choose your language.
The language chosen in the TV part will automatically be
selected for the DVD part.
• Picture rotation:to correct terrestrial magnetic field effects
and obtain a perfect horizontally aligned picture.
• Country: the choice of country is important for the correct
display of Teletext screens in the corresponding language.
• Auto volume level:check the box if you want to keep the
same sound level on all channels.
• AV1 name,AV2 name, AV3 name: give a name to the
socket according to the equipment that you are connecting to
it. Choose the character to be altered with the or .
keys. Using the 1 or 2 keys, display the character you want.
• Programme for reference time:select the Programme for
reference time line and scroll the channels with the or
keys until the time and date are displayed below the channel
number.Setting the time is only possible with channels
broadcasting Teletext.When the time is set you can display it
with the info key.You can also use the Wake up timer
function.
Leave the menu with exit.
PREFERRED SETTINGS: display the SUMMARY by pressing
the tv menu key on the remote control unit. Select Preferences.
Confirm with ok.
• Show PR. number: tick the box to permanently display the
number of the channel you are watching.
• AV1 video input:using the or keys, state the type
of video signal transmitted by the equipment connected to AV1.
By selecting Automatic, the recognition of the signal (Video,
S-Video, RGB) will be automatic.
Select RGB if you have no picture when you connect a games
console.
Proceed the same way for AV2 and AV3.
• Format control:choose the format for the on-screen picture.
Auto: the TV/DVD (16/9) adapts to the broadcast picture
format if the broadcaster or equipment connected via a EuroAV (scart) socket provides a control signal.
16/9 or 4/3: choose the format if the picture is not
automatically adapted .The format returns to auto if you
change channel or switch off the TV/DVD set.
• Maximum volume: set the maximum volume level as you
require.
• Ext. amplifier: if you connected an amplifier to the cinch
sockets located on the back of your TV set, check the box.
The left and right speakers of the TV set are thereafter
disconnected and you may use the speakers connected to the
amplifier.
If you do not use the external amplifier,deactivate the
External amplifier function: your TV set would otherwise be
muted.
Leave the menu with exit.
GB
5
TV
Page 13

ok
tv
menu
exit
tv dvd
vcr
tv+dvd
sat
hifi
2
3
654
7 8
9
1
0/--
pr
pr
av
list
infoinfo
texttext
TV Remote control
Your remote control can control several pieces of equipment. This page shows
you the functions of the TV part. For the DVD part, see page 12.To control other
equipment, see page 20.
The keyboard keys located on the TV/DVD frontside have similar functions to those
of the remote control,except for the OPEN/CLOSE key,which is only available on
the front of the player and enables you to open or close the disc drawer.
TV navigation
> Time
GB
6
TV
Return
Sleep timer <I> 00:00
Current time 11:28
Wake-up timer
Wake-up time 07:07
Programme number 08 EURO
Daily
SUMMARY
Exit
Program Info
Sound
Picture
Preferences
Installation
TIME
þ
þ
Display the SUMMARY
by pressing the remote
control unit’s tv menu key
once. From the summary,
you are able to access
other menus (Sound,
Picture,Time, etc.) to set
up or use your TV/DVD.
Choose a menu.
Confirm your choice.
Choose a function.
Increase or decrease a
number or setting bar.
Enable or disable a function
by ticking a box þ.
The other keys to control your television
To put your TV/DVD set in stand-by
mode.
Your remote control can control
other equipment, such as VCRs, Hi-Fi
units or satellite receivers.
To control your TV/DVD set,switch
the selector to the tv+dvd position.
To control other equipment,see page 20.
To switch from TV to DVD mode or
from DVD to TV mode.
Programmes
To switch from one programme to
another.
Sound
Set the volume level.
This function is active in any position of
the function selector except the hifi
position.
Mute and re-establish the sound.
The colour keys
Call the sound and picture preset menu.
Display the list of programmes.
Display the name of the programme, the
time, the type of sound and the zoom.
On the channels which broadcast a
programme guide, information about
current programme.
Display the programme guide.
Choose a programme by entering its
Go back to the previous
menu by selecting Return
or leave the menus with
the exit key.
INSTALLATION SUMMARY Menu
INSTALLATION SUMMARY
> Exit
Manual Installation
Auto update
Auto installation
Programme organisation
Personal settings
Press the tv menu key of the remote
control: the SUMMARY menu appears.
Select the Installation line with the
or keys and confirm with ok.
The INSTALLATION SUMMARY menu
appears.
Audio visual programmes
number. For the 2 figure programme,
first type the 0 key (ex.12, type 012).
Choose an appliance which is
connected to the SCART socket or the
cinch socket:AV1,AV2,AV3.
The colour keys are also used for teletext operation.
IMPORTANT
If the batteries of your remote control are flat, you
can use the keys on the front of the unit: they have
the same functions as those of the remote control.
Display teletext.
Page 14

Everyday use
The explanations given on this page will enable you to adjust the image of your TV/DVD set and to program your device to alarmclock or self-stopping mode. The channel list will show you , by 10-channel pages, the channels stored in your TV/DVD set, and
will allow you to access them directly.
Most of the features described in this section are available in the TV mode
only.
Display SUMMARY with the tv menu key and select the Sound,Picture or
Time menu. Confirm with ok.
SOUND
See page 8.
PICTURE
PICTURE
Return
Picture preset Film
Brightness
Colour
Contrast
Sharpness
Contrast expand Low
Tone Neutral
Noise reduction
þ
TIME
Return
Sleep timer <I> --:--
Current time 11:28
Wake-up timer
Wake-up time 07:07
Programme number 08 EURO
Daily
þ
þ
• Picture preset enables you to optimise the picture depending on the kind of
programme you are viewing (Film,Studio,Sport, Standard or Personal).
On some models, the only available options are Standard and Personal.
• Brightness, Colour, Contrast, and Sharpness adjust the picture to your
liking.These adjustments are enabled every time you choose Personal (see
above).
• Contrast expand adjusts the picture according to the surrounding brightness
(strong or weak).
• Tone adjusts the colour balance (warm, neutral or cold).
• Noise reduction improves the quality of the picture in case of poor reception.
TIME
• Sleep timer sets an interval before the TV/DVD is automatically put into
stand-by. Set it to --:-- to cancel.
• Current time enables the time to be adjusted if it is not correct.
• Wake-up timer enables you to set the time at which you want to be woken
up by the TV/DVD.Tick the box to display the menu options.Key in the wakeup time. Choose the channel that you want to wake you up.Tick the Daily
box for a daily wake-up call. Leave the menu with exit.Put the TV/DVD into
stand-by with the remote control unit’s BBkey.The TV/DVD’s red indicator
flashes.The TV/DVD comes on automatically at the programmed time. If you
do not use the remote control unit it goes off one hour later.
Locking the TV/DVD: It is possible to prevent the TV/DVD from being turned
on using the buttons on the set.The remote control unit is required for it to be
used.You can lock the TV/DVD in 3 ways:
• by pressing the remote control unit’s stand-by key BBfor more than 3 seconds,
• by programming an automatic stop sleep timer (see above),
• by putting it on stand-by after programming a wake-up time.
The flashing red “on” indicator indicates that the TV/DVD is locked.It can only be turned
on by the remote control unit.Press any number key on the remote control unit to unlock it.
More info...
Turning the TV/DVD on and off: the TV/DVD is turned on and
off by pressing the AAkey on its front.
A green indicator on the front indicates that the TV/DVD is on.
Going to and from stand-by:switching the TV/DVD on standby
is performed with the key Bon the remote control.This key allows
you to switch off your TV/DVD with the remote control.The status
“on standby”is signalled by the red indicator lamp on the
front side of the TV/DVD set.
To switch on your TV/DVD set again, press any of the remote
control number keys or the ok key.
When you control the TV/DVD with the remote control unit,the
indicator on the front flashes orange.This allows you to check
that the remote control unit is working and the condition of the
batteries.
pr + and pr -: to choose a channel with the remote control unit or
with the TV/DVD. (Pr 01, Pr 02,… Pr99, AV1,…)
Number keys: to choose a channel with the 1, 2, 3, etc. keys.
For the 2-digit channels, first press the 0 key (e.g. for 12, press 012).
Zoom: you are able to enlarge pictures broadcast in 4/3 or
letterbox format (black strips at the top and bottom of the screen)
so as to get rid of areas with no picture. First press exit if a menu
is on the screen and select the magnification required with the
or keys:
ZOOM 0 4/3 picture (black strips at the sides).
ZOOM 1 for pictures in letterbox centred on the
ZOOM 1 (ST) for pictures in letterbox offset to see
CINERAMA 4/3 picture Filling the screen.
Display of information: pressing the info key displays on-screen
the number and name of the channel, the time,the zoom and type
of sound. If the channel you are currently watching broadcasts
Program Info,the name of the programme and its start and end
time will be displayed.
Sound and Picture preference: display the menu with the red
key, select the line wanted and adjust to your liking. On some
models, press the red key once to recall the standard settings.
Freeze:briefly press the ok key when there is no menu on the screen
to freeze the picture. Press any key to cancel.
List of channels: press the list key on the remote control unit to
display the LIST. It contains 10 pages at most and gives the name
and number of each channel.An 11th page is dedicated to
equipment connected via the AV sockets.
To watch one of the channels on the page displayed,key into the
remote control unit the last figure of the channel number (e.g. 5 for
25). The list leaves the screen and pictures from the channel
appear.
Leave the menu with exit.
screen (without sub-titles).
sub-titles.
GB
7
TV
Page 15

Stereo/Nicam/Virtual Dolby sound
The descriptions of this page will enable you to adjust the sound of your TV set according to the various broadcasts you receive.
More info...
Sound type
GB
8
TV
SOUND
Return
Sound type <I> Stereo
Sound mode Dolby Virtual
Surround effect
Balance L/R
Sound preset Film
10 kHz Treble
5 kHz
1,5 kHz Medium
500 Hz
100 Hz Bass
Display the SUMMARY. Select the Sound line. Confirm with ok.
The SOUND menu appears.
Sound type: the choices you can access depend on the programme. Select
the line then choose the type of sound you want.
Sound mode: the choices you can access depend on the model of
TV/DVD and
the type of sound. Select the line then choose the type of sound you want.
The Magic and Virtual Dolby modes are only available if the sound is of a
stereo type.
Surround effect:this line only appears if Dolby Virtual is selected on the
Sound mode line. Select the line and adjust the surround effect.
Balance L/R: select the line, then balance the sound between the Left and
Right speakers.
Sound preset: choose the setting that best suits the sound on the channel
you are watching.Select the line and choose your setting.
Personal represents the graphic equalizer settings.
BROADCAST
Mono
Stereo
Dual
NICAM - 3
AV
CHOICE
Automatic - Mono
Mono - Stereo
Sound 1 - Sound 2
Sound 1 - Sound 2 - Sound 3
Stereo - Sound 1 - Sound 2
Sound mode
Normal
Wide
Magic
Dolby Virtual
Virtual Dolby Surround systems use advanced
”virtualiser” techniques to simulate the soundfield produced by a
Dolby Surround Pro Logic system using only two loudspeakers.
original sound (mono or stereo)
stereo effect for mono sound
accentuated stereo effect with stereo
basewidth enlargement for stereo signals
and pseudo stereo for mono signals
Virtual Dolby Surround. Based on Dolby
Surround Pro Logic decoding,Virtual
Dolby Surround plays the Left,Right,
Centre and virtualised Surround
channels on 2 speakers.
Virtual Dolby Surround
Graphic equalizer:adjust the tone of the sound using the 5 frequency bars.
Once you have set the equalizer, the Sound Preset option goes automatically
to Personal.
Your settings are memorised as the new personal settings.
Leave the menu with exit.
“Dolby”“Pro Logic”and the double D symbol are registered
trademarks of Dolby Laboratories Licensing Corporation. Made
under licence from Dolby Laboratories Licensing Corporation.
Nicam
The NICAM process consists of sending digital stereo sound
comparable to that from an audio CD via a land based transmitter
in addition to its usual mono equivalent. So by means of the
NICAM process, you can get digital sound with the quality of a
compact disc.
Sound preset
Choose the setting that best suits the programme you are watching:
film, voice (for discussions), music, flat (flat response curve), standard
(factory settings), personal (personal settings).
Page 16

Teletext
Used in many countries under various names (TOP Text, Fastext, FLOF text, Videotext), Teletext is a free service offered by
television channels. The service consists of information database (weather, sports results, news, games, etc.) available at all times.
The different headings shown on-screen by blocks of colour are accessed by a single press on the key of the same colour on the
remote control unit.
102 EuroNews 16 : 02 : 99 12 : 00 : 40
Press the text key to display the Teletext Index page (page 100).A message will tell you if
there is no Teletext on the channel that you are watching.
More info...
Sub-page: some channels broadcast Alarm pages that can be
displayed at a chosen time.
E.g. for 3.30 p.m. key in 15.30 as the sub-page number then press
exit. Of course it is necessary to leave the TV/DVD on, on the
channel that broadcasts the Alarm page.
Wintersport
DEUTSCH 101
FRENCH 102
ENGLISH 103
SPANISH 104
Index: to call up the Index page, select 100 with the or keys and confirm with
ok.
Display a page by keying in the three figures of its page number (e.g. 170).After a
moment, the page appears. Refer to the following or previous pages with the .
Scrolling pages:some information takes up several pages.They scroll on-screen as they
are received.To stop them scrolling, select STOP with the or keys and confirm
with ok. Restart scrolling with ok.
Hidden answers:to show or hide an answer (games), select ? ? ? with the or
keys and confirm with ok.
Zoom: select ZOOM with the or keys and press ok once to enlarge the top of
the screen, twice to enlarge the foot of the screen, or three times to return to normal
display.
Display:to superimpose the Teletext on top of the programme picture, select MIX with
the or keys and confirm with ok. One further press on ok returns to normal
display.
Sub-page: to access a sub-page directly, select “----” with the or keys.
Key in the sub-page’s four figure number (e.g. 0003).
According to the channel, displaying the page sub-code may take several
minutes.
Direct access: the yellow and blue keys allow direct access to the pages whose
numbers are displayed in yellow and blue at the foot of the screen.
Additional functions: some channels provide teletext subtitles
for some of their programmes and also updated news flashes.The
corresponding page numbers are shown in the Teletext index. Once
the page is found, the subtitle or news flash will be incorporated
into the picture.The navigation strip disappears after a few
seconds.To make it reappear,press the text key.
Page mode:this operating mode enables quick access to the
pages whose numbers are displayed. If the page displayed refers
back to other page numbers, press the text key to go to page
mode. Select the number of the page you want using the
or .
Display the page with the ok key. You can display the next or
previous page using the or keys.
Leave page mode with the text key.
Leave Teletext with the exit key.
GB
9
TV
Fastext: Fastext broadcasts 4 headings in colour that appear at the foot of the screen.
Use the colour keys on the remote control unit to choose the heading.
TOP text:TOP Teletext broadcasts pages grouped into headings containing articles.
Select the first page of a heading by pressing the blue key or select the first page of an
article by pressing the yellow key.
Page 17

GB
10
TV
Program Info (TV guide)
The programme guide is prepared by your TV/DVD from Teletext information broadcast on certain channels.You are only able to
access the programme guide with the channels memorised by your TV/DVD.Depending on the services offered by the channels in
Teletext, it is possible that the programme guide may not be available.The programme guide enables you to find out about
programmes or make a list of programmes that you want to watch or record.You are also able to download timer information to
a NexTView link video recorder to record a programme or automatically start your TV/DVD at the beginning of the chosen
programme.
The programme guide is not available on all channels:in this case, a message tells you.
Press the blue key to display the programme guide, the first page appears.The first
programme on this page is the one in progress.
To display the previous or next page,use the or keys. Options (Memo,Wake-up,
etc.) are suggested for you on the last line of the menu.Select them with the or
keys.
Memorise: to be alerted while you are watching one programme that another
programme is starting, select the Memo option with the or keys. Choose the
programme to be memorised with the or keys.
Confirm with the ok key.The REVIEW screen appears. Check your settings.
Alarm call: to program the TV/DVD to come on at the start of a chosen programme,
select Wake-up. Choose the programme with the or keys. Confirm with the
ok key.The REVIEW screen appears. Check your programming. Put the TV/DVD into
stand-by with the BBkey on the remote control unit.
The TIMER FULL message means that the programme guide’s 4 timers are full. Refer to the paragraph
opposite to free up memory (More info, Clear).
Recording: to record a programme by letting your TV/DVD set programme a
NexTView-Link video recorder connected via the SCART socket.The time and date
should be set on the TV/DVD and video recorder. Select the Record option. Choose
the programme with the or keys. Confirm with the ok key.
To enable your programming,the NexTView-Link video recorder must be switched on.
You can only cancel recording with the video recorder. Messages tell you the progress of
programming.Follow these instructions. If you press exit while an error message is displayed,the
video recorder will not be programmed.
01 BBCW
20:00 The World Today
ss
20:55 Correspondent: Bosnia
23:05 The Travel Show
23:30 Europe Direct
00:05 Radical Highs
02:25 BBC News and Weather
Memo
Return
TV
TV
Clear
PROGRAM INFO
What’s on Mon. 15
REVIEW
BBC World News
08 : 00>08 : 15 05 BBCW Mon15
The World Today
09 : 15>10 : 30 02 BBC1 Tue 16
USA Direct
10 : 15>10 : 30 01 BBC1 Tue 16
HARD talk
11 : 35>11 : 40 04 BBCWTue 16
TIMER FULL
20:02
Mon 15
06 : 02
Mon15
More info...
NexTView Link:when the list of the TV programmes scheduled for
the coming days is displayed on the TV/DVD screen, you may easily
programme your NexTView-Link video recorder on recording the
telecast of your choice. Select it on the screen of your TV/DVD which
will then download the information to your NexTView Link video
recorder connected via the AV1 socket.
REVIEW:this menu lists programmes chosen for an alarm call or for
a start-of-programme warning.The menu is automatically displayed
once you have confirmed the choice of a programme in the TV
GUIDE menu.You can also display it by selecting Review on the
options line in the TV GUIDE menu and confirming with ok.
The REVIEW menu lets you access the following functions:
Clear allows you to delete one of the programmes from the list.
To do this, select the last line of the menu with the or
keys and display Clear with the or keys. Then use
the or keys to put the cursor on the programme to be
deleted and confirm with ok.
Memo lets you enable (or disable) the display of a message at
the start of a programme on the list.To do this, select the line on
the menu with the or keys and display Memo with the
or keys. Then use the or keys to put the cursor
on the programme that you want to be alerted about and confirm
with ok.A TV is displayed in front of the programme.You can
then watch another channel but you will be alerted by a message
when the selected programme begins.Press the exit key to clear
the message from the screen.
The Return line enables you to go back to TV GUIDE.
PROGRAM INFO SET-UP
01 BBC 1
Return
TV guide page number
Ãè¨
421
Set-up: Program Info: when the channel changes its teletext pages, your TV/DVD set is no
longer able to display the Program Guide and the message “No Program Info data found on
this station.” tells you so.Delete the message with the exit key, then call up the teletext and
note down the number of the daily programme page.Leave the teletext with exit, call up the
Program Guide again and immediately the message “No Program Info data found on this
station.” will come up on the screen, press ok to access menu PROGRAM INFO SET-UP.
Select line TV guide page number and with the number keys of your remote control, enter
the number of the programme page which you have previously searched for in the teletext.
Confirm with ok and leave the menu with exit.Your TV/DVD set should now display the
Program Info.
Page 18

DVD menus
This page shows you the different menus available in DVD mode. If the TV/DVD set is in stand-by mode,switch it on by pressing the PLAY
key of the remote control.If the TV/DVD set is in TV mode, press the tv/dvd key of the remote control or keyboard.
Play
Play mode
Lock
Display
Sound
Languages
Glossary
00:11:14
T : 1 C : 05
Disc name: Blues Brothers
16/9 DTS 1:00:34
1 of 1
Main menu
The main menu will enable you:
- to set up the device (menus and disc languages, sound outputs, display
modes)
- to choose the play mode, or lock the device.
Info menus
The info menu will enable you,during play, to display information about the
disc and to access some special play functions.
The info menu is deactivated when the disc is stopped.
More info...
MAIN MENU:
If you have not loaded any disc, the menu appears automatically.
If a disc is being read, press the STOP key.
To select a menu: with keys or , choose a menu, then
press ok.Sub-menus appear.
Press return to come back to the previous menu.
INFO MENUS:
To access them, the player must be in play mode.
Press on the remote control info (yellow) key to display all the info.
Press once more on the info key for the menu to disappear.
Press a direct access key of the remote control ( , , )
to access the corresponding information.
Disc
Summary
(example)
Disc
options
(example)
Exit
Zoom
Sound
Picture
Disc Contents
Pedigree
dogs
Dog
breeding
DISC MENU
Dialogue language
1 English
2 German
3 French
Ãè¨
Food
History
ZOOM 1
Disc “summary” menu
To access it, press the PLAY key to put the disc in playback, then press the
title key.
This menu is available if the disc contains several titles.
Press once more on the title key for the menu to disappear.
Disc “options” menu
To access it, press the PLAY key to put the disc in playback, then press on
the disc menu key.
The “options” menu of the disc is only available if the disc contains a menu.
Press once more on the disc menu key for the menu to disappear.
Appearance and content of the menus vary according to the discs (follow the indications appearing
on the screen).
TV Menu
You may access certain TV menus while remaining in DVD mode.
Press the red key of the remote control to access the sound and image
preferences of the TV part.
By pressing the tv menu key of the remote control,you may access the
zoom function and the image and sound menus of the TV part.
The Zoom line is only available if the disc format is 4/3.
PLAYBACK CONTROL (PBC)
Some Video CDs (version 2.0, with “PBC”: Play Back Control,
written on the disc or on the sleeve) offer scenes and information
which may be interactively selected through an on-screen menu. This
menu appears once the disc has been loaded (or after having
pressed the PLAY or disc menu keys).
To select one of the menu elements, enter its number with the digit
keys of the remote control, then press ok to access it.
The symbol appears when a function you request is not
available.
GB
11
DVD
Page 19

DVD remote control
tv dvd
vcr
tv+dvd
sat
hifi
disc
menu
title
PLAY
FWD
STOP
REV
PAUSE
return
zoom
zoom
tv
menu
ok
infoinfo
clear
This page shows you the DVD controls available on your remote control.
For the TV part, see page 6.To control other devices, see page 20.
The keyboard keys located on the TV/DVD frontside have the same functions
as those of the remote control,except for the OPEN/CLOSE key,which is only
available on the keyboard and enables you to open or close the disc drawer.
DVD navigation
If you are in TV mode, press the tv/dvd key.
MAIN MENU
PLAYING A DISC
the other control keys of your DVD
Sound
To put your TV/DVD set in stand-by.
To control your TV/DVD set,switch
to the tv+dvd position.
To control other devices,see page 20.
Adjusts the audio volume.
This function is activated on the
TV/DVD set whatever the position
of the function selector, hi-fi
position excepted.
Mutes or cancels muting.
DVD
GB
12
These keys enable you:
- to choose a menu.
- to increase or decrease a
value.
- to select a choice.
Use these keys to access a
menu or return to the
previous one.
Confirm your choice.
Access the INFO menus
(see page 18).
Choose an option in an
Info menu.
Choose an Info menu
Confirm your choice.
Switch from TV to DVD mode or
from DVD to TV mode.
DVD playback
To skip chapters (DVD), tracks
(Audio CD), or indices (Video
CD).
DVD functions
Accesses the audio function of the
INFO menu.
Access the disc “Options” menu (if it
exists).
Accesses the Subtitle function of the
INFO menu: you may then display or
erase the sub-titles (see page 19).
PLAY:to start playback.
Call your preferred TV
sound and image settings.
Access to the TV-part menus
(see page 11).
red key
Call the sound and image
settings you prefer for
your TV set.
Access the menus of the TV
part (Info menus disappear).
REV/ FWD: for a fast forward
or backward move (during
playback).To modify the speed
of a video disc, press this key
several times.
STOP:to stop playing a disc
Access the disc “Summary” menu.
Accesses the angle function of the
INFO menu (see page 19).
(to stop it completely and
Return to the main menu.
Erase Info menus.
restart from the beginning,
press twice).
Hold this key down for a few
Accesses the zoom function
(see page 13).
seconds until the drawer
opens.
Return to the previous menu.
Resume reading 10 seconds
back.
PAUSE: for a pause, a still
frame or an image by image
selection.
IMPORTANT
If the batteries of your remote control are flat, you
can use the keys on the front of the TV/DVD:they
have the same functions as those of the remote
control.
Page 20

Playback
Several playback modes are available.
This page shows the simple playback mode. For the other playback modes, see next page.
- types of discs
Simple playback
1
Play
Play mode
Lock
Display
Sound
Languages
Glossary
Disc name: Blues Brothers
16/9 DTS 1:00:34
Open the drawer using the open/close key next to the drawer.
Place the disc with its printed side upward (if one-sided).
2
After a few seconds, the disc title (or, by default, the type of disc) appears with the image and audio
format information and its total duration (if this information is available).
Press on the ok or PLAY key to start the playback.
3
Some discs automatically propose a menu.You can choose an item with the
keys and press ok to confirm your selection.
STOP key.
+
To stop the playback,press the
4
This disc location is stored by the player: it is the “pickup memory”. If you press once more on the
PLAY key,playback will pick up where you left off.
If you press twice
next playback will start at the beginning of the disc.
on the STOP key or if you unload the disc, this “pickup memory” will be lost: the
Discs you can read
Digital video discs
12 cm and 8 cm, single or double sided, single or dual layer. DVDs are high density optical discs on which high quality picture
and audio are recorded by means of digital signals.
Audio CDs
12 cm and 8 cm.
Video CDs
12 cm and 8 cm (with or without playback control).
NTSC playback
In addition to the PAL DVDs and video CDs,you may enjoy your favourite NTSC movies as well.
NTSC
Discs you cannot read
Currently, these are the discs that you cannot play with this unit :CD-I, CD-ROM, DVD-ROM,DVD-RAM, CDV, CD-G. DVD
with regional code other than that of your player.
Do not try to play Photo CD or CD-R.
More info...
The DVD player remains in playback when you switch to TV mode
by pressing the tv/dvd key.
For example, this enables you to surf on TV channels without having
to interrupt the playing of the disc.
If the player is locked and the disc has been assigned a rating limit,
you must enter the password to play the disc (see page 17).
The discs capabilities (menus, access functions,dialogue and
sub-title languages, camera angles, interactivity) may vary
from one disc to the next.Please check the instructions given
on the disc. Some discs may have been pre-programmed so
as to render impossible some functions, such as skipping
chapters, still-frame and repeat play.
OO
The MAGNIFY function
On some DVDs and Video CDs, this function allows you to enlarge
the image during a playback at normal speed or during a pause.The
zoom-in will be 1.5 or 2 or 4 times the normal size for DVDs and
twice the normal size for Video CDs.
When you press on this remote control key, the image centre is
enlarged.When the image is sufficiently enlarged. you can navigate
from one zone to the next with the keys (on some
discs).
If you call a Info Display while the magnify function is activated, the
keys will only act for the Info Display.
This mode will be cancelled if you request one of the following
functions:
- modification of title, or chapter
- disc menu
- stopping (STOP key)
- access to a marker.
GB
13
DVD
Regional code number: your DVD player is designed and manufactured to respond to the region management
information that is recorded on a DVD disc.
If the DVD disc does not carry the region code corresponding to your player, it cannot be played.The region code for your
player is region No. #2. (Europe,the Middle East, Republic of South Africa, Japan).
Page 21

GB
14
DVD
Playback modes
To access playback modes, select the Play Mode menu with the keys, and press ok to confirm.
To validate a mode, select it with keys or , and press ok to confirm.
Playback modes,DVDs
Play
Play mode
Lock
Display
Sound
Languages
Glossary
Edit Program,DVDs
Title Chapter Program List
5
1 All Add
6
( 5 ) ( 15 )
Edit Program, Audio CDs
Track Program List
5
1 Add
6
Dub Assist ,Audio CDs
Play Order Segment Length 7
m Standard
m Optimized 6
m Program
Standard Play
3 4
Random Play
Program Play
Edit Program
Auto Play
4 3
Delete
Play
Done
T Time
Delete
Play
Done
4 3
Total:
5
030
T C
Segment1
(1 of 5)
Off
8
The Standard Play mode activates a normal playback of the disc.
1
The Random Play mode activates a random playback.
2
In the Program Play mode, the sequence sorting is made according to the list
3
given in the “Edit Program” menu.
If no list has been elaborated, this mode cannot be selected. It is also inhibited if a rating limit
has been set for the film,unless the parental code is entered.
4
The Edit Program menu enables you to create a list so as to read sequences in
an order chosen by yourself. The displayed list is different according to the type
of disc.
DVDS: to enter a sequence in the program list:
- enter a title and chapter number using the keys or the digit keys of the
remote control
- with the key, select the Add button and press ok.
- use the Delete button to erase a sequence.
- the Play button allows you to start reading the programming.
CDS: the list for Audio CDs is a track list.
Contrary to the DVD,to enter a track number for each line of the programming list is
sufficient. This list displays the chosen track numbers with their respective duration. The
last line indicates the total duration of the chosen tracks.
If Auto Play is validated, the player automatically starts reading as soon as a disc
5
has been loaded.
The Dub Assist function eases the recording of personal copies of Audio CDs.
6
According to the duration of your medium (a cassette, for example), Dub Assist
organises the tracks to optimise the recording duration and includes reading
pauses.
Select the Play Order mode:
- Standard: the tracks are sorted in their original order.
- Optimized: the tracks are sorted so as to optimally use the length of the segment (see
the next step) and to leave a minimum length of non-recorded tape on the cassette.
- Program:the tracks are sorted according to the programming list order of the menu
Edit Program.
Choose the length of the segment with keys or .
You can record several segments and switch from one to the other: select the 7or8 key and
press ok.
To start reading the segments, select the on key and press ok to confirm.
More info...
RANDOM PLAYBACK
For a DVD containing several titles, the titles are played at random.
Each title is completely read (with its random chapters) before the next
title is played.
This mode is inhibited for Video CDs and films having been assigned a
rating limit (unless the password is entered).
EDIT PROGRAM
The Add key will be modified into Insert if you select a sequence
already recorded in the programming list.
The Editer Prog. menu is not available for Video CDs.
PLAY ORDER
If the duration of a track 1 exceeds the segment duration,this
track will be divided into several parts. For example, if the
track lasts 48 min. whereas the segment lasts 45 min., the
track will be divided into two parts:1A (45 min.) and 1B
(3min.). Parts 1A and 1B will be placed into the segments as
if they were different tracks.
SEGMENTS PLAYING
When you enable the START key, a message appears to start the
reading (you can then press the PLAY key).
This message will be displayed at the end of each segment to
confirm that the following segment is to be played.
Start
Total:
The Introscan mode is available for Audio CDs.If validated, the player will read
7
the first ten seconds of each track.
Page 22

Display and Sound
The DISPLAY menu enables you to choose the image format and the on-screen displays.
The SOUND menu enables you to enable dynamic range compression and choose the type of sound assigned to the digital output.
To reproduce the sound of a movie theatre from the sound recorded on your Dolby Digital DVDs,connect a Dolby Digital (AC-3)
amplifier/decoder to the optical digital audio output jack and select the sound type in the Sound menu.
Select the Display menu on the main menu using the or
Play
Play mode
Lock
Display
Sound
Languages
Glossary
Play
Play mode
Lock
Display
Sound
Languages
Glossary
TV Image
3 4
On-Screen Displays
Sound Logic
3 4
Digital Output
Dolby Digital
keys, then confirm with ok.
16X9
The TV Image menu determines the image format.
Leave the 16x9 format if you want to fill the picture of your TV (Widescreen).
With the On-Screen Displays menu, choose the information you want to
see on the screen.
Select this sub-menu and press ok to confirm.
With keys or , select an option, then activate or deactivate it with
the ok key.
Select the Sound menu from the main menu with keys or , then
press ok to confirm.
The Sound Logic function enables you to control the audio levels by
compressing the dynamic range.
On
When it is activated, it is easier to hear all of the sound track at a low
volume.This function is only available on Dolby Digital (AC3) DVDs.
To activate it, select the Sound Logic line with keys or and display
“On” with the ok key.
More info...
TV IMAGE
You may select the image format if you use the DVD video output
jacks (see page 21), according to the connected equipment.
Select this sub-menu and validate with ok. Several formats are
offered: 4x3 Letterbox, 4x3 Standard, 16x9 Wide screen.
Choose the format with keys and press ok to confirm.
ON-SCREEN DISPLAYS
Info Displays: tick the box with the ok key to display time and
transport information during play.
Angle indicator: tick the box to display the angle info when the
disc offers several camera angles to choose from (see page 19).
Scene Again Text: tick the box to enable the action of the return
key during play (resume reading 10 seconds back).
AUDIO FORMATS
DTS is a digital sound compression technique
DIGITAL OUT
Laboratories for digital audio multichannel signals.The Dolby Digital
system enables any audio channel configuration,from a stereo sound
(2 channels) up to the digital “surround” sound 5.1.
developed by DIGITAL THEATER SOUND SYSTEMS for
digital audio multichannel signals.
Dolby Digital (AC-3) is a sound
compression technique elaborated by Dolby
GB
15
DVD
Considering the device you connect to the digital audio output jack,choose
the type of sound that will be output by this jack.
Select the Digital Output line with keys or and press ok.
Choose according to the type of disc and the type of sound you want to
output from the digital audio output jack and press ok to confirm.
Digital output according to the chosen options:
Digital output
Disc Format
DTS
PCM
Dolby Digital (AC-3)
CD
DTS Dolby Digital DTS & Dolby Digital No selection
Encoded No sound Encoded No sound
PCM PCM PCM PCM
PCM AC-3 / encoded Encoded PCM
PCM PCM PCM PCM
If you have a Dolby Surround Pro
Logic
amplifier/decoder, you may fully
enjoy its Pro Logic system,
- either with titles bearing the Dolby Surround label
- or with DVD films whose sound has been recorded
through Dolby Digital 5.1 channels.
In both cases, your Pro Logic decoder must be connected to the 2channel analog output of your TV/DVD set (see page 21 cinch audio
outputs).
PCM
The linear PCM is a signal recording format used for CDs.
CDs are recorded in 44.1kHz /16bits.
DVDs are recorded in 48kHz / 16 bits,or even up to 96kHz / 24 bits.
Page 23

GB
16
DVD
Preferred languages
During the initial installation (page 4),the language you choose during the first step has automatically been selected for the DVD
part. Nonetheless, you may change the language for the player menus, and choose the languages you prefer for dialogues, subtitles and disc menus.The language selection of the DVD part does not affect the language of the TV part.
For each disc, it will be possible to change the language during playback: see page 19.
Select the Languages menu from the main menu with keys
Play
Play mode
Lock
Display
Sound
Languages
Glossary
Player Menus
3 4
Disc Menus
Audio
Subtitles
English
English
English
Auto
1
2
3
or , then press ok to confirm.
To change the player menu languages, select Player Menus
, then press
ok. Choose the language with keys or and press ok to
confirm.
To change the preferred language for disc menus, select Disc Menus,
then press ok. Choose the language with keys or and press ok
to confirm.
If the chosen language is available for a title, it will automatically be selected.
To change the preferred language for dialogues, select Audio, then
press ok. Choose the language with keys or and press ok to
confirm.
The “Original” option corresponds to a language which has been defined as priority on the
disc.
If the chosen language is available for a title, it will automatically be selected.
If it is not, the priority language of the disc will be selected.
More info...
The different languages and sub-titles that are available are
indicated on the DVD sleeve.
You will also find there the audio formats that are available
according to the languages, image format, region and type of disc.
To change the dialogue language during the playback of a
DVD,display the audio info by pressing the key of your remote
control.
Choose the language with keys (see page 19).
To change the sub-title language during the playback of a
DVD, display the sub-title info by pressing the key of your
remote control.
Choose the language with keys (see page 19).
OTHER LANGUAGES :
To select a language other than the displayed ones for the disc
menus, dialogues and sub-titles, select the “Other” line, then enter
the 4 digits of the code corresponding to the chosen language. You
will find the code list at the end of the manual.
To choose the preferred language for sub-titles, select Subtitles, then
4
press ok. Choose the language with keys or and press ok to
confirm.
If the chosen language is available, it will automatically be selected when you display the subtitles (see page 19). If it is not, the “subtitle” language indicated on the disc will be selected.
If you choose the “automatic” option, the preferred language used for sub-titles will be the
one you chose for the dialogues (see above). Because of that, if the preferred language for
dialogues is not available, while sub-titles are available in this language, these sub-titles will
automatically appear on-screen.
Page 24

Locking
This function enables you to control the access to the player. Select the Lock menu, and press ok to confirm.
1
To activate the player lock, you must enter a password:
Play
Play mode
Lock
Display
Sound
Languages
Glossary
Lock Player
3 4
Unlock Player
Change Password
Ratings Limits
System Test
select the Lock Player line with keys or and press ok to confirm.
A “new password” is required:enter four digits with the digit keys of your
remote control,and press ok to confirm.A confirmation is requested: repeat the
operation.
Choose four digits you will easily remember or note them somewhere.
To deactivate the lock, select the Unlock Player line and press ok to confirm.
2
To change the password, select the Change Password line and press ok to
3
confirm.Then enter the four new digits.
More info...
If you forgot your password, you can cancel the lock code; display
the main menu, then hold simultaneously down both ok and menu
keys on the TV/DVD unit.
In Europe, only a few discs are assigned a rating limit.
Rating level /
Country
Rated Titles 4
Unrated Titles
indexed titles
8
7
6
5
4
3
2
1
Password required
Free Access
Some DVDs contain rating limit information.
4
The Ratings Limits function enables you to control the type of discs or
programmes that your family may watch: if some discs or passages exceed the
rating limit you have set, they will not be played.
The scene framing by restriction level is determined by the disc publisher.
Select the Ratings Limits line, then press ok to confirm:
- Choose the country whose rating standards comply with your
requirements:select Counrty and press ok to confirm. Select the country
with keys or and press ok to confirm.
- Choose the limit: select Rated Titles and press ok to confirm.
Select the level with keys or and press ok to confirm.
- All the unrated titles may offer a free access or require a password:select
Unrated Titles and press ok to confirm.
Select “Free access” or “Required password” with keys or and
press ok to confirm.
You might be requested by your retailer to select the System Test menu in
5
order to collect some information.
GB
17
DVD
Page 25

Info Menus
00:11:14
T : 1 C : 05
1 of 1
00:20:22
T : 1
00:03:54
T : 01
I : 1
00:11:14
T : 1 C : 05
00:20:22
T : 1
00:03:54
T : 01
I : 1
Direct access, Repeat play
More info...
GB
18
DVD
The Info menus enable you to obtain information and options on the disc while it is being played.
To display all the information,start reading a disc with the PLAY key, then press the info (yellow) key of the
remote control.
DVDs
DVDs
Audio CDs
Audio CDs
Video CDs
Direct access
A DVD may contain several titles, which may be different films or programmes. These titles may be divided in
numbered chapters.
Audio CDs contain tracks, which you can access directly.
Video CDs may also contain Indices.
To directly access a Title,a Chapter, a Track or an Index, select one of these info
with keys ,then choose a number with keys or directly enter a
number with digit keys.
Video CDs
To directly access another part of the disc, select the Time indication info with keys
, then enter a time with digit keys. You must specify the tens and units for
the hour, minutes and seconds: for example, to access the twentieth minute of a
disc, enter 0, 0, 2,0, 0,0. Confirm with ok.
This function is not available on some discs, even if the elapsed time appears on the screen.
REPEAT PLAY
The repeat principle is a loop reading between a starting and a
finishing point.On some discs, interactive menus may appear during
playback: you must activate some functions within the menu to
proceed with the playback.
A-B REPEAT PLAY for DVDs and Audio CDs.
If during a fast forward or backward reading theB point is reached, the
player will proceed at normal speed from the A point.
If during a fast search the A point is reached,the player will start reading
at normal speed from the A point.
The A-B repeat mode will be cancelled if you press twice on STOP,if
the disc is ejected or if another repeat mode is selected.
Repeat play
To repeat the playback of a title, chapter, track,A-B chosen segment (excepted for Video CDs) or of the whole
disc.
This function is only available with discs for which the elapsed time appears.
Select the Repeat info with keys . Choose an option with keys .
To repeat a sequence between two points A and B, choose the option “repeat A-B”,
then follow the given instructions to enter both points.
To stop repeating the playback:
- select the Repeat info and choose the “stop” option,
- press twice on the STOP key,
- access the disc menu by pressing the disc menu key.
Page 26

Info Menus
Markers, Audio, Subtitles, Camera angles,
Playback mode, Introscan, Audio channel
Start reading a disc with the PLAY key, then press the info (yellow) key of the remote control.
Markers (DVD and Audio CD)
The player can memorise up to 6 places on the disc, as long as the disc remains in the player (and if the TV/DVD set has not
been switched off by the On/Off switch). During that time, you can directly access one of these positions.This function is only
possible with discs with which the elapsed time appears in the Info menu.
Select the Marker info with keys , and press ok to confirm the setting of a marker.
Another menu appears and describes the 6 markers.
Audio, Subtitles, Camera angles (DVD)
Some discs have multiple audio tracks, primarily used for the different languages.The default language is the one selected in
the main menu (see page 16).
To define your choice of language during playback, select the Audio info with keys ,
then choose a language with keys .
During reading, you can display or hide the sub-titles and change the subtitle language. The default setting is the one chosen in
the main menu (see page 16).
To display or hide sub-titles, select the Subtitle info with keys , then press ok to confirm.
Choose a language with keys .
Some discs have multiple camera angles for certain scenes.
To change the camera angle, select the Angle info with keys , then choose the angle with
keys .
More info...
MARKERS
To enter a new marker, select a position indicated as
“unmarked” with keys and press ok.
The indication changes then to indicate the time and number
of chapter or track; the icon also changes, with a play button
and another button indicating a trash can.
To start reading from a marker, select the button and press
ok to confirm.
To suppress a marker, select the button and press ok to
confirm.
DIRECT ACCESS
You can use the remote control keys to directly access the required
info.
To directly access the audio info, press the key of your
remote control.
To directly access the sub-title info, press the key of your
remote control.
To directly access the angle info, press the key of your
remote control.
GB
19
DVD
Playback mode and Introscan (Audio CD)
To change the playback mode, select the Play Mode info with keys , then choose a (Standard,
Random, Program) mode with keys .
The Progr.mode is only available if a list has been drawn in “Edit Program” (“Play Mode ” menu of the main menu, see page 14).
To read the first 10 seconds of each track, select the Introscan info with keys , then
press ok to confirm.
Audio channel (Video CD)
Select the Audio Channel info with keys , then choose an option (stereo sound; lefthand side channel; right-hand side channel; left & right mono) with keys .
To automatically display the camera angle info as soon as
several camera angles are available, activate the “Angle indicator”
option in the “On-screen display” of the main menu (see page 15).
Page 27

Remote control unit: other equipment
vcr
tv+dvd
sat
hifi
vcr
tv+dvd
sat
hifi
tv
menu
ok
exit
2
3
654
7 8
9
1
0/--
pr
pr
vcr
tv+dvd
sat
hifi
tv
menu
ok
exit
2
3
654
7 8
9
1
0/--
pr
pr
2
3
654
7 8
9
1
0/--
pr
pr
av
This remote control unit can control other equipment such as video recorders, Hi-fi systems, or satellite receivers.
GB
20
TV
DVD
To control a video recorder
Set the switch to vcr.
Standby / On.
Display the menu.
Vertical scrolling in the menus.
Horizontal scrolling in the menus.
Confirmation of an action.
Leave the menus.
Direct access to the programmes or enter
the numeric values.
To control a Satellite Receiver
Set the switch to sat.
Standby / On.
Display the menu.
Vertical scrolling in the menus.
Horizontal scrolling in the menus.
Confirmation of an action.
Exit the menus.
Direct access to the programmes or enter the
numeric values.
To control a Hi-fi system
Set the switch to hi-fi
Standby / On.
Mute or re-establish the sound.
Set the volume level.
Choose a radio station by entering the number.
To switch from one programme to another.
To switch from one programme to another.
To switch from one programme to another.
Select the AV input.
To program the remote control unit
PLAY
REV
REV Rewind.
PLAY Play.
FWD
FWD Fast forward.
REC vcr
STOP
REC vcr Record.
PAUSE
STOP Stop.
PAUSE Pause
1. According to the model of remote control unit, press on the vcr key or slide the switch in the position of the equipment to be controlled.
2. Hold the tv menu key down and enter one of the 3 figure codes corresponding to the make of your unit (the code list can be found at the end of this manual).
3. Release the tv menu key.
4. Try to switch off the unit with the key on the remote control unit. If it doesn’t work, try another code.
Depending on the age or type of some products, certain functions may not be available.
Certain codes may cover more functions than others.Test the functions that you can control and maybe try other codes.
VCR
Note the code or codes which are best suited here.
SAT
HIFI
When you change the batteries in the remote control unit,remember to reprogram it.
Page 28

Connections
L. R.
AUDIO
VIDEO
S
S.
VIDEO
DIGITALAUDIO
AUDIO
L R
Select the connected equipment with the av key of the remote control. Press once for AV1, twice for AV2, or three times for AV3.
For some sources, the AV1 or AV2 selection is automatic (slow or fast switch).
The AV1 socket (SCART input-output), located at the rear of the TV/DVD set, enables
you to connect another device ( VHS or 8 mm or DVHS video recorder,VHS or 8
mm camcorder, decoder, satellite receiver, DVD player, video games console or
equipment outputting an RGB signal).
More info...
To copy a cassette: Connect the recording VCR on the AV2
scart socket. Connect the reading device on the AV1 scart socket
if it is a VCR or on the AV3 cinch sockets if it is a camcorder.
READING RECORDING CALL
Device Socket Device Socket PROGRAMME
Headphones
AV3
These sockets are located on the side.
These sockets are located on the back of the
TV/DVD.
They deliver the video and audio
signals coming from the DVD player
part.
The AV2 socket (SCART input / output) at the rear of the TV/DVD can be used to
connect a camcorder as well as an amplifier by means of a SCART-to-Cinch cable.
AV3 (cinch sockets and S socket: inputs only):
on the front or on the side of the TV/DVD
set.The cinch audio and video sockets enable you to connect a VHS or 8 mm camcorder.
The S socket and the cinch audio sockets enable you to connect a S-VHS or Hi 8
camcorder or a digital DVC camcorder.
Select the connected device with the av key of your remote control to display
AV3 on
the screen. Upon switching off of the connected device, the TV/DVD will remain on the AV3
programme. To return on a channel, enter its number with the remote control.
Headphones: connect stereo headphones or earphones to the nnsocket.According to
the models, you will or will not have to mute the loudspeakers with the key. Adjust
the sound with Vol + or - .
DVD output sockets
cinch socket, S socket and digital-audio socket:output only):
to the
rear of the TV/DVD set.
To connect a video recorder or a TV set, use either the cinch audio and video sockets, or
the S socket and cinch audio sockets.
The cinch audio sockets also enable you to connect a stereo amplifier, a Hi-Fi unit,a
Dolby Prologic amplifier/decoder.
The DIGITAL AUDIO socket enables you to connect a Dolby Digital (AC-3)
amplifier/decoder. Do not forget to check the type of sound in the Sound menu of the
DVD part (see page 15).
In accordance with the DVD standard, your TV/DVD is equipped with a Copy Protection Device, which
can be triggered on and off by the DVD disc itself, in order to make any recording of the concerned DVD
disc onto a videotape of very poor picture quality, or even impossible.
“This product incorporates copyright protection technology that is protected by method claims of certain
U.S. patents and other intellectual property rights owned by Macrovision Corporation and other rights
owners. Use of this copyright protection technology must be authorized by Macrovision Corporation, and is
intended for home use only unless otherwise authorized by Macrovision Corporation. Reverse engineering
or disassembly is prohibited.”
Video recorder Video recorder
Camcorder
Connection of a video recorder (see diagram at the end of
the leaflet, inside the cover) - If you connect a video recorder to the
aerial socket, you will have to search and memorise the video
recorder modulator channel. Switch the video recorder on, insert a
recorded cassette to be read and search for images (see Chapter
“Completing set-up” on page 5).
Store at any programme ending with a 9 (9,19, 29 etc...).
Each time you use the video recorder,switch to the programme
assigned to it.
AV1/AV2:in DVD mode, the signal output from the AV1 and AV2
sockets is identical to the display on the TV/DVD screen.
In TV mode, the signal output from the AV1 is always that of the
received channel.The signal output from the AV2 socket is identical
to the display on the TV/DVD screen.
The player's digital audio (optical) output jack fully
comply with the international standard governing this type of
jack (IEC 958).It is designed exclusively for connection to a
Dolby Digital (AC-3) or a suitable decoder.
Do not use the Digital Audio Output jacks to connect to an
equipment other than a Dolby Digital (AC-3) or a suitable decoder.
Such a connection can create a high level of noise that may
be harmful to your ears, and could damage headphones or
speakers.
Older digital equipment, some of which are not fully compliant with
IEC 958, are likely to cause this problem.To avoid this drawback,
use the «audio-digital output» menu (see page 15) to convert the
Dolby Digital (AC–3) audio-digital output from bit to linear PCM
flux.
SCART or SCART AV1
AV1 Camcorder AV2
Cinches Video recorder
or or
S-Video Camcorder
AV3
SCART
AV2
AV3
GB
21
TV
DVD
Page 29

TV menus
tv
menu
okokokokok
okokokokokokok
ok
GB
22
TV
Return
Picture preset Film
Brightness
Colour
Contrast
Sharpness
Contrast expand Faible
Tone Neutre
Noise reduction
TIME
Return
Sleep timer <I> --:-Current time 11:28
Wake-up timer
Wake-up time 07:07
Programme number 08 EURO
Daily
PREFERENCES
Return
Show PR. number
AV1 video input Auto
AV2 video input RGB
Format control Auto
Maximum volume
Ext. amplifier
¨
¨
PICTURE
þ
þ
SUMMARY
Exit
Program Info
Sound
Picture
Time
Preferences
INSTALLATION SUMMARY
> Exit
Manual Installation
Auto update
Auto installation
Programme organisation
Personal settings
> Installation
COUNTRY SELECTION
Return
BB
United Kingdom
Eire
France
Deutschland
Italia
Espa–a
Portugal
Nederland
Belgique-Luxembourg
Schweiz
…sterreich
Sverige
Danmark
Norge
Other
01 BBCW
ss
PROGRAM INFO
What’s on Mon. 15
20:00 The World Today
20:55 Correspondent: Bosnia
23:05 The Travel Show
23:30 Europe Direct
00:05 Radical Highs
02:25 BBC News and Weather
Memo
20:02
Mon 15
Return
BBC World News
TV
08 : 00>08 : 15 08
The World Today
TV
09 : 15>10 : 30 01
USA Direct
10 : 15>10 : 30 01
HARD talk
TV
11 : 35>11 : 40 08
Clear
REVIEW
TIMER FULL
BBCW
BBC1
BBC1
BBCW
06 : 02
Mon 15
Mon15
Tue 16
Tue 16
Tue 16
MANUAL INSTALLATION
Return
Standard EURO BG
Reception Aerial
Autosearch <I
Fine tuning
Store on PR number: -Name ---Decoder
External sound path
>
CH--
þ
¨
SEARCHING
Return
Sound type <I> Stereo
Sound mode Dolby Virtual
Surround effect
Balance L/R
Sound preset Film
10 kHz Treble
5 kHz
1,5 kHz Medium
500 Hz
þ
100 Hz Bass
SOUND
AUTO UPDATE
¥¥¥¥¥¥¥¥¥¥¥¥¥¥¥¥¥¥¥¥¥
03 NEW STATION(S) FOUND
Updating your TV set.
Please wait. To cancel press EXIT.
SEARCHING
AUTO INSTALLATION
¥¥¥¥¥¥¥¥¥¥¥¥¥¥¥¥¥¥¥¥¥
03 STATIONS FOUND
Auto programming your TV set.
Please wait. To cancel press EXIT.
PROGRAMME ORGANISATION
Return
Select PR <I> 13
Swap with PR: -Change name EURO
Delete PR 13
Select programme number using
PR-/PR+ or <I> or 0 to 9 keys.
10 MTV
11 FR2
12 TF1
13 EURO
14 CH40
15 CC01
16 ARTE
17 CART
18 ---19 ARD
PERSONAL SETTINGS
Return
Menu language UK
Country United Kingdom
Picture rotation
Auto volume level
AV1 name VCR
AV2 name AV2
AV3 name CAMC
Programme for <l> 01
reference time
Select a station from which you want
to get the reference time.
¨
13:15 28/09/99
102 EuroNews 16 : 02 : 99 12 : 00 : 40
DEUTSCH 101
FRENCH 102
ENGLISH 103
SPANISH 104
Wintersport
texttext
list
LIST
Exit
01 TF1
02 F2
03 F3
04 C+
05 ARTE
06 M6
07 CNN
08 PREM
09 EURO
Page -/+ </>
Programme : 0 - 9
Page 30

DVD main menus
okokokokokokokokok
okokokokok
If no disc has been loaded, the menu appears automatically. If a
disc is being played,press STOP.
To select a menu: with keys or , select a menu,then
press on the ok key. Sub-menus appear.
Press the return key to come back to the previous menu.
Play
Play
Play mode
Lock
Display
Sound
Languages
Glossary
Play mode
Lock
Display
Sound
Languages
Glossary
Play
Play mode
Lock
Display
Sound
Languages
Glossary
Sound Logic
3 4
Digital Output
3 4
TV Image
On-Screen Displays
Lock Player
3 4
Unlock Player
Change Password
Ratings Limits
System Test
On
DTS
16X9
Play
Play mode
Lock
Display
Sound
Languages
Glossary
Dolby Digital
DTS
Disc name: Blues Brothers
16/9 DTS 1:00:34
Country
Rated Titles 4
Unrated Titles
m 4x3 Letterbox
m 4x3 standard
m 16x9 Wide screen
Info Displays
Angle indicator
Scene Again Text
Enter New Password
-
OK
8
7
6
5
4
3
2
1
Password required
Free Access
Play
Play mode
Lock
Display
Sound
Languages
Glossary
Video CD
Play
Play mode
Lock
Display
Sound
Languages
Glossary
DVD
Play
Play mode
Lock
Display
Sound
Languages
Glossary
Audio CD
Play
Play mode
Lock
Display
Sound
Languages
Glossary
5
Angles 4
Aspect Ratio
Audio
Audio Channel
Author Menus
AutoPlay
Bookmarks
CD-Audio
CD-ROM
6
Standard Play
3 4
Auto Play
Standard Play
3 4
Random Play
Program Play
Edit Program
Auto Play
Standard Play
3 4
Random Play
Program Play
Edit Program
Auto Play
Dub Assist
Introscan
Some discs have
multiple camera
angles for certain
scenes. You can
select these angles
from the Info Display.
Not all discs have
multiple camera
angles.
Off
Title Chapter Program List
5
1 All Add
6
Off
Track Program List
5
1
6
Play Order Segment Length 7
m Standard
m Optimized
m Program
Start
Add
Delete
Play
Done
Delete
Play
Done
Total:
5
030
6
Total:
T C
4 3
T Time
4 3
00:00
0:00
Segment1
8
(1 of 5)
GB
23
DVD
Play
Play mode
Lock
Display
Sound
Languages
Glossary
Player Menus
3 4
Disc Menus
Audio
Subtitles
English
English
English
Auto
m English
m Fran•ais
m Deutsch
m Italiano
m Espa–ol
m Portugu•s
m Nederlands
Page 31

Codes des langues - Kode der Sprachen - Codici dei lingua - Códigos del idiomas- Languages codes
Langues / Sprachen / Lingua code / kode Langues / Sprachen / Lingua code / kode Langues / Sprachen / Lingua code / kode
Idiomas / Languages codici / codigo Idiomas / Languages codici / codigo Idiomas / Languages codici / codigo
Abkhazian 6566 Hungarian 7285 Russian 8285
Afar 6565 Icelandic 7383 Samoan 8377
Afrikaans 6570 Indonesian 7378 Sangho 8371
Albanian 8381 Interlingua 7365 Sanskrit 8365
Ameharic 6577 Interlingue 7369 Scots Gaelic 7168
Arabic 6582 Inupiak 7375 Serbian 8382
Armenian 7289 Irish 7165 Servo-Croatian 8372
Assamese 6583 Italian 7384 Sesotho 8384
Aymara 6588 Japanese 7465 Setswana 8478
Azerbaijani 6590 Javanese 7487 Shona 8378
Bashkir 6665 Kannada 7578 Sindhi 8368
Basque 6985 Kashmiri 7583 Singhalese 8373
Bengali;Bangla 6678 Kazakh 7575 Siswati 8383
Bhutani 6890 Kinyarwanda 8287 Slovak 8375
Bihari 6672 Kirghiz 7589 Slovenian 8376
Bislama 6673 Kirundi 8278 Somali 8379
Breton 6682 Korean 7579 Spanish 6983
Bulgarian 6671 Kurdish 7585 Sundanese 8385
Burmese 7789 Laothian 7679 Swahili 8387
Byelorussian 6669 Latin 7665 Swedish 8386
Cambodian 7577 Latvian,Lettish 7686 Tagalog 8476
Catalan 6765 Lingala 7678 Tajik 8471
Chinese 9072 Lithuanian 7684 Tamil 8465
Corsican 6779 Macedonian 7775 Tatar 8484
Croatian 7282 Malagsy 7771 Telugu 8469
Czech 6783 Malay 7783 Thai 8472
Danish 6865 Malayalam 7776 Tibetan 6676
Dutch 7876 Maltese 7784 Tigrinya 8473
English 6978 Maori 7773 Tonga 8479
Esperanto 6976 Marathi 7782 Tsonga 8483
Estonian 6984 Moldavian 7779 Turkish 8482
Faroese 7079 Mongolian 7778 Turkmen 8475
Fiji 7074 Naru 7865 Twi 8487
Finnish 7073 Nepali 7869 Ukrainian 8575
French 7082 Norwegian 7879 Urdu 8582
Frisian 7089 Occitan 7967 Uzbek 8590
Galician 7176 Oriya 7982 Vietnamese 8673
Georgian 7565 Oromo(Afan) 7977 Volapük 8679
German 6869 Panjabi 8065 Welsh 6789
Greek 6976 Pashto,Pushto 8083 Wolof 8779
Greenlandic 7576 Persian 7065 Xhosa 8872
Guarani 7178 Polish 8076 Yiddish 7473
Gujarati 7185 Portuguese 8084 Yoruba 8979
Hausa 7265 Quechua 8185 Zulu 9085
Hebrew 7387 Rhaero-Romance 8277
Hindi 7273 Romanian 8279
Page 32

MÁSTO FIRMA ULICE A ‰êSLO PS‰ TELEFON
Beneäov BELS servis elektroniky Zapova 525 256 01 0301/25060
Bohum’n TV SERVIS ul. 9. kvžtna 627 735 81 069/6014053
Brno FAMKO International s.r.o. Bayerova 10 602 00 05/41218227
Brno Radiotelevizn’ sluìba s.r.o. Cejl 23 602 00 05/45215468,45214949,45211671
Brno - ëabovÞesky TEVIS BlatnŽho 2 616 00 05/41211112, 41240003
‰esk‡ L’pa JiÞ’ Suchù servis video-televize Kov‡Þova 2059 470 01 0425/26701
‰eskŽ Budžjovice Video TV servis Na ZlatŽ stoce 14 370 05 038/40718 (40121 - œstÞ.)
Chomutov TV servis, Vl‹ek Lubom’r KadaËsk‡ 2800/5 430 03 0396/26498
Chrudim NIKOL Obce Leì‡kó 770 537 01 0455/621986, t./fax.621987
Dolany u Olomouce RTS MONTAN Dolany 376 783 16 068/916255
Dvór Kr‡lovŽ n./L. SEEL s.r.o. Masarykovo n‡m. 40 544 01 0437/820887
Frùdek-M’stek AVOS s.r.o. Ostravsk‡ 1555-6 738 02 0658/644511, 644512
Hodon’n RATES s.r.o. Havl’‹kova 2 695 01 0628/23379
Hradec Kr‡lovŽ MULTES (neopravuje audio) Gagarinova 844 500 03 049/42655
Hradec Kr‡lovŽ AUDIOSERVIS Langr (pouze audio) Ulrichovo n‡m. 763 500 02 049/5210024
Humpolec ELEKTRONIKA Raä’nova 466 396 01 0367/2140, 3182
Jablonec n.Nisou HORçK ELECTRONIC s.r.o. Sadov‡ 8 466 01 0428/312550,fax.312577
Ji‹’n RADIOTELEVIZNê SERVIS Tyräova 298 506 01 0433/22396
Jihlava Viki s.r.o. Fritzova 12 586 01 066/23546
Karlovy Vary NELIN s.r.o. Krymsk‡ 47 360 01 017/3227207-8
Klatovy ELEKTRO ASTRA spol. s r.o. Œkoln’ 440 339 01 0186/321542,321482,21362,fax 21657
Kol’n SEKO Havelcova 70 280 02 0321/25286, 25133
Kostomlaty n. L. /okr.Nymburk SKY - SAT Kostomlaty n.L. 81 289 21 0325/78455
KromžÞ’ì Radiotelevizn’ sluìba N‡m m’ru 1551 767 01 0634/22386,tel./fax. 332900
Liberec Jan Murga - MJ electronic Na Perätùnž 378/42 460 04 048/5104628-9
Most BçRTA Moskevsk‡ 1714 434 01 035/6206709
Nymburk TV-VIDEO centrum PalackŽho 119 288 02 0325/514891
Olomouc RTS MONTAN - sbžrna Masarykova 11 068/5220312
Olomouc TELESERVIS PÛIKRYL Schweitzerova 21 779 00 068/5222107
Opava ELEKTRONIKA SERVIS PRAVDA Krnovsk‡ 79 746 01 0653/211395
Ostrava-Poruba TELEVIZE VIDEO SERVIS U oblouku 507 708 00 069/6912602, 6918459
Ostrava 1 Televizn’ sluìba NOVA-sbžrna Na spojce 5 702 00 069/215605
Ostrava 1 Televizn’ sluìba NOVA-sbžrna Re‡ln’ 4 702 00 069/233568
Ostrava 1 Televizn’ sluìba NOVA N‡draìn’ 102 702 00 069/6112446
Otrokovice TELES - radiotelevizn’ sluìba Olbrachtova 1077 765 02 067/922677
Pardubice RADIOTECHNIKA Pardubice TeplŽho 1398,(J.Palacha 474) 530 02 040/35951,38249,(32139)
P’sek VOBUKO s.r.o. Havl’‹kovo n. 92 397 01 0362/215356
PlzeË AUDIO VIDEO SAT R&K Kopern’kova 34 301 25 019/226044
Praha 2 BELS servis elektroniky Sekaninova 50 120 00 02/6926610
Praha 4 - Chodov Novotnù ELEKTRONIK Hr‡skŽho 1909 140 00 02/7925981
Praha 5 - Zbraslav TELESAT ( TV, satelity a dekodŽry) Ke dra‹k‡m 1 156 00 02/5792 2233, 5792 1249
Praha 6 INTERGATE s.r.o. Pato‹kova 87 169 00 02/3335 0528, fax.3335 1230
Praha 6 - Ûepy Novotnù ELEKTRONIK MakovskŽho 1144 160 00 02/3021277
Praha 8 Novotnù ELEKTRONIK Zenklova 81 180 00 02/90001618
Str‡ì n. Nisou Jan Murga - MJ electronic Myslbekova ul. 463 03 048/5159301, f.5159302
Œumperk KATEX n‡m. Republiky 8 787 01 0649/212807
Teplice-Prosetice VIDCOM elektr onik - servis Plyn‡rensk‡ 280 415 01 0417/531555, 0602/345510
Touìim SAPE s.r.o.,servis a prodej elektroniky MalŽ n‡mžst’ 145 364 01 0169/2417, 2700
Tùniätž n. Orlic’ ELCENTRUM Smetanova 640 517 21 0444/377075
Uherskù Brod BELVIS ELEKTRONIKA Doln’ Valy 507 688 01 0633/633417
òst’ n. Labem INTERTOP-RYVOLA televizn’ opravna Masarykova 66 400 01 047/5210713, f.5214675
òst’ n. Orlic’ KATE-SERVIS Pavel Proch‡zka T.G.Masaryka 102 562 01 0465/524006
Vset’n Radiotelevizn’ servis Smetanova 1131 755 01 0657/615760
듇r n. S‡zavou VOM N‡draìn’ 21 591 01 0616/26096
56 AUTORIZOVANøCH SERVISñ PO CELƒ REPUBLICE
TECHNICKƒ PORADENSTVê, ZçRUƒNê A
POZçRUƒNê OPRAVY PROVçDê ODBORNY
PERSONçL V NAŒICH SERVISECH
SEZNAM SEZNAM AUTORIZOVANøCH SERVISñ SE MñëE ‰ASEM MÁNIT
THOMSON multimedia Czech s. r. o.
Doprav‡kó 3, 184 00, Praha 8
Miasto Nazwa firmy Adres Tel.Kier Telefon
Biała Podlaska SERWIS THOMSON ul. Chełmońskiego 1 0-83 3420461
Białystok PERFEKT ul. Wyszyńskiego 8 0-85 7420628
Bielsko-Biała DIGITAL SERVICE ul. Aleksandrowicka 40 0-33 159306
Bydgoszcz TV COLOR-SERWIS ul. B. Zaleskiego 12 0-52 3795597
Chełm ZAKŁAD USŁUG RTV ul. Różana 18 0-82 5633500
Częstochowa TELSON ul. Kościuszki 10/12 0-34 3654392
Elbląg PUNKT PRZYJŔĆ (GDYNIA) ul. 1 Maja 28 0-50 324115
Gdańsk SERWIS RTV ul. Kościuszki 136 0-58 3478936
Gdynia SERVICE LAB ul. Indyjska 15 0-58 6218344
Gliwice COLOR-SERVICE ul. Szobiszowicka 21 0-32 2314383
Gorzów Wlkp. UNITRONIX SERWIS ul. Słoneczna 3 0-95 7227806
Grudziądz THOMSON-SERWIS ul. Pańska 25 0-51 4623228
Jelenia Góra ZAKŁ. USŁUGOWY RTV Pl. Ratuszowy 5/6 0-75 7523062
Katowice ELEKTRONIK-SERWIS ul. Gliwicka 65 0-32 2543560
Kielce MDS ELEKTRONIK ul. Manifestu Lipcowego 71 0-41 3318091
Konin SERVICE WMW ul. Błaszaka 1 0-63 2456701
Koszalin BETA SERVIS ul. Pawła Findera 49 0-94 3423315
Koszalin Punkt przyjéć (Gdynia) ul. Drzymały 1 0-94 3460193
Kraków MIX-SERWIS ul. Wadowicka 8 A 0-12 2690942
Kraków ASTEL S.C. ul. Bałuckiego 9 0-12 2660999
Kraków ASTEL S.C. ul. Świętokrzyska 10 0-12 6324018
Krasnystaw ZAKŁAD USŁUG RTV ul. Pocztowa 2 0-82 5763007
Leszno EURO ELEKTRONIK ul. Złotnicza 44 0-65 5270043
Lubin MULTISYSTEM ul. Paderewskiego 10 0-76 8444711
Lublin UNITRA ELTRON SERWIS ul. Braci Wieniawskich 5 0-81 7422999
Łódź W & W ul. Org. " WIN " 52 0-42 6576267
Mława SERWIS RTV ul. Piłsudskiego 42 0-23 6544972
Nowy Sącz EURO SERWIS ul. Wiejska 6 0-18 4430335
Nowy Targ SERVIS RTV i AGD ul. Szaflarska 93d 0-18 2665013
Olsztyn ZBYSZKO ul. Gałczyńskiego 1/19 0-89 5277566
Opole SYNCHRO ul. Sz. Szeregów 23 0-77 4559254
Ostrołęka TELE AUDIO VIDEO ul. Kilińskiego 2B 0-29 7643781
Ostrów Wielkopolski SERWIS RTV ul. Kompały 1a 0-62 7367644
Pabianice P.H.U. ZAKMAR ul. Wyspiańskiego 4 0-42 2157008
Piekary Śląskie ELEKTRONIK SERWIS ul. Wyzwolenia 2A 0-32 2818972
Piła TELS ul. Ojca M. Kolbe 13 0-67 2126292
Piotrków Tryb. KOMWID ul. Kołłątaja 6/89 0-44 6481363
Poznań NIKU SERWIS ul..Składowa 5 0-61 8523078
Poznań AKWA ul..Otwocka 8 0-61 8708049
Radom METRO ul. Focha 12,pawilon 26 0-48 3634820
Rzeszów VIDEO-SEVICE ul. Leszczyńskiego 6 0-17 8534668
Siedlce TOP SERVICE ul.
Czerwonego Krzyża 14/11
0-25 39826
Siemianowice Śląskie KMA ELECTRONICS ul. Fojkisa 8 0-32 2287710
Sieradz SOKAL S.C. Al. Pokoju 11 0-43 8224050
Słupsk TV VIDEO ul. Waryńskiego 1 0-59 423069
Suwałki TELE-VIDEO SERWIS ul. Gen. Andersa 7 0-87 671518
Szczecin ZURIT SERWIS ul. Chopina 22 0-91 4525399
Szczecin ZURIT SERWIS ul. Gierczak 24 0-91 4691756
Szczecin HIT SERVICE ul. Szwoleżerów 22 0-91 4333741
Tarnobrzeg SERVIS TV-VIDEO ul. Wyspiańskiego 9 paw.1 0-15 8221075
Tarnów TEKIELAND-ELECTRONIC ul. Kopernika 4 0-14 223812
Toruń OPMEX II SA ul. Hallera 65/3 0-56 6520696
Wałbrzych NAREL ul. Mickiewicza 18 0-74 26216
Warszawa ASEL ul. Gen.Abrahama 2b 0-22 6710958
Warszawa AST ul.Obozowa 82a 0-22 361870
Warszawa VIDEO-TV - SERVICE-CENTER ul. I . Ghandhi 17 0-22 6446156
Włocławek FC TRONIK ul. Wiejska 24 0-54 4118788
Wrocław THOMSERWIS ul. Szczytnicka 30 0-71 3277981
Wrocław SERWIS ELEKTRONICZNY ul. Hauke-Bossaka 6 0-71 3429296
Zamość SERWIS RTV ul. Piłsudskiego 31 0-84 6395000
Zielona Góra JANCOL ul. Dąbrowskiego 67 0-68 3245137
SIEĆ SERWISÓW W CAŁYM KRAJU
PROFESJONALNY PERSONEL NASZYCH SERWISÓW WYKONYJE NAPRAWY
GWARANCYJNE I POGWARANCYJNE ORAZ OFERUJE WSZELKĄ POMOC
TECHNICZNĄ NASZYM KLIENTOM
LISTA SERWISÓW I DANE W NIEJ ZAWARTE MOGĄ ULEC ZMIANIE
THOMSON CONSUMER ELECTRONICS POLAND
ul. Gen. L. Okulickiego 7/9, 05-500 Piaseczno
HELYSÉG: SZERVIZCÉG: BESOROLÁS: Ir. sz.: Cím: Telefon:
Budapest SERELCO Szervíz Elektronikai Bt. Központi márkaszerviz 1089 Diószeghy. u. 18. 333-9575
Balatonlelle TUTI Elektronikai Bt. Központ 8638 Rákóczi u. 240. ( 85) 354-111
Barcs HIFI TV Video Elektronikai Szaküzlet Egység 7570 Zrínyi Miklós u. 10. (82) 461-680
Békéscsaba JUHÁSZ ELEKTORNIKAI Kft. Egység 5600 Kölcsey u. 17. (66) 324-419
Dabas Szignál Szerviz Egység 2370 Bem u. 28. (20) 353-498
Debrecen DEKVA Ker. és Szolgáltató Kft. Központ 4002 Ďrhajósok tere 6. (52) 315-444
Dunaújváros MCSB Elektric Bt. Egység 2400 Petőfi S. u. 2. (25) 287-074
Eger SZERVÍZ 96. Kft. Központ 3300 Reményik u. 18. (36) 313-333
Gödöllő HM ArmCom Rt. Szervíz Egység 2101 Dózsa Gy. u. 63./a (28) 430-648
Gyöngyös S.O.S. SERVICE Kft. Egység 3200 Puskin u. 1. (37) 313-620
Győr Audió-Video Szervíz GMK. Központ 9023 Tihanyi Á. u. 70. (96) 400-624
Kalocsa K.SZ.K. Kft. Egység 6300 Obermayer tér 7. (78) 462-480
Kaposvár Kapos Enter Kft. Egység 7400 Zárda u. 18. (82) 429-306
Kecskemét Electro Record Szervíz Központ 6000 Arany J. u. 6. (76) 484-939
Keszthely VIDEO-FOTON BT. Egység 8360 Kossuth u. 45. (83) 314-215
Lenti ZELKA PRIVÁT Kft. Egység 8960 Dózsa Gy. út 1. (92) 351-160
Miskolc Rádió Televízió Szervíz P&T Kft. Központ 3525 Kis Hunyad u. 52. (46) 340-293
Nagykanizsa TRANS-SAT 2000 Kft Központ 8800 Csengery u. 33. (93) 356-633
Nyergesújfalu CLANETT TV Ker. és Szolgáltató Bt. Egység 2536 Diófa u. 15. (33) 356-633
Nyíregyháza TECHNO-SAT Kft. Egység 4400 Vasgyár u. 2./f (42) 312-561
Pápa SIGNÁL TÉVÉ Bt. Központ 8500 Eötvös u. 6. (89) 324-950
Pécs INFOMIX Kft. Központ 7621 Táncsics M. u. 37/1. (72) 450-650
Sopron KISS-RITTER Bt. Központ 9200 Rákóczi u. 14. (99) 214-161
Szeged VIDI SZEGED Kft. Központ 6720 Klauzál tér 6-7. (62) 470-152
Szentendre Motesiczky Pál TV Video M÷szerész Egység 2000 Janicsár u. 1. (26) 313-915
Székesfehérvár VIDEOTON Szervíz Szolgáltató Kft. Központ 8002 Berényi út 97. (22) 312-344
Szentes Elektronika Szervíz Egység 6600 Piactér "G" épület (20) 471-751
Szolnok Infotech Elektronikai KEr. és Szolg. Kft. Központ 8000 Ostor u. 2. (56) 343-185
Szombathely H & K ELEKTRONIKA Kft. Központ 9700 Puskás Tivadar u. 7. (94) 322-203
Szekszárd MIKRO-VIDEO KKT Központ 7100 Kossuth L. u. 3. (74) 312-214
Tatabánya SAMSONY Szervíz Egység 2800 Bánhidai ltp. 120. (34) 316-581
Veszprém VIDEOTON Szervíz Kft.Vermes András Egység 8200 Templom u. 3. (88) 425-405
Zalaegerszeg ZELKA PRIVÁT Kft. Egység 8900 Mártírok útja 9. (92) 312-658
MAGYAROSZÁG TERÜLETÉN 33 HIVATALOS THOMSON MÁRKASZERVIZ TELÁLHATÓ
SZERVIZEINK SZAKEMBEREI BIZTOSÍTJÁK A GARANCIÁLIS HÁTTERET,
VALAMINT A GARANCIÁLIS IDÖSZAKON TÚL IS SZERTEAGAZÓ
MUSZAKI SEGÍSGGEL ÁLLNAK VEVOINK RENDELKEZÉSÉRE
A MÁRKASZERVIZ HÁLÓZAT A KÖVETKEZË LISTÁN VAN FELTĎNTETVE
AZ ELADÁSOK FOLYAMATOS BËVÜLÉSE KÖVETKEZTÉBEN EZ A LISTA SZINTÉN MÓDOSULHAT
THOMSON multimedia Hungary Kft.
1137 Budapest, Radnóti Miklós u. 2.
M•STO FIRMA ULICE A ‰êSLO PS‰ TELEFON
Bratislava VJS - servis Ladov‡ 9 811 05 07/396014
Bratislava NAY s.r.o. Ladov‡ 3 811 05 07/391473
Koäice Reprox s.r.o. Popradsk‡ 80 040 11 095/6444502
Nitra TTK, Ing. J.Torok, Tel. sluìba "Lipa" Vùstavn‡ 6 949 01 087/534033
Preäov AV - servis N‡mestie legion‡rov 3 080 01 091/731960
Tren‹’n BEAC, elektro-servis Knieìaéa Pribinu 24 911 01 0831/37859
ëilina TV - AV Elektronic Hviezdoslavova 9 010 01 089/626061
Zvolen Ondrej Parobok, oprava TVP Tulsk‡ 6 960 01 0855/351225
SIEè 8 AUTORIZIVANøCH SERVISOV V CELEJ REPUBLIKE
PROFESIONçLNI PRACOVNêCIV NAáOCH SERVISOCH VYKONçVAJò
OPRAVY V RçMCI ZçRUKY AJV ‰ASE PO SKON‰ENê ZçRUKY AKO AJ PONòKAJò
AKòKOLÕVEKTECHNICKò POMOC NAáIM ZçKAZNêKOM
THOMSON multimedia Czech s. r. o.
Doprav‡kó 3, 184 00, Praha 8
PL
H
SK
CZ
Page 33

Codes - Kodes - Codici - Códigos - Codes
VCR
AIWA 167,168
AKAI 103,104,105,106,107
BLAUPUNKT 108,109,162
BRANDT 101,112,156,102
DAEWOO 140,141,142,143,144,145,146,147
FERGUSON 101,102,160,112,153,155,156,157
FISHER 135,136,137
FUNAI 130
GOLDSTAR 123,134
GRUNDIG 161,169,170
HITACHI 110,112,122,123
JVC 106,110,111,112,113
MITSUBISHI 148,149
NEC 139
NOKIA 103,110,135,138
NORDMENDE 101,102,112,154,156,157,158
ORION 124,125,126,127,128,129
PANASONIC 108,109,162
PHILIPS 161,162,163,164,165,166
RADIOLA 161,162,163,164,165,166
SABA 101,102,112,153,155,156,157,158
SAMSUNG 133
SANYO 119,120,121
SCHNEIDER 161,162,163,164,165,166
SHARP 131,132
SONY 115,116,117,118
TELEAVIA 101,112,156,155,102
TELEFUNKEN 101,102,112,156,155,159
THOMSON 101,102,112,154,156,157,158
TOSHIBA 110,111,114
DVD
DENON DVD3000 208
PANASONIC A-300EN A 100 A 350 204
PHILIPS Asia DVD840 202
PHILIPS Europe 203
PIONEER DVL-909 DV-505 206
RCA (TCE) DRD 1001 200
SONY DVP-S7000 DVP-S3000 207
THOMSON DTH-1000 DTH-2000 201
TOSHIBA SD-K310 205
SAMSUNG 209
LD
DENON 221
HITACHI 222
MITSUBISHI 223
PHILIPS 224
PIONNER CLD-925 229
SONY 225 - 226
THORN 228
Chaine Hi-Fi - Stereoanlage - Impianto Hi-Fi
Equipo Hi-Fi - Hi-Fi System
DENON 502 - 515
HARMAN KARDON AVR 20 503
516
JVC 517
KENWOOD KR-X 1000 505
KR -V 7080 505
KR-V 5080 506
518
MARANTZ SR 96 507
519 - 520
ONKYO 501
PIONEER 508
521 - 522
SONY STR-DA 80ES 509
STR-DE315 514
523
TECHNICS 513
THOMSON DPL100 HT 511
DPL300 DPL1000 500
YAMAHA RX-V 2092 510
RX-V 992 510
RX-V 692 510
RX-V 592 510
RX-V 492 510
DSP-A3090 DSP-A1 512
Page 34

Codes - Kodes - Codici - Códigos - Codes
Récepteurs satellite - Satellitenempfänger - Ricevitore via satellite - Receptores satélite - Satellite receivers
AB SAT 449
AKAI 301
ALBA 302 --->309
ALDES 310
AMSTRAD 315 --->321
ARCON 322 --->326
AST 327 --->330
ASTRA 331 --->336
ASTRO 337 - 339
340
BT SATELLITE 341
BUSH 342
CAMBRIDGE 343
CANAL SATELLITE 442
CHAPARAL 344
CITYCOM 345
CLATRONIC 346
CONNEXION 349 - 350
DRAKE 351
ECHOSTAR 352 --->354
EEC 355
EUROPA 356
FERGUSON 357 --->361
FINLUX 362 --->364
FTE 365 - 366
FUBA 367 --->369
GALAXIS 370
GOLDSTAR 371
GOODMANS 372
GRUNDIG 338 - 374 - 376
HANSEATIC 377
HIRSCHMANN 378 --->382
HITACHI 383
HUTH 384 - 385
ITT/NOKIA 386 - 387
KATHREIN 388 --->391
LASAT 392 --->396
LENCO 397
MATSUI 398
MICRO TECHNOLOGY 399
MORGANS 401
NOKIA 404
ORBITECH 406 - 407
PACE 303 - 408 --->412
PHILIPS 373 - 375
413 --->423
450
PROSAT 424
RADIX 348 - 451
REVOX 400
SABA 446 --->448
SAGEM 443
SALORA 425 - 426
SENTRA 444
SKY DIGITAL 452
STRONG 427
TATUNG 429
TECHNISAT 430 --->433
THOMSON 303 - 359 - 398 - 445 - 453
THORENS 434
UNIDEN 435 - 436
WISI 437 --->440
ZEHNDER 441
DIGITAL
AB SAT 449
CANAL SATELLITE 442
NOKIA 405
ON DIGITAL 454
PACE 454
SAGEM 443
SKY DIGITAL 452
THOMSON 453
TPS 443
VIA DIGITAL 453
XSAT 449
Page 35

ICC20 TV/DVD - 1/2
THOMSON multimedia
46 quai A. Le Gallo
92648 Boulogne
Cedex France
RCS NANTERRE B 322 019 464
http://www.thomson-multimedia.com
25466870
© Copyright THOMSON multimedia 99/00
HELPLINE
Votre contact THOMSON : 0 810 810 891
(pour la France, prix d'un appel local)
Ihr Kontakt zu THOMSON: 0180 1000 390
(für Deutschland, Kosten zum Ortstarif)
You can contact THOMSON by dialling: 0845 601 3093
(For Great-Britain, all calls will be charged at local rate)
Para contactar con THOMSON marque: 901 900 410
(las llamadas serán cargadas al precio de la tarifa local)
Il vostro contatto THOMSON: 8488 10 168
(tariffa chiamata urbana)
www.thomson-europe.com
 Loading...