

Thomasville Summer Silhouette 12255-011 Assembly Instructions Manual
Page 1 of 2
Assembly Instructions Summer SilhouetteTM Glass-Top Dining Table Model # 12255-011
Thank you for purchasing this quality product. Be sure to check all packing materials carefully for small parts that may have come
loose inside the carton during shipment. Please read all instructions carefully before starting the assembly process.
CAUTION: Some items and/or the components are cumbersome and heavy. Therefore, the assistance of one or more people
is recommended in order to prevent personal injury and insure that the item and/or its components are not damaged during the
assembly process. Perform all assembly steps on a flat, soft, non-abrasive surface to avoid scratching the finish. Do not over-
tighten the screws or bolts.
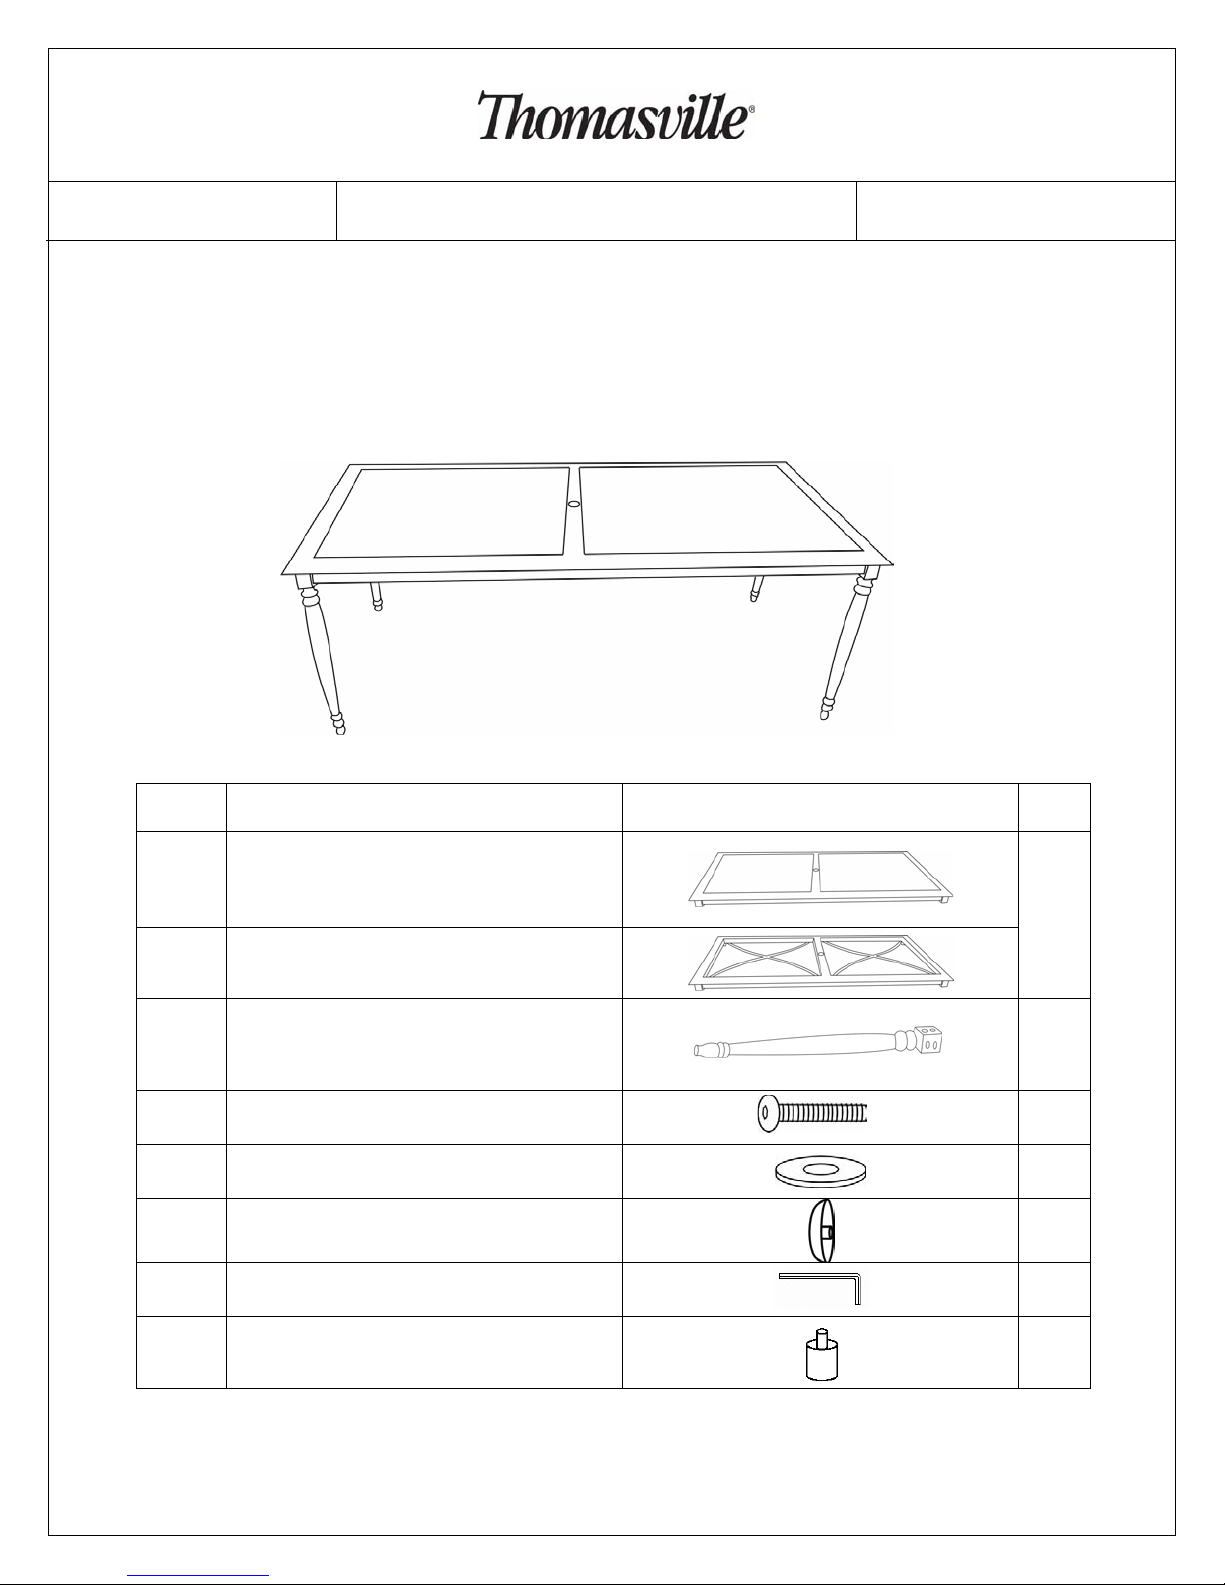
Hardware & Parts List
No. Description Picture Qty
A1 Table Top (with glass packed inside)
1
A2 Table Top Frame (with glass removed)
B Table Legs
C Screws 1/4”*20
D
Washers φ6.5*1.0
E Screw Covers 1/4”
F Hex Key
4
24
24
24
1
G Touch-up Paint
! KEEP THESE INSTRUCTIONS FOR FUTURE REFERENCE !
1
Page 2 of 2
Assembly Instructions Summer SilhouetteTM Glass-Top Dining Table Model # 12255-011
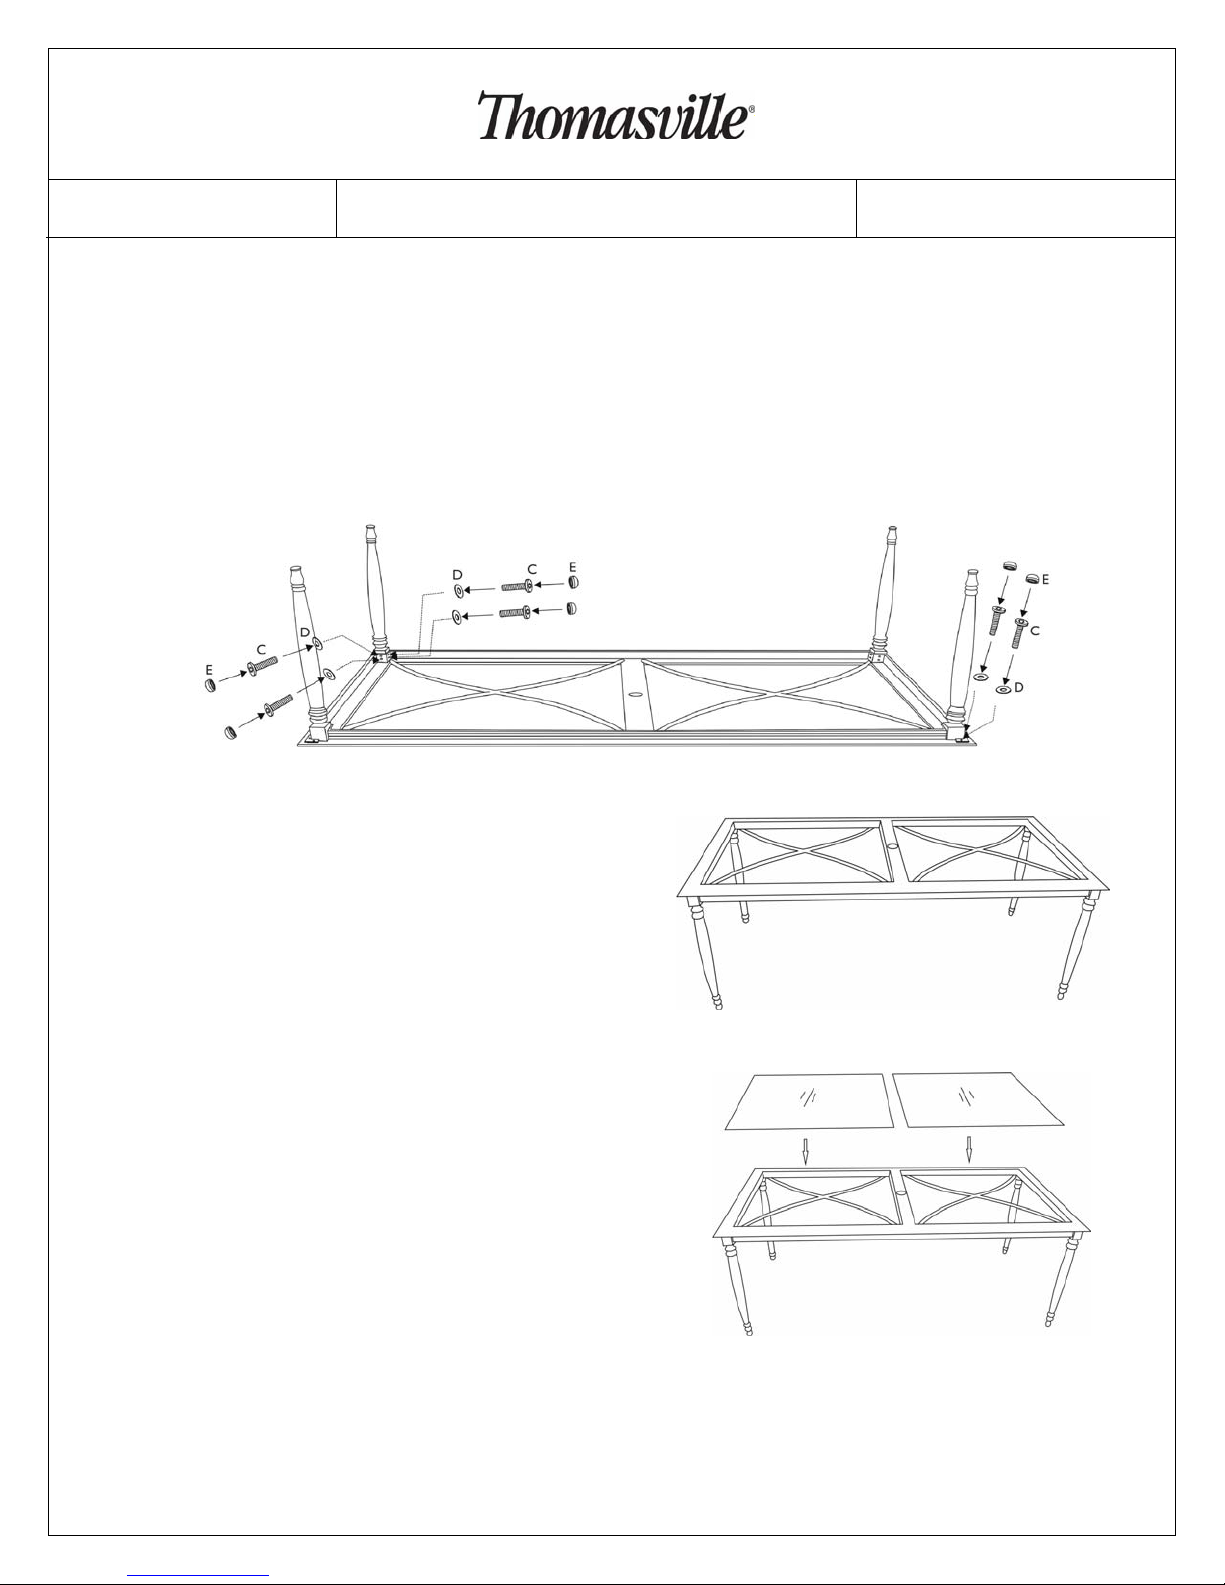
1. Carefully remove the glass panels that were packed inside of the tabletop frame (A1) for shipping. Next, carefully place the
tabletop frame (A2 – with the glass removed) upside down on a flat, soft, non-abrasive surface. Place a table leg (B) in the corner
of the table top frame bottom rim and align the holes in the rim with the holes in the table leg. Insert the screws (C) with washer
(D) through the holes in the corner of the table rim and screw them into the holes in the table leg. Then, insert screws (C) with
washer (D) through the holes on the outside of the table legs and screw them into the holes in the table rim. Do NOT
completely tighten any of the screws until all six screws have been inserted. After all six screws have been inserted, use the hex
key to securely tighten each screw. Install a screw cover on each of the six screws. See Figure 1.
Repeat this same procedure for the other three legs.
Figure 1
2. After all four legs have been securely attached and the screw
covers installed, carefully turn the table over into the upright position.
See Figure 2.
Figure 2
Carefully place the glass panels, that were removed in Step 1, into the
3.
openings in the table top frame. See Figure 3.
Note: Please keep the touch-up paint (G) for future use on your table if
needed.
! KEEP THESE INSTRUCTIONS FOR FUTURE REFERENCE !
Figure 3
 Loading...