

Thomasville Nouveau series Installation Instructions Manual

CABINETRY INSTALLATION INSTRUCTIONS
1. Before You Begin
These instructions are intended as supplemental reference for those who have the appropriate skills and experience to safely
and successfully install cabinetry, including familiarity with basic carpentry principles, and safe and proper tool use. Wall
framing and construction can vary greatly, and these instructions may not describe your wall. Also, there may be electric,
water, or gas lines or other utilities behind the wall, which you must avoid contacting during installation. If for any reason
after reading these instructions you do not feel condent in your ability to safely and successfully install this cabinetry, please
contact a licensed contractor for installation. Thomasville Nouveau is not responsible for improper installation.
WARNING: Electric, water and gas lines, and other utilities, are frequently running behind walls where cabinets are installed.
Before drilling any holes, driving any screws or inserting any nails, be sure you will not be making contact with any of these
utilities. Failure to follow this instruction may result in property damage, and serious or fatal injury. If you do not feel condent
in your ability to insure that you will not make contact with utilities behind a wall during installation, please contact a licensed
contractor to install the cabinetry.
tools needed
• Pencil • Square • Pry bar
• Hammer • Miter saw • Safety glasses
• Shims • Caulk gun and caulk • Installation Kit
• Drill & bits • Level • Screwdrivers and assorted screws
• Tape measure • Straight edge - 2 ½” round washer head screw
• Chalkline • C-clamps - 1 1⁄8” wood screws
- 1 1⁄8” lo-root flathead screws
4 Helpful Hint: Read through this manual carefully before starting your renovation project so
you’ll become familiar with all the steps.
2. Check your new cabinets
Check to make sure the cabinets and accessories you received are what you ordered and are not damaged. Don’t remove
your old plumbing xtures and kitchen cabinets until you are sure you have the correct products to replace them. Go over
the layout with your designer to make sure you know where everything goes, and identify all nished ends. Don’t remove the
protective lm on acrylics until after you drill for hardware.
3. Remove the existing cabinets (if applicable)
Empty your existing cabinets. Shut off all water supply lines to the kitchen as well as the electricity and remove any existing
appliances. It is best to move the appliances to another room for easier maneuvering in the work area.
If you intend to use your existing sink and traps, disconnect them carefully with the required tools and place them in a safe
place away from all the construction.
Remove the existing cabinets and counter tops as well as any mouldings around windows or doors, and any baseboards that
may be in the way of your installation. Be careful when removing upper cabinets from the wall. It is best to have two sets of
hands to support the old cabinet’s weight when removing the last of the screws. This will help prevent it from falling, causing
injury and/or damage.
Repair any damage to wall surfaces that may show after you’ve installed your new cabinets.
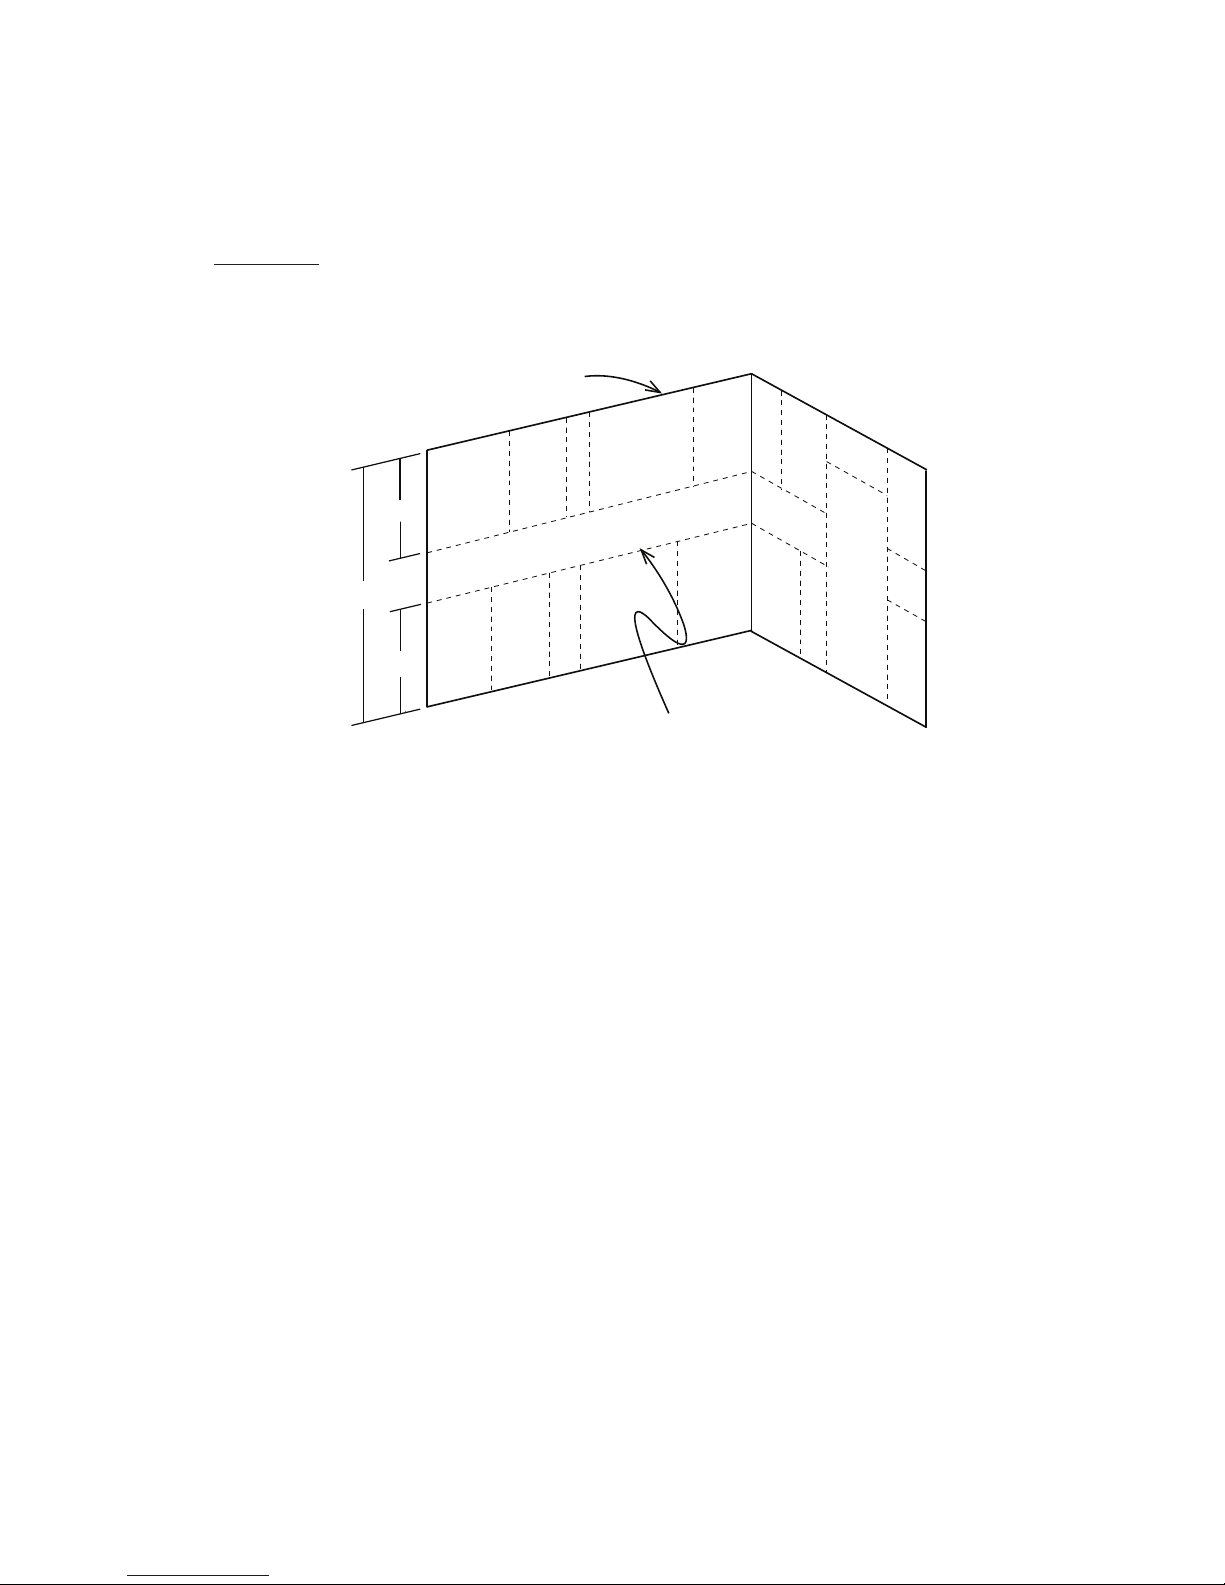
4 Helpful Hint: To help visualize the location of the new cabinets it may help to draw an
outline on the walls where they will be attached. Simply measure the widths of the cabinets
and transfer the measurements to their respective walls.
Pencil line on wall (top of cabinets)
0
3
“
84
“
Range
5
8
/
34
“
Pencil line on wall (top of base cabinets)
Sink
Fridge
4. Preparing to install your new cabinets
Locate electric, gas or water lines running behind the walls. You may need to cut openings in the back panel of the cabinet(s)
to accommodate the utilities before installation, and you will also want to be sure to avoid accidentally damaging those utilities
during installation. Mark the location of all of the studs on the walls that are to support the new cabinets. Use a magnetic
stud nder or a hammer and small nishing nail to accomplish this. It is very important that cabinets are rmly attached to wall
studs for the optimum amount of support. Be sure to avoid electric, gas, or water lines, or other utilities that might be behind
the wall when locating the studs, and whenever drilling into the wall or driving a screw.
Houses can become unlevel over long periods of time due to settling and shifting. It is important to determine where the
highest point in the oor is along the walls where you are going to install your cabinets. Check the oor with a level to
determine the highest point.
Using a chalk line or straight edge, draw a level line at 34-5/8” from the highest point on the oor on the wall where the new base
cabinets will be installed. This line establishes the base cabinet height. Now, measure up 84”(or the height of your cabinetry) from
the same high point in the oor and draw a similar level line on the wall where your wall cabinets will be installed. This line establishes
the top of the wall cabinet height.
Remove the packaging as well as all of the doors, drawers, false fronts and any adjustable shelving from the new cabinets.
This procedure will help to reduce the weight and prevent injury or damage from falling shelves, swinging doors and sliding
drawers during the initial installation phase.
Your cabinets are equipped with fully adjustable clip hinges for easy door removal. You’ll nd the clip at the end of the hinge
facing the inside of the cabinet. Simply squeeze the clip and the hinge will release without changing the door adjustment.

5. Installing the base cabinets
“
“
If you prefer to install the upper cabinets rst, skip Step 5. And proceed to Step 6. Installing the wall cabinets. Once you’ve
completed Step 6, return to this Step 5 and install the base cabinets. As with all base and wall cabinets, any necessary cutouts for utilities such as water, electricity or gas should be made in the back panel of the cabinet before installation. Measure
the location of the utilities carefully, transfer that to the back of the cabinet, and make a corresponding cut-out in the back
panel of the cabinet, with a spade-bit, hole saw or jigsaw.
Start with the corner cabinet (if applicable). Slide the cabinet into the desired corner and determine if it needs to be shimmed
up to the previously drawn line (34-5/8”). Shim as necessary with wood shims remembering the toe kick will cover the shims
after it is applied. Check the top with a level and adjust the shims accordingly. When the corner cabinet is level, secure it
through the cabinet hanger strip into the stud using 2-1/2” round washer head screw. The 2-1/2” wood screws that came
with your installation kit may be inappropriate for your installation, depending upon the framing and construction of your wall.
You are responsible for using the appropriate screws for your wall.
Repeat this process wherever studs fall behind the corner cabinet nailer strip. If your base corner cabinet is round, install
strapping on the wall to support the counter top and keep the cabinets square.
It may be helpful to install the round base corner cabinet to the adjacent cabinet before leveling and positioning. If there is
no adjacent cabinet to the round base corner unit, leave it unfastened until countertops are installed. Secure it in position by
installing it to the underside of the countertop.
Install strapping on wall
to support countertop
Base corner cabinet installation:
when a base corner cabinet is not
24
Blind corner installation:
pull blind corner cabinet far enough
from wall B, (distance x) to allow
the cabinet door to clear hardware
on adjacent cabinet or appliance.
24
up against another cabinet, a panel
may be installed to close in the side.
x
Wood
corner cabinet
Filler
Wall B
Adjacent
cabinet
Wall A
Right side shows
Slide the next cabinet into position so that side is ushed and plumb against the side of the previously installed corner
cabinet. Using C-clamps, clamp the two cabinets together and shim under the cabinet where necessary. Check to ensure
the cabinet is level. Screw the cabinets together using 1-1/8” wood screws. You may want to pre-drill these holes to prevent
splitting or cracking. Use four wood screws to join the two cabinets together.
When the two cabinets are secured together, secure the cabinet to the wall, following the 34-5/8” line, using 2-1/2” round
washer head screws through the cabinet hanger strip into any available studs behind the cabinet. Complete the installation of
the base cabinets using the same procedure. If there is a window above your base cabinets, be sure to appropriately center
the cabinet under the window.
 Loading...