

Thomashilfen EASyS Advantage, EASyS Basic, EASyS Modular S, EASyS Advantage S, Swifty Assembly Instructions Manual
...
EASyS Advantage · Basic (EASyS Advantage S)
EASyS Modular S · Swifty · Swifty 2
tRide · ThevoTwist · ThevoTherapy
Spodnie do siedzenia
Instrukcja montażu – Osprzęt
Siddebukser
Montage-vejledning – Tilbehør
Grensele
Monteringsanvisning – Tillbehör
Skrittsele
Monteringsanvisning – Tilbehør
Zitbroek
Montage handleiding – Accessoires
Sostegno pelvico
Istruzioni di montaggio – Accessori
Arnés pélvico
Instrucciones de montaje – Accesorios
Harnais pelvien
Notice de montage – Accessoires
Soft pelvic harness
Assembly instructions – Accessory
Sitzhose
Montageanleitung – Zubehör
2
ThevoTwist ThevoTherapy
Swifty tRide
EASyS Advantage · Basic (EASyS Advantage S) · EASyS Modular S
3
3 4
1 2

4
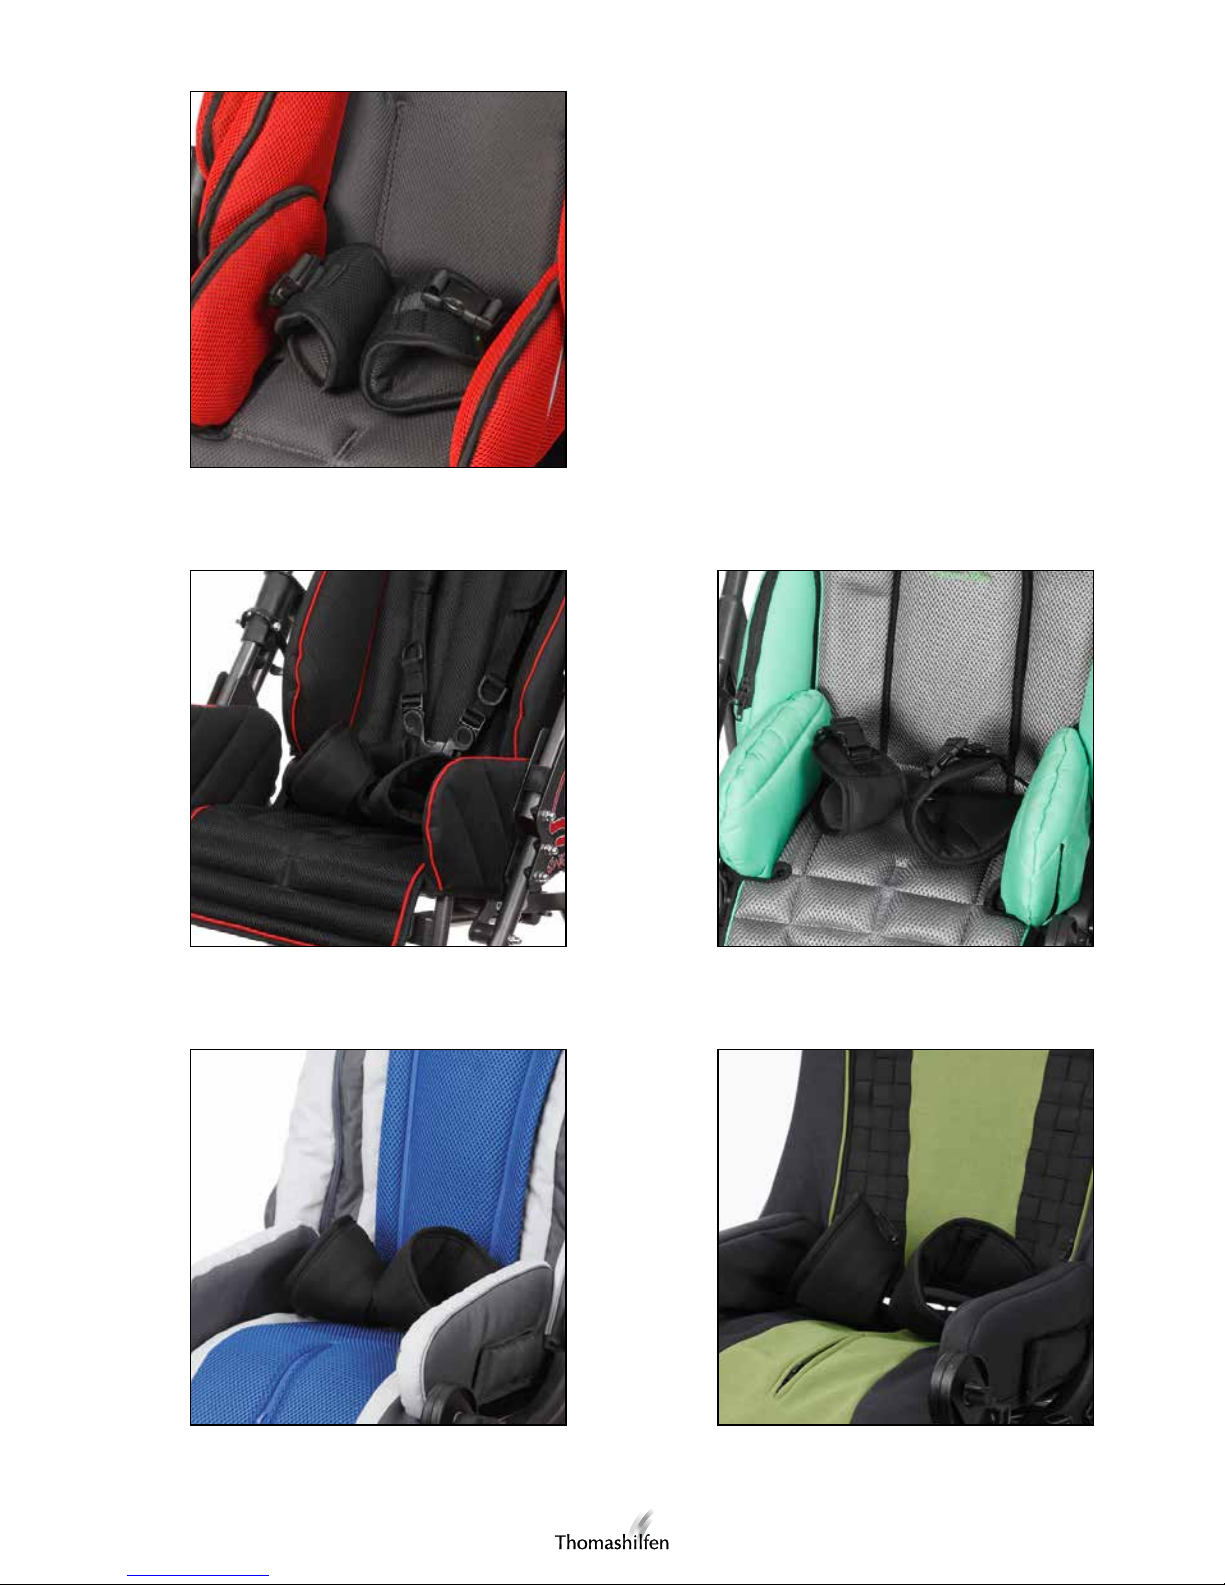
Sitzhose Art.-Nr.: 6614 (Gr. 1) / 6714 (Gr. 2)
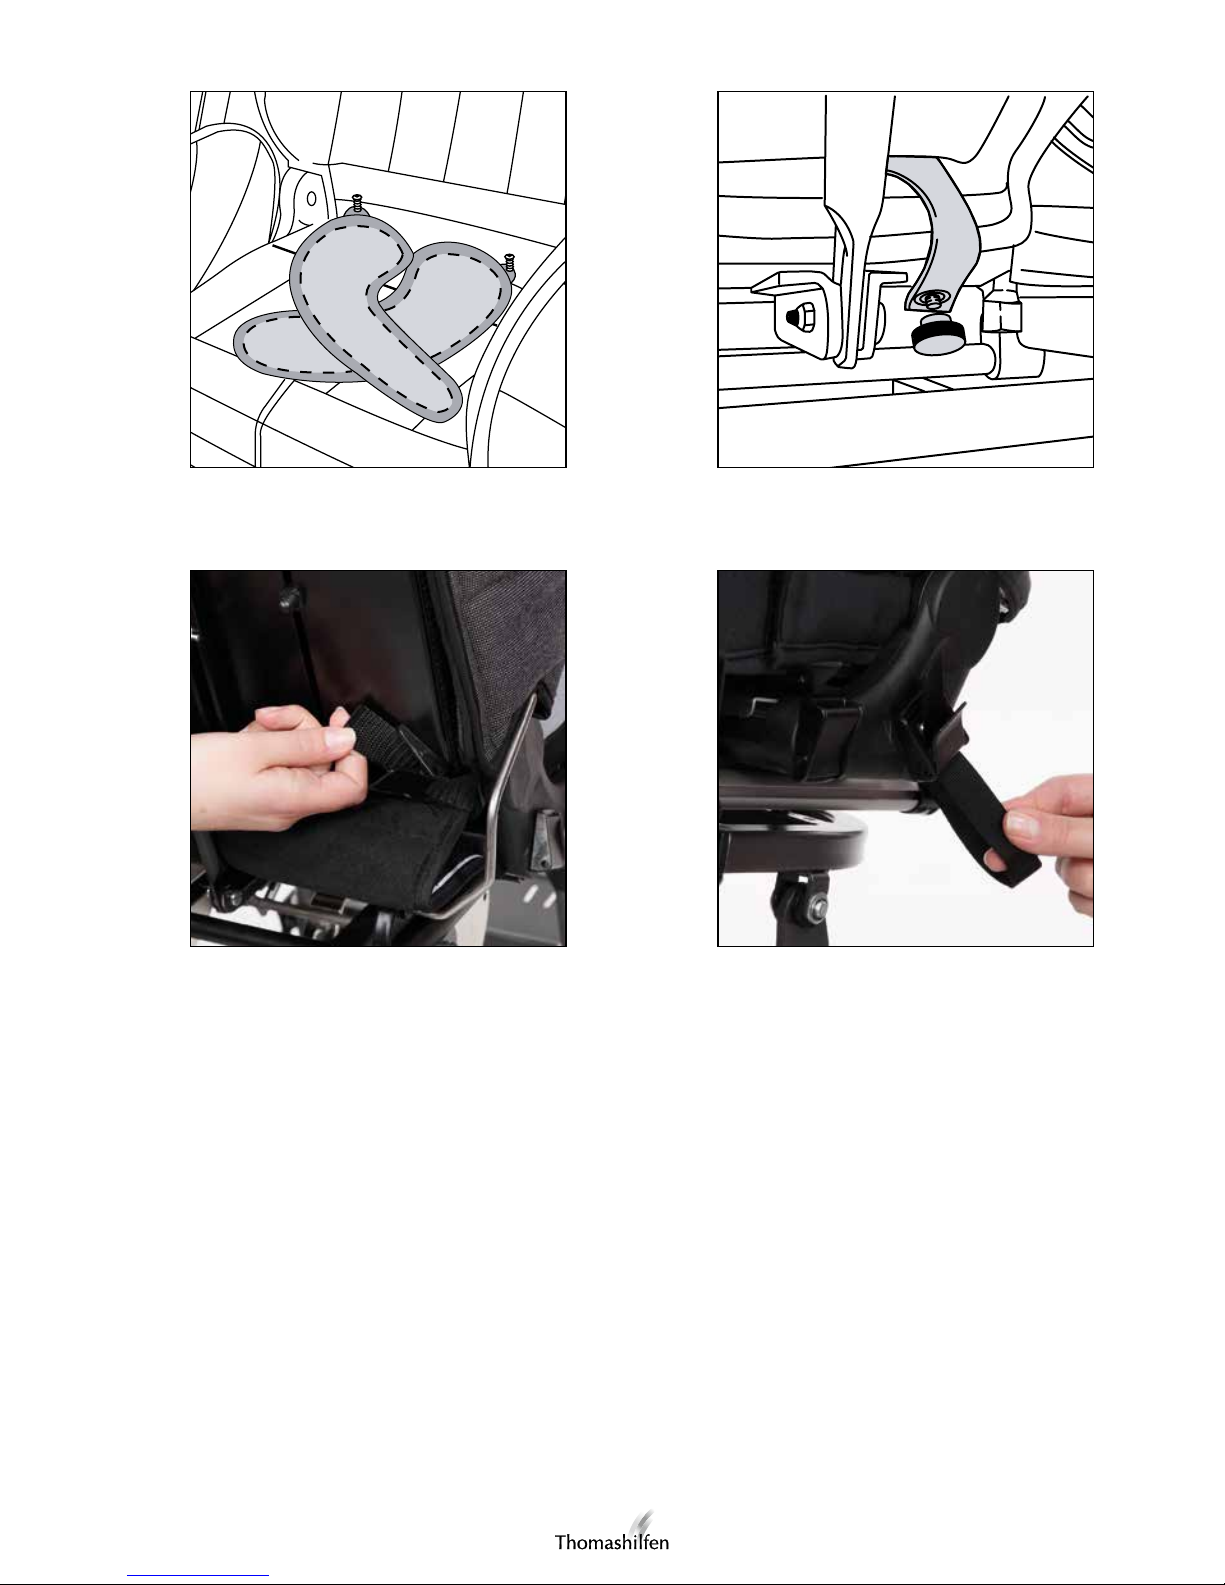
Hose auf die Sitzfläche legen (Schnallen zeigen nach unten). (Abb. 1)
nur Swifty: Die vorgefertigten Schlitze im hinteren Bereich des Sitzpolsters
auftrennen.
nur Swifty: Die zwei nach hinten verlaufenden Gurte durch das Sitzpolster führen und auf der hinteren Sitzfläche befestigen.
außer Swifty: Die zwei nach hinten verlaufenden Gurte unter der Sitzfläche
am hinteren Querrohr befestigen (Handschrauben auf vorhandenes Gewinde
drehen). (Abb. 2)
Die beiden unteren Gurtenden können hinten an der Rückenplatte (Abb. 3)
oder seitlich am Kunststoffelement (Abb. 4) (außer Swifty) mit Klappschnallen
befestigt werden. Die Gurte rechts und links neben dem Rückenpolster zu der
entsprechenden Klappschnalle führen und befestigen.
nur Swifty: Rückenpolster wieder schließen.
TIPP: Zusätzlich kann die Gurtlänge auch vorne eingestellt werden, dazu am
D-Ring ziehen um den Gurt zu kürzen.
Soft pelvic harness Item code : 6614 (size 1) / 6714 (size2)
Lay the soft pelvic harness onto the seat surface (buckles face downwards).
(fig. 1)
only Swifty: Open the prefabricated slots in the rear area of the seat cushion.
only Swifty: Guide both belts running backwards through the upholstery and fix
them at the rear of the seat surface .
except Swifty: Attach the two belts which run at the back under the seat to the
rear diagonal tube (turn thumb screw on the screw thread available). (fig. 2)
The two bottom belt ends can be attached with cam buckles to either the back
plate (fig. 3) or the plastic element at the side (fig. 4) (except Swifty). Guide the
belts left and right next to the back upholstery to the corresponding cam buckle
and fix them.
only Swifty: Close the back upholstery.
TIP: The belt length can also be adjusted from the front. Pull the D-ring to shorten the belt.
 Loading...