

Page 1

Teile-Nr. 185 212
Techn. Änderungen vorbehalten
GA 01/04
Kundendienststellen
Deutschland:
Robert Thomas
Metall- und Elektrowerke
GmbH & Co. KG
Hellerstrasse 6
57290 Neunkirchen
Telefon 0 2735 - 788- 581-583
Telefax 02735 - 788 -599
e-mail: r-wilke@robert-thomas.de
Belgien/Belgique/België:
Schiffer - Beriault S.p.r.l.
Rue Bois Libert 25
B-4053 Embourg
Tél./Fax 043 - 41 15 18
e-mail: thomas@rivers.de
France:
Mister ATOM Pieces
97, rue H-Durre
B. P. 113
F-59590 Raismes
Tél. 03.27.45.82.82
Fax 03.27.45.82.99
Mena Toulouse Service
4, rue Jules Raimu
F-31200 Toulouse
Tel. 05.61.58.07.70
Fax 05.61.11.98.44
L.B.S. Le Bon Service
4, rue de l’Industrie
F-67450 Mundolsheim
Tel. 03.88.18.17.16
Fax 03.88.18.17.20
Niederlande:
A. u. M. Whiteparts B.V.
Takkeblijsters 37a
NL 4817 BL Breda
Tel. 076 - 5 7205 05
Fax 076 - 5 72 0700
Schweiz:
Saluda Technik AG
Marchstein 173
CH-56234 Triengen
Tel./Fax 041 93/ 3 30 75
Schweden:
Olsson & Co.
Kungsporten 4A
42750 Billdal
Tel. 031 - 93 9575
Fax 031 - 91 42 46
Österreich:
Wukovits
Kaiser-Joseph-Straße 64
A-3002 Purkersdorf
Tel./Fax 0 22 31/634 67
Ernst Wallnöfer
Elektro-Industrievertretung
Bundesstraße 29, Neu-Rum
A-6003 Innsbruck
Tel. 05 12 / 26 38 38,
Fax 05 12 / 26 3838 26
Fa. Pölz
Brünner Straße 5
A-1210 Wien
Tel. 01/2 78 53 65
Fax 01/27 8536 55
Quelle Zentralservice:
Industriezeile 47
A-4021 Linz
Tel. 07 32 / 7809-15,
Fax 07 32 /78 09-584
sowie alle Quelle
Technik Center Servicestellen
DIE SAUBERE LÖSUNG
Robert Thomas
Metall- und Elektrowerke GmbH & Co. KG
Postfach 18 20, 57279 Neunkirchen
Hellerstraße 6, 57290 Neunkirchen
Telefon +49 - 27 35 - 7 88 - 0
Telefax +49 - 2735 - 788 - 519
e-mail: info@robert-thomas.de
www.robert-thomas.de
GERMANY
Fa. Reicher
Hohenegg 17
A-8262 Ilz
Tel. 0 33 85 / 5 83
Fax 0 33 85/ 2 20 40
Fa. Pircher
Belruptstraße 44
A-6900 Bregenz
Tel. 0 55 74 /4 2721-0
Fax 0 55 74/42 7215
Johann Grössing
Autorisierter Kundendienst
Seidelbastweg 10
A-4030 Linz
Page 2
THOMAS Waschsauger
SUPER 30 S AQUAFILTER
Gebrauchsanweisung · Instructions for Use · Mode d’emploi · Gebruiks-
aanwijzing · Modo de empleo · Modo de utilição · Használati utasítás
Instrukcja obsługi · Kullanma talimatı · Rukovodstvo po qkspluatacii
Page 3
Inhalt Seite
Warnhinweise 3
Geräteabbildung 5
Montage 6
Montage-Beschreibung 7
Alles Saugen (naß und trocken) 8
Gebrauch des Gerätes mit Sprühextraktion 9-10
Gerätereinigung und Pflege 11
Hilfe bei evtl. Störungen 11
Kundendienst 11
Contents Page
Illustration of Parts 5
Points of Safety 12
Assembling the Appliance 6
Assembly Instructions 13
Wet and dry vacuuming 14
Operating the spray-extraction system 15-16
Maintenance and care 17
If unexpected difficulties arise 17
Customer Service 17
Sommaire Page
Illustration de l’appareil 5
Indications importantes 18
Illustrations du montage 6
Description du montage 19
Aspirer tout (liquides et poussières) 20
Emploi du système injection-extraction 21-22
Nettoyage et entretien 22
Conseils lors de difficultés éventuelles 23
Service-après-vente 23
Inhoud Bladzijde
Toestelafbeelding 5
Belangrijke raadgevingen 24
Montage 6
Montagebeschrijving 25
Alles zuigen (stof en vlooistoffen) 26
Gebruik van het sproei-zuigsysteem 27-28
Reiniging en onderhoud 29
Raadgevingen bij storingen 29
Dienst na verkoop 29
Contenido Pagina
Ilustración del aparato 5
Indicaciones importantes 30
Ilustraciones de montaje 6
Descripción de montaje 31
Aspirar todo (mojado y seco) 32
Uso del sistema pulverizar-extraer 33-34
Limpieza y mantenimiento del aparato 35
Ayuda en caso de molestias eventuales 35
Servicio posventa 35
Índice Página
Ilustração do aparelho 5
Ilustrações de montagem 6
Indicações importantes 36
Descrição da montagem 37
Aspirar tudo: líquidos e pó 38
Utilização do aparelho com pulverizador/extrator 39-40
Limpeza e cuidado do aparelho 41
Ajuda em casos eventuais de avarias 41
Serviço de ajuda após vendas 41
Tartalomjegyzék Oldal
A készülék és tartozékai 5
Szerelési és kezelési ábrák 6
Fontos figyelmeztetések 42
A készülék összeállítása 43
Porszívózás (száraz és nedves felszívás) 44
A folyadékporlasztós tisztítórendszer használata 45-46
A takarítógép tisztítása és karbantartása 46
Hibaelhárítás 47
THOMAS ProTex szonyeg- és kárpittisztító
koncentrátum 48
ıı
çindekiler Sayfa
Aletin görünümü 5
Montaj 6
Önemli açıklamar 48
Montaj tarifi 49
Kuru süpürmek 49
Islak süpürmek 50
Aletin püskürtme ekstraksiyonu ile kullanımı 50-51
Aletin temizligi ve bakımı 51
Muhtemel ariza halinde 51
Spis treści Strona
Wskazówki bezpieczeństwa 52
Opis urządzenia 5
Ilustracje do montażu 6
Opis montażu 53
Odkurzanie wszystkiego (na mokro i sucho) 54
Użytkowanie urządzenia z funkcją zraszania 55
Czyszczenie i konserwacja urządzenia 56
Usterki i ich usuwanie 57
Serwis 57
Soderøanie Stranica
Izobraøeniä agregata i
dopolnitel´nyx prinadleønostej 5
Montaø 6
Ukazaniä po texnike bezopasnosti 58
Opisanie montaøa 59
Rabota v lübom reøime (øidkostnom i suxom)
60
Ispol´zovanie agregata v raspylitel´nozkstrakcionnom reøime 61-62
Uxod za agregatom i ego ohistka 63
Meropriätiä prp vozmoønyx neispravnostäx 63
Sluøba Zakazhika 63
2
F
NL
E
TR
PL
P
H
Page 4

3
Wichtige Hinweise
Bitte lesen Sie die in dieser Gebrauchsanweisung aufgeführten Informationen
sorgfältig durch. Sie geben wichtige Hinweise für die Sicherheit, die Installation,
den Gebrauch und die Wartung des
THOMAS Waschsaugers. Bewahren Sie die
Gebrauchsanweisung sorgfältig auf und
geben Sie diese ggf. an Nachbesitzer
weiter. Der Hersteller haftet nicht, wenn
die nachstehenden Anweisungen nicht
beachtet werden. Der THOMAS Waschsauger darf nicht mißbräuchlich, d. h.
entgegen der vorgesehenen Verwendung
benutzt werden. Er dient ausschließlich der
Nutzung im Haushalt.
• Die Spannungsangabe auf dem Typenschild muss
mit der Versorgungsspannung übereinstimmen.
• Das Gerät darf nicht in Betrieb genommen werden,
wenn:
– die Netzanschlußleitung beschädigt ist,
– das Gerät sichtbare Schäden aufweist,
– das Motorteil einmal heruntergefallen sein sollte.
• Prüfen Sie den Sauger auf Transportschäden.
• Entsorgen Sie die Verpackung nach den örtlichen
Vorschriften.
• Lassen Sie das Gerät im eingeschalteten Zustand
nie unbeaufsichtigt und achten Sie darauf, daß
Kinder nicht am Gerät spielen.
• Veränderungen am Gerät können Ihre Gesundheit
gefährden. Deshalb nur durch eine Fachwerkstatt
reparieren lassen.
• Benutzen Sie das Gerät nie in Räumen, in denen
feuergefährliche Stoffe lagern oder sich Gase
gebildet haben.
• Äußerste Sorgfalt ist geboten, wenn Sie Treppenstufen reinigen. Stellen Sie sicher, daß das Gerät
eine feste Stellung auf dem Boden der Treppe hat
und sorgen Sie dafür, daß der Schlauch nicht über
seine bestehende Länge hinaus angespannt wird.
Halten Sie das Gerät immer mit einer Hand fest,
wenn Sie den Sauger auf Treppenstufen benutzen.
• Benutzen Sie den Waschsauger nicht für
Trockensaugen, wenn das Filtersystem nicht
entsprechend der Anleitung montiert ist.
• Achtung! Diese Geräteausführung ist nicht zum
Absaugen gesundheitsgefährdender Stäube
geeignet.
• Keine lösungsmittelhaltigen Flüssigkeiten wie z. B.
Lackverdünnung, Öl, Benzin und auch keine
ätzenden Flüssigkeiten aufsaugen.
• Nicht im Freien stehenlassen und keiner direkten
Nässe aussetzen.
• Düsen und Rohre dürfen (bei eingeschaltetem
Gerät) nicht in Kopfnähe kommen z. B. Gefahr für
Augen und Ohren.
• Niemals den Stecker am Kabel aus der Steckdose
ziehen, sondern ausschließlich am Stecker.
• Sorgen Sie dafür, daß die Netzanschlußleitung
weder Hitze noch chemischen Flüssigkeiten ausgesetzt ist und nicht über scharfe Kanten oder
Oberflächen gezogen wird.
• Wenn die Anschlußleitung dieses Gerätes
beschädigt wird, muß sie durch den Hersteller oder
seinen Kundendienst oder eine ähnlich qualifizierte
Person ersetzt werden, um Gefährdungen zu
vermeiden.
• Sauger nicht direkt neben Heizaggregaten
aufbewahren.
• Niemals den THOMAS Waschsauger selbst
reparieren, sondern nur durch eine bevollmächtigte
Kundendienst-Station instandsetzen lassen.
• Verwenden Sie nur Original-Ersatzteile.
• Die Verwendung von Verlängerungskabel in
Naßräumen ist im Interesse Ihrer eigenen Sicherheit
zu vermeiden.
• Der Netzstecker ist zu ziehen:
– bei Störungen während des Betriebes,
– vor jeder Reinigung und Pflege,
– nach dem Gebrauch,
– bei jedem Filterwechsel.
• Bevor der THOMAS Waschsauger entsorgt wird,
schneiden Sie bitte die Netzanschlußleitung ab.
• Nie den Reinigungsmittel-Strahl auf Steckdosen
oder elektrische Geräte richten
• Nach dem Naßsaugen oder Sprühextrahieren
Behälter sofort entleeren.
• Chemikalien (Sprühextraktions-Reinigungsmittel)
gehören nicht in die Hände von Kindern.
• Achtung! Nur bei Verwendung des OriginalTHOMAS-Reinigungsmittels können Gerätefunktionen und Reinigungswirkung gewährleistet
werden.
• Personen mit empfindlicher Haut sollten direkten
Kontakt mit der Reinigungslösung vermeiden.
• Vor Durchführung irgendwelcher
Arbeiten am Gerät den Schalter in
Position „Null” bringen und Netzstecker
herausziehen.
• Sollte das Reinigungskonzentrat auf die
Schleimhäute (Auge, Mund, etc.) gelangen, ist
sofort mit viel Wasser nachzuspülen.
Page 5

4
1 = Schmutzbehälter
Co llec ting b in
Cuve
Verga arba k
Recipie nte
recip iente
tartály
Pislik deposu
Zbiornik na zanieczyszczenia
Gräzesbornik
2 = Mo to rkopf
Mo tor b lock
Bloc -moteur
Mo torde el
Bloq ue mo tor
blo co do moto r
motorblokk
Motor baælıœı
Głowica silnika
Blok dvigatelä
3 = Verschlußschnapp er
Snap fastener
Fermeture a dé clic
Knipslot
Tap a d e c ierre de go lpe
tampa de fecho de go lpe
zárókallantyú
Kapatma dili
Zatrzask zamykający
Zawelkivaüwaäsä
4 = Lenkrollen
Ca stor w heels
Roulette s o rientables
Stuurwieltjes
Polea-g uía
po leia-guia
talpgörgo˝ k
Yönlendirme tekerlekleri
Kółka jezdne
Napravläüwie roliki
5 = Schnellkupplung
Co upling p iece - Valve
Snelkopp eling
Embrag ue d e uso rápid o
emb rea gem rápida
nyomó cso˝ c satlakoz ója
Çabuk kuplaj
Sprzęgło szybkodziałające
Bystrorazßemnoe soedinenie
6 = Kontrolleuchte
Pilot lamp
Bascule/ Lampe -témoin
Co ntrollampje
Piloto de co ntrol
lâmpa da de co ntrole
kijelzo˝ lámpa
Kontrol lambası
Lampka kontrolna
Kontrol´naä lampa
7 = Drehschalter
Co ntrol knob - Bouton de rég lage
Draaiknop
Interruptor g iratorio
interruptor g iratório
tárcsás kap csoló
Döner æalter
Wyłącznik (Zał./ Wył.)
Povorotnyj pereklühatel´
8 = Ansaug stutzen
Suction so cket - Bouche d’ aspiration
Zuigmo nd
Co do de emp alme de a spiració n
ca bo de ligaç ão d e a spiraçã o
gé ge cso˝ aljz at
Emme borusu manæonu
Króciec ssący
Vsasyvaüwij patrubok
9 = Tragegriff
Ca rrying ha ndle
Poigné e d e ma niement
Dekselgree p - Asa de transpo rte
punho de transpo rte
fogantyú -
Taæıma kolu
Uchwyt no.ny
Ruhka dlä perenoski
10 = Netzanschlußleitung
Ma ins c able
Câ ble d e rac co rdement
Aa nsluitkab el
Line a de co nexió na la red
ca bo ad utor
hálózati csatlakozózsinór
Elektrik baœlantı kablosu
Przewód przyłączeniowy
Setevoj kabel´
11 = By-Pass-Saugkraft-
regulierung
By-pass suction co ntrol
Réglag e de p uissance by-pass
By-pass-zuig krachtrege ling
Regulariza ción de la fuerza
asp irado ra b y-pass
regulaç ão de forç a d e a spiraçã o by-pass
szívó ero˝ sz abá lyozó tolóka
By-Pass Emme kuvveti ayarı
Regulacja siły ssania
Bajpasnyj regulätor
vsasyvaüwej mownosti
12 = Druckschlauch
Delivery tube · Co nduite du ne ttoyant
Persleiding · M anga de presió n
mang a d e p ressão
nyomó cso˝
Basınç hortumu
Wąż ciśnieniowy
Napornyj πlangoprovod
13 = Saugschlauch
Flexible hose · Flexible
Slang
Tubo flexible para aspirar
mang ueira de pressã o
gé ge cso˝
Emme hortumu
Wąż ssący
Vsasyvaüwij
πlangoprovod
14 = Saugrohr
Suction tubes · Tuyaux
Buize n · Tubo asp irante
tubo de asp iraç ão
merev sz ívócso˝
Emme borusu
Rura ssawna
Vsasyvaüwaä trubka
15 = Kunststoff-Clips
Plastic c lips · Clips
Clips d e p lástico
clip de p lástico
Plastik klips
nyomó cso˝ felero˝ síto˝ pá nt
Plastik klipsler
Obejmy plastikowe
Plastikovye zaøimy
16 = Rohr-Clipse
Tube clips · Clips p our tuyaux
Buisclips · Clips d e tubo
Fermag li per tubo
Cso˝klip
G rampo s pa ra tubo s
Boru klipsi
Obejmy do rury
Zaøimy dlä truby
17 = Abspe rrventil
Spray diffusor co ntrol
Pistolet diffuseur
Ventielhouder
Válvula de cie rre
válvula de blo queio
nyomó sze lep
Kapatma ventili
Zawór zamykający
Zapornyj klapan
18 = Te ppich-Sprüh-
extraktions-Düse
Spray-extraction c arpe t
shampo o noz zle
Suceur injec tion-extraction p our tapis
Sproe iextractiezuigmo nd
Tob era de pulverizar-extraer p ara
alfomb ras
bo ca l de pulverizaç ão / e xtraçã o d e tap ete
szo˝ nyeg tisztító fej
Halı püskürtme ekstraksiyon baælıœı
Ssawka zraszająca do dywanów
Nasadka dlä raspyleniä
moüwix sredstv dlä kovrovyx
pokrytij
19 = Druckschlauch
Delivery tube Co nduite d u nettoya nt
Persleiding
Ma nga de presión
mang ueira de pressã o
nyomó cso˝
Basınç hortumu
Wąż ciśnieniowy
Napornyj πlangoprovod
20 = Polste r-Sprüh-
extraktionsdüse
Spray-extraction up holstery
shampo o noz zle
Suceur injec tion-extraction
po ur fauteuils
Sproe i-extractiezuig mond
voo r stoffering
Tob era de pulverizar-extraer p ara
ac olcha do s
bo ca l de pulverizaç ão / e x-traçã o de
estofad os de móveis
kárpittisztító fej
Koltuk püskürtme ekstraksiyon baælıœı
Ssawka do tapicerki i zraszania
Nasadka dlä raspyleniä moüwix
sredstv dlä mägkoj mebeli
21 = Polsterdüse
Upholstery noz zle
Brosse po ur fauteuils
Zuige r voo r ze telbekled ing
Tob era para aco lchad os
bo ca l de estofad os d e mó veis
kárpitszívó fej
Koltuklar için emme baælıœı
Ssawka do tapicerki
Nasadka dlä mägkoj mebeln
(tol´ko“Super 30“)
22 = Hartbodenadapter
Ada ptor fo r hard floo rs
Ada pteur-raclette
Ada pter voo r g lad de vloe ren
Ada ptado rp ara suelos duros
ad aptado r pa ra piso s duros
fejkieg észíto˝ sz ilárd p adló hoz
Sert döæeme adaptörü
Przystawka do podłoży twardych
Perexodnik dlä øestkix
napolßnyx pokrytij
23 = Teppichdüse
Ca rpet + flo or no zz le
Brosse tapis/ sols d urs
Tap ijtbo rstel
Tob era de alfombras
bo ca l de tape te
szo˝ nyeg porszívó fej
Halı için baælık
Szczotka dywanowa
Nasadka dlä histki kovrovyx
pokrytij
24 = Fugendüse
Crevice no zz le · Suce ur pla t
Platte z uiger · Tob era de ranuras
bo ca l de fenda s
fugasz ívófej
Eklem yeri için baælık
Ssawka szczelinowa
Nasadka dlä ohistki uzkix
welej (tol´ko“Super 30“)
25 = Spa nnring
Clamp ing ring
Annea u de ca lage
Spa nring
Ab raz ade ra · ab raç ade ira
felero˝ síto˝ gy u˝ ru˝
Germe halkası
Pierścień dociskowy
Zaøimnoe kol´co
26 = Filtervlies
tissue filter
Partie textile du filtre
Filtervlies
Filtro de material no tejido
Filtro
Mo torvédo˝ szu˝ ro˝ sap ka
Filtre keçesi
Worek filtracyjny
Волокнистый фильтр
27= W asserfilter
water filter
Filtre à eau
Waterfilter
Filtro de agua
Filtro de água
Vízszu˝ ro˝
Su filtresi
Filtr wodny
Фильтр для воды
28 = Sprühmitteltank
Extrac tion liquid tank
Réservoir po ur liquide ne ttoyante
Shampo o reservoir
Depó sito d el líquido pulverizad or
reservatório de ag ente de
pulverizaç ão
tisztítóo ldat tartálya
Püskürtme madde deposu
Zbiornik na płyn zraszający
Bahok dlä raspyläemogo
moüwego sredstva
29 = Reinigungskonzentrat
Clea ning so lution
Ne ttoyant co nce ntré
G eco ncentreerd reiniging smiddel
Prod ucto d e limpiez a c onc entrado
soluçã o química
tisztítófo lyad ék konce ntrátum
Temizleme konsantresi
Koncentrat czyszczący
Koncentrirovannoe moüwee
sredstvo
30 = Feinstaub-Textilfilter
Fine particle textile filter
Filtre textile pour poussières fines
Fijne stof textielfilter
Filtro de tejido para polvo fino
textil szűrőbetét
¤nce toz tekstil filtresi
Filtr przeciwpyłowy
тонкодисперсный текстильный
фильтр
35 = Hygiene-Handschuhe
G ants - G loves
Handsc hoe nen - Gua ntes
meias de higiene
nylonkesz tyu˝
Sıhhi eldiven
Rękawiczki ochronne
Gigieniheskie perhatki
Page 6
5
Geräteabbildung/Illustration of Parts/Illustration/Toestelafbeelding/Ilustración del
aparato/ Ilustrações de montagem/A készülék és tartozékai/Aletin görünümü/
Ilustracja urządzenia /
IzobraΩenie agregata i dopolnitel´nyx prinadleΩnostej
16
17
1514
13
18
20 21
22
23
2625
28
27
29
30
15
13
19
2
7
6
5
8
1
4
11
17
12
14
9
10
3
18
24
Page 7
6
Montage/Assembling the Appliance/Montage /Montage / Ilustraciones de
montaje / Montagem / Szerelési és kezelési ábrák / Montaj / Ilustracje do
montażu /
Mонтаж
H
K
W
J
Q R
25
26
31
14
I
2 L
clack“
„
18
22
Page 8

Wir gratulieren Ihnen zu einem guten
Kauf!
Nutzen Sie den vollen Gegenwert durch
richtigen Gebrauch.
Verwendungsmöglichkeiten
Der THOMAS Waschsauger kann als Staubsauger
zur Reinigung von Teppichen, Polstermöbeln, Glattböden und für die regelmäßige Wohnungspflege eingesetzt werden; er kann Schmutz ebenso wie Flüssigkeiten aufnehmen, z. B. macht er verstopfte Spülbecken
und andere Ausgüsse frei. Mit nur wenigen Handgriffen kann Ihr Waschsauger mit beiliegendem Standardzubehör zur Naßreinigung Ihrer Teppiche oder
Polstermöbel ausgerüstet werden.
Der THOMAS Waschsauger ist ein Mehrzweckprodukt. Im Sprühextraktionsbereich ist er für die Grundreinigung von Teppichen, Polstermöbeln sowie Hartböden vorgesehen und unter Verwendung der
Fensterwaschdüse eignet er sich auch zur Fensterreinigung. Beim Naßsaugen kommen nur Flüssigkeiten
auf Wasserbasis in Frage, und er darf niemals für
entflammbare Flüssigkeiten gebraucht werden. In seiner Staubsaugerfunktion ist er u. a. zur Beseitigung
von trockenem Schmutz und Staub von Teppichen,
Fußböden, Möbeln und Gardinen vorgesehen.
Montage-Beschreibung
Nehmen Sie das Gerät aus dem Karton, entfernen
Sie alles Packmaterial und identifizieren Sie die folgenden Teile und Funktionen auf den Zeichnungen
am Anfang dieser Gebrauchsanweisung, die Ihnen
helfen sollen, die nachfolgenden Hinweise zu verstehen.
Die für das Fahrwerk erforderlichen Teile werden aus
verpackungstechnischen Gründen in der Verpackung
lose beigefügt.
Lenkrollen montieren
A Verschlußschnapper (3) öffnen und Motorkopf
(2) abheben.
B Sprühmitteltank (28) und Reinigungsflüssigkeit
entnehmen. Behälter (1) mit der Öffnung nach
unten aufstellen.
C Um eine leichtere Montage zu erreichen, emp-
fehlen wir, die Stifte (30) an beiden Enden leicht
einzufetten.
Zuerst die Stifte (30) in den Behälterboden (1)
stecken, dann mit den Lenkrollen (4) zusammen
bis auf Anschlag eindrücken.
Den Behälter (1) mit den montierten Lenkrollen
(4) auf die Rollen stellen und eine Funktionsprüfung durchführen.
Motorkopf aufsetzen
D Motorkopf (2) so aufsetzen, daß die Flächen an
der Haube und dem Behälter übereinstimmen.
Anschließend die beiden Verschlußschnapper (3)
andrücken.
Saugschlauch anschließen
E Saugschlauch (13) in den Ansaug-Stutzen (8) so
eindrücken, daß die Markierungen von AnsaugStutzen und Sauganschlußstück übereinstimmen
und der Knopf einrastet.
Anschließend kann das gewünschte Zubehör
angeschlossen werden.
Zum Abnehmen des Schlauches das Schlauchanschlußstück drehend abziehen.
Saugrohrhalterung
F Saugrohr (14) kpl. mit Zubehör und Saug-
schlauch an der Geräterückseite einhängen.
Kabelaufbewahrung
G Nach dem Saugen kann die Netzanschlußleitung
(10), wie auf der Abbildung aufgezeigt, aufgewickelt und in die Kabelmulde eingehängt
werden.
Motorschutz-Filter
K Nach jedem Naßsaugen und Sprühextraktions-
arbeitsgang den Motorschutzfilter (33) auf Verschmutzung überprüfen und, falls nötig, reinigen.
Dazu das Schwimmerventil (38) in Pfeilrichtung
öffnen und den Motorschutzfilter aus der
Ansaugöffnung entnehmen. Den gereinigten
bzw. neuen Filter wieder einlegen und anschließend das Schwimmerventil aufsetzen.
Reinigungskonzentrat
Ihr THOMAS Waschsauger enthält 0,5 Liter ProTex
Reinigungskonzentrat. Hinweise zur Anwendung und
Dosierung entnehmen Sie bitte dem Flaschenetikett.
7
Page 9
Trockensaugen
Benutzen Sie Ihr AQUAFILTER-Gerät im
Trockensaugbetrieb niemals ohne Aquafilter,
Feinstaubtextilfilter, Filtervlies und
entsprechender Wasserfüllung.
Saugen Sie keine großen Mengen von Feinstaub,
z.B. Mehl, Kakaopulver, Zement usw.
Vorbereitung
A Bei gezogenem Netzstecker den Motorkopf (2)
abnehmen.
B Frischwassertank (28) entnehmen.
L
Den am Motorkopf (2) angebrachten Ansaugschlauch (37) in die dafür vorgesehene Halterung (36) drücken.
H Filtervlies (26) mittels Spannring (25) montieren
und mit den Drehklammern (31) sichern.
I 3-teiligen AQUA-Filter bis auf Anschlag
zusammenstecken und fest auf den
Ansaugstutzen aufschieben.
Achten Sie dabei auf die
Markierungen.
Der AQUA-Filter muß am Saugtonnenboden
einrasten und am Boden gleichmäßig aufliegen.
Füllen Sie 2 Liter klares Wasser in den
Saugbehälter.
J Feinstaubtextilfilter durch Umlegen des oberen
Randes in den Saugbehälter einhängen.
D Motorkopf (2) aufsetzen. Der Drehschalter am
Gerät muß auf 0” stehen.
G Netzanschlußleitung (10) anschließen.
Inbetriebnahme
Gerät einschalten
M Beim Arbeitsgang Trockensaugen” muß der
Drehknopf (7) auf das Symbol „Teppichdüse”
gestellt werden.
Kontrolleuchte (6) darf nicht aufleuchten.
Gerät ist betriebsbereit.
Reinigung und Pflege des AQUAFiltersystems
Aus Hygienegründen das AQUAFILTERSystem und den Saugbehälter nach jedem
Gebrauch entleeren, reinigen und trocknen.
Schmutziges Wasser und feuchte Teile
begünstigen die Vermehrung von Bakterien
und Pilzen.
Feinstaubtextilfilter je nach Verschmutzung mit einem
trockenen oder feuchten Tuch abwischen. Bei stärkerer
Verschmutzung mit klarem Wasser, ohne Wasch- und
Reinigungsmittelzusätze, auswaschen. Achten Sie darauf, dass der Filter beim nächsten Saugeinsatz ganz
durchgetrocknet ist.
Naßsaugen
Zusammenbau
A Bei gezogenem Netzstecker den Motorkopf (2)
abnehmen.
Achtung! Vor dem Saugen von Flüssigkeiten die
Filtereinheiten (26, 27 + 30) entnehmen.
L Das Schwimmerventil (38) stets sauber und gang-
bar halten. Es unterbricht automatisch das
Ansaugen, wenn der Behälter voll ist.
D Motorkopf (2) aufsetzen. Der Drehschalter am
Gerät muß auf „0” stehen.
G Netzanschlußleitung (10) anschließen.
Inbetriebnahme
Gerät einschalten
M Beim Arbeitsgang „Naßsaugen” muß der Dreh-
knopf (7) auf das Symbol „Teppichdüse” gestellt
werden.
Kontrolleuchte (6) darf nicht aufleuchten.
Gerät ist betriebsbereit.
Flüssigkeiten aus Behältern können direkt mit dem
Saugschlauch bzw. den Saugrohren aufgesaugt werden.
Vorsicht beim Absaugen aus Behältern
oder Becken, deren Flüssigkeitsspiegel
höher liegt und deren Füllinhalt größer ist
als das Fassungsvermögen des Saugbehälters. In diesem Fall würde bei vollem
Behälter und geschlossenem Schwimmerventil nach dem Saugheber-Prinzip weiter
Flüssigkeit nachfließen.
Deshalb in solchen Fällen nur Teilmengen absaugen
und zwischendurch den Saugbehälter entleeren.
Nach dem Saugen zuerst das Saugrohr aus der Flüssigkeit heben und danach erst den Motor abschalten.
Achtung! Benzin, Verdünnung, Heizöl usw. können
durch Verwirbelung mit der Saugluft explosive Dämpfe oder Gemische bilden.
Azeton, Säuren und Lösungsmittel können die am
Gerät verwendeten Materialien angreifen. Putz- und
Schmutzwasser mit handelsüblichen Haushaltsreinigern können unbedenklich aufgesaugt werden.
Nach dem Naßsaugen den Behälter und alle verwendeten Teile reinigen und trocknen lassen.
8
Page 10

9
Gebrauch des Sprühextraktionssystems
Vor der Teppich-Naßreinigung
Vergewissern Sie sich, daß alles, was Sie naß reinigen
wollen, auch dafür geeignet ist.
Sie sollten das Gerät nicht für zarte, handgewebte
oder farbunechte Teppiche benutzen.
Zur Prüfung geben Sie etwas Reinigungsmittellösung
auf einen weißen Lappen und reiben diesen an einer
weniger gut sichtbaren Stelle auf den Teppich. Zeigen
sich auf dem Lappen keine Farbspuren, kann von
einer Farbechtheit ausgegangen werden. Im anderen
Fall darf der Teppich nicht naß gereinigt werden.
Haben Sie Zweifel, wenden Sie sich diesbezüglich an
einen Fachhändler.
Vor jeder Teppich-Naßreinigung ist die gesamte
Fläche gründlich zu saugen.
Während des Reinigens und danach sollte der Raum
gut belüftet werden, um eine rasche Trocknung zu
ermöglichen.
Teppich naßreinigen / sprühextrahieren
A Bei gezogenem Netzstecker Motorkopf (2)
abnehmen.
B Bei Anwendung des Sprühextrakionssystems ist
darauf zu achten, daß der Sprühmitteltank (28)
eingesetzt ist.
N Geben Sie das Reinigungskonzentrat in den
Sprühmitteltank (28) und füllen Sie den Rest mit
Wasser auf. (Dosierhinweis auf Protex Flaschenetikett beachten.)
Verwenden Sie handwarmes Wasser (max.
30 °C). Höhere Temperaturen können dem
Gerät, aber auch Teppich und Polstermöbeln
schaden.
L Lösen Sie den sich im Motorkopf (2) befindlichen
Ansaugschlauch (37).
O Hängen Sie diesen, während Sie den Motorkopf
(2) aufsetzen, in die Reinigungsflüssigkeit.
D Verriegeln Sie den Behälter durch Andrücken
der beiden Verschlußschnapper (3).
Saug- und Druckschlauch anschließen
P Schieben Sie das Absperrventil (17) in die Auf-
nahme am Saugrohr. Anschließend stecken Sie
den Handgriff (11) in das Saugrohr (14). Befestigen Sie nun den Druckschlauch (19) mit den
Schlauchclipsen (15) am Saugschlauch (13).
E Danach wird der Saugschlauch (13) in den
Ansaugstutzen (8) so eingeschoben, daß die
Markierungen übereinstimmen und der Saugschlauch (13) einrastet.
Q Anschließend den Druckschlauch (19) in die
Schnellkupplung (5) am Motorkopf (2) fest eindrücken.
Schieben Sie nun das zweite Saugrohr (mit den
Einhängeösen) auf das bereits montierte Rohr.
S Montieren Sie die Sprühextraktionsdüse (18).
T
Den an der Düse befestigten Druckschlauch (12)
mit der Kupplung (39) am Absperrventil (17)
ansetzen und durch Drehen zur Verriegelung
bringen. Anschließend den Druckschlauch (12)
mit den kleineren Rohrclipsen (16) am Saugrohr
befestigen.
Der Drehschalter am Gerät muß auf „0” stehen.
G Netzanschlußleitung (10) anschließen.
Das Gerät ist nun betriebsbereit.
Gerät einschalten
U
Drehknopf (7) auf Sprühextraktionsstellung
drehen.
Die Kontrolleuchte (6) muß nun auf
-
leuchten.
Das Sprühextrakions-System
• Reinigungslösung mit Druck tief einsprühen
• Schmutz lösen und fasertief auswaschen
• Schmutzwasser kraftvoll absaugen und
Teppichfloor wieder aufrichten.
Alles in einem Arbeitsgang.
Saugrohr
Druckleitung
Arbeitsrichtung
Absaugen und
Aufrichten
Einsprühen
Lösen und Auswaschen
Page 11

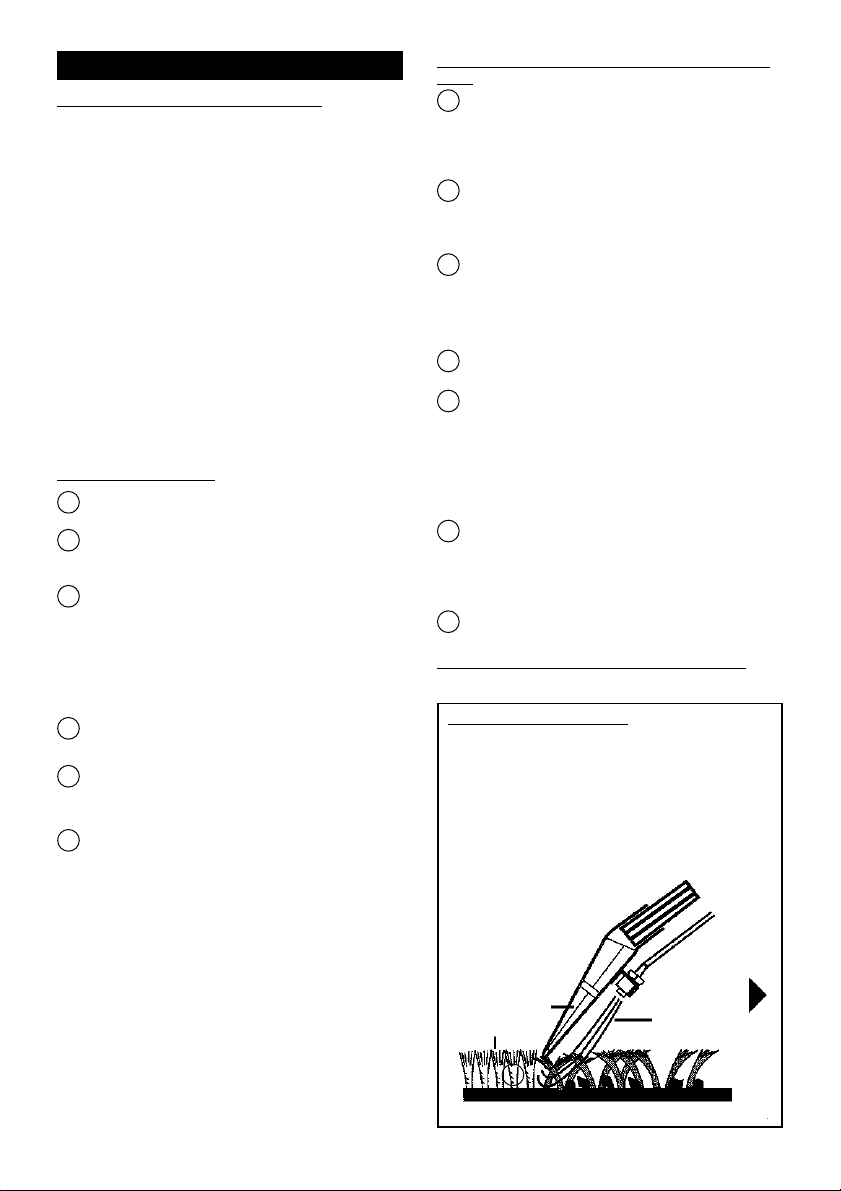
T Die Teppich-Sprühextraktionsdüse in einer Zim-
merecke auf den Teppich aufsetzen. Den Ventilhebel (40) am Griffstück drücken bis Reinigungslösung aufgesprüht wird. Dann die auf dem
Teppich aufliegende Düse in einer geraden Bahn
langsam über den Teppich ziehen.
Am Ende der Bahn oder bei Unterbrechungen
den Ventilhebel loslassen, um den Sprühstrahl zu
stoppen. Wenn die aufgesprühte Flüssigkeit
abgesaugt ist, die Düse abheben und mit leichter
Überlappung eine neue Bahn beginnen!
So kann Streifen für Streifen die gesamte Fläche
behandelt werden.
Sollten auf der gereinigten Bahn noch Flüssigkeitsspuren zurückbleiben, können diese Stellen
mit losgelassenem Ventilhebel (40) nochmals
abgesaugt werden.
Dank des durchsichtigen Oberteils der Saugdüse
können Sie selbst entscheiden, wann dieser Vorgang beendet ist.
V Bei stark verschmutzten Stellen können Sie mit
dem Gerät die doppelte Flüssigkeitsmenge auftragen, indem Sie in der Vorwärtsbewegung bereits aufsprühen und beim Zurückziehen sprühen
und saugen. Zusätzlich läßt sich durch Stellung
„nur Sprühen” eine Vorbehandlung durchführen.
Achten Sie darauf, daß nicht zu viel Flüssigkeit
auf dem Teppich verteilt wird, weil hierdurch
Wellen oder Beulen im Teppich entstehen können, die sich erst nach längerem Trockenvorgang
wieder zurückbilden.
Damit ein Nachlaufen der im Saugrohr befindlichen Flüssigkeit vermieden wird, sollten Sie das
Saugrohr noch bei laufendem Motor schräg nach
oben halten.
Danach erst Gerät ausschalten.
Achtung!
• Wenn der Teppich zu einem früheren
Zeitpunkt shampooniert wurde, kann
es bei erstmaligem Gebrauch des
Sprühextraktionsgerätes zu stärkerer
Schaumbildung im Schmutzbehälter
kommen. Falls Schaum aus dem Luftauslaß heraustreten sollte, schalten Sie
das Gerät ab und entleeren den
Schmutzbehälter. Um weitere Schaumbildung zuvermeiden, geben Sie eine
Tasse Essig in den Schmutzbehälter.
Erhöhte Schaumbildung ist nach einmaliger Grundreinigung mit dem
THOMAS ProTex Reinigungskonzentrat
ausgeschlossen, da dieses mit einem
speziellen Schaumstop ausgerüstet ist.
• Solange der Teppich noch feucht ist,
sollten Sie ihn nicht begehen.
W
Den Hartbodenadapter (22) wie im Bild dargestellt mit der Gummilippe nach vorne zeigend in
Pfeilrichtung auf die Sprühex-Teppichdüse (18)
bis auf Anschlag aufschieben.
Jetzt können Sie Ihre glatten Keramik-, Stein- und
Kunststoffböden in einem Arbeitsgang reinigen
und trocknen.
X
Zur Reinigung Ihrer Polstermöbel oder Autositze
verwenden Sie die Polstersprühextraktionsdüse (20).
Die Polstersprühextraktionsdüse (20) wird direkt
auf das Absperrventil (17) aufgeschoben und
durch Drehen der Kupplung (39) wird der Druckschlauch am Ventil befestigt.
Achten Sie bei Polstern darauf, daß nicht zuviel
Flüssigkeit aufgetragen wird, da je nach Unterbau mit einer längeren Trocknungszeit zu rechnen ist.
Reinigungsvorgang siehe Teppichreinigung.
Netzstecker ziehen.
R Vor dem Abnehmen des Motorkopfes (2) den
Druckschlauch (19) lösen. Betätigen Sie dazu die
Auslösetaste an der Kupplung (5).
A Motorkopf (2) vom Gerät abnehmen und auf
eine Auffangschale absetzen, um Verunreinigung
durch abtropfendes Wasser zu vermeiden.
B Sprühmitteltank (28) entnehmen und entleeren.
Schmutzbehälter entleeren und gründlich ausspülen.
O Zur Pflege der Pumpe und Ventile den Sprühmit-
teltank mit klarem Wasser füllen, in den Behälter
setzen und den Motorkopf (2) wieder aufsetzen.
Das Sprühsystem auf glattem Boden oder über dem
Spülbecken in Betrieb nehmen.
Anschließend die beiden Behälter reinigen und die
demontierten Teile gut trocknen lassen.
Nach der Naßreinigung
Polsterreinigung
Hartboden naßreinigen
10
Page 12
Gerätereinigung und Pflege
Vor dem Reinigen stets den Netzstecker ziehen!
Motorgehäuse nie in Wasser tauchen!
Motorgehäuse und Behälter mit feuchtem Tuch abwi-
schen und nachtrocknen.
Behälter und verwendete Zubehörteile müssen nach
jedem Naßsaugen mit warmem Seifenwasser gereinigt werden, insbesondere nach Aufnahme von klebrigen Flüssigkeiten.
Hilfe bei evtl. Störungen
Falls Ihr Gerät wider Erwarten einmal nicht zufriedenstellend funktioniert, brauchen Sie nicht gleich den
Kundendienst einzuschalten. Bitte prüfen Sie zunächst,
ob die Störung nur kleine Ursachen hat:
Wenn beim Saugen Staub austritt:
• Ist das Filtersystem entsprechend der Anleitung
montiert?
• Wurde ein Original-Wasserfilter/Filtervlies ver-
wendet?
Wenn die Saugkraft allmählich nachläßt:
• Ist der Schmutzbehälter voll?
• Sind die Filterporen durch Feinstaub oder Ruß ver-
stopft?
• Sind Düse, Verlängerungsrohr, Saugschlauch oder
Wasserfilter durch Schmutz verstopft?
(Saugschlauch bei eingeschaltetem Gerät auseinanderziehen - Dehnung lockert Verstopftes).
• Ist der Motorschutzfilter (33) verschmutzt?
Wenn die Saugkraft plötzlich nachläßt:
• Hat das Schwimmerventil die Saugluft gestoppt ?
Das kann passieren bei extremer Schrägstellung
oder beim Umkippen des Gerätes. Sauger ausschalten – der Schwimmer fällt nach unten – das
Gerät ist wieder betriebsbereit.
Wenn der Motor nicht läuft:
• Ist die Sicherung intakt und Spannung da ?
• Sind Kabel, Stecker und Steckdose intakt ?
• Vor Prüfung Stecker ziehen.
• Niemals selbst den Motor öffnen !
Wenn keine Reinigungsflüssigkeit austritt:
• Ist die Pumpe eingeschaltet (Kontrolleuchte [6] muß
aufleuchten)?
• Ansaugfiltersieb reinigen (37)
• Ist Reinigungsflüssigkeit im Sprühmitteltank?
• Hängt der Ansaugschlauch frei im Sprühmitteltank ?
• Ist die Sprühdüse verstopft ?
Falls die Sprühdüse einmal verstopft ist, Düse einige
Zeit ins Wasser legen. Danach kräftig durchblasen.
Der Umwelt zuliebe bitte beachten:
Verpackungsmaterial, ausgediente Geräte und entleerte Reinigungs-Konzentrat-Flaschen nicht einfach
wegwerfen, sondern der Wiederverwertung
zuführen.
Den zuständigen Recyclinghof bzw. die nächste Sammelstelle bitte bei Ihrer Kommunalverwaltung erfragen.
Nur mit Wasser verdünntes Reinigungsmittel darf
über die Kanalisation entsorgt werden.
In konzentrierter Form ist das Reinigungsmittel nur
beim zuständigen Recyclinghof bzw. der nächsten
Sammelstelle abzugeben.
Kundendienst:
Fragen Sie Ihren Händler nach der Adresse oder
Telefon-Nummer des für Sie zuständigen THOMASKundendienstes.
Bitte geben Sie Ihm zugleich die Angaben vom
Typenschild auf der Rückseite Ihres THOMAS
Waschsaugers an.
Zur Aufrechterhaltung der Sicherheit des Gerätes
sollten Sie Reparaturen, insbesondere an stromführenden Teilen, nur durch Elektro-Fachkräfte
durchführen lassen. Im Störungsfall sollten Sie
sich daher an Ihren Fachhändler oder direkt an
den Kundendienst wenden.
11
CE-KONFORMITÄTSERKLÄRUNG
Wir erklären in alleiniger Verantwortung, dass dieses
Produkt mit den folgenden Normen oder normalen
Dokumenten übereinstimmt.
– EG-Niederspannungsrichtlinie (73/23/EWG),
geändert durch 93/68/EWG
– EG-Richtlinie Elektromagnetische Verträglichkeit
(89/336/EWG), geändert durch 91/263/EWG,
92/31/EWG, 93/68/EWG
Angewandte harmonisierte Normen:
DIN EN 60335-1, DIN EN 60335-2-2;
DIN EN 61000-3-2: 1995; DIN EN 61000-3-3: 1995;
DIN EN 55014-1: 1993; DIN EN 55014-2: 1997
Page 13

Important GB
Please read through the information
contained in this instructions booklet
carefully. It gives important advice on the
safety, assembly, use and maintenance of
the THOMAS SUPER 30 S Aquafilter. Retain
the instructions booklet in a safe place for
future reference and, if applicable, pass it
on to the subsequent owner of the
appliance.
The manufacturer will not be liable if the
instructions specified below pare not
observed. Do not put the THOMAS
SUPER 30 S Aquafilter to improper use, i.e.
do not use the appliance other than for the
purposes it is meant for. It is intended for
household use only.
• The voltage data on the appliance’s rating plate
must conform to the power supply.
• Do not operate the appliance if:
– the mains cable is damaged
– the appliance shows clear signs of damage
– the motor block has been dropped.
• Check the appliance for any damages which may
have occurred during transport.
• Dispose of the packaging in accordance with local
regulations.
• Never leave the appliance switched unattended
and make sure that children do not play with the
appliance.
• Modifications to the appliance can endanger your
safety and health. Therefore, repairs to the
appliance should be carried out by an authorised
engineer only.
• Never operate the appliance in rooms where
inflammable materials are stored or where gases
have formed.
• Extreme care is required when vacuuming stair
carpets with your appliance. Ensure that the
vacuum cleaner stands firmly on the step and take
care that the flexible hose is not stretched beyond
its actual length. When using the vacuum cleaner
on stairs, always ensure that you hold the
appliance steady with one hand.
• Do not use the washing vacuum cleaner for dry
vacuuming it the filter system is not fitted in
accordance with the instructions.
• Warning! This vacuum cleaner is not suitable for
vacuuming noxious substances.
• Do not vacuum solvent liquids, such as paint
thinner, oil, petrol or corrosive liquids.
• Do not leave the appliance in the open and do not
expose directly to oisture.
• Do not allow nozzles and tubes (when the
appliance is switched on) to come within the
proximity of the head - danger for eyes and ears,
for example.
• Never unplug the appliance by pulling at the cable,
but only by removing the plug directly from the
socket.
• Ensure that the mains cable is not exposed to either
heat or chemical substances, nor that it is pulled
across sharp edges or surfaces.
• If the connecting cable of this equipment unit is
damaged, it must be replaced by the manufacturer
or by his customer service department or by other
similarly qualified persons in order to prevent risks.
• Do not store the appliance next to a hot stove or
heater.
• Never repair the SUPER 30 S yourself, but have all
repairs carried out by an authorised customer
service station only.
• Only original accessories should be used.
• In the interests of your own safety, avoid the use of
extension cables in bathrooms or shower rooms.
• Pull out the plug
– if the appliance malfunctions during operation
– before cleaning and maintenance
– after use
– when changing the filter.
• Before disposal of the SUPER 30 S, cut off the mains
cable.
• Never point the jet of cleaning solution at plug
sockets or electrical appliances.
• After vacuuming liquids or spray-extracting, empty
the collecting bin immediately.
• Chemicals (spray-extraction cleaning solution) do
not belong in the hands of children.
• Important! Correct functioning of the appliance
and cleansing efficiency can be ensured only when
the original THOMAS cleaning solution has been
used.
• Avoid direct contact with the cleaning solution if
you have sensitive skin.
• Before carrying out any work
whatsoever on the appliance, turn the
control knob to the “off“ position and
pull out the plug.
• If the cleaning concentrate comes in contact with
mucous membranes (eyes, mouth, etc), immediately
rinse with water.
12
Page 14

Congratulations on your new
purchase!
Enjoy your appliance to the full through
correct usage.
Applications
You are now the owner of one of the most efficient
and versatile appliances available, which can easily be
adapted for any one of its four cleaning functions. The
THOMAS SUPER 30 S Aquafilter can be used as a
vacuum cleaner for cleaning carpets, upholstery,
smooth floors and for regular household care; it can
vacuum dirt as well as liquids, e.g. it can clear blocked
sinks and drains. With only a few simple accessories, it
can be used for shampooing your carpets or
upholstery.
The THOMAS SUPER 30 S Aquafilter is a multi-purpose
product. In conjunction with the cleaning solution, the
spray-extraction function enables you to clean carpets,
upholstery and hard floors.
The window-cleaning
nozzle also renders it suitable for cleaning windows.
The wet vacuuming mode is suitable for picking up
water-based liquids only and it should never be used
for vacuuming inflammable liquids. As a vacuum
cleaner, it is intended for the removal of dry dirt and
dust from carpets, floors, furniture and curtains.
Unpacking the appliance
Unpack the appliance from the carton, remove any
packaging and identify the following parts and
functions in the diagrams at the beginning of this
booklet to gain a better understanding of the
instructions given below.
The letters indicated below refer to the diagrams on
pages 4 and 6.
Assembly instructions
The parts required for the chassis are to be found
loosely packed in the carton.
Assembling the castor wheels
A
Undo the snap-on fasteners (3) and lift off the
motor block (2).
B
Take out the extraction liquid tank (28) and
cleaning solution. Turn the collecting bin (1) upside
down, i.e. with the opening facing the floor.
C
To facilitate assembly, we recommend lightly
greasing the pegs at both ends.
First insert the pegs (30) in the base of the
collecting bin (1), then push them in, together with
the castors (4), as far as they will go.
Turn the collecting bin (1) back over onto the
castors (4) and check that these have been
correctly assembled by moving the collecting bin
(1) back and forth in all directions.
Fitting the motor block
D
Place the motor block (2) on the collecting bin (1),
making sure that the surfaces of both parts
correspond. Secure the motor block (2) by means
of both snap-on fasteners (3).
Connecting the flexible hose
E
Insert the flexible hose (13) in the suction socket
(8) in such a manner that the markings on both
the suction socket and the hose connecting piece
correspond and the button clicks into place. Then
attach the desired accessories.
Remove the hose by turning the hose connecting
piece and slowly with drawing the hose.
Suction tube holder
F
The suction tubes (14) complete with accessories
and flexible hose (13) can be hooked into the
fixtures at the back of the appliance.
Cable storage
G
After use, the mains cable (10) can be wound
loosely in the hand and hung over the notch in
the carrying handle, as shown in the illustration.
Motor protection filter
J
After each wet suction and spray extraction
process, check the motor protection filter (33) for
contaminations and clean if required. For this,
open the float valve (38) in the direction of the
arrow, and take the motor protection filter from
the suction opening.
Replace the cleaned or new filter and then put
the float valve back in place.
Concentrated cleaning solution
Your THOMAS SUPER 30 S Aquafilter contains 0.5 l of
Protex cleaning concentrate. Please see bottle label
for instructions for use and dosage.
13
Page 15
Dry vacuuming
Never use your AQUAFILTER appliance in dry
vacuum mode without the Aquafilter, the fine
particle textile filter, tissue filter and an
appropriate water level.
Do not vacuum up large quantities of particle
dust, e.g. flour, cocoa powder, cement, etc.
Preparation
A Remove the motor head (2) with the cable
disconnected from the mains plug.
B Remove fresh water tank (28).
L Press the suction hose (37) fitted to the motor
head (2) in the holder (36) provided for this
purpose.
H Fit tissue filter (26) by means of the clamping ring
(25) and fasten with turning clips (31).
I Connect up the three-piece AQUA filter, pushing
it together until the two parts fit snugly, and push
it firmly onto the suction socket.
Note the marker
guides!
The AQUA filter has to snap into place on the
floor of the suction canister and has to lie there
evenly.
Fill 2 litres of clear water into the collecting bin.
J Hang the fine particle filter in the collecting bin
by turning down the top edge.
D Mount motor head (2). The rotary switch on the
appliance must be set to “0”.
G Connect up mains connection cable (10).
To put into operation
Switch on appliance
M The rotary knob (7) must be set to the carpet
nozzle symbol when dry vacuuming.
The pilot lamp (6) should not be lit up.
Appliance is ready to use.
Cleaning and care of the AQUA filter
system
For reasons of hygiene, empty, clean
and dry the AQUAFILTER system and the
collecting bin after each use. Dirty
water and damp parts will promote the
growth of bacteria and mildew.
Clean the fine particle filter – according to how dirty it
is – with a dry or damp cloth. If it is very dirty, clean it
out with clear water, without adding any detergents or
cleaning fluids. Please make sure that the filter is
completely dry before next using the vacuum cleaner.
Wet vacuuming
Assembly
A Remove the motor head (2) after connection
cable has been disconnected from the mains
plug.
Caution! Remove the filter unit (26, 27 + 30)
before vacuuming liquids.
L Always ensure that the float (38) is kept clean and
in good condition. It acts as a safety device and
automatically interrupts the flow of air when the
collecting bin is full.
D Put the motor block (2) back in position. The
control knob on the appliance must be set at „0”.
G Plug the appliance into a mains socket.
Switching on the appliance
M
When using the appliance in the wet vacuuming
mode, the control knob (7) must be set at the
„carpet + floor nozzle" symbol.
The pilot lamp (6) should not be lit up.
The appliance is ready for use.
Liquids can be directly vacuumed out of containers
with either the vacuum hose or the hose with a section.
Take care when vacuuming liquids from
high-sided containers or basins, where the
quantity level exceeds the liquid capacity
of the collecting bin. Remember that, in
such a case, the liquid will continue to flow
from the container even if the collecting
bin is full and the float has stopped the
suction flow of the appliance.
Therefore, vacuum only small quantities of liquid at a
time and empty the collecting bin before switching on
again.
Always lift the suction tube out of the liquid before
switching off the motor.
Warning! If petrol, paint thinner, fuel oil etc. are allowed to mix with the suction air flow, explosive fumes
or compounds may be formed.
Acetone, acids and solvents may attack the materials
on your appliance. It is quite safe to vacuum water
which contains ordinary household cleaning agents.
After vacuuming liquids, the collecting bin and all
accessories used should be wiped clean and left to dry.
14
Page 16
Operating the spray-extraction system
Before spray-extraction cleaning
Make sure that what is to be cleaned by spray-extraction is suitable for this purpose.
Do not use the appliance for delicate, hand-woven or
non-fast carpets.
Test the colour-fastness of your carpet by pouring a
little cleaning solution onto a white cloth and rubbing
this onto a normally hidden section of the carpet. If
there are no traces of dye on the cloth, it can be assumed that the carpet is colour-fast.
However, if dye comes off onto the cloth, do not clean the carpet by spray-extraction.
If you are in doubt, contact a specialist dealer.
Before shampooing your carpet, vacuum-clean the
whole area thoroughly.
Ensure that the room is well-aired during and after
spray-extraction cleaning to enable the carpet to dry
quickly.
Carpet shampooing
A Pull out the plug and lift off the motor block (2).
B
When using the appliance in the spray-extraction
mode, ensure that the extraction liquid tank (28)
is inserted in the collecting bin.
N Pour the cleaning concentrate into the sprayer
tank (28) and fill up with water. (Observe the
dosing instructions on the lable of the Protex
bottle.)
Use lukewarm water (max. 30°C) only. Higher
temperatures can damage not only the appliance, but also the carpet and upholstery.
L Detach the cleaning solution tube (37) from its
fixture in the motor block (2).
O While putting the motor block (2) back on the
collecting bin, let the cleaning solution tube (37)
dangle down into the cleaning solution.
D Secure the motor block on the collecting bin by
means of both snap-on fasteners (3).
Connecting the flexible hose and delivery
tube
P Push the shut-off valve (17) in the mount on the
suction tube. Afterwards push the hand grip (11)
in the suction tube (14). Now fasten the pressure
hose (19) to the suction hose (13) with the hose
clips (15).
E Then insert the flexible hose (13) in the suction
socket (8) in such a manner that the markings on
both correspond and the button audibly clicks
into place.
Q Subsequently, insert the delivery tube (19) firmly
into the coupling piece (5) on the motor block (2).
Now attach the second suction tube (the one with
fixture studs) to the suction tube which is already
mounted.
S Attach the spray-extraction carpet shampoo
nozzle (18).
T Mount the pressure hose (12), fasten to the
nozzle with the coupling (39) in the shut-off valve
(17) and turn to lock in position. Afterwards
fasten the pressure hose (12) to the suction tube
by means of the smaller tube clips (16).
The control knob on the appliance must be set at
“0”.
G Plug the appliance into a mains socket.
The appliance is now ready for use.
Switching on the appliance
U Turn the control knob (7) to the „spray-extrac-
tion" symbol.
The pilot lamp (6) should now be lit up.
15
The spray-extraction system:
• spray pressurised jets of cleaning solution
• breaks down dirt and cleanses deep into the
fibres
• extracts dirty water powerfully and lifts up
carpet pile.
All in a single operation.
suction tube
delivery tube
direction of work
extracts and
raises
sprays
dissolves and cleanses
Page 17
T Place the spray-extraction carpet shampoo nozz-
le on the carpet in a corner of the room. Press
the control trigger (40) on the handgrip (11) until
cleaning solution sprays onto the carpet. Then
slowly draw back the upright nozzle in a straight
line over the carpet.
On completion of a lane or when interrupting
operation, release the trigger to stop the jet
spray flow of cleaning solution. When the sprayed on liquid has been vacuumed off, raise the
nozzle and, with a slight overlap, begin a new
lane.
In this way, the entire area can be covered strip
by strip.
If there are still traces of liquid on the cleaned
strip of carpet, these areas can be vacuumed
over again, but make sure that the trigger control (40) is released!
As the upper part of the nozzle is transparent,
you can judge for yourself by the colour of the
extracted water when to end the spray-extraction process.
V Badly soiled areas can be pre-treated by turning
the control knob to the „spray only" position. Aim
the nozzle at the area to be treated and press
the trigger control to emit a jet spray of cleaning
solution. Leave to work in for a short time, then
spray-extract as described above (remember to
turn the control knob back to the „spray-extraction” position U).
Take care not to spray too much fluid onto the
carpet as this can result in ripples or lumps forming, which only disappear again after a prolonged drying period. When vacuuming liquids,
avoid spilling the residual liquid in the vacuum
hose or tube by holding the hose or tube up with
the motor still running, and then switch off.
Important!
• If the carpet has been shampooed
before, there may occur a stronger foam
development during the first use of your
spray-extraction system. Should foam
emerge from the air outlet, switch off the
appliance and empty the collecting bin.
To avoid further development of foam,
add one cup of vinegar into the collecting
bin.
Increased development of foam is
impossible after having used the
THOMAS SUPER 30 S Aquafilter with its
Original Thomas ProTex cleaning
solution for one time, since it includes a
special foam stopper.
• Do not walk on the carpet while it is still
damp.
W
Slide the hard floor adaptor (22) onto the sprayextraction carpet shampoo nozzle (18).
Now you can wash and dry smooth ceramic, stone, synthetic or wooden floors in one single operation.
X To shampoo upholstery or car seats, use the
spray-extraction upholstery shampoo nozzle (20).
Take care not to apply too much fluid to uphol-
stery as, depending on the type of padding, a
lengthy drying period can be expected.
The spray-extraction upholstery shampoo nozzle
(20) is fitted directly onto the spray diffusor control (17). The delivery tube is secured at the valve
by turning the coupling piece (39).
Detach the delivery tube (12) by turning the coupling piece (39).
Operate as described under “Carpet shampooing”.
Pull out the plug.
R Before removing the motor block (2), detach the
delivery tube (19). Press the release button on the
quick-action coupling (5). The connecting rod is
ejected automatically.
A Remove the vacuum cleaner's motor head (2)
and place onto shallow container to avoid
getting the intended surface dirty from residual
water.
B Take out the extraction liquid tank (28) and
empty. (Any unused cleaning solution can be
stored in a suitable receptacle.) Empty the
collecting bin (1) and wash out thoroughly.
O
Care for the pump and valves by filling the
extraction liquid tank with clear water, putting it in
the collecting bin and replacing the motor block (2).
Operate the spray-system on a smooth floor or over
the sink.
Subsequently, clean both receptacles and leave the
dismantled parts to dry thoroughly.
After spray-extraction cleaning
Upholstery shampooing
Washing hard floors
16
Page 18

Care and maintenance
Before cleaning always disconnect the connection
cable from the mains plug!
Never immerse motor housing in water!
Wipe over motor housing and tank with moist cloth
and rub dry.
Tank and used accessories have to be cleaned with
warm soapy water every time the appliance is used
for wet vacuuming, more especially after removing
sticky liquids.
If unexpected difficulties arise
Before contacting your dealer, check whether the fault
is due to one of the following minor causes:
Dust escaping from suction socket:
• Has the filter system been fitted in accordance with
the instructions?
• Has an original water filter/tissue filter been used?
Gradual reduction in suction power:
• Is the collecting bin full?
• Are the pores of the filter clogged up by dust or
soot?
• Is there a blockage in the nozzle, extension tube,
flexible hose or aquafilter? (Stretch the flexible hose
while the appliance is switched on – this will loosen
the obstruction.)
• Is the protective motor filter (33) dirty?
Sudden reduction in suction power:
• Has the float stopped the flow of air? This can happen if the appliance is standing at a slant or if the
appliance falls over. Turn off the vacuum cleaner –
the float will fall back into place – the appliance is
ready for use again.
The motor does not function:
• Has the fuse blown?
• Is there damage to the mains cable, plug or socket?
Pull out the plug before checking!
• Never open the motor yourself!
Cleaning solution does not flow out:
• Clean the filter mesh at the end of the cleaning
solution tube (37).
• Is the pump switched on? (The pilot lamp [6] should
be lit up.)
• Is there cleaning solution in the extraction liquid tank?
• Is the cleaning solution tube dangling freely into the
extraction liquid tank?
• Is the delivery tube nozzle blocked?
(In this case, unscrew the cap nut and place the
nozzle in water for a time. Subsequently, blow
vigorously through the nozzle. When replacing the
nozzle, ensure that the jet spray opening stands
parallel to the suction tube.)
For the sake of the environment, please
note:
Do not simply throw away packing materials and
discarded appliances, but bring them to a recycling
depot.
Details about the appropriate recycling depot or the
nearest collection point can be obtained from your
local council offices.
Only cleaning agents which have been diluted with
water may be disposed of in the sewage system.
If the cleaning agent is in concentrated form, it must
be properly disposed of at the nearest recycling
center or at the next hazardous waste collection
center.
Customer Service
Ask your dealer for the address or telephone number
of your nearest THOMAS Customer Service.
Specify model number and type when
contacting your dealer - you will find these
details on the rating plate located at the
back of the SUPER 30 S Aquafilter.
To maintain the safety of your appliance,
you should have repairs, especially on live
parts, carried out by a trained electrician
only. In the event of a fault, you should
therefore approach your dealer or the
THOMAS Customer Service directly.
17
CE Declaration of Conformity
We declare upon our sole liability that this product
conforms to the following norms or norm documents.
EC low voltage guideline (73/23/EEC),
modified by 93/68/EEC
EC guideline electromagnetic compatibility
(89/336/EEC), modified by 91/263/EEC, 92/31/EEC,
93/68/EEC
Applied harmonised norms:
DIN EN 60335-1, DIN EN 60335-2-2;
DIN EN 61000-3-2: 1995; DIN EN 61000-3-3: 1995;
DIN EN 55014-1: 1993; DIN EN 55014-2: 1997
Page 19

18
Avis importants F
Lisez s.v.pl. soigneusement les
informations mentionnées dans le présent
mode d'emploi. Ce sont des indications
importantes pour la sécurité, le montage,
l'utilisation et l'entretien de l'appareil.
Conservez ce mode d'emploi et
transmettez-le, le cas échéant, aux
prochains acquéreurs. Le producteur
refuse toute responsabilité, si les
instructions ci-dessous ne sont pas
respectées. L'appareil ne peut pas faire
l'objet d'abus, c. à.d. être utilisé à des fins
pour lesquelles il n'est pas destiné. Il sert
uniquement à l'usage domestique normal.
• La tension d’alimentation doit correspondre aux
indications données sur la plaque signalétique.
• Ne pas enclencher l'appareil si:
– le câble d'alimentation est endommagé,
– l'aspirateur présente des endommagements
visibles,
– le bloc-moteur est tombé par terre.
• Contrôlez, si l'appareil ne présente pas des dégâts
de transport.
• Pour l'élimination de l'emballage, conformez-vous
aux prescriptions locales.
• Ne jamais laisser l’appareil allumé sans surveillance
et veiller à ce que les enfants ne jouent pas avec
l’appareil.
• Des transformations apportées à l'appareil
peuvent mettre votre sécurité et votre santé en
danger. Les réparations sont en conséquence
uniquement à faire exécuter par des services
techniques spécialisés.
• N'utilisez jamais l'aspirateur dans des chambres où
se trouvent des matériaux inflammables ou dans
des pièces où se sont formés des gaz.
• Faites particulièrement attention quand vous
nettoyez les marches d'escaliers. Rassurez-vous que
le Aspirateur eau et poussière THOMAS soit posé
fermement sur la marche d'escalier et que le
flexible ne soit pas tendu au-delà de sa longueur
effective. Vous devez tenir l'appareil toujours d'une
main, quand vous l'utilisez dans les marches
d'escaliers.
• Ne pas utiliser l’aspirateur pour une aspiration à
sec, si le système de filtres n’a pas été monté en
conformité avec les instructions.
• Attention! Cet aspirateur n'est pas apte à
aspirer des poussierès dangereuses pour la santé.
• Ne jamais aspirer des liquides contenant des
dissolvants comme p. ex. les diluants de couleurs,
les huiles, la benzine, etc., ou encore des liquides
corrosifs.
• Ne pas laisser l'aspirateur au-dehors; il est à
préserver de l'humidité.
• Les suceurs et tuyaux ne sont pas à porter (quand
l'appareil est en marche) à proximité de la tête, il
pourrait en résulter un danger p.ex. pour les yeux
et les oreilles.
• Ne jamais retirer la fiche de la prise de courant en
tirant sur le câble, mais bien sur la fiche même.
• Veillez à ce que le câble d'alimentation ne soit
jamais exposé à la chaleur ou à des liquides
chimiques ou tiré par-dessus des arrêtes et surfaces
tranchantes.
• Si le câble de branchement de cet appareil devait
être endommagé, il doit être remplacé par le
fabricant ou par son service après-vente ou encore
par une autre personne qualifiée pour éviter tous
risques.
• Ne pas garder lè Aspirateur eau et poussière
THOMAS à proximité d'appareils de chauffage.
• Ne réparez jamais vous-même l'appareil.
Confiez ce travail à un service technique agréé.
• Utiliser uniquement les accessoires originaux.
• Dans l'intérêt de votre propre santé, n'utilisez pas
des câbles-rallonges dans les pièces humides.
• Retirer la fiche:
- lors de la marche anormale de l'appareil,
- avant tout nettoyage et entretien,
- après utilisation,
- lors de chaque changement de filtre.
• Avant l'élimination définitive du Aspirateur eau et
poussière coupez
s.v.pl. son câble d'alimentation.
• Ne dirigez jamais le jet d'eau de nettoyage sur les
prises de courant ou les appareils électriques.
• Videz la cuve immédiatement après l'aspiration de
liquides ou l'injection-extraction.
• Préservez les enfants des produits chimiques
(produit nettoyant pour l'injection-extraction).
• Attention! La bonne marche de l'appareil ainsi
que son efficacité de nettoyage sont seulement
assurés si vous vous servez du liquide nettoyant
Thomas ProTex original.
• Il est conseillé aux personnes à la peau sensible
d'éviter le contact avec le produit nettoyant.
• Avant d'effectuer le moindre travail à
l'appareil, mettez l’interrupteur sur la
position “0” et retirez la fiche.
• Si par mégarde le concentré de nettoyage entre
en contact avec les muqueuses (oeil, bouche,
etc. . . .), il faut immédiatement rincer
abondamment a l'eau claire.
Page 20

19
Vous avez effectué un excellent achat!
Nous vous en félicitons.
Profitez pleinement de ses services par un
usage adéquat.
Possibilités d'emploi
Vous possédez maintenant un des appareils les plus
efficaces et les plus polyvalents actuellement offerts
sur le marché, qui s'adapte facilement à chacune de
ses 4 fonctions de nettoyage. Le Aspirateur eau et
poussière THOMAS peut s'utiliser comme aspirateur
pour le nettoyage des tapis, fauteuils, sièges, sols durs
et pour l'entretien régulier de votre appartement. Il
aspire la poussière et autres saletés ainsi que les
liquides; il débouche p. ex. les éviers et siphons. Muni
de quelques accessoires simples, il servira à
shampouiner vos tapis, fauteuils etc.
Le Aspirateur eau et poussière THOMAS est un
appareil universel. En position injection-extraction il
nettoie vos tapis, fauteuils, sièges ainsi que les sols
durs en utilisant le nettoyant recommandé. Avec la
buse lavage, il peut également être utiliser pour le
nettoyage des vitres.
En position aspiration de liquides, il n'est destine qu'à
l'enlèvement de liquides à base d'eau. L'appareil ne
peut servir en aucun cas à l'aspiration de liquides
inflammables. En mode aspiration de matières sèches,
il n'est destiné qu'à l'aspiration de poussières et de
saletes des tapis, planchers, meubles, rideaux etc.
Deballage de l'aspirateur
Sortir l'appareil du carton, retirer le materiél d'emballage et identifier les différentes pièces et fonctions, en
consultant les illustrations du début de ce livret, afin
de bien comprendre les instructions qui suivent.
Les lettres suivantes se rapportent aux illustrations des
pages.
Description du montage
Assemblage du Aspirateur eau et poussière THOMAS.
Les composants du socle sont places séparément dans
l'emballage.
Montage des roulettes
A Ouvrir les poignées de verrouillage (3) et retirer
le bloc-moteur (2).
B Retirer le réservoir pour liquide nettoyante (28) et
le nettoyant liquide. Placer la cuve (1) à l'envers,
donc son ouverture vers le bas.
C Pour faciliter le montage, nous conseillons de
graisser légèrement les extremités des chevilles
(30).
Placer d'abord les chevilles (30) jusqu'à la butée
dans leur logement du fond de la cuve (1).
Enfoncer ensuite les roulettes (4) et les chevilles
(30) jusqu'à encliquetage.
Retourner la cuve (1) pour la placer surles
roulettes (4) montées et faire un essai de
fonctionnement.
Placement du bloc-moteur
D
Mettre en place le bloc-moteur (2) de façon à ce
que les parties planes du capot et de la cuve
soient mises en concordance. Ensuite caler avec
les poignées de verrouillage (3).
Raccordement du flexible
E
Introduire le flexible (13) dans la bouche
d'aspiration (8) de façon à ce que les repères du
flexible et de la bouche d'aspiration soient mis en
concordance et que le bouton-arrêtoir
s'encliquette. Pour enlever le flexible, tirer sur le
flexible en le tournant vers la gauche et la droite.
Ensuite vous pouvez raccorder les accessoires
désirés.
Porte-tuyau
F
Accrocher le tuyau (14) avec le flexible (13) et
son accessoire au dos de l'aspirateur.
Porte-câble
G
Après l'aspiration, enrouler le câble (10) pour le
pendre, comme indiqué à la reproduction, dans
l'encoche de la poignée du capot.
Filtre de protection moteur
J
Après chaque aspiration par voie humide et
operation d'extraction à pulvérisation, vérifier si
le filtre de protection moteur (33) est encrassé et,
si nécessaire, le nettoyer. Pour ce faire, ouvrir la
soupape à flotteur (38) dans le sens indiqué par
la flèche et prélever le filtre de protection moteur
de l'orifice d'aspiration. Remettre en place le
filtre nettoyé ou nouveau et ensuite poser la
soupape à flotteur dessus.
Concentré de nettoyage
Votre Aspirateur eau et poussière Thomas contient 0,5
litre de produit de nettoyage concentré Protex. Quant
aux instructions d'application et dosage, se reporter à
l’étiquette sur la bouteille.
Page 21

20
Aspiration à sec
En mode aspiration à sec, l’appareil AQUAFILTER
ne doit jamais être utilisé sans filtre AQUA et sans
filtre textile et partie textile du filtre pour poussières
fines. De même, il faut toujours veiller auparavant
à ce qu’il soit rempli correctement avec de l’eau.
N’aspirez jamais de grandes quantités de
poussières fines, telles que par exemple de la
farine, du cacao en poudre, du ciment etc.
Préparatifs
A
Enlever le bloc-moteur (2) après avoir pris soin
de débrancher la prise de courant.
B Enlever le réservoir d’eau (28).
L
Enfoncer le tuyau souple d’aspiration (37) se
trouvant sur le bloc-moteur (2) dans le support
(36) prévu à cette effet.
H Monter la partie textile du filtre (26) à l’aide de
l’anneau de serrage (25) et fixer avec les brides
tournantes.
I Insérer le filtre AQUA 3-pièces jusqu’à la butée
puis le pousser complètement jusqu’au raccord
d’aspiration.
Lors de cette opération, respecter les
marques apposées .
Le filtre AQUA doit s’enclencher sur le fond de la
cuve et reposer de façon uniforme au fond. Remplir
la cuve de l’aspirateur avec 2 litres d’eau claire.
J Accrocher le filtre textile pour poussières fines sur
le bord de la cuve en retournant le bord
supérieur du filtre.
D Monter le bloc-moteur (2). Le bouton de réglage
se trouvant sur l’appareil doit être en position “0”.
G Raccorder le câble de raccordement (10).
Mise en service
Mise en marche de l’appareil
M
En service d’aspiration à sec, le bouton de
réglage (7) doit être réglé sur le symbole du „bec
pour tapis”.
Le témoin lumineux (6) doit être éteint.
L’appareil est prêt à fonctionner.
Nettoyage et entretien du système
AQUAfilter
Pour des raisons d’hygiène, le système
AQUAfilter et la cuve de l’aspirateur doivent
être vidés, nettoyés et séchés après chaque
utilisation. Eau sale et pièces humides
favorisent en effet la prolifération des
bactéries et des champignons.
Essuyer le filtre textile pour poussières fines, en fonction de son encrassement, avec un chiffon sec ou humi-
de. S’il est fortement encrassé, le rincer à l’eau claire,
sans addition de produits de lavage ou de détergents.
Veiller à ce que le filtre soit entièrement sec lors de la
prochaine utilisation de l’aspirateur.
Aspiration à eau
Montage
A Enlever le bloc-moteur (2) après avoir pris soin
de débrancher la prise de courant.
Attention! Enlever l’unité de filtres avant
d’aspirer des liquides (26, 27 +30).
L Veiller à la propreté et à la bonne mobilité du
flotteur (38). Il interrompt automatiquement
l'aspiration dès que le récipient est plein.
D Replacer le bloc-moteur (2) sur la cuve.
L'interrupteur rotatif de l'appareil doit être
positionne sur "0".
G Raccorder le câble d'alimentation (10).
Mise en marché
M
Quand vous aspirez des liquides, le bouton de
réglage (7) doit être placé sur le symbole
“brosse“.
La lampe-témoin (6) ne peut pas s'allumer.
L'aspirateur est prêt à l'emploi.
Les liquides contenus dans des récipients peuvent être
aspires directement par le flexible, ou en l'occurence
par les tuyaux d'aspiration.
Prudence lors de l'aspiration depuis de
récipients à niveau de liquide plus élevé et
de volume plus important que l'aspirateur.
Sur base du principe de vases communiquants, le liquide continuerait à affluer,
même si la cuve était pleine et le flotteur
fermé.
C'est pourquoi, dans ce cas, il y a lieu de
proceder par tranches.
L'aspiration terminée, retirer d'abord le tuyau du
liquide et arrêter ensuite seulement le moteur.
Attention! L'essence, les diluants de couleur, le
mazout etc. peuvent créer, par suite de tourbillons
avec l'air d'aspiration, des vapeurs ou mélanges
explosifs.
L'acétone, les acides et les dissolvants peuvent
endommager les matériaux dont sont faits l'aspirateur
et ses accessoires. Les eaux de nettoyage, mélangées
aux détergents domestiques usuels peuvent être
aspirées sans le moindre risque.
Après l'aspiration de liquides, nettoyer et laisser
sécher la cuve et tous les accessoires.
Page 22

21
Emploi du système injection-extraction
Avant le nettoyage au shampooing
Rassurez-vous au prealable à ce que tout ce que vous
envisagez de nettoyer avec le système injectionextraction se prête pour ce traitement.
Nous deconseillons l'emploi de cet appareil pour le
nettoyage de tapis fins, tissés à la main ou aux
couleurs fragiles.
Faites le test suivant. Appliquez un peu de liquide
nettoyant sur un chiffon blanc et propre et frottez le
sur le tapis ou la moquette à nettoyer à un endroit
pas trop visible. Si aucune trace de couleur n'apparait
sur le chiffon, il peut être supposé que les teintes
résisteront au traitement. Dans le cas contraire, le
nettoyage envisagé ne peut pas être exécuté.
En cas de doute, demandez l'avis d'un spécialiste.
Avant chaque injection-extraction, toute la surface
que vous envisagez de nettoyer doit être aspirée
soigneusement.
Durant et après le nettoyage il y a lieu d'aérer intensivement la pièce, afin de permettre un séchage rapide.
Nettoyer les tapis
A
Retirer la prise de courant et enlever le blocmoteur (2).
B Quand vous travaillez par système injection-
extraction, il y a lieu de veiller à ce que le réservoir pour liquide nettoyante (28) soit mis en placé.
N Donnez le concentré de nettoyage dans le
réservoir de produit à pulvériser (28) et remplir le
reste d'eau (observer l'instruction de dosage sur
l’étiquette de bouteille Protex).
Utiliser de l'eau tiède (max. 30° C). Des
températures plus élevées peuvent endommager
l'appareil ou encore les tapis et fauteuils.
L Liberer la conduite d’amenée de nettoyant (37)
qui se trouve dans le bloc-moteur (2) et pendez
la dans le liquide nettoyant tout en mettant le
bloc-moteur (2) en placé.
D Caler ensuite avec les poignées de verrouillage (3).
Raccord de la conduite du nettoyant et du
flexible
P
Enfiler la soupape d’arrêt (17) dans le logement
du tuyau. Enfoncer ensuite la poignée (11) dans
le tuyau (14).Fixer à présent la conduite de nettoyant (19) sur le flexible (13) à l’aide des clips (15).
E Introduire ensuite le flexible (13) dans la bouche
d'aspiration (8) de l'appareil de façon que les
repères du flexible et de la bouche d'aspiration
soient mis en concordance et que le flexible (13)
encliquette.
Q Pousser par la suite la conduite pour nettoyant
(19) à fond dans la valve (5) du bloc-moteur (2).
Emmancher alors le deuxième tuyau d'aspiration
(avec les oeillets de suspension) sur le tube déjà
monte.
S Monter le suceur injection-extraction (18).
T
Joindre la conduite de nettoyant (12) se trouvant
sur le suceur au raccord (39) de la soupape
d’arrêt (17) et bloquer en tournant. Fixer ensuite
la conduite de nettoyant (12) sur le tube à l’aide
des petits clips pour tuyaux (16).
L'interrupteur rotatif de l'appareil doit être
positionne sur "0".
G Raccorder le câble d'alimentation (10).
L'appareil est maintenant prêt à l'emploi.
Mise en marché
U
Placer le bouton de réglage (7) sur la position
„injection-extraction“.
La lampe-témoin (6) doit maintenant
s'allumer.
Le système injection-extraction
• Injecter la solution nettoyante sous pression.
• Dissoudre les souillures et graisses, laver jusqu'au
plus profond du tapis.
• Aspirer en puissance l'eau de nettoyage usée,
redresser les poils du tapis.
Le tout en une phase
de travail.
tube d’aspiration
conduite du nettoyant
direction de travail
aspirer et
redresser
injecter
dissoudre et laver
Page 23

22
T Commencer le nettoyage dans un coin de la
chambre et poser le suceur injection-extraction
sur le tapis. Tirer la gachette du pistolet diffuseur
(40) et produit nettoyant est injecté sur le tapis.
Tirer ensuite le suceur, en ligne droite, lentement
par-dessus le tapis.
A la fin de la bande ainsi tracée ou lors
d'interruptions de travail, lâcher la gachette pour
arrêter la diffusion de liquide. Quand le liquide
est aspiré, lever le suceur et commencer une
nouvelle bande en chevauchant légèrement sur
la bande précédente.
Travailler ainsi bande après bande pour faire
toute la surface.
Au cas où la bande de tapis nettoyé présentait
encore des traces d'humidité, aspirer ces endroits
une nouvelle fois avec gachette lâchée.
Comme la partie superieure du suceur injectionextraction est transparente, il vous sera facile de
juger quand l'aspiration peut être arrêtée.
V
Les endroits très encrassés peuvent être traités avec
une double portion de nettoyant. Guidez le suceur
devant vous en injectant une première fois après
avoir positionné le bouton rotatif sur le symbole
“uniquement injection“. Replacez ensuite le bouton
sur la position “injection-extraction“ et tirez le suceur
vers vous en injectant et extractant. En plus vous
avez la possibilité de pratiquer un pré-traitement en
positionnant le bouton rotatif sur le repère
„uniquement injection“ - cette formule permet de
laisser agir le produit nettoyant avant d'etre aspiré.
Veiller à ne pas diffuser trop de nettoyant sur le
tapis, afin d’éviter la formation d'ondes ou de
bosses, qui disparaîtront seulement après un
séchage prolongé.
Pour éviter l'écoulement du liquide contenu dans
le tuyau d'aspiration, il est conseillé de tenir le
tuyau à la verticale, moteur en marché.
N'éteindre l'apparell qu'après avoir effectué
cette manoeuvre.
Attention!
• Si le tapis a déjà ete traité auparavant
au shampooing, une formation excessive de mousse dans la cuve d'eau usée
est possible lors du premier traitement
avec le Aspirateur eau et poussière
THOMAS. Au cas où la mousse sortira
par les fentes d'aération du blocmoteur, couper l'appareil et vider la
cuve pour eau usée. Ensuite, pour éviter
la formation de mousse, verser 1 tasse
de vinaigre dans la cuve pour eau usée.
La formation excessive de mousse ne se
produira plus après le premier nettoyage
approfondi avec le Thomas Aspirateur
eau et poussière et le liquide nettoyant
Thomas ProTex original, celui-ci étant
pourvu d'une anti-mousse spéciale.
• Ne vous servez pas du tapis aussi
longtemps qu'il est encore humide.
W
Glisser l'adapteur-raclette (22) sur le suceur
injection-extraction pour tapis (18).
Cette formule vous permet de nettoyer et de
sécher en une phase de travail vos planchers
ceramiques, synthetiques ou en bois.
Entretenir les fauteuils
X
Pour nettoyer les fauteuils, sièges de voiture etc.
vous vous servez du suceur injection-extraction
pour fauteuils (20).
N'appliquez pas trop de liquide nettoyant car,
suivant la nature du bourrage, un séchage
prolongé pourrait être nécessaire.
Le suceur d'extraction-pulvérisation des meubles
rembourres (20) se placé directement sur la valve
de fermeture (17) et le tuyau de refoulement est
fixé à la valve en faisant tourner le coupleur (39).
Desserrer le tuyau de refoulement (12) en
tournant le coupleur (39).
Processus de nettoyage comme pour tapis.
Retirer la fiche.
R
Avant de retirer le bloc-moteur (2), la conduite
pour nettoyant (19) doit être libérée. Activer
pour ce faire la touche de déclenchement sur le
raccord rapide (5). La tige de raccordement est
projetée automatiquement.
A Retirer la tête du moteur (2) et la poseur sur un
receptacle afin d’éviter les salissures dues a un
écoulement d'eau.
B Retirer et vider le réservoir pour nettoyant (28).
(Le liquide nettoyant non utilisé peut être
conserve dans un réservoir approprié.)
Vider et rincer la cuve pour eau usée.
O Pour l'entretien de la pompe et de la valve,
remplir le réservoir d'eau propre pour le placer
ensuite dans l'appareil. Monter ensuite le bloc-
moteur (2).
Faire fonctionner l'injection au-dessus d'un évier p. ex.
Nettoyer ensuite le réservoir et la cuve et laisser bien
sécher tous les accessoires démontés.
Nettoyage et entretien
Avant de procéder au nettoyage, ne pas oublier de
débrancher la prise de courant!
Ne jamais plonger le corps du moteur dans l’eau!
Nettoyer le corps du moteur et le réservoir à l’aide
d’un chiffon humide et passer ensuite un chiffon sec.
Après l'injection-extraction
Nettoyer les sols durs
Page 24

23
Le réservoir et les accessoires utilisés doivent être
nettoyés à l’eau savonneuse chaude après chaque
utilisation, notamment après avoir aspiré des liquides
gluants.
Conseils lors de difficultes eventuelles
Si contre toute attente, l'appareil ne fonctionnait pas à
votre entière satisfaction, avant de faire appel au
service technique, vérifier si la défectuosité ne
provient pas de causes mineures.
Si de la poussière apparait lors de
l’utilisation:
• Le système de filtres a-t’il été monté en conformité
avec les instructions?
• S’agit-il d’un filtre à eau/d’une partie textile de
filtre d’origine?
Quand la puissance d'aspiration diminue
lentement:
• La cuve est-elle pleine?
• Les pores des filtres sont-ils bouchés?
• Le suceur, le tuyau, le flexible ou filtre eau sont-ils
bouches? (Faire marcher l'aspirateur et tirer sur le
flexible.
Son élongation aide à déboucher.)
• Le filtre protection-moteur (33) est-il encrassé?
Quand la force d'aspiration diminue
subitement:
• Le flotteur a-t-il interrompu l'aspiration?
Ceci peut se produire quand l'aspirateur est
fortement incline ou quand il a été renversé. Dans
ce cas, arrêter le moteur - le flotteur tombe vers le
bas - l'aspirateur est à nouveau prêt à l'emploi.
Quand le moteur ne tourne pas:
• Y a-t-il du courant électrique? Les fusibles sont-ils
intacts?
• Le câble, la fiche et la prise de courant sont-ils
intacts? (Avant vérification, retirer la fiche.)
• Ne jamais ouvrir vous-même le bloc-moteur!
Quand le liquide nettoyant n'est pas
ejecte:
• Nettoyage du filtre d'aspiration.
• La pompe est-elle enclenchée? (Le témoin [6] doit
être allumé).
• Y a-t-il du nettoyant dans le réservoir?
• L'extrémité de la conduite pour nettoyant pend elle
dans le réservoir?
• L'injecteur est-il bouché?
Au cas où l'injecteur est bouché, défaire l'écrou à
raccord et tremper l'injecteur quelque temps dans
l'eau. Souffler ensuite fortement à travers son
orifice. Lors du montage, veiller à ce que la fente
de l'injecteur soit parallèle au suceur injectionextraction.
Pour la protection de l'environnement:
Ne pas se contenter de jeter l'emballage et les
appareils bons pour le rebut, mais les envoyer au
recyclage.
Demandez à votre mairie où se trouve l'unité de
recyclage competente ou le point de ramassage le
plus proche.
La poussière ordinaire peut être mise directement aux
ordures.
Seul le produit de nettoyage dilue a l'eau peut être
évacué par les canalisations.
Sous forme concentrée le produit doit être déposé au
centre de recyclage concerné ou dans un point de
recuperation spécialisé.
Service après-vente
Consultez votre distributeur pour connaître l'adresse
ou le no. de téléphone du service technique de votre
région.
Prière de lui communiquer en même temps
les données reprises à la fiche
signalétique, qui se trouve à l'arrière de
l'appareil.
Dans le but de maintenir la sécurité de
l'appareil intacte, laisser effectuer les
réparations, tout spécialement aux éléments
électriques actifs, uniquement par une main
d'oeuvre qualifiée. C'est pourquoi nous vous
conseillons de vous adresser en cas de
défectuosité à votre distributeur ou au
service technique THOMAS.
Déclaration de conformité CE
Nous déclarons, en assumant l’entière responsabilité de
cette déclaration, que ce produit satisfait aux normes et
documents normalisés suivants
- Directive CE pour appareils basse tension (73/23/CEE)
- Directive CE de compatibilité électromagnétique
(89/336/CEE), modifiée par les directives 91/263/CEE,
92/31/CEE, 93/68/CEE
Normes harmonisées appliquées
DIN EN 60335-1, DIN-EN 60335-2-2;
DIN EN 61000-3-2: 1995; DIN EN 61000-3-3: 1995
DIN EN 55014-1: 1993; DIN EN 55014-2: 1997
Page 25

24
Belangrijke raadgevingen NL
Wij verzoeken U de belangrijke
informatie, bevat in deze
gebruiksaanwijzing, zorgvuldig te lezen.
Zij bevat belangrijke aanwijzingen voor
de veiligheid, de inrichting, het gebruik en
het onderhoud van het toestel. Bewaar
deze gebruiksaanwijzing zorgvuldig en
geef ze door aan de nieuwe eigenaar in
geval van voortverkoop. De producent
weigert elke vorm van verantwoordelijkheid in geval de volgende aanwijzingen
niet opgevolgd worden. De stofzuiger
maag niet verkeerdelijk gebruikt worden,
dus voor doeleinden waarvoor hij niet
ontwerpen werd. Hij mag enkel en alleen
gebruikt worden in het huishouden.
• De spanningsopgaaf op het typebordje moet met
de voedingsspanning overeenstemmen.
• Het toestel mag niet gebruikt worden als:
- de voedingskabel beschadigt is,
- de zuiger zichtbare schade vertoont,
- de motorblok op de grond gevallen is.
• Kontrolleer het toestel op eventuele schade,
veroorzaakt tijdens het vervoer.
• Neem de plaatselijke voorschriften in acht bij het
vernietigen of verwijderen van de verpakking.
• Laat U het apparaat in ingeschakelde toestand
nooit zonder toezicht en let U erop, dat de
kinderen niet aan het apparaat spelen.
• Wijzigingen aan het toestel kunnen uw veiligheid
en gezondheid in gevaar brengen. Laat daarom
alle herstellingen uitvoeren door een
gespecialiseerde dienst.
• Gebruik de stofzuiger nooit in ruimten waar zich
gas gevormd heeft of waar zich ontvlambare
stoffen bevinden.
• Pas bijzonder goed op bij het reinigen van
traplopers.
Overtuig U ervan dat het toestel stevig rust.
Desnoods het toestel met een hand vasthouden.
• De filters regelmatig vervangen.
• Gebruikt U de wasstofzuiger niet voor het
droogzuigen, wanneer het filtersysteem niet in
overeenstemming met de handleiding is
gemonteerd.
• Opgelet! Dit toestel is niet geschikt voor het
zuigen van stof dat gevaarlijk is voor de
gezondheid.
• Nooit bijtende vloeistoffen of vloeistoffen die
oplossingsmiddelen bevatten zoals bv.
verfverdunner, olie en benzine, opzuigen.
• Laat het toestel niet buiten staan en behoed het
voor vochtigheid.
• Sproeiers en buizen mogen, als de zuiger
ingeschakeld is, niet in de nabijheid van het hoofd
komen – gevaar voor ogen en oren.
• Enkel en alleen aan de stekker zelf trekken, om
hem uit het stopkontakt te verwijderen, nooit aan
de stroomkabel.
• Zorg ervoor dat de stroomkabel nooit blootgesteld
wordt aan hitte of chemische vloeistoffen en dat hij
nooit over scherpe kanten of vlakken getrokken
wordt.
• Als de aansluitleiding van dit apparaat wordt
beschadigt, moet deze door de fabrikant of zijn
klantenservice of een vergelijkbaar
gekwalificeerde person worden vervangen om
gevaren te voorkomen.
• Bewaar de stofzuiger nooit vlak naast een warme
oven of een radiator.
• Probeer nooit zelf de stofzuiger te herstellen, maar
laat enkel en alleen erkend klantendienst de
herstelling uitvoeren.
• Enkel originele toebehoren gebruiken.
• Vermijd het gebruik van een verlengkabel in
vochtige ruimten, het is in het belang van uw eigen
veiligheid.
• De stroomstekker moet uitgetrokken worden:
– in geval van storingen in de werking van het
toestel,
– voor elke reiniging en elk onderhoud,
– na gebruik,
– bij elke filterwissel.
• Snijd de voedingskabel af vooraleer de oude
stofzuiger te vernietigen of te verwijderen.
• Nooit de reinigingsmiddelstraal op stopcontacten
of elektrische toestellen richten.
• Na het natzuigen of sproei-extraheren de tank
onmiddelijk ledigen.
• Chemicaliën (sproei-extractie-reinigingsmiddel)
moeten zo bewaard worden, dat kinderen er niet
aan kunnen komen.
• Let op
Alleen bij gebruik van het originele Thomas ProTex
reinigingsmiddel kan het juiste functioneren van de
zuigers en de werking van het reinigingsmiddel
gegarandeerd worden.
• Personen met gevoelige huid moeten direct contact
met de reinigingsoplossing vermijden.
• Voor het uitvoeren van
werkzaamheden aan de zuiger de
schakelaar op „uit” zetten en de stekker
uit de contactdos trekken.
• Geraakt het geconcentreerd schoonmaakprodukt
op de slijmhuid (ogen, mond enz.), dan moet deze
met veel water gespoeld worden.
Page 26

25
Gefeliciteerd! U heeft een goede
aankoop gedaan. Geniet ten volle
van uw aanwinst door het juiste
gebruik.
Toepassingsmogelijkheden
U bent nu bezitter van een van de beste en veelzijdigste zuigers die er bestaan en hij kan bovendien
makkelijk voor een van zijn vier reinigingsfuncties
ingericht worden. De THOMAS wasstofzuiger kan als
stofzuiger voor het reinigen van tapijten, gestoffeerde
meubelen, gladde vloeren en voor het regelmatige
onderhoud van de woning worden gebruikt; hij kan
verontreinigingen even goed als vloeistoffen
opzuigen, bijvoorbeeld maakt verstopte fonteinen en
gootstenen vrij.
Met slechts enkele eenvoudige toebehoren kan hij
voor het natte reinigen van uw tapijten of
gestoffeerde meubelen worden gebruikt.
De THOMAS wasstofzuiger is een multi-purpose
produkt. Door de sproei extractie is hij voor de
basisreiniging van tapijten, gestoffeerde meubelen en
gladde vloeren met gebruik van de reinigingsoplossing geschikt. Door gebruik van de vensterwasmonstuk is hij ook voor het reinigen van vensters
geschikt.
Bij het natzuigen komen uitsluitend vloeistoffen op
waterbasis in aanmerking en hij mag nooit voor het
gebruik van ontvlambare vloeistoffen worden
gebruikt. In zijn functie als stofzuiger is hij uitsluitend
voor het verwijderen van droge verontreinigingen en
stof van tapijten, vloeren, meubels en gordijnen
gedacht.
Zuiger uitpakken
Neem de zuiger uit het karton, verwijder al het
verpakkingsmateriaal en identificeer de volgende
onderdelen en functies op de tekeningen in het begin
van deze gebruiksaanwijzing, die u moeten helpen de
onderstaande tekst beter te begrijpen.
Montage van het toestel
De onderdelen van de sokkel zijn los in de verpakking
bijgevoegd.
Montage van de wieltjes
A
Knipsloten (3) openen en het motordeel (2)
afnemen.
B
Shampoo reservoir (28) en reinigingsvloeistof
eruit halen. De vergaarbak (1) met de opening
naar beneden opstellen.
C
Om een gemakkelijke montage te bereiken, raden
wij aan de einden van de stiften (30) in te vetten.
Eerst de stiften (30) tot aan de aanslag in de
bodem van de vergaarbak (1) steken. Daarna de
wieltjes (4) en stiften (30) tot ze inklinken
indrukken.
De tank (1) op de rollen (4) zetten en controleren
of alles goed functioneert.
Motordeel opzetten
D
Het motordeel (2) zo plaatsen, dat de platte
velden van de motorblok en de vergaarbak
overeenstemmen (klikt ineen). Nadien met de
twee knipsloten (3) beveiligen.
Aansluiten van de zuigslang
E De zuigslang (13) in de zuigmond (8) vastdrukken
en vervolgens draaien tot de knop inklikt en het
merkteken van slang en zuigmond overeenstemmen. Om de slang af te nemen: het slangaansluitstuk al draaiend aftrekken. Vervolgens
kan het gewenste toebehoor aangesloten
worden.
Zuigslanghouder
F De zuigbuis (14) met slang (13) vasthaken aan de
rugzijde van het toestel.
Kabeldrager
G
Na het zuigen de stroomkabel (10) oprollen en
ophangen in de gleuf van de handgreep, zoals
op schets K aangegeven.
J Motorbeschermingsfilter
Na ieder natzuigen en sproei extractiewerk de
motorbeschermingsfilter (33) op verontreiniging
controleren en, indien nodig, reinigen. Daarvoor
het vlotterventiel (38) in de richting van de pijl
openen en de motorbeschermingsfilter uit de
zuigopening halen. De gereinigde respectievelijk
nieuwe filter er weer in leggen en daarna het
vlotterventiel erop zetten.
Geconcentreert reinigingsmiddel
Uw Aspirateur eau et poussière THOMAS bevat 0,5
liter Protex reinigingsconcentraat. Tips voor
toepassing en dosering staan op het etiket van de fles.
Page 27

26
Droogzuigen
Benut U Uw AQUAFILTER-apparaat in een
droogzuigbedrijf nooit zonder aquafilter, fijne
stof textielfilter, filtervlies en pasende
watervulling.
Zuigt u nooit grotere hoeveelheden van fijne stof
bijv. Meel, cacaopoeder, cement enz.
Voorbereiding
A Bij uitgetrokken netstekker de motorkop (2)
afnemen.
B Verswaterreservoir (28) afnemen.
L De aan de motorkop (2) aangebrachte
aanzuigslang (37) in de daarvoor voorgeziene
houder (36) drukken.
H Het filtervlies (26) met behulp van de spanring
(25) monteren en met de draaiklemmen
beveiligen.
I 3-delige AQUA-filter tot aan de aanslag
samensteken en vast op de toevoeropening
apschuiven.
Let U daarbij op de
markeringen.
De AQUA-filter moet op de zuigtonbodem
inklikken en gelijkmatig op de bodem liggen.
Vult U 2 liter helder water in de zuigreservoir.
J Fijne stof textielfilter door omleggen van de
bovenste rand in de zuigreservoir inhangen.
C De motorkop (2) erop zetten. De draaischakelaar
aan het apparaat moet op “0” staan.
G De netaansluitingsleiding (10) aansluiten.
Ingebruikneming
Het apparaat inschakelen
M Bij de werkfase droogzuigen moet de draaiknop
(7) op het symbool tapijtborstel worden gezet.
De controlelamp (6) mag niet branden.
Het apparaat is bedrijfsklaar.
Reiniging en onderhoud van het AQUAfiltersysteem
Om hygiëneredenen het AQUAFILTERsysteem en de zuigreservoir na ieder gebruik
ledigen, reinigen en drogen. Vuil water en
vochtige delen begunstigen de
vermeerdering van bacteriën en schimmel.
Fijne stof tectielfilter al naar vervuiling met een droog
of vochtig doek afwissen. Bij sterkere verontreiniging
met helder water, zonder toevoeging van was- en reigigingsmiddelen, uitwassen. Let U erop, dat de filter bij
de volgende zuiginzet geheel is gedroogd.
Natzuigen
Montage
A Bij uitgetrokken netstekker de motorkop (2)
afnemen.
Opgelet! Voor het zuigen van vloeistoffen de
filtereenheid (26 + 27) wegnemen.
L De vlotter (38) altijd zuiver en gangbaar houden.
Hij onderbreekt automatisch het opzuigen
wanneer de vergaarbak vol is.
D De motorkop (2) erop zetten.
De draaischakelaar van het toestel moet op „0”
staan.
G Snoer (10) aansluiten.
Zuiger inschakelen
M
Bij natzuigen” moet de draaiknop (7) op het
symbool tapijtzuigmond” worden gezet.
Het controlelampje (6) mag niet branden.
De zuiger is nu voor het gebruik gereed.
Vloeistoffen kunnen met de zuigslang of de
zuigbuizen direkt uit de reservoirs gezogen worden.
Opgepast bij het leegzuigen van reservoirs
en vaten, waarvan de vloeistofspiegel
hoger ligt en waarvan de inhoud groter is
dan het volume van de stofzuiger. In dit
geval zou, bij volle vergaarbak en gesloten
vlotter, de vloeistof verder uitlopen, dit
volgens het principe van de communicerende vaten.
In dergelijke gevallen moet men kleinere volumes
zuigen en tussendoor de stofzuiger ledigen. Na het
zuigen eerst de zuigbuis uit de vloeistof lichten en pas
daarna de motor uitschakelen.
Opgelet! Benzine, verfverdunner, stookolie enz.
kunnen door warreling met de zuiglucht, ontplofbare
dampen of mengsels doen ontstaan. Aceton, zuren en
oplosmiddelen kunnen de materialen van de
stofzuiger zelf aantasten.
Poetswater, vermengd met de gebruikelijke
wasmiddelen, kunnen zonder bezwaren opgezogen
worden.
Na het natzuigen, de vergaarbak en alle gebruikte
toebehoren reinigen en laten drogen (zie rubriek
„reinigen en onderhoud”).
Page 28

Gebruik van het sproei-zuigsysteem
Vóór de natreiniging
Overtuig u dat alles wat u nat wilt reinigen er ook
voor geschikt is.
U mag de zuiger niet voor tere, met de hand
geweefde of niet kleurechte tapijten gebruiken.
Om te proberen doet u wat reinigingsmiddel op een
witte lap en wrijft deze op een minder goed zichtbare
plaats op het tapijt. Als er op de lap geen kleuren te
zien zijn kunt u ervan uitgaan, dat het tapijt kleurecht
is. Als dit niet het geval is, mag het tapijt niet nat
gereinigd worden.
Als u twijfelt vraagt u dan uw winkelier.
Voor het nat reinigen van tapijten moet de gehele
oppervlakte grondig droog gezogen worden.
Tijdens het reinigen en daarna moet het vertrek goed
geventileerd worden om het tapijt vlug te laten
drogen.
Tapijt reinigen
A
Nadat de stekker uit de contactdoos is getrokken
de motorkop (2) eraf halen.
B
Bij gebruik van het sproei-extractiesysteem moet
erop gelet worden, dat de shampoo reservoir
(28) in de zuiger gezet is.
N
Doe het reinigingsconcentraat in de tank voor
het sproeimiddel (28) en vul het ontbrekende
gedeelte met water op. (Let op de doseertip op
het etiket van de Protex fles).
Gebruik uitsluitend handwarm water. Hogere
temperaturen kunnen niet alleen de zuiger, maar
ook tapijten en gestoffeerde meubelen
beschadigen.
L
Maak de in de motorkop (2) zittende aanzuigslang (37) los en hang hem, terwijl u de motorkop
(2) erop zet, in de reinigingsvloeistof.
D
Vergrendel de tank door de beide snapsluitingen
(3) aan te drukken.
Zuig- en drukslang aansluiten
P
Schuift U het afsluitventiel (17) in de opneming
van de zuigbuis. Aansluitend steekt U de
handgreep (11) in de zuigbuis (14). Bevestigt U
nu de persleiding (19) met de slangklippen (15)
aan de zuigslang (13).
E
Daarna wordt de zuigslang (13) zo in de zuigbuis
(8) geschoven, dat de streepjes met elkaar
overeenstemmen en de slang hoorbaar inklikt.
Q
Daarna de drukslang (19) stevig in de
snelkoppeling (5) van de motorkop (2) drukken.
S Monteer de sproei-extractiesproeier (18).
T
De aan het mondstuk bevestigde persleiding (12)
met de koppeling (39) aan het afsluitventiel (17)
aanzetten en door draaien vergrendelen.
Aansluitend de persleiding (12) met de kleinere
buisklippen (16) aan de zuigbuis bevestigen.
De draaischakelaar van het toestel moet op “0“
staan.
G Snoer (10) aansluiten.
De zuiger is nu voor het gebruik gereed.
Zuiger inschakelen
U Draaiknop (7) op sproei-extractiestand draaien.
Het controlelampje (6) moet nu gaan branden.
Het sproei-extractiesysteem
• Reinigingsmiddel onder druk diep insproeien.
• Verontreinigingen losmaken en diep in de vezel
uitwassen.
• Vuil water flink afzuigen en de pool van het
tapijt weer oprichten.
Alles in een keer.
Zuigbuis
Persleidung
Werkrichting
Afzuigen en
opvangen
Inspoeien
Losmaken en uitwassen
27
Page 29

28
T De tapijtsproei-extractiezuigmond in een hoek
van de kamer op het tapijt zetten. De ventielhefboom (40) aan de handgreep indrukken tot er
reinigingsmiddel opgesproeid wordt. Daarna de
op de tapijt liggende zuigmond recht en
langzaam over het tapijt trekken.
Aan het einde van de baan of bij onderbrekingen de ventielhefboom (40) loslaten om de
sproeistraal te stoppen. Als de opgesproeide
vloeistof afgezogen is, de zuigmond oplichten en
een nieuwe baan iets overlappend beginnen.
Zo kan de gehele oppervlakte strook na strook
behandeld worden.
Als er op de gereinigde baan nog sporen van
vloeistof achterblijven, kunnen deze plaatsen met
losgelaten ventielhefboom (40) nog eens
gezogen worden.
Dank zij het doorzichtige bovenstuk van de
zuigmond kunt u zelf beslissen wanneer dit
beeindigd moet worden.
V Bij zeer sterk verontreinigde plaatsen kunt u met
de zuiger de dubbele hoeveelheid vloeistof
aanbrengen doordat u bij het naar voren
bewegen reeds sproeit en bij het terugtrekken
sproeit en zuigt. Bovendien kan door de stand
“alleen sproeien” vooraf een behandeling
uitgevoerd worden.
Let erop dat niet te veel vloeistof op het tapijt
verdeeld wordt, omdat daardoor golven of
bulten in het tapijte kunnen ontstaan die pas
weer na lang drogen verdwijnen.
Om een terugvloeien van de vloeistof in de
zuigbuis te voorkomen, moet u de zuigbuis bij
nog lopende motor even schuin naar omhoog
houden.
Dan pas het apparaat uitschakelen.
Let op!
• Werd het tapijt reeds geshamponeerd
in een vorige periode, dan kan het
gebeuren dat, bij het eerste gebruik
van het sproeizuigtoestel, een sterkere
schuimvorming in de vergaarbak tot
stand komt. In het geval dat schuim uit
de luchtuitlaat van het motordeel
ontsnapt, schakel dan het toestel uit en
ledig de vergaarbak. Om verdere
schuimvorming te vermijden, 1 tas
azijn in de vergaarbak gieten.
Sterkere schuimontwikkeling is, na
een enkele grondige reiniging met de
4 in 1 en het originele Thomas
reinigingsmiddel uitgesloten, want dit
produkt bevat een speciale
schuimstop.
• Zolang het tapijt nog vochtig is mag u
er niet op lopen.
W
De adapter voor gladde vloeren (22) wordt op
de tapijt sproei-extractiezuigmond (18)
geschoven.
Daarmee kunt u uw gladde keramiek-, steen-,
kunststof- of houten gladde vloer in een keer
reinigen en drogen.
X
Voor het reinigen van uw gestoffeerde meubels
of autostoelen gebruikt u de sproei-extractiezuigmond voor stofferingen (20).
Let er bij de stofferingen op, dat er niet te veel
vloeistof aangebracht wordt omdat naar gelang
van de ondergrond op een langere droogtijd
moet worden gerekend.
De stofferingszuigmond met extractiesproeier
(20) wordt rechtstreeks op de afsluitklep (17)
geschoven en door het draaien van de
koppeling (39) wordt de drukslang op de klep
bevestigd.
Maak, door de koppeling (39) te draaien, de
drukslang los.
Stekker uit de contactdoos halen.
R Voor u de motorkop (2) eraf haalt, moet de
drukslang (19) losgemaakt worden. Drukt U
daarvoor op de uitschakelingstoets aan de
snelkoppeling (5). Het aansluitcontact wordt
automatisch uitgestoten.
A Motorkop (2) van het apparaat nemen en op
een opvangschaal plaatsen om vervuiling door
druipend water te voorkomen.
B
Shampoo reservoir (28) eruit halen en
leegmaken. Niet verbruikt reinigingsmiddel kan
in een passende buis bewaard worden. Reservoir
met verontreinigingen ledigen en grondig
uitspoelen.
O
Om de pomp en de ventielen schoon te houden
moet de tank voor het reinigingsmiddel met
helder water worden gevuld. In de houder
zetten en de motorkop (2) weer aanbrengen.
Het sproeisysteem op een gladde vloer of boven een
gootsteen in bedrijf stellen.
Daarna de beide tanks reinigen en de gedemonteerde onderdelen goed laten drogen.
Na het natreinigen
Onderhoud van zitgarnituur
Gladde vloeren schoon maken
Page 30

29
Reiniging en onderhoud van het apparaat
Voor het reinigen altijd de netstekker uittrekken!
Het motorhuis nooit in water dompelen!
Het motorhuis en de reservoir met een vochtig doek
afwissen en nadrogen.
De reservoir en de gebruikte toebehoren moeten na
ieder natzuigen met warm zeepwater worden
gereinigd, vooral na het zuigen van kleverige
vloeistoffen.
Raadgevingen bij storingen
Wanneer uw toestel, buiten alle verwachtingen, toch
niet funktionneert zoals het hoort, dan hoeft U niet
dadelijk de klantendienst op te bellen.
Onderzoek eerst of het defekt niet te wijten is aan
een kleine reden.
Wanneer bij het zuigen stof vrijkomt
• Is het filtersysteem in overeenstemming met de
handleiding gemonteerd?
• Wird een originele waterfilter / filtervlies gebruikt?
Wanneer de zuigkracht geleidelijk
verminderd:
• Is de vergaarbak vol?
• Zijn de filterporien door fijne stof of roet verstopt?
• Zijn zuigmond, waterfilter, slang of buizen door
vuil verstopt? (Het toestel inschakelen en de zuigslang uiteentrekken. Door het uittrekken van de
slang kan de verstopping loskomen.)
• Is de motorbeschermingsfilter (33) verontreinigt?
Wanneer het zuigvermogen plots
terugloopt:
• Heeft de vlotter de zuiglucht afgestopt?
Dit kan gebeuren wanneer het toestel extreem
schuin staat of omkantelt. In dit geval, zuiger
uitschakelen; de vlotter valt naar beneden en het
toestel is opnieuw bedrijfsklaar.
Wanneer de motor niet draait:
• Is de zekering intakt en/of is er stroom?
• Zijn kabel, stekker en kontaktdoos intakt?
(Vóór het onderzoek de stekker uittrekken.)
• Nooit zelf de motor openen!
Als er geen reinigingsvloeistof naar buiten
komt:
De zeef van het aanzuigfilter schoonmaken
• Is de pomp ingeschakeld? (controlelampje [6] moet
branden).
• Zit er reinigingsvloeistof in shampoo reservoir?
• Hangt de aanzuigslang vrij in shampoo reservoir?
• Is de sproeier verstopt?
Zou de sproeier eens verstopt zijn, de dopmoer
afschroeven en de sproeier in water leggen.
Daarnaar er krachtig dóórblazen. Bij de montage
er op letten dat de split van de sproeier parallel
met de shampoozuigmond loopt.
Terwille van het milieu:
Verpakkingsmateriaal en afgedankte stofzuigers niet
eenvoudig weggooien, maar voor hergebruik
aanbieden.
Vraag bij de gemeente informatie over de
verantwoordelijke reinigingsdienst of het dichtbijzijnde
verzamelpunt.
Het schoonmaakprodukt mag alleen met water
verdund via de riolering afgevoerd worden.
In geconcentreerde vorm moet het schoonmaakprodukt bij een recycling-instelling of de
dichtsbijgelegen verzamelplaats voor dergelijke
produkten afgeleverd worden.
Klantendienst
Vraag uw handelaar naar het adres of het
telefoonnummer van de bevoegde herstellingsdienst.
Geef hem a.u.b. ook de gegevens van het
merkplaatje op de achterkant van de
stofzuiger. Eventuele herstellingen,
vooraal aan elektro-onderdelen,
uitsluitend laten uitvoeren door elektrotechniekers. Zo garandeert U de veiligheid
van uw toestel. Daarom verzoeken wij U in
geval van defekt, uw handelaar of direkt
de Thomas-klantendienst te raadplegen.
CE-CONFORMITEITSVERKLARING
Wij verklaren in einige verantwoordelijkheid, dat dit
product met de volgende normen of normale
documenten overeenstemd.
– EG-laagspanningsrichtlijn (73/23/EEG) veranderd
door 93/68/EEG
– G-richtlijn elektromagnetische verdraagzaamheid
(89/336/EEG) veranderd door 91/263/EEG,
92/31/EEG, 93/68/EEG.
Toegepaste geharmoniseerde normen:
DIN EN 60335-1, DIN EN 60335-2-2;
DIN EN 61000-3-2; 1995, DIN EN 61000-3-3, 1995;
DIN EN 55014-1: 193; DIN EN 55014-2. 1997
Page 31

30
Indicaciones importantes E
Le rogamos leer atentamente las
informaciones especiaficadas en este
modo de empleo. Le dará importantes
indicaciones para la seguridad, la
instalación, eluso y el mantenimiento del
THOMAS aspirador de lavado. Conserve el
modo de empleo cuidado-samente y
páseselo dado el caso al siguiente propietario. El fabricante no es responsable si las
siguientes instrucciones no se tienen en
cuenta. El THOMAS aspirador de lavado
no se debe usar de manera abusiva, es
decir, contra el uso previsto. Está fabricado
exclusivamente para el uo doméstico.
• La indicación de tensión en la placa de
características debe coincidir con la tensión de
alimentación.
• El aparato no se debe poner en marcha si:
- la linea de conexión a la red está estropeada
- el aparato tiene defectos visibles
- se haya caído la parte del motor
• Revise el aspirador por daños de transporte.
• Elimine el embalaje según las instrucciones locales.
• No dejar nunca el aparato en estado conectado
sin vigilancia y prestar atención a que los niños no
jueguen con el aparato.
• Cambios en el aparato pueden dañar su salud.
Por eso solamente deje reparar el aparato por un
taller autorizado.
• Nunca use el aparato en lugares, en los que se
tienen materiales inflamables o en los que se han
formado gases.
• Tenga la máxima precaución cuando limpie los
escalones. Tenga la seguridad, que el aparato esté
colocado de manera firme sobre el suelo de la
escalera y tenga cuidado que el tubo no se estire
más de su tamaño correspondiente. Siempre
cuando use spirador en los escalones, tenga la
seguridad, de retener el aparato con una mano.
• No utilizar el aspirador de lavado para la
aspiración en seco, cuando el sistema filtrante no
está montado de acuerdo con las Instrucciones.
• ¡ Atención ! Esta especificación del aparato no es
apropiada paraaspirar materiales/polvos dañinos
a la salud.
• No aspirar líquidos con contenido disolvente,
como dilución de laca, aceite, gasolina ni líquidos
cáusticos.
• No dejarlo al aire libre y no ponerlo en contacto
directo con humedad.
• Toberas y tubos (mientras el aparato esté en
marcha) no deben acercarse a la cabeza por
ejemplo, peligro para los ojos y los iídos.
• Nunca tirar del cable del enchufe sino
exclusivamente del enchufe.
• Asegúrese que el cable no esté en contacto con
líquidos químicos ni con calor y que no sea
arrastrado sobre suelos o esquinas cortantes.
• Si se estropea el cable de conexion de este
aparato, para evitar peligros tendra que ser
sustituido por el fabricante o su Servicio de
Postventa o una persona de calificacion simila.
• No colocar el aspirador directamente al lado de la
calefacción.
• Nunca repare el THOMAS aspirador de lavado
personalmente, sino solamente dejelo reparar por
un taller autorizado de servicio posventa.
• Utilice solamente repuestos originales.
• El uso del alargador en habitaciones húmedas,
debe evitarse en interés de la propia seguridad.
• El enchufe debe ser sacado:
- si hay interferencias mientras el aparato está en
marcha
- antes de cada limpieza y mantenimiento
- después del uso
- cada vez que se cambia el filtro.
• Antes de eliminar el THOMAS aspirador de
lavado, le rogamos cortar el cable.
• Nunca apuntar el chorro del producto de limpieza
hacia el enchufe o hacia aparatos eléctricos.
• Después de aspirar en mojado o de pulverizarextraer, inmediatamente vaciar el recipiente.
• Substancias químicas (productos de limpieza para
pulverizar-extraer) no se deben dejar al alcance de
los niños.
• ¡ Atencion ! Solamente el uso del producto de
limpieza original de „Thomas" garantiza la función
del aparato y el efecto de limpieza.
• Se recomienda a personas con piel sensible no
estar en contacto directo con el producto de
limpieza.
• Antes de realizar cualquier trabajo con el aparato,
colocar el botón de mando en la posicion „Cero“ y
desconectar el enchufe
• Si el producto concentrado de limpieza llega a
alcanzar la mucosa (ojos, boca, etcétera),
inmediatamente límpiese con bastante agua.
Page 32

31
¡Le felicitamos por haber hecho
una buena compra !
Aproveche su valor usando el aparato
correctamente.
Posibilidad de aplicación
El THOMAS aspirador de lavado puede ser utilizado
como aspiradora para limpiar alfombras, muebles
tapizados (sófas, sillones, ...), suelos lisos y para la
limpieza regular en el hogar. Puede absorber
suciedad de la misma manera que líquidos, por
ejemplo desatascafregaderos y cualquier otro tipo
de desagüe. Solamente con un sencillo manejo y con
el accesorio estándar, su aspirador de lavado se
puede equipar para la limpieza mojada de sus alfombras o de sus muebles tapizados (sofás, sillones, ...).
El THOMAS aspirador de lavado es un producto
universal. En el sector pulverizar-extraer está previsto
para la limpieza básica de alfombras, muebles
tapizados y suelos duros usando el producto de
limpieza. Utilizando la boquilla para ventanas
también es apto para limpiar ventanas.
En la función de aspirar en mojado sólo se deben
absorbíquidos a base de agua. Nunca se debe usar
para líquidos inflamables. En su función como
aspiradora está previsto para apartar suciedad seca
y polvo de alfombras, suelos, muebles y cortinas.
Descripción de montaje
Saque el aparato del cartón, quite todo el material
para embalar e identifique las siguientes piezas y
funciones en los dibujos que dibujan al principio de
este modo de empleo y que le ayudarán a entender
las siguientes indicaciones. Las piezas necesars para el
mecanismo de traslación, se encuentran por motivos
técnicos de empacado sueltas en el embalaje.
Montar las poleas-guía
A Abrir la tapa de cierre de golpe (3) y levantar el
bloque motor (2).
B Extraer el depósito del líquido pulverizador (28)
y el producto de limpieza. Colocar el recipiente
(1) con la abertura hacia abajo.
C Para facilitar el montaje, le recomendamos
engrasar los pasadores (30) en ambos extremos.
Primero introducir los pasadores (30) en el fondo
del recipiente (1), después oprimirlos juntos con
las poleas-guía (4) hasta el tope.
Poner el recipiente (1) con las poleas-guía (4) en
el suelo y realizar una prueba de
funcionamiento.
Colocar el bloque motor
D Colocar el bloque motor (2) de tal manera, que
la superficie de la tapa y del recipiente
coincidan. Después apretar las dos tapas de
cierre de golpe (3).
Acoplar el tubo flexible para aspirar
E
Oprimir el tubo flexible para aspirar (13) en el
codo de empalme de aspiración de tal manera,
que las marcas del codo de empalme de
aspiración y las marcas del terminal de empalme
de aspiración coincidan y que el botón se
enclave. Para quitar la mara retirar la manga del
terminal de empalme dándole vueltas.
Después se pueden acoplar los accesorios deseados.
Soporte fijador del tubo aspirador
F Enganchar el tubo (14) completo con los
accesorios y el tubo flexible para aspirar (13) en
el lado posterior del aparato.
Conservación del cable
G Después de haber aspirado, se recoge el cable
según el dibujo y se cuelga en la mediacaña del
cable.
Filtro de protección del motor
J
Después de haber aspirado en mojado y de
cada fase de trabajo con el pulverizar-extraer,
revisar el filtro de protección del motor (33) por
si se encuentra suciedad y si es necesario,
limpiarlo. Para esto abrir la válvula de flotador
(38) en dirección de la flecha y sacar el filtro de
protección del motor del orificio de aspiración.
Meter el filtro limpio o sea el nuevo filtro y a
continuación poner encima la válvula de
flotador.
Producto de limpieza concentrado
Su THOMAS aspirador de lavado contiene 0,5 l de
producto de limpieza concentrado Protex. Las
indicaciones sobre el uso y la dosificación se
encuentran en la etiqueta de la botella.
Page 33

32
Aspiración en seco
! No emplear nunca el aparato AQUAFILTER en
servicio de aspiración seca sin el Aquafilter, el
filtro de tejido, el filtro de material no tejido para
polvo fino y el correspondiente llenado de agua.
No aspirar ninguna cantidad grande de polvo
fino, por ejemplo, harina, cacao en polvo,
cemento, etc.
Preparación
A Con la clavija de enchufe de la red extraída,
retirar el cabezal del motor (2).
B Extraer el tanque de agua fresca.
L Presionar la manguera de aspiración (37)
colocada en el cabezal del motor (2) en el
soporte (36) previsto para ello.
H Montar el filtro de material no tejido (26) por
medio de la abrazadera (25) y asegurar con la
grapa giratoria.
I Encajar juntas las 3 partes del AQUA-Filter hasta
el tope y deslizarlas fijándolas sobre el manguito
de aspiración.
Para esto prestar atención
a las marcas.
El AQUA-Filter debe encajar en el suelo
bombeado de aspiración y apoyar con
uniformidad en el suelo. Echar 2 litros de agua
limpia en el depósito de aspiración.
J Colgar el filtro de tejido para polvo fino en el
depósito de aspiración doblando el borde
superior.
D Colocar el cabezal del motor (2). El conmutador
giratorio del aparato debe estar en “0”.
G Conectar el cable de conexión a la red (10).
Puesta en servicio
Conectar el aparato
M En la fase de trabajo “Aspiración en seco”, el
botón giratorio (7) se debe poner sobre el
símbolo “Tobera para alfombras”.
La luz de control (6) no se debe encender.
El aparato está dispuesto para el servicio.
Limpieza y cuidados del sistema AQUA-Filter
Por motivos de higiene, después de cada uso
vaciar, limpiar y secar el sistema AQUA-Filter
y el depósito de aspiración.
El agua sucia y las piezas húmedas favorecen
el aumento de bacterias y hongos.
Limpiar el filtro de tejido para polvo fino, según sea el
ensuciamiento, con un trapo seco o húmedo. Con
ensuciamiento fuerte lavar con agua limpia, sin añadir
productos de lavado o de limpieza. Prestar atención a
que el filtro esté totalmente seco en el siguiente empleo
para la aspiración.
Aspiración en húmedo
Montaje
A Con la clavija de enchufe de la red extraída,
retirar el cabezal del motor (2).
¡Atención! Antes de la aspiración de líquidos,
retirar la unidad de filtrado (26, 27 + 30).
C Siempre conservar la válvula de flotador (38)
limpia y corriente. Se interrumpe automáticamente la aspiración cuando el recipiente está
lleno.
D Colocar el bloque motor (2). El interruptor
giratorio debe estar colocado en „0".
G Enchufar a la red (10).
Puesta en marcha
Conectar el aparato
M En la fase de operación de aspirar en mojado el
interruptor giratorio (7) debe estar colocado en
el símbolo „tobera de alfombra”.
La lá
mpara de control (6) no debe
iluminarse.
El aparato está dispuesto para el funcionamiento.
Se pueden aspirar directamente líquidos de
recipientes con el tubo flexible para aspirar o sea con
los tubos aspirantes.
Tenga cuidado al aspirar recipientes y
pilares, cuyos niveles de líquido sean más
altos y cuyo contenido de relleno sea más
voluminoso que la capacidad del
recipiente. En este caso estando el
recipiente lleno y la válvula de flotador
cerrada seguirá corriendo el líquido según
el principio del sifón de aspiración.
Por esta razón debería absorberse en estos casos
solamente una parte del líquido y entremedias vaciar
el recipiente.
Después de haber aspirado sacar el tubo aspirante
del líquido y después apagar el motor.
¡ Atención ! Gasolina, dilución, aceite combustible
etc. pueden crear a causa de la turbulencia con el
aire aspirado vapores o mezclas explosivas.
Acetona, ácidos y disolventes pueden atacar los
materiales usados en el aparato. Se puede absorber
sin inconveniente el agua de limpieza y suciedad con
detergentes domésticos usuales en el comercio.
Después de haber aspirado en mojado limpiar el
recipiente y todas las partes que han sido usadas y
dejarlo secar.
Page 34

33
Uso del sistema pulverizar-extraer
Antes de la limpieza en mojado de la
alfombra
Cerciórese que todo lo que Ud. quiera limpiar en
mojado sea adecuado para eso.
No debería utilizar la máquina para alfombras
delicadas, finas, tejidas a mano o de colores no
sólidos.
Para probar si destiñe, eche un poco del producto de
limpieza en un trapo blanco y frote con éste una
parte poco visible de su alfombra. Si no se ven huellas
de colores en el trapo blanco, puede tener la
seguridad de que la alfombra es de color estable. En
otro caso no se debe lavar la alfombra en mojado.
Si Ud. tiene dudas al respecto diríjase al personal
especializado.
Antes de cada limpieza en mojado la alfombra debe
ser aspirada a fondo.
Durante y después de la limpieza la habitación debe
estar bien ventilada para facilitar que se seque
pronto.
Limpieza en mojado de la alfombra /
pulverizar-extraer
A Estando el aparato desenchufado retire el
bloque motor (2).
B Usando el sistema pulverizar-extraer tiene que
tener cuidado que el depósito del líquido
pulverizador (28) esté colocado.
N Añada el producto de limpieza concentrado al
depósito del líquido pulverizador (28) y rellene el
resto con agua. (Fijese de las indicaciones sobre
la dosificación cuales se encuentral en la
etiqueta de la botella Protex).
Ulilice agua tibia (max. 30° C). Temperaturas
más altas pueden dañar el aparato pero
también las alfombras y los muebles tapizados
(sofás, sillones, ...).
L
Desprenda el tubo flexible para aspirar (37) que
se encuentra en el bloque motor (2).
O
Cuelgue el tubo flexible para aspirar (37) en el
recipiente que contiene el líquido de limpieza
mientras coloca el bloque motor (2) en su sitio.
D
Asegure el recipiente apretando las dos tapas de
cierre de golpe (3).
Unir las mangueras de aspiración y de
presión
P
Empujar la válvula de cierre (17) en el alojamiento del tubo de aspiración. A continuación
conectar el asa (11) en el tubo de aspiración (14).
Ahora sujetar la manguera de presión (19) con el
clip para manguera (15) a la manguera de
aspiración (13).
E
Después empuje el tubo (13) hacia la tubuladura
de aspiración (8) de tal manera que las marcas
coincidas y se oiga un chasquido.
Q
A continuación oprima con fuerza la manga de
presión en el embrage de uso rápido (5) del
bloque motor (2).
Empuje ahora el segundo tubo (con los corchetes
de suspensión) sobre el tubo ya montado.
S Monte la tobera de pulverizar-extraer (18).
T
Unir la manguera de presión (12) sujeta a la
tobera con el acoplamiento (39) a la válvula de
cierre (17) y enclavar mediante un giro. A
continuación sujetar la manguera de presión (12)
con el pequeño clip para tubo (16) al tubo de
aspiración.
El interruptor giratorio debe estar colocado
en „0”.
G Enchufar la linea de coneccion a la red (10).
El aparato está dispuesto para el
funcionamiento.
Conectar el aparato
U
Coloque el interruptor giratorio (7) en la posición
pulverizar-extraer.
La lá
mpara de control (6) debe iluminarse.
El sistema pulverizar-extraer
• Pulverizar el producto de limpieza
presionando a fondo
• Aportar la suciedad y lavar a fondo hasta el
filamento
• Aspirar con fuerza el agua sucia y levantar de
nuevo el pelo de la alfombra.
Todo en una fase de trabajo.
3. tubo aspirador
4. tubería de presión
direccion de trabajo
Aspirar y
levantar
pulverizar
quitar y lavar
Page 35

34
T
Coloque la tobera de pulverizar-extraer para
alfombras en una esquina de la habitación sobre
la alfombra. Oprima la palanca de la válvula
(40) con la empuñadura hasta que salga el lí
quido de limpieza. Luego deslizar lentamente la
tobera situada sobre alfombra en linea recta..
Cuando haya aspirado una parte de la alfombra
o en caso de interrumpir el trabajo deje de
apretar la palanca de la válvula para parar el
chorro de pulverización. Una vez que el líquido
haya sido absorbido levante la tobera y continúe
el trabajo pasando de nuevo por una parte de
la superficie ja aspirada.
De esta manera se puede trabajar parte por
parte toda la superficie.
Si en la parte limpia han quedado huellas de
líquido estas pueden ser nuevamente absorbidas
sin apretar la palanca de la válvula (40).
Gracias a que la parte superior de la tobera es
transparente puede decidir Ud. mismo cuando
terminar con el proceso.
V
En partes extremadamente sucias Ud. puede
echar doble cantidad de líquido. Para realisar
ésto eche líquido en la alfombra al avanzar
hacia adelante y de nuevo cuando retroceda, asi
será absorbido automaticamente.
Adicionalmente se puede realizar un tratamiento
previo colocando en el símbolo „solamente
rociar”.
Tenga cuidado que no se reparta demasiado
líquido sobre la alfombra porque se pueden
formar ondulaciones que necesitarán bastante
tiempo para volver a su posición original.
Para evitar el derrame del líquido todavía
situado en el tubo, debería Ud. levantarlo hacia
arriba de manera inclinada mientras el motor
está funcionando.
Después desconectar el aparato.
¡Atencion !
• Si la alfombra ha sido previamente
tratada con otros productos, puede ser
que usando el aparato de pulverizarextraer por primera vez, se pueda
formar más espuma de lo normal en el
recipiente. Si llega a salir espuma por
la salida del aire apage el apaato y
vacíe el recipiente. Para evitar más
formaciones de espuma añada 1 taza
de vinagre en el recipiente.
Después de una limpieza con el
producto concentrado „Thomas”
ProTex no se formará más espuma
porque éste va equipado con una
substancia especial que evita dicha
formación de espuma.
• Mientras la alfombra esté humeda no
la debe pisar.
W Colocar el adaptador para suelos duros en la
tobera para alfombras, con la parte de goma
hacia arriba siguiendo la dirección que señale la
flecha, tal y como indica el dibujo.
Así Ud. puede limpiar y secar sus suelos lisos, de
cerámica, suelo enlosado y suelos de plástico en
una sola operación.
X Para limpiar sus muebles tapizados o asientos de
automóvil use la tobera de pulverizar-extraer
para acolchados (20).
Tenga cuidado de que no caiga demasiado
líquido en los acolchados. Porque depende de la
base que tenga el acolchado tardará más
tiempo en secarse.
La tobera de pulverizar-extraer para acolchados
(20) debe ser directamente acoplada a la válvula
de cierre (17) y girando el embrague (39) se
asegurará la manga de presión a la válvula.
Suelte la manga de presión girando el embrague
(39).
Para el procedimiento de limpieza véase Ud. el
modo de limpieza de alfombras.
Desenchufar.
R
Antes de abrir el bloque motor (2) se debe sacar
la manga de presión (19). Para este fin, accione
la tecla de desenclavamiento en el acoplamiento
rápido (5). El pasador de conexión se expulsa
automáticamente.
A Retire el bloque motor (2) de la máquina y
colóquelo en un recipiente aparte para evitar
que caiga suciedad si gotéa.
B Quite y vacíe el depósito del líquido pulverizador
(28). (El líquido de limpieza no usado puede ser
conservado en un recipiente especial). Vaciar y
lavar sólidamente el recipiente.
O Para la limpieza de la bomba y válvulas llenar el
depósito del líquido pulverizador con agua
limpia, ponerlo en el recipiente y poner encima el
bloque motor (2).
Poner en marcha el sistema de pulverizar sobre suelos
lisos o sobre el fregador.
A continuación limpie los dos recipientes y deje secar
bien las partes desmontadas.
Depués de la limpieza en mojado
Limpieza de acolchado
Limpieza en mojado de suelo duro
Page 36

35
Limpieza y cuidado del aparato
¡Antes de la limpieza extraer siempre la clavija de
enchufe de la red!
¡No sumergir nunca en el agua la carcasa del motor!
Limpiar la carcasa del motor y el depósito con un
trapo húmedo y a continuación secar.
El depósito y las piezas accesorias empleadas se
deben limpiar en húmedo con agua jabonosa caliente
después de cada aspiración, en especial después de
la recogida de líquidos pegajosos.
Ayuda en caso de avería
Si en alguna ocasión su aparato no funciona según
las expectativas deseadas, no es necesario alarmar al
servicio posventa. Le rogamos revisar si el defecto
tiene pequeñas causas.
Cuando sale polvo al aspirar:
● ¿ Está montado el sistema filtrante de acuerdo con
las Instrucciones ?
● ¿ Se ha empleado un filtro de agua / filtro de
material no tejido original ?
Cuando la fuerza aspiradora poco a poco
se disminuye:
● ¿ Está el recipiente lleno ?
● ¿ Están los poros del filtro tapados a causa de
hollín o de polvofino ?
● ¿ Están obstruidas las toberas, filtro de agua, el
tubo de extensión o el tubo flexible para aspirar?
(Separar el tubo mientras el aparato este en
marcha - la extensión elimina la obstrucción.
● ¿ Está sucio el filtro de protección de la turbina?
Cuando la fuerza aspiradora disminuye de
golpe:
● ¿ Ha detenido la válvula de flotador la corriente
de aire? Esto puede suceder cuando el aparato
esté extremadamente inclinado o cuando se le dé
la vuelta. Apague el aspirador – el flotador baja –
el aparato está nuevamente dispuesto para el
funcioento.
Cuando no funcione el motor:
● ¿ Está el fusible intacto y hay corriente ?
● ¿ Están los cables, enchufes y la caja de enchufes
intactos ?
● ¿ Antes de probarlosdesenchufar.
● ¡ Nunca abra el motor !
Cuando no sale líquido de limpieza:
● ¿ Está la bomba conectada (la lámpara de control
(6) debe iluminarse)?
● Limpiar el filtro (37)
● ¿ Se encuentra líquido de limpieza en el depósito
del líquido pulverizador ?
● ¿ Está suelto el tuvo flexible en el depósito del
líquido pulverizador?
● ¿ Está la tobera obstruida?
Si en alguna ocasión de pulverización se obstruye la
tobera meta la tobera un tiempo en agua. Después
sople con fuerza.
Por la proteccion del medio ambiente:
No tire el material de embalaje, aparatos gastados y
botellas de producto de limpieza concentrado sino
llévelo para que de nuevo sean reciclados.
Pregunte en la administración municipal por el lugar
de reciclado o por el próximo lugar de
lamacenamiento competente.
Solamente productos de limpieza disueltos con agua
se pueden eliminar por el desagüe.
Los productos de limpieza concentrados solamente se
deben entregar en el lugar de reciclado o en el
próximo lugar de almacenamiento competente.
Servicio posventa
Pregunte a su comerciante por la dirección o el
número de teléfono del servicio posventa „Thomas”
competente para Ud.
Le rogamos facilitarle los datos de la placa
de características situados en el lado
posterior
de su THOMAS aspirador de lavado.
Para mantener la seguridad del aparato
deje reparar los defectos, sobretodo en las
partes que conducen la corriente,
solamente por especialistas electrónicos.
Por eso debe dirigirse en caso de defectos
a su comerciante especializado o
directamente al servicio posventa.
CERTIFICADO DE CONFORMIDAD CE
Certificamos con responsabilidad propia, que este
producto cumple las siguientes normas o documentos
normales.
– Directiva de Baja Tensión CE (73/23/CEE),
modificada por la 93/68/CEE
– Directiva CE sobre Compatibilidad Electromagnética
(89/336/CEE), modificada por las 91/263/CEE,
92/31/CEE, 93/68/CEE
Normas armonizadas empleadas:
DIN EN 60335-1, DIN EN 60335-2-2;
DIN EN 61000-3-2: 1995; DIN EN 61000-3-3: 1995;
DIN EN 55014-1: 1993; DIN EN 55014-2: 1997
Page 37

36
Indicações importantes! P
Ler com bastante atenção as presentes
normas informações que fazem parte
integrante do modo de utilização. Tratam-se
de indicações importantes sob o ponto de
vista da segurança, da instalação, da
utilização e da manutenção de Thomas
SUPER 30 S. Ler com atenção estas indicações
e entregar as mesmas para o utilizador
seguinte. O produtor não assume nenhuma
responsabilidade quando as presentes
instruções não são observadas. O Thomas
SUPER 30 S não deverá nunca ser utilizado
para funções para as quais o aparelho não
foi previsto. Este aparelho deve ser utilizado
exclusivamente dentro do lar.
• As características da corrente indicadas na chapa de
características têm de coincidir com as da corrente
da rede.
• O aparelho não deverá ser usado quando:
– houver danificação do cabo adutor,
– o aparelho apresentar danos visíveis,
– o motor tiver caído uma ven.
• Examinar se não houve danos de transporte no
aspirador.
• Eliminar a embalagem segundo as normas locais de
eliminação de embalagem no respeito do meio
ambiente.
• Nunca deixe o aparelho ligado sem vigilância e
não permite que crianças brinquem com ele.
• Modificações no aparelho poderão representar um
perigo para a sua saœde. Deixar efetuar
reparações somente por uma oficina especializada.
• Nunca utilizar o aparelho em ambientes com perigo
de fogo devido a substâncias inflamáveis ou onde
houver formação de gases.
• Prestar muita atenção quando se efetua a limpeza
de degraus de escadas. Deve-se ter a certeza que o
aparelho se encontra numa base sólida. Prestar
atenção para que a mangueira não tenha um
comprimento demasiado grande que apresente
tensão. Quando o aparelho estiver num degrau da
escada deve-se ter a certeza que se possa mantê-lo
firme com uma mão.
• Não utilize o aspirador-lavador para aspirar a
seco se o sistema de filtro não se encontrar
instalado em conformidade com as instruções.
• Atenção! Este aparelho não deve ser utilizado
para aspirar pós ou substâncias perigosos para a
saœde!
• Nunca aspirar líquidos com teor de detergentes,
como, por exemplo, solução de laque, óleo, gasolina
e outros líquidos cáusticos.
• Nunca deixar ao ar livre e nunca deixar em contato
direto com a umidade.
• Nunca deixar que os bocais e os tubos (com
aparelho ligado) estejam perto da cabeça. Há
perigo para os olhos e as orelhas.
• Nunca puxar a plugue da tomada pelo cabo,
utilizar para isto sempre diretamente a ficha.
• Prestar atenção para o cabo adutor não se
esquente ou entre em contato com substâncias
químicas e que seja puxado em cantos ou superfícies
agudas.
• Quando cabo adutor estiver danificado o mesmo
deverá ser substituído pelo serviço autorizado de
após vendas ou por uma pessoa qualificada para
evitar perigos.
• Nunca manter o aspirador perto de radiadores.
• Nunca efetuar pessoalmente reparações no Thomas
SUPER 30 S. Deixar as reparações serem feitas
sempre pelo serviço autorizado competente.
• Utilizar somente peças originais.
• Deve-se evitar, por razões de segurança pessoal, a
utilização de cabos de prolongamento em recintos
œmidos.
• Deve-se desligar da tomada:
– em caso de avarias durante a utilização;
– quando se efetuam trabalhos de limpeza e
cuidado;
– após o uso;
– ao efetuar a troca do filtro.
• Antes de eliminar o aparelho definitivamente devese cortar o cabo adutor.
• Nunca orientar o jato de detergente sobre tomadas
ou sobre aparelhos elétricos.
• Depois de utilizar à úmido ou após a utilização
pulverização/extração deve-se remover os
recipientes.
• Agentes químicos (detergentes de pulverização/
extração) não deverão ser colocados ao alcance de
crianças.
• Atenção! Somente quando se utiliza o detergente
original Thomas garante-se o funcionametno do
aparelho e o efeito de limpeza.
• As pessoas com pele sensível devem evitar contato
com detergente de limpeza.
• Antes de realizar qualquer trabalho no
aparelho deve-se colocar o interruptor
em posição "zero" e retirar a ficha da
domada.
• Se o concentrado de limpeza atingir as mucoses
(olhos, boca, etc...) deve-se limpar imediatamente
com água.
Page 38

37
Nossos parabéns pela sua
boa compra!
Aproveite bem a sua compra utilizando o
aparelho corretamente!
Possibilidades de utilização
O aspirador-lavador THOMAS poderá ser utilizado
para a limpeza de tapetes, estofados de móveis, pisos
lisos bem como para o cuidado cotidiano da casa. Ele
pode aspirar sujeiras como também líquidos. Ele pode
limpar, por exemplo pias e canalização com entupimentos. Acrescentando somente alguns acessórios o
Thomas aspirador-lavador pode ser utilizado para
limpeza à úmido de tapetes e estofadas e almofadas.
O Thomas aspirador-lavador é um aparelho de
utilização múltiple. No setor de pulverização/
extração é apropriado para a limpeza profunda de
tapetes, almofadas e pisos duros utilizando o
detergentes específico. Utilizando o bocal
apropriado, também pode ser utilizado para limpar
janelas.
Em caso de utilização à úmido deve-se utilizar
somente líquidos em base de água e nunca em
líquidos inflamáveis. Em sua função de aspirador é
ideal, entre outras coisas, para eliminar sujeira seca e
pó de tapetes, móveis e cortinas.
Montagem-descrição
Retirar o aparelho do cartão, remover o material de
embalagem e identificar as peças e funções do
desenho que se encontram no início do presente
modo de utilização para que possa entender bem as
seguintes instruções:
As partes necessárias para o dispositivo de
locomoção são embaladas soltas por razões técnicas
de embalagem.
Montar as poleias-guias
A Abrir a tampa de fecho de golpe (3) e levantar o
bloco do motor (2).
B Remover o reservatório de agente de
pulverização (28). Colocar o recipiente (1) com a
abertura para cima.
C Para pode realizar a montagem com facilidade
aconselha-se que se engraxem as extremidades
dos pinos (30).
Inserir, primeiramente, os pinos (30) nos picos do
recipiente (1), depois pressionar até ao tope
juntamente com as poleias-guias (4).
Colocar o recipiente (1) com as poleias-guias (4)
montadas sobre os rolos e fazer um teste de
funcionamento.
Colocar o bloco do motor
D Colocar o bloco do motor (2) de maneira que as
superfícies da tampa coincidam com o recipiente.
Após isto, apertar ambos os fechos de golpe (3).
Ligar a mangueira de aspiração
E Pressionar a mangueira de aspiração (13) em
direção do cabo de ligação de aspiração (8) até
que as marcas do cabo de ligação de aspiração
coincidam com a peça de conexão de aspiração.
Para retirar a mangueira deve-se remover
girando a peça de conexão de mangueira.
Após isto, inserir o acessório desejado.
Sujeição do tubo de aspiração
F Pendurar o tubo de aspiração (14) completo com
acessório e mangueira de aspiração (13) na
parte posterior do aparelho.
Conservação do cabo
G Após a aspiração pode-se enrolar o cabo
adutor (10) segundo o indicado na figura e
pendurar no dispositivo guarda do cabo.
J Filtro de proteção do motor
Após a utilização à úmido e após o processo de
trabalho de pulverização/extração deve-se
examinar se há sujeira no filtro de proteção do
motor (33). Se for o caso, deve-se efetuar a limpeza correspondente. Abrir, para isto, a válvula
flotante (38) na direção da seta e remover o
filtro de proteção do motor da abertura de
aspiração. Colocar o filtro limpado ou o novo
filtro e colocar, após isto, a válvula flotante.
Concentrado de limpeza
O seu Thomas aspirador-lavador possui 0,5 litros de
concentrado de limpeza Protex. Observar as
indicações de dosagem e de aplicação na etiqueta do
frasco.
Page 39

38
Aspirar a seco
Nunca use o seu aparelho AQUAFILTER na
operação de aspiração a seco sem o filtro de
água, sem o filtro têxtil para pó fino e sem a
correspondente carga de água.
Não aspire grandes quantidades de pó fino,
como p.ex. farinha, pó de cacau, cimento, etc.
Preparação
A Com a ficha desligada da tomada, retire o bloco
do motor (2).
B Retire o reservatório de água fresca.
L Empurre para o suporte respectivo (36) a
mangueira de aspiração (37) instalada no bloco
do motor (2).
H Monte o filtro (26) por meio da abraçadeira (25)
e fixe com os grampos giratórios.
I Encaixe o filtro AQUA de 3 partes até ao
batente e empurre firmemente até ao bocal de
aspiração.
Verifique a posição
das marcas.
O filtro AQUA tem de encaixar no fundo da
cuba de aspiração e assentar homogeneamente
no fundo.
Deite 2 litros de água limpa no recipiente de
aspiração.
J Suspenda o filtro têxtil para pó fino, dobrando a
margem superior.
D Instale o bloco do motor (2). O interruptor
giratório no aparelho tem de estar em ”0”.
G Ligue o cabo eléctrico (10) à tomada.
Entrada em funcionamento
Como ligar o aparelho
M Na operação ”Aspirar a seco”, o interruptor
giratório (7) tem de ser colocado no símbolo
”Bocal de tapete”.
A lâmpada (6) não deve acender
O aparelho está pronto para funcionar.
Limpeza e assistência
Por motivos de higiene, o sistema AQUAFILTER
e o recipiente de aspiração devem ser esvaziados, limpos e secos após cada utilização
porque a água suja e peças molhadas
favorecem a proliferação de bactérias e fungos.
O filtro têxtil para pó fino deve ser limpo com
um pano seco ou húmido de cada vez que ficar
sujo. Se o grau de sujidade for elevado, lave
com água limpa, mas sem detergentes. O filtro
deve estar perfeitamente seco quando for
utilizado novamente para aspirar.
Aspirar em molhado
Montagem
A Com a plugue desligada da tomada, retire o
bloco do motor (2).
Atenção: Antes de aspirar líquidos, não se
esqueça de retirar a unidade de filtro (26, 27 +
30).
L Manter a válvula flotante (38) sempre limpa e
operacionável. Ela interrompe automaticamente
a aspiração quando o recipiente está cheio.
D Colocar o bloco do motor (2). O interruptor
giratório no aparelho deverá estar em "0".
G Ligar o fio adutor (10).
Colocação em funcionamento
Ligar o aparelho
M Com o processo de trabalho "aspiração a seco"
o interruptor giratório (7) deverá estar no
símbolo "bocal de tapete".
A lâmpada de controle (6) não deverá
iluminar-se.
O aparelho está pronto para funcionar.
Os líquidos de recipientes poderão ser aspirados
diretamente com a mangueira de aspiração ou com
os tubos de aspiração.
Prestar atenção ao aspirar de recipientes
ou de pias cujo nível de líquido é mais
elevado e cujo conteúdo seja superior à
capacidade do recipiente do aspirador.
Neste caso, poderá ocorrer que com
recipiente cheio e com válvula flotante
fechada ainda corra líquido segundo o
princípio de elevação de aspiração.
Por isto mesmo, nestes casos, deve-se aspirar somente
quantidades parciais e esvaziar, de vez em quando, o
recipiente de aspiração.
Após a aspiração deve-se, primeiramente, elevar o
tubo de aspiração do líquido e depois desligar o
motor.
Atenção! Gasolina, diluentes, óleo diesel etc...
poderão formar misturas ou vapores explosivos
mediante a formação de redemoinhos.
Acetona, ácidos e detergentes poderão agredir os
materiais do aparelho. A água de limpeza ou de
proteção ser aspiradas sem problemas junto com
detergentes domésticos comuns encontráveis no
mercado.
Após a aspiração à úmido deve-se limpar e deixar
secar o recipiente e todas as peças utilizadas.
Page 40

39
Utilização do sistema de pulverização/extração
Antes da limpeza a seco de tapete
Assegurar-se de que tudo o que pretende aspirar
seja realmente apropriado a ser aspirado.
Nunca utilizar o aparelho para tapetes delicados,
tecidos à mão ou de cor não autêntica.
Para constatar isto deve-se deitar um pouco de uma
solução de detergente num pano limpo e roçar o
mesmo num lugar menos visível do tapete. Se não
surgirem restos de cor no pano, pode-se partir do
princípio de uma autenticidade da cor. Nos outros
casos, não se deve limpar a úmido o tapete.
Se tiver dúvidas a respeito, entre em contato com
lojas especializadas do gênero.
Durante os trabalhos de limpeza e após isto o recinto
deverá estar bem ventilado para possibilitar uma
secagem rápida.
Limpar tapetes à úmido/pulverizaçãoextração
A Remover o bloco do motor (2) com a ficha
removida da tomada.
B Quando se utiliza o sistema de pulverização/
extração deve-se prestar atenção a que o
reservatório do agente de pulverização (28)
esteja instalado.
N Colocar concentrado de limpeza no reservatório
do agente de pulverização (28) e encher o resto
com água (observar as indicações de dosificação
na etiqueta do frasco Protex).
Utilizar água morna (máx. de 30 graus).
Temperaturas elevadas poderão danificar o
aparelho, o tapete bem como os móveis.
L Solar a mangueira de aspiração (37) que se
encontra no bloco do motor (2).
0 Pendurar a mesma ao colocar o bloco do motor
(2) no líquido de limpeza.
D Bloquear o recipiente apertando ambos fechos
de golpes (3).
Como ligar a mangueira de aspiração e de
pressão
P Empurre a válvula de bloqueio (17) para o
alojamento no tubo de aspiração. Seguidamente,
encaixe o manípulo (11) no tubo de aspiração
(14). Fixe seguidamente a manga de pressão (19)
com os grampos respectivos (15) na mangueira
de aspiração (13).
E Após isto, empurra-se a mangueira de aspiração
(13) no cabo de ligação de aspiração de modo
que as marcas coincidam e a mangueira de
aspiração (13) se encaixe de maneira audível.
Q Após isto, colocar bem firme a mangueira de
pressão (19) na embreagem rápida (5) no bloco
do motor (2).
Empurrar, então, o segundo tubo de aspiração
(com os olhais de pendurar) no tubo já
previamente montado.
S Monte o bocal de pulverização / extracção de
tapete (18).
T Coloque na válvula de bloqueio (17) a manga
de pressão (12) fixa no bocal com o
acoplamento (39) e rode para prender.
Seguidamente, fixe a manga de pressão (12) no
tubo de aspiração com os pequenos grampos
para tubos (16).
O interruptor giratório no aparelho deverá estar
em "0".
G Ligar o cabo adutor (10)
O aparelho está pronto para funcionar.
Ligar o aparelho
U Girar o interruptor giratório (7) à posição de
pulverização/extração.
A lâmpada de controle (6) deverá, então,
iluminar-se.
Sistema de pulverização/extração
* Pulverizar a solução de limpeza profundamente
com pressão.
* Dissolver a sujeira e lavar bem profundamente.
* Aspirar a água suja com energia e direcionar
novamente para o piso.
Tudo num processo de trabalho
tubo de aspiração
tubo de pressão
direção de trabalho
aspirar e
centrar
pulverizar
dissolver e lavar
Page 41

40
T Colocar o boca de pulverização/extração sobre o
tapete num canto do quarto sobre o tapete.
Pressionar a alavanca da válvula (40) na peça do
punho até que a solução de limpeza seja pulverizada. Depois conduzir o bocal que se encontra sobre
o tapete numa linha reta sobre o tapete.
No fim da pista ou em caso de interrupções
deve-se soltar a alavanca da válvula para
interromper o jato de pulverização. Quando o
líquido pulverizado for aspirado deve-se
levantar o bocal e, com uma pequena cobertura,
deve-se iniciar uma nova pista.
Assim, consegue-se tira por tira tratar toda a
superfície.
Se, na pista limpada, sobrar um pouco de
líquido, pode-se aspirar novamente estes pontos
com a alavaca da válvula solta (40).
Devido à parte superior transparente do bocal
de aspiração pode-se decidir à vontade quando
se interromperá o processo.
V Em lugares bem sujos deve-se colocar o duplo
de líquido realizando a pulverização no
movimento de avanço e na volta pulveriza-se
outra vez e aspira-se ao mesmo tempo. Além
disto, com a indicação "pulverizar somente"
pode-se realizar um tratamento prévio.
Prestar atenção a que não se distribua líquido
demais no tapeteporque, assim, podem formar-se
ondas e bolhas, as quais poderão formar-se
novamente após um processo longo de secagem.
Para que se possa evitar um corrimento posterior
do líquido que se encontra no tubo de aspiração
deve-se manter o tubo de aspiração em posição
vertical para cima somente com o motor em
funcionamento.
Somente, após isto, deve-se ligar o aparelho.
Atenção!
Se o tapete tiver recebido anteriormente
shampoopoderáocorrerque,ao utilizarpela
primeira vez o aparelho de pulverização/
extração ocorraformação de espuma forte no
recipiente de sujeira. Se, eventualmente,
houver escapamento de espuma da purga de
ar deve-sedesligar o aparelhoe esvaziar o
recipiente de sujeira. Para evitar maior
formação de espuma deite um copo de
vinagre no recipiente de sujeira.
Uma formação ulterior de espuma fica
praticamente excluída após a realização de
uma limpeza profunda com o concen-trado de
limpeza de Thomas ProTex.
Não pisar no tapete enquanto o mesmo
estiver úmido.
Uma formação de espuma elevada é
praticamente excluída após uma limpeza
profunda com concentrado Thomas ProTex
porque o mesmo está equipado com um
shampoo especial.
Enquanto o tapete está úmido não se deve
pisar em cima do mesmo.
W Limpar com ajuda do adaptador de tapete duro,
segundo o indicado na figura, utilizando os
lábios de borracha indicando para acima na
direção da seta empurrando para o bocal do
tapete até ao top.
Assim pode-se lavar e secar num processo só os
pisos lisos de cerâmica, pedras e plástico.
X Para a limpeza de almofadas de móveis ou de
automóveis deve-se utilizar o bocal de
pulverização/extração de almofadas (20).
Tratando-se de móveis deve-se prestar atenção
a que não se deite demasiado líquido porque
segundo a constituição da camada inferior
poderá levar muito tempo para secar.
O bocal de pulverização/extração de
almofadas (20) deverá ser empurrado
diretamente para a válvula de bloqueio (17) e,
girando a embreagem (39) consegue-se sujeitar
a mangueira de pressão na válvula.
Afrouxar a mangueira de pressão girando a
embreagem (39).
Confira a limpeza de tapete no que se refere ao
processo de limpeza.
Retirar a ficha da tomada
R Antes de remover o bloco do motor (2) deve-se
afrouxar a mangueira de pressão (19). Para isso,
carregue na tecla de soltar no acoplamento
rápido (5). O pino de união é expulso
automaticamente.
A Remover o bloco motor (2) do aparelho e
colocá-lo o recipiente coletor para evitar
impurezas de água gotejante.
B Remover e esvaziar o tanque de agente de
pulverização (a solução que não for utilizada
poderá ser conservada num recipiente
apropriado). Os recipientes de sujeira deverão
ser esvaziados e bem limpados.
O Para proteger as bombas e as válvulas deve-se
encher o tanque do agente de pulverização com
água clara, colocar nos recipientes e recolocar o
bloco do motor (2).
Colocar em funcionamento o sistema de pulverização
num piso sólido ou sobre uma pia.
Após isto, limpar ambos os recipientes e secar bem as
partes desmontadas.
Após a limpeza à úmido
Limpeza de almofadas
Limpar à úmido tapetes duros
Page 42

41
Limpeza e conservação do aparelho
Antes de limpar o aparelho, desligue sempre a ficha
da tomada.
Nunca mergulhe a caixa do motor em água.
Limpe a caixa do motor e o recipiente com um pano
humedecido.
Tanto o recipiente como os acessórios utilizados têm
de ser lavados com água quente e sabão após cada
trabalho de aspiração em molhado, especialmente
após a aspiração de fluidos pegajosos.
Ajuda em caso de avarias eventuais
Se, contrariamente ao esperado, o seu aparelho não
funcionar bem, não precisa ir diretamente ao serviço
após vendas. Examine, primeiramente, se a avaria
apresenta somente causas pequenas:
Se durante a aspiração sair pó
• O sistema de filtro está montado em conformidade
com as instruções?
• Foi utilizado um filtro de água/filtro original?
Se a força de aspiração se perde com o
tempo
● O recipiente de sujeira está cheio?
● Os poros do filtro estão entupidos com pó fino ou
ferrugem.
● Os bocais, filtro de agua, os tubos de
prolongamento ou a mangueira de aspiração
estão entupidos com sujeira? (remover a
mangueira de aspiração com o aparelho ligado - a
extensão e dilatação afrouxa o que se encontra
entupido.
● Está sujo o filtro de proteção da turbina?
Se, de repente, a força de aspiração se
perde
● A válvula flotante do ar de aspiração está
entupida? Então, poderá acontecer em caso de
posição vertical extrema ou ao virar-se o aparelho.
Desligar o aparelho, - a válvula caia para abaixo e o aparelho estará novamente pronto para
funcionar.
Quando o motor não funciona
● O fusível está ok, e há tensão?
● Os cabos, tomadas, fichas estão em ordem?
● Remover a tomada antes do teste.
● Nunca abrir sozinho o motor.
Quando não há saída de líquido de limpeza
● A bomba está ligada. A (lâmpada de controle 6
deverá estar iluminada!)
● Limpar a peneira do filtro de aspiração /37)
● Há líquido de limpeza no tanque de agente de
pulverização?
● A mangueira de aspiração está livre no tanque de
agente de pulverização?
● O bocal de pulverização está entupido?
Se o bocal de pulverização estiver entupido devem-se
colocar os bocais, durante algum tempo, na água.
Após isto, ventilar bem forte.
Por amor ao meio ambiente respeitar o
seguinte:
O material de embalagem, os aparelhos não mais
usados e as garrafas de concentrado de limpeza não
devem simplesmente serem jogados foro para sim
reciclados.
Perguntar, por favor, na administração local, onde há
um centro coletor mais próximo ou um lugar de
reciclagem.
Na canalização deve-se colocar somente o
detergente diluído com água.
Em forma concentrada deve-se sempre levar o
detergente a um centro coletor ou a um centro de
reciclagem.
Serviço de após venda
Pergunte ao seu cliente o endereço ou o número de telefone do serviço competente de após venda de Thomas.
Indicar ao serviço de após venda os dados da
placa de características que se encontra na
parte posterior de seu Thomas aspiradorlavador.
Para poder manter a segurança de seu aparelhodevemserrealizadostrabalhos de
reparação, especialmente quando se trata de
peças condutorasdeenergia,somentepor
pessoaseletrecistas especializados. Em casos de
avarias consulte o seu vendedor especializado
ou diretamente o serviço de após venda.
DECLARAÇÃO DE CONFORMIDADE DA CE
Declaramos que este produto está em conformidade
com as normas ou com os documentos normalizados
seguintes:
– Directiva da CE sobre baixas tensões (73/23/CEE),
modificada por 93/68/CEE
– Directiva da CE sobre compatibilidade electroma-
gnética (89/336/CEE), alterada por 91/263/CEE,
92/31/CEE, 93/68/CEE
Normas harmonizadas aplicadas:
DIN EN 60335-1, DIN EN 60335-2-2
DIN EN 61000-3-2: 1995; DIN EN 61000-3-3: 1995;
DIN EN 55014-1: 1993; DIN EN 55014-2: 1997
Page 43

42
Fontos figyelmeztetések
Ké r j ük , o l v assa el f ig ye lm ese n a
ha szná la ti u ta sít ást, a me ly fo nt os
informá ciók a t ta rt alm a z a ta k arítóg é p
biz tonsá go ssá gá ra , ü ze mb ehe lye zé sér e, ha szn á la tá ra é s
k ar b a nt artá sá ra v o n a tk ozóa n.
O˝rizze m eg az uta sítá st és ha ha szná lt
k észü lé k é t ela dj a, a dj a ez t is át az új
tul aj d o nosna k.
A g yá rt ó és k ere sk edo˝ ne m vá ll al
fe l e lo˝ ssége t, h a a tov á bb ia k ba n
fe l sorolt e lo˝ í r á sok a t fi gy el me n k ív ül
ha gy j a.
A t a k arítógé pe t ne m sza ba d
re nde lt e té sto˝ l e lté ro˝ e n üze me lt et ni ,
k iz áróla g há zta rt á si ha szn ála tr a
a lk a lm a s!
Figye lem:
● a takarítóg épet 2 30 V hálóz ati feszültség
mu˝ köd te ti, a biz to síték min. 1 6 A.
● a kész üléket nem sz aba d üz embe helyez ni, ha
– a csa tlako zózsinór sérült,
– maga a készülék láthatóan sérült,
– a motorblokkot valaha leejtetté k.
● So hase hag yja a kész üléket bekapc solt
állapotba n felügye let nélkül, és ügyeljen a rra,
hogy g yerekek a készülékkel ne játsszanak.
● válto ztatásokat a készüléken csak a rra feljogo-
sított szakszerviz vég ezhet,
● nem szab ad a g épet olyan helyiség ben
hasz nálni, aho l tu˝zvesz élyes a nyago k találhatók
ill. különbözo˝ g ázok képz o˝ dhetnek,
● ó vatosan járjon e l lépcso˝ k tisztítá sakor.
Gyö zo˝ djö n meg róla, hogy a gép biztosan áll a
lépc so˝ fokon és a szívóc sövet ne feszítse túl nag y
távo lság ra. Le gjo bb, ha munka köz ben egyik
kezével mag át a készüléket fogja, rög zíti,
● N e használja a takarítóg épe t száraz szíváshoz,
hogyha a sz ûrõrendsz er nem a z utasításnak
meg felelõ en van szerelve.
● ez a készülék nem alkalmas eg észség re káros
po rsze ru˝ anyag ok felszívásá ra,
● o ldó szerta rta lmú folyadé kokat, ú. m. festékhigító,
be nzin, olaj, valamint maró fo lyadékokat nem
sza bad a kész ülékkel felszivatni,
● a takarítóg épet nem sza bad a sz aba dba n tárolni,
sem köz vetlen nedvességhatásnak kitenni,
● ne a zsinórt húzza ki az a ljzatbó l, mindíg a
dug aszná l fogja meg ,
● a c satlakoz óz sinórt ne húzza mag as ho˝ fokú
hely kö zelébe n, sem veg yszeres fo lyad ékban;
éles peremen való átvezetése is kerülendo˝ ,
● a kész ülék forró tu˝ zhely vag y fu˝ to˝ te st köze lében
nem tárolható,
● a meghibá sodo tt készüléket – b eleértve a háló zati
csa tlakoz ózsinórt is – csak sz akembe r (sze rviz)
javíthatja!
● nedves helyiségbe n, sajá t biztonsága é rdekébe n,
ne hasz náljo n ho sszab bítózsinó rt,
● a há lóz ati c satlako zót ki kell húzni:
– üzeme lés közbe n ész lelt hiba esetén,
– minde n tisztítás e lött,
– használat után mindenkor,
– sz u˝ ro˝ betét cse rélésekor,
● nedves szivatás va gy folyadékos sz o˝ nyegtisztítás
után a tartályt haladéktalanul ürítse ki,
● a tisztítósz eres po rlasz tó sugarat so ha ne irányítsa
fali csatlakoz óaljza to kra, sem más elektromo s
készülékre,
● vegysze reket, a tisztítófo lyad ék koncentrátumot ne
eng edjük g yermekek kezéb e kerülni,
● csak az eredeti THOMAS
tisztítófolyadékok használatával
tökéletes a készülék mu˝ködése és
kiváló a tisztítóhatás.
Egyéb mosó po rok ha szná lata a gép ben is
károso dást o koz hat!!!
● érzékeny b o˝ ru˝ ek kerüljék a tisztítófo lyad ékkal
való kö zvetlen érintkez ést,
● a kész üléken végzendo˝ b ármely mu˝ velet elo˝ tt a
tárcsá s kap csolót „ nulla” he lyze tb e kell állíta ni,
a háló zati csatlakozót ped ig ki kell húzni.
● a sz ívócsö vet ill. fejet/ b ekapc solt készülék
ese tén/ ne emelje feje közvetlen köz elébe –
ez sze mre, fülre veszé lyes lehet,
H
Page 44

43
A takarítógép alkalmazhatósága
THOMAS SUPER 30 S AQ UAFILTER készülék po rszívó ként használható szo˝ nyeg ek, kárpitoz ott
bútorok, sz ilárd p adló zatok tisztításához és á lta lába n a szokásos lakástakarításho z; a sz áraz sz enynyez o˝ anya go kat és folyadéko kat eg yaránt felszívja,
pl. eldugult lefolyók tisztítására is alkalmas. N éhány
eg yszeru˝ a lkatrész hasz nálatával a szo˝ nyegek és
kárpitozo tt bútorok nedves tisztítá sát is megoldja.
A takarítógé p rendkívüli új je llemz o˝ je, hogy víz szu˝ ro˝
sze rkez ettel rendelkezik, a mely a be szívott leveg o˝ t
vizen á ramoltatja át és e bbe n a po r lecsa pódik.
Pap ír po rzsá k hasz nálata nem szükség es!!
Ez a takarítóg ép sokoldalúan hasz nálható te rmék.
A kiporlasz to tt tisztító oldat seg ítségével szo˝ nyeg ek
és kárpitozott bútorok, va lamint szilárd pad lóz atok,
az ablakmosó fej segítség ével ped ig a blakok
tisztítására alkalmas.
Külön e lo˝ nye, hogy a tárcsá s kap csoló kiporlasz tá si
funkciót je lölo˝ sz imbó lumra állítá sával e lo˝ áztatási
mu˝ velet végez heto˝ , tehát a kész ülék csak a tisztítóo lda to t po rlasztja be az anyag ba , akár többszö r is, és
nem sz ívja vissza. Vég ül a po rlasz tó -szívó prog ram
be állításával a sze nnyez ett fo lyadék e ltávo lítható.
Ero˝ sen szennyezett szo˝ nyeg ek, textiliák esetén
rendkívül hatékony tisztítást biztosít.
Ned ves po rszívó ként a lkalmaz va c sak víza lapú
folyadékok jöhetnek szóba , g yúlékony fo lyadékokat
nem sz abad felszivatni. Porszívóként a készülék csa k
szá raz sze nnyez o˝ anyag ok é s po r eltá volítására
alkalmas sz o˝ nyegekbo˝ l, pad lóz atról b útor- és
autókárpitbó l!
A készülék összeállítása
A készülék futómu˝ elemei külön találhatók a
kartonban.
Ta l p g ö r go˝ k fe lsz e re lé se
A áb ra: A záró kallantyúkat (3) nyissa fel é s a
motorblokkot (2) emelje le.
B á bra: A tisztítóoldat tartá lyát (2 8) é s a
tisztítófolyadé k konc entrátumot vegye ki.
A po rszívó ta rtályt (1 ) fordítsa fel nyílásáva l
lefelé.
C ábra: A könnyebb sze relheto˝ ség érdekéb en
java soljuk a talpgö rgo˝ k tenge lycsa pjait (30)
két végükön megz síroz ni.
Elo˝ ször a tengelycsap okat (30 ) nyo mja b e a
tartály a lján található nyílásokba, majd a
görgo˝ ket (4) ráhúzva együtt nyo mja be
ütközé sig.
A tartályt (1) a felszerelt talpg örgo˝ kkel (4 )
ez után állítsa talpá ra ill. a görgo˝ kre és
elleno˝ rizze a kifog ástalan mozgathatóságot.
M o t o r b l o k k f elh el ye zé se
D á bra: A mo to rblokkot (2) úgy helyez ze fel, ho gy
a motorház és a tartály pereme po nto san
illeszkedjé k. A kapc solók a gég ecso˝ bemeno˝
aljzattal egy vo nalba kerüljenek, Ezután a
zárókallantyúk (3 ) lehajtásával rögzítse.
Gé g ecso˝ be he lye zé se
E á bra: A g égec sövet (1 3) úgy nyomja be a
tartályo n levo˝ aljzatba , ho gy a
cso˝ csatlako záson és az a ljzaton látható illesztési je lek pontosan eg ymáshoz kerüljenek és a
rugalmas rög zíto˝ gomb helyére pattanjo n.
A gég ecso˝ kivételekor a c satlakoz óg yu˝ ru˝ t
csa varó moz dulattal húzz a kifelé.
A m er ev szív ó cso˝ elh el ye zé se
F
áb ra: A merev sz ívócsö vet (1 4) tartozékaival és
a gégec so˝ vel (13) e gyütt ö ssze szerelt
állapotba n fel lehet helyezni akasztógombja
seg ítségéve l a kész ülék fog antyújána k hátsó
részé n található bea kasz tó nyílásba , íg y
mozg atásnál sem igényel külön e lhelyez ést
vag y egyik kézbe n történo˝ ho rdo zást.
Há ló z a ti csat la k oz óz sinór el he ly e zé se
G
áb ra: A munka vé geztével a háló zati
csa tlakoz ózsinórt (1 0), a hog y az ábra mutatja,
lazán fel lehet tekerni és a fo gantyún található
be mélyedé sre fel lehet akasztani.
J M ot o r v éd o˝ - szu˝ r o˝
Minde n nedves felszívás ill. folyadékpo rlasztós
tisztítási mu˝ velet után ajá nlatos a motorvéd o˝ szu˝ ro˝ (3 3) sze nnyez ettség ének elleno˝ rzé se,
szükség esetén meg tisztítása. Ehhez a z
úszó go lyó sz elep (38 ) kosarát – az alján látható
jelek sz erint – nyílirányb an megdö ntve emelje le
és a z alatta köz épe n található nyílásbó l a motorvédo˝ -szu˝ ro˝ kerek szivacskorongo t emelje ki.
A meg tisz tított vag y új sz u˝ ro˝ t helyezz e be , majd
az úszó go lyó sz elep kosarát is tegye vissza és
nyomja a helyére.
Page 45

44
Száraz porszívózás
Aq uafilter készülékét száraz porszívóz ásra soha
ne hasz nálja Aquafilte r (vízz el szu˝ ro˝ eg ység ), a
finom p ort felfogó textil szu˝ ro˝ betét és a
meg felelro˝ víztöltés nélkül.
Ne szívasson fel nag y mennyiség ben finom
po rt, pl. lisztet, kakaópo rt, c ementet, stb.
A A háló zati csa tlakoz ó kihúzása után a
motorblokkot (2) emelje le.
B A tisztítófo lyad ék-ta rtályt vegye ki.
L Ezután a motorblokk alsó rész én kivezetett
nyomócsö vet (3 7) dug ja b e a z o tt található
vakfoglalatba (36 ) (mivel szá raz po rszívásnál
nincs sz ükség a tisztítófo lyadék nyomóc sövére).
H A mo to rvédo˝ szu˝ ro˝ sapkát (2 6) és rá a
rög zíto˝ gyu˝ ru˝ t (25) a z á bra sze rint helyezze fel,
vég ül a két szo rítókallantyú ráfo rdításá val
rög zítse.
I A két részes aquafiltert dugja ö ssze és a tartály
be lso˝ o ldalán lévo˝ szívóc so˝ csonkra ero˝sítse fel.
Ügye ljen
a jelzésekre.
Az Aquafilter betétnek a szívó ta rtá ly a lján
be pattanva, vízszintesen kell e lhelyez kednie.
Töltsön 2 lite r tiszta vizet a sz ívótartályba.
J A textil szu˝ ro˝ be tétet a sz ívótartály felso˝
pe remére felfektetve helyezze be.
D Helyez ze vissza a motorblokkot (2).
A készüléken lévo˝ tárcsás kap csolónak „ 0”
helyzetben kell állni.
G A háló zati csatlakozót (10 ) dugja a z a ljza tb a.
A k é szülé k b e k a pcsolá sa
M ábra: Száraz porszíváskor a tá rcsás
kapc solónak (7 ) „szo˝ nyeg porszivófej” jelre
állítva kell lennie.
A kontrollámpának (6) ekkor nem szabad
világítania.
A készülék e zzel üzemkész .
Az Aquafilter rendszer tisztítása és
karbantartása
Az Aquafilter rendszert és a szívótartályt
minden használat után higiéniai okokból ürítse
ki, tisztítsa és szárítsa meg, ugyanis a szennyes
víz és a nedves alkatrészek elo“segítik a
baktériumok és gombák elszaporodását.
A textil szu˝ ro˝ betétet a sz ennyez ettség mérté kének
meg felelo˝ en sz áraz vag y nedves kendo˝ vel törö lje á t.
Ero˝ s sze nnyez ettség e setén tiszta vízz el, mo só- és
tisztítósze r alkalmazása nélkül, mo ssa á t. Ügyeljen
arra, ho gy a szu˝ ro˝ betétet csak teljesen meg száradt
állapotba n használja ismét.
N ed ve s fe l szív ás
A A háló zati csa tlakoz ó kihúzása után a
motorblokkot (2) emelje le.
Vigyázat! Ne dves szívásnál ill. fo lyadéko k
felszivatása kor a vízszu˝ ro˝ egységet és a
motorvéd o˝ szu˝ ro˝ sapkát vegye ki.
L Az úszó szelepe t (38 ) tartsa mindig tisztán és
mozg athatóan, mivel e z a utomatikusan
meg szakítja a sz ívást, amikor a tartá ly megtelik.
D Helyez ze vissza a motorblokkot (2).
A készüléken lévo˝ tárcsás kap csolónak „ 0”
helyzetben kell lennie.
G A háló zati csatlakozót (1 0) dug ja a z a ljza tb a.
A k é szülé k b e k a pcsolá sa
M ábra: Ned ves felszíváskor a tárcsás
kapc solónak (7 ) „ szo˝ nyeg porszívófej” jelre
állítva kell lennie.
A kontrollámpának (6) ekkor nem
szabad világítania.
A készülék ezzel üzemkész.
Különbö zo˝ tartályo kbó l folyad ékokat is át lehet
szivatni a g égec so˝ vag y a merev szívóc so˝ seg ítség ével.
Vigyá zat! Ha a takarítóg ép ta rtályánál nag yobb
térfog atú ill. magasa bb folyadékszintu˝ tartályból
szivat á t folyadékot, akkor a készülék tartályának
meg te ltével z árt úszó szelep esetén továbbra is
átfolyik a folyadék a köz lekedo˝ ed ény e lv alapjá n.
Éppen ez ért eg ysze rre csa k részmennyiség eket
szivasson át és ido˝ nként ürítse ki a takarítóg ép
tartályát. Szivatás után e lo˝ szö r a sz ívócsö vet e melje
ki a folyadékból, c sak ez után kapc solja ki a motort.
Vigyá zat! Benz in, festékhigító, fu˝ to˝ olaj, stb.
felkavarásakor a szívóleve go˝ vel keve redve
rob baná svesz élyes e leg yek vag y g o˝ zök
keletkezhetnek.
Ac eton, sa vak és oldó szerek a készülék a nyagát
károsíthatják. A kereskedelemben szokványo s
ház ta rtási tisztítószerek és ez ek szennyvize minden
továb bi nélkül felszivatható. Nedves sziva tá s után a
tartályt é s a töb bi a lkatrész t meg kell tisztíta ni é s
szá radni hagyni.
Page 46

45
A folyadékporlasztós
tisztítórendszer használata
N ed ve s tisztítá s e lo˝ tt
G yo˝ zo˝ djé k meg róla, hogy a tisztítandó a nyago k és
felületek ned ves tisztítá sra a lkalmasa k.
Ne hasz nálja a gépet gyenge, kéz iszö vött vag y nem
színtartó szo˝ nyegek tisztítására. Ennek eldö nté séhez
teg yen a higított tisztítóo lda tb ól egy keveset fehér
rong yra és azz al dörzsö lje meg a szo˝ nyeg et egy
kevésb é látható helyen. Ha ne m maradna k a
rong yon szinezé knyomo k, akkor a szo˝ nyeg
színtartó nak tekintheto˝ . Ellenkez o˝ ese tb en a
szo˝ nyeget ne vesse a lá nedves tisztítá snak.
A szo˝ nyeg nedves tisztítása e lo˝ tt azt teljes felületén
alapo san p orszívózza ki. A tisztítá s alatt és után jól
sze llo˝ zzön a helyiség , ho gy a szárad ás is g yorsan
következhe ssék b e.
Szo˝ n y e gt i sztítá s
A áb ra: A há lóz ati c satlako zó kihúzása után
veg ye le a motorblokkot (2).
B á bra: A fo lyad ékporlasz tó s tisztítórendszer
hasz nálatakor ügyeljen arra, ho gy a tisztító oldat
tartálya (28) be nnleg yen a helyén a
készülékbe n.
N áb ra: Ö ntsön 1 00 –15 0 g tisztító folyadé k
koncentrátumot az o lda t tartályába (2 8) é s töltse
az t fel teljesen vízz el. C sak kézmeleg vize t hasz náljon (max. 30 ° C). A mag asabb ho˝ mérséklet
nemcsak a készüléket, ha nem a szo˝ nyeg et vagy
kárpitozo tt bútort is káro síthatja.
L ábra: Húzz a ki a mo to rblokk alsó felén a
tisztítófolyadé k csatlako zó nyo móc sövét a
vakfoglalatból.
O ábra: Úgy helyezze vissza a motorblokkot a
készülékre, hogy a nyomócsö vet lógassa be le a
tisztítóoldatos tartályba.
D á bra: Zárja le a g épe t a két zárókallantyú (3 )
lenyo másával.
A szí v ó- é s n y o m ócso˝ csa t la k o z t a tá sa
P ábra: Csúsztassa a nyo mószelep részt (1 7) az
ad apteren (17a) ta lálhotó vez etösinbe, majd a
gég ecsövet a szab ályzó tolóka (1 1) felöli
vég darabjá val tolja ö ssze a merev szívó cso˝ vel.
A vékony nyo móc sövet (19 ) ez után a pá nto kkal
(15) e ro˝ sitse a gégec so˝ hoz .
E á bra: A g égec sövet (1 3) úgy helyezz e be a
tartályo n levo˝ csa tlako zó aljza tb a (8), hogy a
csa tlakoz ási po ntok e gymáshoz kerüljenek é s a
gég ecso˝ karmantyúja b epa ttanjo n a helyére.
Q ábra: Vég ül a nyo mócsövet (19 ) a motorblokk
(2) o lda lán található aljzatba (5) c satlakoz ta ssa
eg yszeru˝ benyo mással.
A nyomócso˝ (19 ) e gyik vég én g yorscsatlakozó
található, amely az (5 ) aljzatba eg yetlen
be pattintá ssal b ehelyez heto˝ , másik végén pe dig
eg yszeru˝ bajo nett csatlakozó van a
nyomósze lephez (17) való ero˝ síté shez .
S ábra: Sze relje a merev szívócso˝ vég ére a
szo˝ nyegtisztító feje t (18 ), amely e gyb en a
tisztítóoldat porlasztó fuvókáját is tartalmazza.
T
áb ra: A p orlasztófejhez rög zített nyomócso˝ (12 )
másik vég ét a bajo nett csa tlakoz óval (39)
helyezz e fe l a nyo mószelepre (17 ). Végül a
kiseb b felero˝ síto˝ mu˝ anyag pántokkal (16 )
rög zítse a nyo mócsö vet (12) a szívó cso˝ höz .
A készüléken levo˝ tárcsá s kap csolónak „ 0”
helyzetben kell állnia.
G ábra: A háló zati csatlakozót dugja be az
aljzatba é s a készülék üzemelésre kész.
A szönye gt i sztí t ó üze me lt et ése
U
áb ra: A tárcsá s kap csolót (7) á llítsa a
szo˝ nyegtisztító porlasztós fejet ábrázo ló jelre.
A kontroll á m pá na k m o st vi lá gíta ni a k e ll.
A folyadékpo rlasztáso s tisztítórendsze r
* A tisztító o ldat nagy nyo mással történ
o˝
be porlasz tá sa
* A sze nnyez és felo ldása és kimosása sz álmélység ig.
* A sze nnyez ett víz er
o˝ teljes fe lszívása , bolyhok
kiegyenesítése
.
Minde z e gyetlen mene tb en
törté nik.
szívócs
ö
nyomócs
ö
tisztítás iránya
elszívás és
felegyenesítés
kiporlasztás
oldás és kimosás
Page 47

46
T á bra: A fo lyad ékporlasz tó s tisztítófejet a helyi-
ség eg yik sarkáb an helyezze a sz o˝ nyegre,
innen kez dje a munkát. Aho gy fogja a
szívó csövet, a sze lepnyitó kallantyút (40 )
nyomja le, a míg a tisztítóo lda t nem kezd
po rlasztva kiáramlani a fuvókán keresztül.
Ezután a sz önyegen nyugvó szívófe jet
hosszá ban lassan húzz a vé gig a szo˝ nyegen,
minte gy eg yenes sávot képez ve.
A sáv vég én ill. esetleges meg szakításkor
eng edje fel a kallantyút, hogy a z o ldat
kiporlasztásá t meg szüntesse. Ha a sávo n
vég ighaladva a kiporlasz to tt tisztítóo lda to t a
szívó fejje l egyideju˝ leg már felsze dte, e melje
meg kissé a szívófejet és könnyed á te melö
mozd ulattal kez dje meg pá rhuza mosan az
újabb sáv tisztítá sát. Igy szo rosa n egymás mellé
illeszkedö sávonként tisztítsa fel a z e gész
felületet.
Ha a letisztíto tt sávo n még folyadé knyomo k
marad nána k, felenged ett kallantyúval (4 0),
tehát fo lyadékporlasz tá s nélkül, ez eket a
helyeket ismételte n szivassa fel. Mivel a szívófej
felso˝ része áttetszo˝ mu˝ anya g, a melyen a b elülre
felszívo tt ned vességcse ppek jól láthatók;
könnyen megá llapítható, hogy mikor fejezö dö tt
be a ned vesség felszivatása.
V ábra: Ero˝ sen sz ennyez ett helyeken a
készülékkel kétsze res mennyiség u˝
tisztítófolyadé kot is a dag olhat, ésped ig elo˝ re
törté nö tolással fo lyadékot po rlaszt a
szo˝ nyegre, vissza felé való húzá ssal p edig ismét
po rlaszt és ugyanakkor a szívófej fel is szívja.
Ha a tá rcsás kapcsolót „csak po rlasz tá s” je lre
állítja , ug yanígy könnyen elvég ezhetö ez az
elo˝ kezelési mu˝ velet.
Ügye ljen a rra, hog y ne kerüljön túl sok
tisztítóoldat a sz o˝ nyegre, mert az hullámo sodást
vag y felpúposodá st o koz hat és e zek c sak
hossza dalmas szá rítá si e ljárással korrigálhatók.
A tisztítá s végez té vel tartsa kissé ferdén felfelé a
szívó csövet és járassa a mo to rt, csa k ez utá n
kapc solja ki, így a sze nnyes folyadék nem
cso rog vissza a szo˝ nyeg re.
Figye lem! Ha a sz o˝ nyeget korább an sampo nnal
kezelték, a fo lyad ékporlasz tó s tisztítórendszer e lso˝
alkalmaz ásakor ero˝ teljese bb hab képzo˝ désre
kerülhet so r a szennyvízfelfogó tartályba n. Ha a
légkiereszto˝ nyíláson már hab jönne ki, kapcso lja ki
a készüléket és ürítse ki a szennyvízg yüjto˝ tartályt.
Tová bbi hab képzo˝ dés meggátlására ajánljuk 1 kis
kávésc sész e e cet beö ntését a szennyvíztartályba.
Foko zo tt hab képzo˝ dés a takarítóg ép e gyszeri
alkalmaz ása és THOMA S ProTex és ProFloo r
tisztítóoldat használata után kizá rt, mivel a folyadék
speciális hab zásgátlót tartalmaz.
Amíg a szo˝ nyeg nedve s, ne járjon rajta !
Szilá rd p adlóza t ta k arítá sa
W ábra: A szilárd pad lóho z való fejkiegész íto˝ t
(22) húzza rá a folyadéko s szö nyeg tisztító
fejre (18 ).
Igy a síma kerámia-, ko˝ -, mu˝ anya g- és fa
pa dlób urkolatokat egyetlen munkafo lyamatba n
tisztíthatja é s sz áríthatja fel.
Ká rp it o z o t t bú t o r o k ti sztítá sa
X ábra: Kárpitozo tt bútorok és autóülések
tisztításához a kárpittisztító fejet (20 ) kell
feltenni. Ügye ljen a rra, hog y ne ho rdjo n fel túl
sok tisztítóoldatot, mivel a bútor felépítésétöl
függ o˝ en jó val hossz abb szá radási ido˝ re kell
szá mítania.
A kárpittisztító fejhez (2 0) köz vetlenül
csa tlakoz ta ssa a nyo mószelepet (17 ), majd
ehhez a gé gecsö vet, tehá t a merev szívóc so˝ re
nincs sz ükség .
áb ra: O ldja ki a nyo móc sövet úgy, hogy a
nyomósze lepnél lévö bajo nett csatlakoz ót (39)
elfordítva hioldja és így a nyomóc sö kihúzható.
Folya d é k p o r l a szt ó s ti sztí t á s u tá n
v é gz en dö
Húzza ki a hálóz ati c satlako zót.
R á bra: A motorblokk (2) levétele elött le kell
oldani a nyo mócsövet (19 ). Ehhez nyomja le a z
(5) c satlako zó a ljza t kioldó go mbját.
A nyomócso˝ vég darabja mag ától kipattan.
A áb ra: Veg ye le a készülékro˝ l a
motorblokkot (2).
B á bra: A tisztítóo ldat tartályát (2 8) veg ye ki és
ürítse ki. (A fel nem haszná lt tisztítóo ldat
meg felelö tartályban a következ ö alkalomra
tárolható.) A szennyvízfelfog ó ta rtá lyt ürítse ki és
alapo san mo ssa ki.
O ábra: A tisztítóo lda t szivattyújának é s
sze lepének kitisztítása é rdekébe n a tisztítóo ldat
tartályát töltse meg tiszta vízz el, helyez ze vissza
a készülék tartályáb a é s a motorblokkot (2)
ismét ero˝ sítse vissza a helyére.
A po rlasztórendszeren fuvassa át a tiszta vize t
ko˝ pad lóra vagy mo sdókag ylóba . Végül mindkét
tartályt újra mossa ki és a szé tsz erelt
alkatrészeket hag yja meg száradni.
A t a k arítógé p ti sztítá sa é s
k ar b a nt artá sa
A tisztítá s e lo˝ tt a há lóz ati dugasz t mindig ki kell húzni!
A motorház at soha sem sza bad vízb e mártani!
A motorház at és a ta rtá lyt nedves ruhával le kell
törölni, é s hagyni kell meg száradni.
A tartályt, és valamennyi hasz nált tartoz ékalkatrész t
minden nedves szívás után meleg sz app anos vízz el
meg kell tisztíta ni, különö sen rag adós fo lyadékok
szívása esetén.
Page 48

47
Hibaelháritás
Ha az alábbi hibá k jelentkez nek a z üzemelés során,
ez ek esetleg köz vetlenül elháríthatók, eg yébként
forduljon szervizhez:
Mu˝ködés közben por száll ki a készülékbo˝l
• viz sgálja meg, hogy a szu˝ ro˝ betét felhelyezé se
meg felelo˝ é s szo rosan illeszkedo˝ leg yen,
• c sak eredeti szu˝ ro˝ betétet haszná ljon,
• e lleno˝ rizz e a motorvéd o˝ szu˝ ro˝ sapkát, ha sza kadt,
cse rélje ki.
A szívóero˝ fokozatosan csökken
• sz ennyez o˝ anyagtartály e setleg meg te lt;
•a szu˝ ro ˝ betétet esetleg finom por vag y koro m tömte
el;
• a szívó fejet, a merev szívó csövet és a g égec sövet
eltömte a sze nnyez o˝ dés. (Bekap csolt készülékkel
sze dje szét a szívócsö veket, a sz ennyez ödés így
fellazulhat és kifuvód hat.)
A szívóero˝ hirtelen lecsökken
• a z úszó szelep elzárja a szívó levego˝ t, a mely
leginkáb b akkor fo rdulhat elö, ha a készüléket
ero˝ sen ferde helyze tb en haszná lja vag y feldö nti.
A készüléket kapcso lja ki, a z úszószelep ekkor
visszaesik és a készülék ismét hasz nálható.
A motor nem mu˝ködik
• viz sgálja meg a b iztosítékot, hog y a készülék
kap- e á ramo t;
• viz sgálja meg a c satlakoz óz sinór, duga sz é s
aljzat sértetlenségét;
• viz sgálat elött a há lóz ati csatlakoz ót húzza ki;
• se mmi esetre se m szab ad a motort felnyitni!
Nem jön ki a tisztítóoldat
• lenyomta-e a po rlasztó nyo mószelep kapcso ló
kallantyúját (a ko ntrollámpána k (6) világ íta nia
kell);
• va n-e tisztítóo lda t a tartályba n;
• b elül a felszívócso˝ szaba don b elóg -e a
tisztítóoldat tartá lyáb a;
• tisztítsa meg a felszívó cso˝ vég én levo˝ kis szu˝ ro˝ t;
• e setleg eltömo˝ dö tt a porlasz tó nyílás.
Ha a porlasz tó nyílás tömo˝ dött el, a kkor az azt
tartalmaz ó nég yszö gu˝ mu˝ anyag idomot sínszerü
illesztésébo˝ l húzz a ki é s á ztassa tiszta vízb en.
Utána ero˝ sen fújja á t. Visszahelyez éskor ügyeljen
arra, ho gy a porlasz tó fej p árhuza mosan álljon a
szívó fejjel.
Mino˝ségtanusítás
Kizá rólagos kép viselo˝ és impo rto˝ r:
WELTECH Kft
10 97 Budapest, Pápay I. u. 3 .
Tel/ fa x: 2 15-00 96
Tel: 21 5-00 96, 2 15 -89 24, 2 18 -06 66
Hálózati feszültség 230 V
Biztosíték 16 A
Max. teljesítményf elvétel 140 0 W
Max. alulnyom ás (szívás) 180 mbar
Max. szivatty únyomás 4 bar
– max. , továbbítot t mennyiség 0,6 5 l/ m in
Tartá ly befogadók épessége 3 0 l
Szennyvízbef ogadó képesség 20 l
– foly adékporlasztásos tisztításnál 14 l
Tisztítóoldat tartál ya 10 l
A készülék hat ósugara 10 m
Mért zaj teljesíményszint LWA 84 dB
CE Konformitási nyilatkozat
Kizárólagos felelősségünk tudatában
kijelentjük, hogy ez a termék megfelel a
következő szabványoknak vagy szabványdokumentumoknak:
- EG alacsony feszültségi ajánlás (73/23/EWG),
(93/68/EWG) dokumentummal módosítva
- EG ajánlás: elektromágneses tűrés
(89/336/EWG), módosítva (91/263/EWG),
(92/31/EWG), (93/68/EWG)
Alkalmazott harmonizált szabványok:
DIN EN 60335-1, DIN EN 60335-2-2;
DIN EN 61000-3-2, 1995; DIN EN 61000-3-3, 1995;
DIN EN 55014-1, 1993; DIN EN 55014-2, 1997
Page 49

48
ÖÖnneemmllii aaççııkkllaammaallaarr
Bu kullanma talimatını lütfen dikkatlice okuyunuz. Bu kullanma talimatı,
THOMAS Yykama ve
Süpürme Makinesi
in emniyeti, kurulması,
kullanımı ve bakımı konu-larında önemli bilgiler
içermektedir. Kullanma talimatını iyi saklayınız ve
lüzumu halinde malla birlikte sonraki sahibine
veriniz. A
h
haœœ
ıda belirtilen hususlara uyulmaması
halinde imalatçı her hangi bir mesuliyet kabul
etmez.
THOMAS Yykama ve Süpürme Makinesi
Super 30 S
yanlı
æ
æ
, yani öngörülenin aksine
k
kuullllaannııllmmaammaallııddıırr.. BBuu aalleett ssaaddeeccee eevvddee kkuullllaannıımm
aammaaccıınnaa yyöönneelliikkttiirr..
• Æebeke gerilimi model etiketindeki gerilime
uygun olmalıdır.
• Aleti aæaœıdaki hallerde çalıhtırmayınız:
– Cereyan kablosunda hasar olması halinde,
– Alette gözle görülen hasar olması halinde,
– Motor kısmının bir defa yere düæmesi halinde.
• Emiciyi nakliye hasarı konusunda kontrol ediniz.
• Çalıæır vaziyetteki aleti daima gözetim altında
tutunuz ve çocukların aletle oynamamalarına
dikkat ediniz.
• Alette yapılacak deœiæiklikler saœlıœınzı tehlikeye
sokabilir. Bu sebepten dolayı sadece uzman bir
atölyede tamir ettiriniz.
• ıçerisinde yangın tehlikesi arzeden malzemelerin
bulunduœu veya gazların oluætuœu odalarda aleti
kesinlikle kullanmayınız.
• Merdiven basamaklarını temizlerken çok dikkatli
olunuz. Aletin, merdivenin zemininde saœlam bir
æekilde durmasını ve hortumun mevcut uzunluœundan daha fazla çekilmemesini saœlayınız.
Her defasında elektrikli süpürgeyle merdiven basamaœı süpürmeniz halinde, düæmemesi için
süpürgeyi elinizin biriyle sıkı tutunuz.
• Filtre sistemi talimat doœrultusunda monte
edilmediœi sürece yıkama ve süpürme makinesini
kuru süpürme için kullanmayınız.
• Dikkat! Bu alet saœlıœa zarar verici tozları süpür-
mek için uygun deœildir.
• Örneœin boya incelticisi, yaœ ve benzin gibi eritici
maddeler ve yakıcı maddeler içeren sıvıları emerek süpürmeyiniz.
• Dıæarıda ve direkt neme maruz bırakmayınız.
• Ventillerin ve boruların (alet açıkken) baæınızın
yakınına gelmemesi gereklidir, örneœin göz ve
kulaklar için tehlike.
• Prizden çıkartırken hiç bir zaman kablodan tutup
çekmeyiniz, fiæi çekip çıkartınız.
• Cereyan kablosunu hiç bir zaman sıcaklıœa veya
kimyasal sıvılara maruz bırakmayınız ve keskin
kenarlar veya yüzeyler üzerinden çekmeyiniz.
• Bu aracın baœlantı kablosu zarar gördügü taktirde
tehlikeli bir durumun oluæmasını önlemek için
üreticisi veya onun servisi veya benzer vasıflara
sahip bir æahıs tarafından deœiætirilmesi gerekir.
• Süpürgeyi ısıtma aletlerinin direkt yanında muhafaza etmeyiniz.
• THOMAS Yıkama ve Süpürme Makinesi ’i asla
kendiniz tamir etmeyiniz. Sadece yetkili müæteri
hizmetleri servis istasyonuna tamir ettiriniz.
• Sadece orjinal yedek parça kullanınız.
• Islak odalarda uzatma kablosu kullanımından
kendi emniyetiniz gereœi kaçılınması gereklidir.
• Aæaœıdaki hallerde cereyan fiæini çıkartınız:
– Çalıætırırken arıza olması halinde,
– Her temizlik ve bakımdan önce,
– Kullandıktan sonra,
– Her defasında filtre deœiætirirken,
• Temizlik malzemesi püskürtücüsünü hiç bir zaman prizlere veya elektrikli aletlere çevirmeyiniz.
• Islak olarak süpürdükten veya püskürterek
temizlik yaptıktan sonra depoyu derhal boæaltınız.
• Kimyasal maddeler (püskürtme maddesi, temizlik maddesi) çocukların eline geçmemelidir.
• Dikkat! Sadece orjinal Thomas-Temizlik Maddelerinin kullanılması halinde aletin fonksiyonu ve
temizleme etkisi saœlanabilir.
• Cildi hassas olan kiæilerin temizlik maddeleriyle
direkt temastan kaçınmaları iyi olur.
• Alette her hangi bir çalıhma yapmadan önce
halter pozisyonunu “Sıfır“ a getiriniz ve fihi
çekiniz.
• Temizlik konsantresinin mukoza zarlarına (göz,
aœız, vs.) gelmesi halinde buraları derhal bol
suyla yıkayınız.
TR
Page 50

49
Montaj tarifi
Döner tekerlerin takılması
A Yaylı kapagı (3) açınız motor bahlıgını (2)
çıkartınız.
B Püskürtme maddesi deposunu (28) ve temizlik
sıvısını çıkartınız. Tankı (1) agzı ahagı gelecek
hekilde koyunuz.
C Montajı kolay yapabilmeniz için her iki uçtaki
kamaları (30) açmanızı tavsiye ederiz.
Önce kamaları (30) tankın (1) tabanına soku-
nuz, daha sonra döner tekerlerle (4) birlikte
dayanaga kadar bastırınız.
Takılmıæ döner tekerli (4) depoyu (1) tekerlerin
üzerine koyunuz ve fonksiyon kontrolünde
bulununuz.
Motor ba
æ
ælıœœ
ının takılması
D
Motor baælıœını (2), kapaœın ve tankın yüzeyi
bir birine uyacak æekilde koyunuz. Daha sonra
iki yaylı kapaœı (3) bastırınız.
Emme hortumunu takmak
E
Emme hortumunu (13), emme kiriælerinin ve
emme baœlantı parçasının iæaretli yerleri
birbirlerine uyacak ve düœme yerine oturacak
æekilde emme kiriælerine (8) bastırınız. Hortumu çıkartmak için hortum baœlantı parçasını
çevirerek çekiniz.
Daha sonra istenilen aksesuar takılabilir.
Emme borusu tutucusu
F
Emme borusunu (14), aksesuar ve emme hortumu (13) ile birlikte komple aletin arka tarafına
takınız.
Kablo gözü
G
Cereyan kablosu (10), süpürdükten sonra
resimde görüldügü gibi sarılıp kablo gözüne
yerleætirilebilir.
J Motoru koruyucu filtre
Her defasında ıslak olarak süpürdüœünüz ve
püskürtme ekstrasyonuyla temizlik yaptıœınız
zaman motoru koruyucu filtreyi (33) kirlenme
konusunda kontrol ediniz ve gerekmesi
halinde temizleyiniz. Bunun için bilyalı supabı
(38) ok istikametinde açınız ve motoru
koruyucu filtreyi emme aralıœından çıkartınız.
Temizlenmiæ ya da yeni filtreyi yerleætiriniz ve
daha sonra bilyalı supabı takınız.
T
Teemmiizzlliikk mmaaddddeessii kkoonnssaannttrreessii
THOMAS Yıkama ve Süpürme Makinesi’inizde 0,5 litre
Protex temizlik maddesi konsantresi bulunmaktadır.
Ìçeriœi her biri 10 litre olmak üzere 2–3 dolumluk için
yeterlidir. Bu miktar 10 litrelik püskürte maddesi
deposuna 1 ile 1/2 fincan (150-250 ml) miktarına tekabül
eder ve yaklahık 50 m2bir yüzey için yeterlidir.
Kuru süpürmek
AQUAF¤LTRE cihazınızı kuru süpürme
modunda kesinlikle aqua filtresiz, ince toz
tekstil filtresiz ve susuz kullanmayın.
Büyük miktarlarda örn. un, kakao tozu,
çimento vb. gibi ince tozları emerek
süpürmeyin.
Hazırlık
A Aletin fiæi çekili iken motor baælıœını (2)
çıkarınız.
B Taze su tankını çıkarınız.
L Motor baælıœına (2) takılı olan emme
hortumunu (37) bunun için öngörülen tutucuya
(36) bastırınız.
H Filtre keçesini (26) germe halkası (25)
yardımıyla monte ediniz ve döner kelepçelerle
iyice tutturunuz.
I 3 parçadan oluæan AQUA filtreyi birleætirin ve
sıkıca emme manæonunun üzerine geçirin.
Bunu yaparken iæaretlere dikkate
edin.
AQUA filtre emme bidonunun tabanında
yerine oturmalı ve düzgün æekilde tabana
yerleæmelidir.
Emme kabına 2 litre saf su doldurun.
J Üst kenarını katlayarak ince toz tekstil filtresini
emme kabına asın.
D Motor baælıœını (2) takınız. Aletteki döner æalter
“0” pozisyonunda olmalıdır.
G Elektrik baœlantı kablosunu (10) takınız.
√
ææ
letmeye almak
Aletin açılması
M “Kuru süpürme” iæleminde döner æalterin (7)
“Halı için baælık” sembolüne getirilmesi
gerekir.
Kontrol lâmbası (6) yanmamalıdır.
Alet çalıæmaya hazırdır.
AAQQUUAA ffiillttrree ssiisstteemmiinniinn tteemmiizzlleennmmeessii vvee bbaakkıımmıı
AAQQUUAAFF¤¤LLTTRREE ssiisstteemmiinnii vvee eemmmmee kkaabbıınnıı
hhiijjyyeenniikk nneeddeennlleerrddeenn ddoollaayyıı hheerr kkuullllaannıımm
ssoonnrraassıı bbooææaallttıınn,, tteemmiizzlleeyyiinn vvee kkuurruullaayyıınn..
K
Kiirrllii ssuu vvee nneemmllii ppaarrççaallaarr bbaakktteerrii vvee mmaannttaarr
oolluuææuummuunnaa sseebbeepp oolluurrllaarr..
¤nce toz tekstil filtresini kirlenme derecesine göre
kuru veya nemli bir bezle silin. Aæırı kirlenmelerde
deterjan vb. kullanmadan saf suyla yıkayın. Bir
sonraki kullanıma kadar filtrenin tamamen
kurumuæ olmasına özen gösterin.
Page 51

50
Islak süpürmek
Montaj
A Fiæi prizden çekiniz ve motor baælıœını (2)
çıkarınız.
Dikkat! Sıvı maddeleri emerek süpürmeden
önce filtre ünitesini çıkarınız.
L Bilyalı supabı (38) daima temiz ve hareket ede-
bilir halde tutunuz. Bilyalı supab tank dolduœunda süpürme iæini otomatik olarak durdurur.
D Motor baælıœını (2) takınız. Aletteki döndürme
æalterin “0” da olması gereklidir.
G Kabloyu cereyana (10) takınız.
Ì
Ìæælleettmmeeyyee aallmmaakk
AAlleettii aaççıınnıızz
M “Islak süpürme” iæinde döner düœmenin (7)
“halı supabı” sembolüne getirilmiæ olması
gereklidir.
K
Koonnttrrooll llaammbbaassıınnıınn ((66)) yyaannmmaammaassıı ggeerreekklliiddii
rr::
Alet çalıæmaya hazırdır.
Tanklardaki sıvılar emme hortumu veya borularıyla
direkt olarak süpürülebilir.
Sıvı düzeyi yüksek ve doluluk içeri
œ
œ
i emme deposunun hacminden daha fazla olan tank veya
depolardan emerek sıvı temizlerken dikkatli
olunuz. Sıvı bu durumda deponun dolu ve bilyalı supabın kapalı olduœœu zaman sifon ilkesine
göre akmaya devam eder.
Bu sepepten dolayı emilmesi gerekli miktarın böyle
hallerde sadece bir kısmını emerek süpürünüz ve
emme deposunu arada bir boæaltınız.
Emmeden sonra, önce emme borusunu sıvıdan
çıkartınız ve daha sonra da motoru kapatınız.
Dikkat! Benzin, inceltici madde, kalorifer yakıtı vs.
gibi maddeler emme havası nedeniyle oluæan
girdap sonucu patlayıcı buhar veya bileæikler
oluætura-bilirler.
Aseton, asitler ve eritme maddeleri alette kullanılan
malzemelere olumsuz etkide bulunabilirler. Temizlik suyu ve kirli sular ev temizliœinde kullanılan piyasadaki maddelerle sakıncasız bir æekilde emilebilir.
Islak süpürmeden sonra tankı ve kullanılan bütün
parçaları temizleyiniz ve kurutunuz.
Püskürtme ekstrasyon sisteminin kullanımı
Halıları ıslak temizlemek / Püskürterek temizlemek
A Fiæi prizden çekiniz ve motor baælıœını (2)
çıkartınız.
B Püskürtme ekstrasyon sistemini kullanmanız
halinde püskürtme maddesi deposunun (28)
takılı olmasına dikkat ediniz.
N Püskürtme maddesi deposuna 1/4 litre
temizlik maddesi konsantresi doldurunuz.
Deponun geri kalan kısmını suyla doldurunuz.
Ilık su kullanınız (azami 30° C) Daha fazla
sıcaklıktaki su hem alete hem de halıya zarar
verebilir.
L Motor baslıœında (2) bulunan emme hortumunu
(37) çıkartınız.
O Bunu, motor baælıœını (2) takarken temizlik
sıvısının içerisine takınız.
D Yaylı kapakları (3) bastırarak depoyu yerine takınız.
Emme ve basınç hortumunu takmak
P Kapatma ventilini (17) emme borusundaki
yataœın içine sürünüz. Daha sonra kulpu (11)
emme borusuna (14) takınız. æimdi basınç
hortumunu (19) hortum klipsleriyle (15) emme
hortumuna (13) takınız.
E Daha sonra emme hortumunu (13) iæaretli
yerler bir birine uyacak ve duyulacak kadar ses
çıkartacak æekilde emme kiriælerine (18)
takınız.
Q Daha sonra basınç hortumunu (19) motor
baælıœındaki (2) çabuk kuplaja (5) iyice
bastırınız.
Æimdi (asma delikli) ikinci emme borusunu
önceden takılmıæ boruya takınız.
S Püskürtme ekstrasyon supabını (18) takınız.
T
Emme baælıœına takılı basınç hortumunu (12)
kuplajla (39) birlikte kapatma ventiline dayayınız
ve çevirmek suretiyle takarak kilitleyiniz. Daha
sonra basınç hortumunu (12) küçük boru
klipsleriyle (16) emme borusuna takınız.
Aletteki döner æalterin “0” da olması gereklidir.
G Kabloyu cereyana (10) takınız.
Alet æimdi çalısmaya hazırdır.
Aleti açmak
U Döne düœmesini (7) püskürtme ekstrasyon
pozisyonuna çeviriniz.
Emme ve basınç hortumunu takmak
T Halıya püskürtme ekstrasyon supabını odanın
bir köæesinde halının üzerine koyunuz.
Temizlik maddesi püskürünceye kadar saplı
parçadaki supab koluna (40) basınız. Daha
sonra halının üzerinde bulunan supabı düz bir
æekilde yavaæça halının üzerinden çekiniz.
V Fazla kirlenmiæ yerlere, aletle ileri doœru gider-
ken ve geri gelirken halının üzerine temizlik
maddesi püskürterek ve emerek aletle iki kat
miktarda sıvı sürünüz. Ayrıca, “nur Sprühen,
yani sadece püskürtme” pozisyonuyla ön bir
temizlik yapılır.
Page 52

51
W
Sert zemin adaptörünün resimde görüldüœü
gibi lastik ucu yukarı bakacak æekilde ok istikametinde dayanaœa kadar halı supabına itilmesi gereklidir.
Bununla düz seramik, tas ve plastik zeminleri
bir iæ sürecinde temizleyip kurutabilirsiniz.
X Döæemeli mobilyanızı veya araba koltuklarını
temizlemek için döæeme püskürtme
ekstrasyon supabını (20) kullanınız.
Her altlıgın kuruması için uzun süre gerektiginden döhemelere çok fazla sıvı sürülmemesine dikkat ediniz.
Döheme püskürtme ekstrasyon supabını (20)
direkt kapatma ventiline (17) takınız, kuplajı (3)
çevirerek basınç hortumunu supaba takınız.
Basınç hortumunu kuplajı (39) çevirerek çıkartınız.
Temizligin nasıl yapılacagı konusunda halı
temizleme bölümüne bakınız.
Fiæi çekiniz.
R Motor baælıœını (2) çıkartmadan önce basınç
hortumunun (19) çıkartılması gereklidir. Çabuk
kuplajdaki (5) deklanæör tuæuna basınız.
Baœlantı pimi otomatik olarak dıæarı sürülür.
A Motor baælıœını (2) aletten çıkartınız, damlayan
su sonucu kirlenmesini ömlemek için bir kabın
içerisine koyunuz.
B Püskürtmemaddesi deposunu (28) çıkartınız
ve boæaltınız. (Kullanılmamiæ temizlik maddesi
uygun bir kabın içerisinde muhafaza edilebilir).
Kir tankını boæaltınız iyice temizleyiniz.
O Pompaların ve supabların bakımı için
püskürtme maddesi deposunu berrak suyla
doldurup kabın içerisine koyunuz ve motor
baæliœını (2) tekrar takınız.
Püskürtme sistemini düz zemin üzerinde veya
yıkama lavabosunda çalıhtırınız.
Daha sonra her iki tankı da temizleyiniz ve
sökülmüh parçaları iyice kurutunuz.
Aletin temizlenmesi ve bakımı
Temizlemeden önce daima elektrik fiæini prizden
çekiniz!
Motor kasasını asla suya batırmayınız!
Motor kasası ve kapları nemli bir bezle siliniz ve
kurutunuz.
Her ıslak süpürme iælemi sonrası ve bilhassa
yapıæan sıvılar emilerek süpürüldüœünde, kaplar ve
kullanılan donanım parçaları sabunlu sıcak suyla
temizlenmelidirler.
Muhtemel arıza halinde
Süpürürken toz çıkması halinde:
• Filtre sistemi talimat doœrultusunda monte edildi
mi?
• Orijinal su filtresi/filtre keçesi takıldı mı?
Emme gücünün aniden dühmesi halinde:
• Bilyalı supab emme havasını durdurdu mu? Aæırı
yan konumda veya aletin yana yatması halinde
böyle bir æey olabilir. Emiciyi kapatınız – Bilyalı
supab aæaœı düæer – Alet tekrar çalıæmaya
hazırdır.
Temizleyici sıvı çıkmaması halinde:
• Pompa açık mı (kontrol lambasının [6] yanması
gereklidir)?
• Emme filtresi süzgecini (37) temizleyiniz.
• Püskürtme maddesi deposunda temizlik
maddesi var mı?
• Emme hortumu püskürtme maddesi deposuna
serbestçe takılı mı?
• Püskürtme supabı tıkanmıæ mı?
Temizlikten sonra
Dö
æ
æ
eme temizliœœi
Sert zemini ıslak olarak temizlemek
CCEE -- UUyygguunnlluukk BBeeyyaannıı
Ürünümüzün aæaœıda yazılı normlara veya norm
niteliœinde belgelere uygun olduœunu münhasır
sorumlu olarak beyan ederiz.
– 93/68/EWG ile deœiæikliœe uœrayan AB Alçak
Gerilim Yönetmeliœi (73/23/EWG)
– 91/263/EWG, 92/31/EWG ve 93/68/EWG ile
deœiæikliœe uœrayan AB Elektromanyetik
Uygunluk Yönetmeliœi
Uygulanan armonize normlar:
DIN EN 60335-1, DIN EN 60335-2-2;
DIN EN 61000-3-2: 1995; DIN EN 61000-3-3:
1995;
DIN EN 55014-1: 1993; DIN EN 55014-2: 1997
Page 53

Wskazówki bezpieczeństwa PL
Prosimy o uważne przeczytanie instrukcji
obsługi, ponieważ zawarte są w niej
wskazówki dotyczące bezpiecznego i
prawidłowego posługiwania się odkurzaczem
piorącym THOMAS. Instrukcję należy
starannie przechowywać i przekazać ją
ewentualnemu następnemu właścicielowi
odkurzacza. Producent nie odpowiada za
szkody wynikłe wskutek nieprzestrzegania tej
instrukcji. Nie wolno używać odkurzacza
piorącego THOMAS w sposób niezgodny z
jego przeznaczeniem. Służy on wyłącznie do
użytku domowego.
•
Podane na tabliczce znamionowej napięcie
musi odpowiadać danemu napięciu w siecu.
• Urządzenia nie wolno uruchamiać, jeżeli:
- przewód przyłączający jest uszkodzony,
- urządzenie ma widoczne uszkodzenia,
- spadła głowica silnika.
• Zaleca się sprawdzić, czy odkurzacz nie
odniósł uszkodzeń podczas transportu.
• Karton należy usunąć zgodnie z lokalnymi
przepisami.
• Włączonego urządzenia nigdy nie wolno
pozostawiać bez nadzoru. Należy też uważać,
aby w pobliżu urządzenia nie przebywały dzieci.
• Samowolne zmiany w urządzeniu mogą
zagrażać bezpieczeństwu użytkownika.
Ewentualne naprawy mogą być wykonane tylko
przez autoryzowane punkty serwisowe.
• Urządzenia nie wolno używać w
pomieszczeniach, w których gromadzone są
materiały łatwopalne lub w których istnieje
niebezpieczeństwo wydzielania się gazów.
• Zaleca się największą ostrożność przy
sprzątaniu schodów. Należy wówczas
zapewnić pewne posadowienie urządzenia. Nie
wolno naciągać węża ssącego poza jego
pierwotną długość. Urządzenie należy stale
przytrzymywać jedną ręką.
• Nie należy używać urządzenia do odkurzania na
sucho, gdy system filtrów nie jest
zamontowany zgodnie z instrukcją.
• Uwaga! Urządzenie nie jest przeznaczone do
odsysania materiałów niebezpiecznych dla
zdrowia.
• Nigdy nie wolno odkurzać cieczy zawierających
rozpuszczalniki jak np. rozpuszczalników do
farb, oleju, benzyny ani substancji żrących.
• Nie należy pozostawiać odkurzacza na wolnym
powietrzu i poddawać bezpośredniemu
oddziaływaniu wilgoci.
• Przy włączonym odkurzaczu nie wolno
przybliżać do głowy dysz (szczotek) ani rur,
ponieważ mogłoby to stać się przyczyną
urazów - w szczególności oczu i uszu.
• Nigdy nie wolno wyciągać wtyczki z gniazda
przez pociągnięcie za kabel lecz wyłącznie
trzymając za wtyczkę.
• Przewód przyłączeniowy nie może być
poddany działaniu wysokiej temperatury ani
substancji chemicznych. Nie wolno go też
ciągnąć przez ostre krawędzie lub
powierzchnie.
• Uszkodzenia przewodu sieciowego odkurzacza
THOMAS może naprawić producent,
autoryzowany punkt serwisowy lub inna
wykwalifikowana osoba. Uniknie się wówczas
zagrożeń bezpieczeństwa użytkownika.
• Odkurzacza nie wolno przechowywać w
bezpośredniej bliskości urządzeń grzewczych.
• Nigdy nie wolno samemu naprawiać
odkurzacza THOMAS. Naprawę należy
powierzać wyłącznie autoryzowanemu
punktowi serwisowemu.
• Należy stosować wyłącznie oryginalne części
zamienne i akcesoria.
• Dla własnego bezpieczeństwa należy unikać
stosowania kabla przedłużającego w
pomieszczeniach mokrych.
• Wtyczkę sieciową należy wyciągnąć z gniazda
w następujących przypadkach:
- w razie zaistnienia usterek podczas pracy,
- przed każdym czyszczeniem i konserwacją,
- po użyciu urządzenia,
- przy każdej wymianie filtra.
• Przed ostateczną utylizacją odkurzacza
piorącego THOMAS należy odciąć przewód
przyłączeniowy.
• Nigdy nie wolno kierować strumienia środka
czyszczącego w kierunku gniazd lub urządzeń
elektrycznych.
• Po odkurzaniu na mokro lub zraszaniu należy
natychmiast opróżnić i wyczyścić zbiornik.
• Środki chemiczne, w tym środki czyszczące,
należy chronić przed dziećmi.
• Uwaga! Jedynie przy zastosowaniu
oryginalnego środka czyszczącego firmy
THOMAS gwarantuje się właćciwą pracę
urządzenia i efekt czyszczenia.
• Osoby o wrażliwej skórze powinny unikać
bezpośredniego kontaktu ze środkami
czyszczącymi.
• Przed przeprowadzeniem jakichkolwiek
prac przy urządzeniu należy ustawić
wyłącznik w pozycji “zero” i wyciągnąć
wtyczkę sieciową.
• W przypadku dostania się koncentratu
czyszczącego do błon śluzowych (oka, ust itd.)
należy natychmiast przepłukać je dużą ilością
wody.
52
Page 54

Gratulujemy Wam dobrego zakupu !
Wykorzystajcie Państwo w pełni wartość
odkurzacza dzięki jego prawidłowemu
użytkowaniu.
Użytkowanie urządzenia
Odkurzacz piorący THOMAS można stosować do
odkurzania dywanów, mebli tapicerowanych,
podłóg oraz do regularnego utrzymywania
mieszkania w czystości. Może on zbierać zarówno
kurz jak i ciecze, np. udrażnia zapchane przewody
ściekowe i zlewy. W prosty sposób odkurzacz
można wyposażyć w znajdujące się w
standardowym wyposażeniu części do pracy na
mokro przy czyszczeniu dywanów lub mebli
tapicerowanych.
Odkurzacz piorący THOMAS jest urządzeniem
uniwersalnym. Za sprawą funkcji zraszania jest on
przystosowany do gruntownego czyszczenia
dywanów, mebli tapicerowanych oraz podłoży
twardych, a przy zastosowaniu szczotki do okien
nadaje się również do mycia okien. Przy pracy na
mokro można zbierać jedynie ciecze na bazie
wody, a nigdy substancje łatwopalne. Funkcja
odkurzania pozwala m.in. na usuwanie suchego
brudu i kurzu z dywanów, podłóg, mebli i firan.
Opis montażu
Należy wyciągnąć urządzenie z kartonu i usunąć
calość materiału opakowaniowego. Następnie
rozpoznać poszczególne części w oparciu o
ilustracje zamieszczone na początku instrukcji.
Z przyczyn technicznych części mechanizmu
jezdnego zostały umieszczone luzem w
opakowaniu i muszą być zmontowane przed
uruchomieniem.
Montaż kółek jezdnych
A Otworzyć zatrzask zamykający (3) i zdjąć
głowicę silnika (2).
B Zdjąć zbiornik na płyn zraszający (28) i płyn
czyszczący. Zbiornik na nieczystości (1)
ustawić otworem do dołu.
C By ułatwić montaż zalecamy lekko
nasmarować sztyfty (30) na obu końcach.
Najpierw sztyfty (30) wsunąć w dno zbiornika
(1), następnie wcisnąć je aż do oporu razem z
kółkami jezdnymi (4).
Ustawić zbiornik (1) na zamontowanych
kółkach jezdnych (4) i sprawdzić ich
sprawność.
Zakładanie głowicy silnika
D Głowicę silnika (2) tak założyć, aby pokryły się
powierzchnie przy pokrywie i zbiorniku.
Następnie zacisnąć oba zatrzaski zamykające
(3).
Przyłączenie węża ssącego
E Wąż ssący (13) wcisnąć do króćca ssącego
(8) w ten sposób, aby pokryły się oznaczenia
znajdujące się na króćcu i na wężu oraz aby
zaskoczył zatrzask.
Następnie można przyłączyć żądany element
wyposażenia.
W razie konieczności zdjęcia węża ssącego
należy go wyciągnąć z króćca pokręcając
przy tym jego nasadą.
Zamocowanie rury ssawnej
F Rurę ssawną (14) w komplecie z
wyposażeniem i wężem ssącym zaczepić na
tylnej ścianie urządzenia.
Przechowywanie kabla
G Po pracy urządzenia kabel przyłączający (10)
można luźno zwinąć w dłoni i wsunąć go w
uchwyt nośny odkurzacza - patrz ilustracja.
Filtr ochronny silnika
K Po każdym odkurzaniu na mokro i zraszaniu
sprawdzić filtr ochronny silnika (33), czy nie
jest zanieczyszczony i o ile to konieczne,
oczyścić. W tym celu otworzyć zawór
pływakowy (38) zgodnie z ruchem wskazówek
zegara i wyjąć filtr ochronny silnika z otworu
wlotowego. Oczyszczony wzgl. nowy filtr
włożyć z powrotem, a następnie ustawić
zawór pływakowy.
53
Page 55

Odkurzanie na sucho
Podczas odkurzania suchego, odkurzacza
nie należy nigdy używać bez filtra AQUA,
filtra przeciwpyłowego i odpowiedniego
wypełnienia go wodą.
Nie odkurzać większych ilości pyłów, np.
mąki, kakao w proszku, cementu, itp.
Przygotowanie
A
Po wyciągnięciu wtyczki zdjąć głowicę silnika (2).
B Wyjąć zbiornik wody świeżej (28).
L Przymocowany do głowicy silnika (2) wąż
ssący (37) wcisnąć w przewidziane do tego
zamocowanie (36).
H Przy pomocy pierścienia dociskowego (25)
nałożyć worek filtracyjny (26) i zamocować go
klamrami obrotowymi (31).
I 3-częściowy filtr AQUA złączyć ze sobą i
nasunąć na nasadkę ssącą.
Należy przy tym zwrócić uwagę na
oznaczenia.
Filtr AQUA musi zaskoczyć na podłożu
pojemnika i być na podłożu równomiernie
rozłożony.
Do pojemnika ssącego nalać 2 litry czystej
wody.
J Filtr przeciwpyłowy poprzez przełożenie
górnej krawędzi zaczepić na pojemniku
ssącym.
D Nałożyć ponownie głowicę silnika (2).
Wyłącznik przy urządzeniu musi znajdować
się w pozycji “0”.
G Podłączyć przewód przyłączeniowy (10).
Uruchomienie
Włączenie urządzenia
M W trybie pracy “na mokro” wyłącznik (7) musi
być ustawiony na symbolu “szczotka
dywanowa”.
Lampka kontrolna (6) nie może się palić.
Urządzenie jest gotowe do użycia.
Czyszczenie i konserwacja systemu
filtrowego AQUA
Z uwagi na higienę po każdorazowym urzyciu
opróżnić, oczyścić i wysuszyć system filtrowy
AQUA. Brudna woda i wilgotne części sprzyjają
powstawaniu bakterii i grzybów.
Filtr przeciwpyłowy w zależności od jego
zabrudzenia oczyścić za pomocą wilgotnej
szmatki. Przy większym zabrudzeniu wymyć
czystą wodą bez dodatku środków czyszczących.
Przestrzegać aby przy następnym odkurzaniu filtr
był całkowicie suchy.
Odkurzanie na mokro
Montaż
A Po wyjęciu wtyczki zdjąć głowicę silnika (2).
Uwaga !
Przed odsysaniem cieczy należy zawsze zdjąć
jednostki filtracyjne (26, 27 + 30).
L Zawór pływakowy (38) należy stale
utrzymywać w czystości i sprawności.
Przerywa on automatycznie ssanie, gdy
zbiornik napełni się do końca.
D Nałożyć ponownie głowicę silnika (2).
Wyłącznik przy urządzeniu musi znajdować
się w pozycji “0”.
G Podłączyć przewód przyłączeniowy (10).
Uruchomienie
Włączenie urządzenia
M W trybie pracy “na mokro” włącznik (7) musi
być ustawiony na symbolu “szczotka
dywanowa”.
Lampka kontrolna (6) nie może się palić.
Urządzenie jest gotowe do użycia.
Bezpośrednio za pomocą węża ssącego, wzgl. rur
ssawnych można odsysać ciecze z pojemników
lub ze zbiorników.
Należy zachować ostrożność przy odsysaniu z
pojemników, w których poziom cieczy
znajduje się wyżej niż górna krawędź zbiornika
odkurzacza i w których zawartość cieczy jest
większa od pojemności zbiornika. W takim
wypadku przy pełnym zbiorniku i zamkniętym
zaworze pływakowym ciecz może - zgodnie z
zasadą syfonu - nadal napływać.
Dlatego w takich przypadkach odsysać należy
tylko część cieczy i co pewien czas opróżniać
zbiornik.
Po zakończeniu odsysania najpierw wyjąć rurę
ssawną z cieczy, rurę i wąż ssący trzymać
uniesione do góry (aby zapobiec wylaniu się
cieczy), dopiero wówczas wyłączyć silnik.
Uwaga ! Benzyna, rozpuszczalniki, olej opałowy
itd. mogą w skutek zawirowania przez powietrze
ssące tworzyć wybuchowe pary lub mieszanki.
Aceton, kwasy i rozpuszczalniki mogą uszkodzić
materiał, z którego wykonane zostało urządzenie.
Woda do czyszczenia i zanieczyszczenia
zawierające zwykłe środki czyszczące stosowane
w gospodarstwie domowym mogą być odsysane
bez obawy.
Po zakończeniu odkurzania na mokro oczyścić
oraz osuszyć zbiornik na nieczystości i wszystkie
użyte części.
54
Page 56

Użytkowanie systemu zraszania
Przed odkurzaniem dywanów na mokro
Należy się najpierw upewnić, czy wszystko, co
zamierzają Państwo odkurzać na mokro, również
się do tego nadaje.
Nie powinno się używać urządzenia do delikatnych, ręcznie tkanych lub farbujących dywanów.
By to sprawdzić, wystarczy dodać nieco roztworu
środka czyszczącego na białą szmatkę i wetrzeć
ją w mało widocznym miejscu dywanu. Jeśli na
szmatce nie pojawią się ślady kolorów, kolory
dywanu można uznać za trwałe. W innym
przypadku nie wolno odkurzać dywanu na mokro.
W razie wątpliwości zaleca się zwrócić o radę do
sprzedawcy.
Przed każdym czyszczeniem dywanu na mokro
należy gruntownie odkurzyć całą powierzchnię.
W trakcie czyszczenia i zaraz po nim pomieszczenie powinno być dobrze przewietrzone, by
umożliwić szybkie schnięcie.
Odkurzanie dywanu na mokro / zraszanie
A Po wyjęciu wtyczki zdjąć głowicę silnika (2).
B
Stosując funkcję zraszania należy zwrócić
uwagę na to, by zbiornik na płyn zraszający
(28) był założony.
N Wlać koncentrat czyszczący do zbiornika na
płyn zraszający (28) i resztę uzupełnić wodą.
Przestrzegać przy tym sposobu dozowania
podanego na etykiecie butelki płynu ProTex.
Używać letniej wody (max. 30 °C). Wyższe
temperatury mogą zaszkodzić samemu
urządzeniu, a także dywanowi i meblom
tapicerowanym.
L Poluzować znajdujący się przy głowicy silnika
(2) wąż ssący (37).
O Podczas ponownego nakładania głowicy
silnika (2) włożyć go do płynu czyszczącego.
D Zamknąć zbiornik poprzez dociśnięcie
obydwu zatrzasków zamykających (3).
Przyłączenie węża ssącego i ciśnieniowego
P Wsunąć zawór zamykający (17) w zamoco-
wanie przy rurze ssawnej. Następnie włożyć
uchwyt (11) w rurę ssawną (14). Umocować
teraz wąż ciśnieniowy (19) obejmami
plastikowymi (15) do węża ssącego.
E Potem wąż ssący (13) wcisnąć do króćca
ssącego (8) w ten sposób, aby pokryły się
oznaczenia znajdujące się na króćcu i na
wężu oraz aby zaskoczył zatrzask.
Q Następnie mocno wcisnąć wąż ciśnieniowy
(19) w sprzęgło szybkodziałające (5)
znajdujące się przy głowicy silnika (2).
Przesunąć teraz drugą rurę ssawną (z uchami
zaczepowymi) na zamontowaną już rurę.
S Zamontować ssawkę zraszającą (18).
T
Zamocowanego do szczotki węża ciśnieniowego (12) przyłożyć ze sprzęgłem (39) do
zaworu zamykającego (17) i obracając
doprowadzić do zaryglowania. Następnie
przymocować wąż ciśnieniowy (12)
mniejszymi obejmami do rury ssawnej (16).
Wyłącznik na urządzeniu musi znajdować się
w pozycji “0”.
G Podłączyć przewód przyłączeniowy (10).
Urządzenie jest teraz gotowe do użycia.
Włączenie urządzenia
U Wyłącznik (7) nastawić na pozycję zraszania.
Lampka kontrolna (6) musi się teraz palić.
55
System zraszania
– głęboko i mocno natryskiwać roztwór czyszczący
– rozpuścić brud i wymyć do głębokości włókien
– zanieczyszczenia silnie odessać i wyprostować z
powrotem włosie dywanu.
Wszystko w trakcie jednej operacji.
rura ssawna
przewód ciśnieniowy
kierunek pracy
odessanie i
wyprostowanie
zraszanie
rozpuszczanie i wypranie
Page 57

T Ssawkę zraszającą do dywanów ustawić w
rogu pokoju na dywanie. Dźwigienkę
zaworową (40) przycisnąć do uchwytu, aż
roztwór czyszczący zostanie zroszony. Potem
leżącą na dywanie szczotkę powoli
przesuwać po dywanie w linii prostej.
Na końcu wyznaczonego rzędu lub w razie
przerw popuścić dźwigienkę zaworową, by
zmniejszyć strumień cieczy. Gdy zroszona ciecz
została odessana, podnieść szczotkę i z lekkim
zachodzeniem na siebie rozpocząć nowy rząd!
W ten sposób można pasek po pasku
wyczyścić całą powierzchnię.
W razie gdyby na oczyszczonym rzędzie
pozostały jeszcze ślady cieczy, można
miejsca to odessać jeszcze raz z opuszczoną
dźwigienką zaworową (40).
Dzięki przejrzystej górnej części ssawki
samemu można zdecydować, kiedy operacja
ta jest zakończona.
V Przy silnie zabrudzonych miejscach można
nanieść urządzeniem podwójną ilość płynu w
ten sposób, że poruszając się do przodu już
się raz zrasza, a przy cofaniu zrasza i odsysa.
Dodatkowo przy ustawieniu “tylko zraszanie”
można przeprowadzić wstępną operację.
Należy uważać na to, by na dywanie nie
rozprowadzić zbyt dużo cieczy. Na skutek
tego mogą bowiem na dywanie powstawać
pofałdowania lub wybrzuszenia, które zanikną
dopiero po dłuższym okresie schnięcia.
W celu uniknięcia wypływania znajdującej się
w rurze ssawnej cieczy należy jeszcze przy
wążczonym silniku unieść przewód ssący
ukośnie do góry.
Dopiero potem wyłączyć urządzenie.
Uwaga !
• Jeśli dywan poddany był wcześniej czyszczeniu
szamponem, może przy pierwszym użyciu
odkurzacza z funkcją zraszania dojść do
silniejszego tworzenia się piany w zbiorniku na
nieczystości. W razie gdyby piana wydostawała się z wylotu powietrza, należy wyłączyć
urządzenie i opróżnić zbiornik. Chcąc uniknąć
dalszego tworzenia się piany, należy dodać do
zbiornika filiżankę octu.
Podwyższone tworzenie się piany jest po
jednorazowym gruntownym czyszczeniu
koncentratem czyszczącym THOMAS ProTex
wykluczone, ponieważ zawiera on specjalny
składnik zapobiegający pienieniu.
• Dopóki dywan jest jeszcze wilgotny, nie
powinno się po nim chodzić.
W Przystawkę do podłóg (22) - tak jak to poka-
zano na ilustracji - nałożyć do góry zgodnie z
ruchem wskazówek zegara na ssawkę
zraszającą do dywanów (18) aż do oporu.
Można teraz czyścić i suszyć gładkie podłoża
ceramiczne, kamienne i z tworzyw sztucznych
w ciągu jednej operacji.
X
Do czyszczenia mebli tapicerowanych lub foteli
samochodowych należy używać ssawki do
tapicerki i zraszania (20). Ssawka ta (20) jest
nakładana bezpośrednio na zawór zamykający
(17) i poprzez obracanie sprzęgła (39) wąż
ciśnieniowy jest przymocowywany do zaworu.
Należy uważać przy tym na to, żeby nie
nanieść zbyt dużo cieczy, ponieważ - zależnie
od części dolnej korpusu - trzeba liczyć się z
dłuższym okresem schnięcia.
Proces czyszczenia - patrz czyszczenie dywanów.
Po czyszczeniu na mokro
Wyjąć wtyczkę sieciową.
R Przed zdjęciem głowicy silnika (2) rozłączyć
wąż ciśnieniowy (19). Nacisnąć w tym celu na
wyłącznik przy sprzęgle (5).
A Zdjąć z urządzenia głowicę silnika (2) i położyć
ją na miskę zbierającą, by uniknąć zanieczyszczeń spowodowanych kapiącą wodą.
B Zdjąć i opróżnić zbiornik na płyn zraszający
(28). Opróżnić i gruntownie przepłukać
zbiornik na nieczystości.
O W celu konserwacji pompy i zaworów
napełnić zbiornik na płyn zraszający czystą
wodą, włożyć do zbiornika i ponownie nałożyć
głowicę silnika (2).
Funkcję zraszania uruchomić na gładkich
podłożach lub nad zlewem.
Następnie oczyścić obydwa zbiorniki i dobrze
osuszyć zdemontowane części.
Czyszczenie i konserwacja urządzenia
Przed przystąpieniem do czyszczenia urządzenia
należy zawsze pamiętać o uprzednim wyciągnięciu
wtyczki sieciowej.
Obudowy silnika nigdy nie zanurzać w wodzie, w
razie konieczności przetrzeć ją tylko wilgotną
szmatką i następnie osuszyć.
Zbiornik i użyte części wyposażenia po każdym
odkurzaniu na mokro wymyć ciepłą wodą, ewentualnie z dodatkiem nie szorującego środka czyszczącego, szczególnie po zbieraniu kleistych cieczy.
Czyszczenie tapicerki
Odkurzanie na mokro twardych podłoży
56
Page 58

Usterki i ich usuwanie
Jeśli nasze urządzenie nie pracuje zadowalająco,
nie zawsze musimy od razu wzywać serwis. Należy
najpierw sprawdzić, czy usterka nie ma aby błahej
przyczyny.
Jeśli przy odkurzaniu wydostaje się kurz:
• Sprawdzić, czy system filtrów został
zamocowany zgodnie z instrukcją.
• Sprawdzić, czy użyty został oryginalny filtr
wodny / worek filtracyjny.
Jeśli siła ssania stopniowo maleje:
• Sprawdzić, czy zbiornik jest pełny.
• Sprawdzić, czy pory materiału filtracyjnego nie
zostały zatkane przez drobny pył lub sadzę.
• Sprawdzić, czy ssawki (szczotki), rura
przedłużająca, wąż ssący lub filtr wodny nie są
zatkane przez zanieczyszczenia (zdemontować
elementy węża ssącego przy wyłączonym
urządzeniu - jego rozciągnięcie spowoduje
rozluźnienie zalegającego zanieczyszczenia).
• Sprawdzić, czy filtr ochronny silnika (33) jest
zanieczyszczony.
Jeśli siła ssania zmaleje nagle:
• Sprawdzić, czy zawór pływakowy nie zamknął
przepływu powietrza. Może się to zdarzyć przy
skrajnie ukośnym ustawieniu lub przechyleniu
urządzenia. Wyłączyć odkurzacz - pływak
opadnie wówczas na dół - i urządzenie jest
ponownie gotowe do użycia.
Jeśli silnik nie pracuje:
• Sprawdzić, czy bezpiecznik nie jest uszkodzony i
czy jest napięcie w sieci.
• Sprawdzić, czy kabel, wtyczka i gniazdo
wtykowe są w dobrym stanie.
• Przed sprawdzeniem wyciągnąć wtyczkę z gniazda.
• Nigdy nie otwierać silnika samodzielnie!
Jeśli nie wydostaje się płyn czyszczący:
• Sprawdzić, czy pompa jest włączona - lampka
kontrolna (6) musi się palić.
• Oczyścić sitko filtra ssawnego (37).
• Sprawdzić, czy płyn czyszczący znajduje się w
zbiorniku na płyn zraszający.
• Sprawdzić, czy wąż ssący wisi luźno w zbiorniku
na płyn zraszający.
• Sprawdzić, czy ssawka zraszająca nie jest
zatkana.
Jeśli ssawka zraszająca jest zatkana, pozostawić ją
na jakiś czas w wodzie. Potem mocno przedmuchać.
Mając na uwadze sprawy ochrony środowiska
należy przestrzegać:
Opakowań, wysłużonych urządzeń i opróżnionych
butelek po koncentracie czyszczącym nie wyrzucać
zwyczajnie lecz oddawać do powtórnego przetworzenia.
O właściwą firmę zajmującą się powtórnym przetwarzaniem wzgl. najbliższy punkt zbierania odpadów
można dowiedzieć się w swojej administracji.
Poprzez sieć kanalizacyjną wolno usuwać jedynie
środki czyszczące rozcieńczone wodą.
W formie koncentratu środek czyszczący należy
oddać we właś ciwej firmie zajmującej się
powtórnym przetwarzaniem wzgl. najbliższym
punkcie zbierania odpadów.
Serwis
Prosimy zwrócić się do sprzedawcy Waszego
urządzenia, który w razie konieczności poda Wam
adres lub numer telefonu właściwej placówki
serwisowej firmy THOMAS.
Prosimy o podawanie przy tym danych z tabliczki
informacyjnej Waszego odkurzacza, umieszczonej
na tylnej ściance urządzenia.
Aby zachować bezpieczeństwo pracy urządzenia,
naprawy - w szczególności części przewodzących
prąd elektryczny - należy powierzać tylko wykwalifikowanemu elektromonterowi. W przypadku usterki
należy zwrócić się zatem do sprzedawcy lub bezpośrednio do punktu serwisowego firmy THOMAS
57
Oświadczenie wiarygodności CE
Niniejszym oświadczamy na własną
odpowiedzialność, iż dane urządzenie odpowiada
wymogom następujących norm lub dokumentom
normowym:
– Wytyczne EG dotyczące niskiego napięcia
(73/23/EWG), zastąpione 93/68/EWG
– Wytyczne EG dotyczące wytrzymałości
elektromagnetycznej (89/336/EWG), zastąpione
91/263/EWG, 92/31/EWG, 93/68/EWG
Zastosowane normy zgodności:
DIN EN 60335-1, DIN EN 60335-2-2;
DIN EN 61000-3-2: 1995; DIN EN 61000-3-3: 1995;
DIN EN 55014-1: 1993; DIN EN 55014-2: 1997
Page 59

58
• Ne ostavläjte agregaty na otkrytom vozduxe i
ne podvergajte ix prämomu vozdejstviü vlagi.
• Nasadki i trubki pri vklühennom agregate ne
dolΩny naxodit´sä v neposredstvennoj
blizosti ot golovy, tak kak v qtom sluhae
voznikaet opasnost´ povreΩdeniä glaz i uπej.
• Ni v koem sluhae dlä udaleniä πtepsel´noj
vilki iz rozetki ne tänite za kabel´, a tol´ko
za samu vilku.
• Sledite za tem, htoby setevoj soedinitel´nyj
kabel´ ne podvergalsä ni nagrevu, ni
vozdejstviü agressivnyx ximihesknx
øidkostej, i ne kasalsä pri natäøenii ostryx
kromok ili poverxnostej.
• PovrpeΩdennyj soedinitel´nyj provod qtogo
ustrojstva opasen; v sluhae povreΩdeniä
provod dolΩen byt´ zamenen predpriätiemizgotovitelem ili ego sluΩboj servisa, ili
drugim kvaliFicirovannym specialistom.
Vaønejπie ukazaniä po texnike bezopasnosti
• Никогда не оставляйте прибор во включённом
состоянии без присмотра и обращайте
внимание на то, чтобы дети не игрались с
прибором.
• Не пользуйтесь моющим пылесосом для сухого
всасывания, если система фильтров не
встроена соответственно руководству по
эксплуатации.
• Внимание! Агрегаты данных исполнений не
предусмотрены для очисткн от вредной для
здоровья пыли.
• Не засасывайте содержащие растворители
жидкости, такие, как, например, разжижители
для лака, масла, бензин, а также агрессивные
жидкости.
Пожалуйста, внимательно прочтите приведенную в
данном Руководстве по эксплуатации
информацию. Она содержит важнейшие указания
по технике безопасности, монтажу, эксплуатации и
техническому обслуживанию агрегатов типа
“ТHOMAS SUPER 30 S”. Бережно храните
Руководство по эксплуатации и передавайте его
возможному последующему владельцу.
Изготовитель не несет никакой ответственности в
случае несоблюдения ирпведенных ниже указаний.
Агрегаты типа “ТHOMAS SUPER 30 S” не должны
применяться неправильным образом, т. е. не в
соответствии с предусмотренными требованиями
по эксплуатации. Данные агрегаты служат для
использования только в домашнем хозяйстве.
Напряжение, указанное на заводской табличке
прибора, должно соответствовать напряжению
питающей сети.
Page 60
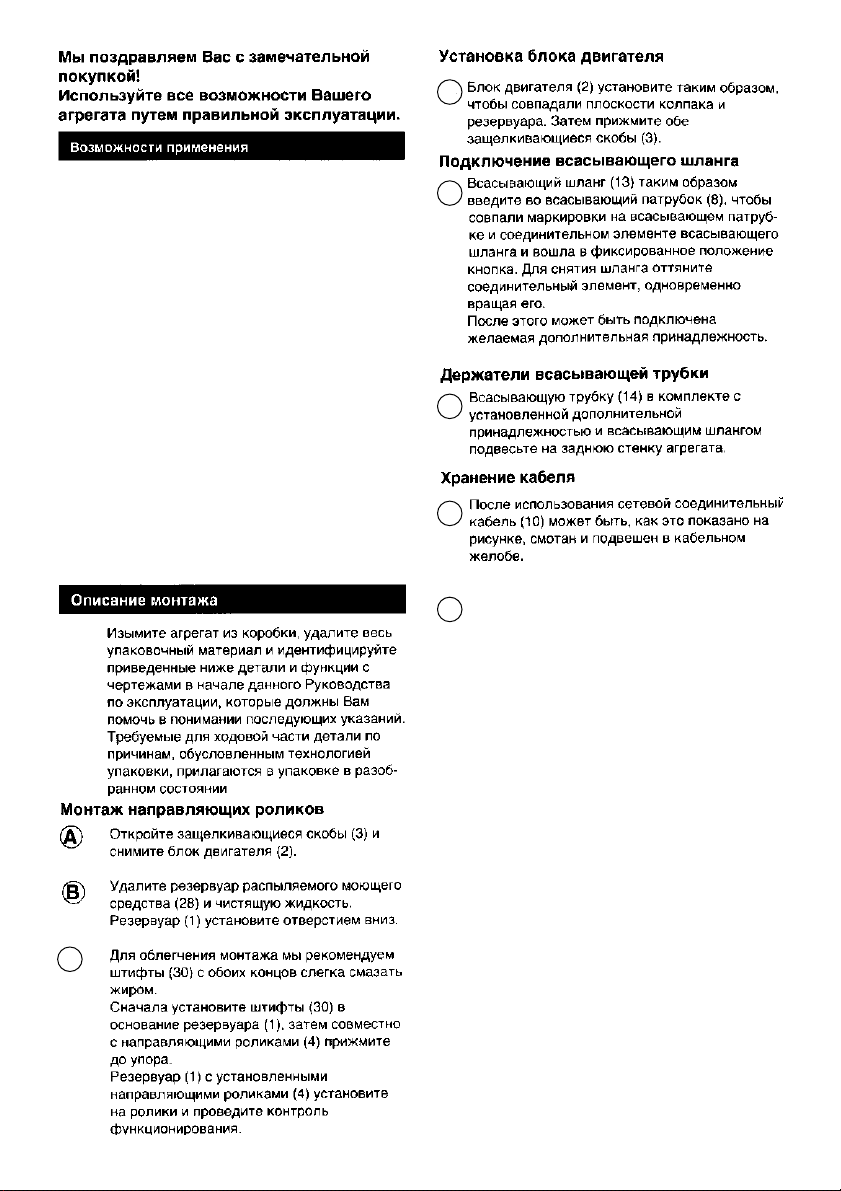
59
Моторозащитный филтр
Иосле каждого процесса засасывания и
рабочего процесса распыления проверить
моторозащитный/33/фильтр на загрезнение
и в необходимости прочистить. Для зтого
открытъ поплавковый клапан / 38 / в
направлении стрелки и моторозащитный
фильтр выбрать из всасывающего отверстия.
Почищенный или же новый филытр снова заложить в
исходное положение и насадить опять
поплавковый клапах.
Чистящий концентрат
Ваш содержит 0,5 л. протекс очистительного
коншентрата. Указание на применение и дозировку
берите пожалуста с этикетки бутылки.
Агрегаты типа “ТHОМАS SUPЕR 30 S” могут
использоваться в качестве пылесосов для очистки
ковровых покрытий, мягкой мебели, гладких полов
и напольных покрытий и для регулярного ухода за
жилыми помещениями; они могут поглощать как
пыль, так и жидкости, например, они могут освобождать забившиеся кухонные раковины и другие
сливы. Путем минимального количества ручных
операций Ваш агрегат типа “ТHOMAS SUPER 30 S”
может быть оснащен прилагаемыми стандартными
принадлежностями для влажной очистки Ваших
ковроых покрытий или мягкой мебели. Агрегаты
типа “ТHОМАS SUPER 30 S” являются
многоцелевыми изделиями. В области распыления
моющих средств они предусмотрены для чистки
ковровых покрытий, мягкой мебели и гладких полов
и напольных покрытий с применением чистящего
раствора. При использовании насадки для мытья
окон он также орифоден для чистки окон. При
всасывании жидкостей речь может идти только о
жидкостях на водяной основе; агрегат ни в коем
случае не должен применяться для удаления
возгораемых жидкостей. Режим всасывания пыли
предусмотрен для удаления сухой грязи и пыли с
ковровых покрытий, полов, мебели и гардин.
C
D
E
F
G
K
Page 61

Пуск в эксплуатацию
Включение прибора
М
В режиме сухого всасывания поворотный
включатель (7) должен быть установлен на
символ “жовровая насадка”.
Контрольная лампочка (6) не должна загораться.
Прибор готов к работе.
Режим всасывания жидкостей
Сборка
A
Oтсоединить прибор от розетки и снять верхнюю
моторную часть (2).
Внимание! перед всасыванием жидкостей
удалить блок фильтров (26 + 27).
L
D
G
M
60
Режим сухого всасывания
! Никогда при сухой уборке не пользуйтесь
Вашим прибором Aquafilter без аквафильтра,
тонкодисперсного текстильного фильтра и
соответствующей заправки водой.
Не всасывайте большие количества
тонкодисперсной пыли, напр., муки, порошка
какао, цемента и т. п.
Подготовка
A
Отсоединить прибор от розетки и снять
верхнюю моторную часть (2).
В Удалить ёмкость для чистой воды (28).
L
Имеющийся на верхней моторной части шланг
для всасывания (37) вставить в
предназначенное для yтого крепление (36).
Н Установить волокнистый фильтр (26) с
помощью зажимного кольца (25) и закрепить
его поворотными скобами (31).
I Состыковать до упора аквафильтр, состоящий
из 3 частей, и крепко насадить его на
всасывающий штуцер.
При этом следите за
маркировкой.
Аквафильтр должен быть защёлкнут на дне
всасывающего резервуара и равномерно
лежать на дне.
Залейте 2 литра чистой воды во всасывающий
бак.
J Путём перекладывания верхнего края
подвесить тонкодисперсный текстильный
фильтр во всасывающем резервуаре.
D Насадить верхнюю моторную часть (2).
поворотный включатель на приборе должен
быть установлен на “0”.
G Подключить сетевой шнур (10).
Технический уход за системой аквафильтра.
По гигиеническим причинам систему
аквафильтра и всасывающий резервуар
после каждого использования следует
опорожнить, почистить и просушить.
Грязная вода и мокрые части
благоприятствуют размножению бактерий и
грибков.
Тонкодисперсный текстильный фильтр в
зависимости от степени загрязнения нужно
протереть сухой или слегка влажной суконкой.
При сильном загрязнении его следует промыть
чистой водой без добавления моющих и чистящих
средств. Следите за тем, чтобы при следующем
использовании фильтр был полностью просушен.
Page 62

61
B
N
L
D
Подключить всасывающий и напорный
шланги
Р
Вставить запорный клапан (17) в крепление на
всасывающей трубе. Затем насадить на
всасывающую трубу (14) рукоятку (11). Tеперь
следует закрепить напорный шланг (19)
пружинными зажимами (15) на всасывающем
Т
Прикреплённый к насадке напорный шланг (12)
насадить сцеплением (39) на запорный клапан
(17) и повернуть до закрепления. 3атем укрепить
напорный шланг (12) малыми пружинными
зажимами (16) на всасывающей трубе.
E
Q
S
G
U
Page 63

Для этого нажмите размыкающую кноиу на
быстродействующей мудте (5). Соединительный
штифт автоматически выталкивается.
W
X
R
B
O
T
V
62
Page 64

63
Введите систему распыления в эксплуатацию на
гладком полу или над кухонной раковиной. Затем
очистите оба резервуара и демонтированные части
хорошо просушите.
Чистка прибора и уход за ним
Перед чисткой всегда отсоединяйте прибор от
розетки!
Hикогда не погружайте корпус мотора в воду!
Протирайте корпус мотора и ёмкость влажной
суконкой и после просушивайте.
Ёмкость и использованные принадлежности после
каждого всасывания жидкостей и особенно после
клейких жидкостей должны быть промыты тёплой
мыльной водой.
Мероприятия при возможных неисправностях
Если Ваш агрегат, вопреки ожиданиям,
фухкционирует не удовлетворяющим Вас образом,
Вам необязательно незамедлительно обращаться в
службу заказчика. Вначале проверьте, не вызваны
ли помехи лишь незначительныни неисправностями:
Если пыль проступает при всасывании:
• Установлена ли система фильтров соответственно
руководству?
• Применяется ли оригинальный водяной
фильтр/волокнистый фильтр?
Если постепенно уменьшается всасывающая
мощность:
• Не переполнен ли грязесборник?
• Не забиты ли фильтрющие патроны
мелкодисперсной пылью или сажей?
• Не забиты ли пылью насадка, удлинительная
трубка или всасывающий шланг?
(растяните всасывающий шланг при включенном
агрегате - растяжение устраняет засорение).
• Не загрязнен ли защитный фильтр турбины?
Если внезапно уменьшается всасывающая
мощность:
• Не остановил ли поплавковый клапан проход
воздуха?
Это может случиться при экстремальном
наклонном положении и при опрокидывании
агрегата. Отключите пылесос - поплавок
опускается вниз - агрегат вновь готов к
эксплуатации.
Если не работает двигатель :
• Исправен ли предохранитель и имеется ли
напряжение?
• Псправы ли кабель, сетевой штепсель и розетка?
• Перед проверкой вытяните сетевой штекер из
розетки.
• Ни в коем случае не открывайте самостоятельно
двигатель!
Если не выходит чистящая жидкость:
• Включен ли насос (доджна гореть контрольная
лампа (6)?
• Очистите сито всасывающего фильтра (37).
• Имеется ли в бачке для распыляемого средства
чистящая жидкость?
• Свободно ли висит всасывающий шланг в бачке
для распыляемого средства?
• Не забита ли распыляющая насадка?
Если распыляющая насадка забита, положите ее на
некоторое время в воду. После этого тщательно
продуйте.
Для защиты окружающей среды, пожалуйста,
соблюдайте:
Упаковочный материал, пришедшие в негодность
агрегаты и пустые бутылки из-поу чистящего
концентрата не выбрасывайте просто так, а
передавайте их для повторной переработки.
О ближайшей станции повторной переработки или
сборном пункте Вы можете узнать в Вашем
управлении коммунального хозяйства.
Только разбавленный водой чистящий концентрат
может быть удален через систему канализации.
В концентрированной форме чистящий концентрат
необходимо сдавать на станцию повторной
переработки или сборный пункт.
Служба Заказчика
Выясните у торгующей организации адрес или номер
телефона ответственной за Вас службы заказчика
фирмы “THOMAS“.
Пожалуйста, сообщайте eй одновременно данные,
находящиеся на типовой табличхе,
расположенной на задней стенке Вашего агрегата.
Для обеспечения безопасной эксплуатации
Вашего устройства все ремонтные работы,
особенно на токоведущих частях, Вы должны
доверять специалистами-электриками. В случае
неисправности Вам необходимо ио этому поводу
обратиться в Вашу торговую организацию или
непосредственно в службу заказчика.
Декларация соответствия нормам СЕ
Мы заявляем под личную ответственность, что
данное изделие соответствует следующим
нормам или нормативным документам:
- нормативам ЕС для низковольтных приборов
(37/23/EWG), изменено на 93/68/EWG,
- нормативам ЕС на электромагнитную
совместимость (89/336/EWG), изменено на
91/263/EWG, 92/31/EWG, 93/68/EWG.
Использованные гармонизированные нормы:
DIN EN 60335-1, DIN EN 60335-2-2;
DIN EN 61000-3-2: 1995; DIN EN 61000-3-3: 1995;
DIN EN 55014-1: 1993; DIN EN 55014-2: 1997.
 Loading...