

Page 1

SP-320
digital piano
user manual
Page 2

Musikhaus Thomann
Thomann GmbH
Hans-Thomann-Straße 1
96138 Burgebrach
Germany
Telephone: +49 (0) 9546 9223-0
E-mail: [email protected]
Internet: www.thomann.de
27.02.2017, ID: 381525
Page 3

Table of contents
1 General notes............................................................................................................................ 4
1.1 Further information........................................................................................................ 4
1.2 Notational conventions................................................................................................. 4
1.3 Symbols and signal words........................................................................................... 5
2 Safety instructions................................................................................................................. 6
3 Features....................................................................................................................................... 8
4 Installation................................................................................................................................. 9
5 Connection options............................................................................................................. 12
6 Control panel and connections..................................................................................... 13
7 Operating................................................................................................................................. 15
7.1 Turning on / off.............................................................................................................. 15
7.2 Automatic shutoff......................................................................................................... 15
7.3 Adjusting the volume.................................................................................................. 15
7.4 Setting the touch sensitivity..................................................................................... 15
7.5 Master Tuning / MIDI functions............................................................................... 16
7.5.1 Master Tuning............................................................................................................. 16
7.5.2 MIDI functions............................................................................................................ 16
7.5.3 MIDI panic button..................................................................................................... 17
7.5.4 Local On / Off.............................................................................................................. 17
7.5.5 Reset to factory defaults......................................................................................... 18
8 Functions.................................................................................................................................. 19
8.1 Playing demo songs..................................................................................................... 19
8.2 Reverb and Chorus effects......................................................................................... 19
8.3 Metronome..................................................................................................................... 19
8.4 Transposing..................................................................................................................... 20
8.5 Layer mode...................................................................................................................... 20
9 Troubleshooting................................................................................................................... 21
10 Technical specifications.................................................................................................... 22
11 MIDI implementation chart............................................................................................. 23
12 Function button allocation.............................................................................................. 25
13 Protecting the environment........................................................................................... 29
Table of contents
SP-320
3
Page 4
1 General notes
This manual contains important instructions for the safe operation of the unit. Read
and follow the safety instructions and all other instructions. Keep the manual for
future reference. Make sure that it is available to all those using the device. If you sell
the unit please make sure that the buyer also receives this manual.
Our products are subject to a process of continuous development. Thus, they are
subject to change.
1.1 Further information
On our website (www.thomann.de) you will find lots of further information and
details on the following points:
Download This manual is also available as PDF file for you to download.
Keyword search
Use the search function in the electronic version to find the
topics of interest for you quickly.
Online guides
Our online guides provide detailed information on technical
basics and terms.
Personal
consultation
For personal consultation please contact our
technical hotline.
Service
If you have any problems with the device the
customer service will gladly assist you.
1.2 Notational conventions
This manual uses the following notational conventions:
The letterings for connectors and controls are marked by square brackets and italics.
Examples: [VOLUME] control, [Mono] button.
Texts and values displayed on the device are marked by quotation marks and italics.
Examples: ‘24ch’, ‘OFF’.
Letterings
Displays
General notes
digital piano
4
Page 5
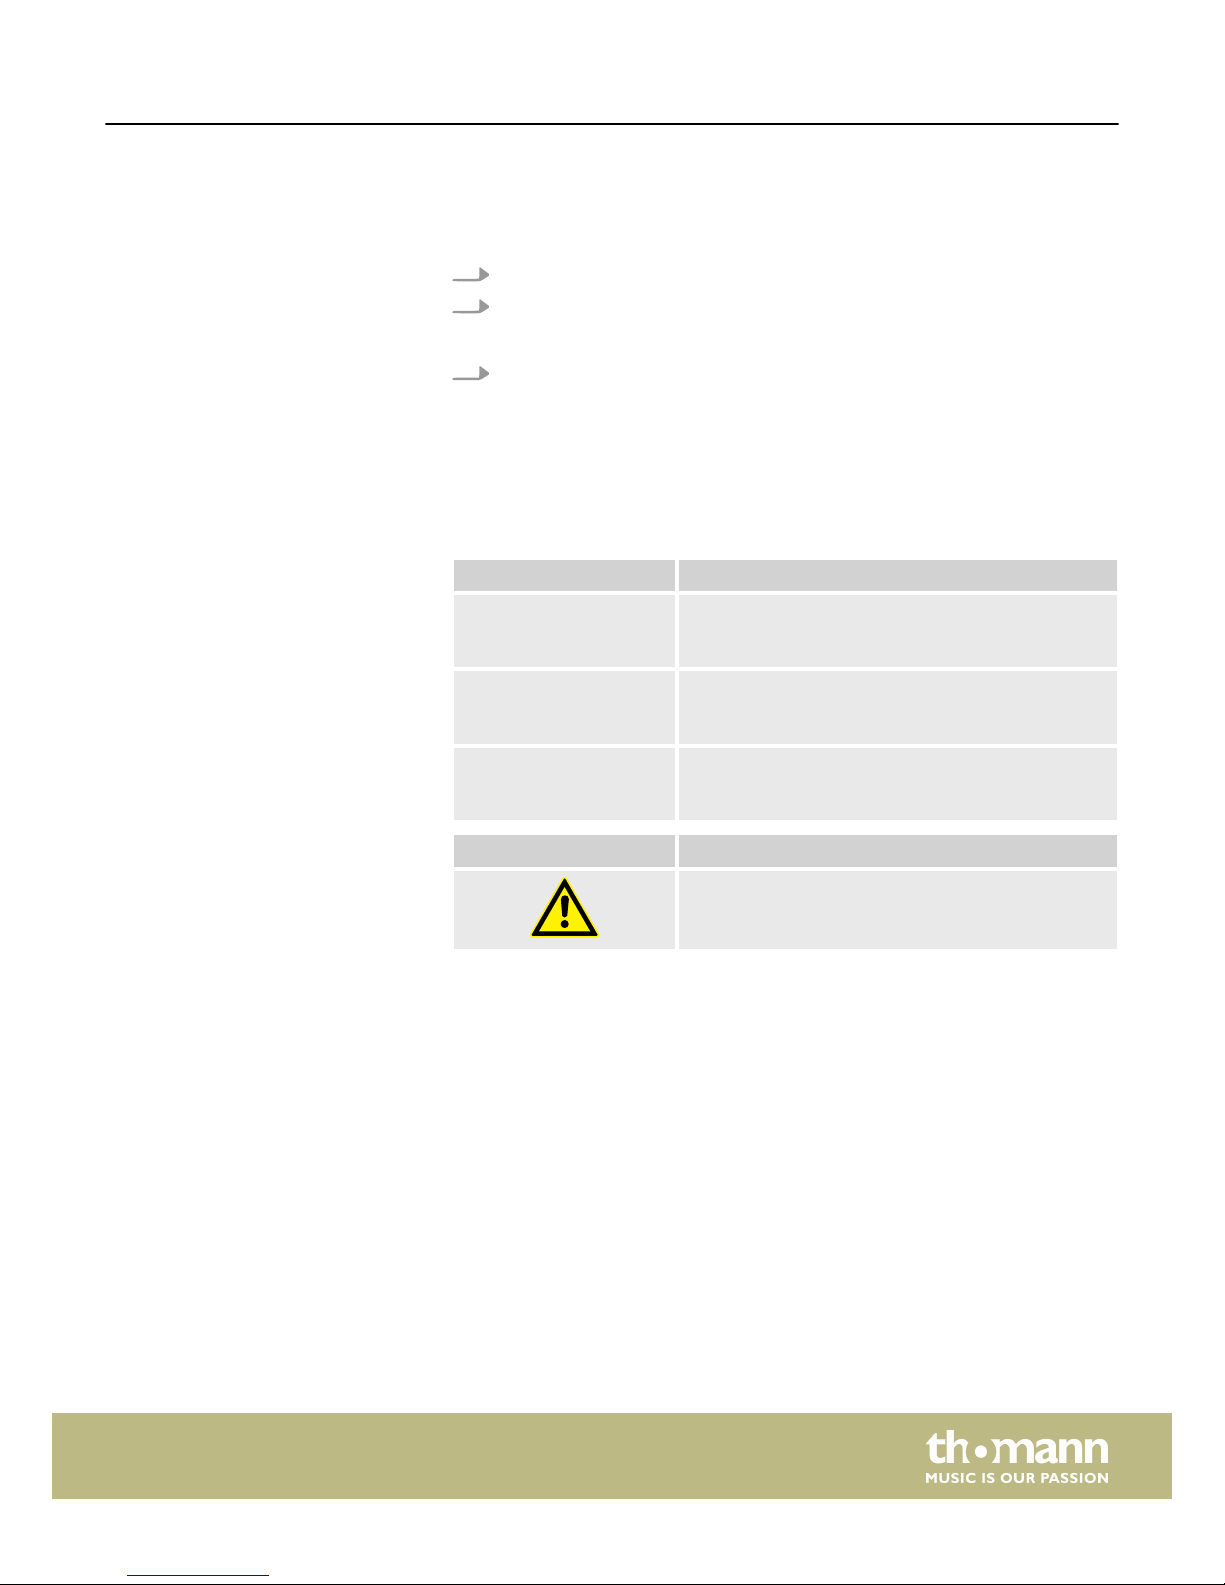
The individual steps of an instruction are numbered consecutively. The result of a
step is indented and highlighted by an arrow.
Example:
1. Switch on the device.
2. Press [Auto].
ð
Automatic operation is started.
3. Switch off the device.
1.3 Symbols and signal words
In this section you will find an overview of the meaning of symbols and signal words
that are used in this manual.
Signal word Meaning
DANGER! This combination of symbol and signal word indicates
an immediate dangerous situation that will result in
death or serious injury if it is not avoided.
CAUTION! This combination of symbol and signal word indicates
a possible dangerous situation that can result in minor
injury if it is not avoided.
NOTICE! This combination of symbol and signal word indicates
a possible dangerous situation that can result in mate‐
rial and environmental damage if it is not avoided.
Warning signs Type of danger
Warning – danger zone.
Instructions
General notes
SP-320
5
Page 6
2 Safety instructions
This device is intended to be used for electronic sound generation using a piano key‐
board. Use the device only as described in this user manual. Any other use or use
under other operating conditions is considered to be improper and may result in per‐
sonal injury or property damage. No liability will be assumed for damages resulting
from improper use.
This device may be used only by persons with sufficient physical, sensorial, and intel‐
lectual abilities and having corresponding knowledge and experience. Other persons
may use this device only if they are supervised or instructed by a person who is
responsible for their safety.
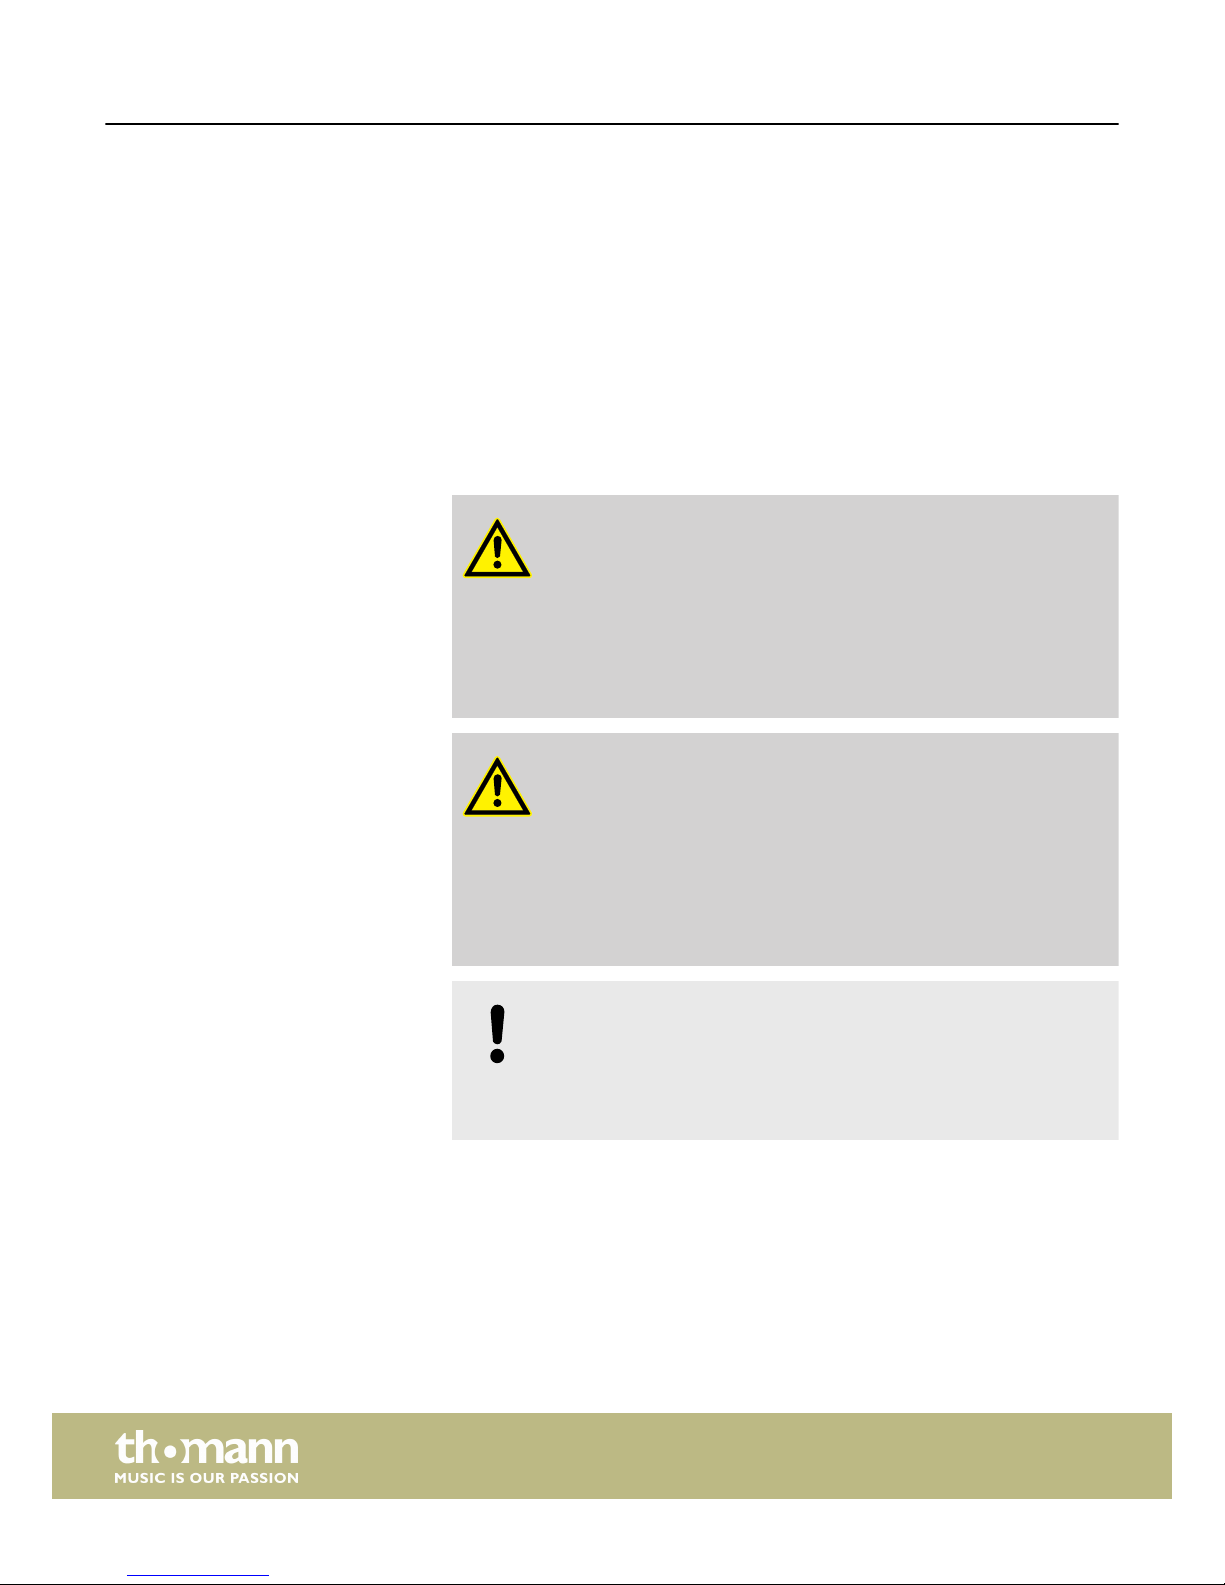
DANGER!
Danger for children
Ensure that plastic bags, packaging, etc. are disposed of properly and
are not within reach of babies and young children. Choking hazard!
Ensure that children do not detach any small parts (e.g. knobs or the
like) from the unit. They could swallow the pieces and choke!
Never let children unattended use electrical devices.
CAUTION!
Possible hearing damage
With loudspeakers or headphones connected, the device can produce
volume levels that may cause temporary or permanent hearing impair‐
ment.
Do not operate the device permanently at a high volume level.
Decrease the volume level immediately if you experience ringing in
your ears or hearing impairment.
NOTICE!
Operating conditions
This device has been designed for indoor use only. To prevent damage,
never expose the device to any liquid or moisture. Avoid direct sunlight,
heavy dirt, and strong vibrations.
Intended use
Safety
Safety instructions
digital piano
6
Page 7
NOTICE!
External power supply
The device is powered by an external power supply. Before connecting
the external power supply, ensure that the input voltage (AC outlet)
matches the voltage rating of the device and that the AC outlet is pro‐
tected by a residual current circuit breaker. Failure to do so could result
in damage to the device and possibly the user.
Unplug the external power supply before electrical storms occur and
when the device is unused for long periods of time to reduce the risk of
electric shock or fire.
NOTICE!
Risk of fire due to incorrect polarity
Incorrectly inserted batteries may destroy the device or the batteries.
Ensure that proper polarity is observed when inserting batteries.
NOTICE!
Possible damage by leaking batteries
Leaking batteries can cause permanent damage to the device.
Take batteries out of the device if it is not going to be used for a longer
period.
Safety instructions
SP-320
7
Page 8

3 Features
The digital piano is characterized by the following features:
n 88 light weighted keys
n 12 selectable timbres
n Polyphony: 32-voice
n Layer mode
n Reverb and Chorus effects
n Integrated metronome
n 12 Demo songs, playback tempo adjustable
n Connections: Headphones, USB to host (MIDI / audio), LINE OUT (L / R), sustain
pedal
n Voltage supply: via the supplied power adapter or 6 D cells (LR20, 1.5 V)
Features
digital piano
8
Page 9
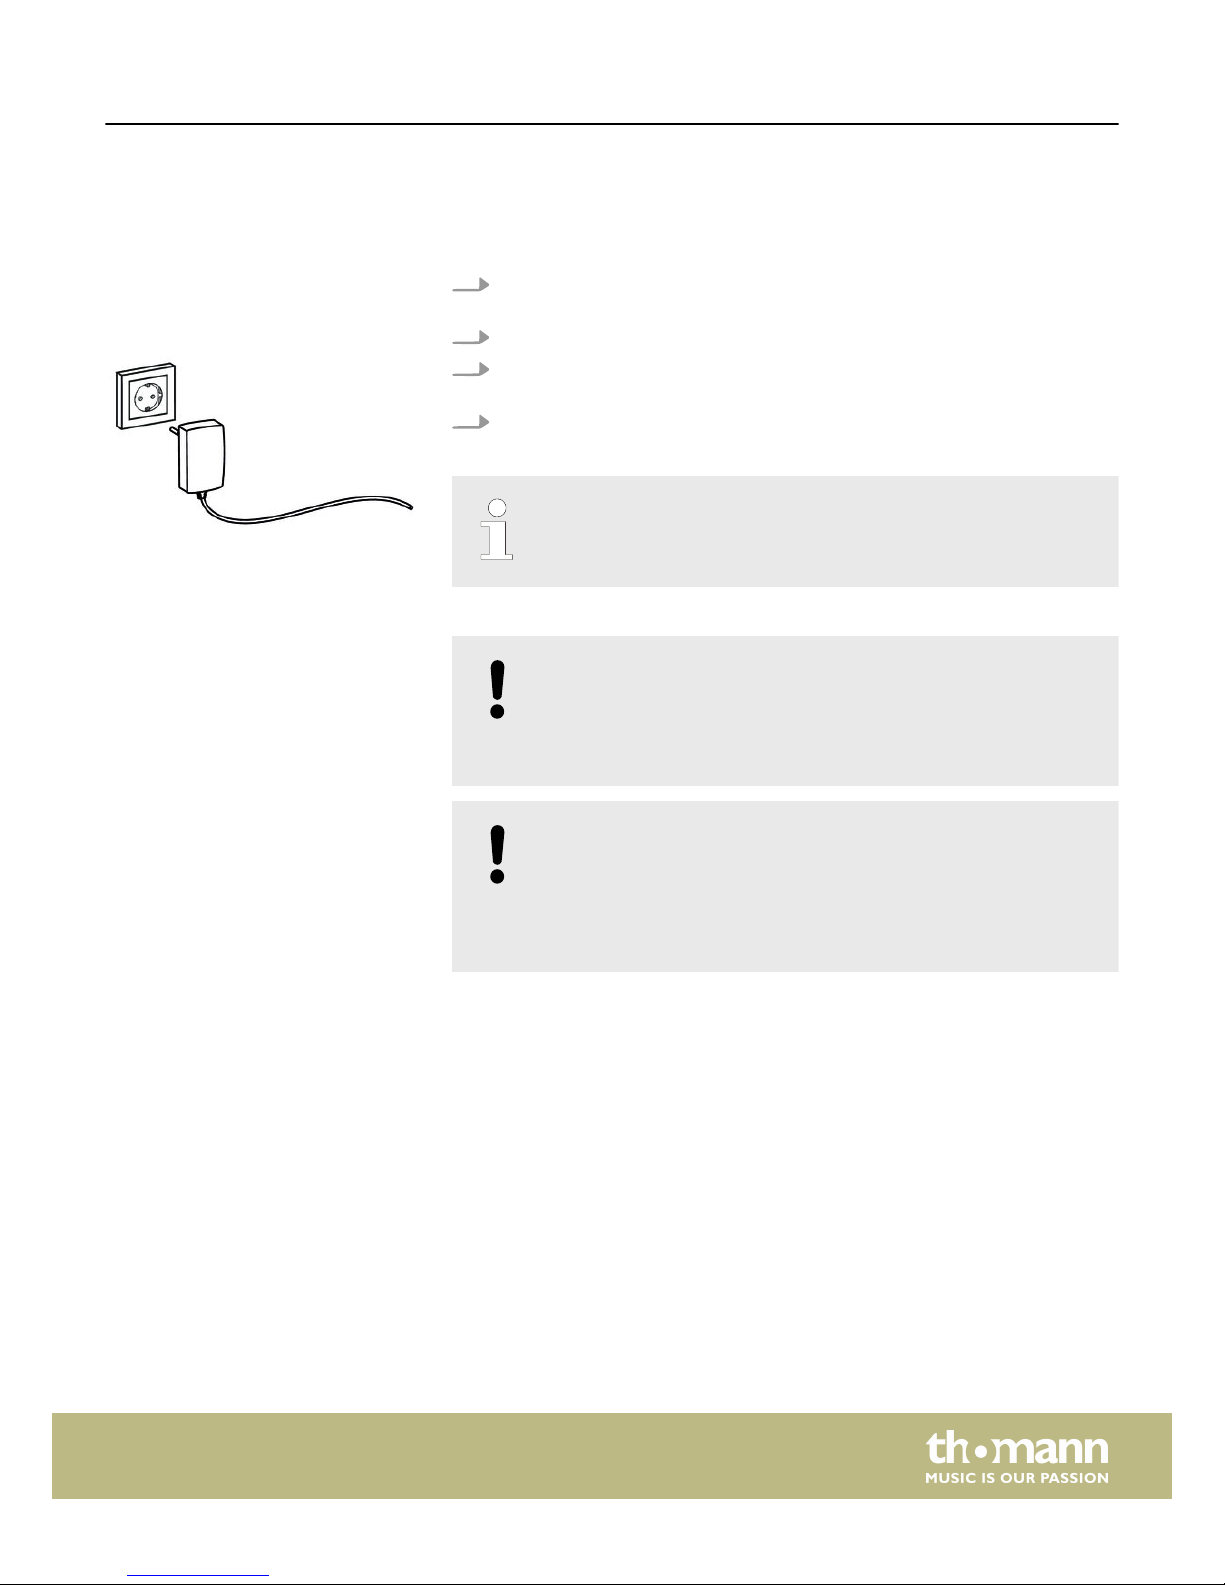
4 Installation
1. Make sure that the device is turned off before you connect it to the power
supply or disconnect it.
2. Turn the volume control to minimum.
3. Connect the included power adapter to the 12V connector of the unit and then
plug the power adapter into a wall outlet.
4. Now you can turn on the device.
If the piano is not in use or when a thunderstorm with danger of lightning
threatens, disconnect the device from its mains power for safety.
NOTICE!
Risk of fire due to incorrect polarity
Incorrectly inserted batteries may destroy the device or the batteries.
Ensure that proper polarity is observed when inserting batteries.
NOTICE!
Possible damage by leaking batteries
Leaking batteries can cause permanent damage to the device.
Take batteries out of the device if it is not going to be used for a longer
period.
Mains connection
Battery operation
Installation
SP-320
9
Page 10
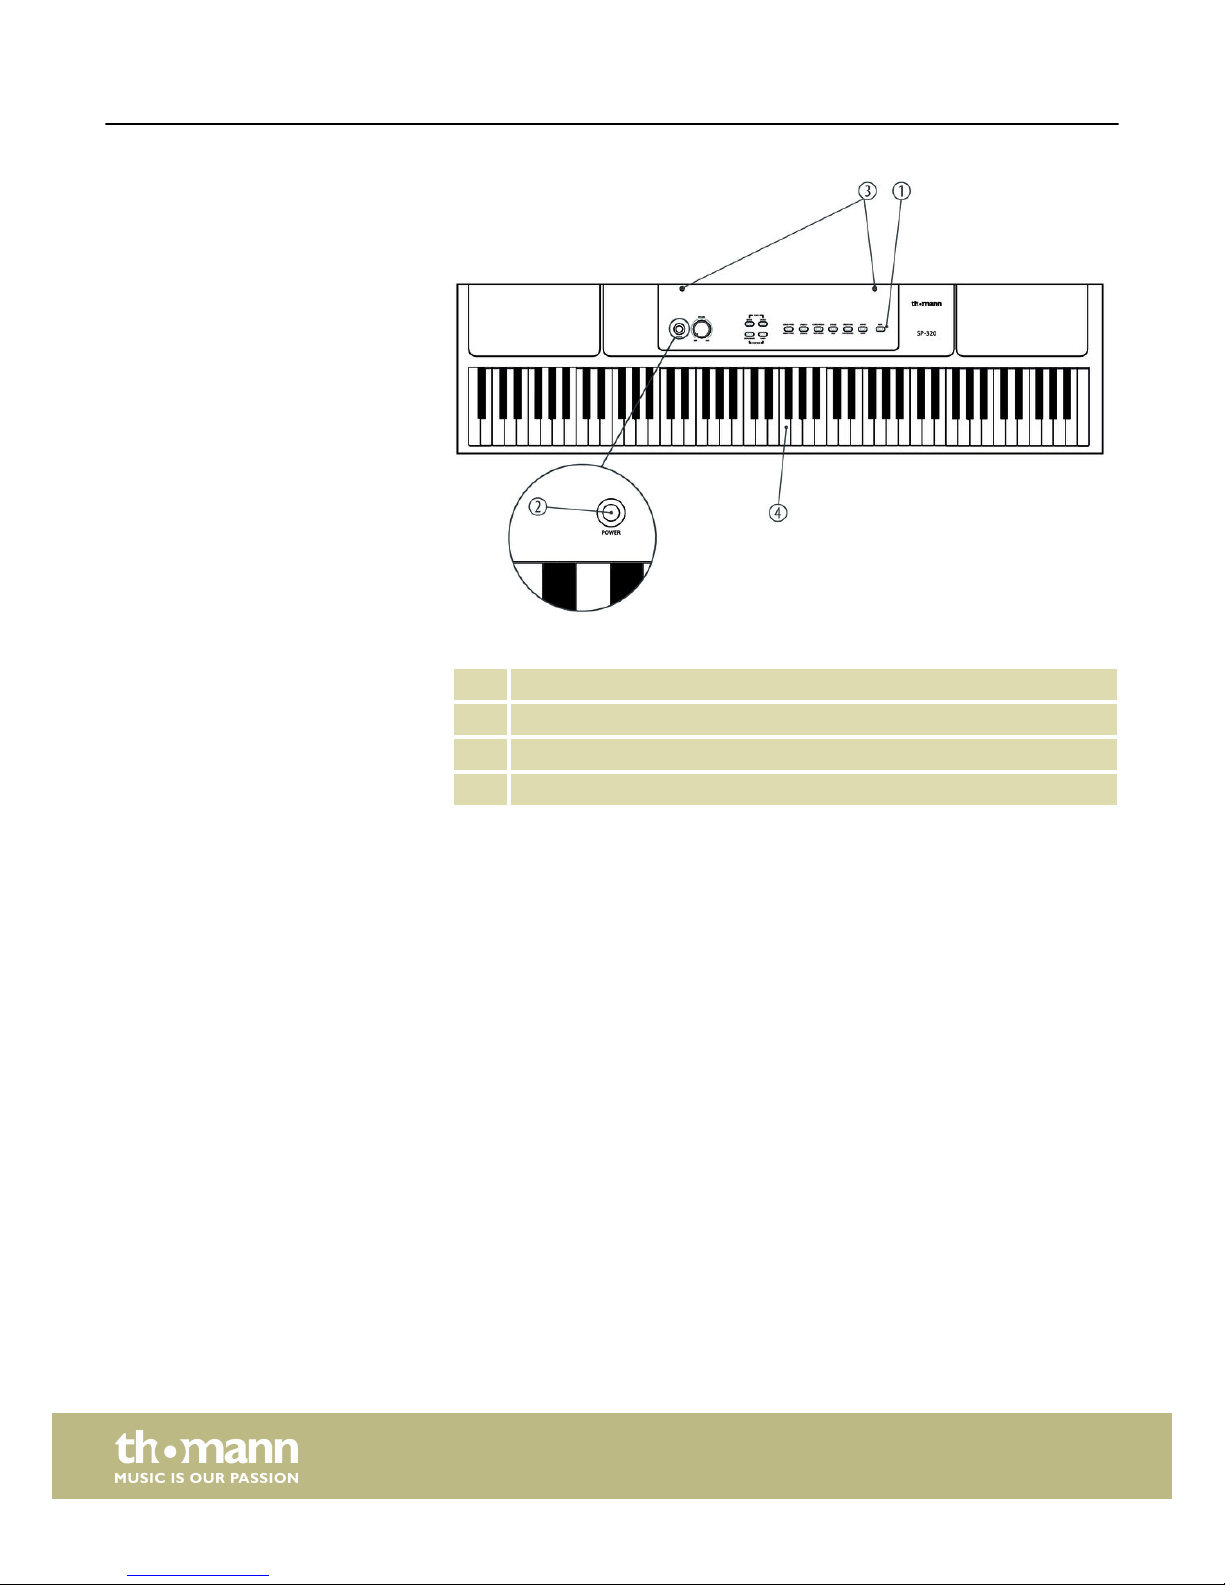
1 Operating panel
2 Main switch
3 Holes for music stand
4 Claviature
Assembly overview
Installation
digital piano
10
Page 11
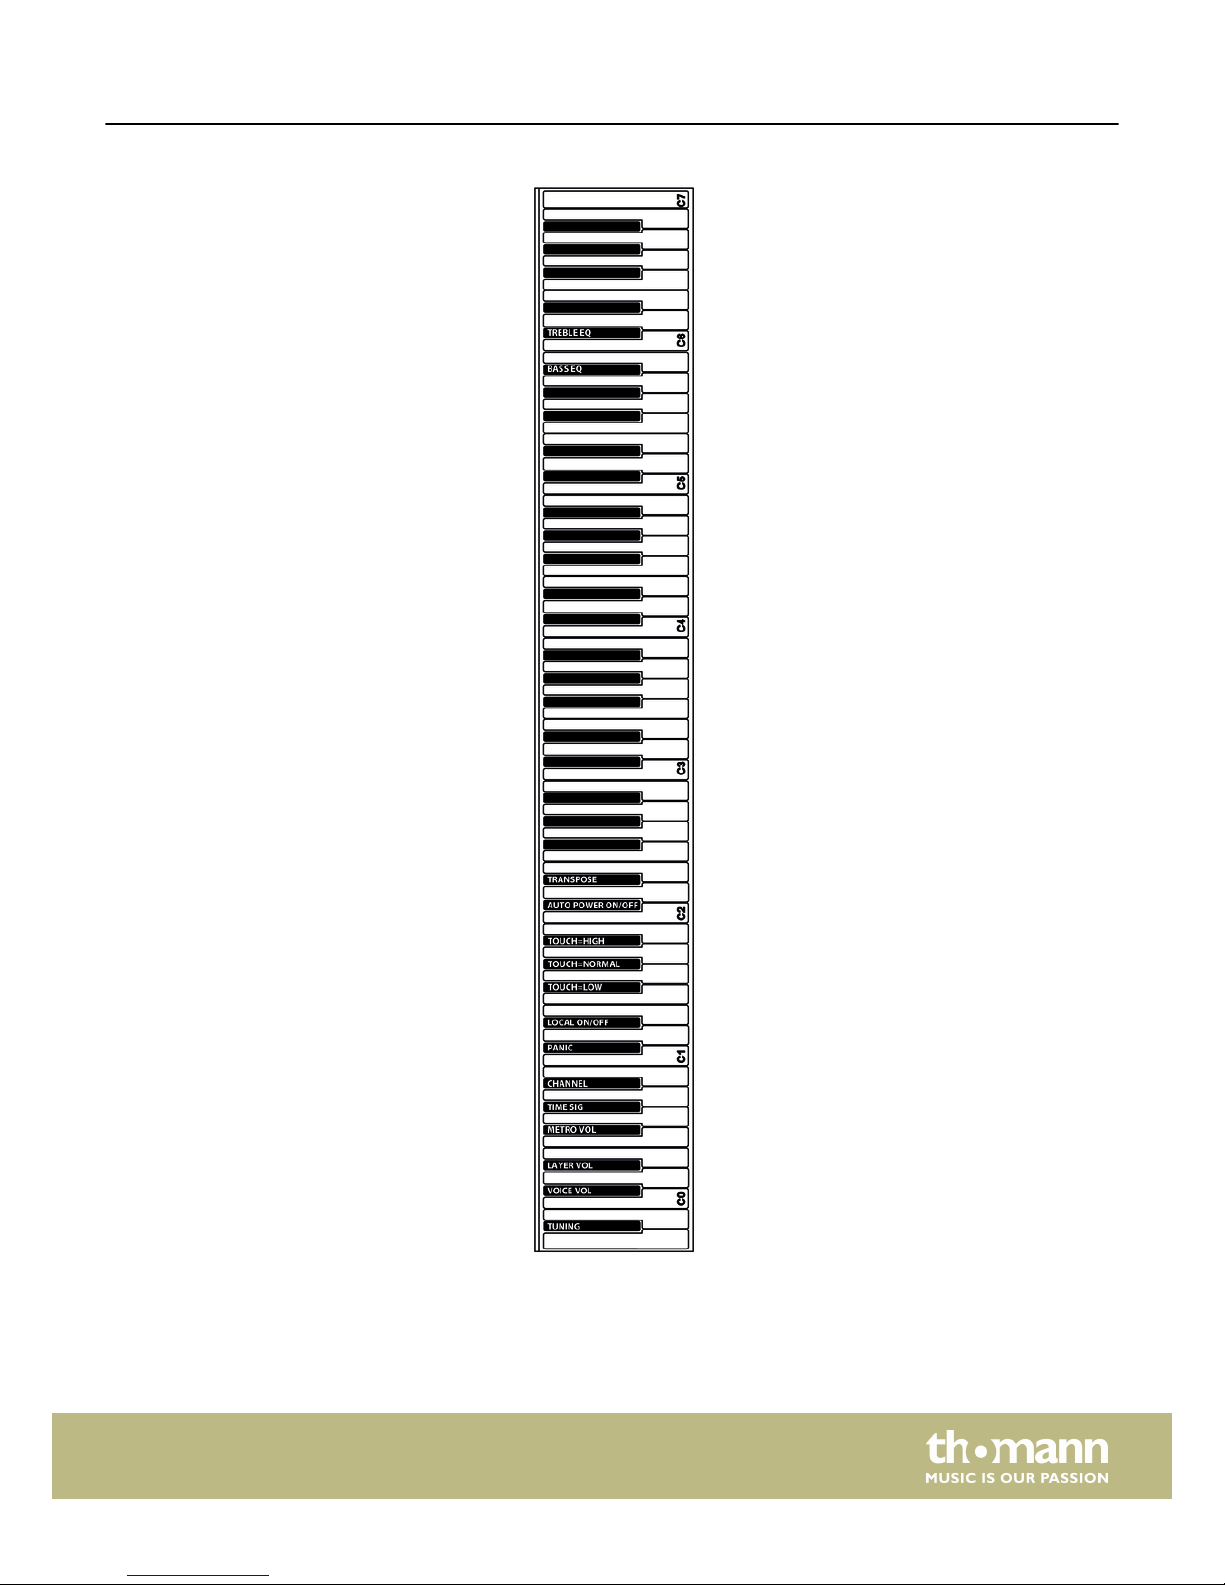
Installation
SP-320
11
Page 12
5 Connection options
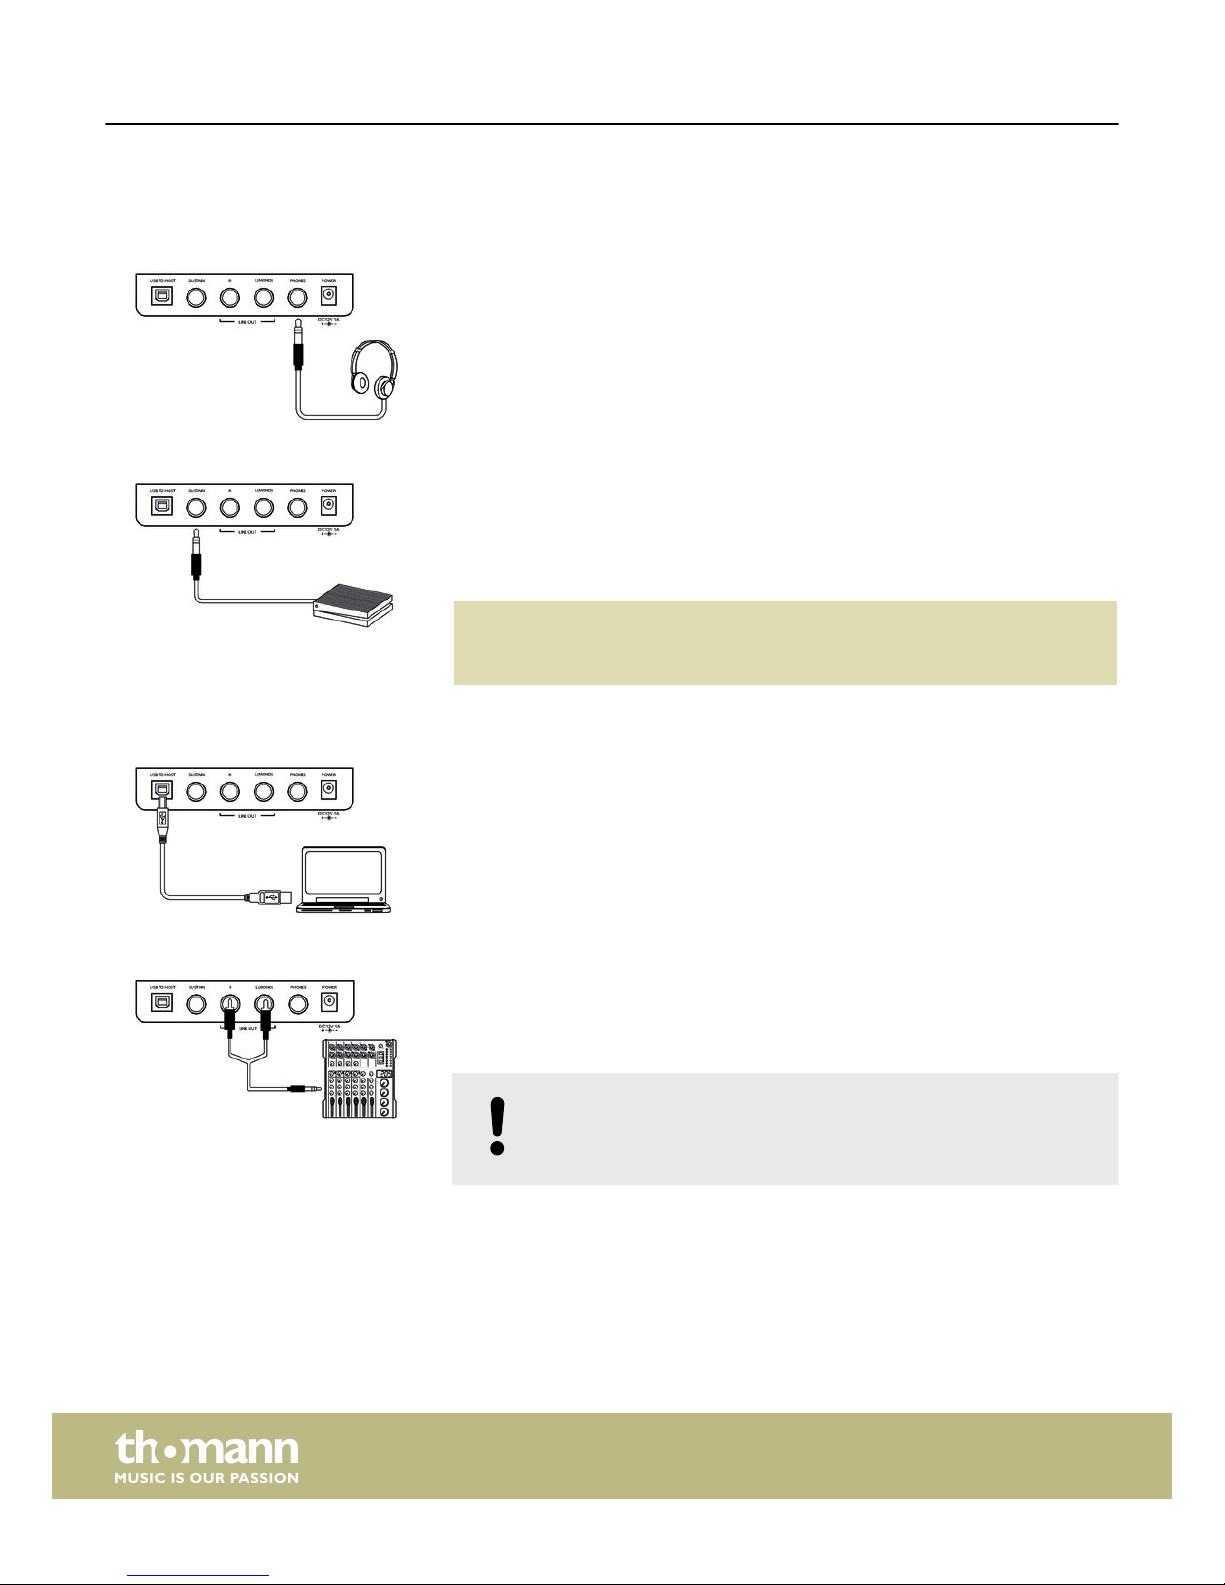
The headphones output is located on the rear side of the device.
Connecting headphones (not supplied) to the headphones output mutes the
speakers.
Connect the supplied Sustain pedal to the provided connector on the rear side of the
device.
Pedal functions:
Sustain pedal
With the sustain pedal all played notes sound longer. This effect simulates the
lifting of the damper in an analogue keyboard instrument.
Via this output, the MIDI data generated by the digital piano are transferred to a PC
(MIDI stands for ‘Musical Instrument Digital Interface’ and enables the electronic
interaction of various instruments and sound modules as a worldwide standard).
At the same time, the audio signal from the digital piano is transmitted to a con‐
nected PC via this output and can be recorded and reproduced using appropriate
software.
Use the [LINE OUT] sockets to connect the digital piano to an amplifier, stereo device,
mixing console or recording device. Plug one end of the audio cable into the
[LINE OUT] sockets in the connection box of the digital piano and the other end into
the input of the respective audio device.
NOTICE!
To prevent damage to the speakers, turn the volume down to ‘Min‐
imum’ before you connect other devices to the digital piano.
Headphones
Pedal
USB to host
External audio devices Line Out (L / R)
Connection options
digital piano
12
Page 13
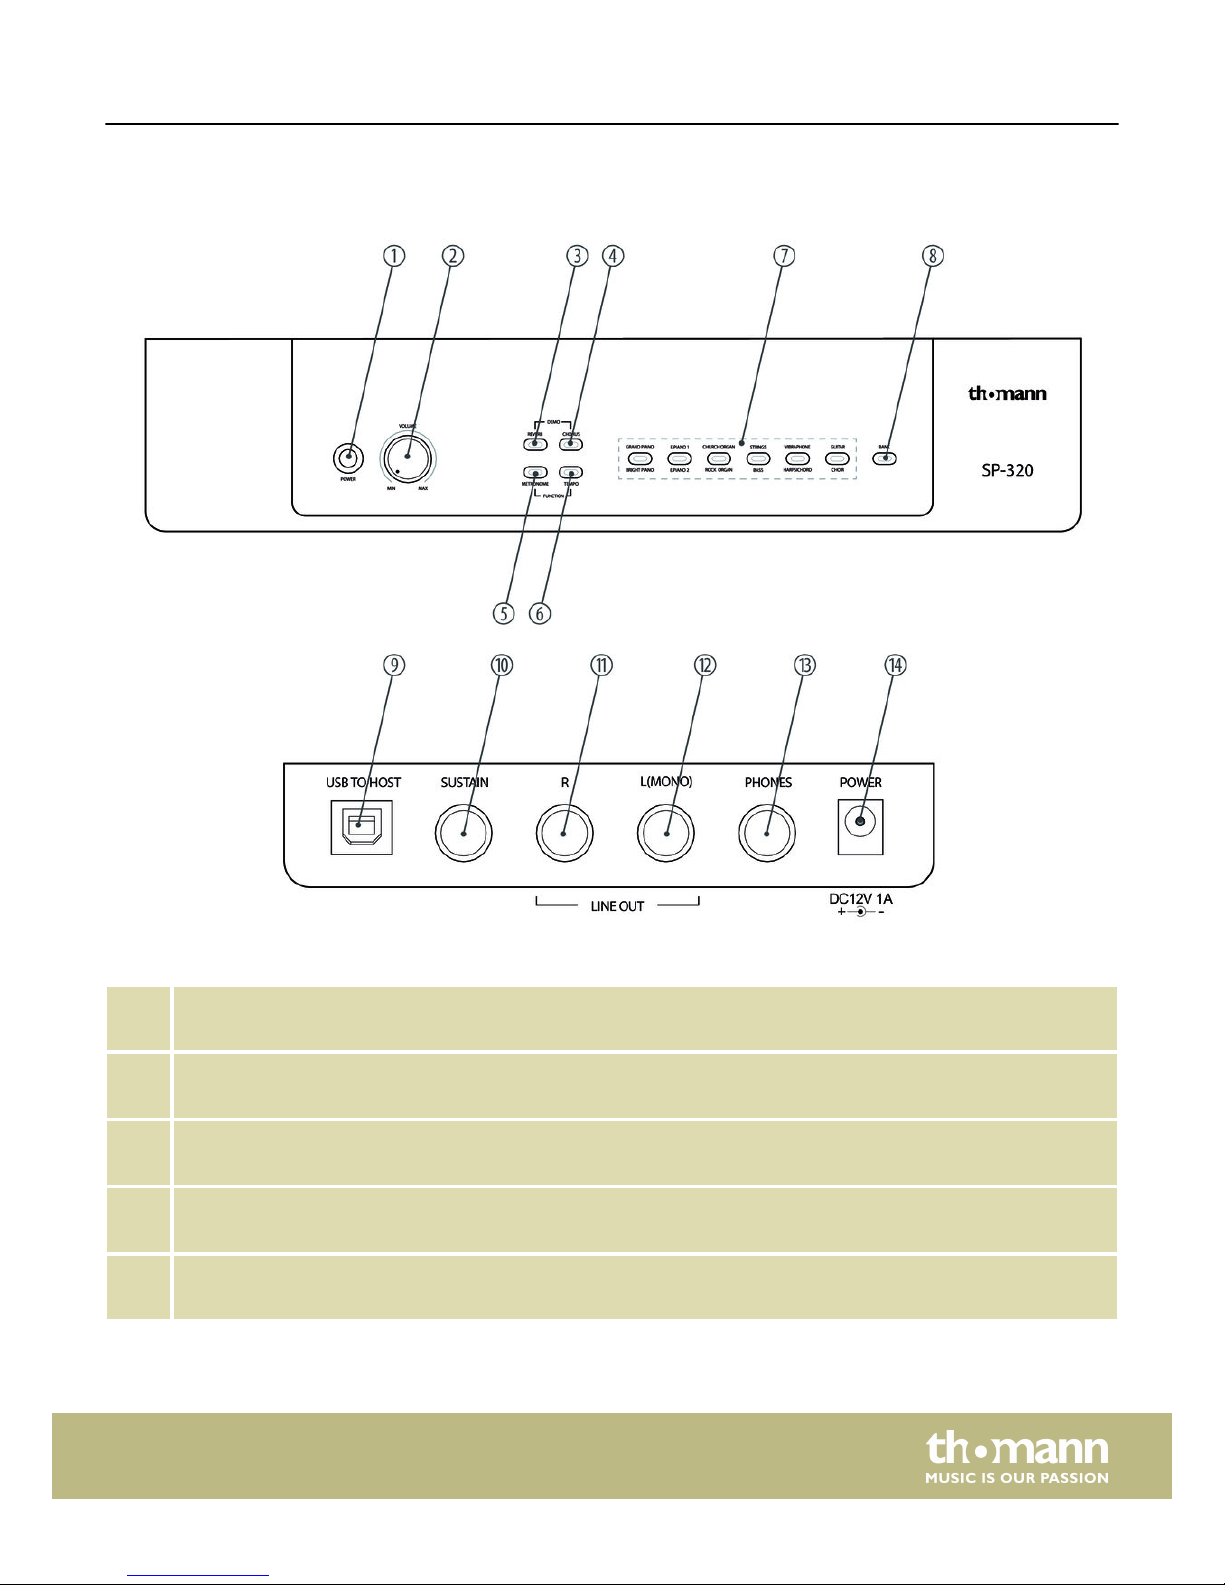
6 Control panel and connections
1 [POWER]
Main switch. Turns the device on and off.
2 [VOLUME]
Volume control for the built-in speakers and connected headphones.
3 [DEMO/REVERB]
Button to engage the Reverb effect.
4 [DEMO/CHORUS]
Button to engage the Chorus effect.
5 [FUNCTION/METRONOME]
Button to turn the metronome on and off.
Control panel and connections
SP-320
13
Page 14
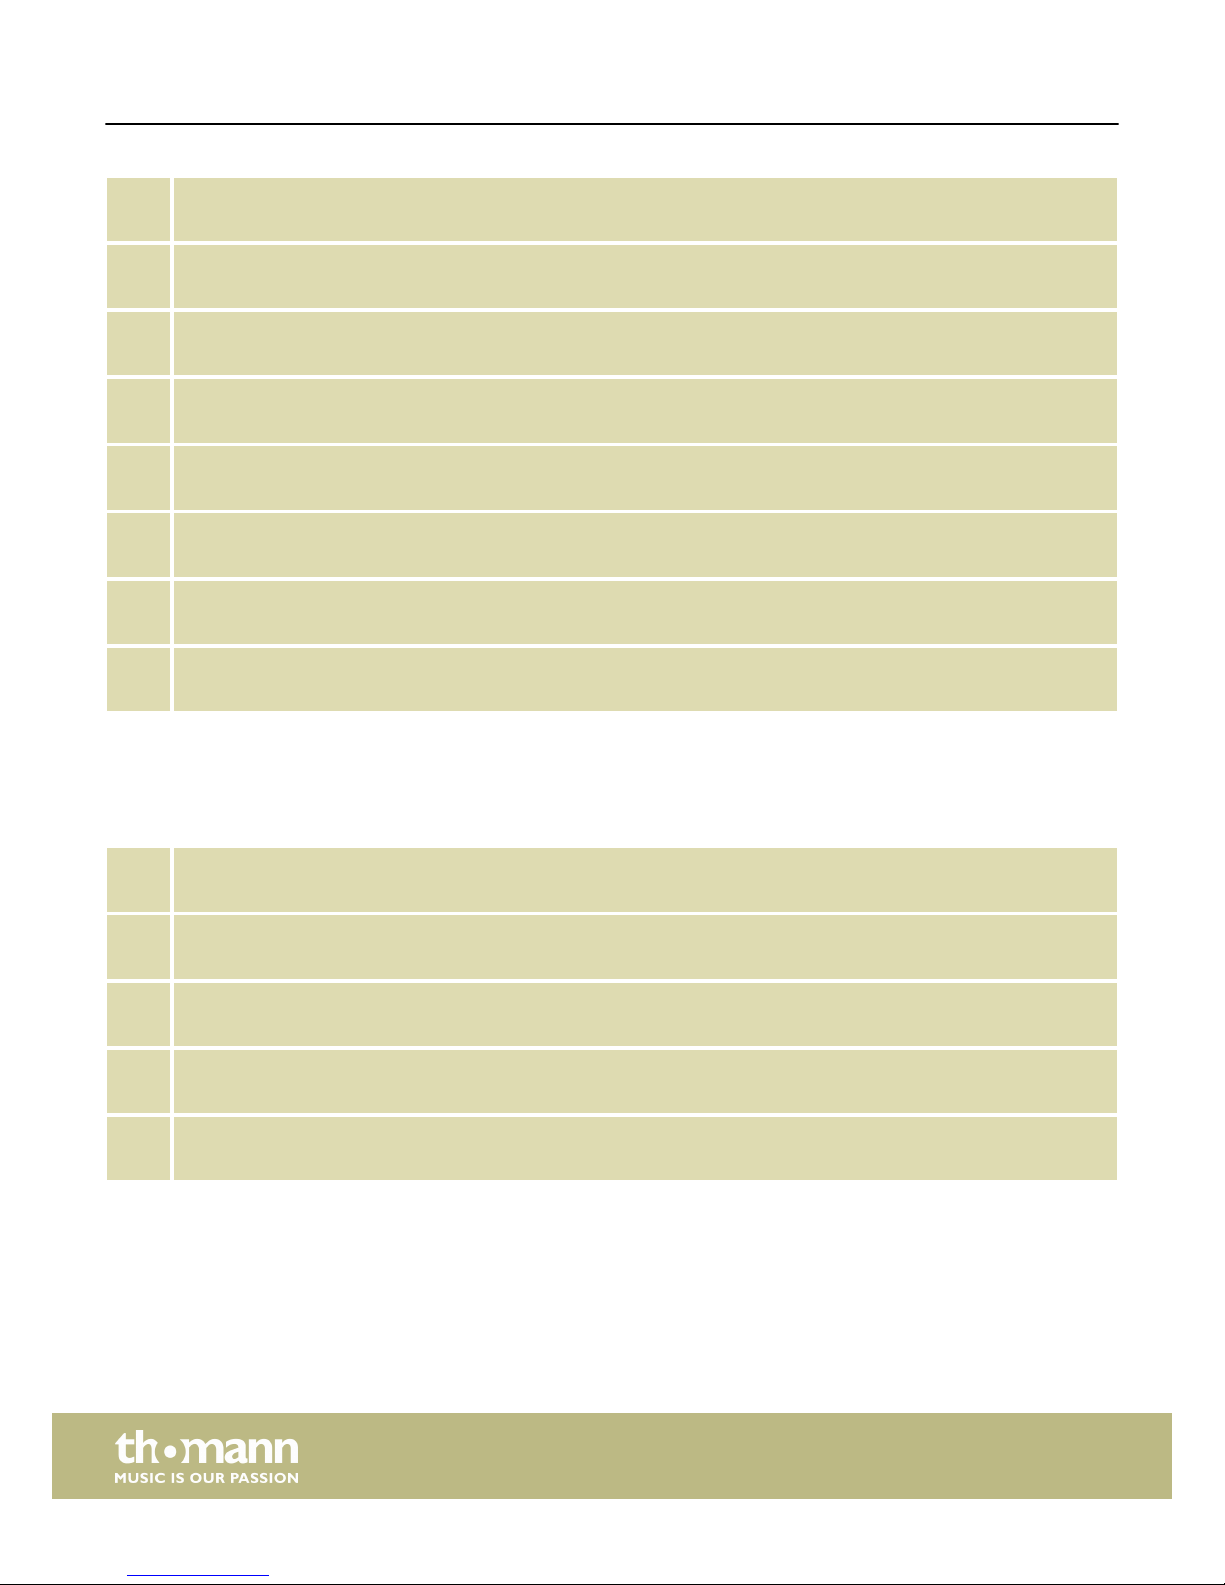
6 [FUNCTION/TEMPO]
Button to adjust the metronome tempo.
7 [GRAND PIANO / BRIGHT PIANO]
Voice select button Grand Piano / Bright Piano
[EPIANO1/EPIANO2]
Voice select button EPIANO1 and EPIANO2.
[CHURCH ORGAN/ROCK ORGAN]
Voice select button Church Organ / Rock Organ.
[STRINGS/BASS]
Voice select button Strings / Bass.
[VIBRAPHONE/HARPSICHORD]
Voice select button Vibraphone and Harpsichord.
[GUITAR/CHOIR]
Voice select button Guitar and Choir accompaniment.
8 [BANK]
Toggle button to change the sound banks.
9 [USB TO HOST]
USB interface to connect a computer.
10 [SUSTAIN]
Sustain pedal connection.
11/12 [LINE OUT][R]/[L(MONO)]
Output sockets for connecting the digital piano to an amplifier, stereo system, mixer or recording device.
13 [PHONES]
1/4" phone socket to connect headphones.
14 [POWER]
DC12V1A port for an external power supply.
Connection box
Control panel and connections
digital piano
14
Page 15
7 Operating
7.1 Turning on / off
Press the main switch [POWER] left in the operating panel to turn the device on and
off. All LEDs now briefly flash.
If you hear nothing coming from the speakers, the volume may be set to
‘minimum’. To increase the volume, turn the volume knob clockwise.
7.2 Automatic shutoff
When the digital piano is not being used for 30 minutes, it switches off automatically.
To turn it back on again, press the main switch [POWER].
First keep [METRONOME] and [TEMPO] pressed to enter Edit mode. To now enable or
disable the automatic shutoff keep the piano key [C
#
2] pressed. At the same time,
press [C3] once to enable, twice to disable automatic shutoff.
Press [METRONOME] and [TEMPO] simultaneously to exit the Edit mode.
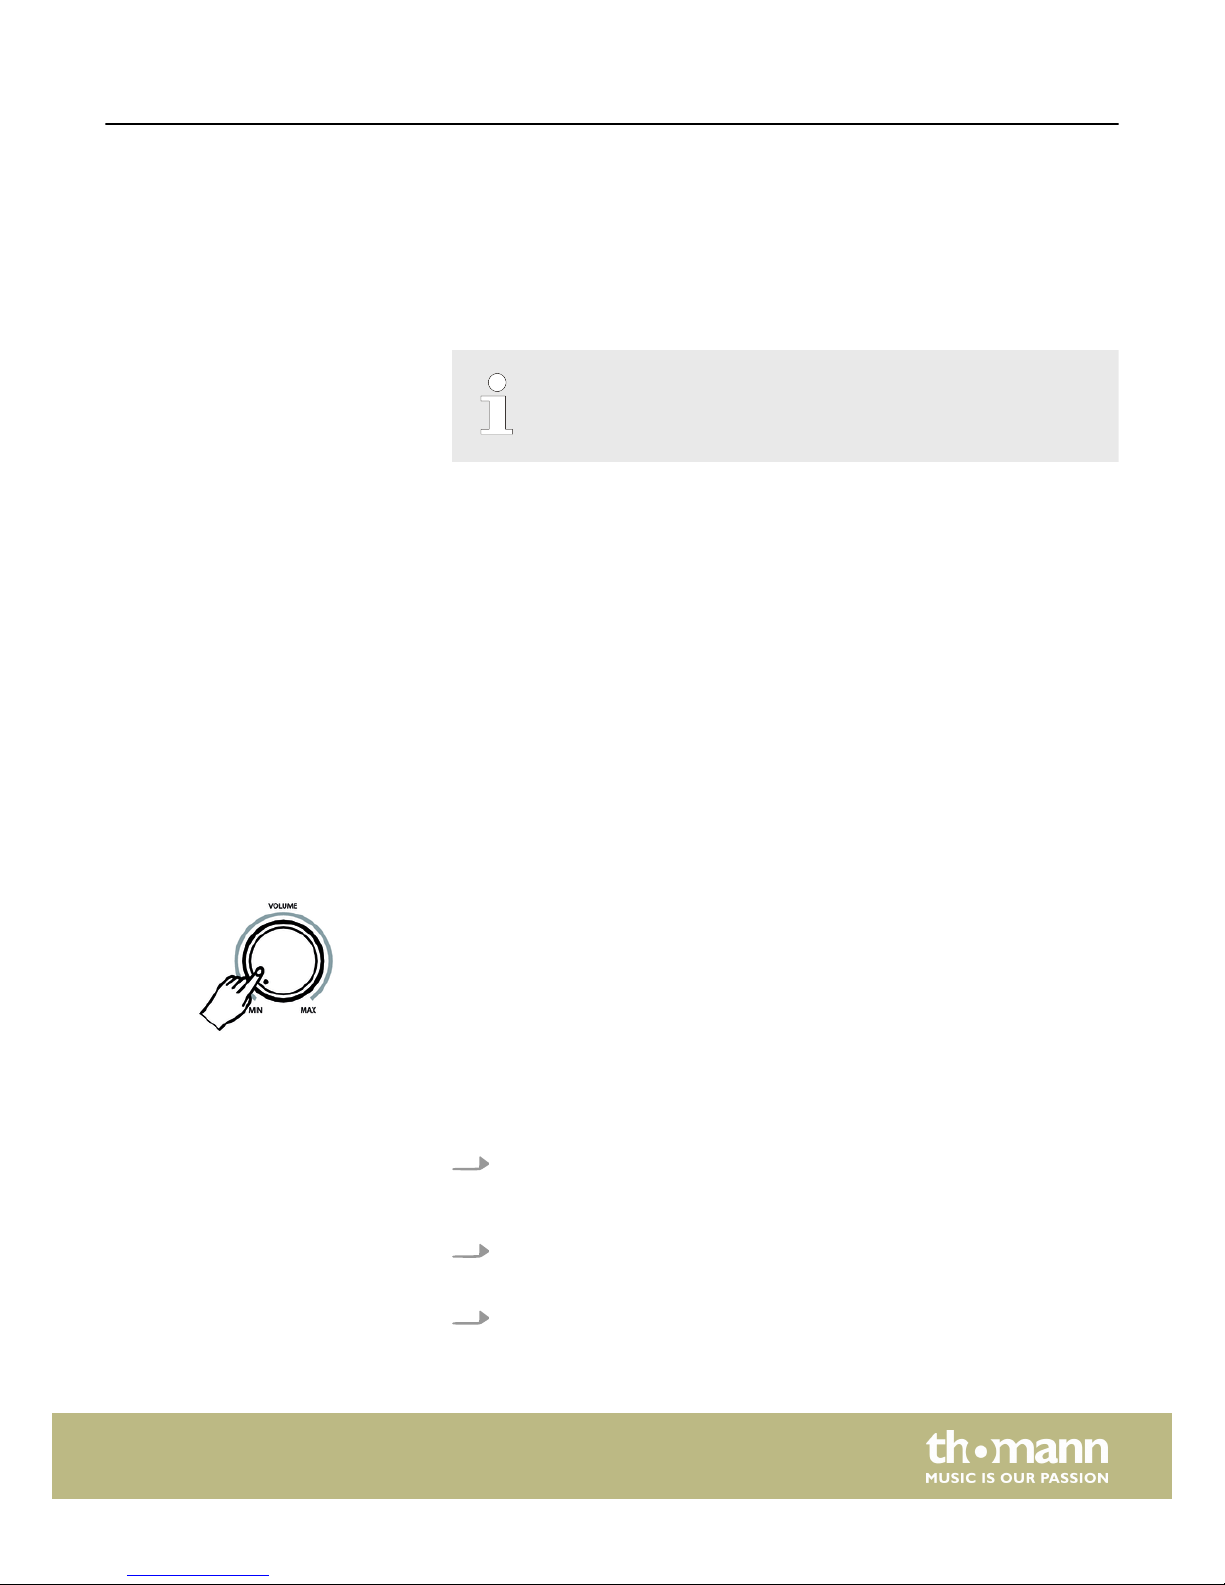
7.3 Adjusting the volume
Turn the volume control [VOLUME] to adjust a pleasant volume for playback and
practising. Turn the volume control clockwise to increase the volume. Turn it
counter-clockwise to reduce the volume.
7.4 Setting the touch sensitivity
With this function you can adjust the touch response of the keyboard at three levels.
1. Keep [METRONOME] and [TEMPO] pressed to enter Edit mode. The LEDs of the
two function buttons light up blue now.
ð
The LED of the button lights.
2. Press [TOUCH] to activate the function.
ð
The LED of the button lights.
3. Keep [F#1], [G#1] and [A#1] pressed to adjust the touch sensitivity according to
the table below.
Disabling automatic shutoff
Operating
SP-320
15
Page 16
4. The device automatically exits the edit mode.
ð
The LED of the button lights.
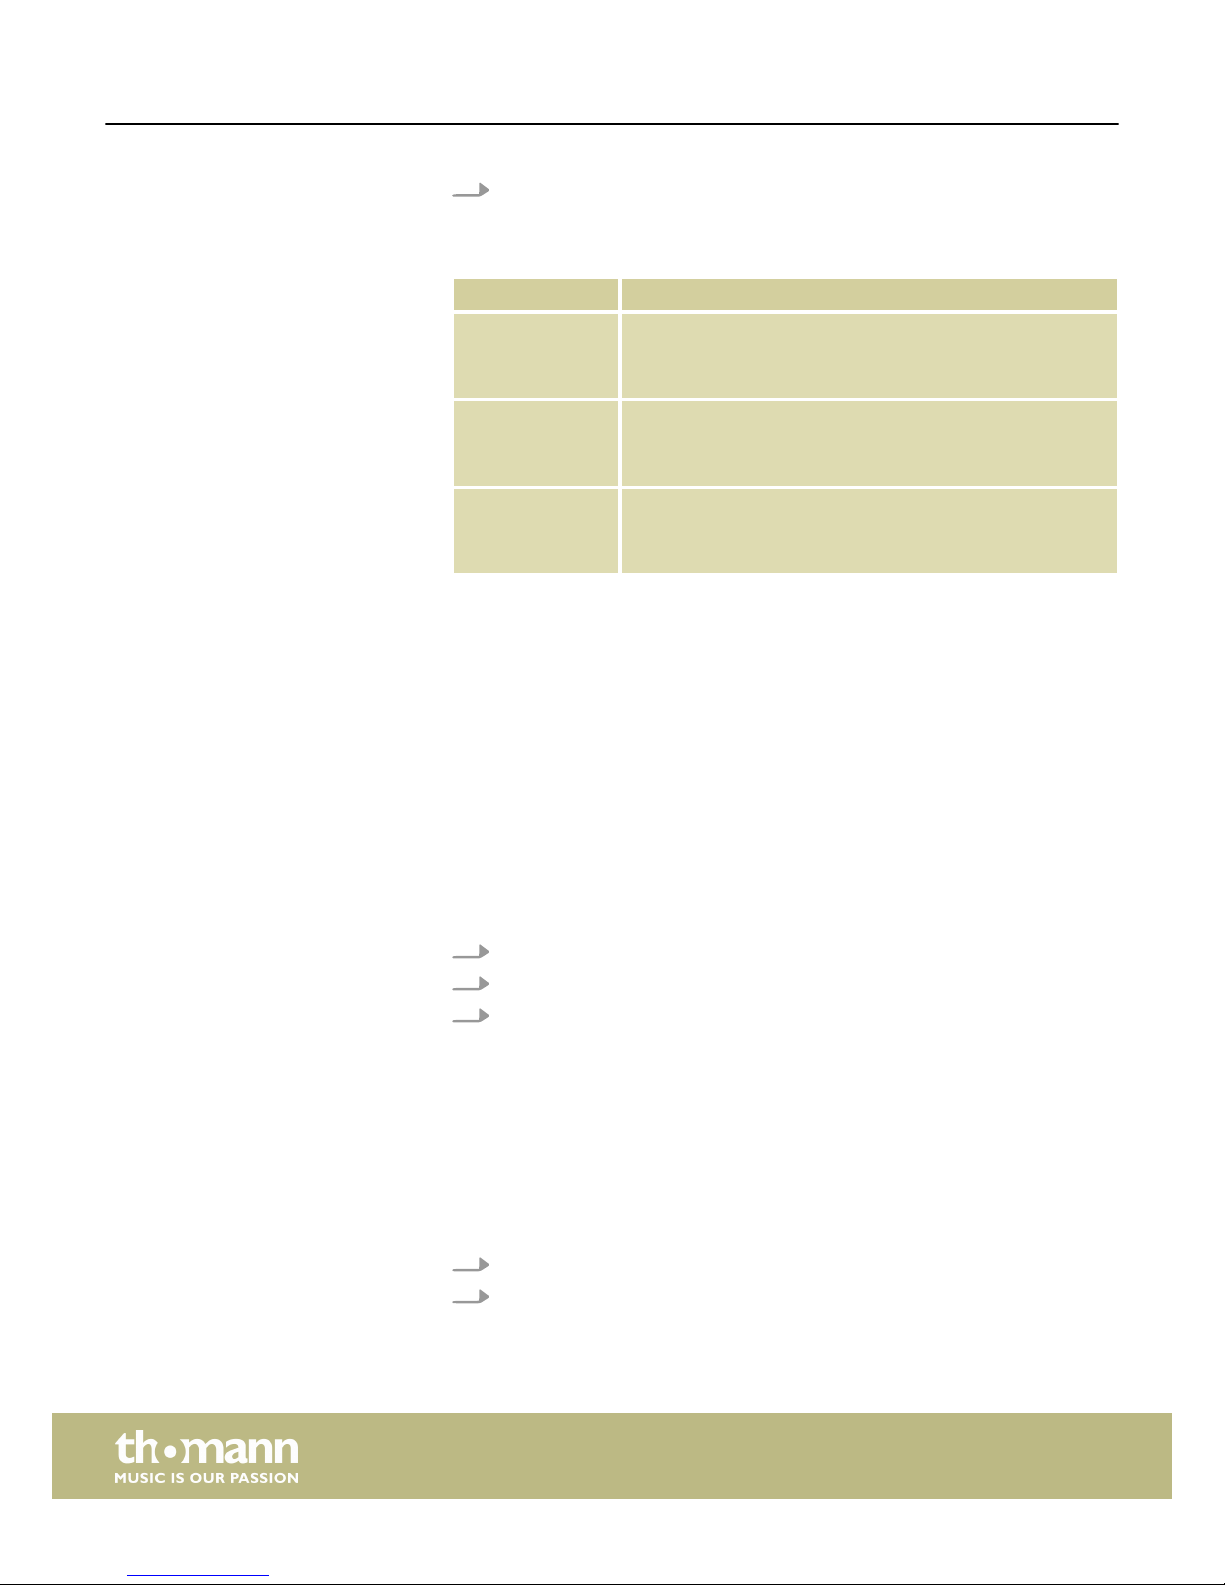
Setting Meaning
‘F#1’ Soft (0...30)
In this setting, the volume is lower than usual even when
playing with a hard touch.
‘G#1’ Normal (31...70)
This setting corresponds to the usual touch response of a key‐
board (factory default setting).
‘A#1’ Hard (71...127)
In this setting, the volume is higher than usual even when
playing with a soft touch.
7.5 Master Tuning / MIDI functions
In Edit mode, various parameters of the digital piano can be customized. Keep
[METRONOME] and [TEMPO] pressed to enter the Edit mode.
7.5.1 Master Tuning
The piano is tuned to 440 Hz by default. That's why the piano does not need to be
tuned after turning on. If desired, the tuning of the piano can be adjusted in small
increments -50 and +50 (one semitone).
1. Enter the Edit mode. Keep [METRONOME] and [TEMPO] pressed.
2. Use [A#-1] to tune the piano in semitone increment.
3. Use [METRONOME] and [TEMPO] to exit the Edit mode.
7.5.2 MIDI functions
With this function you can activate the MIDI output of the digital piano. The MIDI out
channels range from 1 to 16. Enter the Edit mode. Keep [METRONOME] and [TEMPO]
pressed.
To change the value of the MIDI OUT channel, proceed as follows:
1. Press [A#0] according to the value of the desired MIDI out channel.
2. The number of hits on [C3] sets the value of the MIDI out channel. The default
MIDI out channel is set to 1. Press [A#0] once in Edit mode. To confirm that the
MIDI out channel is set to 1, the tone C3 is reproduced once.
Operating
digital piano
16
Page 17
3. Example: Pressing key [A#0] nine times will play the tone C3 ten times. This
confirms that the MIDI out channel value has been set to 10.
7.5.3 MIDI panic button
Pressing the Panic button sends the commands ‘Reset all controllers’ and ‘All sounds
off’ as MIDI messages to all MIDI channels from 1 – 16.
This function can particularly be used when notes ‘hang’ in external MIDI
devices or MIDI software.
1. Enter the Edit mode. Keep [METRONOME] and [TEMPO] pressed.
2. Then press [C#1] to activate the Panic function. This sends general programme
commands to reset the MIDI functions, like ‘All notes off’, etc.
3. When the panic reset is finished, the piano automatically returns to play mode.
7.5.4 Local On / Off
The Local On / Off function disconnects the keyboard from its internal sound system.
This allows you to use the piano as a MIDI controller for other MIDI devices (or for
virtual software instruments running on your computer). If you are running MIDI
sequencing software, it is also recommended to run it in Local Off mode.
1. Enter the Edit mode. Keep [METRONOME] and [TEMPO] pressed.
2. Press [D#1] for Local On / Off
n ‘Local: ON’ – built-in sound system activated (double key touch sound).
n ‘Local: OFF’ – built-in sound system deactivated (single key touch sound).
3. Keep [METRONOME] and [TEMPO] pressed to exit the Edit mode.
When switching off the built-in sound system, the speakers as well as the
line and headphones outputs are switched off.
Operating
SP-320
17
Page 18

7.5.5 Reset to factory defaults
Resetting to factory defaults clears the battery-powered memory and resets all func‐
tions to the factory defaults, as they existed on delivery. To reset the piano to factory
defaults, proceed as follows:
1. Switch off the device.
2. Keep [REVERB] and [CHORUS] simultaneously pressed and turn the piano on.
ð
All select button LEDs will now light up briefly when you hold down the
two buttons. Once this is done, you can release [REVERB] and [CHORUS].
The piano is now in the normal mode (can be played normally). The LEDs
on the control elements now show the original status according to the fac‐
tory setting.
Operating
digital piano
18
Page 19

8 Functions
8.1 Playing demo songs
Press [REVERB] and [CHORUS] simultaneously to enter Demo song play mode. Use the
select buttons to select the desired demo song.
Press [REVERB] and [CHORUS] again to stop playback.
8.2 Reverb and Chorus effects
The sound of the digital piano can be modified by the built-in Reverb and Chorus
effect. Press [REVERB] or [CHORUS].
8.3 Metronome
Press [METRONOME] to turn the Metronome on and off.
Proceed as follows to set the time signature:
1. Keep the [METRONOME] button pressed.
2. Use the piano key [G#0] to select the desired time signature: 2/2, 1/4, 2/4, 3/4,
4/4, 5/4, 6/4, 3/8, 6/8, 7/8, 9/8 or 12/8. Standard value is set to 4/4.
3. Press [METRONOME] and [TEMPO] to exit the Edit mode.
To adjust the volume proceed as follows:
1. Keep [METRONOME] and [TEMPO] pressed to enter Edit mode.
2. Press [F#0] to switch to the Volume menu for the main layer.
3. Now you can adjust the volume in 88 note steps from 0 – 127. [C7] corresponds
to value 127 and [A-1 ] to value 0.
4. Press [METRONOME] and [TEMPO] to exit the Edit mode.
Metronome tempo is adjustable from 20 to 280 beats per minute (BPM). Proceed as
follows to adjust:
1. Keep [METRONOME] and [TEMPO] pressed for 3 seconds to change the setting.
2. Press piano key [G#0] to select the tempo. For example, the piano key [C3] cor‐
responds to 120 BPM.
3. Press [METRONOME] and [TEMPO] to exit the Edit mode. The LED goes out now.
Setting the Metronome volume
Setting the Tempo
Functions
SP-320
19
Page 20

8.4 Transposing
Use [METRONOME] and [TEMPO] to transpose the entire keyboard by twelve semi‐
tones up or down. Use [D#2] to call up the ‘Transpose’ function. Use the piano keys
[C2] to [C4] to transpose the value range. By default, the value corresponding to [C3]
is set.
8.5 Layer mode
In Layer mode, two voices can be played in parallel with the corresponding volume.
Both can be selected with the direct select buttons.
Proceed as follows to adjust the Layer mode:
1. Keep the desired MAIN sound selection key pressed (e.g. [GRAND PIANO]).
2. Then press a second desired selection button to set a layer effect (e.g.
[STRINGS]). Now the LEDs of both selection buttons light up once you release
the button.
To layer two sounds on different banks:
1. Keep the desired selection button pressed (e.g. [GRAND PIANO]) and [BANK] at
the same time. Once the [BANK] LED and the LED of the respective selection
button light up, you can release the buttons.
2. Then press a second selection button (e.g. [STRINGS]) to get a layer effect on
the second bank. The LEDs of the two function buttons light up blue now.
To adjust the volume in main layer, proceed as follows:
1. Keep [METRONOME] and [TEMPO] pressed to enter Edit mode. The LEDs of the
buttons [METRONOME] and [TEMPO] light up now.
2. Now you can adjust the volume in 88 note steps from 0 – 127. [C7] corresponds
to value 127 and [A-1 ] to value 0.
3. Keep [METRONOME] and [TEMPO] pressed to exit the Edit mode.
To adjust the volume of the layer voice proceed as follows:
1. Keep [METRONOME] and [TEMPO] pressed to enter Edit mode. The LEDs of the
buttons [METRONOME] and [TEMPO] light up now.
2. Press [D#0] to switch to the Volume menu for the tonal colours.
3. Now you can adjust the volume in 88 note steps from 0 – 127. [C7] corresponds
to value 127 and [A-1 ] to value 0.
4. Keep [METRONOME] and [TEMPO] pressed to exit the Edit mode.
Setting the volume in main layer
(voice 1)
Setting the volume of the layer voice
(voice 2)
Functions
digital piano
20
Page 21
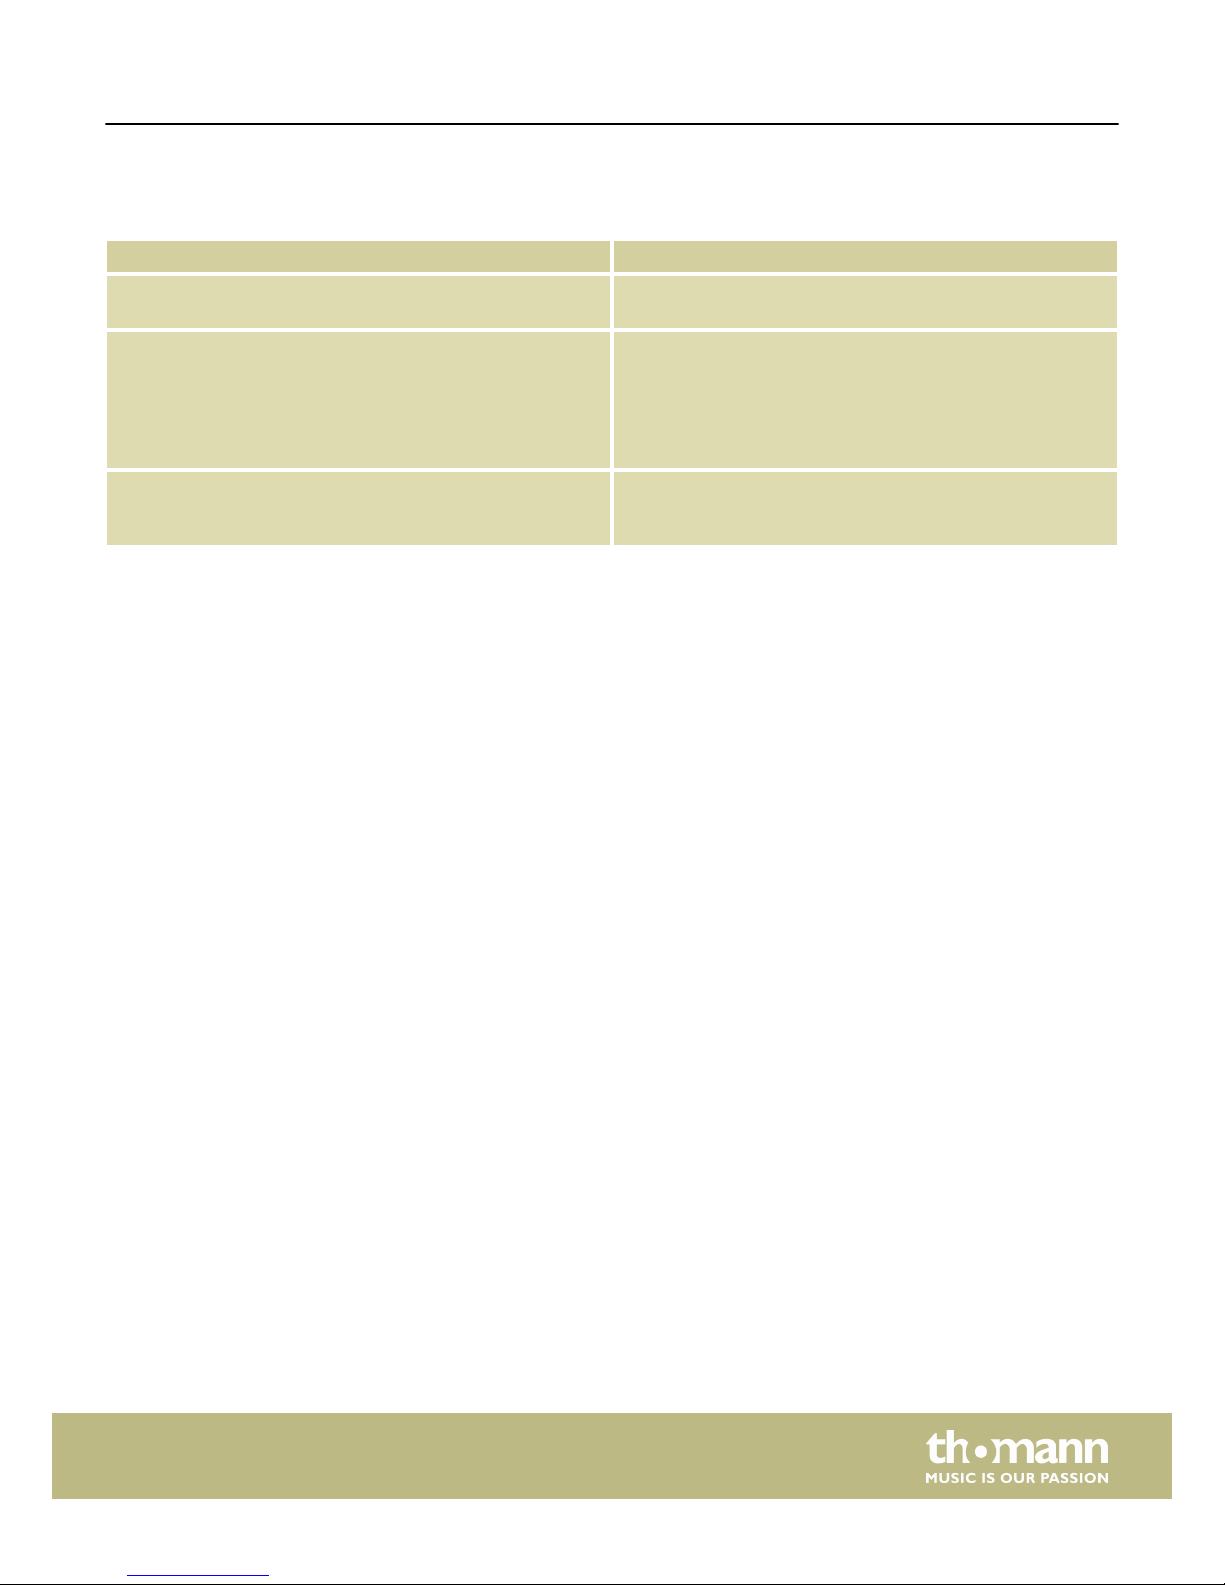
9 Troubleshooting
Problem Possible causes and solutions
You hear a 'pop' sound from the speakers when switching the
digital piano on and off.
This is normal. No need to worry.
No sound can be heard when playing the piano. Make sure that the volume control is set appropriately.
Check if headphones are connected. Connecting headphones
will mute the speakers of the digital piano.
Check in the function menu that the built-in sound system is
activated. On activating, the display shows ‘ Local On’.
Malfunction occurs when using a mobile phone. Using a mobile phone near the digital piano can cause inter‐
ference. To prevent this, turn off the mobile phone or use it
only at a safe distance.
Troubleshooting
SP-320
21
Page 22
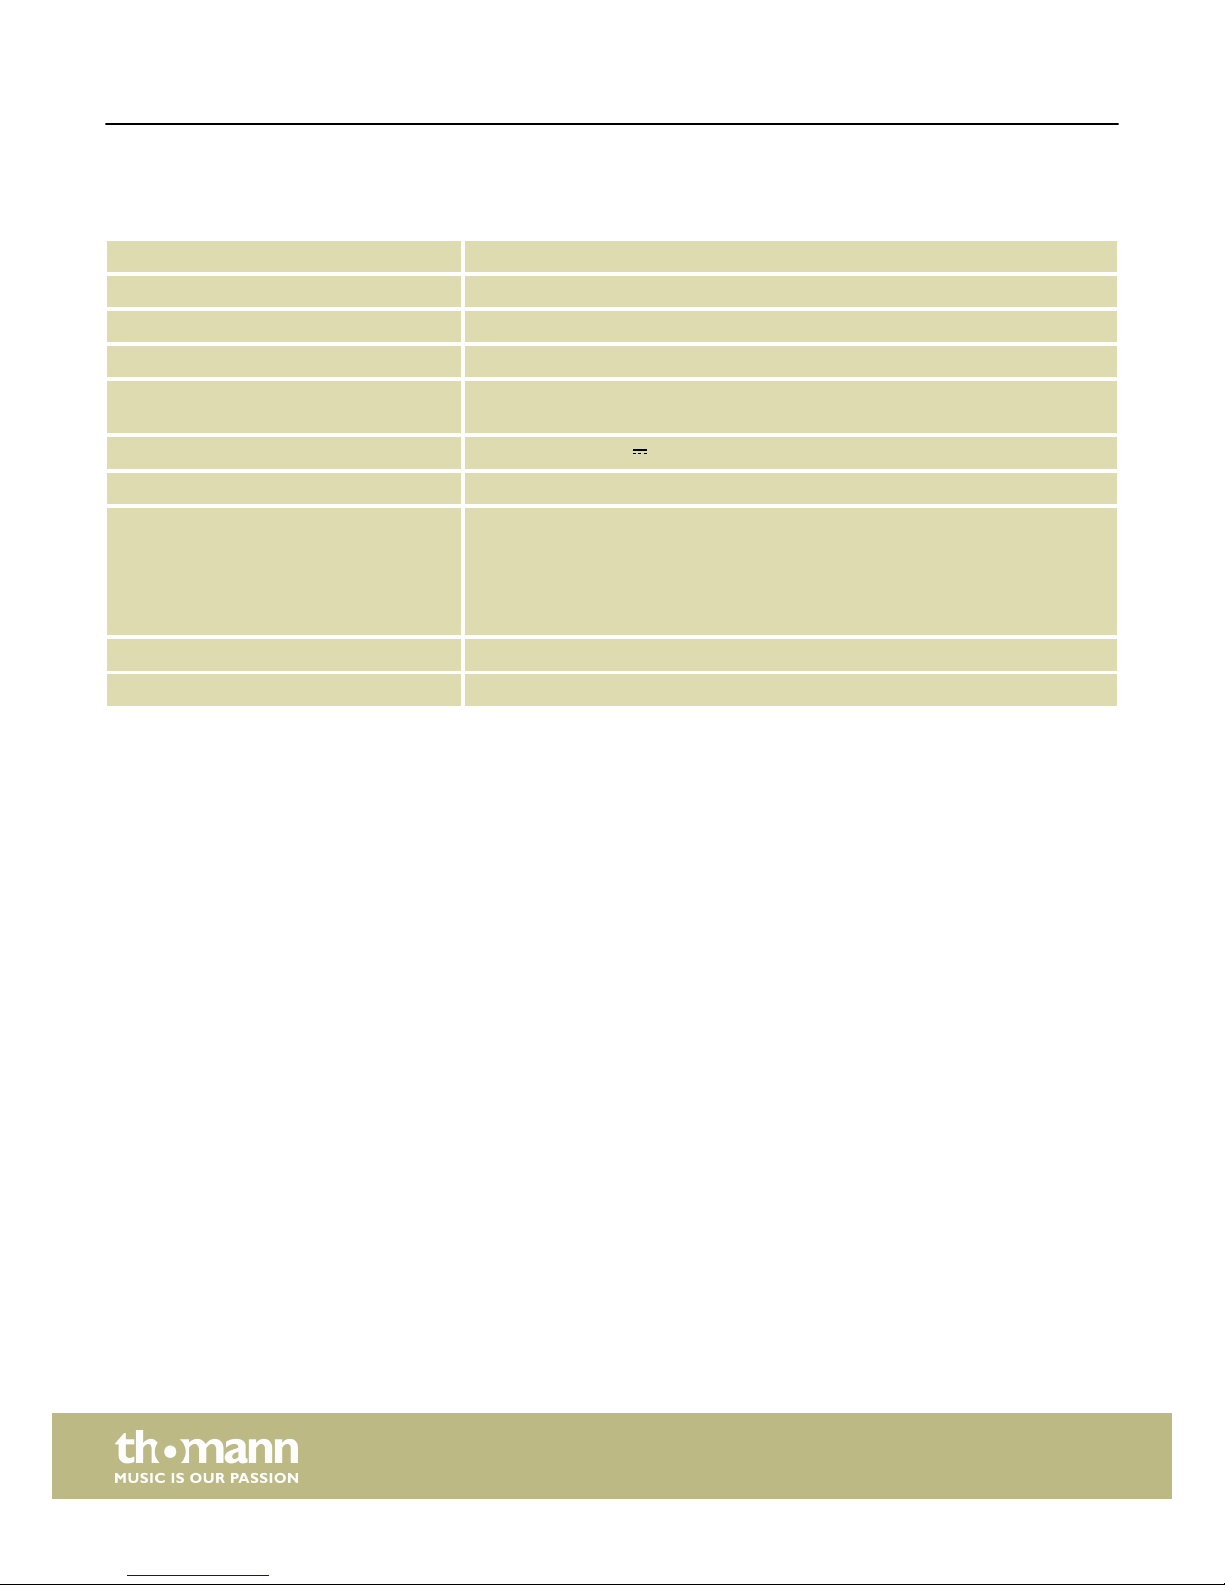
10 Technical specifications
Keyboard 88 light weighted keys and adjustable touch velocity
Polyphony 32-voice
Tonal colours 12
Pedals Sustain
Connections Mains socket (Power), Headphones (1/4" phone socket), LINE Out (L / R), Sustain
pedal, USB to Host
Voltage supply
Power adapter (12 V ) or battery operation: 6 D cells (LR20, 1.5 V)
Speakers 2 × 20 W, 6 Ω
Dimensions (W × H × D) 1275 mm × 275 mm × 85 mm
(without music stand)
1275 mm × 275 mm × 1000 mm
(with music stand)
Weight 9 kg
Housing colour Black, polished
Technical specifications
digital piano
22
Page 23
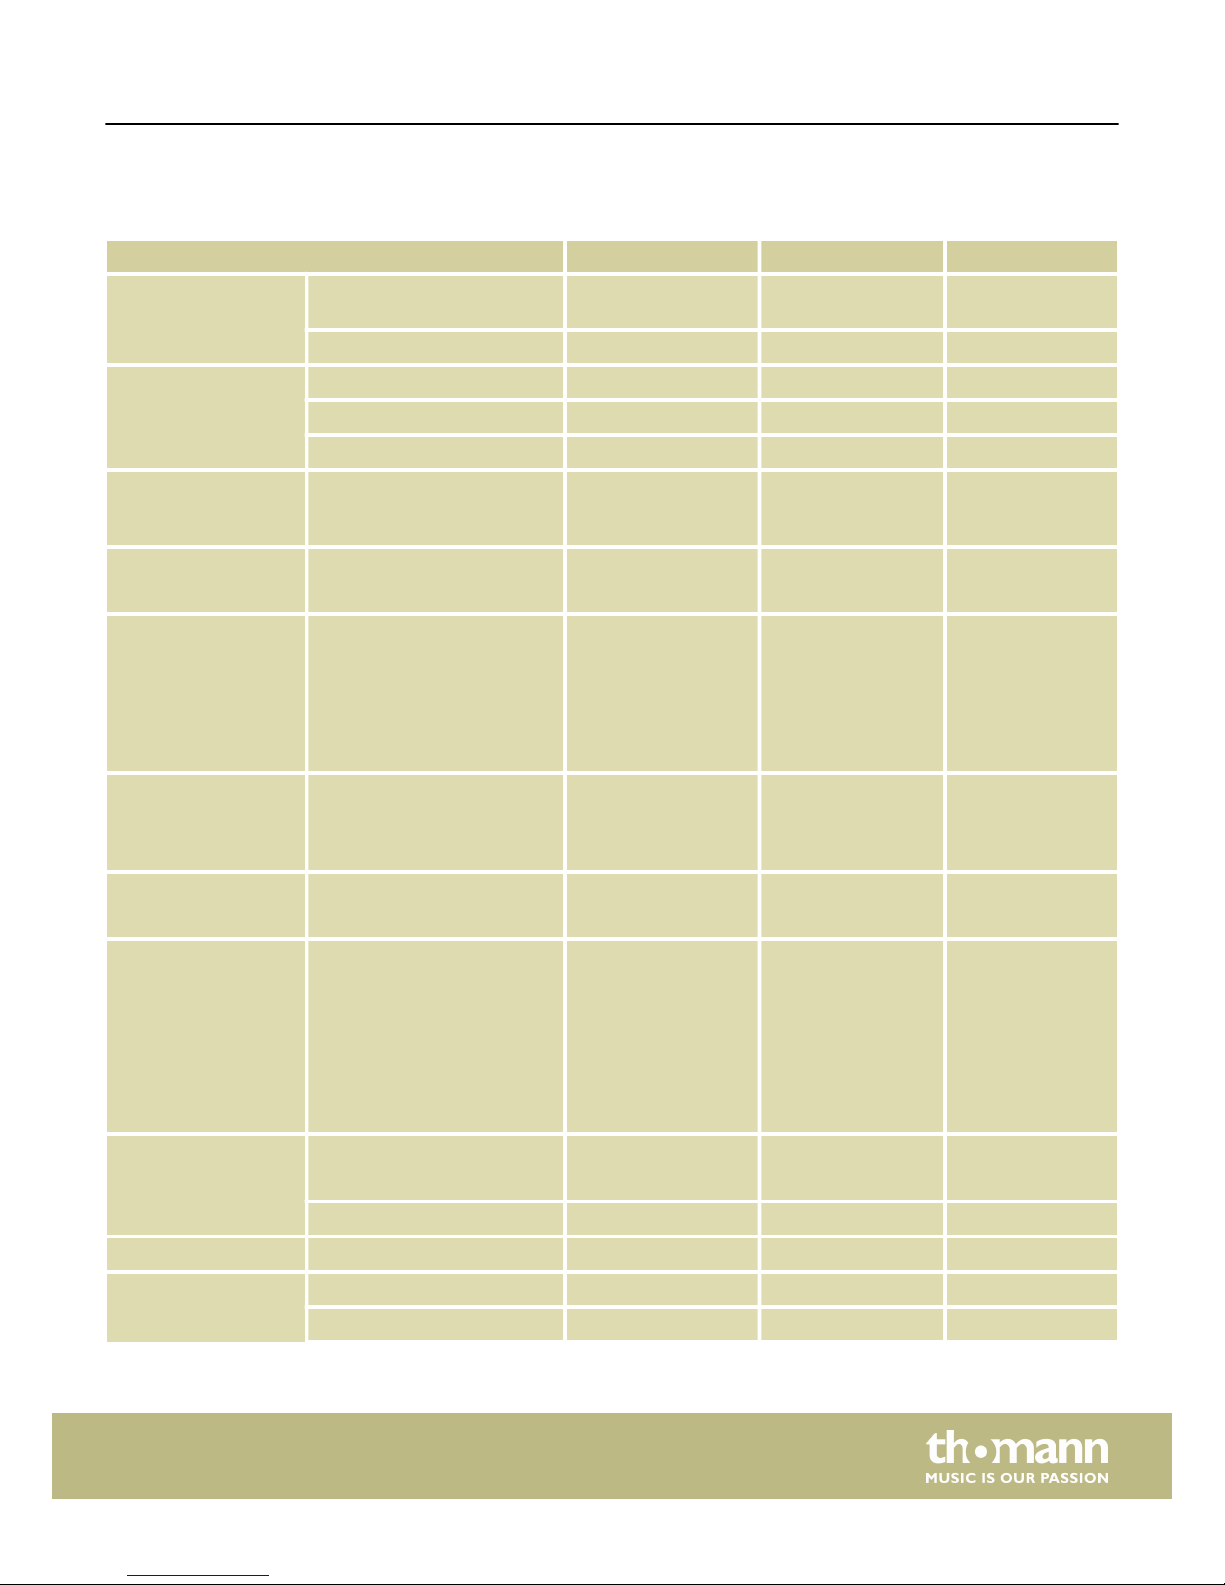
11 MIDI implementation chart
Function Sent Received Notes
Basic Channel Default 1 – 16 1 – 16 up to 3 channels at
a time
Changed 1 – 16 1 – 16
Mode Default Mode 3 Mode 3
Messages Yes No
Altered ******** No
Control Change 0 – 127 0,1, 5,6, 7, 10,11, 32,
64, 65, 66, 67, 80, 81,
91, 93, 100, 121
Programme Change True # 0 – 127
********
0 – 11 12
System Exclusive Yes* Yes* *the controller
detects and
responds to the GM
device requests.
Master Tune sup‐
ported. Master
Volume supported.
System Common Song Position Pointer
Song Select
Tune Request
No
No
No
No
No
No
System Real Time Clock
Commands
No
No
No
No
Aux Messages All Sounds Off*
Reset All Controllers
Local ON/OFF*
ALL Notes OFF
Active Sensing
System Reset
Yes
Yes
Yes
Yes
No
No
Yes
Yes
Yes
Yes
Yes
Yes
*the controller
responds to the GM
signal, but not to
the piano voices
Program Change Yes
0 – 127
Yes
0 – 127
True 0 – 127 0 – 127
System Exclusive No Yes
System Common Song Position Pointer No No
Song Select No No
MIDI implementation chart
SP-320
23
Page 24
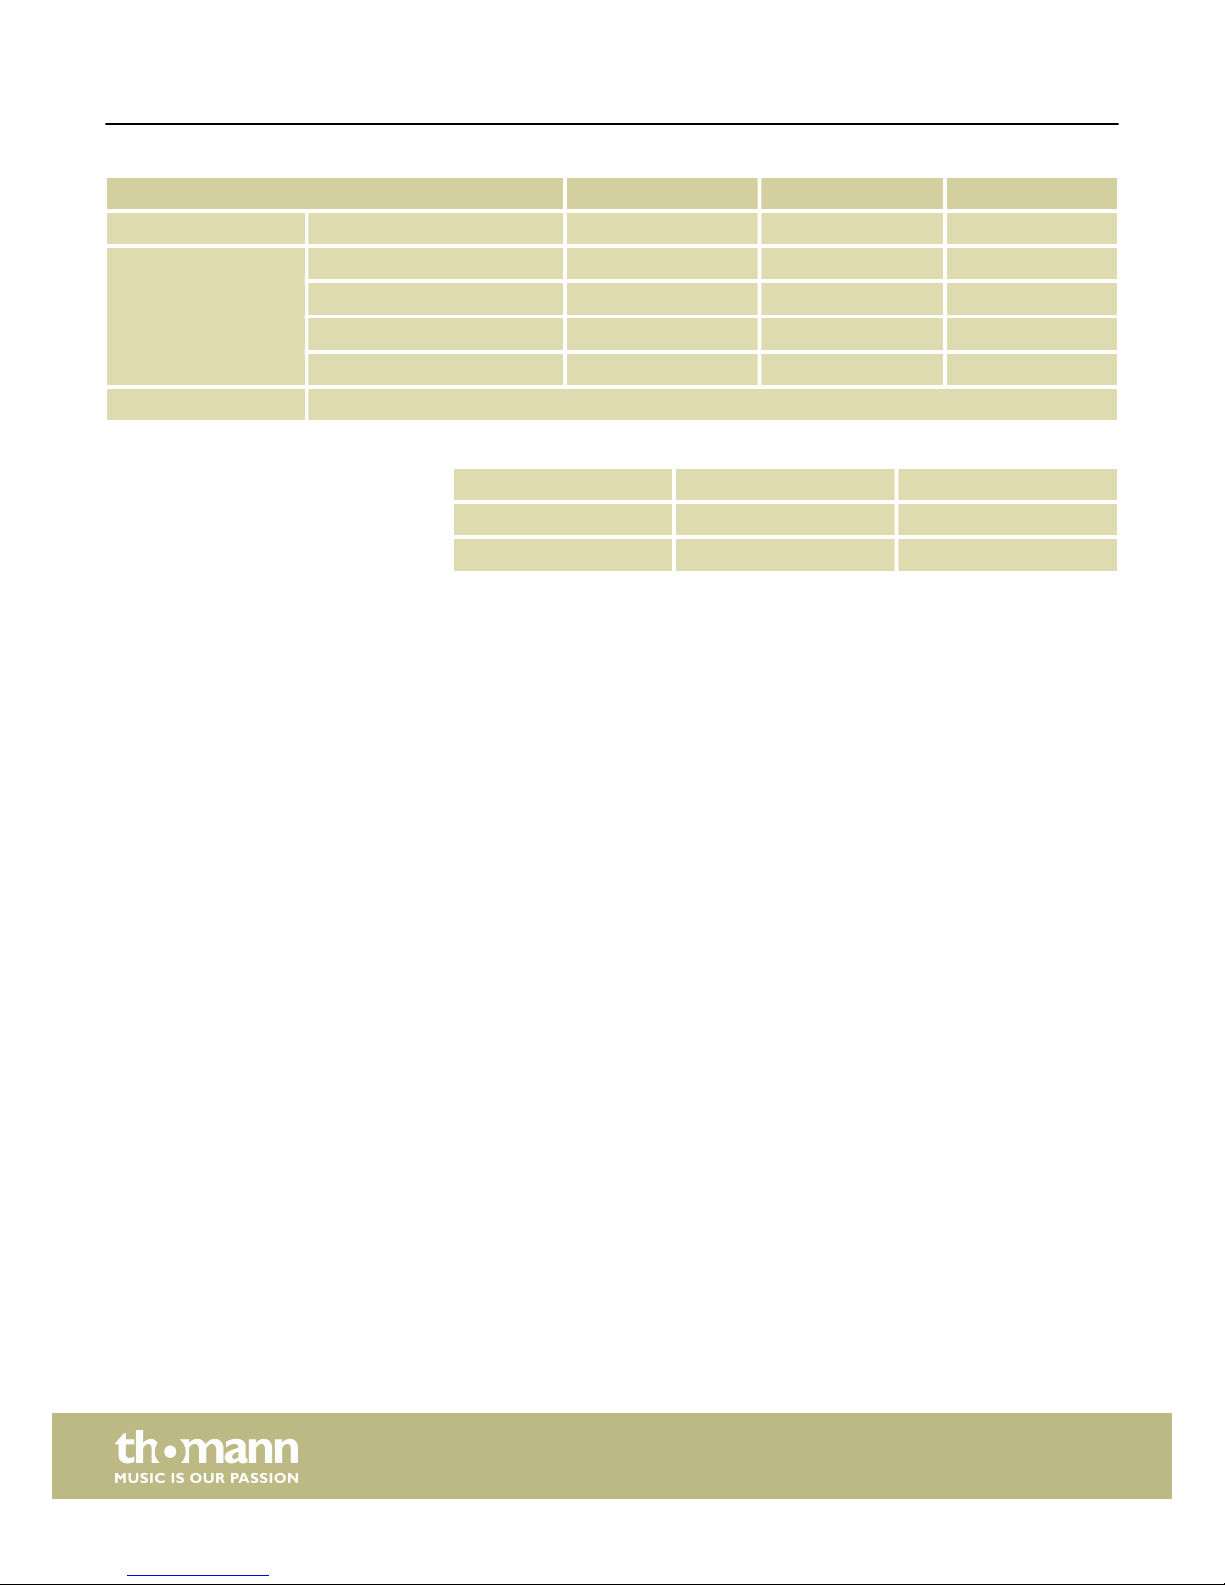
Function Sent Received Notes
Tune Request No No
Aux Messages LOCAL ON/OFF Yes Yes
All Notes Off Yes Yes
Active Sensing No Yes
System Reset No Yes
Notes:
POLY OFF MONO ON
OMNI ON Mode 1 Mode 2
OMNI OFF Mode 3 Mode 4
MIDI channel modes
MIDI implementation chart
digital piano
24
Page 25
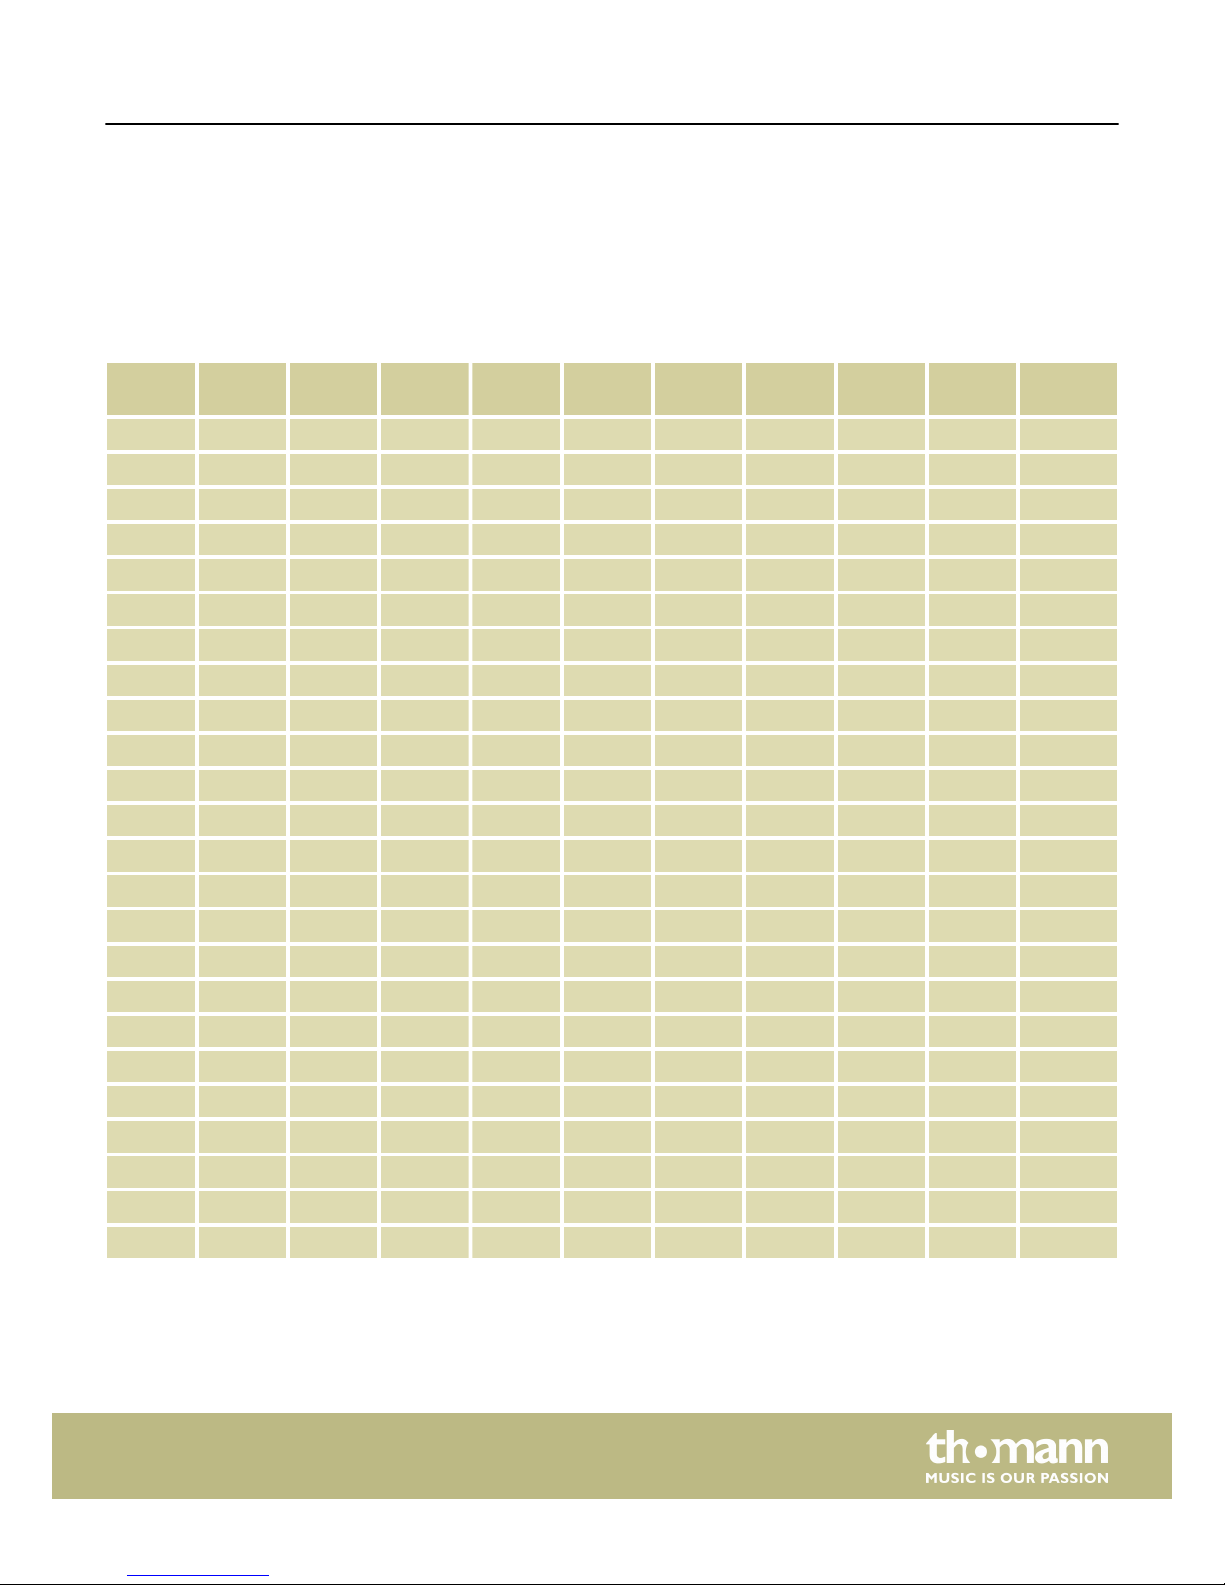
12 Function button allocation
Select the value to be parameterised using the following table:
Tuning Voice
Vol
Layer
Vol
Metro.VolReverb
Vol
Chorus
Vol
Tempo TrebleEQBass EQ Trans.
A-1 0 0 0 0 0 0 20 -12 -12 x
A#-1 3 2 2 2 2 2 24 x x x
B-1 5 4 4 4 4 4 28 -11 -11 x
C0 8 6 6 6 6 6 32 -10 -10 x
C#0 10 8 8 8 8 8 36 x x x
D0 13 10 10 10 10 10 10 40 -9 -9
D#0 15 12 12 12 12 12 44 x x x
E0 18 14 14 14 14 14 48 -8 -8 x
F0 20 16 16 16 16 16 52 -7 -7 x
F#0 23 18 18 18 18 18 56 x x x
G0 26 20 20 20 20 20 60 -6 -6 x
G#0 28 22 22 22 22 22 62 x x x
A0 29 24 24 24 24 24 64 -5 -5 x
A#0 31 26 26 26 26 26 66 x x x
B0 32 28 28 28 28 28 68 -4 -4 x
C1 33 30 30 30 30 30 70 -3 -3 x
C#1 35 32 32 32 32 32 72 x x x
D1 36 34 34 34 34 34 74 -2 -2 x
D#1 37 36 36 36 36 36 76 x x x
E1 38 38 38 38 38 38 80 -1 -1 x
F1 40 40 40 40 40 40 82 0 0 x
F# 41 42 42 42 42 42 84 x x x
G1 42 44 44 44 44 44 86 1 1 x
G#1 44 46 46 46 46 46 88 x x x
Function button allocation
SP-320
25
Page 26
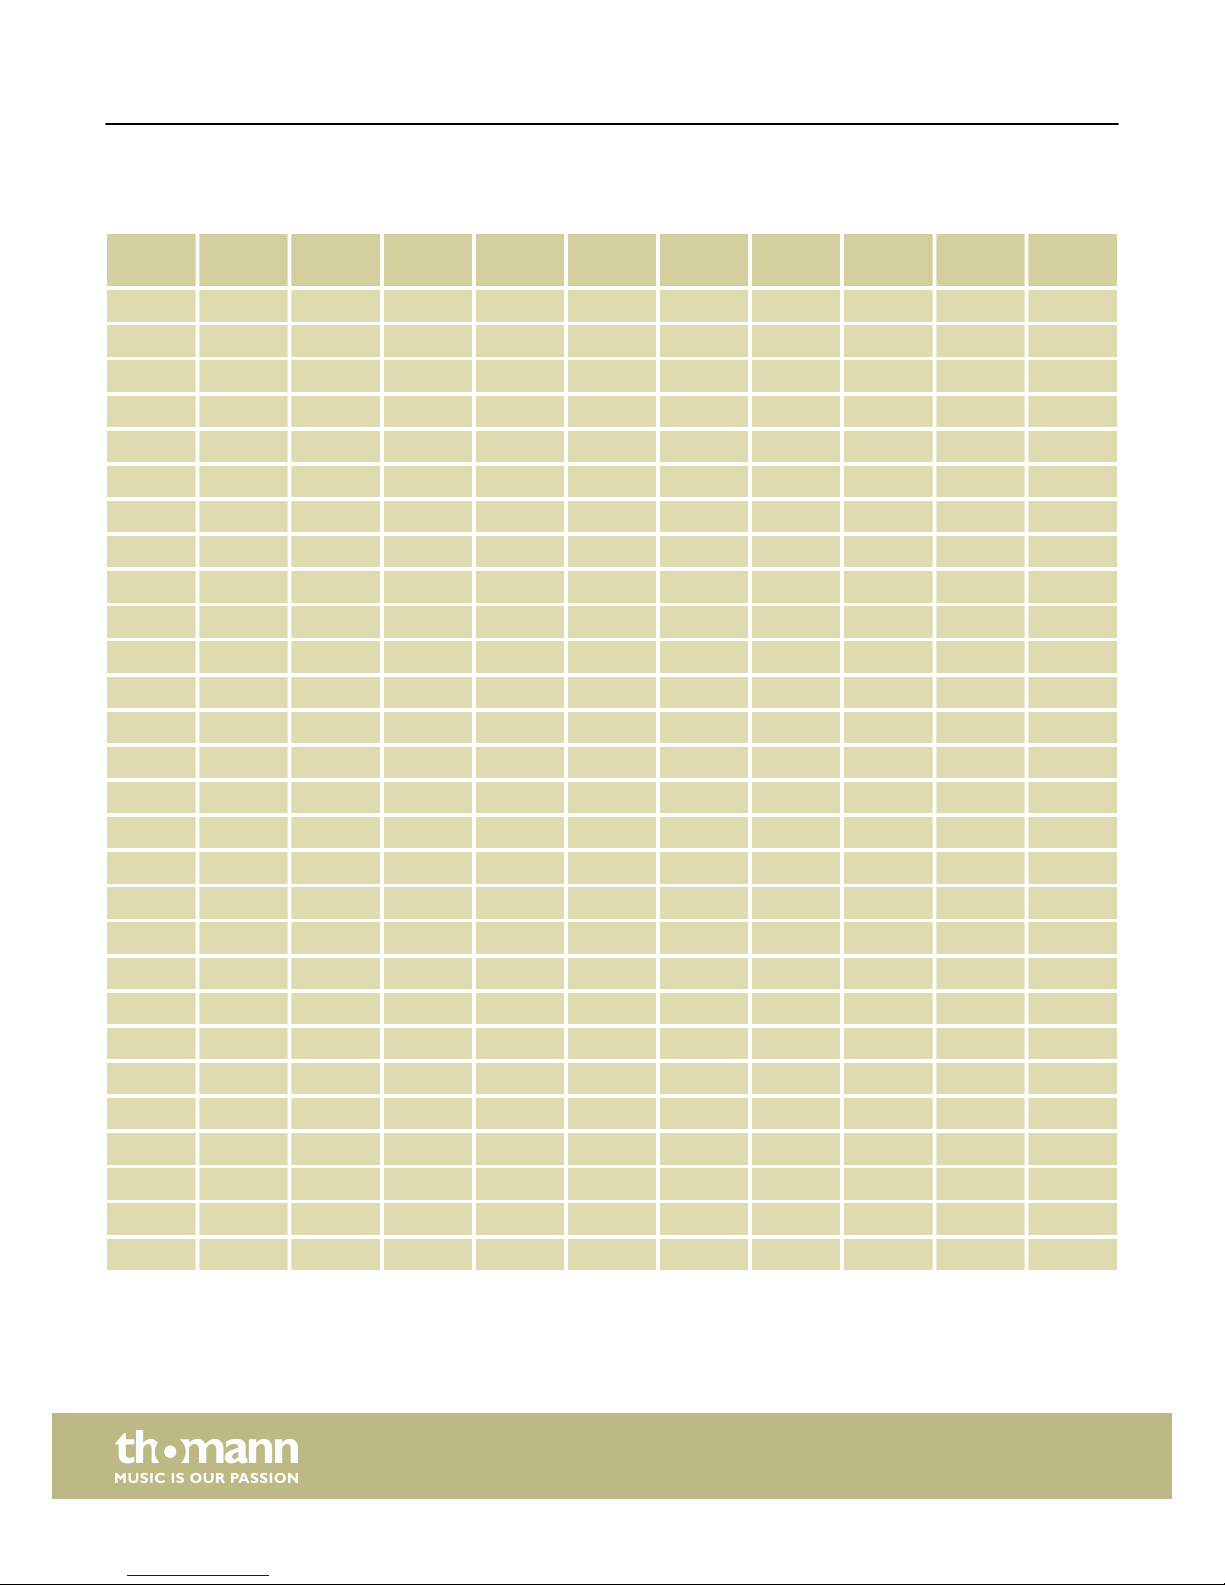
Tuning Voice
Vol
Layer
Vol
Metro.VolReverb
Vol
Chorus
Vol
Tempo TrebleEQBass EQ Trans.
A1 45 48 48 48 48 48 90 2 2 ×
A#1 46 50 50 50 50 50 92 × × ×
B1 47 52 52 52 52 52 94 3 3 ×
C2 49 54 54 54 54 54 96 4 4 -12
C#2 50 56 56 56 56 56 98 × × -11
D2 51 58 58 58 58 58 100 5 5 -10
D#2 52 60 60 60 60 60 102 × × -9
E2 54 62 62 62 62 62 104 6 6 -8
F2 55 64 64 64 64 64 106 7 7 -7
F#2 56 66 66 66 66 66 108 × × -6
G2 58 68 68 68 68 68 110 8 8 -5
G#2 59 70 70 70 70 70 112 × × -4
A2 60 72 72 72 72 72 114 9 9 -3
A#2 61 74 74 74 74 74 116 × × -2
B2 63 76 76 76 76 76 118 10 10 -1
C3 64 78 78 78 78 78 120 11 11 0
C#3 65 80 80 80 80 80 122 × × 1
D3 67 81 81 81 81 81 124 12 12 2
D#3 68 82 82 82 82 82 126 × × 3
E3 69 83 83 83 83 83 128 × × 4
F3 70 84 84 84 84 84 130 × × 5
F#3 72 85 85 85 85 85 132 × × 6
G3 73 86 86 86 86 86 134 × × 7
G#3 74 87 87 87 87 87 136 × × 8
A3 76 88 88 88 88 88 138 × × 9
A#3 77 89 89 89 89 89 140 × × 10
B3 78 90 90 90 90 90 142 × × 11
C4 79 91 91 91 91 91 144 × × 12
Function button allocation
digital piano
26
Page 27
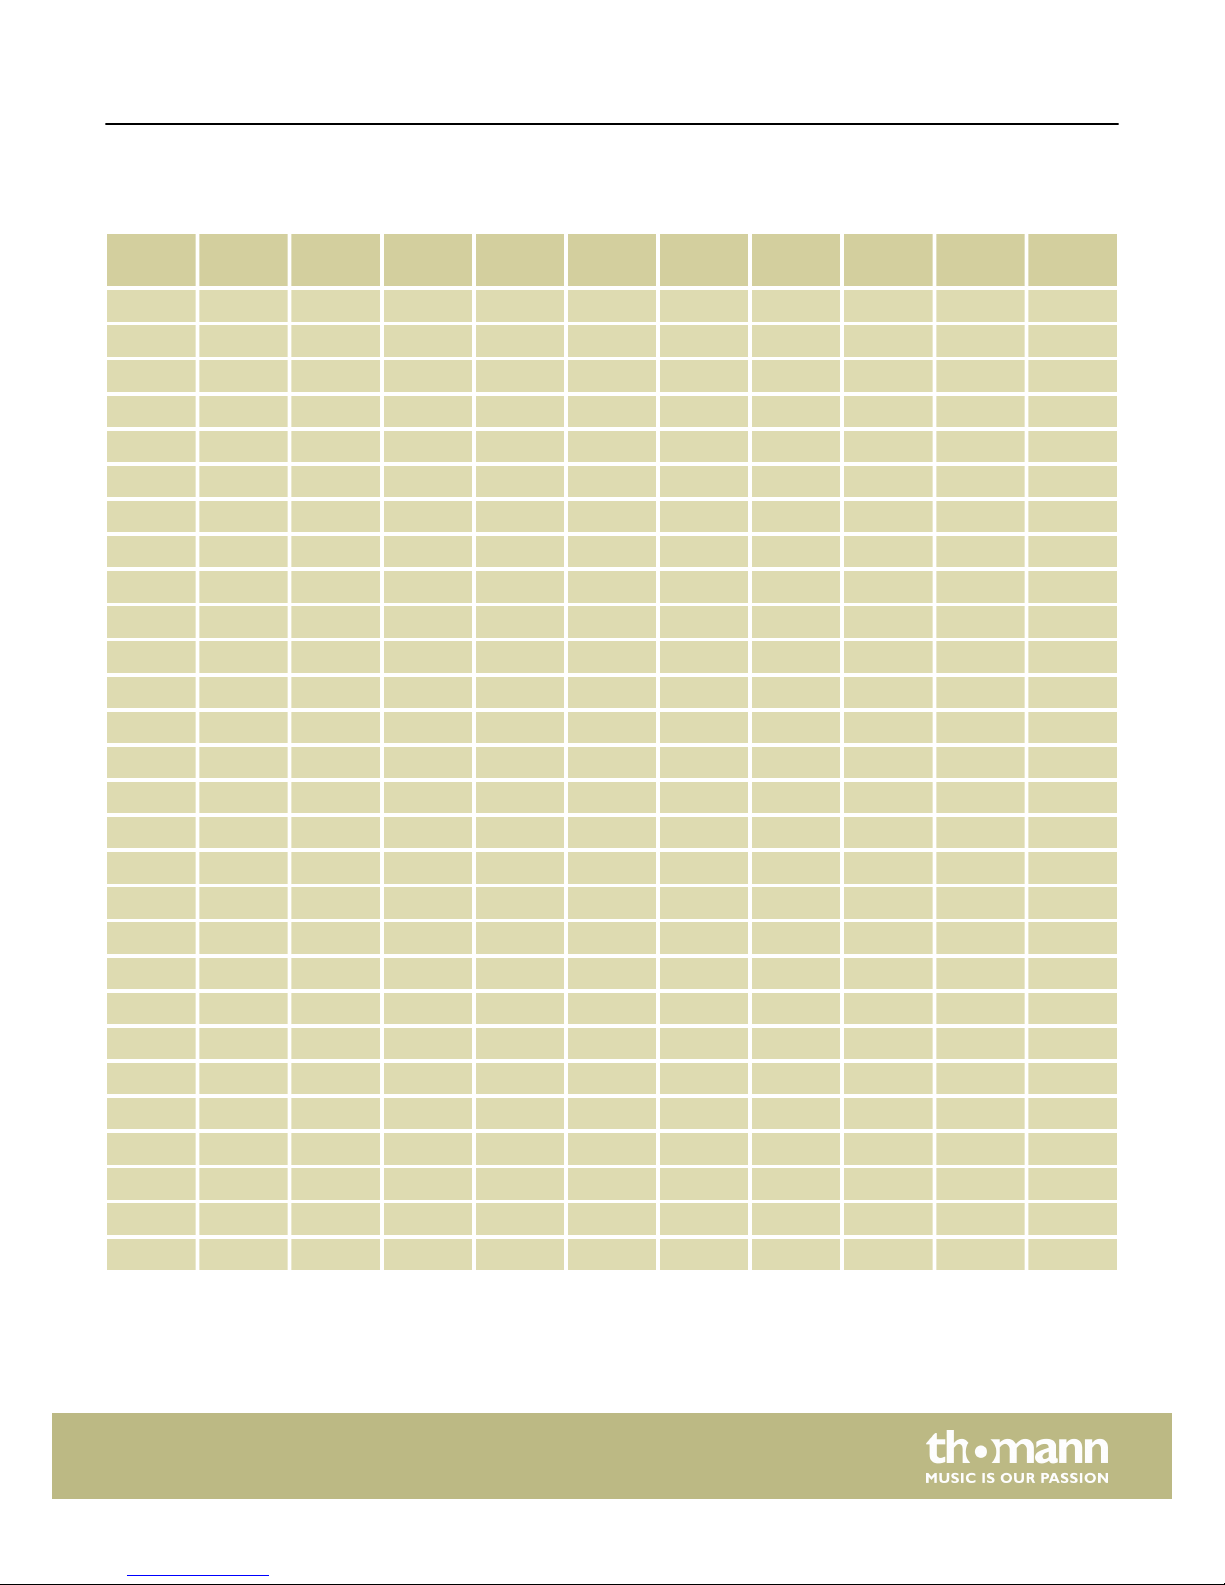
Tuning Voice
Vol
Layer
Vol
Metro.
Vol
Reverb
Vol
Chorus
Vol
Tempo TrebleEQBass EQ Trans.
C#4 81 92 92 92 92 92 146 × × ×
D4 82 93 93 93 93 93 148 × × ×
D#4 83 94 94 94 94 94 150 × × ×
E4 84 95 95 95 95 95 152 × × ×
F4 86 96 96 96 96 96 154 × × ×
F#4 87 97 97 97 97 97 156 × × ×
G4 88 98 98 98 98 98 158 × × ×
G#4 90 99 99 99 99 99 160 × × ×
A4 91 100 100 100 100 100 162 × × ×
A#4 92 101 101 101 101 101 164 × × ×
B4 93 102 102 102 102 102 166 × × ×
C5 95 103 103 103 103 103 168 × × ×
C#5 96 104 104 104 104 104 170 × × ×
D5 97 105 105 105 105 105 172 × × ×
D#5 99 106 106 106 106 106 174 × × ×
E5 100 107 107 107 107 107 176 × × ×
F5 101 108 108 108 108 108 178 × × ×
F#5 102 109 109 109 109 109 180 × × ×
G5 104 110 110 110 110 110 185 × × ×
G#5 105 111 111 111 111 111 190 × × ×
A5 106 112 112 112 112 112 195 × × ×
A#5 108 113 113 113 113 113 200 × × ×
B5 109 114 114 114 114 114 205 × × ×
C6 110 115 115 115 115 115 210 × × ×
C#6 111 116 116 116 116 116 215 × × ×
D6 113 117 117 117 117 117 220 × × ×
D#6 114 118 118 118 118 118 225 × × ×
E6 115 119 119 119 119 119 230 × × ×
Function button allocation
SP-320
27
Page 28
Tuning Voice
Vol
Layer
Vol
Metro.
Vol
Reverb
Vol
Chorus
Vol
Tempo TrebleEQBass EQ Trans.
F6 116 120 120 120 120 120 235 × × ×
F#6 118 121 121 121 121 121 240 × × ×
G6 119 122 122 122 122 122 245 × × ×
G#6 120 123 123 123 123 123 250 × × ×
A6 122 124 124 124 124 124 255 × × ×
A#6 123 125 125 125 125 125 260 × × ×
B6 125 126 126 126 126 126 270 × × ×
C7 127 127 127 127 127 127 280 × × ×
For the fields marked with ‘X’, no value is assigned in the Edit mode.
Tune Voice
Vol
Layer
Vol
Metro.
Vol
Local Channel Tempo Voice
Select
Trans Auto
Power
Off
Factory
defaults
0 127 100 100 ON 1 120 1 (Grand
Piano)
0 OFF
Reset values (factory defaults)
Function button allocation
digital piano
28
Page 29
13 Protecting the environment
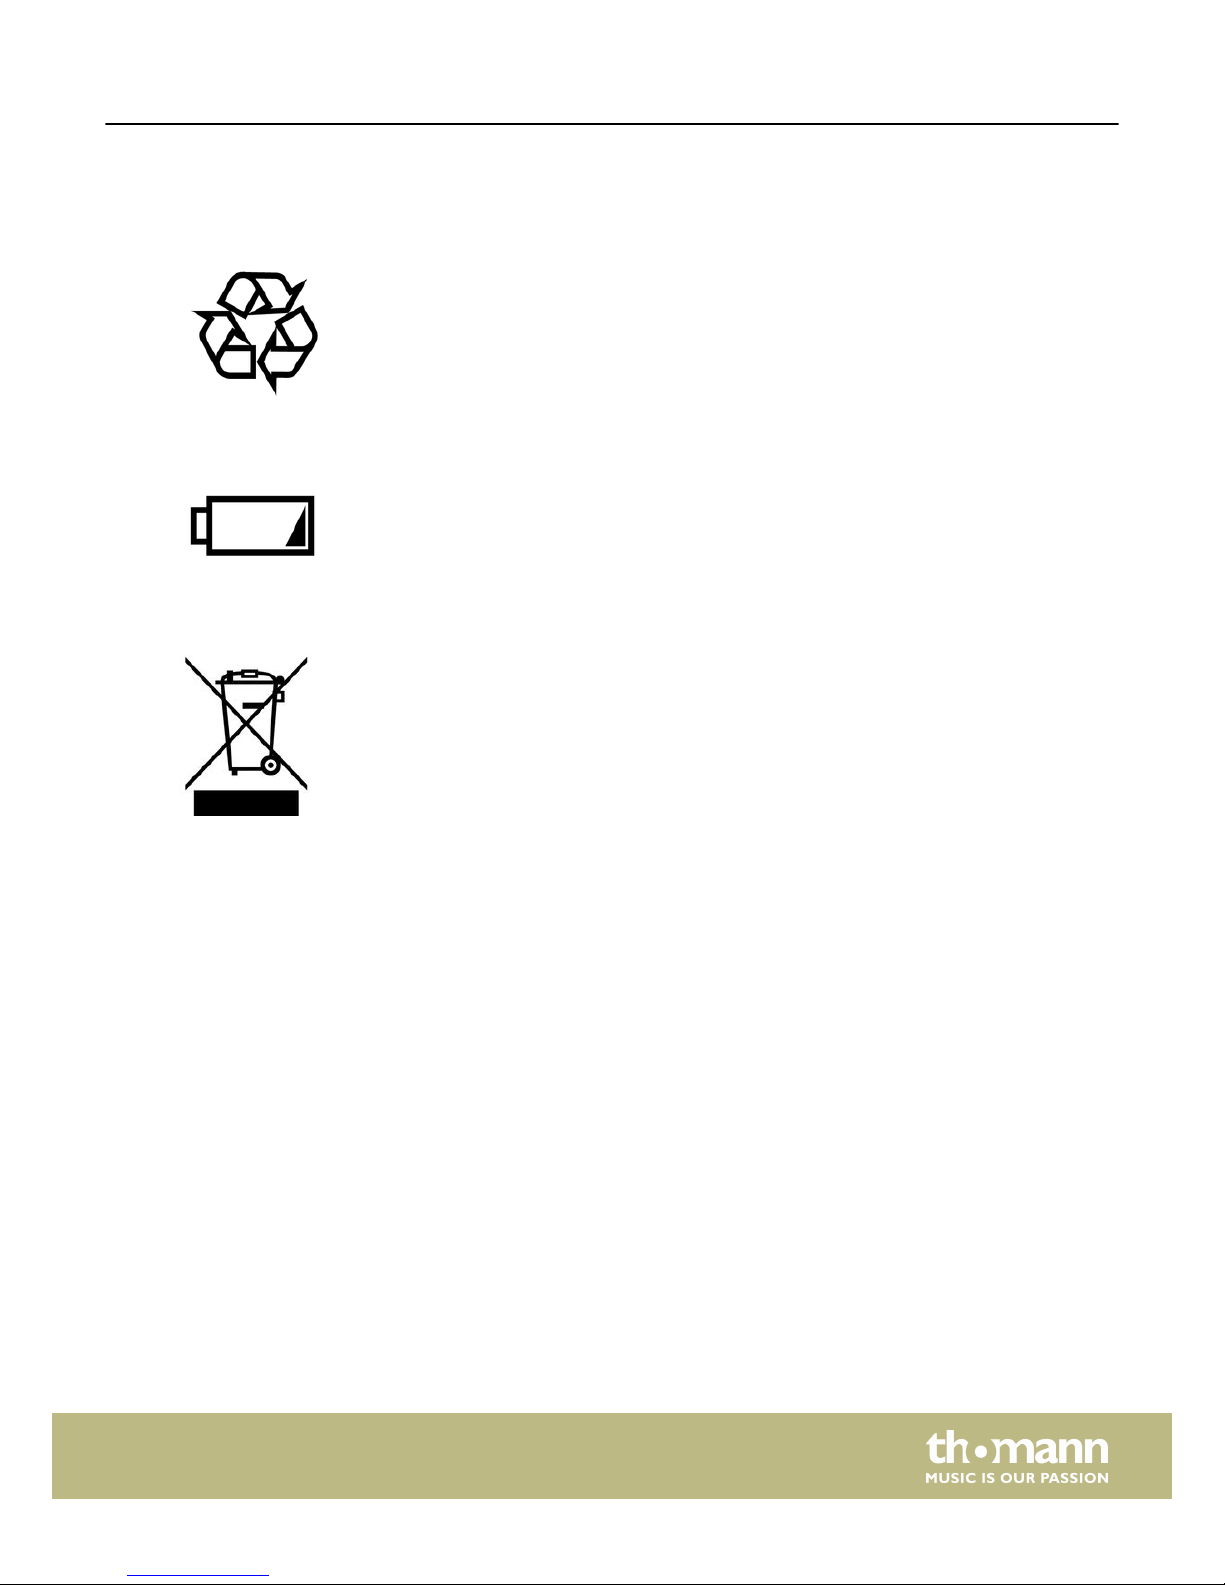
For the transport and protective packaging, environmentally friendly materials have
been chosen that can be supplied to normal recycling.
Ensure that plastic bags, packaging, etc. are properly disposed of.
Do not just dispose these materials with your normal household waste, but make
sure that they are fed to a recovery. Please follow the notes and markings on the
packaging.
Batteries must not be disposed of as domestic waste or thrown into fire. Dispose of
the batteries according to national or local regulations regarding hazardous waste.
To protect the environment, dispose of empty batteries at your retail store or at
appropriate collection sites.
This product is subject to the European Waste Electrical and Electronic Equipment
Directive (WEEE). Do not dispose with your normal household waste.
Dispose this device through an approved waste disposal firm or through your local
waste facility. When discarding the device, comply with the rules and regulations
that apply in your country. If in doubt, consult your local waste disposal facility.
Disposal of the packaging material
Disposal of batteries
Disposal of your old device
Protecting the environment
SP-320
29
Page 30

Notes
digital piano
30
Page 31

Page 32

Musikhaus Thomann · Hans-Thomann-Straße 1 · 96138 Burgebrach · Germany · www.thomann.de
 Loading...