

Think Tank Photo Flash 70-200 User Manual
Hydrophobia® Flash 70-200 Instructions
ph: 866.55THINK (558.4465) fax: 707.527.0808
3636 North Laughlin Road, Suite 170, Santa Rosa, CA 95403
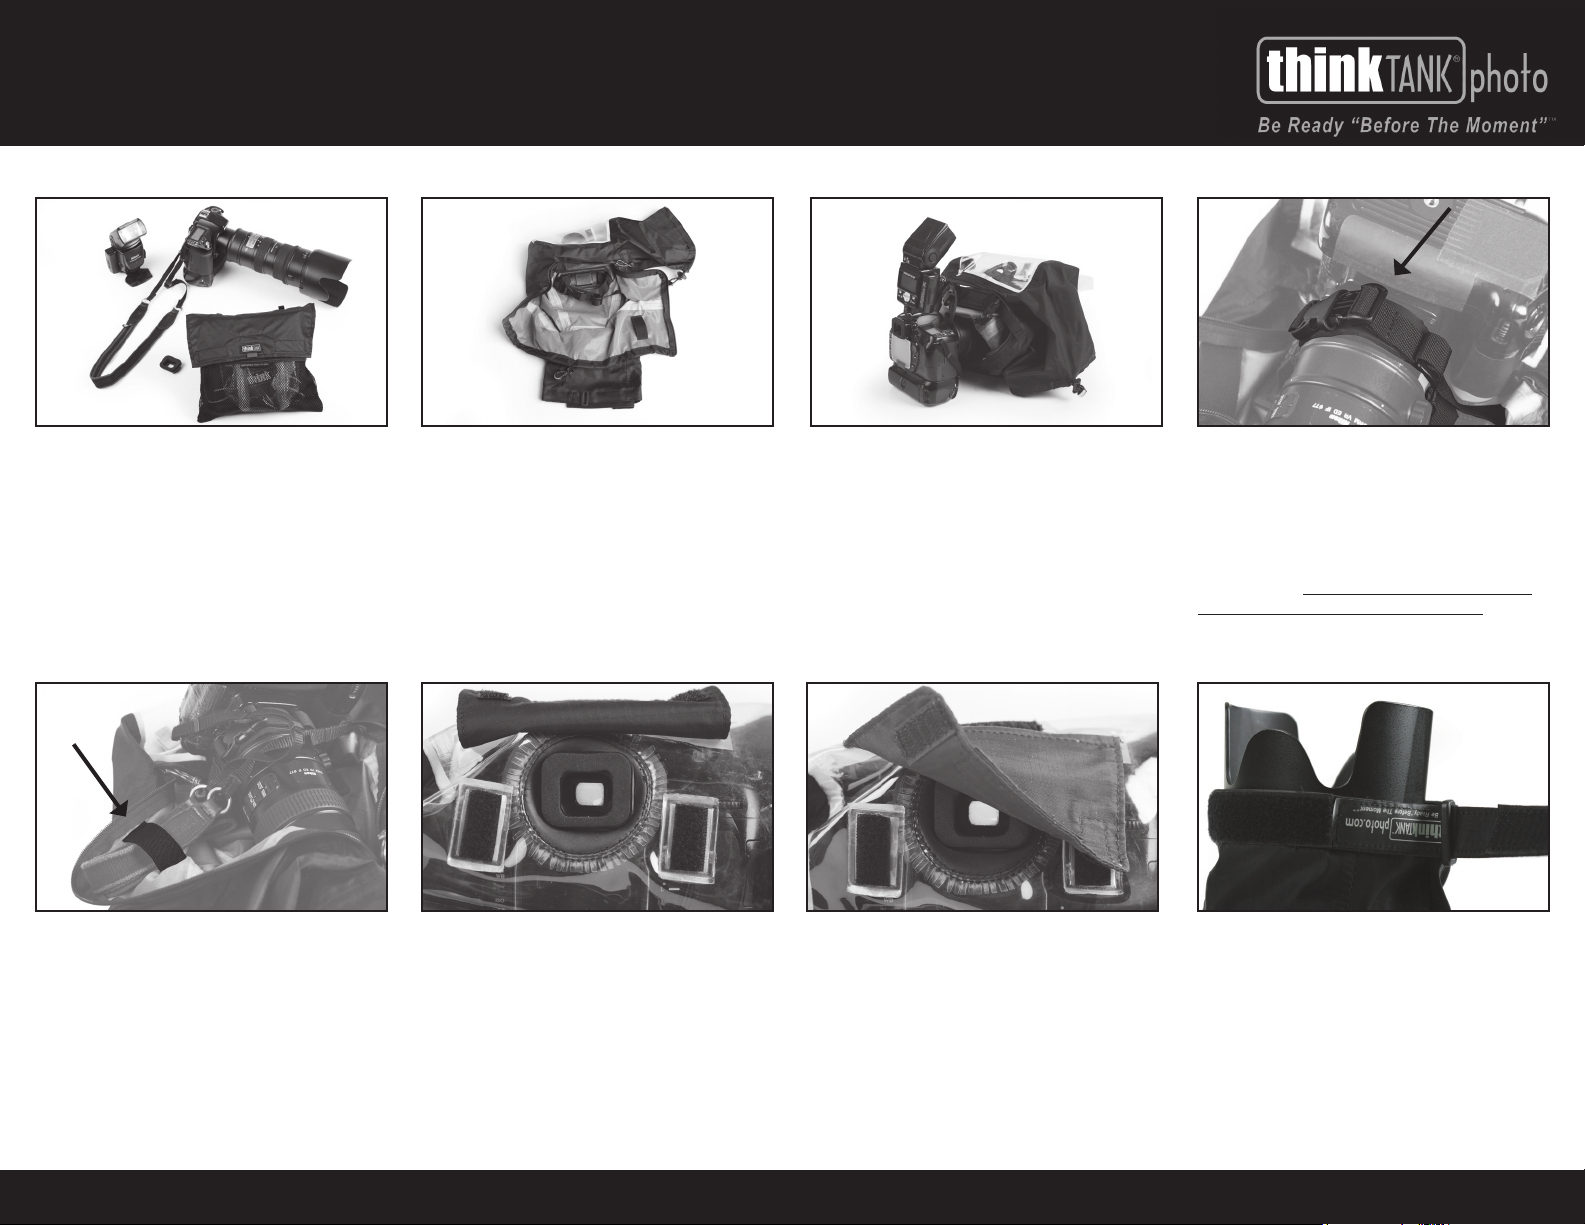
Step 1: Assemble the lens hood, lens, DSLR,
and Hydrophobia eyepiece (sold separately). Keep
the flash disconnected for now. The lens hood is
required to attach the Hydrophobia 70-200 and it
also helps shield the front element of the lens
from weather.
Step 5: Fold the strap attached to the camera and
tuck it into elastic camera strap retainer inside the
Hydrophobia. This keeps the camera’s strap out
of the way and eliminates the hassle of removing
the camera’s strap before attaching the rain cover.
Close the weather-proof zipper.
Step 2: Remove the Hydrophobia rain cover from
its carrying pouch. Unzip the “L” shaped, weatherresistant zipper on the bottom of the rain cover to
open. Locate the Lens Strap inside the
Hydrophobia and unbuckle it.
Step 6: Insert the Hydrophobia eyepiece (attached
at Step 1) through the neoprene eyepiece port
on the back of the Hydrophobia. This keeps a
weather-resistant seal around the eyepiece and
an unobstructed view through the camera.
Step 3: Attach the flash and tilt the head at a
slight angle off vertical. Insert the front end of the
lens (with lens hood attached) completely into the
Hydrophobia. Pull Hydrophobia over the flash and
camera.
When the camera is not in use, fold the eyepiece
flap over the eyepiece to protect the eyepiece
from the elements.
Step 4: IMPORTANT - The Lens Strap supports
the camera’s weight when the Hydrophobia
Camera Strap is used. If the Lens Strap is not
properly clipped around the lens, neither the
camera nor the lens will be secured inside
the rain cover. Carefully turn the camera over.
Wrap the Lens Strap snugly around the lens, close
to the camera. Ensure that the buckle and strap
are positively connected around the lens.
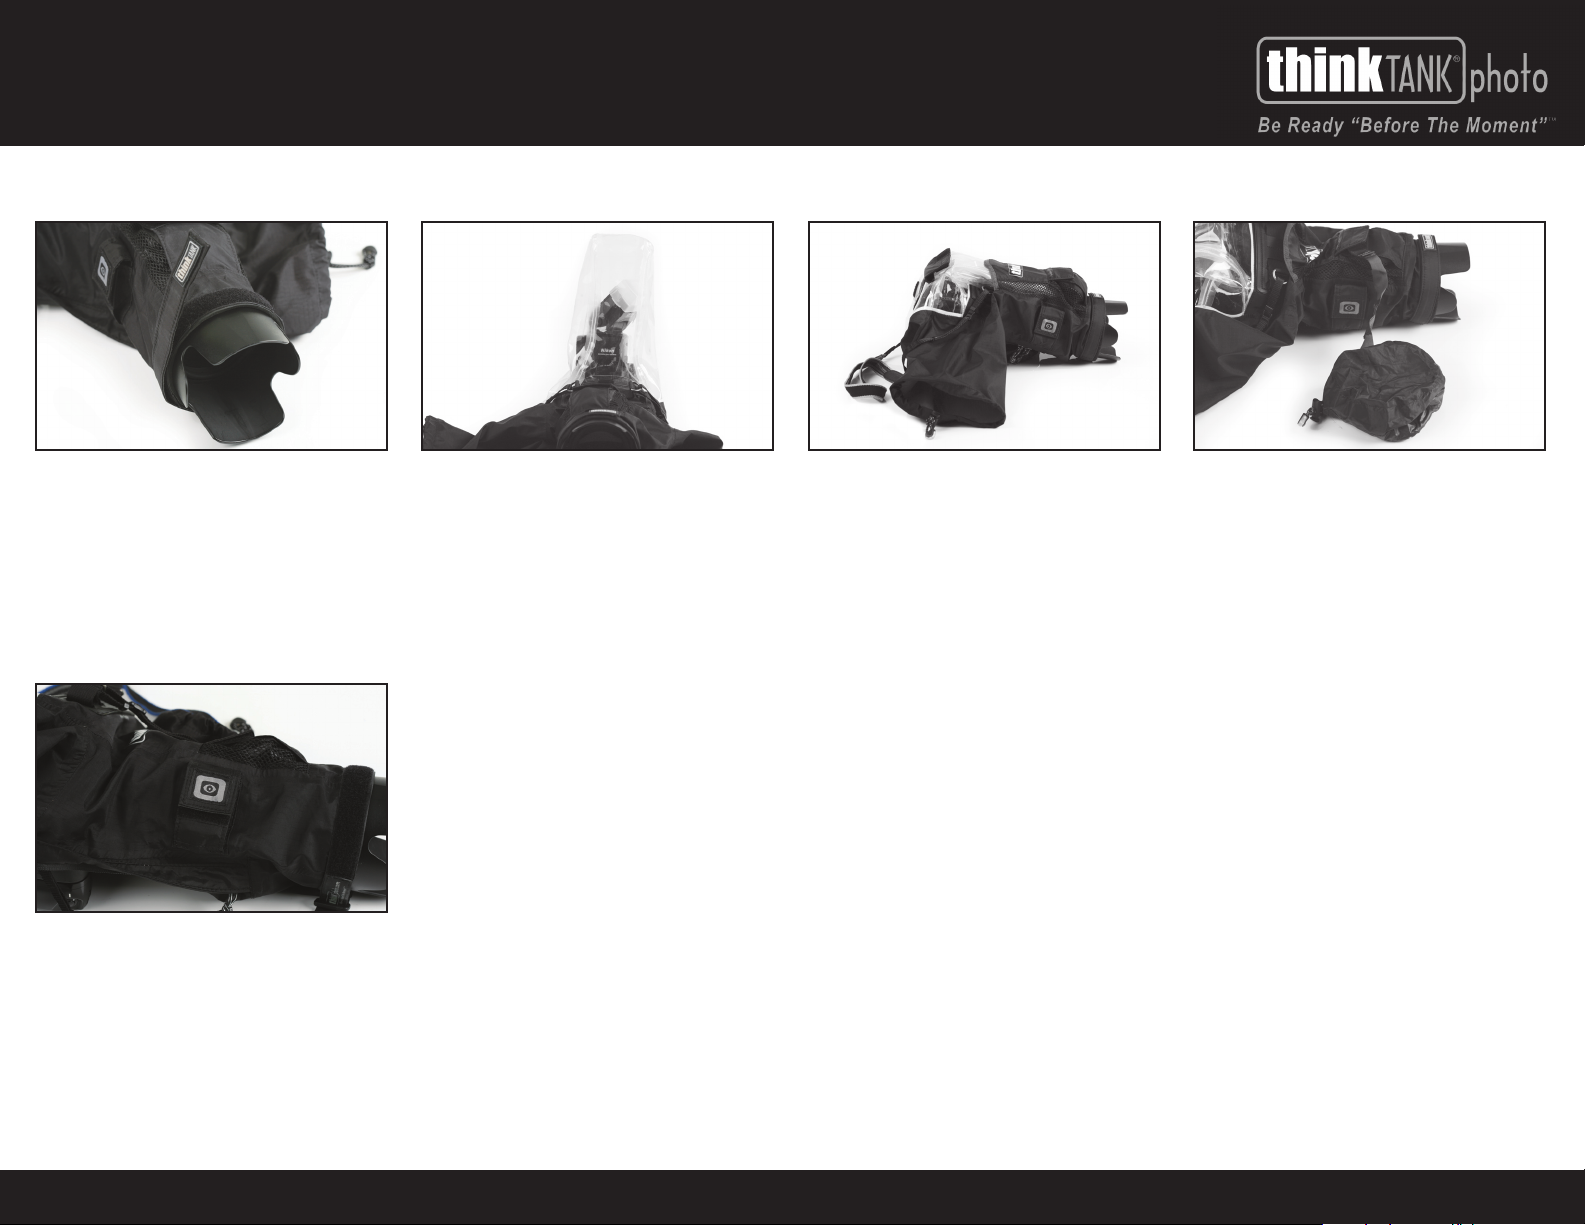
Step 7: Position the front end of the Hydrophobia
just behind the edge of the lens hood. If a petal
shaped hood is used, be sure the edge of the rain
cover does not wrap around the side openings of
the hood (as shown).
For more information about this and other Think Tank products, visit www.thinktankphoto.com
The choice of working professionals
Hydrophobia® Flash 70-200 Instructions
page 2
Step 8: Pull the front strap tightly around the lens
hood. Make sure the top features of the rain cover
(eyepiece flap, camera strap D-rings, and hood
cap pocket) are all in line and straight forward.
Reposition the rain cover as needed, and then seal
the hook-and-loop around the lens hood to lock
the front strap in place.
The camera’s eyepiece can be stored in the eyepiece pocket on the side of the Hydrophobia.
This is also a convenient pocket to store the
Hydrophobia eyepiece when it is not in use.
The clear flash tower is designed to be large
enough to point the flash head in any direction.
It also accommodates some flash diffusers, and
Pocket Wizards, depending on size.
Care Instructions:
To preserve the waterproof coatings on the
fabric, let Hydrophobia dry completely before
storage. To wash, rinse with water only. Do not
use soap and do not machine wash, permanent
damage will result. Hang in shaded area to dry.
The Hydrophobia Flash 70-200 can also be used
without the flash tower extended, for times when
a strobe is unnecessary. Simply disconnect the
flash and tuck the flash tower into the pocket in
the middle of the rain cover.
A lens hood cover is stored in the pocket above
the lens. Use the hood cap to protect the lens
from the elements when the camera is not in use.
This is also a convenient pocket to hold your lens
cap (from your lens) while shooting.
For more information about this and other Think Tank products, visit www.thinktankphoto.com
 Loading...