

Think Tank Photo 498 User manual
Airport TakeOff Instructions
ph: 866.55THINK (558.4465) fax: 707.527.0808
3636 North Laughlin Road, Suite 170, Santa Rosa, CA 95403
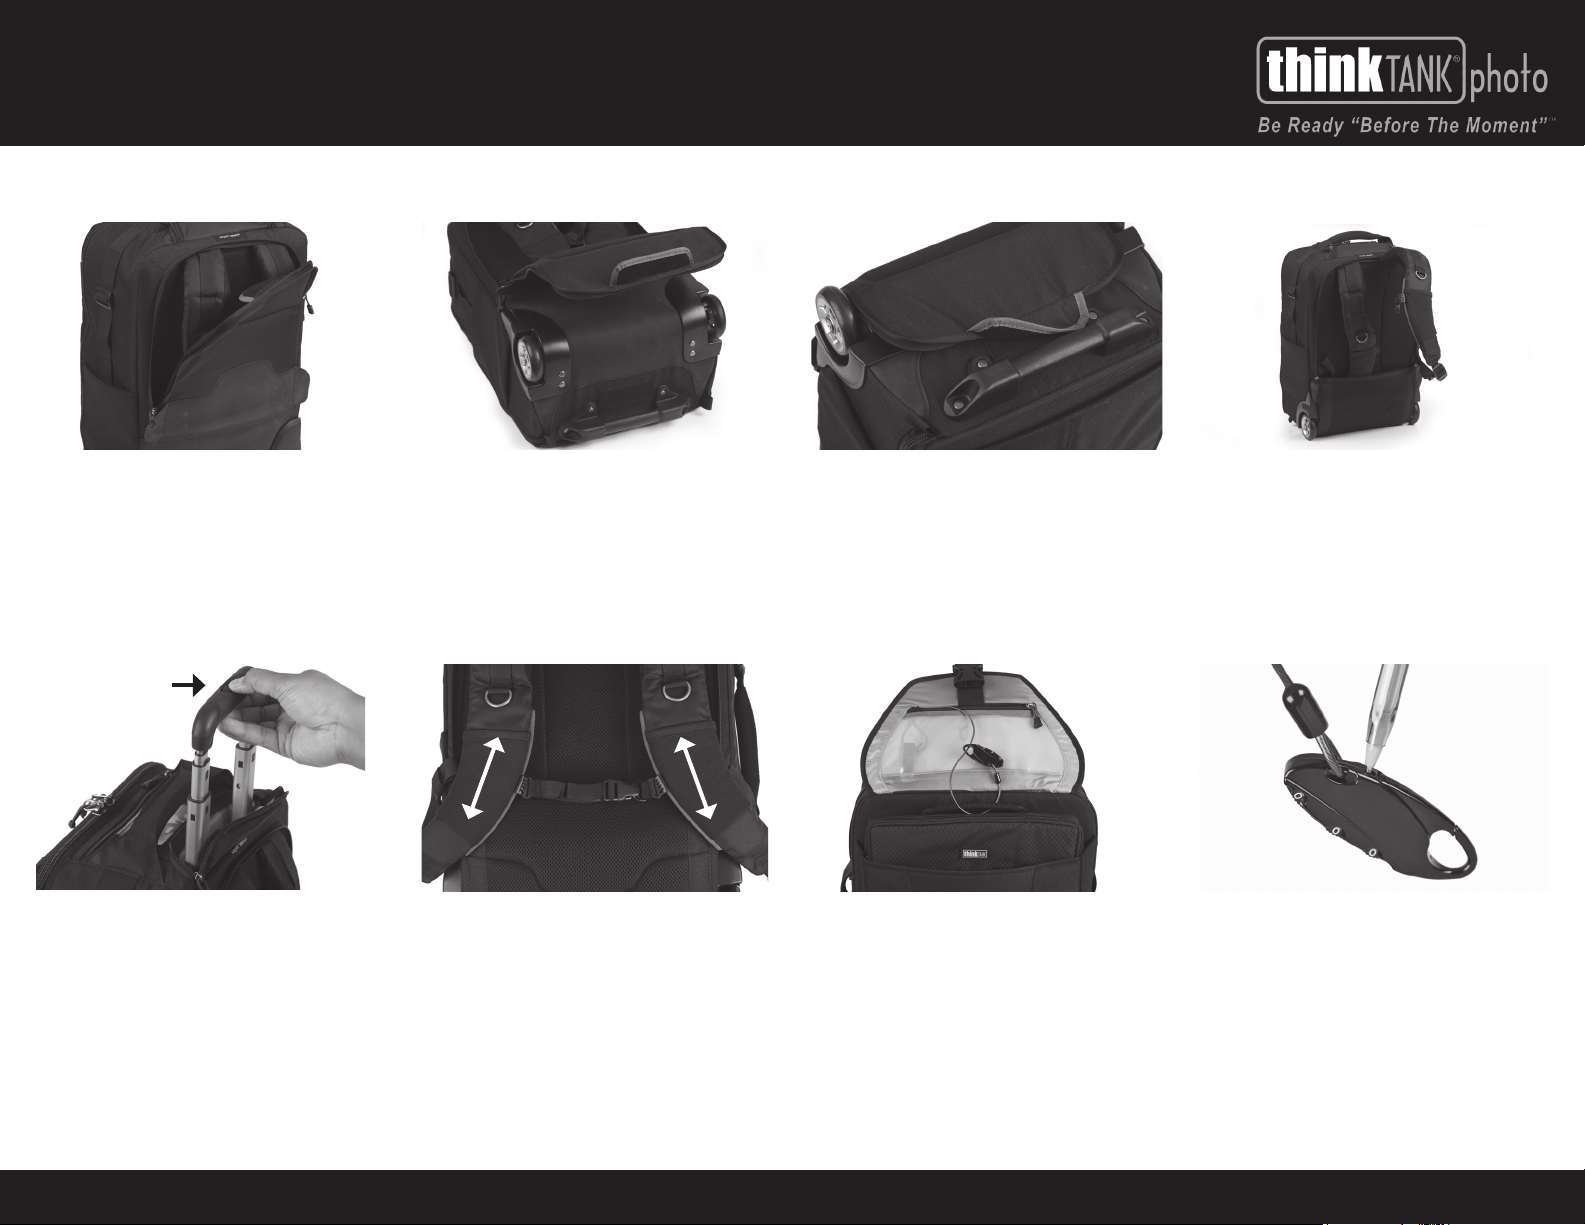
Deploying Backpack Straps
Step 1: Completely unzip the panel covering
the backpack straps.
Extendable Handle
Open the zipper flap on top of the Airport TakeOff
to reveal the extendable handle. To raise the
handle, press and hold the button on the middle
of the handle and simultaneously raise the handle
completely. The release button must always be
held down for the handle to be fully extended
or retracted.
Step 2: Pull the panel down and under the
wheel housings at the bottom of the bag.
Step 3: Tightly seal the panel in place with
the hook and loop, just behind the foot stand
underneath the bag.
Step 4: Untuck the backpack straps from the
pocket and adjust as needed for proper fit.
Reinsert the backpack straps into the pocket to
use the backpack as a rolling bag. Closing the
covering panel is not necessary. The Airport
TakeOff can still be effectively used as a rolling
bag while the panel is open.
Adjustable Sternum Strap Security Cable and Lock Setting the Lock Combination
The sternum strap adjusts up and down, along
the blue rails on the backpack straps.
The cable and lock are inside the clear pocket,
underneath the front flap on the Airport TakeOff.
They are used to secure an optional laptop slip
case, such as the Artificial Intelligence 15 or 17,
when it is stored in the front pocket.
The lock combination default setting is 0-0-0.
To reset the combination, use a pen to press the
small release button, on the side of the lock, until
it clicks. Release the button and set the desired
3 digit combination. Be sure that each digit is
centered precisely in the spaces. Press the
locking clasp inward until it clicks to confirm the
new combination.
For more information about this and other Think Tank products, visit www.thinktankphoto.com
The choice of working professionals
Airport TakeOff Instructions
page 2
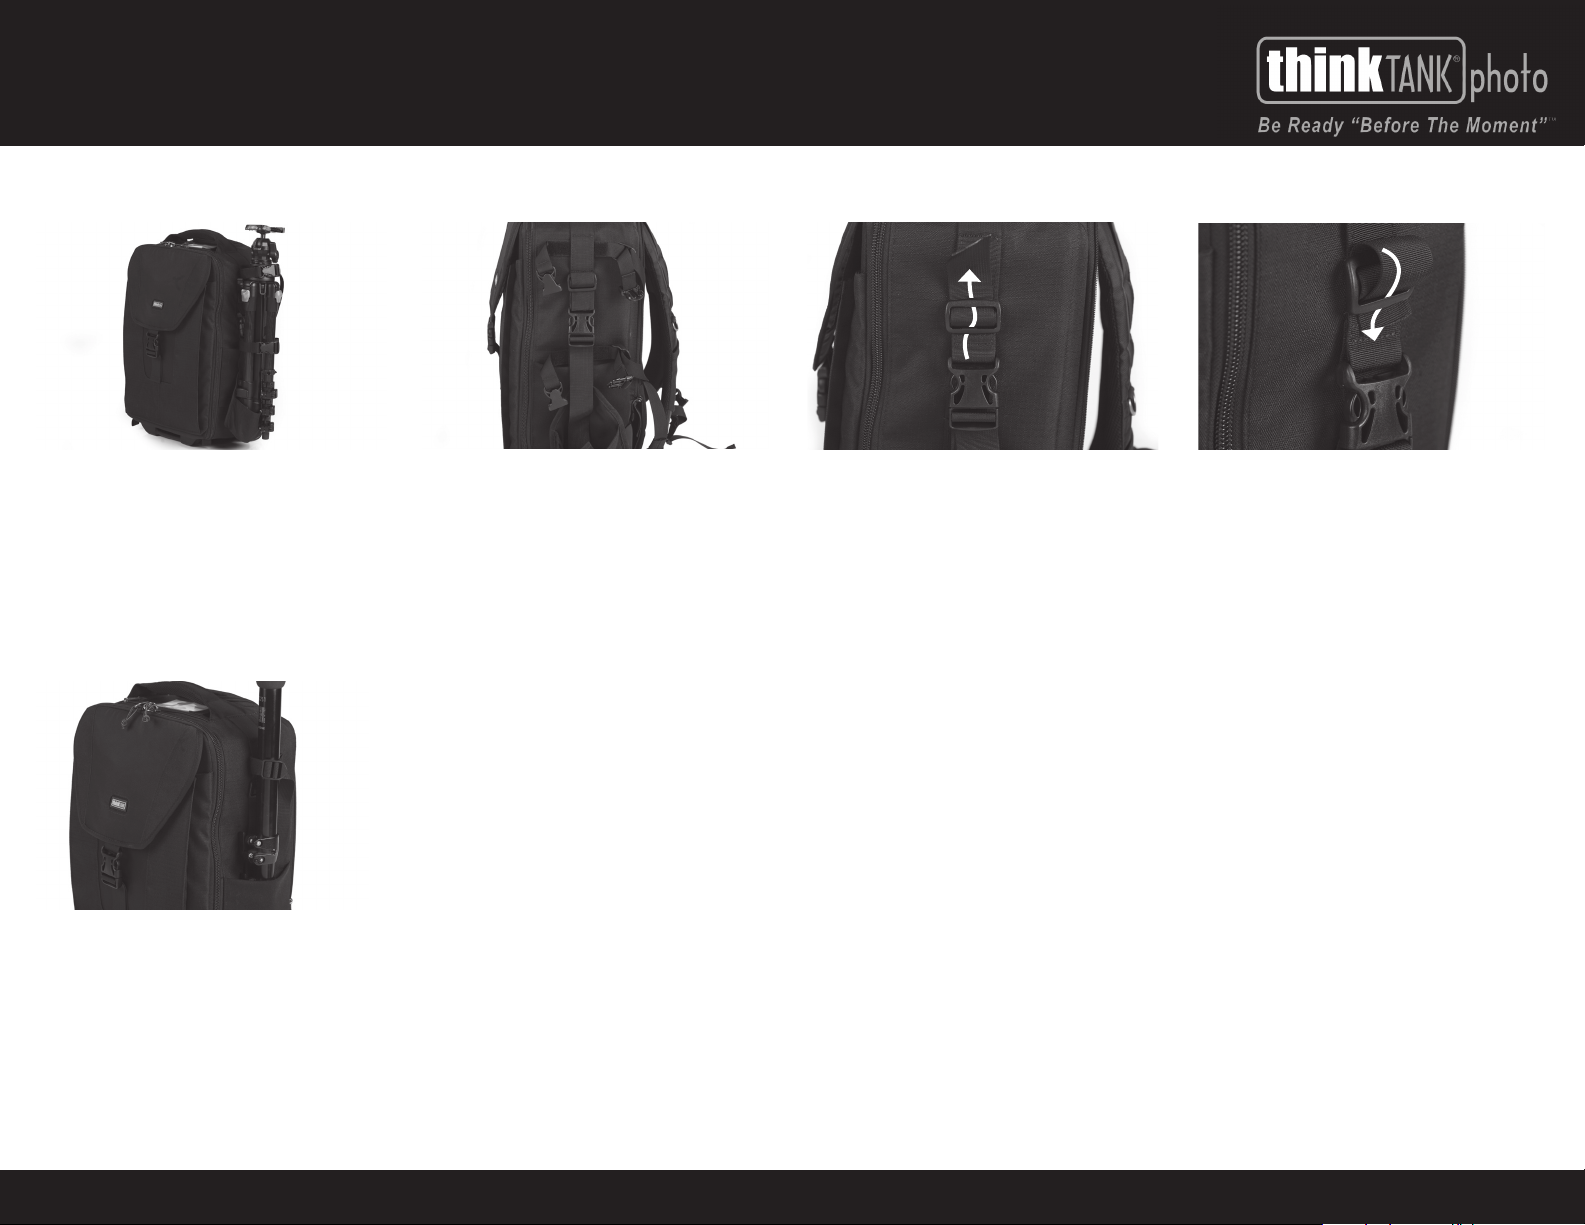
Carrying a Tripod or Monopod
Step 1: A tripod or monopod can be carried on
the side of the Airport TakeOff by using the straps
and tripod cup included with the bag. The tripod
cup is only necessary to use for tripods with bulky
leg releases. The stretchable side pocket on the
Airport TakeOff can fit two legs of tripods with
compact leg releases, instead of attaching the
tripod cup.
Step 5: A monopod can be carried in the
stretchable side pocket and stabilized near the
top of the bag with the included monopod strap.
Step 2: Insert the tripod straps horizontally, above
and below the triglide buckle that is fixed on the
side of the Airport TakeOff. There is hook and loop
on each tripod strap and the corresponding
placement slot to prevent the straps from sliding
out, when unclipped.
Step 3: The tripod cup attaches to the fixed
triglide buckle on the side of the Airport TakeOff.
Thread the open end of the tripod cup strap, up
through the triglide.
Step 4: To secure the tripod cup in place, double
over the loose end of the strap and insert it into
the bottom side of the triglide.
For more information about this and other Think Tank products, visit www.thinktankphoto.com
 Loading...