

Think Tank Photo 470 User manual
ShapeShifter™ Instructions
Instructions for equipment storage, compression or expansion
of main compartment, waistbelt use, load adjustment straps,
and tripod or monopod attachment.
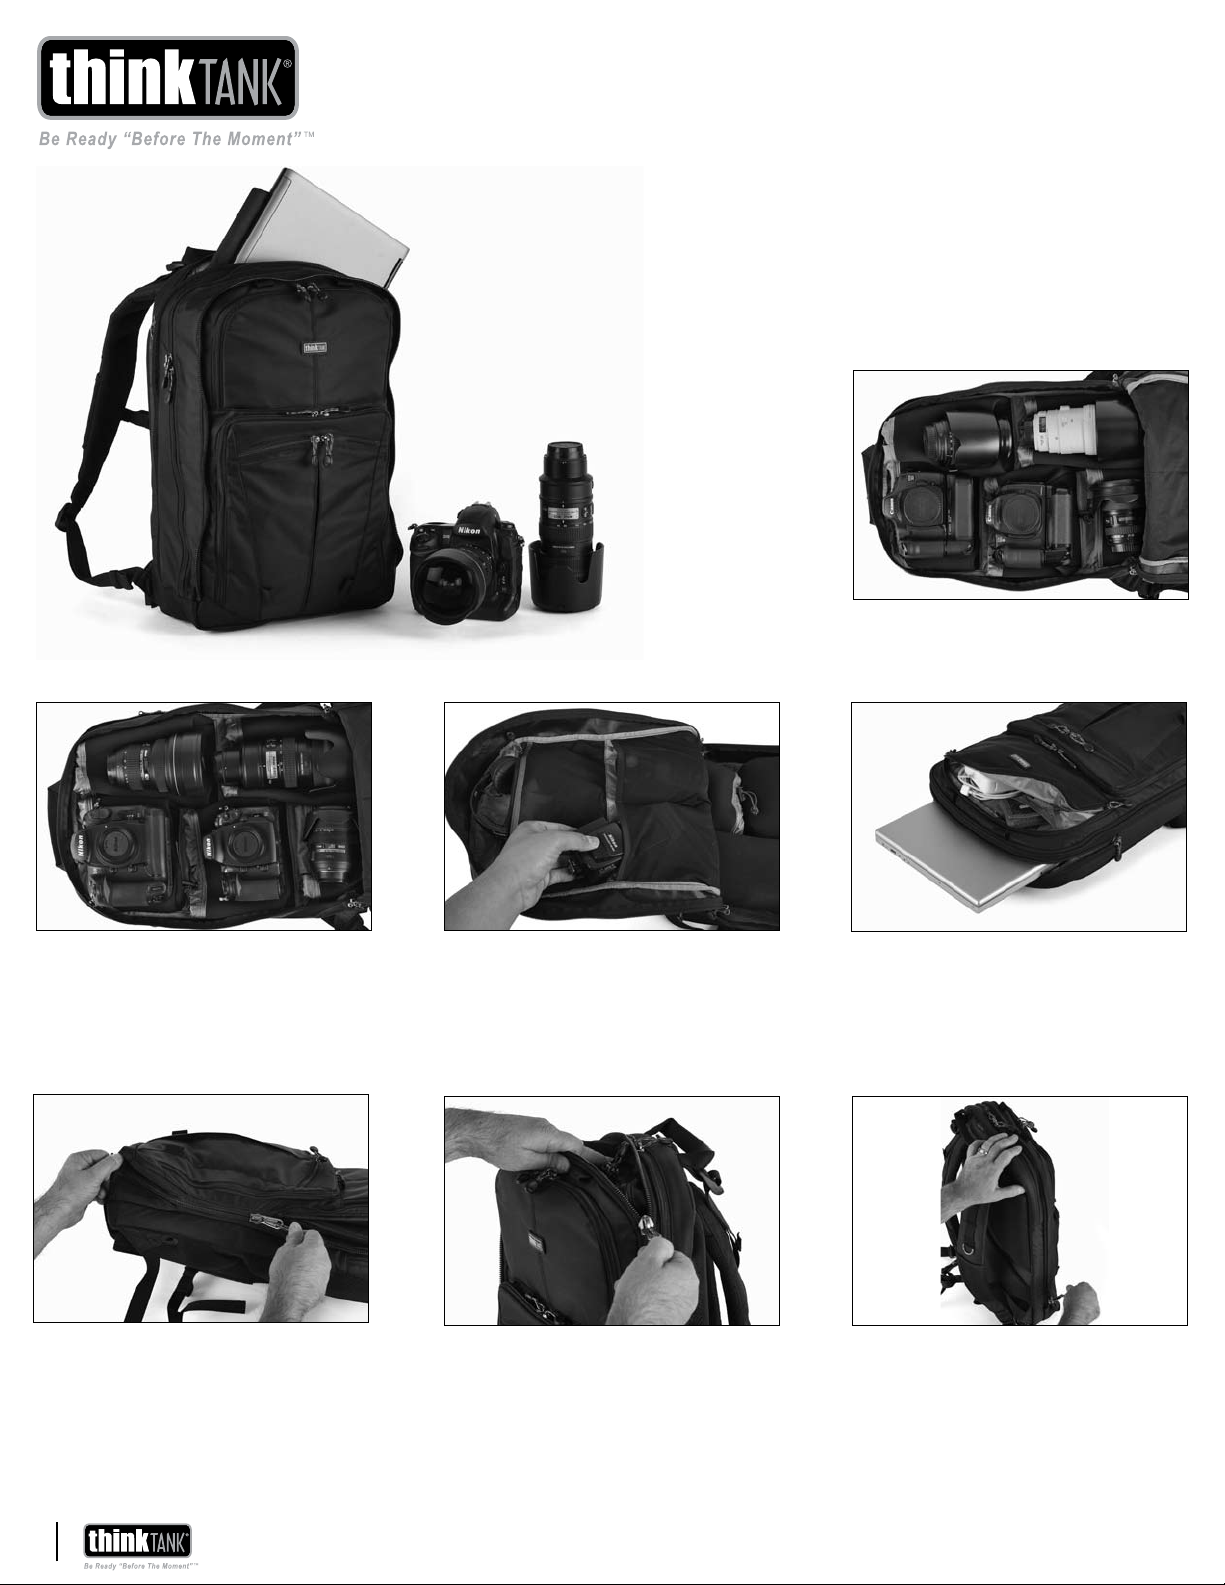
Storing Photo Equipment
Layout of Canon cameras and lenses.
Layout of Nikon cameras and lenses. Stretchable interior pockets can carry
strobes and other equipment.
Main Compartment Compression/Expansion
To compress the ShapeShifter, first
remove the camera equipment from
the main compartment. Flatten the
compartment and close the compression
zipper around the backpack.
Push any excess fabric inward to avoid
binding the compression zipper.
Up to a 17” laptop can be carried in the
ShapeShifter. A dedicated compartment
allows for laptop storage when the
backpack is compressed or expanded.
ShapeShifter can be compressed down
to three inches in depth after the
cameras and lenses are removed. Some
gear can stay in the main compartment,
however the bag may be thicker depending
on the size of the remaining equipment.
1
www.thinktankphoto.com
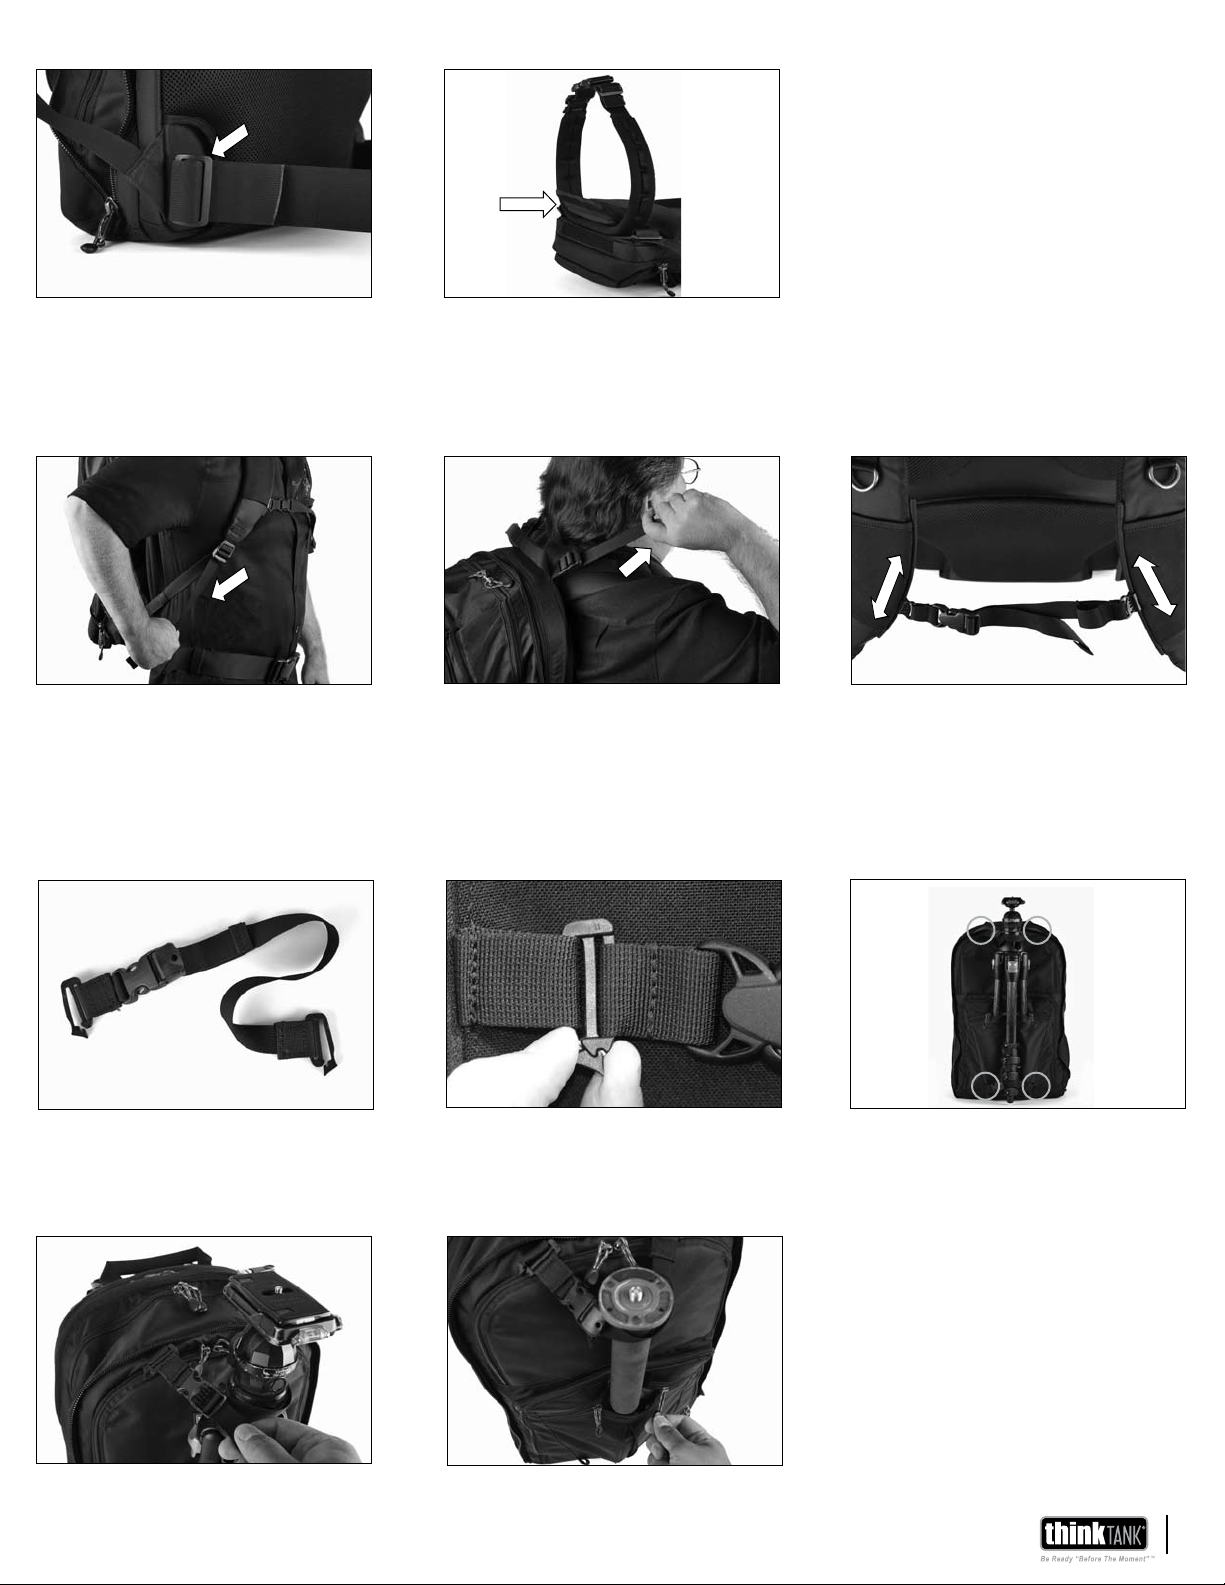
Removable Waistbelt Attaching a Modular Belt
The included waistbelt is removable by
unthreading the webbing through the
buckle.
Remove the ShapeShifter waistbelt. Then
open the “hook & loop” panel at the bottom
of the backpack to slide a Think Tank Pro
Speed Belt™ or Skin™ Belt into place.
Adjusting the ShapeShifter Harness Adjustable Sternum Strap
First pull forward and down on the
shoulder harness adjustment straps until
the backpack feels properly balanced.
Then set the load adjustment straps by pulling
up and forward on the loose ends. Tighten to
maximum comfort. Once the load adjustment
straps are set, fine tune the backpack’s fit by
making minor readjustments to the shoulder
harness adjustment straps.
The sternum strap can be raised or lowered,
to accommodate a photographer’s unique
height or torso length.
Tripod or Monopod Attachment
Locate the two adjustable tripod straps
provided with the ShapeShifter.
Carrying a Tripod
Unlock the adjustable strap then pull the
strap tight around the top of the tripod.
Tighten the lower strap around the exposed tripod leg for additional stability.
Slide the opened “Slik Clip” through the
webbing loop and snap it shut with your
fingers on both sides.
Carrying a Monopod
Attaching a monopod requires the use of
only the top tripod strap. Close the zipper
as much as possible for additional stability.
Connect the tripod straps to the webbing
loops on the ShapeShifter (circled). Insert
two tripod legs into the outside lower
pocket.
2
 Loading...