

Page 1

HardwareMaintenanceManual
ThinkPadT410andT410i
Page 2

Note:Beforeusingthisinformationandtheproductitsupports,besuretoreadthegeneralinformation
underAppendixA“Notices”onpage165.
SeventhEdition(October2012)
©CopyrightLenovo2010,2012.
LIMITEDANDRESTRICTEDRIGHTSNOTICE:IfdataorsoftwareisdeliveredpursuantaGeneralServicesAdministration
“GSA”contract,use,reproduction,ordisclosureissubjecttorestrictionssetforthinContractNo.GS-35F-05925.
Page 3

Contents
Aboutthismanual...........iii
Chapter1.Safetyinformation......1
Generalsafety................1
Electricalsafety...............2
Safetyinspectionguide............3
Handlingdevicesthataresensitivetoelectrostatic
discharge..................3
Groundingrequirements............4
Safetynotices(multilingualtranslations)......4
Lasercompliancestatement(multilingual
translations)................17
Chapter2.Importantservice
information..............23
StrategyforreplacingFRUs.........23
Strategyforreplacingaharddiskdrive...24
Importantnoticeforreplacingasystem
board................24
Howtouseerrormessage........24
StrategyforreplacingFRUsforCTO,CMV,and
GAV...................25
Productdenition............25
FRUidenticationforCTO,CMV,andGAV
products...............25
Chapter3.Generalcheckout.....27
Whattodorst..............27
Checkoutguide..............28
SystemsupportingtheLenovoThinkVantage
ToolboxprogramandthePC-DoctorforDOS
diagnosticsprogram..........28
SystemsupportingtheLenovodiagnostics
programs...............34
Powersystemcheckout...........36
CheckingtheACadapter.........36
Checkingoperationalcharging......37
Checkingthebatterypack........37
Checkingthebackupbattery.......38
Chapter4.Relatedservice
information..............39
RestoringthefactorycontentsbyusingRecovery
DiscSet.................39
Passwords................40
Power-onpassword...........40
Hard-diskpassword...........40
Supervisorpassword..........41
Howtoremovethepower-onpassword...41
Howtoremovethehard-diskpassword...41
Powermanagement............42
Screenblankmode...........42
Sleep(standby)mode..........42
Hibernationmode...........43
Symptom-to-FRUindex...........43
Numericerrorcodes..........44
Errormessages............48
Beepsymptoms............50
No-beepsymptoms...........50
LCD-relatedsymptoms.........50
Intermittentproblems..........52
Undeterminedproblems.........52
Chapter5.Statusindicators.....53
Chapter6.Fnkeycombinations...57
Chapter7.FRUreplacement
notices................61
Screwnotices...............61
Retainingserialnumbers...........63
Restoringtheserialnumberofthesystem
unit.................63
RetainingtheUUID...........63
ReadingorwritingtheECAinformation...64
Chapter8.Removingandreplacinga
FRU..................65
BeforeservicingThinkPadT410andT410i
models..................65
1010Batterypack.............66
1020ExpressCardblankbezel........67
1030SerialUltrabaySlimdeviceortravelbezel..68
1040Harddiskdrive(HDD)andsolid-statedrive
(SSD)..................69
1050DIMMslotcover............70
1060DIMM(intheslotontheundersideofthe
computer)................71
1070PCIExpressMiniCardforwirelessWAN..72
1080Keyboard..............74
1090DIMM(intheslotunderthekeyboard)...78
1100Backupbattery............80
1110PCIExpressMiniCardforwirelessLAN..81
1120Keyboardbezelassembly,FPCcable,and
Bluethoothdaughtercard(BDC-2.1)......83
1130SmartCardorContactlessSmartCard...87
1140Modemdaughtercard(MDC).......88
©CopyrightLenovo2010,2012
i
Page 4

1150Speakerassembly...........89
1160LCDunit...............91
1170Fanassembly.............95
1180CPU................98
1190Basecoverassembly,I/OsubcardwithUSB
connectorand1394connector,andI/Osubcard
cable..................99
1200Magnesiumstructureframe.......104
1210Systemboard,DC-inconnectorcable,and
ExpressCardslotassembly..........106
2010LCDbezelassembly..........108
2020LEDboard..............109
2030Integratedcamera...........110
2040LCDpanelandLCDcable........111
2050Cameracable.............113
2060WirelessLANantennaassemblyorwireless
LAN/WANantennaassembly.........116
2070HingesandLCDrearcoverassembly...117
Chapter9.Locations........119
Frontview................119
Rearview.................120
Bottomview...............121
Chapter10.Partslist........123
Overall..................125
LCDFRUs................146
Keyboard.................150
Miscellaneousparts............151
acpoweradapters.............153
Powercords...............154
Recoverydiscs..............156
Commonservicetools...........163
AppendixA.Notices.........165
Trademarks................166
iiHardwareMaintenanceManual
Page 5

Aboutthismanual
ThismanualcontainsserviceandreferenceinformationforthefollowingThinkPad
®
products.
ThinkPadT410andT410i
MT2516,2518,2519,2522,2537,2538,and2539
Usethismanualalongwiththeadvanceddiagnosticteststotroubleshootproblems.
Important:
ThismanualisintendedonlyfortrainedservicetechnicianswhoarefamiliarwithThinkPadproducts.Use
thismanualalongwiththeadvanceddiagnosticteststotroubleshootproblemseffectively.
BeforeservicingaThinkPadproduct,besuretoreadalltheinformationunderChapter1“Safety
information”onpage1
andChapter2“Importantserviceinformation”onpage23.
©CopyrightLenovo2010,2012
iii
Page 6

ivHardwareMaintenanceManual
Page 7

Chapter1.Safetyinformation
Thischapterpresentsfollowingsafetyinformationthatyouneedtobefamiliarwithbeforeyouservice
aThinkPadNotebook.
•“Generalsafety”onpage1
•“Electricalsafety”onpage2
•“Safetyinspectionguide”onpage3
•“Handlingdevicesthataresensitivetoelectrostaticdischarge”onpage3
•“Groundingrequirements”onpage4
•“Safetynotices(multilingualtranslations)”onpage4
•“Lasercompliancestatement(multilingualtranslations)”onpage17
Generalsafety
Followtheserulestoensuregeneralsafety:
•Observegoodhousekeepingintheareaofthemachinesduringandaftermaintenance.
•Whenliftinganyheavyobject:
1.Makesurethatyoucanstandsafelywithoutslipping.
2.Distributetheweightoftheobjectequallybetweenyourfeet.
3.Useaslowliftingforce.Nevermovesuddenlyortwistwhenyouattempttolift.
4.Liftbystandingorbypushingupwithyourlegmuscles;thisactionremovesthestrainfromthe
musclesinyourback.Donotattempttoliftanyobjectthatweighsmorethan16kg(35lb)orthat
youthinkistooheavyforyou.
•Donotperformanyactionthatcauseshazardstothecustomer,orthatmakestheequipmentunsafe.
•Beforeyoustartthemachine,makesurethatotherservicetechniciansandthecustomer'spersonnelare
notinahazardousposition.
•Placeremovedcoversandotherpartsinasafeplace,awayfromallpersonnel,whileyouareservicing
themachine.
•Keepyourtoolcaseawayfromwalkareassothatotherpeoplewillnottripoverit.
•Donotwearlooseclothingthatcanbetrappedinthemovingpartsofamachine.Makesurethatyour
sleevesarefastenedorrolledupaboveyourelbows.Ifyourhairislong,fastenit.
•Inserttheendsofyournecktieorscarfinsideclothingorfastenitwithanonconductiveclip,about8
centimeters(3inches)fromtheend.
•Donotwearjewelry,chains,metal-frameeyeglasses,ormetalfastenersforyourclothing.
Attention:Metalobjectsaregoodelectricalconductors.
•Wearsafetyglasseswhenyouarehammering,drilling,soldering,cuttingwire,attachingsprings,using
solvents,orworkinginanyotherconditionsthatmightbehazardoustoyoureyes.
•Afterservice,reinstallallsafetyshields,guards,labels,andgroundwires.Replaceanysafetydevice
thatiswornordefective.
•Reinstallallcoverscorrectlybeforereturningthemachinetothecustomer.
•Fanlouversonthemachinehelptopreventoverheatingofinternalcomponents.Donotobstructfan
louversorcoverthemwithlabelsorstickers.
©CopyrightLenovo2010,2012
1
Page 8

Electricalsafety
Observethefollowingruleswhenworkingonelectricalequipment.
Important:
Useonlyapprovedtoolsandtestequipment.Somehandtoolshavehandlescoveredwithasoftmaterial
thatdoesnotinsulateyouwhenworkingwithliveelectricalcurrents.
Manycustomershave,neartheirequipment,rubberoormatsthatcontainsmallconductivebersto
decreaseelectrostaticdischarges.Donotusethistypeofmattoprotectyourselffromelectricalshock.
•Findtheroomemergencypower-off(EPO)switch,disconnectingswitch,orelectricaloutlet.Ifanelectrical
accidentoccurs,youcanthenoperatetheswitchorunplugthepowercordquickly.
•Donotworkaloneunderhazardousconditionsornearequipmentthathashazardousvoltages.
•Disconnectallpowerbefore:
–Performingamechanicalinspection
–Workingnearpowersupplies
–Removingorinstallingmainunits
•Beforeyoustarttoworkonthemachine,unplugthepowercord.Ifyoucannotunplugit,askthecustomer
topower-offthewallboxthatsuppliespowertothemachine,andtolockthewallboxintheoffposition.
•Ifyouneedtoworkonamachinethathasexposedelectricalcircuits,observethefollowingprecautions:
–Ensurethatanotherperson,familiarwiththepower-offcontrols,isnearyou.
Attention:Anotherpersonmustbetheretoswitchoffthepower,ifnecessary.
–Useonlyonehandwhenworkingwithpowered-onelectricalequipment;keeptheotherhandinyour
pocketorbehindyourback.
Attention:Anelectricalshockcanoccuronlywhenthereisacompletecircuit.Byobservingtheabove
rule,youmaypreventacurrentfrompassingthroughyourbody.
–Whenusingtesters,setthecontrolscorrectlyandusetheapprovedprobeleadsandaccessoriesfor
thattester.
–Standonsuitablerubbermats(obtainedlocally,ifnecessary)toinsulateyoufromgroundssuchas
metaloorstripsandmachineframes.
Observethespecialsafetyprecautionswhenyouworkwithveryhighvoltages;Instructionsforthese
precautionsareinthesafetysectionsofmaintenanceinformation.Useextremecarewhenmeasuring
highvoltages.
•Regularlyinspectandmaintainyourelectricalhandtoolsforsafeoperationalcondition.
•Donotusewornorbrokentoolsandtesters.
•Neverassumethatpowerhasbeendisconnectedfromacircuit.First,checkthatithasbeenpoweredoff.
•Alwayslookcarefullyforpossiblehazardsinyourworkarea.Examplesofthesehazardsaremoistoors,
nongroundedpowerextensioncables,powersurges,andmissingsafetygrounds.
•Donottouchliveelectricalcircuitswiththereectivesurfaceofaplasticdentalmirror.Thesurfaceis
conductive;suchtouchingcancausepersonalinjuryandmachinedamage.
•Donotservicethefollowingpartswiththepoweronwhentheyareremovedfromtheirnormaloperating
placesinamachine:
–Powersupplyunits
–Pumps
–Blowersandfans
–Motorgenerators
–Similarunitstolistedabove
Thispracticeensurescorrectgroundingoftheunits.
•Ifanelectricalaccidentoccurs:
2HardwareMaintenanceManual
Page 9

–Usecaution;donotbecomeavictimyourself.
–Switchoffpower.
–Sendanotherpersontogetmedicalaid.
Safetyinspectionguide
Thepurposeofthisinspectionguideistoassistyouinidentifyingpotentiallyunsafeconditions.Aseach
machinewasdesignedandbuilt,requiredsafetyitemswereinstalledtoprotectusersandservicetechnicians
frominjury.Thisguideaddressesonlythoseitems.Youshouldusegoodjudgmenttoidentifypotential
safetyhazardsduetoattachmentofnon-ThinkPadfeaturesoroptionsnotcoveredbythisinspectionguide.
Ifanyunsafeconditionsarepresent,youmustdeterminehowserioustheapparenthazardcouldbeand
whetheryoucancontinuewithoutrstcorrectingtheproblem.
Considertheseconditionsandthesafetyhazardstheypresent:
•Electricalhazards,especiallyprimarypower(primaryvoltageontheframecancauseseriousorfatal
electricalshock)
•Explosivehazards,suchasadamagedCRTfaceorabulgingcapacitor
•Mechanicalhazards,suchaslooseormissinghardware
Todeterminewhetherthereareanypotentiallyunsafeconditions,usethefollowingchecklistatthebeginning
ofeveryservicetask.Beginthecheckswiththepoweroff,andthepowercorddisconnected.
Checklist:
1.Checkexteriorcoversfordamage(loose,broken,orsharpedges).
2.Poweroffthecomputer.Disconnectthepowercord.
3.Checkthepowercordfor:
a.Athird-wiregroundconnectoringoodcondition.Useametertomeasurethird-wireground
continuityfor0.1ohmorlessbetweentheexternalgroundpinandtheframeground.
b.Thepowercordshouldbethetypespeciedinthepartslist.
c.Insulationmustnotbefrayedorworn.
4.Checkforcrackedorbulgingbatteries.
5.Removethecover.
6.Checkforanyobviousnon-ThinkPadalterations.Usegoodjudgmentastothesafetyofany
non-ThinkPadalterations.
7.Checkinsidetheunitforanyobviousunsafeconditions,suchasmetallings,contamination,wateror
otherliquids,orsignsofreorsmokedamage.
8.Checkforworn,frayed,orpinchedcables.
9.Checkthatthepower-supplycoverfasteners(screwsorrivets)havenotbeenremovedortamperedwith.
Handlingdevicesthataresensitivetoelectrostaticdischarge
Anycomputerpartcontainingtransistorsorintegratedcircuits(ICs)shouldbeconsideredsensitiveto
electrostaticdischarge(ESD.)ESDdamagecanoccurwhenthereisadifferenceinchargebetweenobjects.
ProtectagainstESDdamagebyequalizingthechargesothatthemachine,thepart,theworkmat,andthe
personhandlingthepartareallatthesamecharge.
Notes:
1.Useproduct-specicESDprocedureswhentheyexceedtherequirementsnotedhere.
Chapter1.Safetyinformation3
Page 10

2.MakesurethattheESDprotectivedevicesyouusehavebeencertied(ISO9000)asfullyeffective.
WhenhandlingESD-sensitiveparts:
•Keepthepartsinprotectivepackagesuntiltheyareinsertedintotheproduct.
•Avoidcontactwithotherpeople.
•Wearagroundedwriststrapagainstyourskintoeliminatestaticonyourbody.
•Preventthepartfromtouchingyourclothing.Mostclothingisinsulativeandretainsachargeevenwhen
youarewearingawriststrap.
•Useagroundedworkmattoprovideastatic-freeworksurface.Thematisespeciallyusefulwhen
handlingESD-sensitivedevices.
•Selectagroundingsystem,suchasthoselistedbelow,toprovideprotectionthatmeetsthespecic
servicerequirement.
Note:TheuseofagroundingsystemtoguardagainstESDdamageisdesirablebutnotnecessary.
–AttachtheESDgroundcliptoanyframeground,groundbraid,orgreen-wireground.
–Whenworkingonadouble-insulatedorbattery-operatedsystem,useanESDcommongroundor
referencepoint.Y oucanusecoaxorconnector-outsideshellsonthesesystems.
–Usetheroundgroundprongoftheacplugonac-operatedcomputers.
Groundingrequirements
Electricalgroundingofthecomputerisrequiredforoperatorsafetyandcorrectsystemfunction.Proper
groundingoftheelectricaloutletcanbeveriedbyacertiedelectrician.
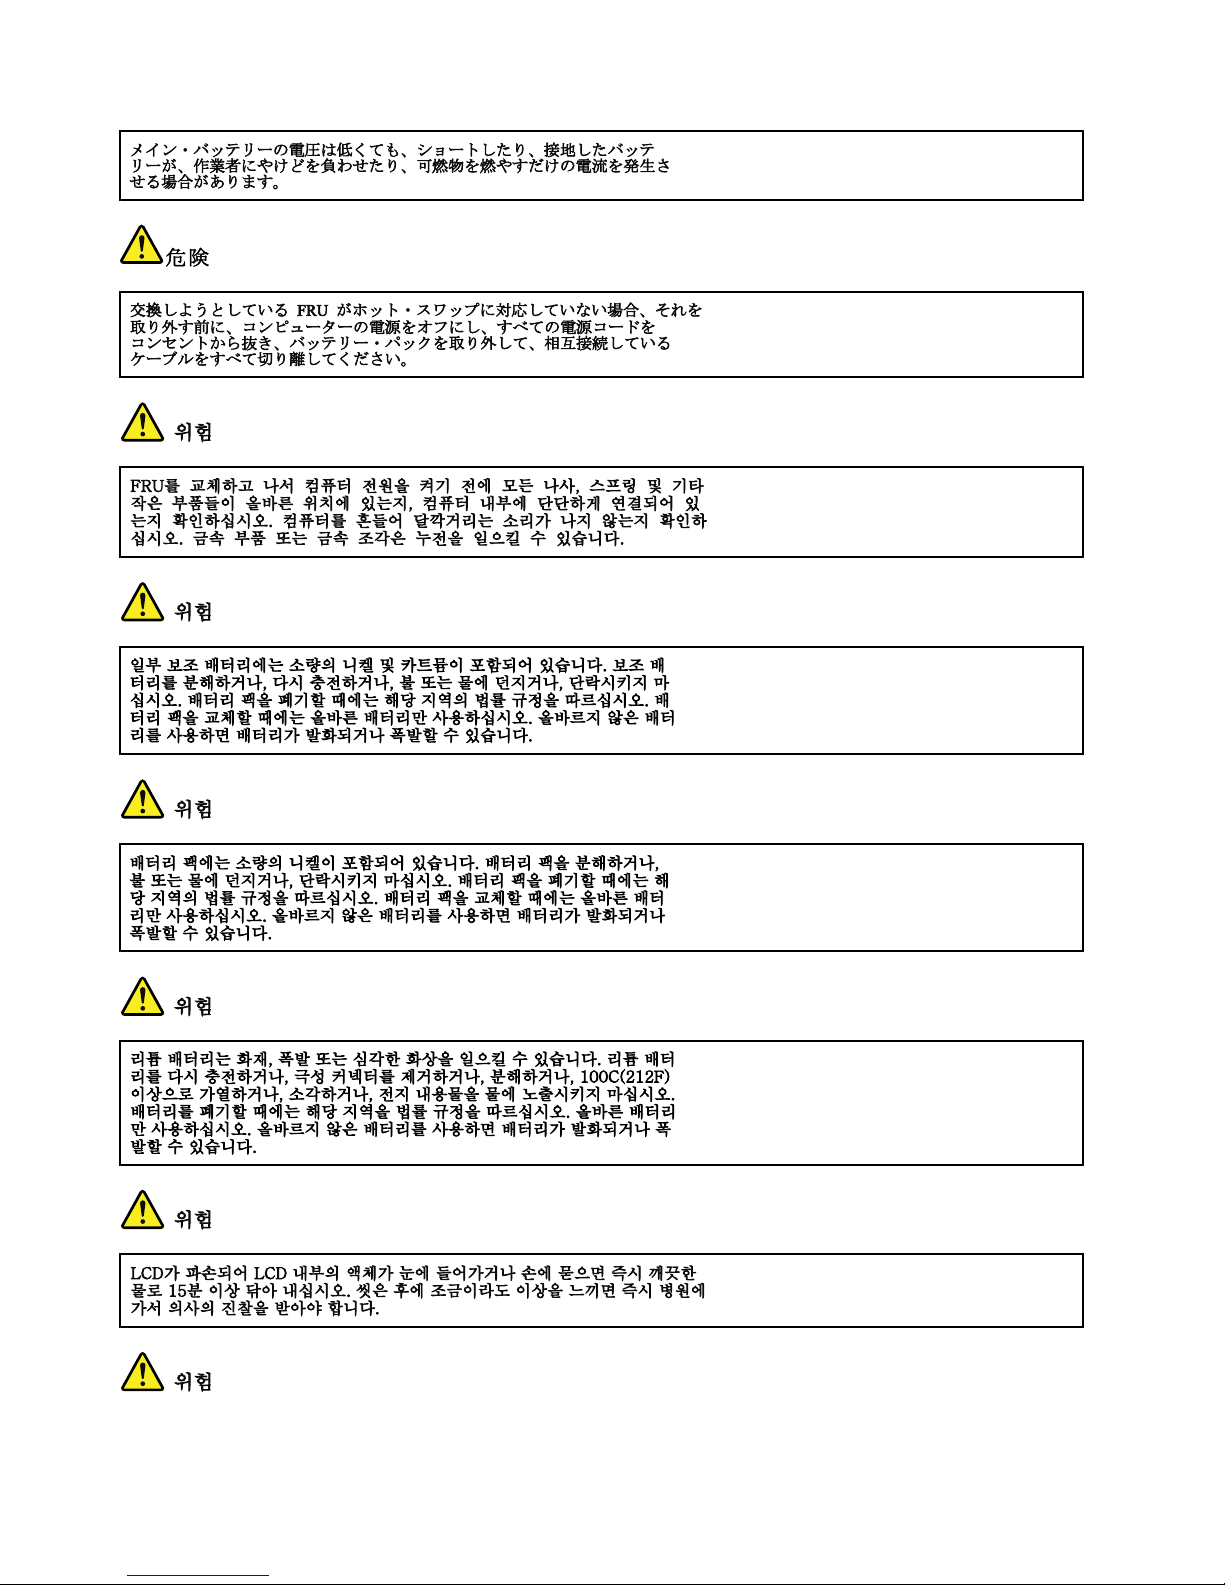
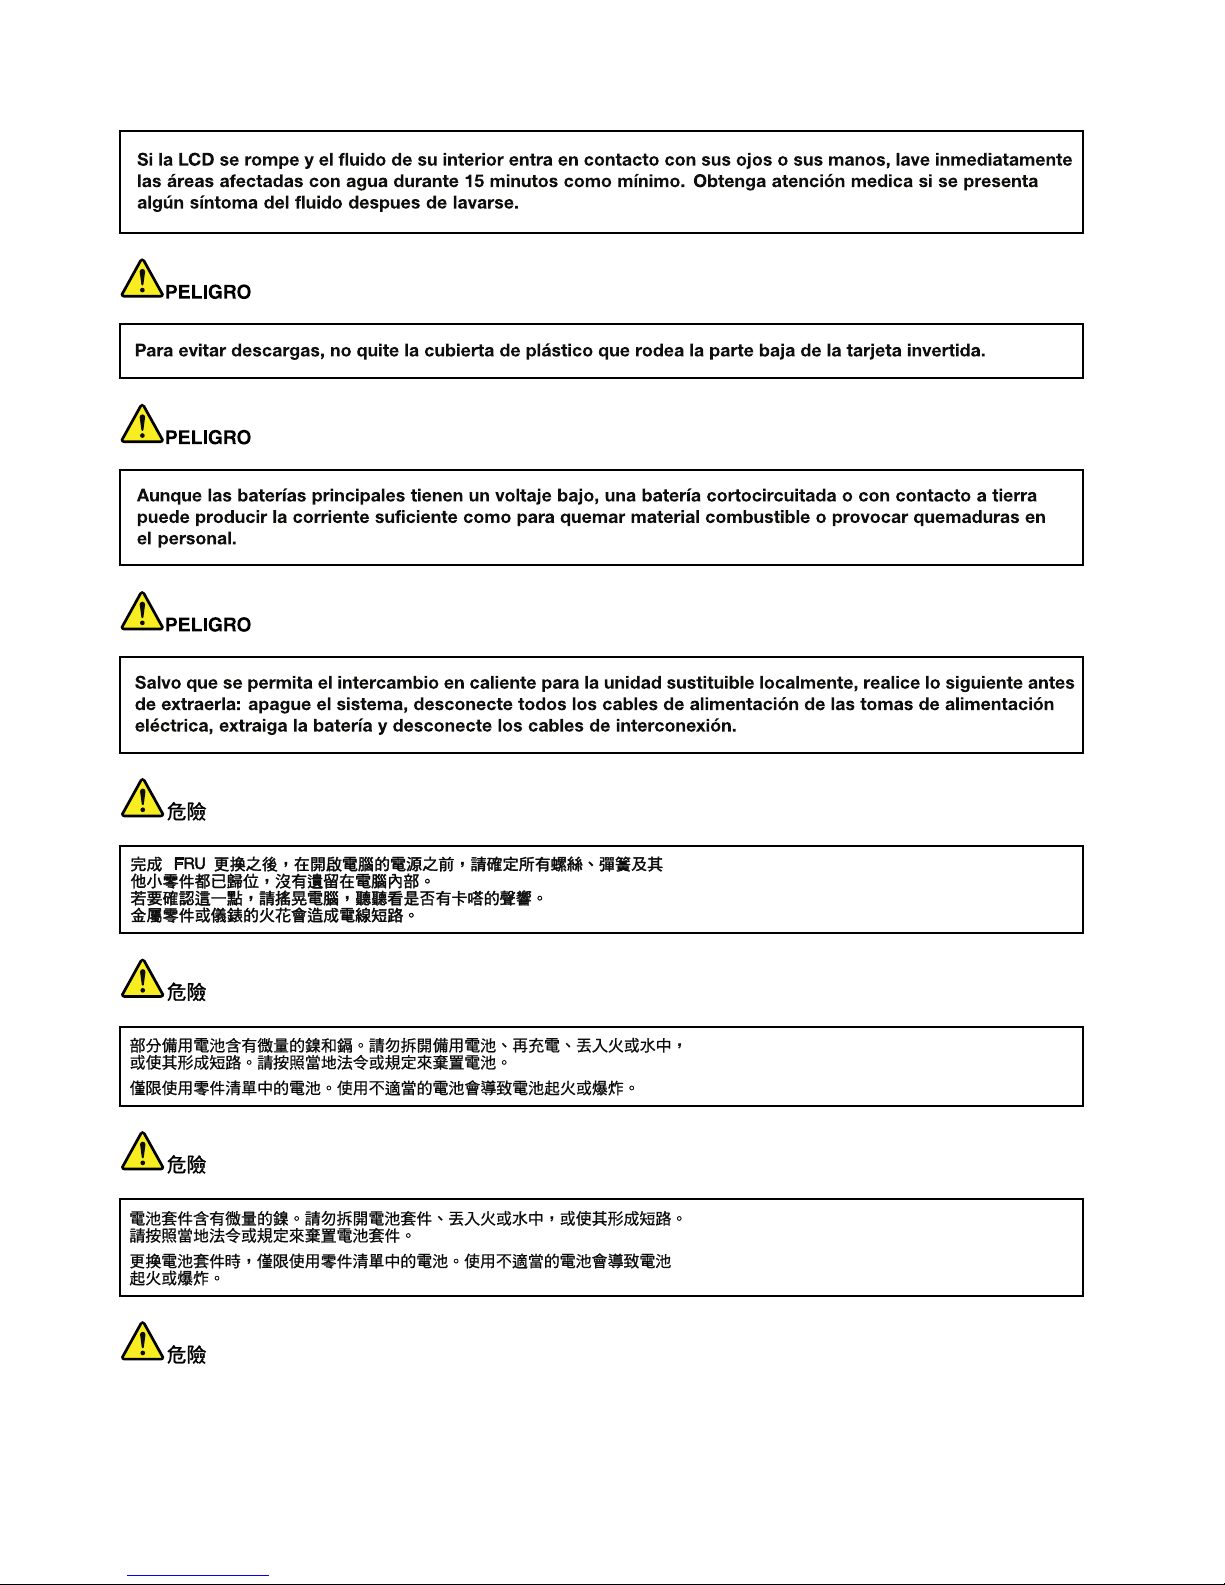
Safetynotices(multilingualtranslations)
Thesafetynoticesinthissectionareprovidedinthefollowinglanguages:
•English
•Arabic
•BrazilianPortuguese
•French
•German
•Hebrew
•Japanese
•Korean
•Spanish
•T raditionalChinese
DANGER
DANGER
4HardwareMaintenanceManual
Page 11
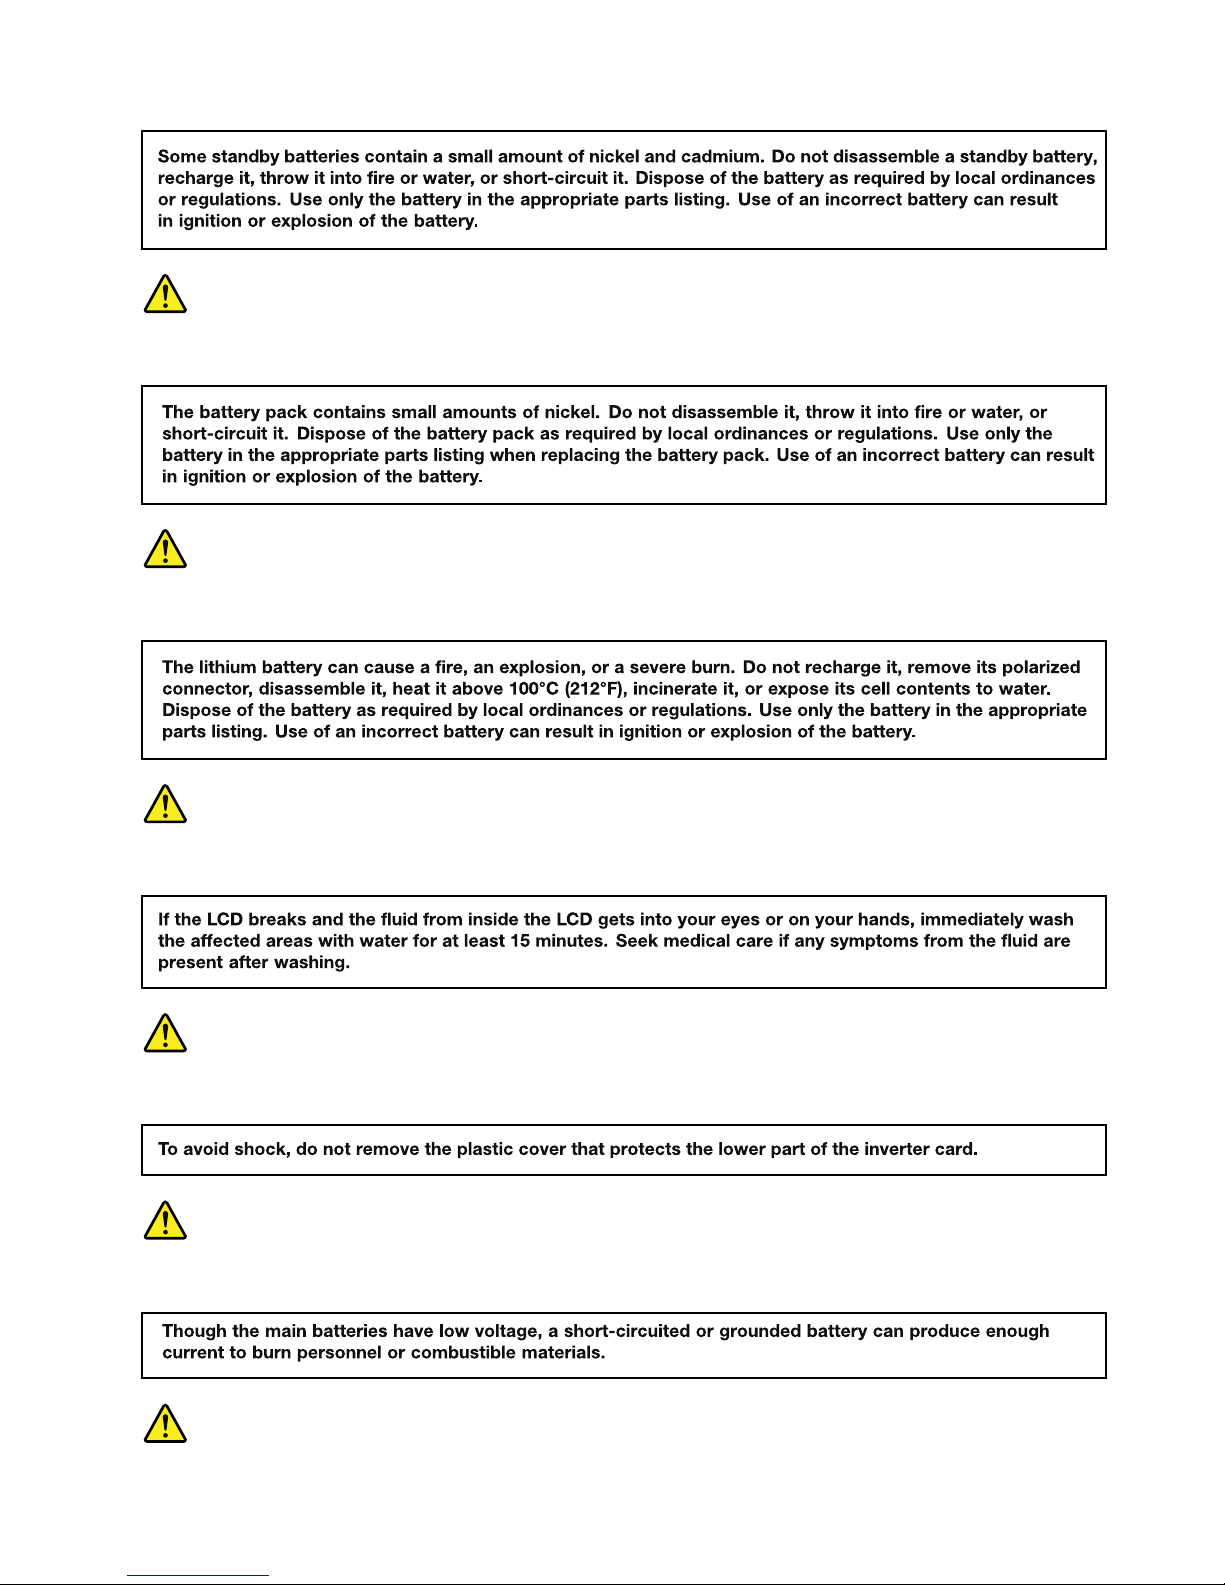
DANGER
DANGER
DANGER
DANGER
DANGER
Chapter1.Safetyinformation5
Page 12
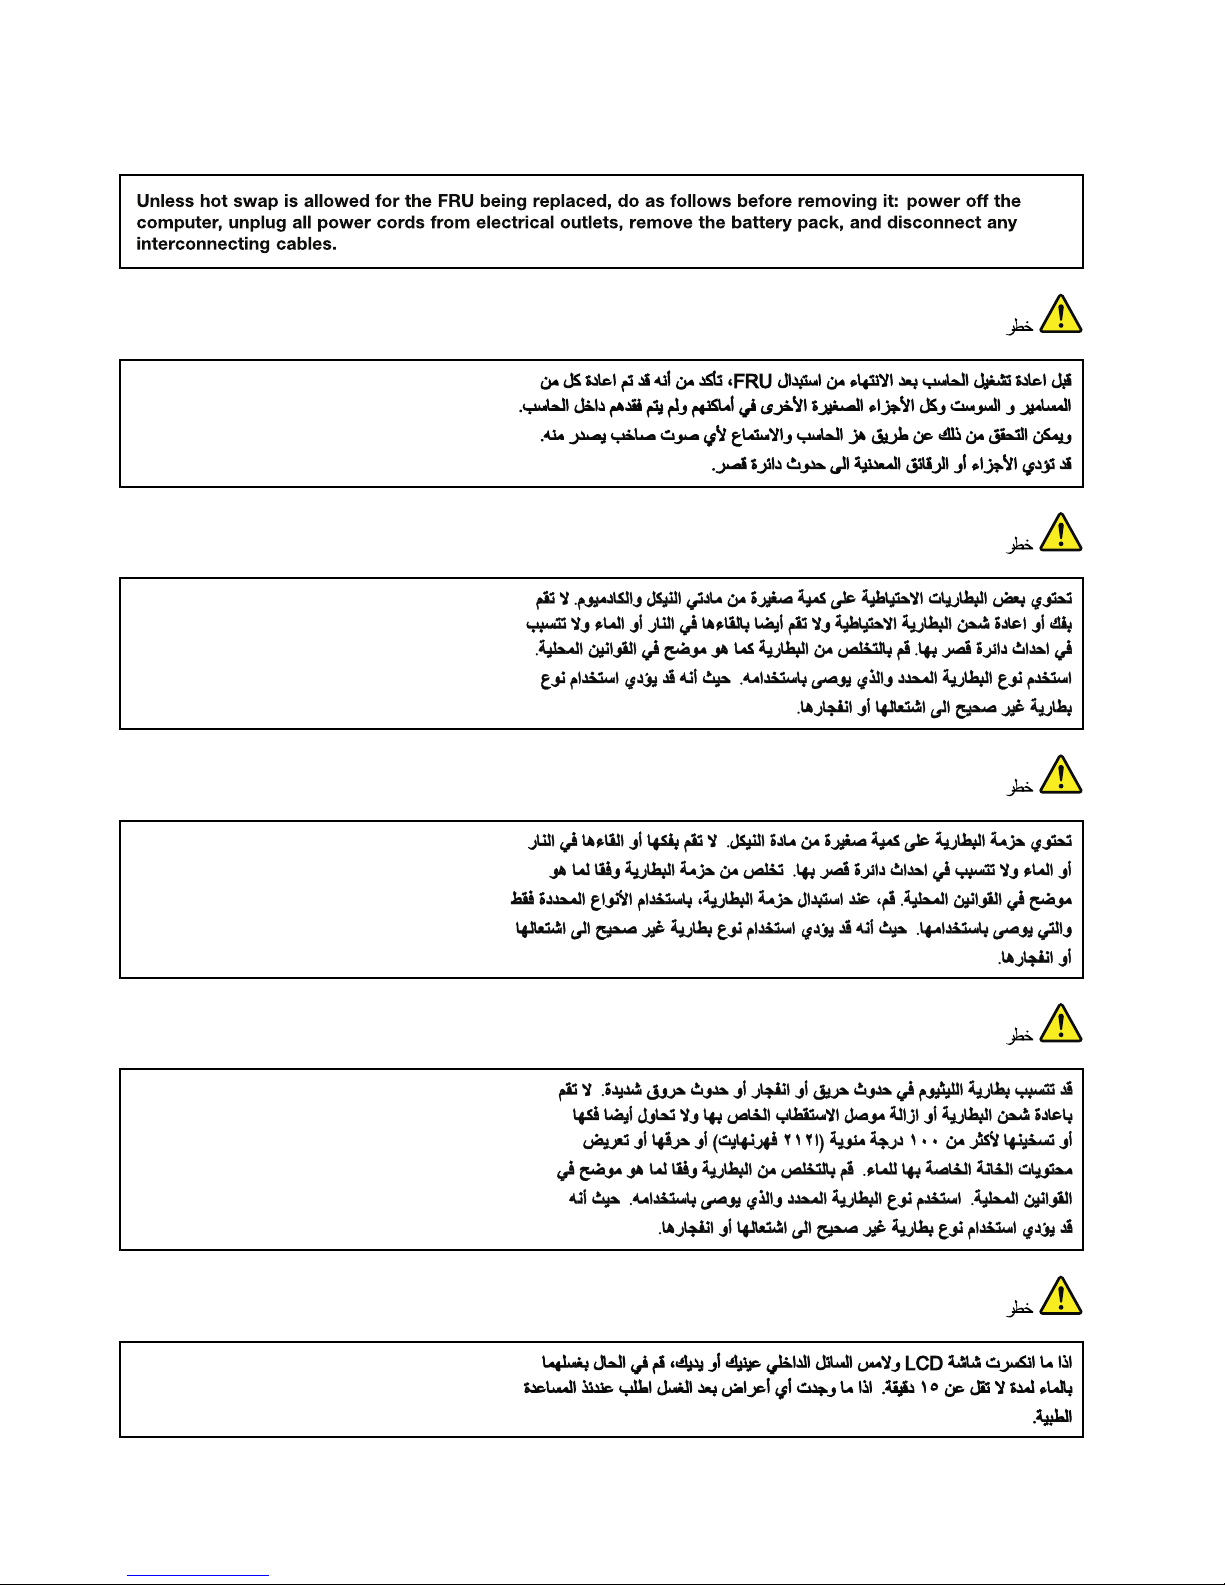
DANGER
6HardwareMaintenanceManual
Page 13
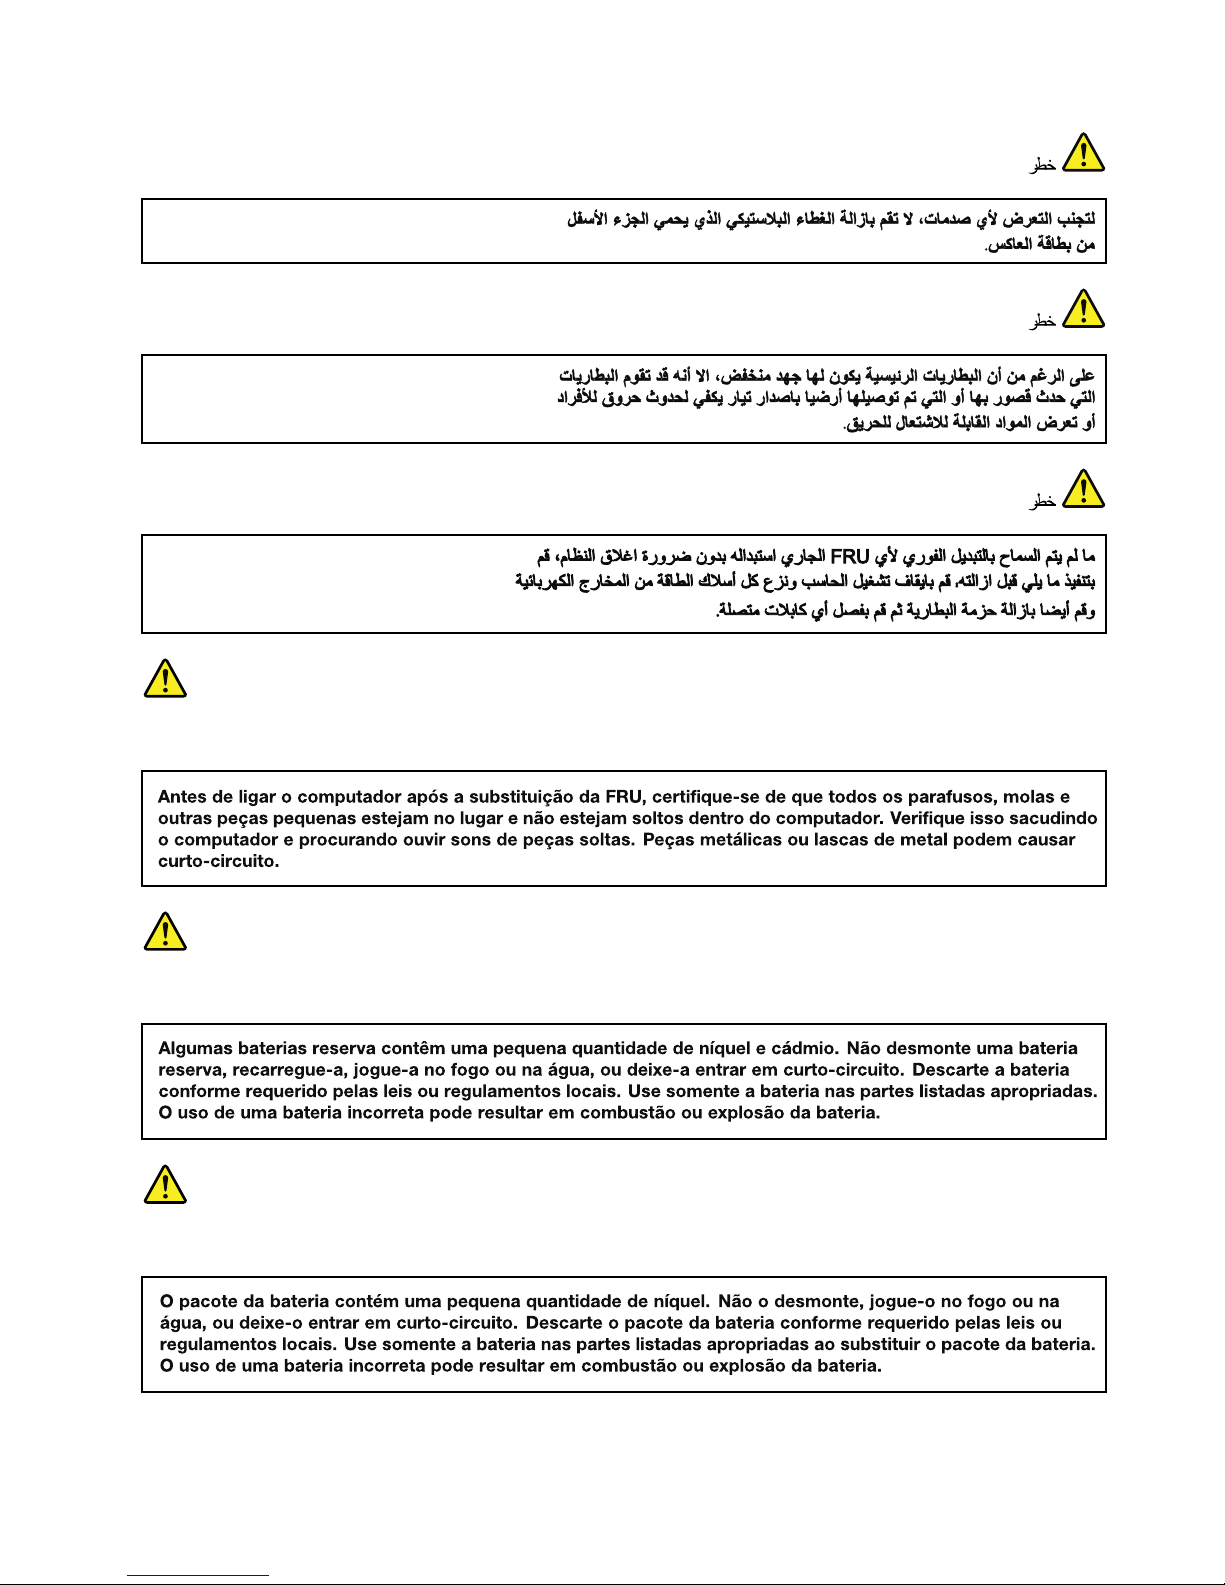
PERIGO
PERIGO
PERIGO
Chapter1.Safetyinformation7
Page 14

PERIGO
PERIGO
PERIGO
PERIGO
PERIGO
DANGER
8HardwareMaintenanceManual
Page 15
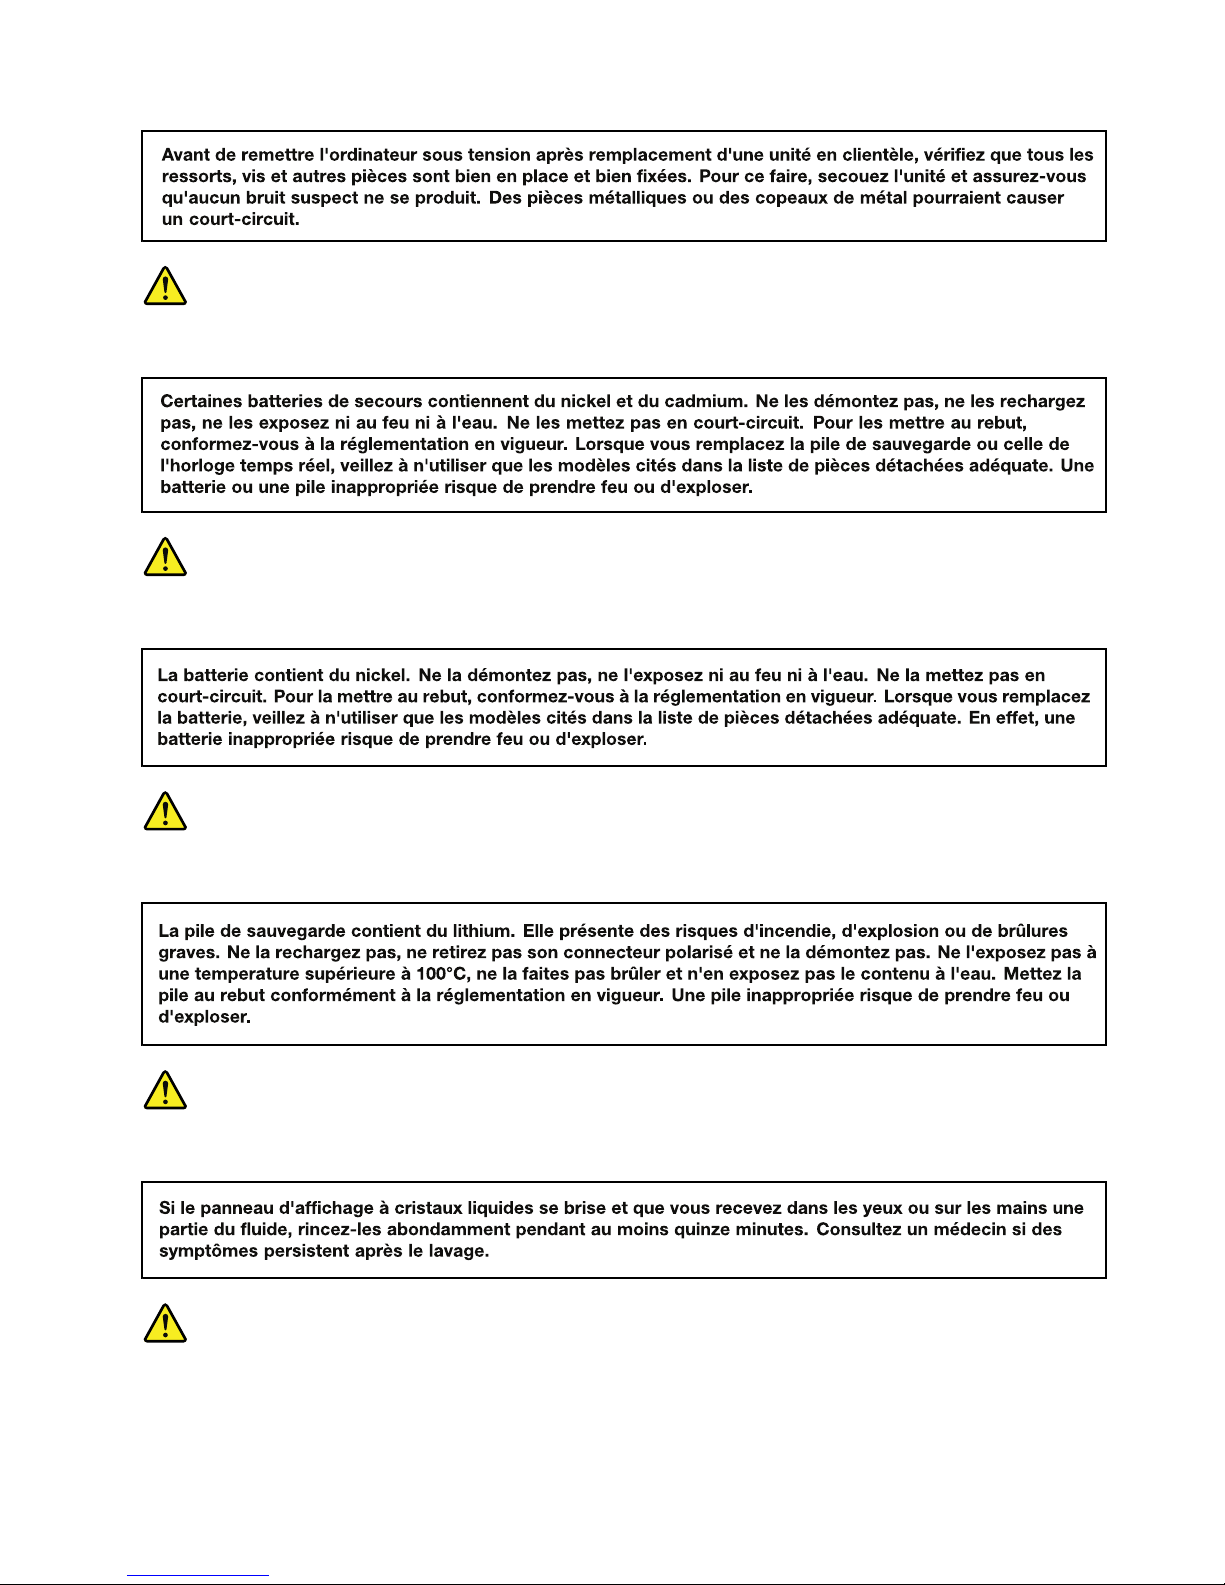
DANGER
DANGER
DANGER
DANGER
DANGER
Chapter1.Safetyinformation9
Page 16
DANGER
DANGER
VORSICHT
VORSICHT
VORSICHT
10HardwareMaintenanceManual
Page 17
VORSICHT
VORSICHT
VORSICHT
VORSICHT
VORSICHT
Chapter1.Safetyinformation11
Page 18
12HardwareMaintenanceManual
Page 19
Chapter1.Safetyinformation13
Page 20
14HardwareMaintenanceManual
Page 21

Chapter1.Safetyinformation15
Page 22
16HardwareMaintenanceManual
Page 23
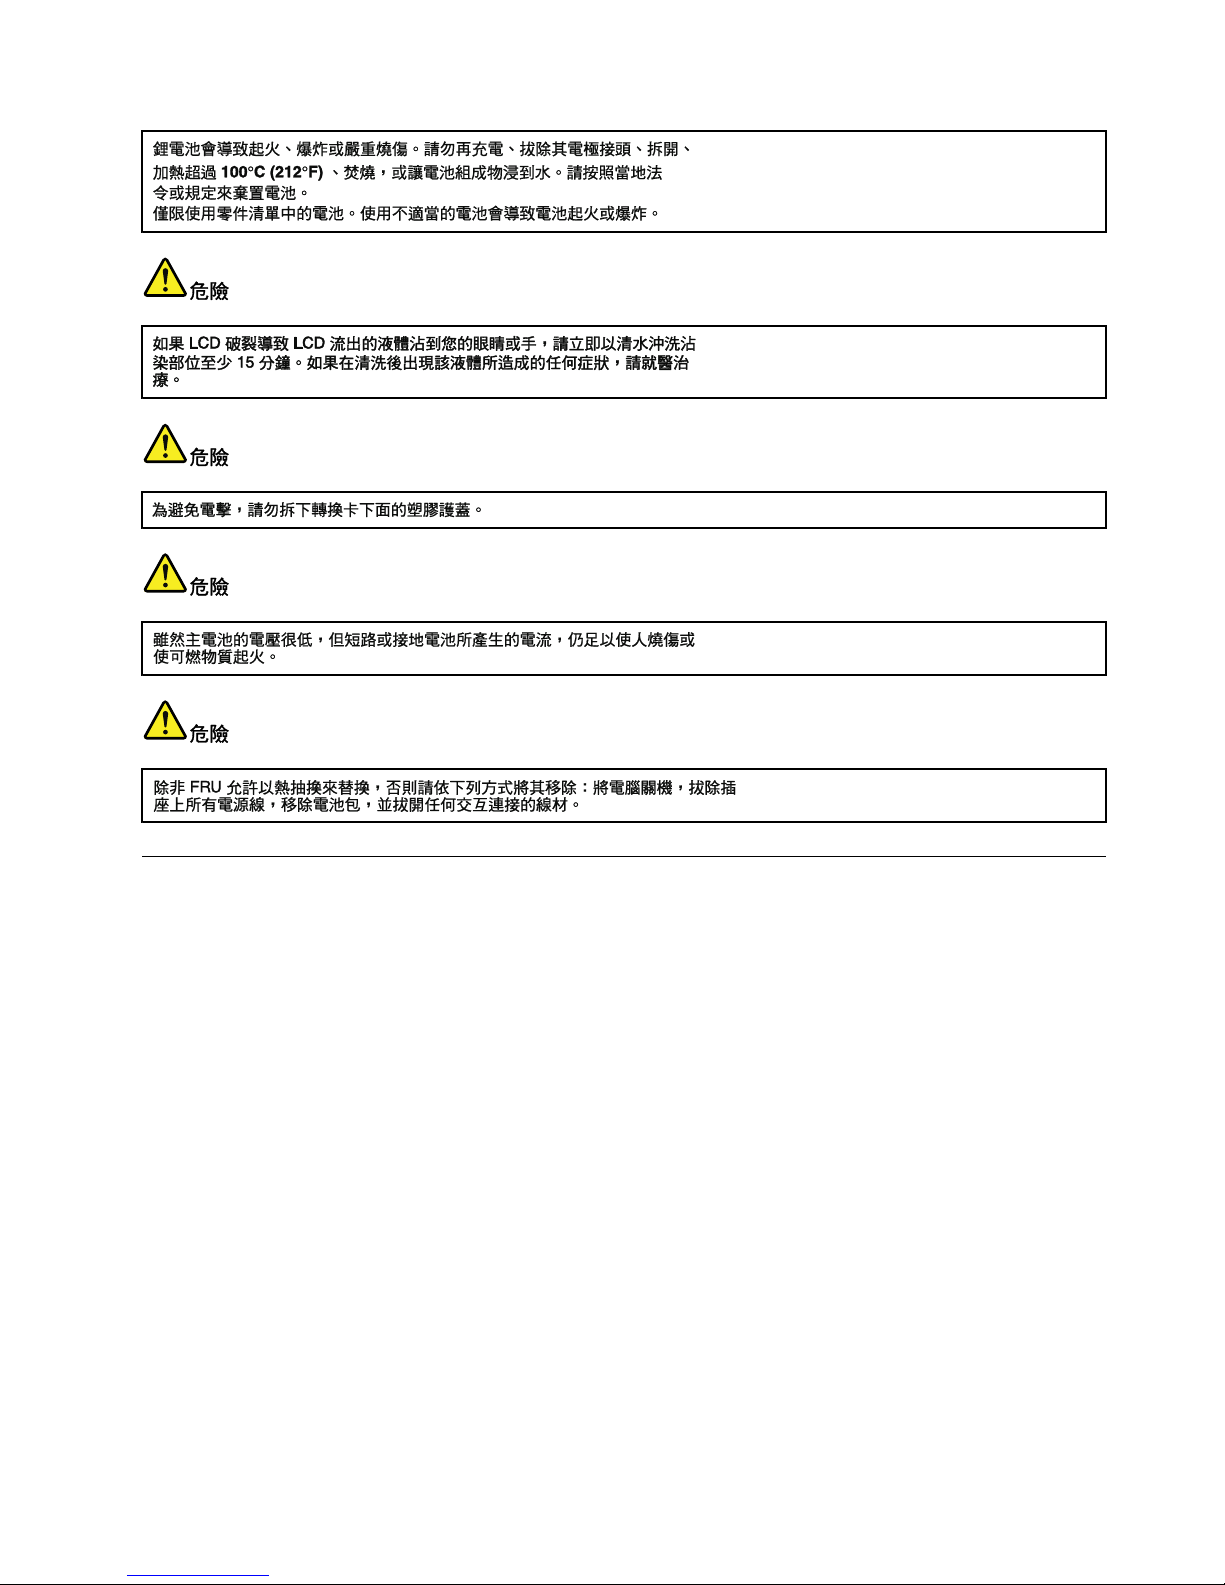
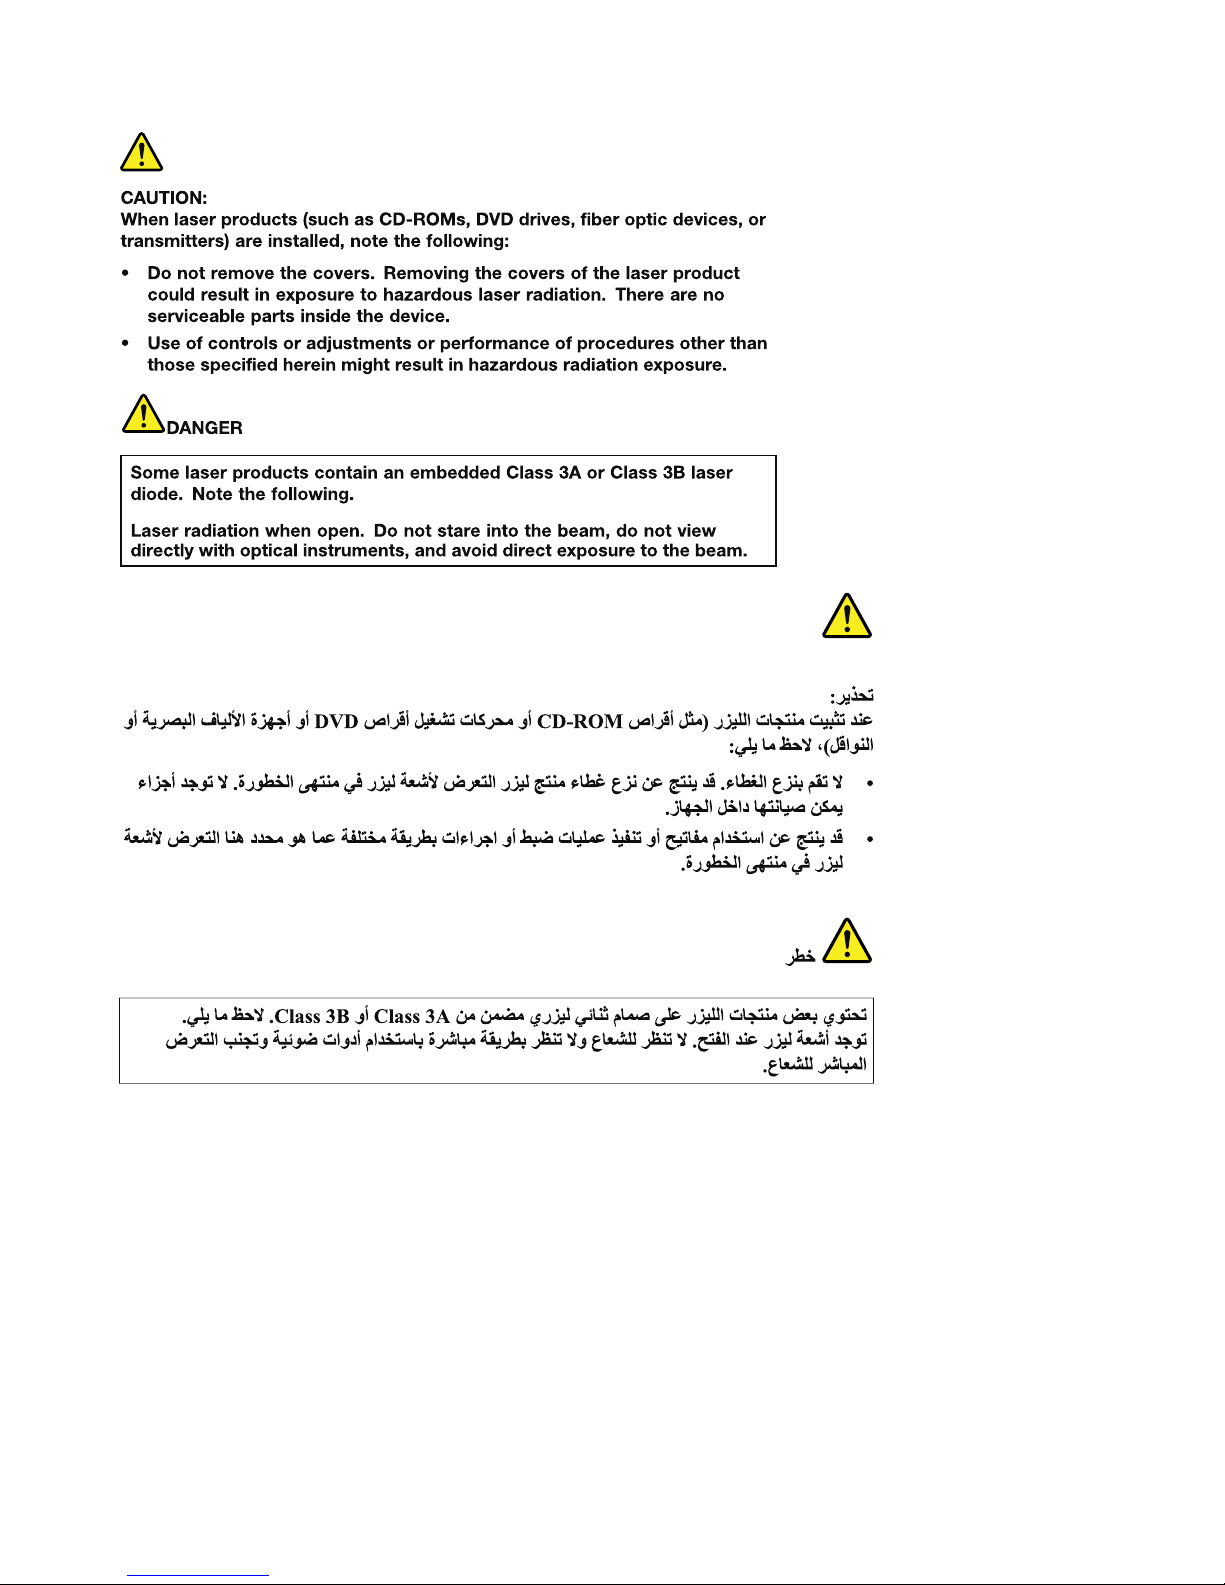
Lasercompliancestatement(multilingualtranslations)
Thelasercompliancestatementsinthissectionareprovidedinthefollowinglanguages:
•English
•Arabic
•BrazilianPortuguese
•French
•German
•Hebrew
•Japanese
•Korean
•Spanish
•T raditionalChinese
Chapter1.Safetyinformation17
Page 24
18HardwareMaintenanceManual
Page 25
Chapter1.Safetyinformation19
Page 26
20HardwareMaintenanceManual
Page 27
Chapter1.Safetyinformation21
Page 28
22HardwareMaintenanceManual
Page 29

Chapter2.Importantserviceinformation
Thischapterpresentsfollowingimportantserviceinformationthatappliestoallmachinetypessupportedby
thismanual:
•“StrategyforreplacingFRUs”onpage23
–“Strategyforreplacingaharddiskdrive”onpage24
–“Importantnoticeforreplacingasystemboard”onpage24
–“Howtouseerrormessage”onpage24
•“StrategyforreplacingFRUsforCTO,CMV ,andGAV”onpage25
–“Productdenition”onpage25
–“FRUidenticationforCTO,CMV ,andGAVproducts”onpage25
Important:
•AdvisecustomerstocontacttheLenovoCustomerSupportCenteriftheyneedanyassistancein
obtainingorinstallinganysoftwarexes,drivers,andBIOSdownloads.T elephonenumbersforLenovo
Supportareavailableat:
http://www.lenovo.com/support/phone
•SystemDisassembly/ReassemblyvideosthatshowtheFRUremovalsorreplacements
fortheLenovo
®
authorizedservicetechniciansareavailableinthefollowingsupportsite:
http://www.lenovoservicetraining.com/ion/
StrategyforreplacingFRUs
Beforereplacingparts:
Makesurethatallsoftwarexes,drivers,andBIOSdownloadsareinstalledbeforereplacinganyFRUs
listedinthismanual.
Afterasystemboardisreplaced,ensurethatthelatestBIOSisloadedtothesystemboardbefore
completingtheserviceaction.
Todownloadsoftwarexes,drivers,andBIOS,gotohttp://www.lenovo.com/supportandclickDownload
Drivers&Software.Thenfollowtheinstructionsonthescreentoinstallthenecessarysoftware.
UsethefollowingstrategytopreventunnecessaryexpenseforreplacingandservicingFRUs:
•IfyouareinstructedtoreplaceaFRUbutthereplacementdoesnotcorrecttheproblem,reinstall
theoriginalFRUbeforeyoucontinue.
•Somecomputershavebothaprocessorboardandasystemboard.Ifyouareinstructedtoreplaceeither
theprocessorboardorthesystemboard,andreplacingoneofthemdoesnotcorrecttheproblem,
reinstallthatboard,andthenreplacetheotherone.
•IfanadapteroradeviceconsistsofmorethanoneFRU,anyoftheFRUsmaybethecauseoftheerror.
Beforereplacingtheadapterordevice,removetheFRUs,onebyone,toseeifthesymptomschange.
ReplaceonlytheFRUthatchangedthesymptoms.
Attention:Thesetupcongurationonthecomputeryouareservicingmayhavebeencustomized.Running
AutomaticCongurationmayalterthesettings.Notethecurrentcongurationsettings(usingtheView
Congurationoption);then,whenservicehasbeencompleted,verifythatthosesettingsremainineffect.
©CopyrightLenovo2010,2012
23
Page 30

Strategyforreplacingaharddiskdrive
Alwaystrytorunalow-levelformatbeforereplacingaharddiskdrive.Thiswillcauseallcustomerdataon
theharddisktobelost.Besurethatthecustomerhasacurrentbackupofthedatabeforedoingthistask.
Attention:Thedrivestartupsequenceinthecomputeryouareservicingmayhavebeenchanged.Be
extremelycarefulduringwriteoperationssuchascopying,saving,orformatting.Ifyouselectanincorrect
drive,dataorprogramscanbeoverwritten.
Importantnoticeforreplacingasystemboard
Somecomponentsmountedonasystemboardareverysensitive.Improperhandlingofasystemboardcan
causedamagetothosecomponents,andmaycauseasystemmalfunction.
Attention:Whenhandlingasystemboard:
•Donotdropasystemboardorapplyanyexcessiveforcetoit.
•Avoidroughhandlingofanykind.
•AvoidbendingasystemboardandhardpushingtopreventcrackingateachBGA(BallGridArray)chipset.
Howtouseerrormessage
Usetheerrorcodesdisplayedonthescreentodiagnosefailures.Ifmorethanoneerrorcodeisdisplayed,
beginthediagnosiswiththersterrorcode.Whatevercausesthersterrorcodemayalsocausefalseerror
codes.Ifnoerrorcodeisdisplayed,seewhethertheerrorsymptomislistedintheSymptom-to-FRU
Indexforthecomputeryouareservicing.
24HardwareMaintenanceManual
Page 31

StrategyforreplacingFRUsforCTO,CMV ,andGAV
Productdenition
DynamicCongureT oOrder(CTO)
ThisprovidestheabilityforacustomertocongureaLenovosolutionfromaneSite,andhavethis
congurationsenttofulllment,whereitisbuiltandshippeddirectlytothecustomer.Themachinelabel,
ProductEntitlementWarehouse(PEW),eSupport,andtheHMMwillloadtheseproductsasthe4-digitMT
and3-digitmodel,wheremodel=“CTO”(Example:1829-CTO).
CustomModelVariant(CMV)
ThisisauniquecongurationthathasbeennegotiatedbetweenLenovoandthecustomer.Aunique4-digit
MTand3-digitmodelisprovidedtothecustomertoplaceorders(Example:1829-W15).ACMVisaspecial
bidoffering.Therefore,itisNOTgenerallyannounced.
•TheMTMportionofthemachinelabelisthe4-digitMTand3-digitmodel,wheremodel=“CTO”
(Example:1829-CTO).ThePRODUCTIDportionofthemachinelabelisthe4-digitMTand3-digitCMV
model(Example:1829-W15).
•ThePEWrecordisthe4-digitMTand3-digitmodel,wheremodel=“CTO”(Example:1829-CTO).
•eSupportwillshowboththeCTOandCMVmachinetypemodels(Example:1829-CTOand1829-W15
willbefoundontheeSupportsite.)
•TheHMMwillhavethe4-digitMTand3-digitCTOmodelonly(Example:1829-CTO).Again,CMVsare
custommodelsandarenotfoundintheHMM.
GeneralAnnounceVariant(GAV)
Thisisastandardmodel(xedconguration).GAVsareannouncedandofferedtoallcustomers.TheMTM
portionofthemachinelabelisa4-digitMTand3-digitmodel,wheremodel=a“xedpartnumber”,not
“CTO”(Example:1829-F1U).Also,PEW ,eSupport,andtheHMMwilllisttheseproductsunderthesame
xedmodelnumber.
FRUidenticationforCTO,CMV,andGAVproducts
TherearethreeinformationresourcestoidentifywhichFRUsareusedtosupportCTO,CMV ,andGAV
products.ThesesourcesarePEW,eSupport,andtheHardwareMaintenanceManual.
UsingPEW
•PEWistheprimarysourceforidentifyingFRUpartnumbersandFRUdescriptionsforthekeycommodities
forCTO,CMVandGAVproductsataMT-serialnumberlevel.Anexampleofkeycommoditiesarehard
diskdrives,systemboards,microprocessors,LiquidCrystalDisplays(LCDs),andmemory.
•Remember,allCTOandCMVproductsareloadedinPEWunderthe4-digitMTand3-digitmodel,where
model=“CTO”(Example:1829-CTO).GAVsareloadedinPEWunderthe4-digitMTand3-digitmodel,
wheremodel=a“xedpartnumber”,not“CTO”(Example:1829-F1U).
•PEWcanbeaccessedatthefollowingWebsite:
http://www.lenovo.com/support/site.wss/document.do?lndocid=LOOK-WARNTY
SelectWarrantylookup.InputtheMTandtheSerialnumberandthelistofkeycommoditieswillbe
returnedinthePEWrecordunderCOMPONENTINFORMATION.
UsingeSupport
Forkeycommodities(examples-harddiskdrive,systemboard,microprocessor,LCD,andmemory)
Chapter2.Importantserviceinformation25
Page 32

eSupportcanbeusedtoviewthewarrantystatusofkeycommoditiesbuiltinaparticularmachineserial(this
isthesamerecordfoundinPEW).eSupportcanbeaccessedathttp://www.lenovo.com/support.
Toviewthewarrantystatusofthekeycommoditiesonyourcomputer,dothefollowing:
1.Gotohttp://www.lenovo.com/support.
2.ClickWarranty&Services.
3.ClickCheckWarrantyStatus.
4.OntheWarrantyStatusLookuppage,clickPartsLookup.
5.T ypeyourmachinetypeandserialnumber,andthenclickSubmit.
FortheremainingFRUs(thecompletelistofFRUsattheMTmodellevel)
eSupportalsocanbeusedtoviewthecompletelistofFRUsforamachinetypeandmodel.
ToviewthecompletelistofFRUs,dothefollowing:
1.Gotohttp://www.lenovo.com/support.
2.ClickParts&Accessories.
3.ProvideyourproductinformationorclickLaunchtoautomaticallyidentifyyourproduct.
4.ClickProduct&PartsDetail.
5.OnthePRODUCTANDPARTSDETAILpage,clickPartsDetailtoviewthecompletelistofFRUs.
UsingtheHardwareMaintenanceManual
Forkeycommodities(examples-harddiskdrive,systemboard,microprocessor,LCD,andmemory)
UsetheHardwareMaintenanceManualasabackuptoPEWandeSupporttoviewthecompletelistof
FRUsattheMTmodellevel.
26HardwareMaintenanceManual
Page 33

Chapter3.Generalcheckout
Thischapterpresentsfollowinginformation:
•“Whattodorst”onpage27
•“Checkoutguide”onpage28
–“SystemsupportingtheLenovoThinkVantageT oolboxprogramandthePC-DoctorforDOS
diagnosticsprogram”onpage28
–“SystemsupportingtheLenovodiagnosticsprograms”onpage34
•“Powersystemcheckout”onpage36
Beforeyougotothecheckoutguide,besuretoreadthefollowingimportantnotes.
Importantnotes:
•Onlycertiedtrainedpersonnelshouldservicethecomputer.
•BeforereplacinganyFRU,readtheentirepageonremovingandreplacingFRUs.
•WhenyoureplaceFRUs,itisrecommendedtousenewnylon-coatedscrews.
•Beextremelycarefulduringsuchwriteoperationsascopying,saving,orformatting.Drivesinthecomputer
thatyouareservicingsequencemighthavebeenaltered.Ifyouselectanincorrectdrive,dataorprograms
mightbeoverwritten.
•ReplaceaFRUonlywithanotherFRUofthecorrectmodel.WhenyoureplaceaFRU,makesurethatthemodel
ofthemachineandtheFRUpartnumberarecorrectbyreferringtotheFRUpartslist.
•AFRUshouldnotbereplacedbecauseofasingle,unreproduciblefailure.Singlefailurescanoccurfora
varietyofreasonsthathavenothingtodowithahardwaredefect,suchascosmicradiation,electrostaticdischarge,
orsoftwareerrors.ConsiderreplacingaFRUonlywhenaproblemrecurs.IfyoususpectthataFRUisdefective,
cleartheerrorlogandrunthetestagain.Iftheerrordoesnotrecur,donotreplacetheFRU.
•BecarefulnottoreplaceanondefectiveFRU.
Whattodorst
WhenyoudoreturnaFRU,youmustincludethefollowinginformationinthepartsexchangeformor
partsreturnformthatyouattachtoit:
1.Nameandphonenumberofservicetechnician
2.Dateofservice
3.Dateonwhichthemachinefailed
4.Dateofpurchase
5.Failuresymptoms,errorcodesappearingonthedisplay,andbeepsymptoms
6.ProcedureindexandpagenumberinwhichthefailingFRUwasdetected
7.FailingFRUnameandpartnumber
8.Machinetype,modelnumber,andserialnumber
9.Customer'snameandaddress
Note:Duringthewarrantyperiod,thecustomermayberesponsibleforrepaircostsifthecomputerdamage
wascausedbymisuse,accident,modication,unsuitablephysicaloroperatingenvironment,orimproper
maintenancebythecustomer.Followingisalistofsomecommonitemsthatarenotcoveredunderwarranty
andsomesymptomsthatmightindicatethatthesystemwassubjectedtostressbeyondnormaluse.
Beforecheckingproblemswiththecomputer,determinewhetherthedamageiscoveredunderthewarranty
byreferringtothefollowinglist:
Thefollowingarenotcoveredunderwarranty:
•LCDpanelcrackedfromtheapplicationofexcessiveforceorfrombeingdropped
•Scratched(cosmetic)parts
©CopyrightLenovo2010,2012
27
Page 34

•Distortion,deformation,ordiscolorationofthecosmeticparts
•Plasticparts,latches,pins,orconnectorsthathavebeencrackedorbrokenbyexcessiveforce
•Damagecausedbyliquidspilledintothesystem
•DamagecausedbytheimproperinsertionofaPCCardortheinstallationofanincompatiblecard
•Improperdiscinsertionoruseofanopticaldrive
•Diskettedrivedamagecausedbypressureonthediskettedrivecover,foreignmaterialinthedrive,
ortheinsertionofadiskettewithmultiplelabels
•Damagedorbentdisketteejectbutton
•Fusesblownbyattachmentofanonsupporteddevice
•Forgottencomputerpassword(makingthecomputerunusable)
•Stickykeyscausedbyspillingaliquidontothekeyboard
•Useofanincorrectacadapteronlaptopproducts
Thefollowingsymptomsmightindicatedamagecausedbynonwarrantedactivities:
•Missingpartsmightbeasymptomofunauthorizedserviceormodication.
•Ifthespindleofaharddiskdrivebecomesnoisy,itmayhavebeensubjectedtoexcessiveforce,
ordropped.
Checkoutguide
UsethefollowingproceduresasaguideinidentifyingandcorrectingproblemswiththeThinkPadNotebook.
Note:ThediagnostictestsareintendedtotestonlyThinkPadproducts.Theuseofnon- ThinkPadproducts,
prototypecards,ormodiedoptionscanleadtofalseindicationsoferrorsandinvalidsystemresponses.
1.Identifythefailingsymptomsinasmuchdetailaspossible.
2.Verifythesymptoms.Trytore-createthefailurebyrunningthediagnostictestorbyrepeatingthe
operation.
SystemsupportingtheLenovoThinkVantageToolboxprogramandthe
PC-DoctorforDOSdiagnosticsprogram
ThesectionprovidesinformationaboutThinkPadcomputersthatsupporttheLenovoThinkVantage
®
ToolboxprogramandthePC-Doctor
®
forDOSdiagnosticsprogram.Somedescriptionsmightnotapply
toyourparticularcomputer.
DiagnosticsusingPC-DoctorforDOS
TheThinkPadNotebookhasatestprogramcalledPC-DoctorforDOS(hereaftercalledPC-Doctor.)Youcan
detecterrorsbyrunningthediagnosticstestincludedinPC-Doctor.
Note:PC-DoctorforDOSisavailableatthefollowingWebsite:
http://www.lenovo.com/support
TocreatethePC-DoctordiagnosticCD,followtheinstructionsontheWebsite.
Forsomepossiblecongurationsofthecomputer,PC-Doctormightnotruncorrectly.T oavoidthisproblem,
youneedtoinitializethecomputersetupbyuseoftheBIOSSetupUtilitybeforeyourunPC-Doctor.
ToenterBIOSSetupUtility,doasfollows:
1.T urnonthecomputer.
2.WhentheThinkPadlogocomesup,immediatelypressF1toentertheBIOSSetupUtility.
28HardwareMaintenanceManual
Page 35

Note:Ifasupervisorpasswordhasbeensetbythecustomer,BIOSSetupUtilitymenuappearsafterthe
passwordisentered.Y oucanstarttheBIOSSetupUtilitybypressingEnterinsteadofenteringthesupervisor
password;however,youcannotchangetheparametersthatareprotectedbythesupervisorpassword.
OntheBIOSSetupUtilityscreen,pressF9,Enter,F10,andthenEnter.
Note:Whenyouinitializethecomputerconguration,somedevicesaredisabled,suchastheserialport.If
youtestoneofthesedevices,youwillneedtoenableitbyusingCongurationutilityforDOS.Theutilityis
availableonthefollowingWebsite:http://www.lenovo.com/support
PC-Doctorcannotbeusedtotestadevicethatisinthedockingstation,evenifthecomputersupportsthe
dockingstation.TotestaUSBdevice,connectittotheUSBconnectorofthecomputer.
Testingthecomputer
Note:ThePC-DoctorforDOSCD-R/CD-RWdiscsupportsonlytestofinternalopticaldiscdrives(CD-RW,
CD-RW/DVDCombo,andDVDMultidrives)onThinkPadcomputers.Itdoesnotsupporttestofanyoptical
discdrivesconnectedthroughUSBdevices,PCcards,CardBuscards,orsimilar.TheUSBlimitationonly
appliestotestingofthedevice.UsingabootablePC-DoctorforDOSCD/DVD,thecomputercanbe
startedfromaUSBattachedopticaldrive.
Torunthetest,doasfollows:
1.T urnoffthecomputer.
2.Makesurethattheopticaldrivethatissupportedasastartupdeviceisinstalledtothecomputer.
3.T urnonthecomputer.Ifthecomputercannotbepoweredon,goto“Powersystemcheckout”on
page36,andcheckthepowersources.
Ifanerrorcodeappears,goto“Symptom-to-FRUindex”onpage43.
4.WhentheThinkPadlogocomesup,immediatelypressF12toentertheBootMenu.
5.InsertthePC-DoctorCDintotheopticaldrive.
6.PresscursorkeystoselectA TAPICDx(x:0,1,...)andthenpressEnter.
7.Followtheinstructionsonthescreen.
8.ThemainpanelofPC-Doctorappears.
9.SelectDiagnosticswiththearrowkeys,andpressEnter.
Note:Y oucanselectanitemnotonlywiththearrowkeys,butalsowiththeT rackPoint
®
pointer.
InsteadofpressingEnter,clicktheleftbutton.
Apull-downmenuappears.(Itsexactformdependsonthemodel.)
Note:PC-Doctormenudoesnotmeantheformalsupportdevicelist.Someunsupporteddevicenames
mayappearinthePC-Doctormenu.
Chapter3.Generalcheckout29
Page 36

Diagnostics
Run Normal Test
Run Quick Test
CPU/Coprocessor
Systemboard
Video Adapter
Fixed Disks
Diskette Drives
Other Devices
Communication
Advanced Memory Tests
Interactive Tests Hardware Info Utility Quit F1=Help
PC-DOCTOR 2.0 Copyright 2008 PC-Doctor, Inc. All Rights Reserved.
Use the cursor keys and ESC to move in menus.Press ENTER to select.
Wireless LAN
Theoptionsonthetestmenuareasfollows:
DiagnosticsInteractiveT ests
•RunNormalTest
•RunQuickTest
•CPU/Coprocessor
•Systemboard
•VideoAdapter
•FixedDisks
•DisketteDrives
•OtherDevices
•Communication
•WirelessLAN
•AdvancedMemoryT ests
•Keyboard
•Video
•InternalSpeaker
•Mouse
•Diskette
•SystemLoad
•OpticalDriveTest
•IntelWLANRadioTest
Notes:
•IntheKeyboardtestinInteractiveT ests,theFnkeyshouldbehelddownforatleast2seconds;otherwise,it
cannotbesensed.
•VideoAdaptertestsupportsonlytheLCDdisplayontheThinkPadNotebook.Ifyouhaveanexternalmonitor
attachedtoyourcomputer,detachitbeforerunningPC-DoctorforDOS.
•T otestDigitalSignatureChip,thesecuritychipmustbesettoActive.
10.Runtheapplicablefunctiontest.
11.Followtheinstructionsonthescreen.Ifthereisaproblem,PC-Doctorshowsmessagesdescribingit.
12.T oexitthetest,selectQuit—ExitDiag.Tocancelthetest,pressEsc.
Note:AfterrunningPC-Doctor,checkthetimeanddateonthesystemandresetthemiftheyareincorrect.
DetectingsysteminformationwithPC-Doctor
PC-Doctorcandetectthefollowingsysteminformation:
30HardwareMaintenanceManual
Page 37

HardwareInfo
•SystemConguration
•MemoryContents
•PhysicalDiskDrives
•LogicalDiskDrives
•VGAInformation
•IDEDriveInfo
•PCIInformation
•PNPISAInfo
•SMBIOSInfo
•VESALCDInfo
•HardwareEventsLog
Utility
•RunExternalTests
•SurfaceScanHardDisk
•BenchmarkSystem
•DOSShell
•T echSupportForm
•BatteryRundown
•ViewT estLog
•PrintLog
•SaveLog
•FullEraseHardDrive
•QuickEraseHardDrive
LenovoThinkVantageT oolbox
LenovoThinkVantageT oolboxisadiagnosticprogramthatworksthroughtheWindows
®
operatingsystem.
Itenablesyoutoviewsymptomsofcomputerproblemsandsolutionsforthem,andincludesautomatic
noticationwhenactionisrequired,computingassistance,advanceddiagnostics,anddiagnostichistory.
Notes:
•ThelatestLenovoThinkVantageToolboxisavailableatthefollowingWebsite:
http://www.lenovo.com/support
•T oinstallthelatestLenovoThinkVantageT oolboxonthecomputer,followtheinstructionsontheWebsite.
Torunthisprogram,doasfollows:
Windows7:
WhiletheWindowsoperatingsystemisrunning,presstheThinkVantagebutton.
Youcanalsorunthisprogramaseitherofthefollowing:
•ClickStart➙AllPrograms➙LenovoThinkVantageTools➙SystemHealthandDiagnostics.
•ClickStart➙ControlPanel➙SystemandSecurity➙Lenovo-SystemHealthandDiagnostics.
WindowsVista
®
andWindowsXP:
ClickStart➙AllPrograms➙LenovoServices➙LenovoSystemT oolbox.
Followtheinstructionsonthescreen.LenovoThinkVantageToolboxalsohasproblemdeterminationaids
thatdeterminesoftwareandusageproblems.
Foradditionalinformationaboutthisprogram,seetheHelpfortheprogram.
Chapter3.Generalcheckout31
Page 38

PC-DoctorforRescueandRecovery
InsomemodelsofThinkPadNotebook,theRescueandRecovery®workspaceenablesyoutorunthe
PC-Doctorprogramtotestthehardwarefeaturesofthecomputer.
Torunthetest,click“RunDiagnostics”ontheRescueandRecoverymainscreen.
32HardwareMaintenanceManual
Page 39

FRUtests
ThefollowingtableshowsthetestforeachFRU.
Table1.FRUtests
FRUApplicabletest
Systemboard1.Diagnostics➙CPU/Coprocessor
2.Diagnostics➙Systemboard
3.IfthedockingstationortheportreplicatorisattachedtotheThinkPadNotebook,
detachit.
4.Placethecomputeronahorizontalsurface,andrunDiagnostics➙ThinkPad
Devices➙HDDActiveProtectionT est.
Note:Donotapplyanyphysicalshocktothecomputerwhilethetestisrunning.
Power
Diagnostics➙ThinkPadDevices➙ACAdapter,Battery1(Battery2)
LCDunit
1.Diagnostics➙VideoAdapter
2.InteractiveT ests➙Video
Audio
EntertheBIOSSetupUtilityandchangeSerialAT A(SATA)settingtoCompatibility,
andrunDiagnostics➙OtherDevice➙ConexantAudio.
SpeakerInteractiveT ests➙InternalSpeaker
Note:OnceAudiotestisdone,thenosoundisheardthistest.Inthiscase,turnoff
andturnonthecomputer.Then,runthistestagain.
Keyboard
1.Diagnostics➙Systemboard➙Keyboard
2.InteractiveT ests➙Keyboard
EntertheBIOSSetupUtilityandchangeSerialAT A(SATA)settingtoCompatibility,
andrunDiagnostics➙FixedDisks.
Harddiskdriveorsolid-state
drive
Youcanalsodiagnosethedrivewithoutstartinguptheoperatingsystem.T odiagnose
thedrivefromtheBIOSSetupUtility,doasfollows:
1.Removeanydiskettefromthediskettedrive,andthenturnoffthecomputer.
2.Turnonthecomputer.
3.Whilethemessage,“T ointerruptnormalstartup,presstheblueThinkVangate
button,”isdisplayedatthelowerleftofthescreen,pressF1toentertheBIOS
SetupUtility.
4.Usingcursorkeys,selectHDDdiagnosticprogram.Pressenter.
5.Usingcursorkeys,selectMainharddiskdriveorUltrabayharddiskdrive.
6.PressEntertostartthediagnosticprogram.
Diskettedrive1.Diagnostics➙DisketteDrives
2.InteractiveT ests➙Diskette
Opticaldrive1.Diagnostics➙OtherDevices➙OpticalDrive
2.InteractiveT ests➙OpticalDriveT est
Memory
1.IftwoDIMMsareinstalled,removeoneofthemandrunDiagnostics➙Advanced
MemoryT ests.
2.Iftheproblemdoesnotrecur,returntheDIMMtoitsplace,removetheotherone,
andrunthetestagain.
Chapter3.Generalcheckout33
Page 40

Table1.FRUtests(continued)
FRUApplicabletest
TrackPointorpointing
device
IftheTrackPointdoesnotwork,checkthecongurationasspeciedintheBIOSSetup
Utility.IftheTrackPointisdisabled,selectAutomatictoenableit.
AfteryouusetheTrackPoint,thepointermaydriftonthescreenforashorttime.This
driftcanoccurwhenaslight,steadypressureisappliedtotheTrackPointpointer.
Thissymptomisnotahardwareproblem.Ifthepointerstopsafterashorttime,no
serviceactionisnecessary.
IfenablingtheT rackPointdoesnotcorrecttheproblem,continuewiththefollowing:
•InteractiveTests➙Mouse
TouchPad
IftheTouchPaddoesnotwork,checkthecongurationasspeciedintheBIOSSetup
Utility.IftheT ouchPadisdisabled,selectAutomatictoenableit.IfenablingtheTouch
Paddoesnotcorrecttheproblem,continuewiththefollowing:
•InteractiveTests➙Mouse
SystemsupportingtheLenovodiagnosticsprograms
ThesectionprovidesinformationaboutThinkPadcomputersthatsupporttheLenovodiagnosticsprograms.
Somedescriptionsmightnotapplytoyourparticularcomputer.
TheLenovodiagnosticsprogramsincludefollowing:
•LenovoSolutionCenter
•Quicktestprograms
•UEFIdiagnosticprogram
•Bootablediagnosticprograms
LenovoSolutionCenter
TheLenovoSolutionCenterprogramenablesyoutotroubleshootandresolvecomputerproblems.It
combinesdiagnostictests,systeminformationcollection,securitystatus,andsupportinformation,along
withhintsandtipsformaximumsystemperformance.
Note:TheLenovoSolutionCenterprogramisavailableonlyonmodelspreinstalledwiththeWindows7
operatingsystem.Italsocanbedownloadedfromhttp://www.lenovo.com/diags.
ToruntheLenovoSolutionCenterprogram,clickStart➙ControlPanel➙SystemandSecurity➙Lenovo
-SystemHealthandDiagnostics,andthenfollowtheinstructionsonthescreen.
Foradditionalinformationaboutthisprogram,seethehelpinformationsystem.
Quicktestprograms
LenovoHardDriveQuickTestandLenovoMemoryQuickT estaretwoquicktestprogramsthatenableyou
totroubleshootandresolvecomputerinternalstorageandmemoryproblems.
Notes:
•IfthecomputeryouareservicingisnotinstalledwiththeLenovoSolutionCenterprogram,youcan
downloadthequicktestprogramsfromtheLenovoSupportWebsite.
•ThetwoprogramsareapplicabletocomputersinstalledwiththeWindows7,WindowsXP ,Windows
Server2003,orWindowsServer2008operatingsystem.
34HardwareMaintenanceManual
Page 41

Todownloadandinstallaquicktestprogram,gotohttp://www.lenovo.com/diags,andfollowtheinstructions
ontheWebsite.
Torunaquicktestusingthedownloadedprogram,dothefollowing:
1.GototheC:\SWTOOLS\ldiagfolder.
2.Double-clickthegui_lsc_lite.exele.
3.WhentheUserAccountControlwindowopens,clickY es.
4.Selectthedeviceclasstobetested.
5.Selectthedevicestobetested.
6.Selecttheteststobeperformed.
7.Followtheinstructionsonthescreentostartthetest.Whenaproblemisdetected,information
messageswillbedisplayed.Refertothemessagestotroubleshoottheproblem.
UEFIdiagnosticprogram
AUEFIdiagnosticprogramispreinstalledonthecomputer.Itenablesyoutotestmemoryandinternal
storageproblems,viewsysteminformation,andcheckandrecoverbadsectorsoninternalstoragedevices.
ToruntheUEFIdiagnosticprogram,dothefollowing:
1.T urnonthecomputer.Ifthecomputercannotbeturnedon,goto“Powersystemcheckout”onpage36,
andcheckthepowersources.Ifanerrorcodeisdisplayed,goto“Symptom-to-FRUindex”onpage43
forerrorcodedescriptionsandtroubleshootinghints.
2.WhentheThinkPadlogoisdisplayed,repeatedlypressandreleasetheF12key.WhentheBootMenu
windowopens,releasetheF12key.
3.PresstheTabkeytoswitchtotheApplicationMenuwindow.
4.UsethearrowkeystoselectLenovoDiagnosticsandthenpressEnter.ThemainscreenoftheUEFI
diagnosticprogramisdisplayed.
5.Followtheinstructionsonthescreentousethediagnosticprogram.
Theoptionsonthemainscreenareasfollows:
TestsTools
•QuickMemoryTest
•QuickStorageDeviceT est
•ExitApplication
•SystemInformation
•RecoverBadSectorsTool
Bootablediagnosticprograms
IfthecomputeryouareservicingisnotinstalledwiththeUEFIdiagnosticprogram,youcandownloada
bootablediagnosticprogramfromtheLenovoSupportWebsite.Thebootablediagnosticprogramsenable
youtotestcomputermemoryandinternalstoragedevices,viewsysteminformation,andcheckandrecover
theinternalstoragedevices.Tousethebootablediagnosticprograms,youcancreateabootablediagnostic
mediumonaUSBdeviceorCD.
Tocreateabootablediagnosticmedium,dothefollowing:
1.Gotohttp://www.lenovo.com/diags.
2.ClickLenovoBootableDiagnostics.
3.FollowtheinstructionsontheWebsitetocreateabootablediagnosticmediumonaUSBdeviceorCD.
Tousethediagnosticmediumyouhavecreated,dooneofthefollowing:
Chapter3.Generalcheckout35
Page 42

•IfyouhavecreatedthebootablediagnosticmediumonaUSBdevice,dothefollowing:
1.AttachtheUSBdevicetothecomputer.
2.T urnonthecomputer.Ifthecomputercannotbeturnedon,goto“Powersystemcheckout”onpage
36
,andcheckthepowersources.Ifanerrorcodeisdisplayed,goto“Symptom-to-FRUindex”on
page43forerrorcodedescriptionsandtroubleshootinghints.
3.WhentheThinkPadlogoisdisplayed,repeatedlypressandreleasetheF12key.WhentheBoot
Menuwindowopens,releasetheF12key.
4.UsethearrowkeystoselectUSBHDDandthenpressEnter.Thediagnosticprogramwillbe
launchedautomatically.
5.Followtheinstructionsonthescreentousethediagnosticprogram.
•IfyouhavecreatedthebootablediagnosticmediumonaCD,dothefollowing:
1.T urnonthecomputer.Ifthecomputercannotbeturnedon,goto“Powersystemcheckout”onpage
36,andcheckthepowersources.Ifanerrorcodeisdisplayed,goto“Symptom-to-FRUindex”on
page43forerrorcodedescriptionsandtroubleshootinghints.
2.InserttheCDintotheopticaldrive.
3.Restartthecomputer.
4.WhentheThinkPadlogoisdisplayed,repeatedlypressandreleasetheF12key.WhentheBoot
Menuwindowopens,releasetheF12key.
5.UsethearrowkeystoselectA T APICDx(x:0,1,...)andthenpressEnter.Thediagnosticprogram
willbelaunchedautomatically.
6.Followtheinstructionsonthescreentousethediagnosticprogram.
Powersystemcheckout
Toverifyasymptom,dothefollowing:
1.T urnoffthecomputer.
2.Removethebatterypack.
3.Connecttheacadapter.
4.Checkthatpowerissuppliedwhenyouturnonthecomputer.
5.T urnoffthecomputer.
6.Disconnecttheacadapterandinstallthechargedbatterypack.
7.Checkthatthebatterypacksuppliespowerwhenyouturnonthecomputer.
Ifyoususpectapowerproblem,seetheappropriateoneofthefollowingpowersupplycheckouts:
•“CheckingtheACadapter”onpage36
•“Checkingoperationalcharging”onpage37
•“Checkingthebatterypack”onpage37
•“Checkingthebackupbattery”onpage38
CheckingtheACadapter
YouareherebecausethecomputerfailsonlywhentheACadapterisused.
•Ifthepowerproblemoccursonlywhenthedockingstationortheportreplicatorisused,replacethe
dockingstationortheportreplicator.
•Ifthepower-onindicatordoesnotturnon,checkthepowercordoftheACadapterforcorrectcontinuity
andinstallation.
•Ifthecomputerdoesnotchargeduringoperation,goto“Checkingoperationalcharging”onpage37.
TochecktheACadapter,dothefollowing:
1.UnplugtheACadaptercablefromthecomputer.
36HardwareMaintenanceManual
Page 43

2.MeasuretheoutputvoltageattheplugoftheACadaptercable.Seethefollowinggure:
Pin
Voltage(Vdc)
1+20
20
3
Ground
1
2
3
(20V)
Note:Outputvoltageacrosspin2oftheacpoweradaptermightdifferfromtheoneyouareservicing.
3.Ifthevoltageisnotcorrect,replacetheACadapter.
4.Ifthevoltageisacceptable,dothefollowing:
•Replacethesystemboard.
•IftheproblempersistsandyoursystemisinstalledwiththePCdoctorforDOS,goto“FRUtests”
onpage33.
Note:NoisefromtheACadapterdoesnotalwaysindicateadefect.
Checkingoperationalcharging
Tocheckwhetherthebatterychargesproperlyduringoperation,useadischargedbatterypackorabattery
packthathaslessthan50%ofthetotalpowerremainingwheninstalledinthecomputer.
Performoperationalcharging.Ifthebatterystatusindicatororicondoesnotturnon,removethebattery
packandletitreturntoroomtemperature.Reinstallthebatterypack.Ifthechargeindicatororiconstilldoes
notturnon,replacethebatterypack.
Ifthechargeindicatorstilldoesnotturnon,replacethesystemboard.Thenreinstallthebatterypack.Ifitis
stillnotcharged,gotothenextsection.
Checkingthebatterypack
BatterychargingdoesnotstartuntilthePowerManagerBatteryGaugeshowsthatlessthan96%ofthe
totalpowerremains;underthisconditionthebatterypackcanchargeto100%ofitscapacity.Thisprotects
thebatterypackfrombeingoverchargedorfromhavingashortenedlife.
Tocheckyourbattery,moveyourcursortothePowerManagerBatteryGaugeiconintheicontrayofthe
Windowstaskbarandwaitforamoment(butdonotclick),andthepercentageofbatterypowerremaining
isdisplayed.T ogetdetailedinformationaboutthebattery,double-clickthePowerManagerBattery
Gaugeicon.
Note:Ifthebatterypackbecomeshot,itmaynotbeabletocharge.Removeitfromthecomputerandleave
itatroomtemperatureforawhile.Afteritcoolsdown,reinstallandrechargeit.
Tocheckthebatterypack,dothefollowing:
1.Poweroffthecomputer.
2.Removethebatterypackandmeasurethevoltagebetweenbatteryterminals1(+)and7(-).Seethe
followinggure:
Chapter3.Generalcheckout37
Page 44

Terminal
Voltage(Vdc)
1+0to+16.8
7
Ground(-)
1(+)
2(+)
3
4
5
6(-)
7(-)
3.Ifthevoltageislessthan+11.0Vdc,thebatterypackhasbeendischarged.
Note:Rechargingwilltakeatleast3hours,eveniftheindicatordoesnotturnon.
Ifthevoltageisstilllessthan+11.0Vdcafterrecharging,replacethebattery.
4.Ifthevoltageismorethan+11.0Vdc,measuretheresistancebetweenbatteryterminals5and7.
Theresistancemustbe4to30KΩ.Iftheresistanceisnotcorrect,replacethebatterypack.Ifthe
resistanceiscorrect,replacethesystemboard.
Checkingthebackupbattery
Dothefollowing:
1.Poweroffthecomputer,andunplugtheacadapterfromit.
2.T urnthecomputerupsidedown.
3.Removethebatterypack(see“1010Batterypack”onpage66).
4.Removethebackupbattery(see“1100Backupbattery”onpage80).
5.Measurethevoltageofthebackupbattery.Seethefollowinggure.
Wire
Voltage(Vdc)
Red+2.5to+3.2
Black
Ground
•Ifthevoltageiscorrect,replacethesystemboard.
•Ifthevoltageisnotcorrect,replacethebackupbattery.
•Ifthebackupbatterydischargesquicklyafterreplacement,replacethesystemboard.
38HardwareMaintenanceManual
Page 45

Chapter4.Relatedserviceinformation
Thischapterpresentsfollowinginformation:
•“RestoringthefactorycontentsbyusingRecoveryDiscSet”onpage39
•“Passwords”onpage40
•“Powermanagement”onpage42
•“Symptom-to-FRUindex”onpage43
ServiceWebsite:
Whenthelatestmaintenancedisketteandthesystemprogramservicediskettebecomeavailable,they
willbepostedonhttp://www.lenovo.com/support.
RestoringthefactorycontentsbyusingRecoveryDiscSet
Whentheharddiskdrive(HDD)orsolid-statedrive(SSD)isreplacedbecauseofafailure,noproductrecovery
programisonthenewdrive.Inthiscase,youmustusetheRecoveryDiscSetforthecomputer.Orderthe
RecoveryDiscSetandthedriveatthesametimesothatyoucanrecoverthenewdrivewiththepre-installed
softwarewhentheyarrive.Forinformationonwhichdiscstoorder,see“Recoverydiscs”onpage156
.
TherecoverydiscsetconsistsoftheuserinstructionsandthefollowingsetofDVDstorestorethecomputer
totheoriginalfactoryconguration.
OperatingSystemRecoveryDisc(onedisc)
ThisdiscrestorestheMicrosoft
®
Windowsoperating
system.Usethisdisctostarttherecoveryprocess.
ApplicationsandDriversRecoveryDisc(oneor
morediscs)
Thisdiscrestoresthepreinstalledapplicationsand
driversonthecomputer.
SupplementalRecoveryDisc
Thisdisccontainsadditionalcontent,suchas
updatestothesoftwarethatwaspreinstalledonthe
computer.Notallrecoverydiscsetscomewitha
SupplementalRecoveryDisc.
Notes:
•Y oumusthaveaDVDdrivetousetherecoverydiscs.IfyoudonothaveaninternalDVDdrive,you
canuseanexternalUSBDVDdrive.
•Duringtherecoveryprocess,alldataonthedrivewillbedeleted.Ifpossible,copyanyimportantdata
orpersonallesthatyouwanttokeepontoremovablemediaoranetworkdrivebeforeyoustartthe
recoveryprocess.
Torestorethecomputertotheoriginalfactorycongurationusingtherecoverydiscset,dothefollowing:
Note:Recoverycantakeonetotwohourstocomplete.Thelengthoftimedependsonthemethodyouuse.Ifyou
userecoverydiscs,therecoveryprocesswilltakeabouttwohours.
1.MaketheCD/DVDdrivetherststartupdeviceinthestartupsequenceusingthefollowingprocedure:
a.PressandholddowntheF1key,andthenturnonthecomputer.Whenthelogoscreenisdisplayed
orifyouhearrepeatingbeeps,releasetheF1key.TheSetupUtilityprogramopens.
b.UsethearrowkeystoselectStartup➙Boot.
c.SelecttheCD/DVDdriveasthe1stBootDevice.
2.InserttheOperatingSystemRecoveryDiscintotheDVDdrive.
©CopyrightLenovo2010,2012
39
Page 46

3.PressF10tosavetheSetupUtilitycongurationchanges.Followtheinstructionsonthescreento
begintherecoveryprocess.
4.SelectyourlanguageandclickNext.
5.Readthelicense.Ifyouagreewiththetermsandconditions,selectIacceptthesetermsand
conditionsandthenclickNext.Ifyoudonotagreewiththetermsandconditions,followthe
instructionsonthescreen.
6.ClickY esinthedisplayedwindowtobegintheoperatingsystemrecoveryprocess.
7.InserttheApplicationsandDriversRecoveryDiscwhenpromptedandthenclickOKtobeginthe
applicationsanddriversrecoveryprocess.
8.IfyouhaveaSupplementalRecoveryDisc,insertitwhenpromptedandclickY es.Ifyoudonothavea
SupplementalRecoveryDisc,clickNo.
9.Whenallofthedatahasbeencopiedfromthelastdiscinthesetandhasbeenprocessed,removethe
discandrestartthecomputer.
Note:Therestoftherecoveryprocessisfullyautomatedandnoactionisrequiredbyyou.The
computerwillrestartintotheMicrosoftWindowsdesktopseveraltimesandyoumightexperience
periodswhennoactivityisapparentonthescreenforseveralminutesatatime.Thisisnormal.
10.Whentherecoveryprocessiscomplete,theSetUpWindowsscreenisdisplayed.Followthe
instructionsonthescreentocompletetheWindowssetup.
11.AfteryouhavecompletedtheWindowssetup,youmightwanttorestoretheoriginalstartupsequence.
StarttheSetupUtilityprogramandthenpressF9torestorethedefaultsettings.PressF10tosaveand
exittheSetupUtility.
Note:Afterrestoringadrivetothefactorydefaultsettings,youmightneedtoreinstallsomedevicedrivers.
Passwords
AsmanyasthreepasswordsmaybeneededforanyThinkPadNotebook:thepower-onpassword(POP),
thehard-diskpassword(HDP),andthesupervisorpassword(SVP).
Ifanyofthesepasswordshasbeenset,apromptforitappearsonthescreenwheneverthecomputeris
turnedon.Thecomputerdoesnotstartuntilthepasswordisentered.
Note:IfonlyanSVPisinstalled,thepasswordpromptdoesnotappearwhentheoperatingsystemisbooted.
Power-onpassword
Apower-onpassword(POP)protectsthesystemfrombeingpoweredonbyanunauthorizedperson.The
passwordmustbeenteredbeforeanoperatingsystemcanbebooted.ForhowtoremovethePOP ,see
“Howtoremovethepower-onpassword”onpage41.
Hard-diskpassword
Therearetwohard-diskpasswords(HDPs):
•UserHDP—fortheuser
•MasterHDP—forthesystemadministrator,whocanuseittogetaccesstotheharddiskeveniftheuser
haschangedtheuserHDP
Note:TherearetwomodesfortheHDP:UseronlyandMaster+User.TheMaster+Usermoderequires
twoHDPs;thesystemadministratorentersbothinthesameoperation.Thesystemadministratorthen
providestheuserHDPtothesystemuser.
Attention:IftheuserHDPhasbeenforgotten,checkwhetheramasterHDPhasbeenset.Ifithas,itcanbe
usedforaccesstotheharddiskdrive.IfnomasterHDPisavailable,neitherLenovonorLenovoauthorized
40HardwareMaintenanceManual
Page 47

servicetechniciansprovideanyservicestoreseteithertheuserorthemasterHDP ,ortorecoverdatafrom
theharddiskdrive.Theharddiskdrivecanbereplacedforascheduledfee.
ForhowtoremovethePOP ,see“Howtoremovethehard-diskpassword”onpage41.
Supervisorpassword
Asupervisorpassword(SVP)protectsthesysteminformationstoredintheBIOSSetupUtility.Theusermust
entertheSVPinordertogetaccesstotheBIOSSetupUtilityandchangethesystemconguration.
Attention:IftheSVPhasbeenforgottenandcannotbemadeavailabletotheservicetechnician,thereisno
serviceproceduretoresetthepassword.Thesystemboardmustbereplacedforascheduledfee.
Howtoremovethepower-onpassword
ToremoveaPOPthatyouhaveforgotten,dothefollowing:
(A)IfnoSVPhasbeenset:
1.T urnoffthecomputer.
2.Removethebatterypack.Forhowtoremovethebatterypack,see“1010Batterypack”onpage66.
3.Removethebackupbattery.Forhowtoremovethebackupbattery,see“1100Backupbattery”on
page80.
4.Connecttheacpoweradapter.T urnonthecomputerandwaituntilthePOSTends.AfterthePOST
ends,thepasswordpromptwillnotbedisplayed.Thepower-onpasswordhasbeenremoved.
5.Reinstallthebackupbatteryandthebatterypack.
(B)IfanSVPhasbeensetandisknownbytheservicetechnician:
1.T urnonthecomputer.
2.WhentheThinkPadlogoisdisplayed,immediatelypressF1.
3.T ypethesupervisorpasswordtoentertheThinkPadSetupprogram.
4.SelectSecurity.
5.SelectPassword.
6.SelectPower-OnPassword.
7.T ypethecurrentsupervisorpasswordintheEnterCurrentPasswordeld.ThenleavetheEnter
NewPasswordeldblank,andpressEntertwice.
8.IntheChangeshavebeensavedwindow,pressEnter.
9.PressF10tosavechangesandexittheThinkPadSetupprogram.
Howtoremovethehard-diskpassword
Attention:IfUseronlymodeisselectedandtheuserHDPhasbeenforgottenandcannotbemade
availabletotheservicetechnician,neitherLenovonorLenovoauthorizedservicetechniciansprovideany
servicestoresettheuserHDPsortorecoverdatafromtheharddiskdrive.Theharddiskdrivecanbe
replacedforascheduledfee.
ToremoveauserHDPthathasbeenforgotten,whentheSVPandthemasterHDPareknown,dothe
following:
1.T urnonthecomputer.
2.WhentheThinkPadlogocomesup,immediatelypressF1toenterBIOSSetupUtility.Formodels
supportingthePassphrasefunction,pressF1whileHDPiconisappearingonthescreen;thenenterthe
masterHDP .Fortheothermodels,enterthemasterHDP .
Chapter4.Relatedserviceinformation41
Page 48

Note:TocheckwhethertheThinkPadNotebookyouareservicingsupportsthePassphrasefunction,
entertheBIOSSetupUtilityandgotoSecurity➙Password.IfUsingPassphraseitemisdisplayed
inthemenu,thisfunctionisavailableontheThinkPadNotebook.
3.SelectSecurity,usingthecursordirectionalkeystomovedownthemenu.
4.SelectPassword.
5.SelectHard-diskxpassword,wherexistheletteroftheharddiskdrive.Apop-upwindowopens.
6.SelectMasterHDP.
7.T ypethecurrentmasterHDPintheEnterCurrentPasswordeld.thenleavetheEnterNewPassword
eldblank,andpressEntertwice.
8.PressF10.
9.SelectYesintheSetupCongurationwindow.BothuserHDPandmasterHDPwillhavebeenremoved.
Powermanagement
Toreducepowerconsumption,thecomputerhasthreepowermanagementmodes:screenblank,sleep
(standbyinWindowsXP),andhibernation.
Screenblankmode
Ifthetimesetonthe“Turnoffmonitor”timerintheoperatingsystemexpires,theLCDbacklightturnsoff.
Toputthecomputerintoscreenblankmode,doasfollows:
1.PressFn+F3.Apanelforselectingapowerplan(inWindowsXP ,powerscheme)appears.
2.SelectPoweroffdisplay(keepcurrentpowerplan)(inWindowsXP,keepcurrentpowerscheme).
Youcanalsoputthecomputerintoscreenblankmode,pressThinkVantagebuttonandusetheThinkVantage
ProductivityCenter.
Note:IfthecomputerisaWindows7model,itdoesnotsupportThinkVantageProductivityCenter.
Toendscreenblankmodeandresumenormaloperation,pressanykey.
Sleep(standby)mode
Whenthecomputerenterssleep(standby)mode,thefollowingeventsoccurinadditiontowhatoccurs
inscreenblankmode:
•TheLCDispoweredoff.
•Theharddiskdriveispoweredoff.
•TheCPUstops.
Toentersleep(standby)mode,pressFn+F4.
Note:YoucanchangetheactionoftheFn+F4keycombinationbychangingthesettingsinPowerManager.
Incertaincircumstances,thecomputergoesintosleep(standby)modeautomatically:
•Ifa“suspendtime”hasbeensetonthetimer,andtheuserdoesnotdoanyoperationwiththekeyboard,
theTrackPoint,theharddisk,theparallelconnector,orthediskettedrivewithinthattime.
•Ifthebatteryindicatorblinksorange,indicatingthatthebatterypowerislow.
Note:Evenifyoudonotsetthelow-batteryalarm,thechargeindicatornotiesyouwhenthebatteryislow,
andthenthecomputerentersthepower-savingmodeautomatically.
42HardwareMaintenanceManual
Page 49

Tocausethecomputertoreturnfromsleep(standby)modeandresumeoperation,dooneofthefollowing:
•PresstheFnkey.
•OpentheLCDcover.
•T urnonthepowerswitch.
Also,ineitherofthefollowingevents,thecomputerautomaticallyreturnsfromsleep(standby)modeand
resumesoperation:
•Theringindicator(RI)issignaledbyaserialdeviceoraPCCarddevice.
•Thetimesetontheresumetimerelapses.
Note:Thecomputerdoesnotacceptanyinputimmediatelyafteritenterssleep(standby)mode.Waita
fewsecondsbeforetakinganyactiontoreenteroperationmode.
Hibernationmode
Inhibernationmode,thefollowingoccurs:
•Thesystemstatus,RAM,VRAM,andsetupdataarestoredontheharddisk.
•Thesystemispoweredoff.
Note:Ifthecomputerentersthehibernationmodewhileitisdockedtothedockingstation,donotundockit
beforeresumingnormaloperation.Ifyoudoundockitandthentrytoresumenormaloperation,youwillget
anerrormessage,andyouwillhavetorestartthesystem.
Tocausethecomputertoenterhibernationmode,doanyofthefollowing:
•PresstheFn+F12keys.
•Ifyouhavedenedoneofthefollowingactionsastheeventthatcausesthesystemtogointohibernation
mode,performthataction.
–Closingthelid.
–Pressingthepowerbutton.
–PressingFn+F4keys.
Also,thecomputergoesintohibernationmodeautomaticallyineitherofthefollowingconditions:
•Ifa“hibernationtime”hasbeensetonthetimer,andiftheuserdoesnotdoanyoperationwiththe
keyboard,theTrackPoint,theharddiskdrive,theparallelconnector,orthediskettedrivewithinthattime.
•Ifthetimerconditionsaresatisedinsuspendmode.
Whenthepoweristurnedon,thecomputerreturnsfromhibernationmodeandresumesoperation.The
hibernationleinthebootrecordontheharddiskdriveisread,andsystemstatusisrestoredfromthe
harddiskdrive.
Symptom-to-FRUindex
Thissectioncontainsfollowinginformation:
•“Numericerrorcodes”onpage44
•“Errormessages”onpage48
•“Beepsymptoms”onpage50
•“No-beepsymptoms”onpage50
•“LCD-relatedsymptoms”onpage50
•“Intermittentproblems”onpage52
•“Undeterminedproblems”onpage52
Chapter4.Relatedserviceinformation43
Page 50

Thesymptom-to-FRUindexinthissectionlistssymptomsanderrorsandtheirpossiblecauses.Themost
likelycauseislistedrst,inboldfacetype.
Note:DotheFRUreplacementorotheractionsinthesequenceshowninthecolumnheaded“FRUor
action,insequence.”IfreplacingaFRUdoesnotsolvetheproblem,puttheoriginalpartbackinthe
computer.DonotreplaceanondefectiveFRU.
Thisindexcanalsohelpyoudetermine,duringregularservicing,whatFRUsarelikelytoneedtobe
replacednext.
AnumericerrorisdisplayedforeacherrordetectedinPOSTorsystemoperation.Inthedisplays,ncan
beanynumber.
Ifnonumericcodeisdisplayed,checkthenarrativedescriptionsofsymptoms.Ifthesymptomisnot
describedthere,goto“Intermittentproblems”onpage52
.
Note:ForadevicenotsupportedbydiagnosticcodesintheThinkPadNotebooks,seethemanualfor
thatdevice.
Numericerrorcodes
Table2.Numericerrorcodes
Symptomorerror
FRUoraction,insequence
0175
BadCRC1,stopPOSTtask—TheEEPROMchecksumis
notcorrect.
Systemboard.
0176
SystemSecurity—Thesystemhasbeentamperedwith.
1.RunBIOSSetupUtility,andsavethecurrent
settingbypressingF10.
2.Systemboard.
0177
BadSVPdata,stopPOSTtask—Thechecksumofthe
supervisorpasswordintheEEPROMisnotcorrect.
Systemboard.
0182
BadCRC2.EnterBIOSSetupandloadSetup
defaults.—ThechecksumoftheCRS2settinginthe
EEPROMisnotcorrect.
1.RunBIOSSetupUtility.PressF9,andEnterto
loadthedefaultsetting.Thensavethecurrent
settingbypressingF10.
2.Systemboard.
0185
Badstartupsequencesettings.EnterBIOSSetupand
loadSetupdefaults.
1.RunBIOSSetupUtility.PressF9,andEnterto
loadthedefaultsetting.Thensavethecurrent
settingbypressingF10.
0187
EAIAdataaccesserror—TheaccesstoEEPROMisfailed.
Systemboard.
0188
InvalidRFIDSerializationInformationArea.
Systemboard.
0189
InvalidRFIDcongurationinformationarea—The
EEPROMchecksumisnotcorrect.
Systemboard.
0190
Criticallow-batteryerror
1.Chargethebatterypack.
2.Batterypack.
0191
SystemSecurity—InvalidRemoteChangerequested.
1.RunBIOSSetupUtility,andthensavecurrent
settingbypressingF10.
2.Systemboard.
44HardwareMaintenanceManual
Page 51

Table2.Numericerrorcodes(continued)
Symptomorerror
FRUoraction,insequence
0192
SystemSecurity—EmbeddedSecurityhardwaretamper
detected.
Systemboard.
0193
RFantennahasbeenremoved
Enterthesupervisorpassword.
0194
Thecomputerhasbeencarriedthroughasecuritygate
Enterthesupervisorpassword.
0195
Securityhardwaretamperdetected
1.EnterBIOSSetupUtilitybyenteringsupervisor
password,andselect“Password➙SecurityChip
➙ClearSecurityChip”toclearthiserror.
2.Securitychip.
3.Systemboard.
0196
Securityhardwareremoved
1.EnterBIOSSetupUtilitybyenteringsupervisor
password,andselect“Password➙SecurityChip
➙ClearSecurityChip”toclearthiserror .
2.Securitychip.
3.Systemboard.
0197
Invalidremotechangerequested.
Theremotecongurationforthesecuritychiphas
failed.Conrmtheoperationandtryagain.
0199
SystemSecurity—Securitypasswordretrycount
exceeded.
1.RunBIOSSetupUtility,andthensavethecurrent
settingbypressingF10.
2.Systemboard.
01C8
Twoormoremodemdevicesarefound.Removeallbut
oneofthem.Press<Esc>tocontinue.
1.RemoveeitheraMini-PCICardoramodem
daughtercard.Otherwise,pressEsctoignore
thewarningmessage.
2.Systemboard.
01C9
TwoormoreEthernetdevicesarefound.Removeallbut
oneofthem.Press<Esc>tocontinue.
1.RemoveeitheraMiniPCIEthernetcardoran
Ethernetdaughtercard.Otherwise,pressEscto
ignorethewarningmessage.
2.Systemboard.
01C9
MorethanoneEthernetdevicesarefound.Removeone
ofthem.Press<Esc>tocontinue.
1.RemovetheEthernetdevicethatyouinstalled;or
pressEsctoignorethewarningmessage.
2.Systemboard.
01CA
MorethanoneWirelessLANdevicesarefound.Remove
oneofthem.
1.RemovethewirelessLANdevicethatyou
installed.
2.Systemboard.
0200
Harddiskerror—Theharddiskisnotworking.
1.Reseattheharddiskdrive.
2.LoadSetupDefaultsinBIOSSetupUtility.
3.Harddiskdrive.
4.Systemboard.
021x
Keyboarderror.
Runinteractivetestsofthekeyboardandtheauxiliary
inputdevice.
0220
Monitortypeerror—Monitortypedoesnotmatchtheone
speciedinCMOS.
LoadSetupDefaultsinBIOSSetupUtility.
0230
ShadowRAMerror—ShadowRAMfailsatoffsetnnnn.
Systemboard.
0231
SystemRAMerror—SystemRAMfailsatoffsetnnnn.
1.DIMM.
2.Systemboard.
Chapter4.Relatedserviceinformation45
Page 52

Table2.Numericerrorcodes(continued)
Symptomorerror
FRUoraction,insequence
0232
ExtendedRAMerror—ExtendedRAMfailsatoffsetnnnn.
1.DIMM.
2.Systemboard.
0250
Systembatteryerror—Systembatteryisdead.
1.Chargethebackupbatteryformorethan8hours
byconnectingtheacadapter.
2.ReplacethebackupbatteryandrunBIOSSetup
Utilitytoresetthetimeanddate.
0251
SystemCMOSchecksumbad—Defaultconguration
used.
1.Chargethebackupbatteryformorethan8hours
byconnectingtheacadapter.
2.ReplacethebackupbatteryandrunBIOSSetup
Utilitytoresetthetimeanddate.
0252
Passwordchecksumbad—Thepasswordiscleared.
ResetthepasswordbyrunningBIOSSetupUtility.
0260
Systemtimererror .
1.Chargethebackupbatteryformorethan8hours
byconnectingtheacadapter.
2.ReplacethebackupbatteryandrunBIOSSetup
Utilitytoresetthetimeanddate.
3.Systemboard.
0270
Real-timeclockerror.
1.Chargethebackupbatteryformorethan8hours
byconnectingtheacadapter.
2.ReplacethebackupbatteryandrunBIOSSetup
Utilitytoresetthetimeanddate.
3.Systemboard.
0271
Dateandtimeerror—Neitherthedatenorthetimeisset
inthecomputer.
RunBIOSSetupUtilitytoresetthetimeanddate.
0280
Previousbootincomplete—Defaultcongurationused.
1.Load“SetupDefault”inBIOSSetupUtility.
2.DIMM.
3.Systemboard.
02B2
IncorrectdriveAtype.
1.Diskettedrive.
2.ExternalFDDcable.
3.I/Ocard.
02D0
Systemcacheerror.
02F0
CPUID:xxFailed.
1.CPU.
2.Systemboard.
02F4
EISACMOSnotwritable.
1.LoadSetupDefaultsinBIOSSetupUtility.
2.Replacethebackupbattery.
3.Systemboard.
02F5
DMAtestfailed.
1.DIMM.
2.Systemboard.
02F6
SoftwareNMIfailed
1.DIMM.
2.Systemboard.
02F7
Fail-safetimerNMIfailed
1.DIMM.
2.Systemboard.
1801
Attacheddockingstationisnotsupported
Shutdownthecomputerandremoveitfromthe
dockingstation.
1802
Unauthorizednetworkcardispluggedin—Turnoffand
removetheminiPCInetworkcard.
1.RemoveMiniPCInetworkcard.
2.Systemboard.
46HardwareMaintenanceManual
Page 53

Table2.Numericerrorcodes(continued)
Symptomorerror
FRUoraction,insequence
1803
Unauthorizeddaughtercardispluggedin—Turnoffand
removethedaughtercard.
1.Removethedaughtercardthatyouinstalled.
2.Systemboard.
1804
UnauthorizedWANcardispluggedin—Poweroffand
removetheWANcard.
1.RemovetheWANcardthatyouinstalled.
2.Systemboard.
1805
UnauthorizedWirelessUSBcardispluggedin—Poweroff
andremovetheWirelessUSBcard.
1.RemovetheWirelessUSBcardthatyouinstalled.
2.Systemboard.
1810
Harddiskpartitionlayouterror.
1.IftheAccessPredesktopAreahasbeenpreviously
disabled,thengototheBIOSSetupUtilityby
pressingF1toopentheBIOSSetupUtility.Select
Security➙PredesktopArea➙AccessPredesktop
Area.SetthisitemtoDisabled.Saveandexit.
2.IftheAccessPredesktopAreahasnotbeen
previouslydisabled,pressEntertoloadAccess
PredesktopArea.ThenrunRECOVERTOFACTORY
CONTENTSinAccessPredesktopArea.
3.Ifitem2failed,pressF3intheWelcomescreenin
RECOVERTOFACTORYCONTENTS.RunFDISK,
andthendeleteallpartitions.RunRECOVERTO
FACTORYCONTENTSinAccessPredesktopArea
again.
4.Ifitem3failed,selectCD-ROMbootinStartupin
AccessPredesktopArea.BootfromtheRecovery
CDandperformfullrecoveryfromit.
5.Ifitem4failed,replacetheharddiskdrive.
1820
Morethanoneexternalngerprintreaderisattached.
Poweroffandremoveallbutthereaderthatyousetup
withinyourmainoperatingsystem.
Removeallbutthereaderthatyousetupforthe
authentication.
1830
Invalidmemoryconguration—Poweroffandinstalla
memorymoduletoSlot-0orthelowerslot.
InstallDIMMinSlot-0,butnotinSlot-1.
Note:FortheconstructionoftheDIMMslot,see“1060
DIMM(intheslotontheundersideofthecomputer)”on
page71
.
2000
HardDriveActiveProtectionsensordiagnostics
failed.Press<Esc>tocontinue.Press<F1>toenter
SETUP
1.Undockdockingstationorportreplicatorifitis
attachedtotheThinkPadNotebook.
2.PlacetheThinkPadNotebookonahorizontalsurface.
Donotapplyanyphysicalshocktothecomputer.
3.RunDiagnostics➙ThinkPadDevices➙HDD
ActiveProtectionTest.
2010
Warning:Yourinternalharddiskdrive(HDD)maynot
functioncorrectlyonthissystem.EnsurethatyourHDD
issupportedonthissystemandthatthelatestHDD
rmwareisinstalled.
Informthefollowinginformationtothecustomer:Ifin
theprimarybaythecustomerisusingnon-Lenovohard
diskdrive(HDD),oranoldgenerationHDDwhichis
notsupportedbythissystem,withtheriskinmind,the
customercanstilluseitbypressingESC.Ifintheprimary
drivebaythecustomerisusingasupportedLenovoHDD
withanoldrmware,thecustomerneedstoupdateits
rmwaretothelatest.Thelatestversionisavailableat
http://www.lenovo.com/support
Chapter4.Relatedserviceinformation47
Page 54

Table2.Numericerrorcodes(continued)
Symptomorerror
FRUoraction,insequence
201x
Thesolid-statedriveyouhaveinstalledhasnotpassed
qualicationforuseinthiscomputer.Usingthisdrivemay
causecompatibilityissuesandpotentialissueswithdata
integrity,includingdataloss.Press<Esc>tocontinue.
Informthefollowinginformationtothecustomer:Ifthe
customerisusinganonqualiedSSDwhichisnot
supportedbythissystem,withtheriskinmind,the
customercanstilluseitbypressingESC.Locationofthe
SSDisdesignatedasbelow:
2010:HDD0(inHDDslot-0)
2011:HDD1(inHDDslot-1)
2012:Ultrabay™withHDDadapter
2100
InitializationerroronHDD0(Mainharddiskdrive)
1.Reseattheharddiskdrive.
2.Mainharddiskdrive.
3.Systemboard.
2102
InitializationerroronHDD1(Ultrabayharddiskdrive)
1.Reseattheharddiskdrive.
2.Ultrabayharddiskdrive.
3.Systemboard.
2110
ReaderroronHDD0(Mainharddiskdrive)
1.Reseattheharddiskdrive.
2.Mainharddiskdrive.
3.Systemboard.
2112
ReaderroronHDD1(Ultrabayharddiskdrive)
1.Reseattheharddiskdrive.
2.Ultrabayharddiskdrive.
3.Systemboard.
Errormessages
Table3.Errormessages
Symptomorerror
FRUoraction,insequence
Deviceaddressconict.
1.Load“SetupDefaults”intheBIOSSetupUtility.
2.Backupbattery.
3.Systemboard.
Allocationerrorfordevice.
1.Load“SetupDefaults”intheBIOSSetupUtility.
2.Backupbattery.
3.Systemboard.
Failingbits:nnnn.1.DIMM.
2.Systemboard.
Invalidsystemcongurationdata.
1.DIMM.
2.Systemboard.
I/OdeviceIRQconict.1.Load“SetupDefaults”intheBIOSSetupUtility.
2.Backupbattery.
3.Systemboard.
Hibernationerror.1.Restorethesystemcongurationtowhatitwas
beforethecomputerenteredhibernationmode.
2.Ifmemorysizehasbeenchanged,re-createthe
hibernationle.
Fanerror.1.Fan.
2.Thermalgrease.
3.Systemboard.
48HardwareMaintenanceManual
Page 55

Table3.Errormessages(continued)
Symptomorerror
FRUoraction,insequence
Thermalsensingerror.
Systemboard.
Cannotbootfromanydevice.Checkthestatusofdevicewhichyouwanttoboot
from.
Devicenotfound.
1.Thedeviceyouwanttobootfrom.
2.Systemboard.
DeviceError.
1.Thedeviceyouwanttobootfrom.
2.Systemboard.
Novalidoperatingsystem.
1.Checkthattheoperatingsystemhasnofailureandis
installedcorrectly.
2.Reinstalltheoperationsystem.
Excludedfrombootorder.
•EntertheBIOSSetupUtilityandaddthedeviceinboot
order.
Chapter4.Relatedserviceinformation49
Page 56

Beepsymptoms
Table4.Beepsymptoms
Symptomorerror
FRUoraction,insequence
Onebeepandablank,unreadable,orashingLCD.1.ReseattheLCDconnector.
2.LCDassembly .
3.ExternalCRT .
4.Systemboard.
Onelongandtwoshortbeeps,andablankorunreadable
LCD.
1.Systemboard.
2.LCDassembly .
3.DIMM.
Twoshortbeepswitherrorcodes.
POSTerror.See“Numericerrorcodes”onpage44.
Twoshortbeepsandablankscreen.
1.Systemboard.
2.DIMM.
Twoormorebeeps,oracontinuousbeep.Operating
systemstartssuccessfully.
Ifamini-PCIEthernetcardisinstalled,conrmthatAlert
OnLAN2inBIOSSetupUtilityisdisabled.
Threeshortbeeps,pause,threemoreshortbeeps,and
oneshortbeep.
Oneshortbeep,pause,threeshortbeeps,pause,three
moreshortbeeps,andoneshortbeep.
1.DIMM.
2.Systemboard
Onlythecursorappears.
Reinstalltheoperatingsystem.
Fourcyclesoffourshortbeepsandablankscreen.
Systemboard(securitychip)
Fiveshortbeepsandablankscreen.
Systemboard
No-beepsymptoms
Table5.No-beepsymptoms
Symptomorerror
FRUoraction,insequence
Nobeep,power-onindicatoron,LCDblank,andno
POST.
1.Makesurethateveryconnectorisconnected
tightlyandcorrectly.
2.DIMM.
3.Systemboard.
Nobeep,power-onindicatoron,andLCDblankduring
POST.
1.ReseatDIMM.
2.Systemboard.
Thepower-onpasswordpromptappears.Apower-onpasswordorasupervisorpasswordisset.
TypethepasswordandpressEnter.
Thehard-diskpasswordpromptappears.Ahard-diskpasswordisset.T ypethepasswordand
pressEnter.
LCD-relatedsymptoms
Important:TheTFTLCDforthenotebookcomputercontainsmanythin-lmtransistors(TFT s).Thepresenceofa
smallnumberofdotsthataremissing,discolored,oralwayslightedischaracteristicofTFTLCDtechnology,but
excessivepixelproblemscancauseviewingconcerns.
IftheLCDyouareservicinghastwoorlessvisibledefectivepixels,itshouldnotbeconsideredfaulty.However,ifthe
LCDhasthreeormorevisibledefectivepixels,itwillbedeemedasdefectivebyLenovoanditshouldbereplaced.
Notes:
•ThispolicyappliestoallThinkPadNotebookspurchasedon1January,2008orlater.
50HardwareMaintenanceManual
Page 57

•LenovowillnotprovidereplacementiftheLCDiswithinspecicationaswecannotguaranteethatany
replacementLCDwillhavezeropixeldefects.
•OnepixelconsistsofR,G,Bsub-pixels.
Table6.LCD-relatedsymptoms
Symptomorerror
FRUoraction,insequence
Nobeep,power-onindicatoron,andablankLCDduring
POST.
Systemboard.
•LCDbacklightnotworking.
•LCDtoodark.
•LCDbrightnesscannotbeadjusted.
•LCDcontrastcannotbeadjusted.
1.ReseattheLCDconnectors.
2.LCDassembly .
3.Systemboard.
•LCDscreenunreadable.
•Charactersmissingpixels.
•Screenabnormal.
•Wrongcolordisplayed.
1.Seeimportantnotefor“LCD-relatedsymptoms.”
2.ReseatallLCDconnectors.
3.LCDassembly .
4.Systemboard.
HorizontalorverticallinesdisplayedonLCD.LCDassembly.
Chapter4.Relatedserviceinformation51
Page 58

Intermittentproblems
Intermittentsystemhangproblemscanbeduetoavarietyofcausesthathavenothingtodowithahardware
defect,suchascosmicradiation,electrostaticdischarge,orsoftwareerrors.FRUreplacementshouldbe
consideredonlywhenaproblemrecurs.
Whenanalyzinganintermittentproblem,dothefollowing:
1.Runthediagnostictestforthesystemboardinloopmodeatleast10times.
2.Ifnoerrorisdetected,donotreplaceanyFRUs.
3.Ifanyerrorisdetected,replacetheFRUshownbytheFRUcode.Rerunthetesttoverifythatno
moreerrorsexist.
Undeterminedproblems
Ifthediagnostictestsdidnotidentifytheadapterordevicethathasfailed,ifwrongdevicesareinstalled,
orifthesystemsimplyisnotoperating,followtheseprocedurestoisolatethefailingFRU(donotisolate
FRUsthathavenodefects).
Verifythatallattacheddevicesaresupportedbythecomputer.
Verifythatthepowersupplybeingusedatthetimeofthefailureisoperatingcorrectly.(See“Powersystem
checkout”onpage36.)
1.T urnoffthecomputer.
2.VisuallycheckeachFRUfordamage.ReplaceanydamagedFRU.
3.Removeordisconnectallofthefollowingdevices:
a.Non- ThinkPaddevices
b.Devicesattachedtothedockingstationortheportreplicator
c.Printer,mouse,andotherexternaldevices
d.Batterypack
e.Harddiskdrive
f.Externaldiskettedriveoropticaldrive
g.DIMM
h.Opticaldiskordisketteintheinternaldrive
i.PCCards
4.T urnonthecomputer.
5.Determinewhethertheproblemhasbeensolved.
6.Iftheproblemdoesnotrecur,reconnecttheremoveddevicesoneatatimeuntilyoundthefailingFRU.
7.Iftheproblemremains,replacethefollowingFRUsoneatatime(donotreplaceanondefectiveFRU):
a.Systemboard
b.LCDassembly
52HardwareMaintenanceManual
Page 59

Chapter5.Statusindicators
Thischapterpresentsthesystemstatusindicatorsthatshowthestatusofthecomputer.
7
1
2
3
4 5 6
8
9
©CopyrightLenovo2010,2012
53
Page 60

11
10
Table7.Statusindicators
IndicatorMeaning
1
Speakermute
Orange:
Thespeakerisonmute.Tosetthespeakersonmuteorunmute,
pressthespeakermutebutton.
2
Microphonemute
Orange:
Themicrophoneisonmute.Noneoftherecordingdevicesis
availablewhilethemicrophonemuteisonbydefault.
3
WirelessLAN,WirelessWAN,
orWiMAXstatus
Green:
ThewirelessLANfeature(theIEEE802.11b/gstandard,802.11
a/b/g,or802.11n),wirelessWANfeature,orWiMaxfeatureis
on,andtheradiolinkisreadyforuse.
Blinkinggreen:
Dataisbeingtransmitted.
4
BluetoothwirelessorWireless
USBstatus
Green:
TheBluetoothwirelessfeatureison,andtheradiolinkisready
foruse.
Blinkinggreen:
Dataisbeingtransmitted.
54HardwareMaintenanceManual
Page 61
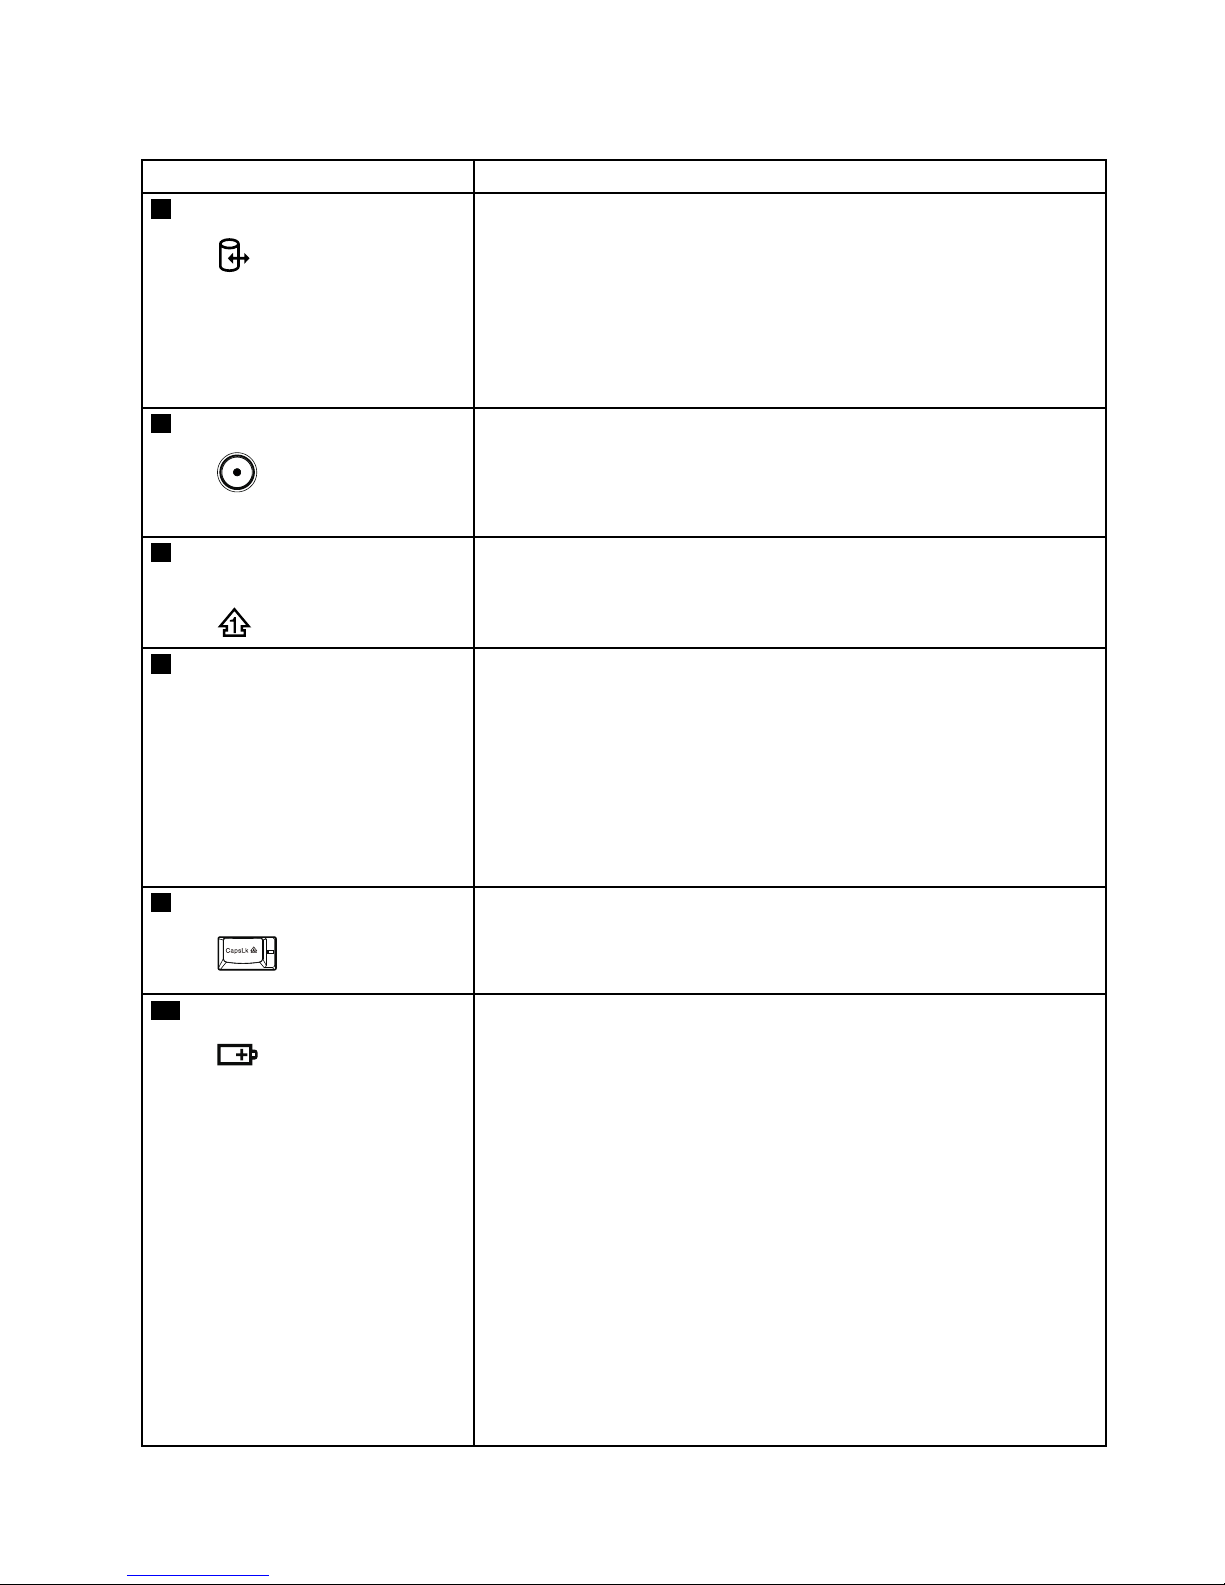
Table7.Statusindicators(continued)
IndicatorMeaning
5
Deviceaccess
Green:
Dataisbeingreadfromorwrittentotheharddiskdrive,the
diskettedrive,orthedriveintheSerialUltrabaySlimdevice.
Whenthisindicatorison,donotputthecomputerintosleep
(standby)modeorturnoffthecomputer.
Note:Donotmovethesystemwhilethegreendeviceaccesslightison.
Suddenphysicalshockcouldcausedriveerrors.
6
Poweron
Green:
Thecomputerisonandreadytouse.Thisindicatorstayslit
aroundthepower-onbuttonwheneverthecomputerisonand
isnotinsleep(standby)mode.
7
Numericlock(On-screen
indicator)
Bydefault,whenthenumericlockison,thenumericlockindicatoris
displayedonthescreen.
8
SerialUltrabaySlimdevice
status
Green:
ASerialUltrabaySlimdeviceisinstalledandinuse.
Blinkinggreen:
ASerialUltrabaySlimdeviceisintheprocessofbeingdetached.
Turnoff:
ASerialUltrabaySlimdeviceisreadytobeattachedor
detached.
9
Capslock
Green:
CapsLockmodeisenabled.T oenableordisableCapsLock
mode,presstheCapsLockkey.
10
Batterystatus
Green:
Thebatteryhasmorethan20%charge.
Orange:
Thebatteryhasbetween5%and20%charge.
Fastblinkingorange:
Thebatteryhaslessthan5%charge.
Note:Thebatterymaybecharging.
Slowblinkingorange:
Thebatteryisbeingcharged.Whenitreaches20%,theblinking
colorchangestogreen.
Slowblinkinggreen:
Thebatteryhasbetween20%and80%charge,andcharging
iscontinuing.Whenthebatteryreaches80%charge,blinking
stops,butthechargingmaycontinueuntilthebatteryis100%
charged.
Chapter5.Statusindicators55
Page 62

Table7.Statusindicators(continued)
IndicatorMeaning
Note:Ifthecomputerisoperatingonbatterypower,thebattery
statusindicatordoesnotworkwhilethecomputeristurnedoff
orisinsleep(standby)modeorhibernationmode.
Quickblinkingorange:
Anerrorhasbeenoccurredinthebattery.
Thebatterystatusindicatorisoff:
Thebatterypackofthecomputerisdetached.
11
Sleep(standbyforWindows
XP)status
Green:
Thecomputerisinsleep(standby)mode.
Blinkinggreen:
Thecomputerisenteringsleep(standby)modeorhibernation
mode,orisresumingnormaloperation.
56HardwareMaintenanceManual
Page 63

Chapter6.Fnkeycombinations
ThefollowingtableshowsthefunctionofeachcombinationofFnwithafunctionkey.
Table8.Fnkeycombinations
KeycombinationDescription
Fn+F1Reserved.
Fn+F2Lockthecomputer.
Fn+F3
Selectapowerplan(inWindowsXP ,powerscheme)thathasbeencreatedbyPowerManager,
oradjustthepowerlevelbyusingtheslidercontrol.Whenyoupressthiscombination,a
panelforselectingapowerplan(powerscheme)appears.
Notes:
Tousethiscombinationofthekeys,ThinkPadPMdevicedrivermusthavebeeninstalled
onthecomputer.
IfyouhaveloggedonwithanadministratoruserIDinWindowsXP,andyoupressFn+F3,
thepanelforselectingapowerschemeappears.Ifyouhaveloggedonwithanotheruser
IDinWindowsXP ,andyoupressFn+F3,thepaneldoesnotappear.
Fn+F4
Putthecomputerinsleep(standby)mode.T oreturntonormaloperation,presstheFnkey
only,withoutpressingafunctionkey.
Notes:
Tousethiscombinationofthekeys,ThinkPadPMdevicedrivermusthavebeeninstalled
onthecomputer.
Ifyouwanttousethecombinationtoputthecomputerintohibernationmodeor
do-nothingmode(inWindowsXP,shutthecomputerdownorshowthepanelforturning
offthecomputer),changethesettingsinthePowerManager.
Fn+F5
Enableordisablethebuilt-inwirelessnetworkingfeatures.IfyoupressFn+F5,alistofwireless
featuresisdisplayed.Y oucanquicklychangethepowerstateofeachfeatureinthelist.
Notes:IfyouwanttouseFn+F5toenableordisablethewirelessfeatures,thefollowing
devicedriversmustbeinstalledonthecomputerbeforehand:
•PowerManagementdriver
•OnScreenDisplayUtility
•Wirelessdevicedrivers
Fn+F6
Changethecameraandaudiosettings.WhenyoupressFn+F6,thecameraandaudiosetting
windowisopenedandthecamerapreviewisturnedon.
Note:Thecamerasettingsareaonlyappearsifthecomputerhasanintegratedcamera.
Fn+F7Applyapresentationschemedirectly,withnoneedtostartPresentationDirector .
TodisablethisfunctionandusetheFn+F7keycombinationforswitchingadisplayoutput
location,startPresentationDirector,andchangethesettings.
Note:IfthecomputerisanWindows7model,itdoesnotsupportpresentationschemes,
howevertheFn+F7combinationmightstillbeusedtoswitchdisplayoutputlocation.
ForWindows7:
Switchbetweenthecomputerdisplayandanexternalmonitor.Windowswillshowthese
displayoptions:
•Computerdisplayonly(LCD)
•Computerdisplayandexternalmonitor(sameimage)
•Computerdisplayandexternalmonitor(extendeddesktopfunction)
©CopyrightLenovo2010,2012
57
Page 64

Table8.Fnkeycombinations(continued)
KeycombinationDescription
•Externalmonitoronly
Note:Toswitchbetweenthecomputerdisplayandanexternalmonitor,theWin+Pkey
combinationisalsoavailable.
ForWindowsVistaandWindowsXP:
Switchbetweenthecomputerdisplayandanexternalmonitor.Ifanexternalmonitoris
attached,computeroutputisdisplayedinthefollowingthreepatternsbyturns:
•Externalmonitor(CRTdisplay)
•Computerdisplayandexternalmonitor(LCD+CRTdisplay
•Computerdisplay(LCD)
Notes:
Thisfunctionisnotsupportedifdifferentdesktopimagesaredisplayedonthecomputer
displayandtheexternalmonitor(theExtenddesktopfunction).
ThisfunctiondoesnotworkwhileaDVDmovieoravideoclipisplaying.
Toenablethisfunction,startPresentationDirector,andchangethesettings.
Note:MultipleuserscanlogontoasingleoperatingsystembyusingdifferentuserIDs.
Eachuserneedstodothefollowing:
ClickStart➙AllPrograms➙ThinkVantage➙PresentationDirector,andchangethe
Fn+F7settings.
Fn+F8
ChangethesettingsoftheUltraNav
®
pointingdevice.
Fn+F9Reserved.
Fn+F10Reserved.
Fn+F11Reserved.
Fn+F12Putthecomputerintohibernationmode.Toreturntonormaloperation,pressthepower
buttonforlessthanfourseconds.
Notes:
Tousethiscombinationofthekeys,ThinkPadPMdevicedrivermusthavebeeninstalled
onthecomputer.
ThoughthescreenfadesoutimmediatelyafterFn+F12arepressed,thecomputer
doesnotenterthehibernationmodeimmediately.Donotmovethesystemuntilthe
sleep(standby)statusindicatorstopsblinking.Movingthecomputerwhenitisentering
hibernationmightcausecorruptionoftheharddiskdrive.
Fn+PgUp
TurntheThinkLight
®
onoroff.
Note:ThisfunctionissupportedonlyontheThinkPadNotebooksthathavetheThinkLight.
TheonoroffstatusoftheThinkLightisshownonthescreenforafewsecondswhenyou
pressFn+PgUp.
Fn+HomeThecomputerdisplaybecomesbrighter.
Thepurposeofthismethodistochangethebrightnessleveltemporarily.OnWindowsVista,
thedefaultbrightnesslevelisloadedaftersleep(standby),hibernation,reboot,ordetachingor
attachinganacadapter.T ochangethedefaultbrightnesslevel,changethesettingsofthe
PowerOptionintheControlPanelorusethePowerManager.
58HardwareMaintenanceManual
Page 65

Table8.Fnkeycombinations(continued)
KeycombinationDescription
Fn+EndThecomputerdisplaybecomesdimmer.
Thepurposeofthismethodistochangethebrightnessleveltemporarily.OnWindowsVista,
thedefaultbrightnesslevelisloadedaftersleep(standby),hibernation,reboot,ordetachingor
attachinganacadapter.T ochangethedefaultbrightnesslevel,changethesettingsofthe
PowerOptionintheControlPanelorusethePowerManager.
Fn+SpacebarEnabletheFullScreenMagnierfunction.
Fn+PrtScHavethesamefunctionastheSysRqkey.
Fn+ScrLk
Enableordisablethenumerickeypad.Theindicatorofnumericlockwillbedisplayedon
thescreen.
Fn+Pause
HavethesamefunctionastheBreakkey.
Fn+cursorkeys
ThesekeycombinationsworkwithWindowsMediaPlayer.Theyhavethefollowingfunctions:
•Fn+downarrowkey:PlayorPause
•Fn+uparrowkey:Stop
•Fn+rightarrowkey:NextT rack
•Fn+leftarrowkey:PreviousT rack
Chapter6.Fnkeycombinations59
Page 66

60HardwareMaintenanceManual
Page 67

Chapter7.FRUreplacementnotices
ExternalCRUstatementtocustomers:
Someproblemswithyourproductcanberesolvedwithareplacementpartyoucaninstallyourself,called
a“CustomerReplaceableUnit”or“CRU. ”SomeCRUsaredesignatedasSelf-serviceCRUsandothers
aredesignatedasOptional-serviceCRUs.InstallationofSelf-serviceCRUsisyourresponsibility;youmay
requestthatLenovoinstallsanOptional-serviceCRUaccordingtothewarrantyserviceforyourproduct.
WhereyouareinstallingtheCRU,LenovowillshiptheCRUtoyou.CRUinformationandreplacement
instructionsareshippedwithyourproductandareavailablefromLenovoatanytimeuponrequest.Youmay
ndalistofCRUsinthepublicationsthatshipwithyourproductorathttp://www.lenovo.com/support.Y ou
mayberequiredtoreturnthedefectivepartthatisreplacedbytheCRU.Whenreturnisrequired:(1)return
instructions,aprepaidshippinglabel,andacontainerwillbeincludedwiththereplacementCRU;and(2)you
maybechargedforthereplacementCRUifLenovodoesnotreceivethedefectivepartwithinthirty(30)days
ofyourreceiptofthereplacementCRU.SeeyourLenovoLimitedWarrantydocumentationforfulldetails.
Thischapterpresentsnoticesrelatedtoremovingandreplacingparts.Readthischaptercarefullybefore
replacinganyFRU.
Screwnotices
Loosescrewscancauseareliabilityproblem.IntheThinkPadnotebookcomputer,thisproblemisaddressed
withspecialnylon-coatedscrewsthathavethefollowingcharacteristics:
•Theymaintaintightconnections.
•Theydonoteasilycomeloose,evenwithshockorvibration.
•Theyarehardertotighten.
Dothefollowingwhenyouservicethismachine:
•Keepthescrewkitinyourtoolbag.Forthepartnumberofthescrewkit,see“Miscellaneousparts”on
page151
.
•Itisrecommendedtousenewscrews.
•Itisrecommendedtouseeachscrewonlyonce.
•Useatorquescrewdriverifyouhaveone.
Tightenscrewsasfollows:
•Plastictoplastic
Turnanadditional90degreesafterthescrewheadtouchesthesurfaceoftheplasticpart:
•Logiccardtoplastic
Turnanadditional180degreesafterthescrewheadtouchesthesurfaceofthelogiccard:
©CopyrightLenovo2010,2012
61
Page 68

•T orquedriver
Ifyouhaveatorquedriver,refertotheTorquecolumninthescrewinformationtableforeachstep.
•Makesurethatyouusethecorrectscrew.Itisrecommendedtousenewscrewsforreplacements.
•Ifyouhaveatorquescrewdriver,tightenallscrewsrmlytothetorquespeciedinthescrewinformation
tableforeachstep.
•Ensuretorquescrewdriversarecalibratedcorrectlyfollowingcountryspecications.
62HardwareMaintenanceManual
Page 69

Retainingserialnumbers
Thissectionincludesthefollowingdescriptions:
•“Restoringtheserialnumberofthesystemunit”onpage63
•“RetainingtheUUID”onpage63
•“ReadingorwritingtheECAinformation”onpage64
Restoringtheserialnumberofthesystemunit
Whenthecomputerwasmanufactured,theEEPROMonthesystemboardwasloadedwiththeserial
numbersofthesystemandallmajorcomponents.Thesenumbersneedtoremainthesamethroughout
thelifeofthecomputer.
Ifyoureplacethesystemboard,youmustrestoretheserialnumberofthesystemunittoitsoriginalvalue.
Beforereplacingthesystemboard,savetheoriginalserialnumberbydoingthefollowing:
1.InstalltheLENOVOThinkPadHardwareMaintenanceDisketteVersion1.76orlater,andrestartthe
computer.
2.Fromthemainmenu,select1.SetSystemIdentication.
3.Select2.ReadS/NdatafromEEPROM.
Theserialnumberofeachdeviceinyourcomputerisdisplayed;theserialnumberofthesystemunitis
listedasfollows:
•20:Serialnumber
Writedownthatnumber.
Note:Theserialnumberofthesystemunitisalsowrittenonthelabelattachedtothebottomofthecomputer.
Afteryouhavereplacedthesystemboard,restoretheserialnumberbydoingthefollowing:
1.InstalltheLENOVOThinkPadHardwareMaintenanceDisketteVersion1.76orlaterandrestartthe
computer.
2.Fromthemainmenu,select1.SetSystemIdentication.
3.Select1.AddS/NdatafromEEPROM.Followtheinstructionsonthescreen.
IftheMTMandProductIDnumbersdifferfromeachotherontherearlabel,usewhatisshownforthe
ProductIDeld.Seeexamplebelow:
MTMonrearlabel:
TTTT-CTOS/NSSSSSSS
ProductIDonrearlabel:
TTTT-MMM(UsethisnumberwhensettingSerialNumber)
Intheexample,theSerialNumbertobeinputis'1STTTTMMMSSSSSSS'.
RetainingtheUUID
TheUniversallyUniqueIdentier(UUID)isa128-bitnumberuniquelyassignedtoyourcomputerat
productionandstoredintheEEPROMofyoursystemboard.Thealgorithmthatgeneratesthenumberis
designedtoprovideuniqueIDsuntiltheyearA.D.3400.Notwocomputersintheworldhavethesame
number.
Chapter7.FRUreplacementnotices63
Page 70

Whenyoureplacethesystemboard,youmustsettheUUIDonthenewsystemboardasfollows:
1.InstalltheLENOVOThinkPadHardwareMaintenanceDisketteVersion1.76orlater,andrestartthe
computer.
2.Fromthemainmenu,select4.AssignUUID.AnewUUIDiscreatedandwritten.IfavalidUUIDalready
exists,itisnotoverwritten.
ReadingorwritingtheECAinformation
InformationonEngineeringChangeAnnouncements(ECA)arestoredintheEEPROMofthesystemboard.
TheelectronicstorageofthisinformationsimpliestheproceduretocheckiftheECAhasbeenpreviously
appliedtoamachine.ThemachinedoesnotneedtobedisassembledtocheckfortheECAapplication.
TocheckwhatECAshavebeenpreviouslyappliedtothemachine,usetheECAInformationRead/Write
functionontheLENOVOThinkPadHardwareMaintenanceDisketteVersion1.76orlater.
1.InserttheLENOVOThinkPadHardwareMaintenanceDisketteVersion1.76orlater,andrestartthe
computer.
2.Fromthemainmenu,select6.SetECAInformation.
3.T oreadECAinformation,select2.ReadECA/reworknumberfromEEPROMandfollowthe
instruction.
4.T oreadboxbuilddate,select5.ReadboxbuilddatefromEEPROM,andfollowtheinstructionon
thescreen.
AfteranECAhasbeenappliedtothemachine,theEEPROMmustbeupdatedtoreecttheECA's
application.UsetheLENOVOThinkPadHardwareMaintenanceDisketteVersion1.76orlatertoupdatethe
EEPROM.
Note:OnlytheECAnumberisstoredintheEEPROM.ThemachinetypeoftheECAisassumedbethesame
asthemachinetypeofthemachinethathadtheECAappliedtoit.
1.InserttheLENOVOThinkPadHardwareMaintenanceDisketteVersion1.76orlater,andrestartthe
computer.
2.Fromthemainmenu,select6.SetECAInformation.
3.T owriteECAinformation,select1.WriteECA/reworknumberfromEEPROM,andfollowthe
instruction.
4.T owriteboxbuilddate,select4.WriteboxbuilddatefromEEPROM,andfollowtheinstructionon
thescreen.
Ifthesystemboardisbeingreplaced,trytoreadtheECAinformationfromtheoldsystemboardandtransfer
theinformationtothenewsystem.Ifthesystemboardisinoperable,thiswillnotbepossible.
64HardwareMaintenanceManual
Page 71

Chapter8.RemovingandreplacingaFRU
ExternalCRUstatementtocustomers:
Someproblemswithyourproductcanberesolvedwithareplacementpartyoucaninstallyourself,called
a“CustomerReplaceableUnit”or“CRU. ”SomeCRUsaredesignatedasSelf-serviceCRUsandothers
aredesignatedasOptional-serviceCRUs.InstallationofSelf-serviceCRUsisyourresponsibility;youmay
requestthatLenovoinstallsanOptional-serviceCRUaccordingtothewarrantyserviceforyourproduct.
WhereyouareinstallingtheCRU,LenovowillshiptheCRUtoyou.CRUinformationandreplacement
instructionsareshippedwithyourproductandareavailablefromLenovoatanytimeuponrequest.Youmay
ndalistofCRUsinthepublicationsthatshipwithyourproductorathttp://www.lenovo.com/CRUs.Y ou
mayberequiredtoreturnthedefectivepartthatisreplacedbytheCRU.Whenreturnisrequired:(1)return
instructions,aprepaidshippinglabel,andacontainerwillbeincludedwiththereplacementCRU;and(2)you
maybechargedforthereplacementCRUifLenovodoesnotreceivethedefectivepartwithinthirty(30)days
ofyourreceiptofthereplacementCRU.SeeyourLenovoLimitedWarrantydocumentationforfulldetails.
ThischapterpresentsdirectionsanddrawingsforuseinremovingandreplacingaFRU.Besuretoobserve
thefollowinggeneralrules:
1.Donottrytoserviceanycomputerunlessyouhavebeentrainedandcertied.Anuntrainedpersonruns
theriskofdamagingparts.
2.BeforereplacinganyFRU,reviewChapter7“FRUreplacementnotices”onpage61.
3.BeginbyremovinganyFRUsthathavetoberemovedbeforereplacingthefailingFRU.AnysuchFRUs
arelistedatthetopofeachFRUreplacementpage.Removethemintheorderinwhichtheyarelisted.
4.FollowthecorrectsequenceinthestepsforremovingaFRU,asgiveninthedrawingsbythenumbers
insquarecallouts.
5.WhenturningascrewtoreplaceaFRU,turnitinthedirectionasgivenbythearrowinthedrawing.
6.WhenremovingaFRU,moveitinthedirectionasgivenbythearrowinthedrawing.
7.T oputthenewFRUinplace,reversetheremovalprocedureandfollowanynotesthatpertainto
replacement.Forinformationaboutconnectingandarranginginternalcables,seeChapter9“Locations”
onpage119.
8.WhenreplacingaFRU,usethecorrectscrew(s)asshownintheprocedures.
DANGER
BeforeremovinganyFRU,turnoffthecomputer,unplugallpowercordsfromelectricaloutlets,
removethebatterypack,andthendisconnectanyinterconnectingcables.
Attention:AfterreplacingaFRU,donotturnonthecomputeruntilyouhavemadesurethatallscrews,
springs,andothersmallpartsareinplaceandnonearelooseinsidethecomputer.Verifythisbyshaking
thecomputergentlyandlisteningforrattlingsounds.Metallicpartsormetalakescancauseelectrical
shortcircuits.
Attention:Thesystemboardissensitiveto,andcanbedamagedby,electrostaticdischarge.Before
touchingit,establishpersonalgroundingbytouchingagroundpointwithonehandorbyusingan
electrostaticdischarge(ESD)strap(P/N6405959).
BeforeservicingThinkPadT410andT410imodels
SomemodelsoftheThinkPadT410andT410iyouareservicingmighthavetheSIMcardthatthecustomer
hasinstalled.
©CopyrightLenovo2010,2012
65
Page 72

IfthecomputeryouareservicinghastheSIMcard,removeitbeforeyoustarttheservicing.
ToremovetheSIMcard,youneedtoremovethebatterypackrst.(See“1010Batterypack”onpage66
.)
Afteryounishtheservicing,makesurethatyouinsertthecardbackintotheslotrmly.
1
2
1010Batterypack
Importantnoticeforreplacingabatterypack:
TheLenovoThinkVantageT oolbox,LenovoSystemT oolbox(inWindowsVistaandWindowsXP),and
LenovoSolutionCenter(inWindows7)haveanautomaticbatterydiagnosticthatdeterminesifthebattery
packisdefective.AbatterypackFRUshouldnotbereplacedunlessthisdiagnosticshowsthatthebattery
isdefective.
Theonlyexceptiontothisisifthebatterypackisphysicallydamagedoracustomerisreportingapossible
safetyissue.
IfLenovoThinkVantageT oolbox,LenovoSystemT oolbox,orLenovoSolutionCenterisnotinstalledinthe
computer,thecustomershoulddownloadthisprogrambeforeanon-physicallydamagedbatterypackis
replaced.Notethatthereplacementofaphysicallydamagedbatterypackisnotcoveredbythewarranty.
Removalstepsofbatterypack
DANGER
Useonlythebatteryspeciedinthepartslistforyourcomputer .Anyotherbatterycouldignite
orexplode.
Unlockthebatterylatch1.Holdingthebatterylatchintheunlockedposition2,removethebatterypackin
thedirectionshownbyarrow
3.
66HardwareMaintenanceManual
Page 73

3
21
Wheninstalling:Installthebatterypackintheslot.Makesurethatthebatterylatchisinthelockedposition.
1020ExpressCardblankbezel
RemovalstepsofExpressCardblankbezel
WhenyoupresstheExpressCardblankbezel1,itpopsout2.
1
2
Chapter8.RemovingandreplacingaFRU67
Page 74

Wheninstalling:Makesurethatthebezeliscorrectlyorientedasshowninthefollowinggure.
1030SerialUltrabaySlimdeviceortravelbezel
Foraccess,removethisFRU:
•“1010Batterypack”onpage66
RemovalstepsofSerialUltrabaySlimdeviceortravelbezel
Holdingthebaylocklatchintheunlockedposition1,slidethebayejectinthedirectionshownbyarrow
2,andthenpullouttheUltrabaySlimdeviceorthetravelbezelinthedirectionshownbyarrow3to
completelyremoveit4.
3
2
1
68HardwareMaintenanceManual
Page 75

4
1040Harddiskdrive(HDD)andsolid-statedrive(SSD)
Foraccess,removethisFRU:
•“1010Batterypack”onpage66
Attention:
•Donotdropthedriveorapplyanyphysicalshocktoit.Thedriveissensitivetophysicalshock.Improper
handlingcancausedamageandpermanentlossofdata.
•Beforeremovingthedrive,havetheusermakeabackupcopyofalltheinformationonitifpossible.
•Neverremovethedrivewhilethesystemisoperatingorisinsuspendmode.
RemovalstepsofHarddiskdriveandsolid-statedrive
2
1
Chapter8.RemovingandreplacingaFRU69
Page 76
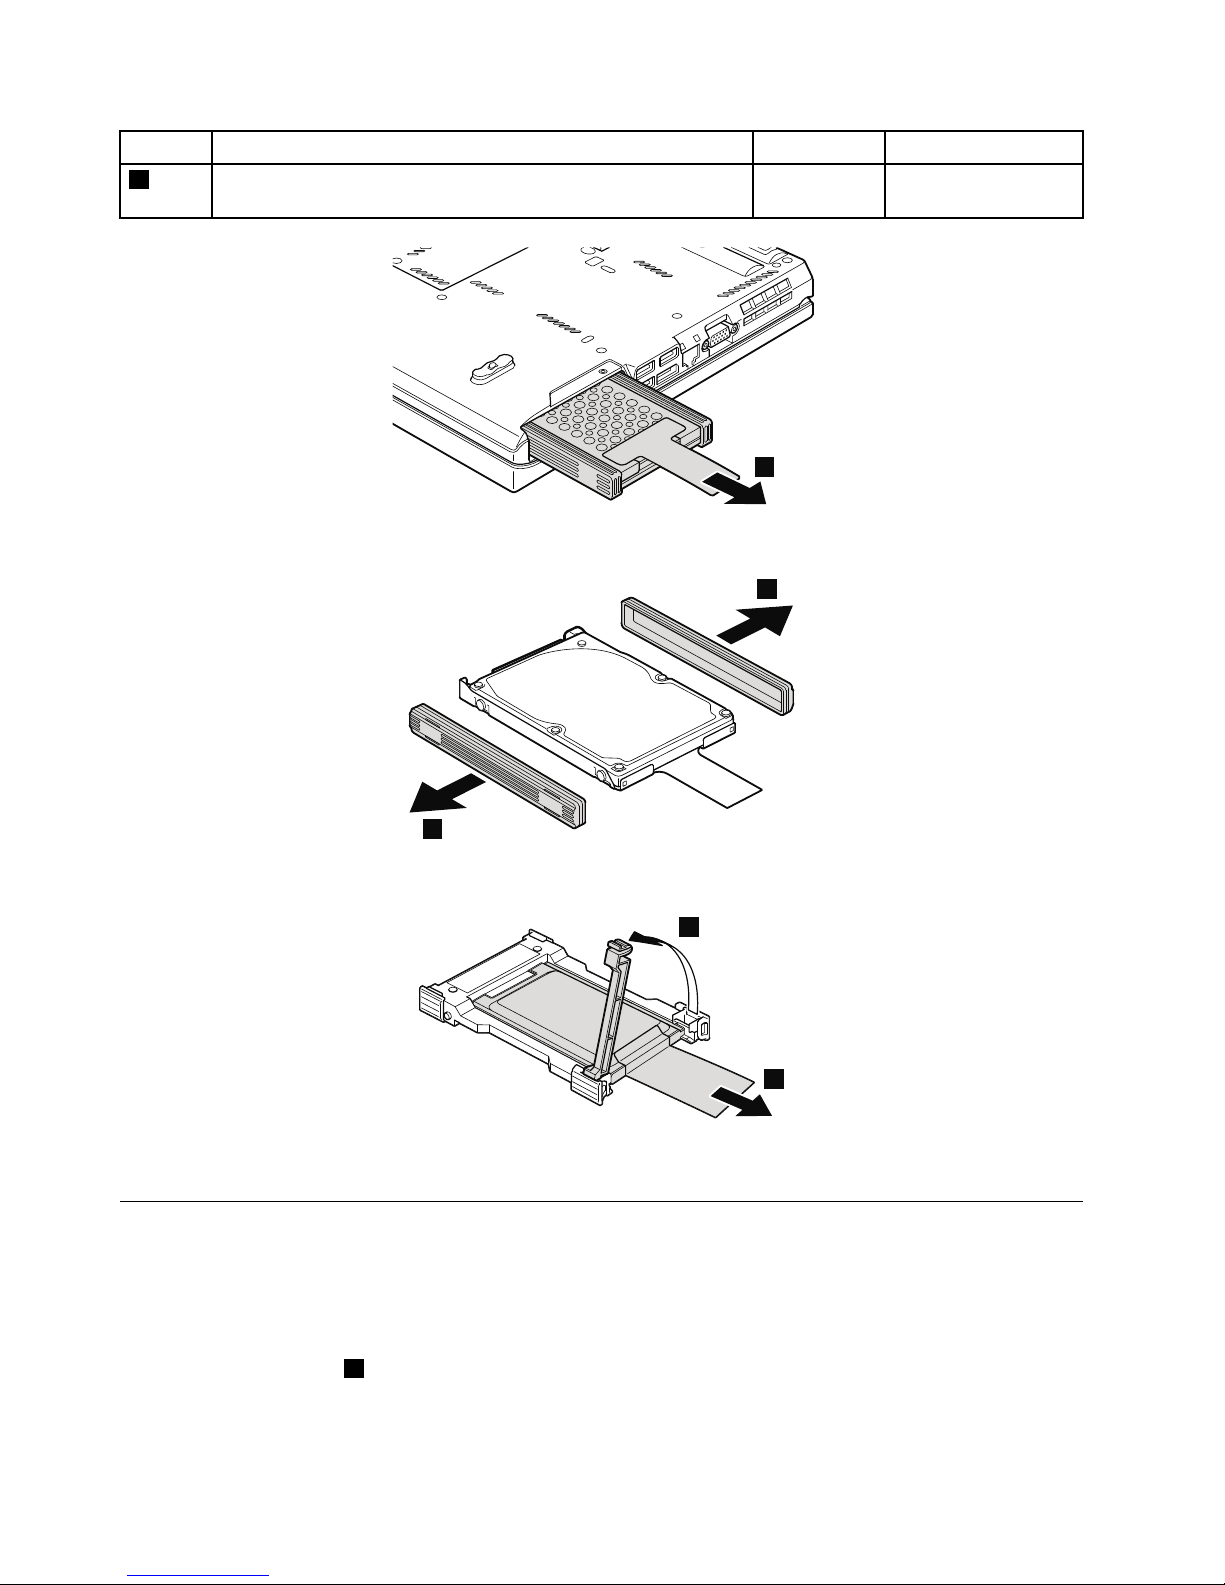
StepScrew(quantity)Color
Torque
1
M3×3mm,wafer-head,nylon-coated(1)
Black0.392Nm
(4.0kgf-cm)
3
ForHDDandHDDrubberrails:
4
4
ForSSDandstorageconverter:
5
4
Wheninstalling:MakesurethattheSSDorHDDisattachedrmly.
1050DIMMslotcover
Foraccess,removethisFRU:
•“1010Batterypack”onpage66
RemovalstepsofDIMMslotcover
Note:Loosenthescrew1.
70HardwareMaintenanceManual
Page 77

1
2
1060DIMM(intheslotontheundersideofthecomputer)
Foraccess,removetheseFRUsinorder:
•“1010Batterypack”onpage66
•“1050DIMMslotcover”onpage70
Note:Y ourcomputerhastwoDIMMslots:oneunderthekeyboardandanotherontheundersideofthe
computer.IfyouinstallaDIMMinonlyoneofthetwoslots,installitintheslotlocatedunderthekeyboard.
Chapter8.RemovingandreplacingaFRU71
Page 78

RemovalstepsofDIMM(intheslotontheundersideofthecomputer)
1
1
2
Wheninstalling:InsertthenotchedendoftheDIMMintothesocket.PresstheDIMMrmly,andpivotit
untilitsnapsintoplace.Makesurethatitisrmlyinstalledintheslotanddoesnotmoveeasily.
1070PCIExpressMiniCardforwirelessWAN
Foraccess,removetheseFRUsinorder:
•“1010Batterypack”onpage66
•“1050DIMMslotcover”onpage70
72HardwareMaintenanceManual
Page 79

RemovalstepsofPCIExpressMiniCardforwirelessWAN
Instep1,unplugthejacksbyusingtheremovaltoolantennaRFconnector(P/N:08K7159)orpickthe
connectorswithyourngersandgentlyunplugtheminthedirectionofthearrow.
2
1
1
2
StepScrew(quantity)Color
Torque
2
M2×3mm,wafer-head,nylon-coated(2)
Black0.181Nm
(1.85kgf-cm)
3
Chapter8.RemovingandreplacingaFRU73
Page 80

Wheninstalling:
PlugtheredcableintothejacklabeledMAIN,andthebluecableintothejacklabeledAUXonthecard.
IfthecomputeryouareservicingisawirelessWAN-readymodelanddoesnothaveawirelessWANcard,
routetheantennacablesandsecurethemwithatapeasshowninthefollowinggure.
1080Keyboard
Foraccess,removetheseFRUsinorder:
•“1010Batterypack”onpage66
•“1050DIMMslotcover”onpage70
Removalstepsofkeyboard
1
StepScrew(quantity)Color
Torque
1
M2×10mm,wafer-head,nylon-coated(1)
Black0.181Nm
(1.85kgf-cm)
74HardwareMaintenanceManual
Page 81

Slightlypressthekeyboardandslideitalittlebitforward,inthedirectionshownbyarrow2,todetachthe
frontedgeofthekeyboardfromtheframe.
2
Liftthekeyboardalittleinthedirectionshownbyarrow3,andthendetachtheconnector4.
4
3
Chapter8.RemovingandreplacingaFRU75
Page 82

Installationstepsofkeyboard
Wheninstallingthekeyboard,doasfollows:
1.Attachthekeyboardconnector.
1
76HardwareMaintenanceManual
Page 83
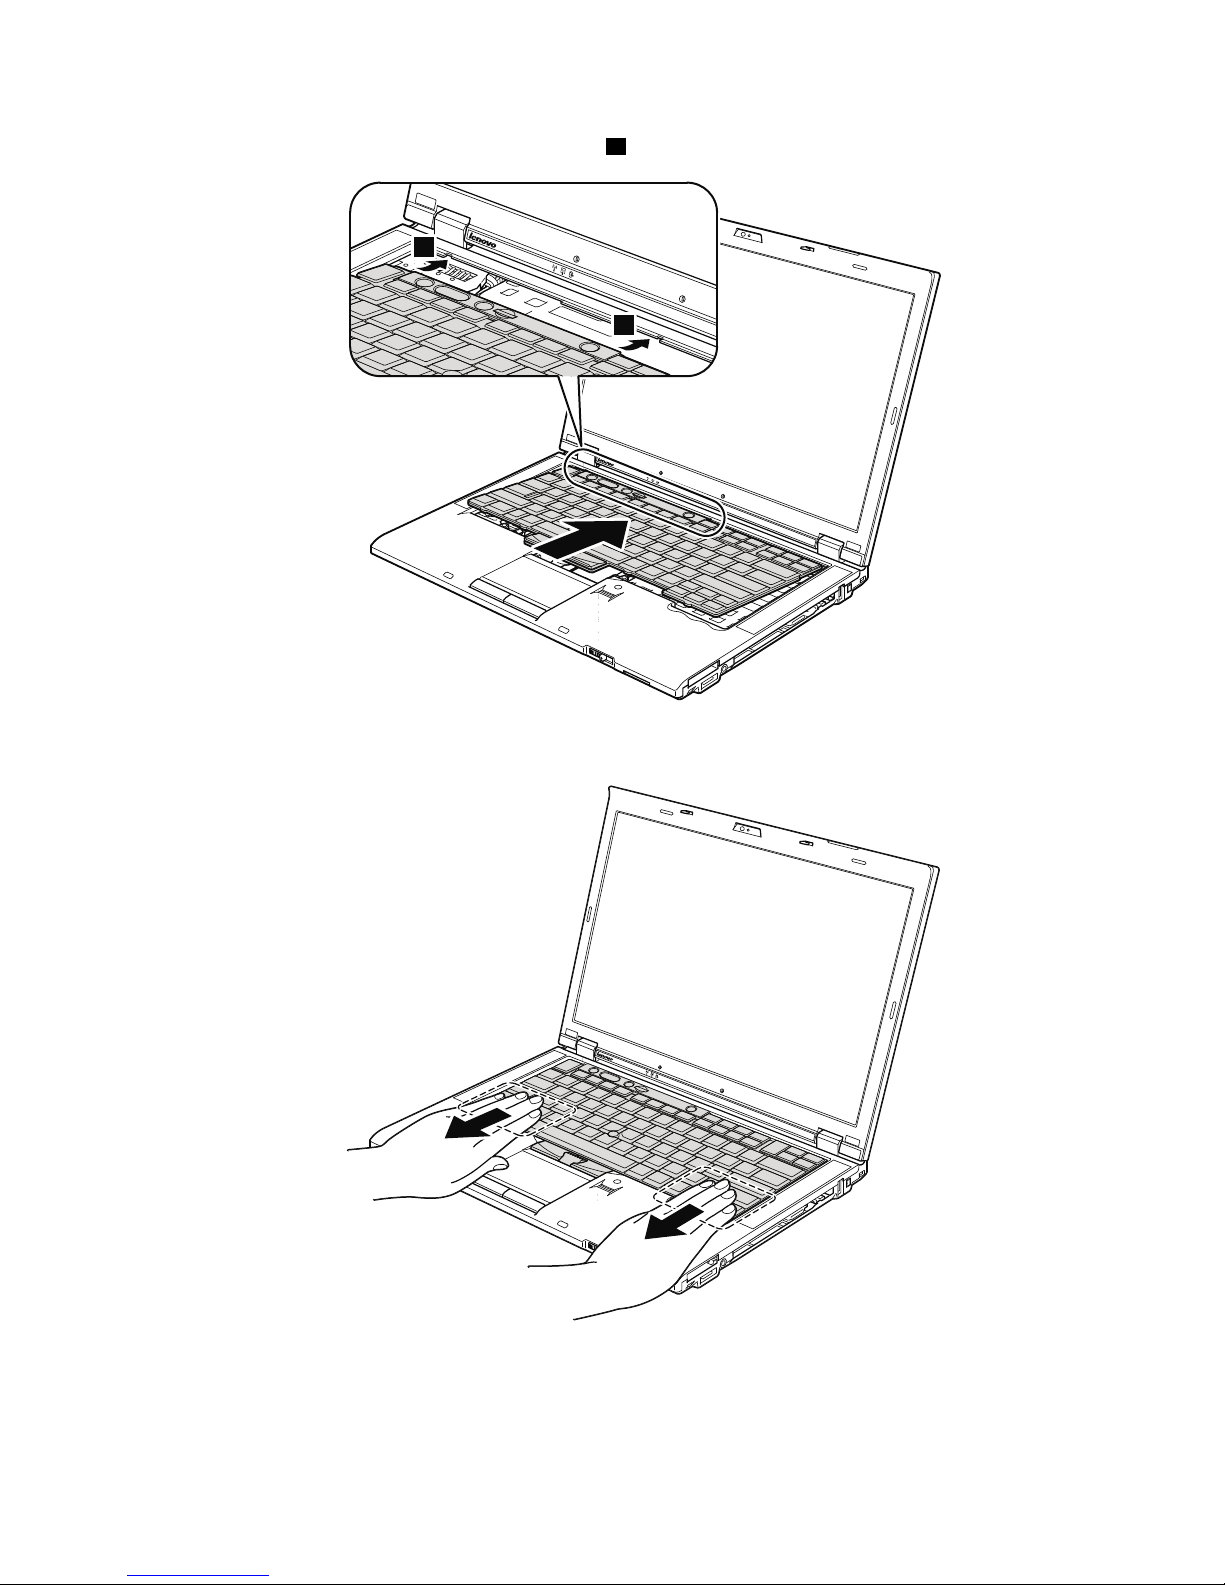
2.Attachthekeyboardsothatthekeyboardedgeaisundertheframeasshowninthefollowinggure.
a
a
3.Gentlypressthekeyswithyourpalmsandslightlyslidethekeyboardtowardyouuntilitsnapsinto
position.
Chapter8.RemovingandreplacingaFRU77
Page 84

4.Makesurethatthefrontedgeofthekeyboardbisattachedrmly.
b
b
b
5.Securethekeyboardbytighteningthescrewsfromthebottomsideofthecomputer.
1090DIMM(intheslotunderthekeyboard)
Foraccess,removetheseFRUsinorder:
•“1010Batterypack”onpage66
•“1050DIMMslotcover”onpage70
•“1080Keyboard”onpage74
Note:Y oucomputerhastwoDIMMslots:oneunderthekeyboardandanotherontheundersideofthe
computer.IfyouinstallaDIMMinonlyoneofthetwoslots,installitintheslotlocatedunderthekeyboard.
78HardwareMaintenanceManual
Page 85

RemovalstepsofDIMM(intheslotunderthekeyboard)
1
2
2
3
Wheninstalling:InsertthenotchedendoftheDIMMintothesocket.PresstheDIMMrmly,andpivotit
untilitsnapsintoplace.Makesurethatitisrmlyxedintheslotanddoesnotmoveeasily.
Chapter8.RemovingandreplacingaFRU79
Page 86
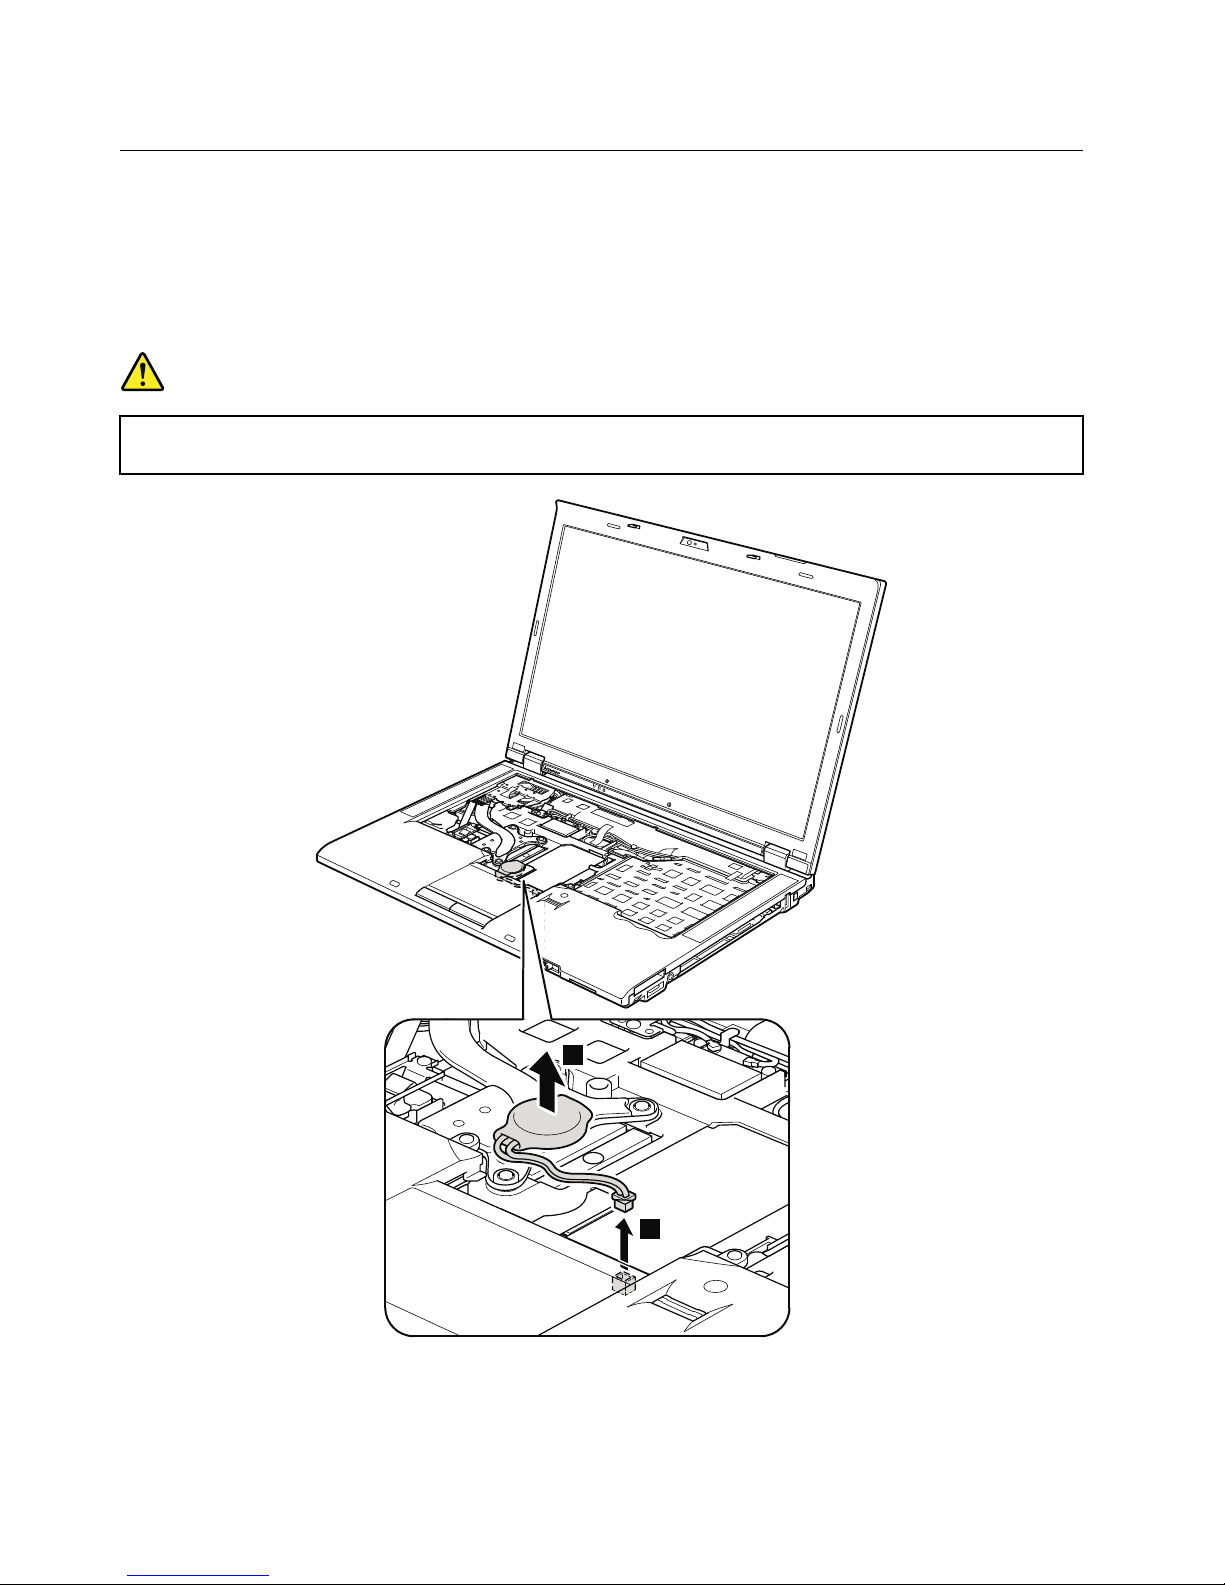
1100Backupbattery
Foraccess,removetheseFRUsinorder:
•“1010Batterypack”onpage66
•“1050DIMMslotcover”onpage70
•“1080Keyboard”onpage74
Removalstepsofbackupbattery
DANGER
Useonlythebatteryspeciedinthepartslistforyourcomputer .Anyotherbatterycouldignite
orexplode.
2
1
80HardwareMaintenanceManual
Page 87

Cablerouting:Attachthebackupbatteryandroutethecableasshowninthefollowinggureandmake
surethatthebatteryconnectorisattachedrmly.
1110PCIExpressMiniCardforwirelessLAN
Foraccess,removetheseFRUsinorder:
•“1010Batterypack”onpage66
•“1050DIMMslotcover”onpage70
•“1080Keyboard”onpage74
Chapter8.RemovingandreplacingaFRU81
Page 88
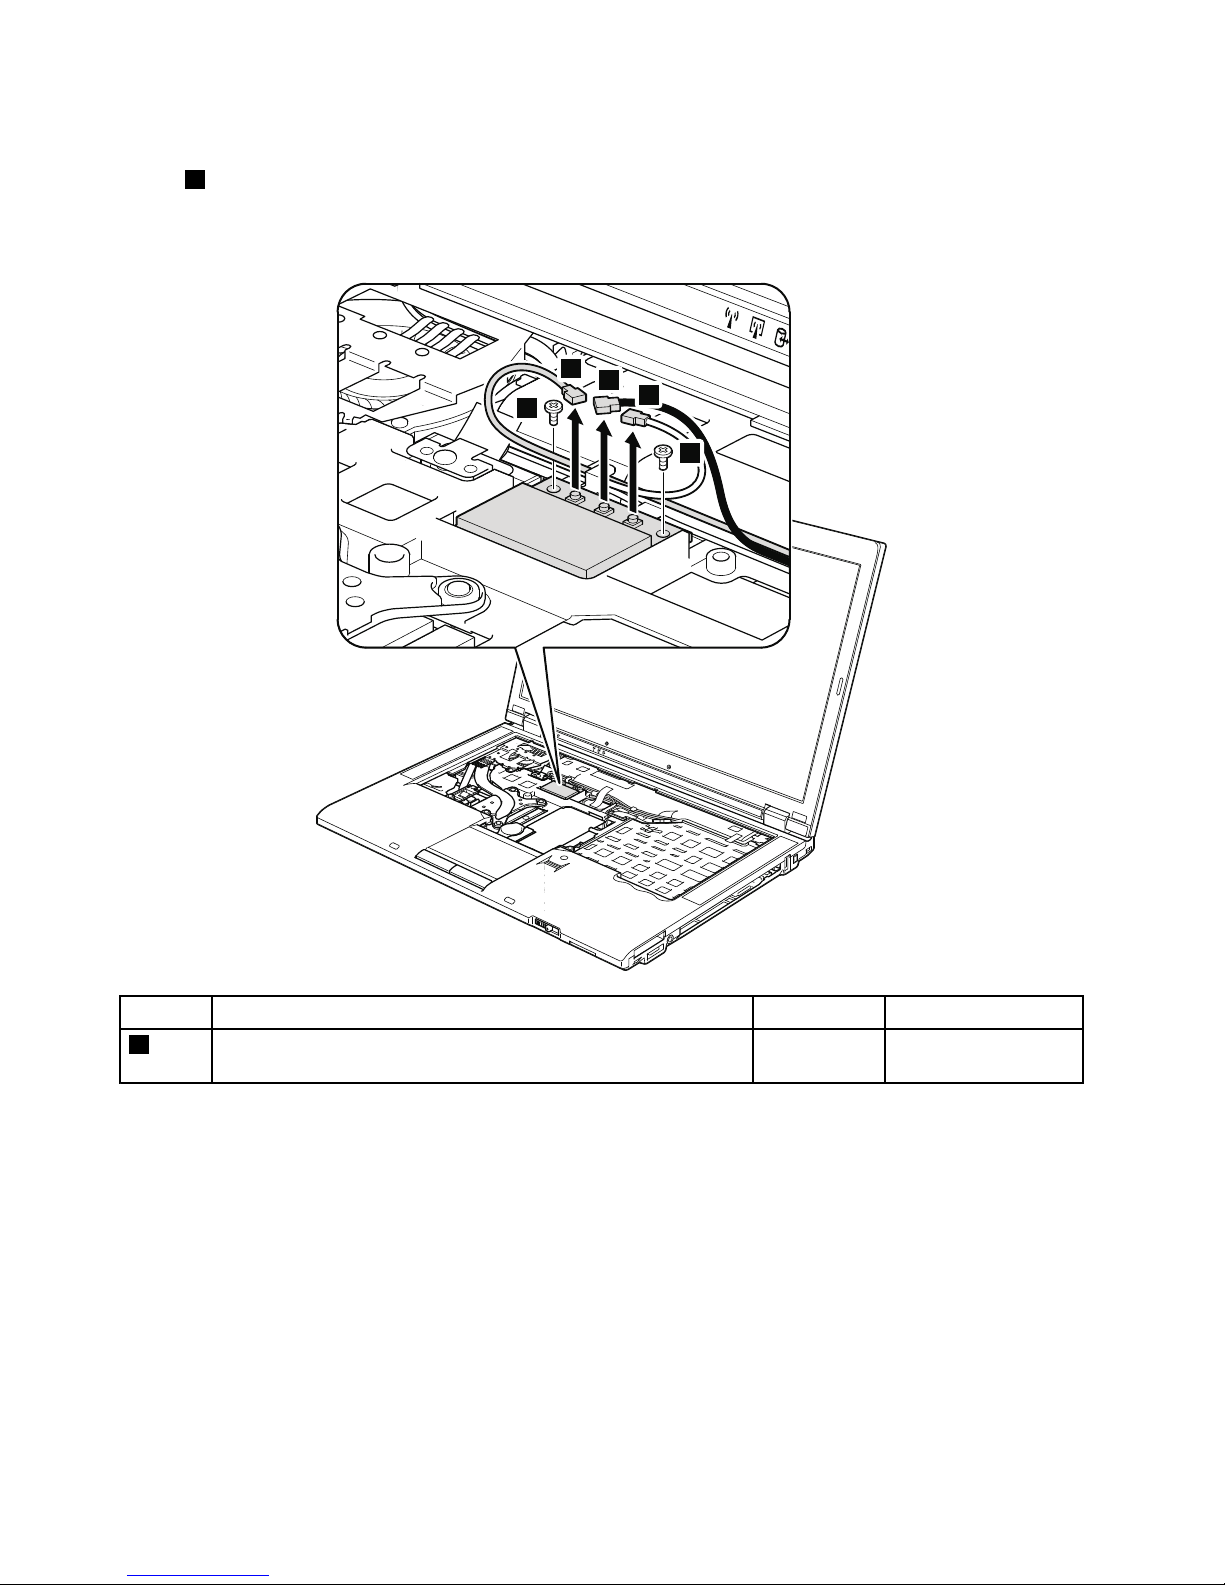
RemovalstepsofPCIExpressMiniCardforwirelessLAN
Instep1,unplugthejacksbyusingtheremovaltoolantennaRFconnector(P/N:08K7159)orpickthe
connectorswithyourngersandgentlyunplugtheminthedirectionofthearrow.
Note:Somemodelsmighthaveonlytwoantennacables.
1
1
1
2
2
StepScrew(quantity)Color
Torque
2
M2×3mm,wafer-head,nylon-coated(2)
Black0.181Nm
(1.85kgf-cm)
82HardwareMaintenanceManual
Page 89

3
Wheninstalling:
•InmodelswithawirelessLANcardthathastwoantennaconnectors,plugthegraycableintothejack
markedMAINorM,andtheblackcableintothejackmarkedAUXorAonthecard.Ifthecomputer
youareservicinghasthreecables,putthewhitecableinthecableprotectiontubeandsecureitwitha
tapeasshowninthisgure.
•InmodelswithawirelessLANcardthathasthreeantennaconnectors,plugthegraycable(MAIN)into
thejackmarkedTR1,thewhitecable(third)intothejackmarkedROorTR3,andtheblackcable(AUX)
intothejackmarkedTR2onthecard.
1120Keyboardbezelassembly,FPCcable,andBluethoothdaughter
card(BDC-2.1)
Foraccess,removetheseFRUsinorder:
•“1010Batterypack”onpage66
•“1020ExpressCardblankbezel”onpage67
•“1050DIMMslotcover”onpage70
•“1080Keyboard”onpage74
Note:TheFPCcableisattachedontheundersideofthekeyboardbezelassembly.Insomemodels,the
Bluetoothdaughtercardisalsoattachedontheundersideofthekeyboardbezelassembly.Formodels
thatdonothavetheBluetoothdaughtercard,skipsteps
8to10.
Chapter8.RemovingandreplacingaFRU83
Page 90
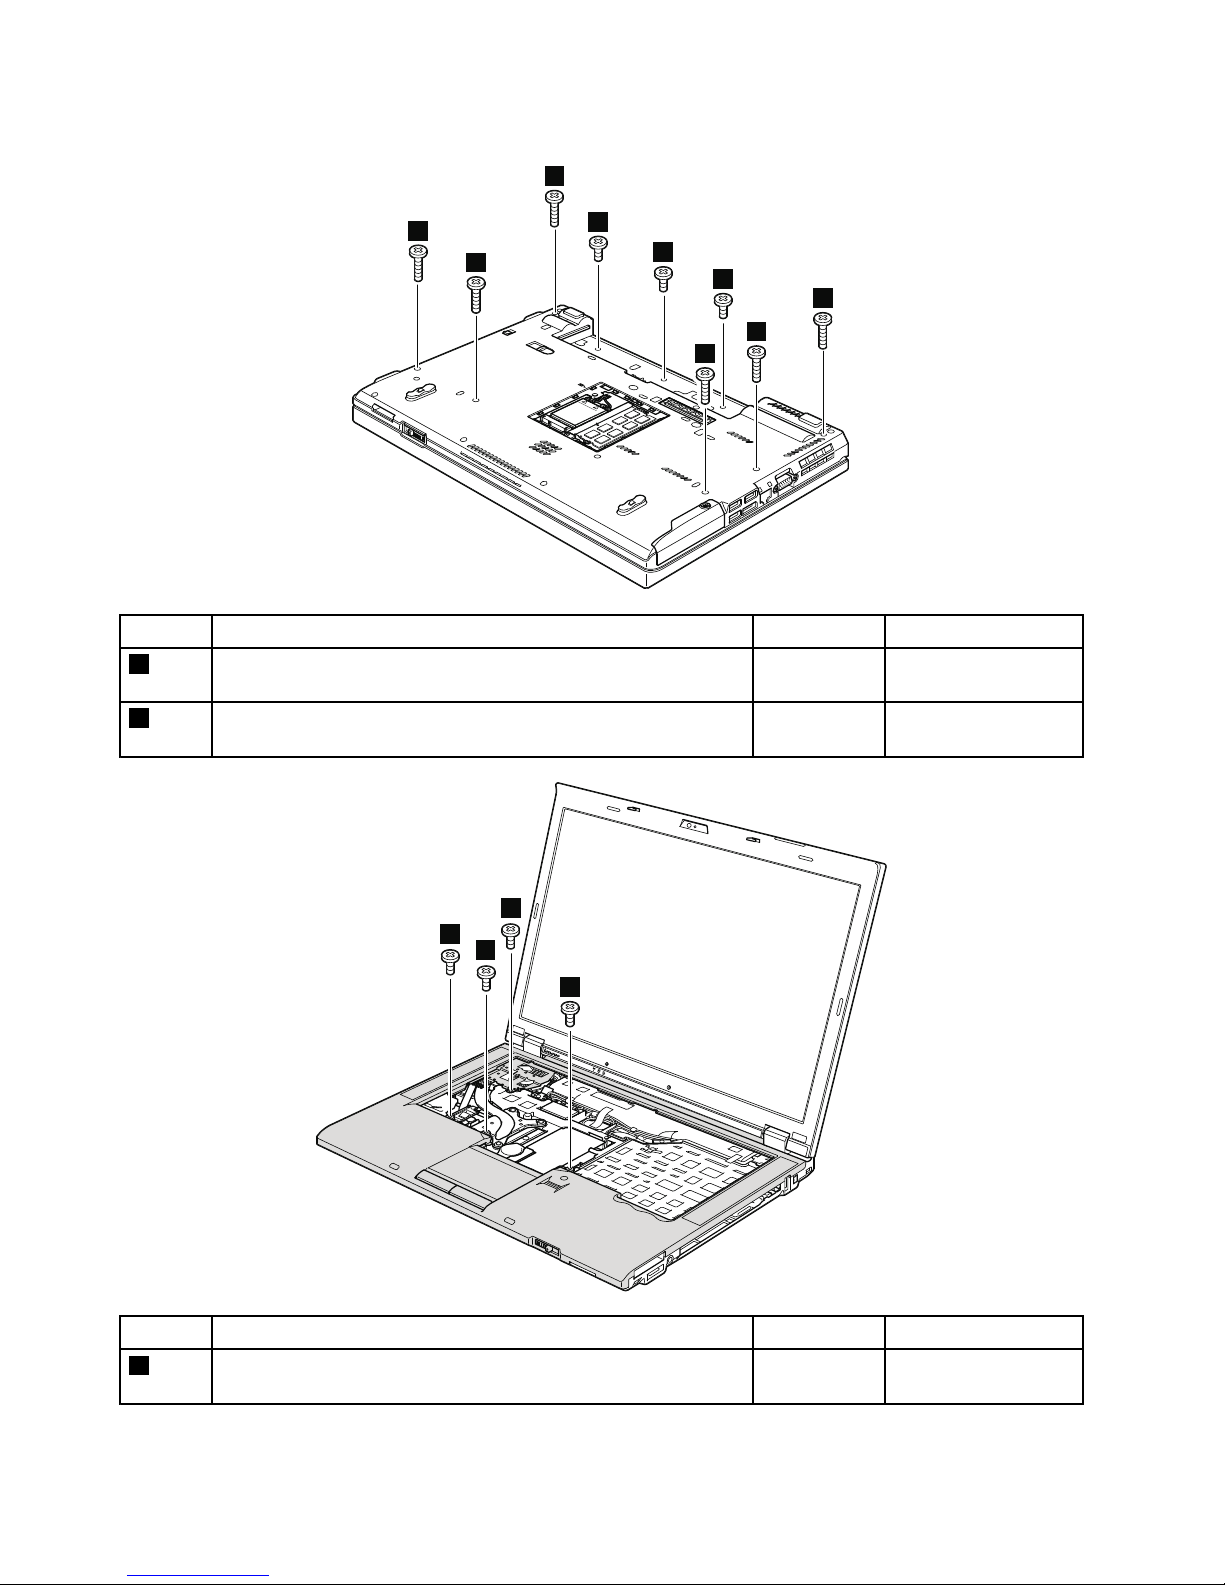
Removalstepsofkeyboardbezelassembly,FPCcable,andBluetoothdaughtercard
1
1
1
1
1
1
2
2
2
StepScrew(quantity)Color
Torque
1
M2×14mm,wafer-head,nylon-coated(6)
Black0.181Nm
(1.85kgf-cm)
2
M2×3mm,wafer-head,nylon-coated(3)
Black0.181Nm
(1.85kgf-cm)
3
3
3
3
StepScrew(quantity)Color
Torque
3
M2×3mm,wafer-head,nylon-coated(4)
Black0.181Nm
(1.85kgf-cm)
84HardwareMaintenanceManual
Page 91

4
4
4
4
4
4
4
4
4
4
4
4
5
6
7
Chapter8.RemovingandreplacingaFRU85
Page 92

Wheninstalling:Makesurethattheconnectorisattachedrmly.
8
9
9
10
12
11
12
13
Wheninstalling:Makesurethattheconnectorsareattachedrmly.
14
15
StepScrew(quantity)Color
Torque
14
M2×3mm,wafer-head,nylon-coated(1)
Black0.181Nm
(1.85kgf-cm)
86HardwareMaintenanceManual
Page 93

16
Wheninstalling:Makesurethattheconnectorisattachedrmly.
1130SmartCardorContactlessSmartCard
Foraccess,removetheseFRUsinorder:
•“1010Batterypack”onpage66
•“1050DIMMslotcover”onpage70
•“1080Keyboard”onpage74
•“1120Keyboardbezelassembly,FPCcable,andBluethoothdaughtercard(BDC-2.1)”onpage83
RemovalstepsofSmartCardorContactlessSmartCard
1
1
1
1
StepScrew(quantity)Color
Torque
1
M2×3mm,wafer-head,nylon-coated(4)
Black0.181Nm
(1.85kgf-cm)
Chapter8.RemovingandreplacingaFRU87
Page 94

2
3
Wheninstalling:Makesurethattheconnectorisattachedrmly.
RemovalstepsofSmartCarddummyspacer
SomemodelshaveSmartCarddummyspacerasamiscellaneouspart.Forthosemodels,removethe
spacerasshown:
1
2
1
1
1
StepScrew(quantity)Color
Torque
1
M2×3mm,wafer-head,nylon-coated(4)
Black0.181Nm
(1.85kgf-cm)
1140Modemdaughtercard(MDC)
Foraccess,removetheseFRUsinorder:
•“1010Batterypack”onpage66
88HardwareMaintenanceManual
Page 95
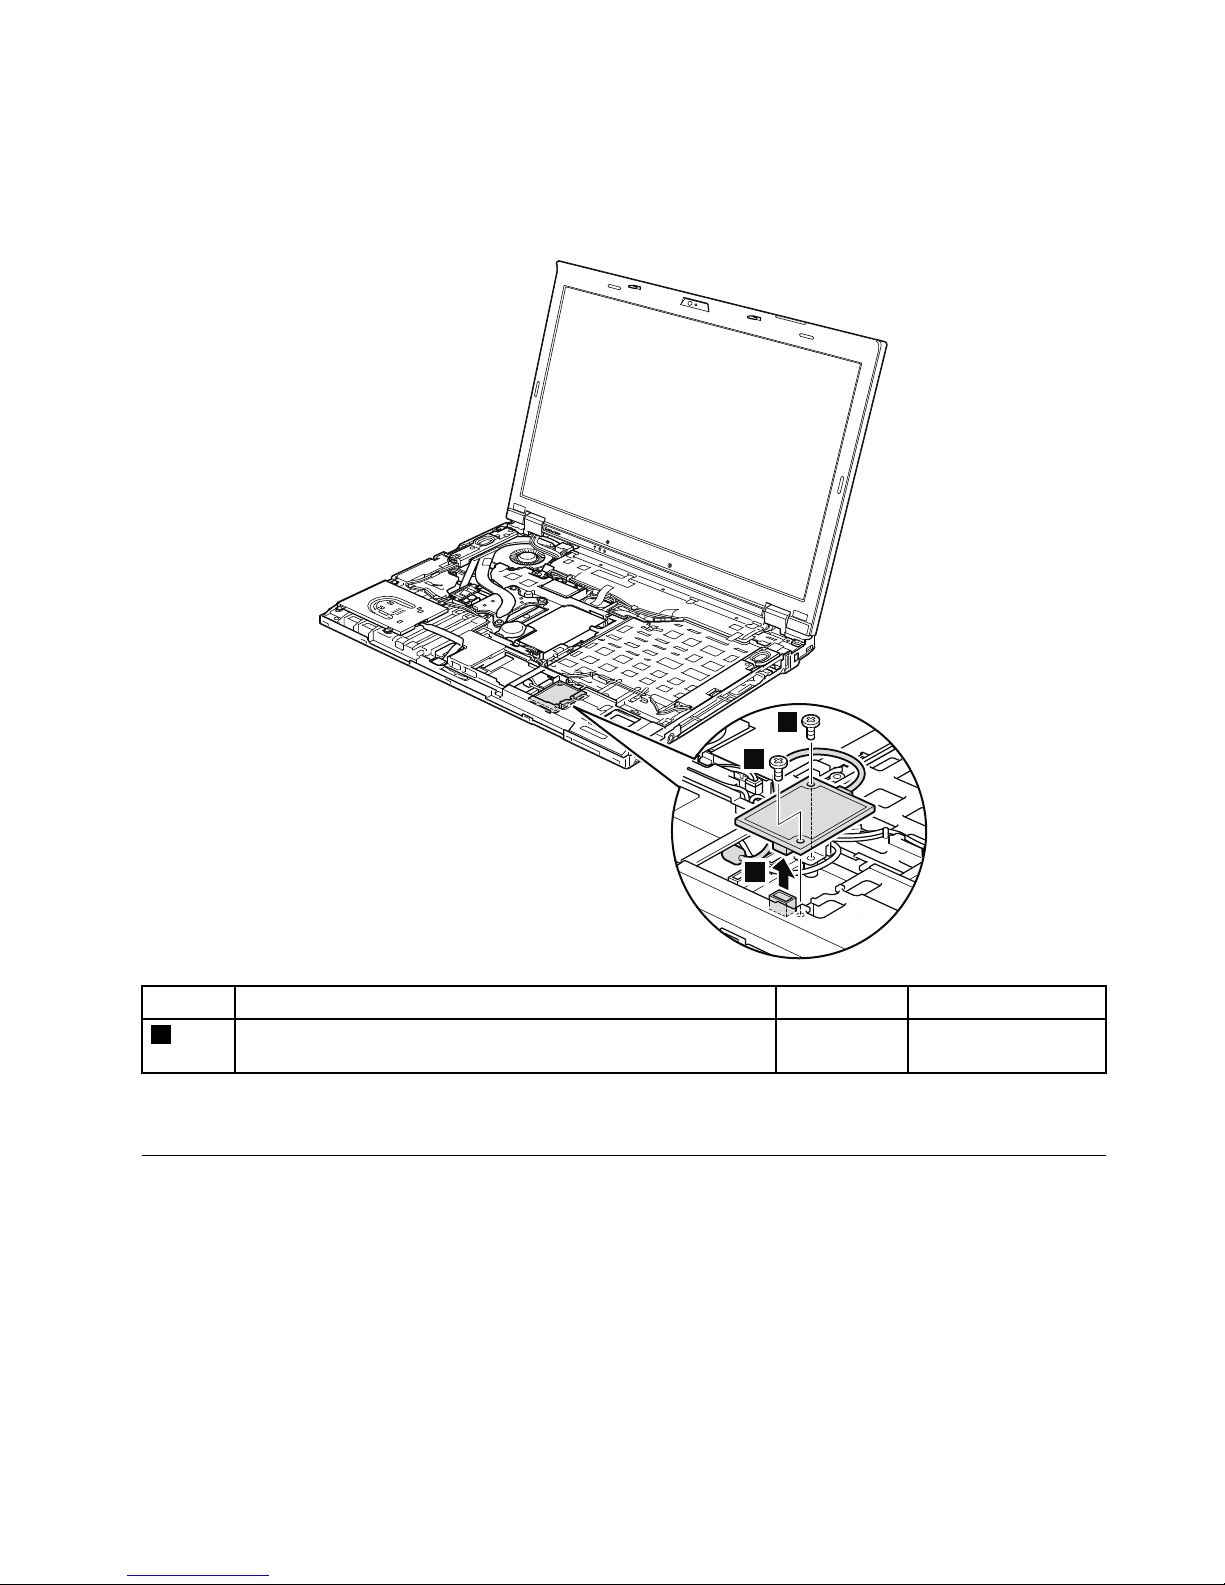
•“1050DIMMslotcover”onpage70
•“1080Keyboard”onpage74
•“1120Keyboardbezelassembly,FPCcable,andBluethoothdaughtercard(BDC-2.1)”onpage83
Removalstepsofmodemdaughtercard(MDC)
1
1
2
StepScrew(quantity)Color
Torque
1
M2×3mm,wafer-head,nylon-coated(2)
Black0.181Nm
(1.85kgf-cm)
Wheninstalling:Makesurethattheconnectorisattachedrmly.
1150Speakerassembly
Foraccess,removetheseFRUsinorder:
•“1010Batterypack”onpage66
•“1050DIMMslotcover”onpage70
•“1080Keyboard”onpage74
•“1120Keyboardbezelassembly,FPCcable,andBluethoothdaughtercard(BDC-2.1)”onpage83
Chapter8.RemovingandreplacingaFRU89
Page 96

Removalstepsofspeakerassembly
1
1
1
1
StepScrew(quantity)Color
Torque
1
M2×3mm,wafer-head,nylon-coated(4)
Black0.181Nm
(1.85kgf-cm)
3
3
2
90HardwareMaintenanceManual
Page 97

Wheninstalling:Attachthespeakerassemblyandroutethecableasshowninthefollowinggure,and
makesurethatthespeakerconnectorisattachedrmly.
1160LCDunit
Foraccess,removetheseFRUsinorder:
•“1010Batterypack”onpage66
•“1020ExpressCardblankbezel”onpage67
•“1050DIMMslotcover”onpage70
•“1070PCIExpressMiniCardforwirelessWAN”onpage72
•“1080Keyboard”onpage74
•“1110PCIExpressMiniCardforwirelessLAN”onpage81
•“1120Keyboardbezelassembly,FPCcable,andBluethoothdaughtercard(BDC-2.1)”onpage83
RemovalstepsofLCDunit
1
1
StepScrew(quantity)Color
Torque
1
M2.5×6mm,wafer-head,nylon-coated(2)
Black0.392Nm
(4.0kgf-cm)
Chapter8.RemovingandreplacingaFRU91
Page 98

2
3
4
5
StepScrew(quantity)Color
Torque
2
M2×3mm,wafer-head,nylon-coated(1)
Black0.181Nm
(1.85kgf-cm)
4
M2×3mm,wafer-head,nylon-coated(1)
Black0.181Nm
(1.85kgf-cm)
92HardwareMaintenanceManual
Page 99
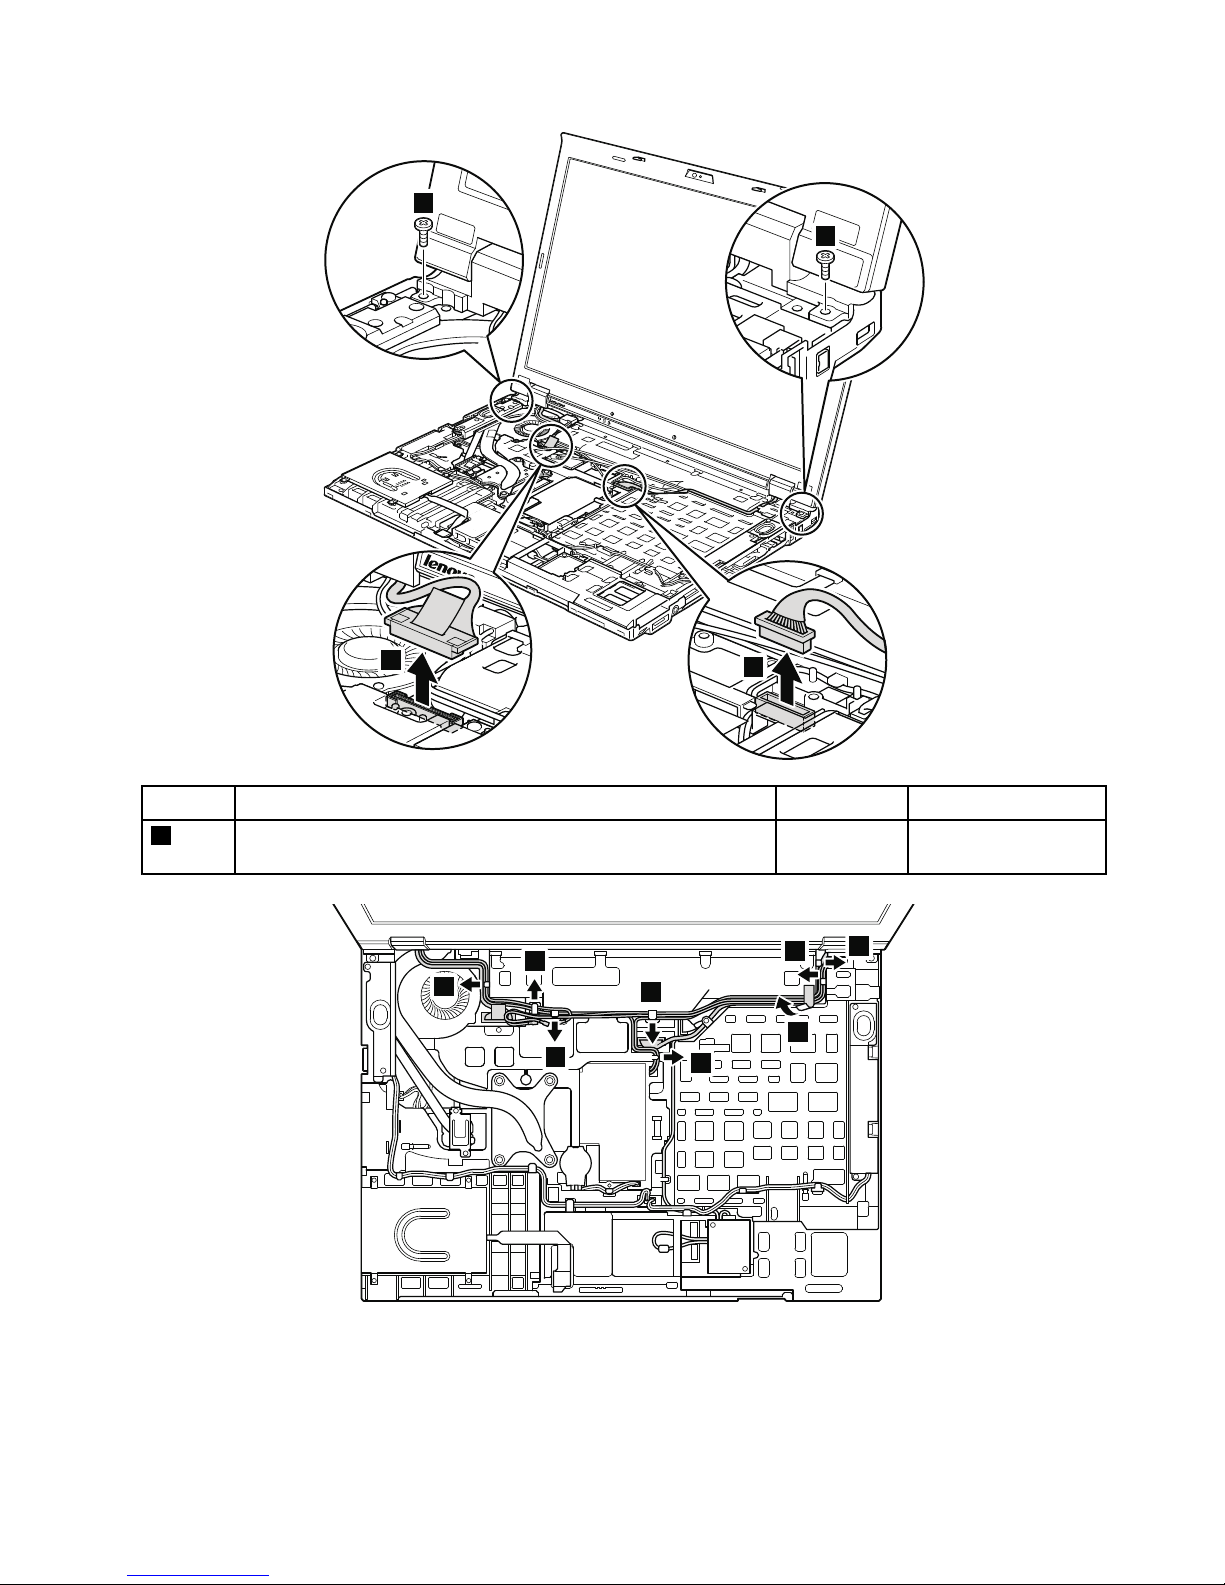
8
8
7
6
StepScrew(quantity)Color
Torque
8
M2.5×6mm,wafer-head,nylon-coated(2)
Black0.392Nm
(4.0kgf-cm)
9
10
10
10
10
10
10
10
Wheninstalling:
•Makesurethatyouattachtheconnectorsrmly.
•Makesurethatyouattachroutethecablescorrectlyandyoutapeupthecablesintheproperpositionsas
showninthefollowinggure.
Chapter8.RemovingandreplacingaFRU93
Page 100

•Whenyouroutethecables,makesurethattheyarenotsubjectedtoanytension.Tensioncouldcause
thecablestobedamagedbythecableguides,orawiretobebroken.
11
94HardwareMaintenanceManual
 Loading...