

Page 1
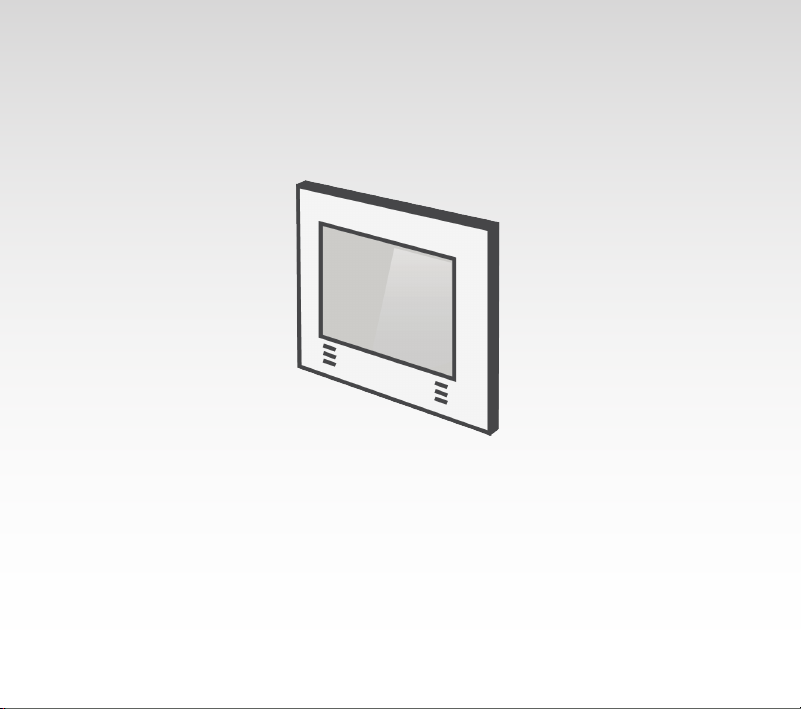
Envision 7
Installation sheet
Scheda di installazione
Page 2
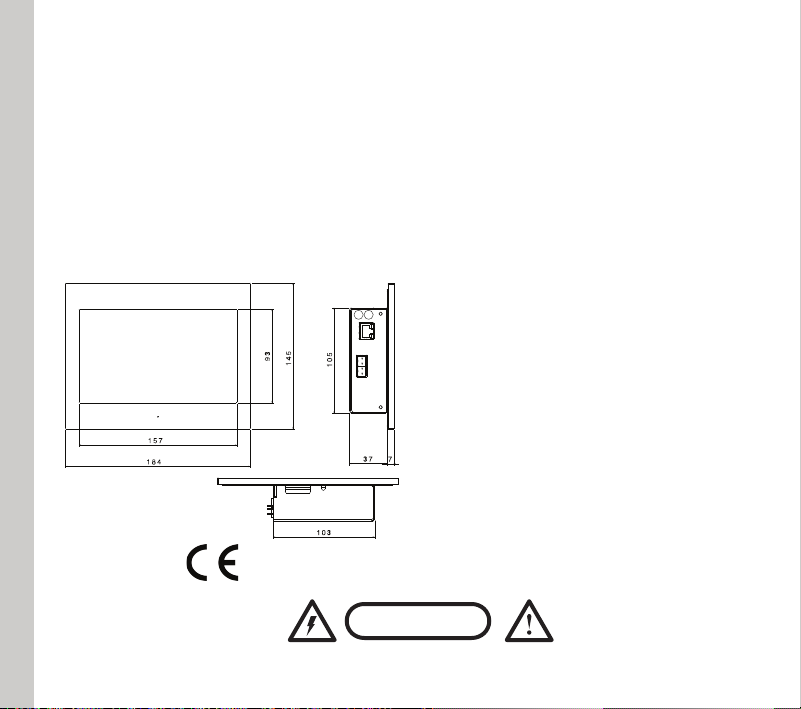
Technical data
Content
7’’ screen 158x93mm,1024x600 dpi resolution
Capacitive touch screen
ENGLISH
Quad-core ARM Cortex A9 CPU
1GB DDR3 SDRAM
Linux Embedded Operative System
Power Input: 12-24 VDC – 1,5 A Max
Power Consumption: 10 Watt
Direct connection to KNX TP bus
Operating Temperature: 0°C / + 50°C
Measurements
Compliances
2006/95/CE
EN 60950-1
89/336/CE
To reduce the risk of electric shock, this product should only be opened by an authorized technician
Envision 7 touch server
BUS and power terminal connector
Installation Sheet
Power Adapter 24 Vdc 30W (optional)
Frame (optional)
Installation
Envision Touch server must be installed in
compliance with electrical installation rules of your
country. The server must be installed in a dust
free place, not subject to water infiltration and
must not be placed near a source of heat or in
direct contact with the sun.
Do not direct connect to main AC power suply
Disclaimer
Not attending to these regulations and safety
instruction might cause fatal accidents, injuries,
and damages to persons and property.
The manufacturer / supplier assumes no liability
for damages caused by failure to comply with the
intended use.
Caution
Risk of electric shock
Do not open
when service is required.
Page 3
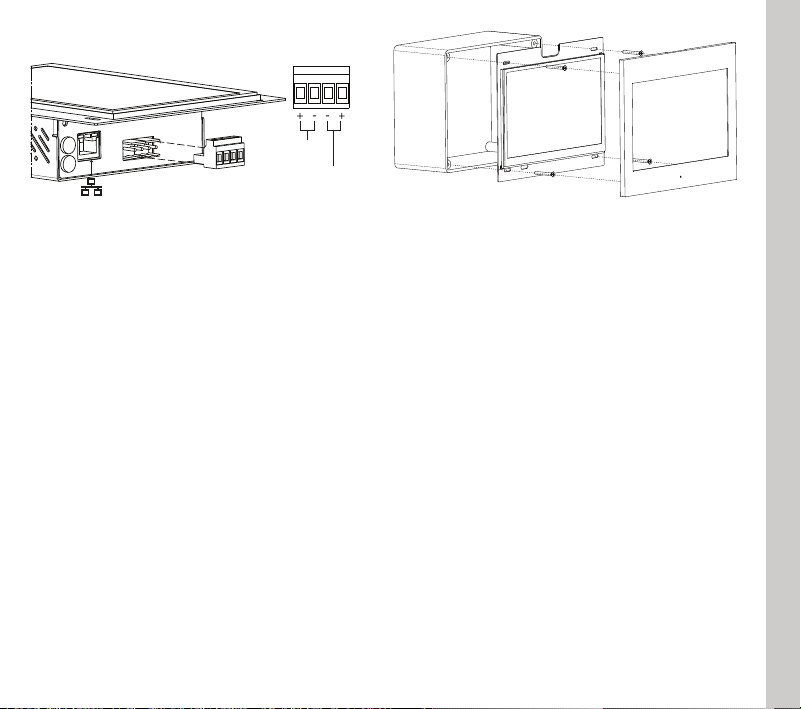
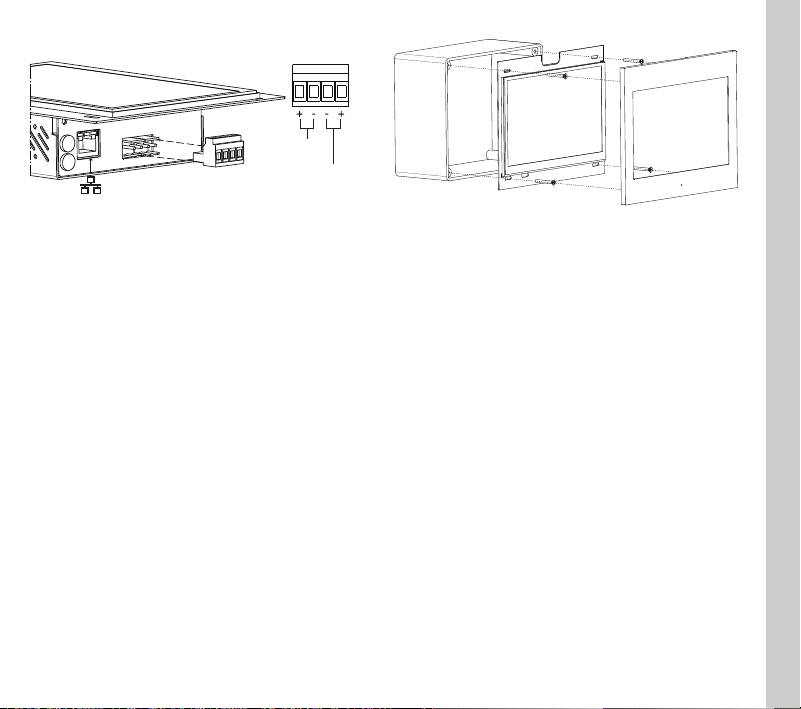
Connections
ETHERNET PORT (DHCP)
BUS
KNX
POWER
12-24Vdc
ENGLISH
Use only supplied connector to connect with the
BUS
, respect polarity.
Remove power from server during electrical
connections.
In-wall box installation
In-wall installation is obtained using a dedicated
plastic box (brand Gewiss model GW48005).
Box permits to easily accomodate control panel
and to compensate little mis-alignment that may
occur during box installation.
After cabling central panel just insert it into the
box and fix it with the 4 screws provided with the
box (like in the following picture).
After fixing the control panel, put the frame on it,
assuring that the four magnets completely
adhere to the metal surfaces of the device.
First configuration
First configuration of the server is via web
console. To reach web console an internet
browser must be used (Firefox or Chrome is
recommended). Please write the following
address into browser: http://<ip address>:5051
where ‘ip address’ is the one of the server. At
first login use following credentials:
User: service
Password: password
To find the IP address of the server a search
utility is available and can be downloaded from:
www.thinknx.com . The server is configured to
use DHCP. If the DHCP fails the server will
acquire by default the next address:
192.168.0.200
If a static ip address has been set, the server is
always reachable at the address:
192.168.24.254 (with subnet mask
255.255.254.0).
Page 4
Caratteristiche
Contenuto della confezione
Schermo 7’’ 158x93mm, risoluzione di 1024x600 dpi
Schermo touch capacitivo
ITALIANO
Quad-core ARM Cortex A9 CPU
1 GB DDR3 SDRAM
Sistema operativo Linux Embedded
Alimentazione: 12-24 VDC – 1,5 A Max
Consumo massimo: 10 Watt
Connessione diretta al bus KNX TP
Temperatura funzionamento: 0°C / + 50°C
Dimensioni
Normative
2006/95/CE
EN 60950-1
89/336/CE
Per ridurre il rischio di scosse elettriche, in caso di assistenza, questo prodotto deve essere aperto
Envision 7 touch server
Connettore BUS e alimentazione
Scheda di installazione
Alimentatore 24Vdc 30W (opzionale)
Cornice (opzionale)
Avvertenze per l’installazione
Envision Touch server deve essere installato
secondo le disposizioni che regolano
l’installazione di materiale elettrico in ambiente
domestico e similare. Deve avvenire in un luogo
non polveroso, non soggetto a infiltrazioni
d’acqua; non deve essere posizionato vicino a
fonti di calore o al diretto contatto con il sole.
Non collegare direttamente alla rete principale
AC
Dichiarazione di non responsabilità
La mancata osservanza delle istruzioni sopra
citate, può causare decessi, lesioni e danni a
persone e cose. Il produttore / fornitore declina
ogni responsabilità per danni causati dal mancato
rispetto della destinazione d'uso.
Attenzione
Rischio di scosse
elettriche - Non aprire
solo da un tecnico autorizzato.
Page 5
Connessioni
PORTA DI RETE (DHCP)
BUS
KNX
POWER
12-24Vdc
ITALIANO
Utilizzare per la connessione del
BUS
il morsetto in
dotazione, rispettando la polarità descritta.
Effettuare i collegamenti in assenza di tensione.
Montaggio a parete
É possibile realizzare il montaggio a parete,
utilizzando la scatola GEWISS GW48005. La
scatola consente una facile installazione,
permettendo correzioni sugli allineamenti in fase di
installazione.
Dopo aver cablato Envision7 posizionarlo nella
scatola e fissarlo con le 4 viti incluse (fare
riferimento alla figura di seguito).
Una volta assicurato l’Envision 7 alla scatola,
fissare la cornice assicurandosi che i magneti siano
ben a contatto con la superficie metallica del
dispositivo.
Prima configurazione
Per accedere al software ThinKnx dopo aver
collegato l’hardware in rete aprire un web browser
(si consiglia FireFox o Chrome) e digitare
http://<indirizzo ip>:5051 dove «indirizzo ip» è
quello assunto dal server.
Come credenziali per il primo accesso usare:
User: service
Password: password
Per determinare l’indirizzo IP assunto dal server
utilizzare l’apposito tool disponibile sul sito:
www.thinknx.com.
In assenza di un servizio DHCP, il server ThinKnx
assumerà l’indirizzo di default: 192.168.0.200.
Se è stato impostato un indirizzo IP statico, il
server sarà comunque sempre raggiungibile
all’indirizzo seguente: 192.168.24.254 (con
maschera di sottorete 255.255.254.0).
Page 6

www.thinknx.com
Go Paperless!
Manuals are online
entirely designed and made
Recycle with us!
 Loading...