

ThinkGizmos TG20 User Manual
TG20 ICE MAKER
CONGRATULATIONS ON OWNING THIS TG20 ICE MAKER
PLEASE READ THIS MANUAL BEFORE USE & SAVE FOR FUTURE
REFERENCE AS IT INCLUDES IMPORTANT SAFETY ADVICE
User Manual
English p 2
Deutsch p 12
Francais p 23
Italiano p 34
Español p 45

ENGLISH MANUAL - CONTENTS
1.
2.
3.
4.
1.1 Important Safety Instructions ............................................................................4
3.1 Knowing Your Ice Maker .................................................................................... 6
3.2 The Control Panel ............................................................................................... 6
2.1 Important Safety Tips ......................................................................................... 5
4.1 Unpacking Your Ice Maker ................................................................................. 7
4.2 Electrical Shock Hazards ..................................................................................... 7
IMPORTANT SAFETY INSTRUCTIONS
GETTING TO KNOW YOUR ICE MAKER
PREPARING YOUR ICE MAKER
GETTING YOUR ICE MAKER READY FOR USE
2
5.
5.1 Cleaning And Maintaining Your Ice Maker ...................................................... 8
5.2 How To Operate Your Ice Maker ...................................................................... 8
OPERATING YOUR ICE MAKER
6.
6.1 Problems, Possible Causes And Solutions ....................................................... 9
TROUBLESHOOTING
7.
7.1 Technical Features ............................................................................................ 10
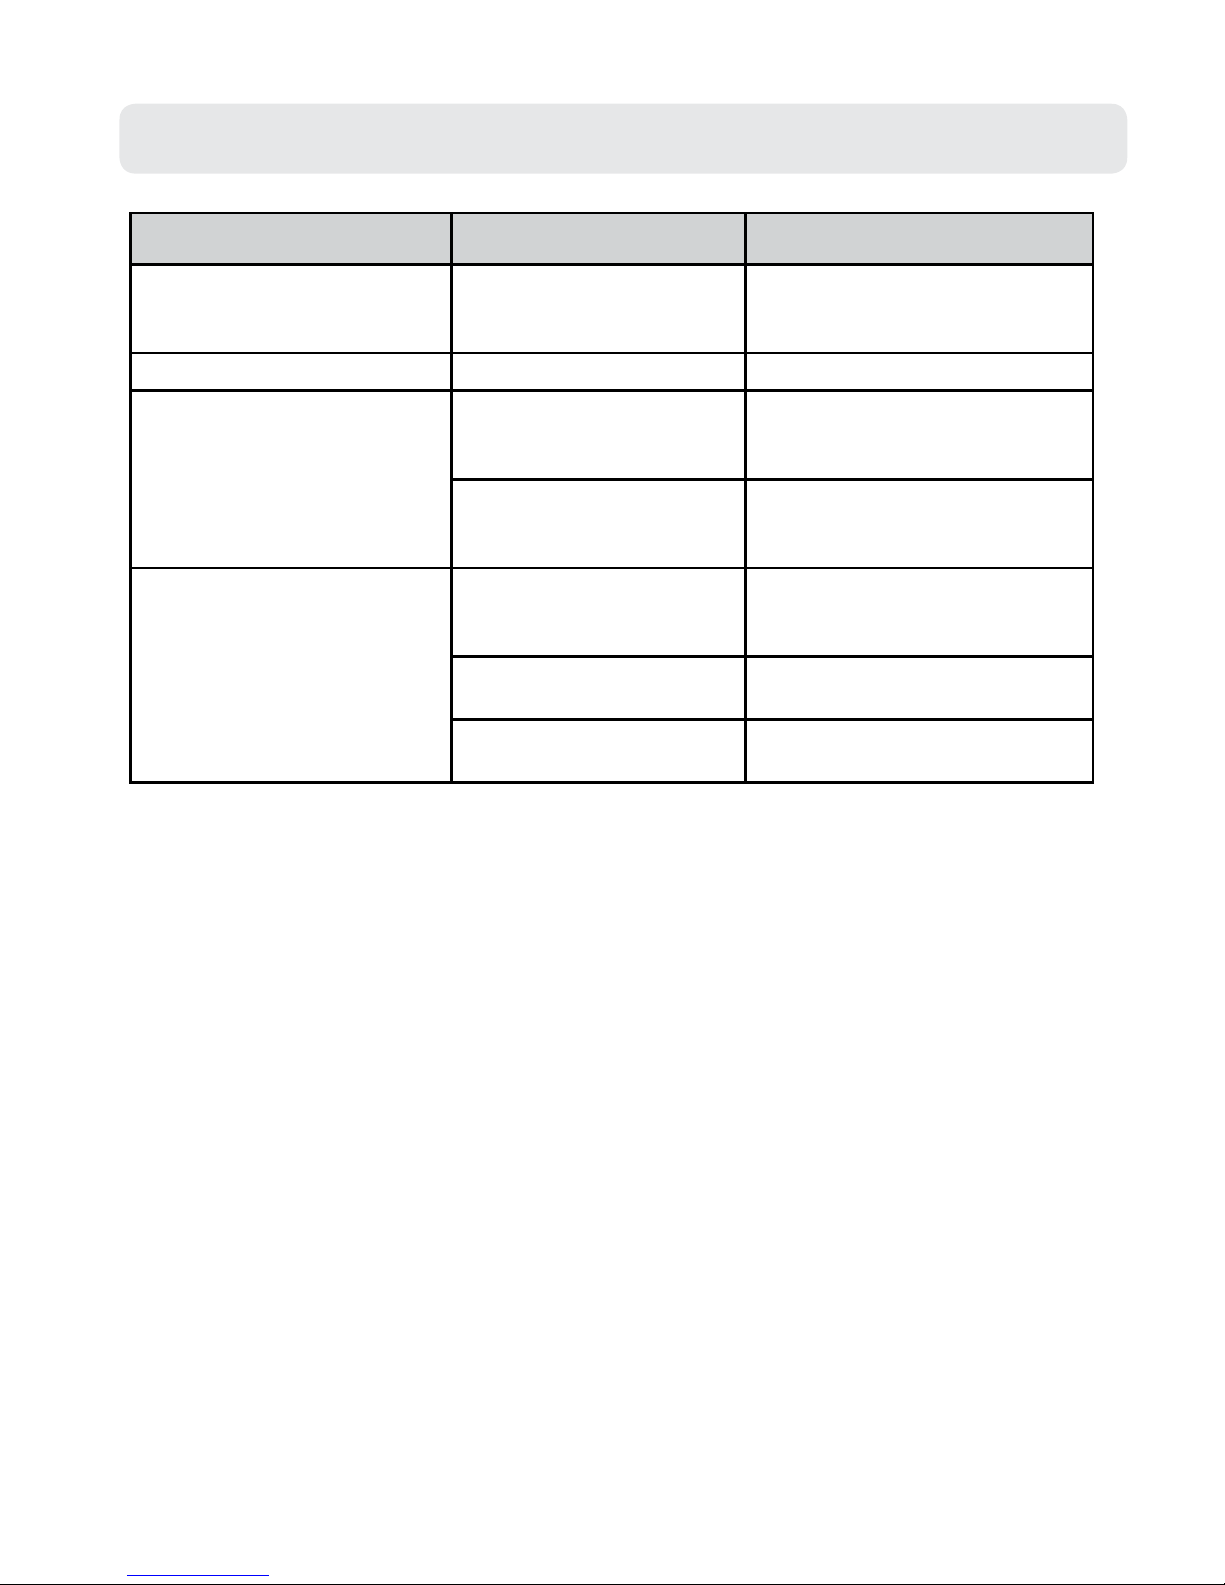
7.2 Electrical Diagram ............................................................................................ 10
TECHNICAL SPECIFICATIONS
8.
8.1 Warranty Information ...................................................................................... 11
WARRANTY
QUICK START GUIDE
3
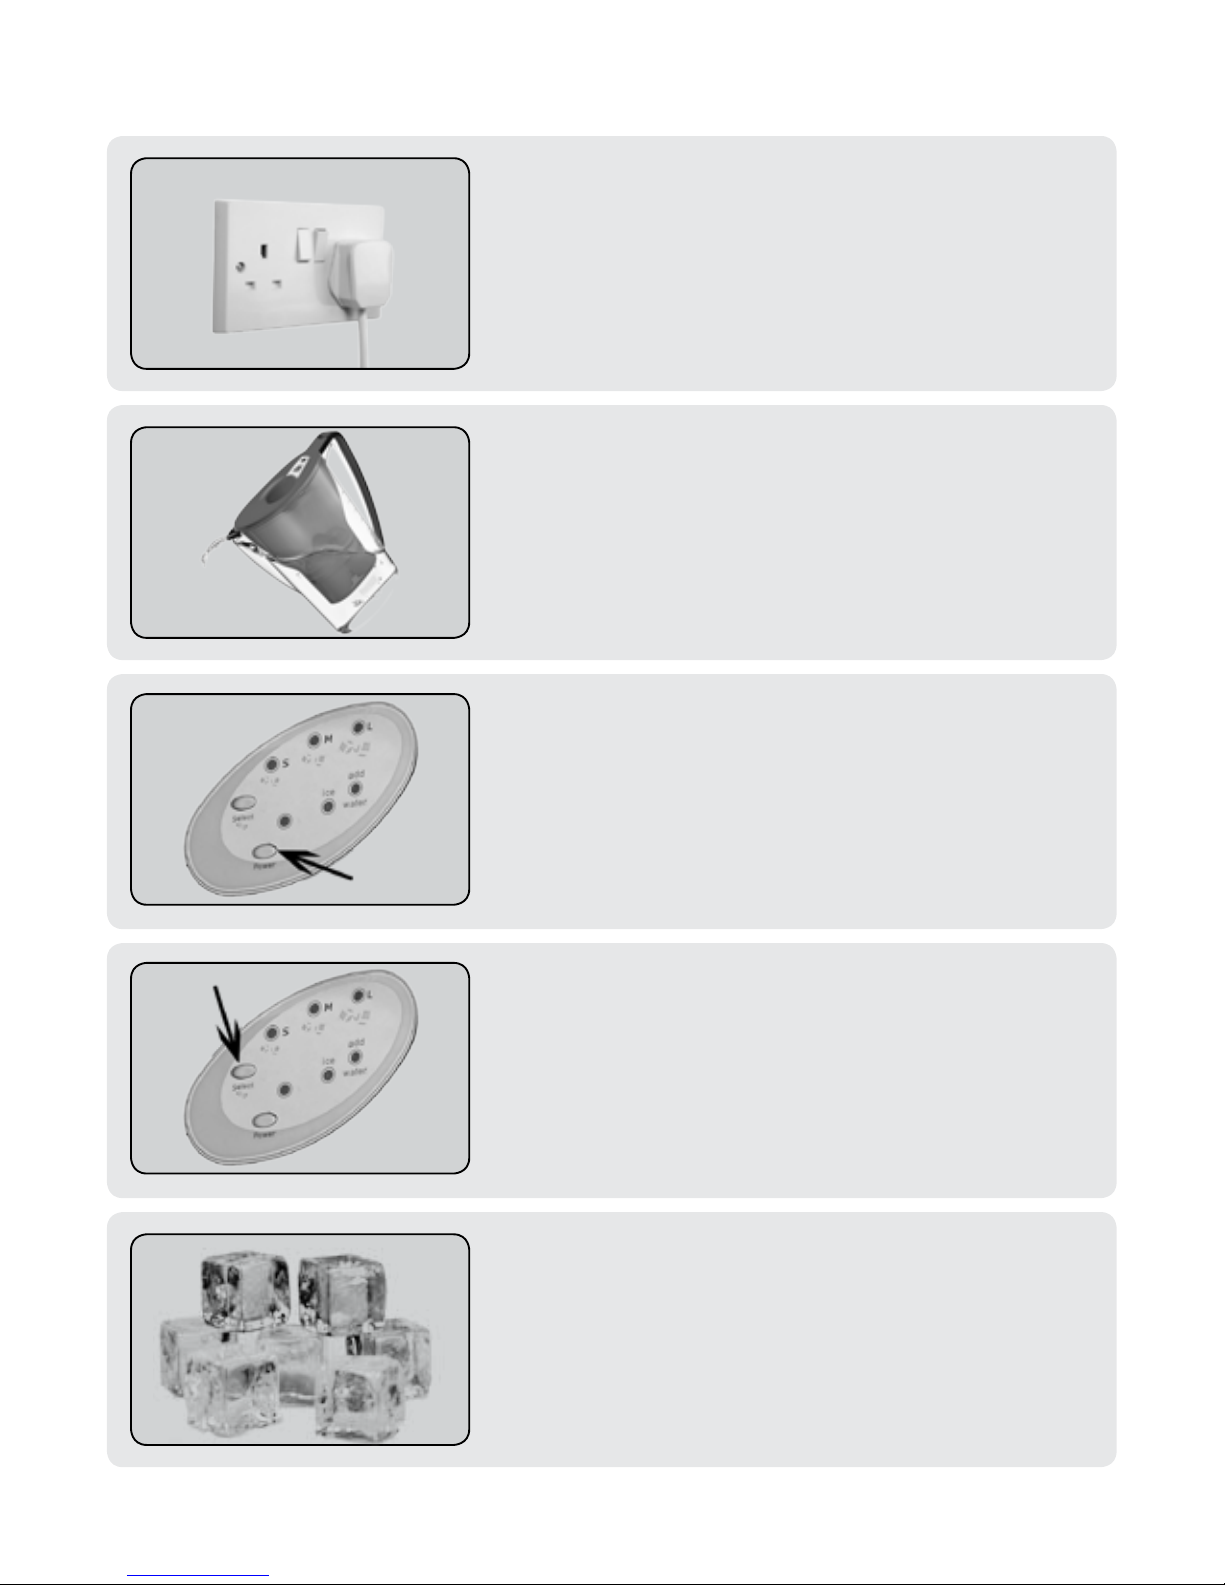
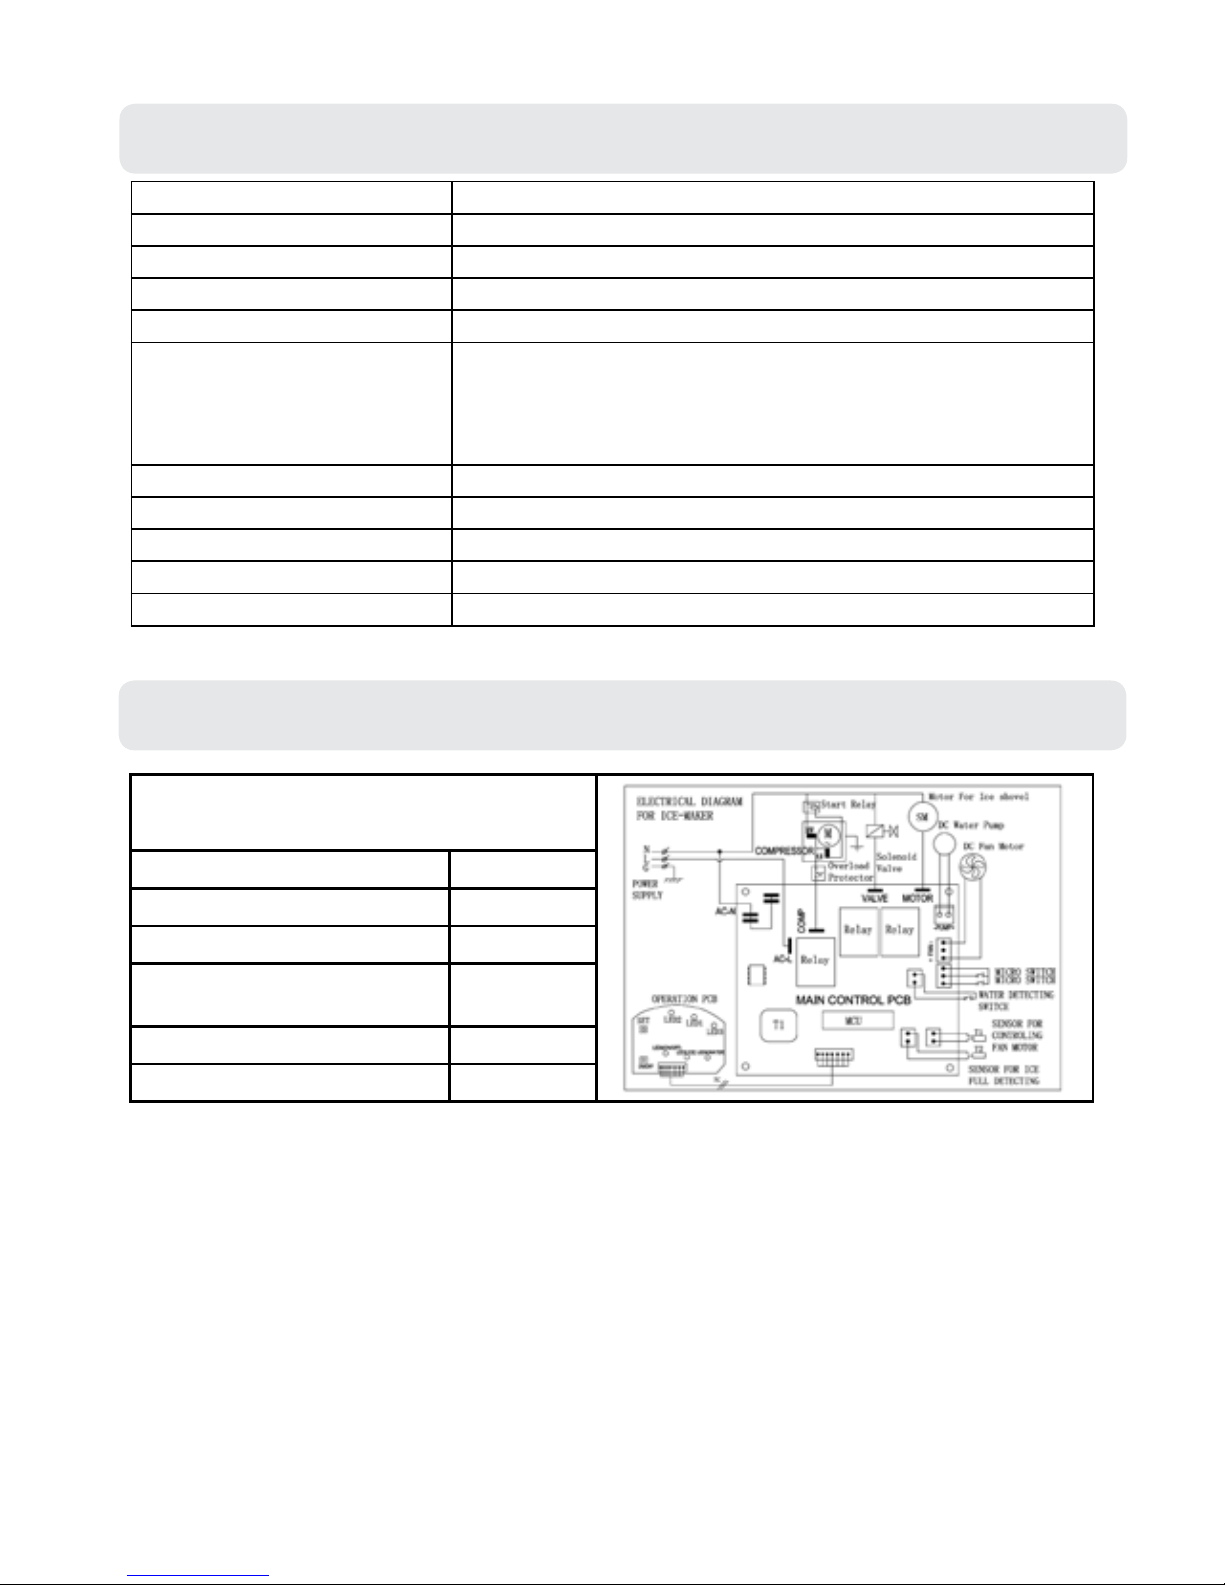
Plug in the Ice Maker
Plug your appliance into an exclusive, properly installed,
grounded wall outlet
1.
3.
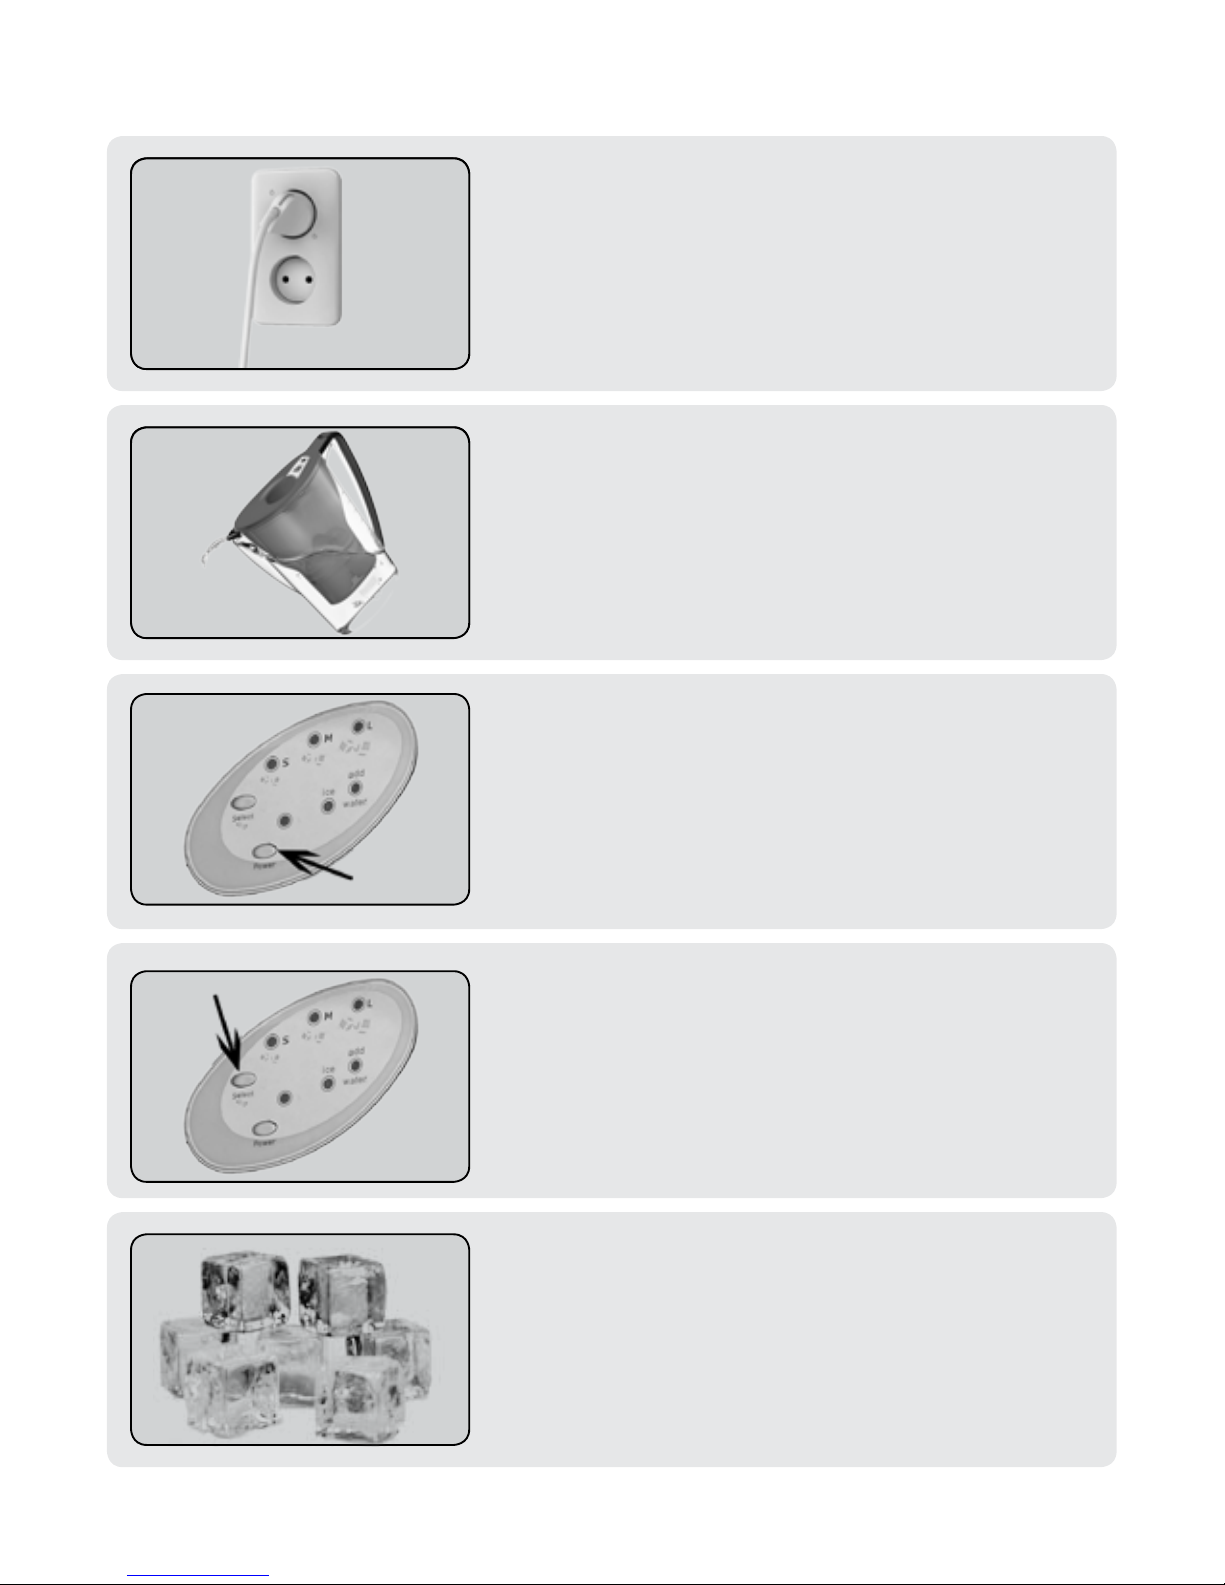
Enjoy
After approx 6-15 minutes depending on Ice Size your
rst batch of Ice will be ready to enjoy.
5.
Fill with water
Fill the water reservoir up to the ll line.
2.
Turn on machine
Press the Power Button to turn the machine on.
4.
Select size of Ice
Using the Ice Select Button, select the required size of
ice.
1. IMPORTANT SAFETY INSTRUCTIONS
4
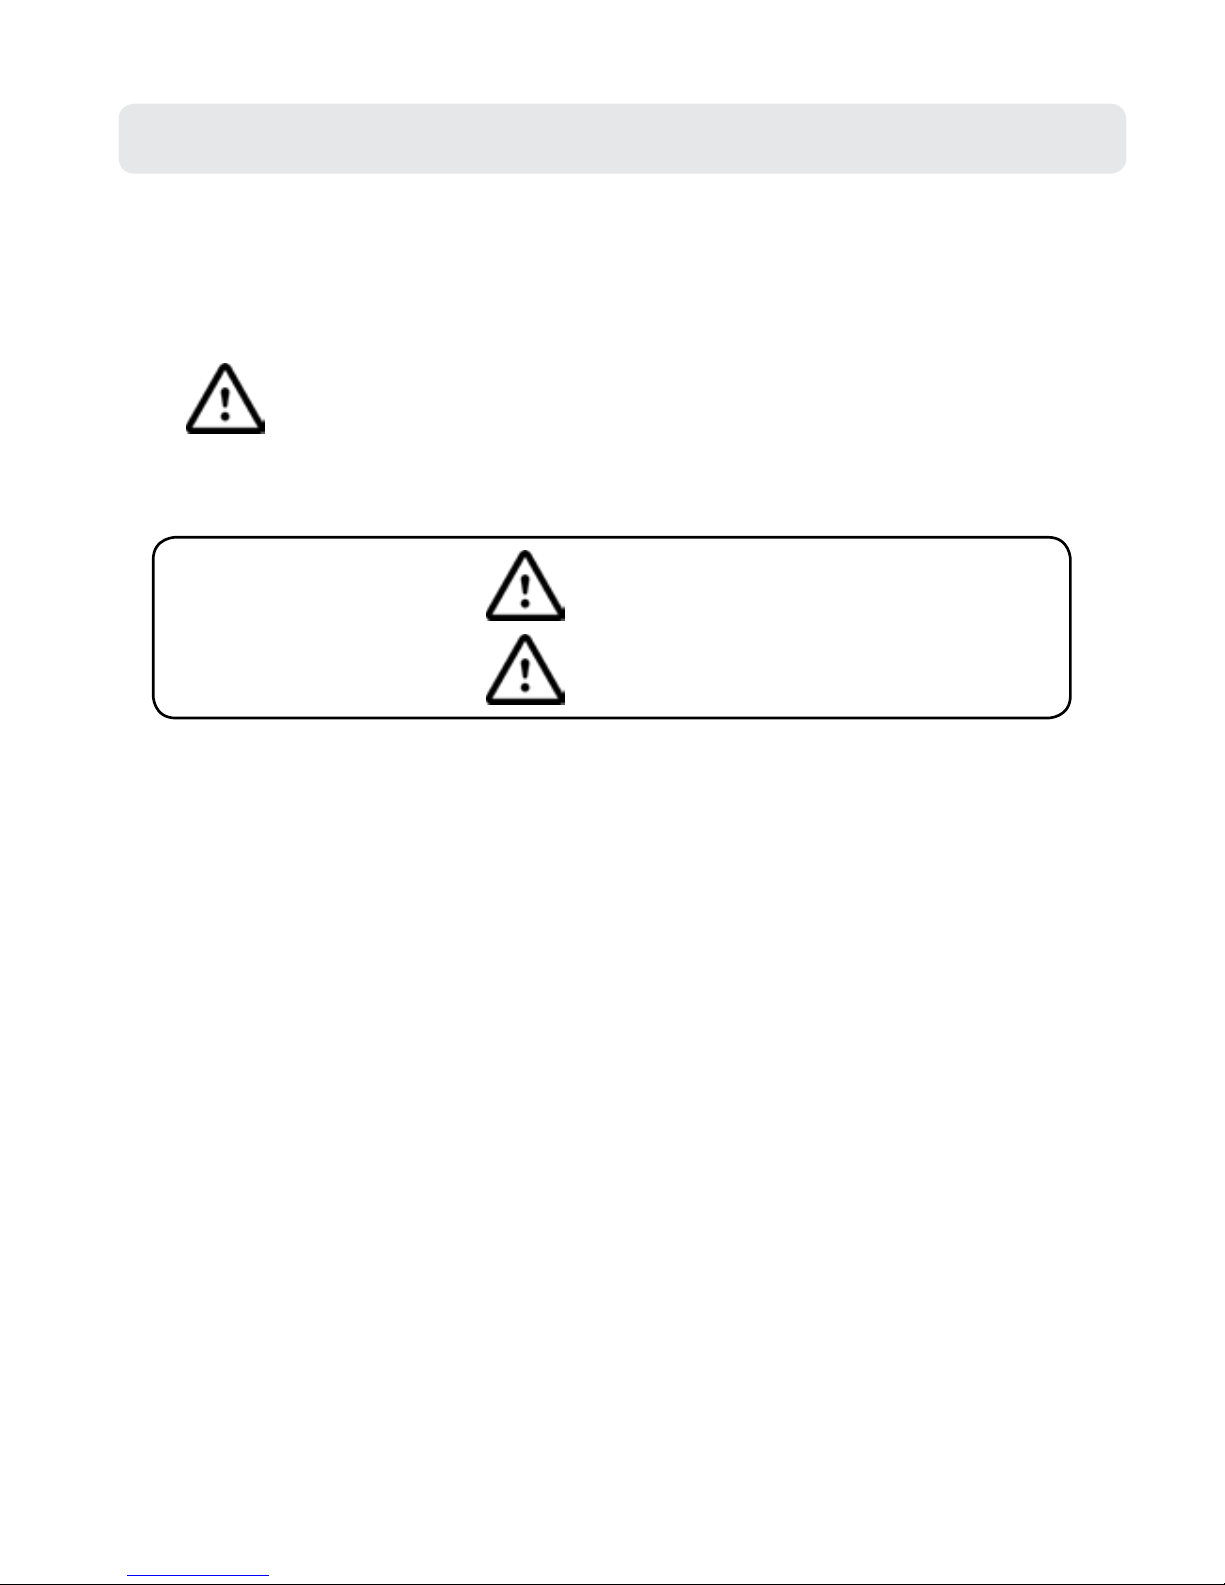
1.1 Important Safety Instructions
We have provided many important safety messages in this manual and on your appliance.
Always read and obey all safety messages.
Your safety and the safety of others are very important.
This is the safety alert symbol.
All safety messages will follow the safety alert symbol and either the word ‘DANGER’ or
‘WARNING’.
DANGER
WARNING
These words mean:
You can be killed or seriously injured if you don’t immediately follow instructions
All safety messages will tell you what the potential hazard is, tell you how to reduce the
chance of injury, and tell you what can happen if the instructions are not followed.

2. PREPARING YOUR ICE MAKER FOR USE
5
2.1 Important Safety Tips
When using electrical appliances, basic safety precautions should be followed to reduce the
risk of re, electric shock, and injury to persons or property.
Read all instructions before using any appliance.
● Do not operate this, or any other appliance with a damaged cord.
● Connect to properly polarized outlets only.
● No other appliance should be plugged into the same outlet. Make sure that the plug is
fully inserted into the socket.
● Do not run the power cord over carpeting or other heat insulators. Do not cover the
cord. Keep cord away from trac areas, and do not submerge in water.
● We do not recommend the use of an extension cord, as it may overheat and become a
risk of re. If you must use an extension cord, use No.14 AWG minimum size and rated
no less than 1875 watts.
● Unplug the ice maker before cleaning or making any repairs or servicing.
● Exercise caution and use reasonable supervision when appliance is used near children.
● Do not use your ice-maker outdoors. Place the ice-maker away from direct sunlight and
make sure that there is at least 4 inches of space between the back of your unit and wall.
Keep a minimum distance of 4 inches on each side of your unit free.
● Do not use other liquid to make the ice-cube other than water.
● Do not clean your ice maker with ammable uids. The fumes can create a re hazard or
explosion.
● Do not tip over.
● If the ice maker is brought in from outside in wintertime, give it a few hours to warm up
to room temperature before plugging it in.
WARNING: This appliance must be earthed.
IMPORTANT: The wires in this mains lead are colored in accordance with the following
code:
Green or Green with a yellow strip: Grounding
White: Neutral
Black: Live
To avoid a hazard due to instability of the appliance, it must be placed on
an even or at surface.
3. GETTING TO KNOW YOUR ICE MAKER
6
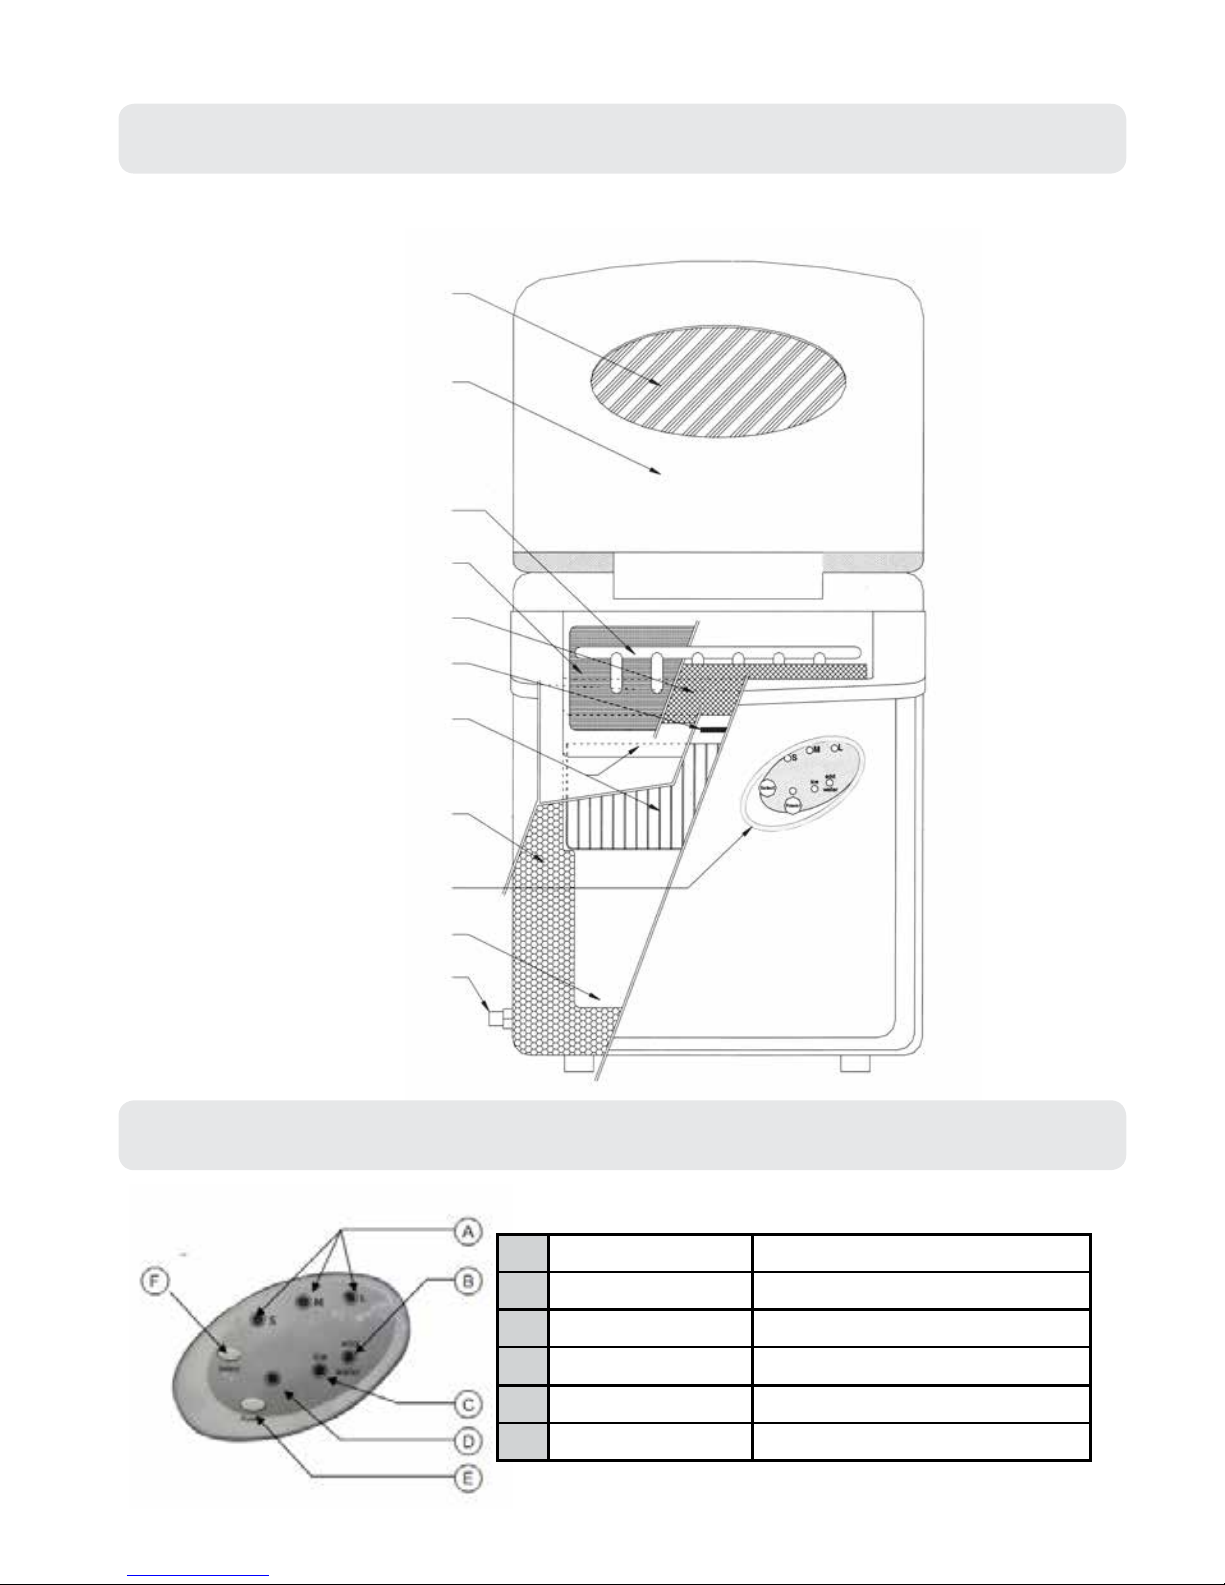
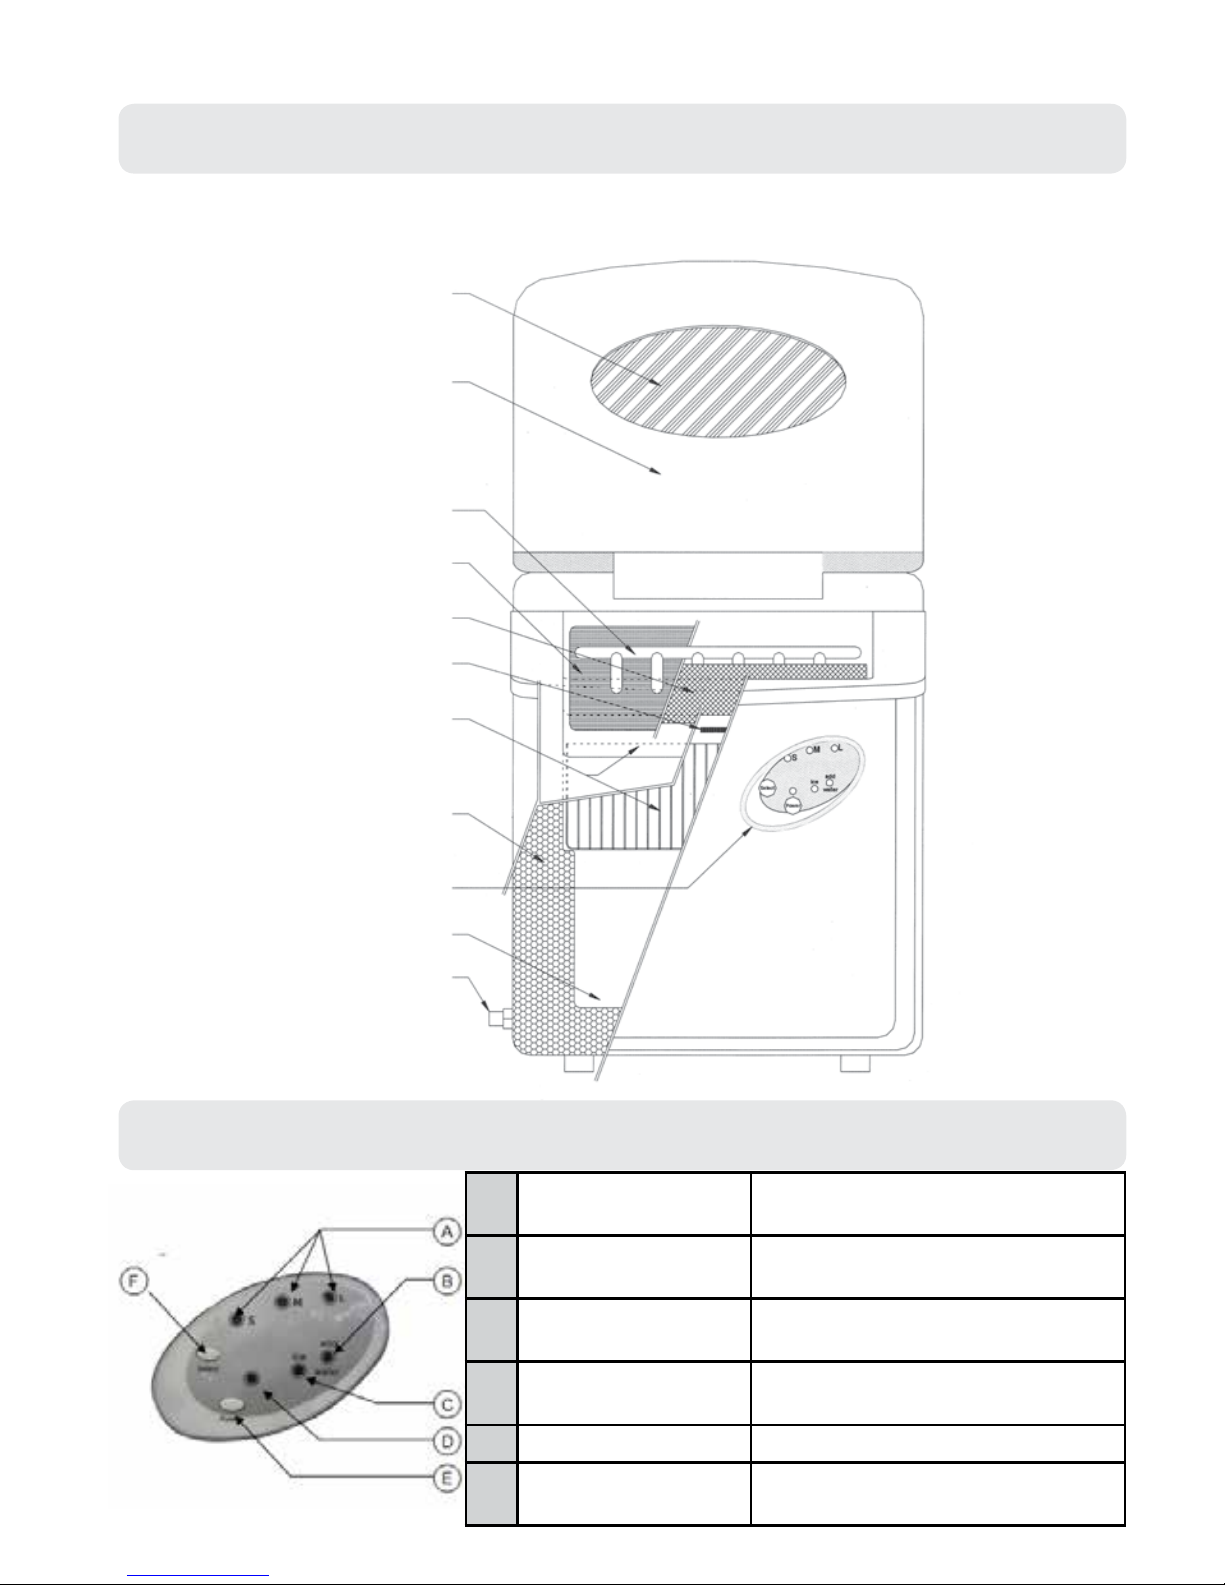
3.1 Knowing Your Ice Maker
The diagram below shows you the parts of your Ice Maker.
3.2 The Control Panel
A Ice Size Shows Selected Ice Size
B Add Water Indicates water reservoir empty
C Ice Indicates Ice Bucket Full
D Power Light Indicates unit is turned on
E Power Button Turns On / Turns O Unit
F Ice Select Button Selects Ice Size (S/M/L)
View Window
Cover
Sensor (Thermostat)
Evaporator
Ice Bucket
Ice Shovel
Ice-Making Box
Control Panel
Water Drain Cap
Water Reservoir
Insulated Body
4. GETTING YOUR ICE MAKER READY FOR USE
7
4.1 Unpacking Your Ice Maker
1. Remove the Ice Maker from the box. Throw away the plastic bag. Do not throw away the
box as this may be required for future storage.
2. Check all the parts are included. There should be 3 parts in total: Ice Maker, Ice Basket
and Ice Scoop.
3. Remove all the tape in the unit.
4. Use lukewarm water and a soft cloth to clean the interior of the Ice Maker, the ice basket
and the ice scoop.
5. Find a location for your ice maker that is protected from direct sunlight and other
sources of heat (i.e.: stove, furnace, radiator). Place the ice maker on a level surface.
Make sure that there is at least 4 inches of space between the back and sides of your ice
maker and the wall.
6. Allow one hour for the refrigerant uid to settle before plugging ice maker in.
7. The appliance must be positioned so that the plug is accessible.
4.2 Electrical Shock Hazards
WARNING
Electrical Shock Hazard
Plug Into a grounded outlet.
Do not use an extension cord.
Failure to follow these instructions can result in
death, re, or electrical shock.
This unit should be properly grounded for your safety. The power cord of this appliance is
equipped with a three-prong plug which mates with standard three prong wall outlets to
minimize the possibility of electric shock.
Plug your appliance into an exclusive, properly installed, grounded wall outlet. Do not
under any circumstances, cut or remove the third (ground) prong from the power cord.
Any questions concerning power and/or grounding should be directed toward a certied
electrician.
This appliance requires a standard 220-240volt, 50Hz electrical outlet with three-prong
ground.

5. OPERATING YOUR ICE MAKER
8
5.1 Cleaning and Maintaining your Ice Maker
Before using your ice maker, it is strongly recommended to clean it thoroughly.
1. Take out the ice basket.
2. Clean the interior with diluted detergent, warm water and a soft cloth.
3. Then use the water to rinse the inside parts, and drain out the water by unplugging the
drain cap on the side.
4. The outside of the ice maker should be cleaned regularly with a mild detergent solution
and warm water.
5. Dry the interior and exterior with a soft cloth.
6. When the machine is not in use for a long time, open water drain cap to drain water
completely from water reservoir.
5.2 How to operate your Ice Maker
1. Open the cover, remove the ice basket and pour water into tank. Keep water level below
the max water level mark.
2. Select the size of the ice cube by pressing the “Select” button. If the room temperature
is lower than 15°C, it is recommended to select the small or medium ice size in order to
avoid ice sticking together.
3. Press “Power” button on the control panel to begin the ice making cycle.
4. The ice making cycle lasts 6 to 15 minutes, depending on the size of the ice cube
selection and the ambient temperature. On a very hot day or in a hot room, ice-making
time may vary.
5. While the icemaker is on, check water level periodically. If the water pump can’t pump
water, the ice maker will stop automatically, and the “Add Water” indicator will be lit.
Press “Power” button to turn o the machine, ll water up to the level mark and press
“Power” button again to turn on the machine. Allow the refrigerant liquid inside the
compressor at least 3 minutes to settle before restarting.
6. The ice maker automatically stops working when the ice basket is full and the “Ice”
indicator will be lit.
7. Change water in the water reservoir every 24 hours to ensure a reasonable hygiene
level.
8. If the Ice Maker isn’t in use, drain all water left in the water reservoir.
6. TROUBLESHOOTING
9
6.1 Problems, Possible Causes and Solutions
PROBLEM POSSIBLE CAUSE SOLUTION
‘Add Water’ Indicator is on. Lack of Water Stop the ice maker, ll water,
and press “Power” button again
to restart the unit.
‘Ice’ Indicator is on. There is too much ice. Remove ice from ice basket.
Ice cubes stick together. The ice cycle is too long. Stop the ice maker, and restart it
when the ice blocks melt. Select
the small size ice cube selection.
Water temperature in inner
tank is too low.
Change the water in the inner
Tank. Temperature of water is
better set between 7°C-30°C.
Ice making cycle is normal
but no ice is made.
Ambient temperature or
water temperature in inner
tank is too high.
Please run the ice maker below
30°C and pour colder water into
tank.
Refrigerant liquid leakage. Verify by a qualied technician.
Pipe in the cooling system
is blocked.
Verify by a qualied technician.
www.thinkgizmos.com
Model TG20
Certicates CE + RoHS
Refrigerant Liquid/Quantity R600a / 29g
Voltage 220-240V
-50Hz
Power Consumption 0.9A
Power / Standby 120W / 0.5W
7. TECHNICAL SPECIFICATIONS
10
7.1 Technical Features
Dimensions L/W/H 36.8m / 31.3cm / 38.1cm (Height is 58.8cm with cover open)
Air Flow Allow 4 inches around the machine for air to ow correctly.
Weight 11.8 kg
Power 220-240 V / 50Hz, 120 W
Daily Ice Production 12 - 15 kg / 24 h
Ice Production Time Depending on ice size selected:
-S (small): 6-12 Mins
-M (medium): 7-13 Mins
-L (large): 8-15 Mins
Certication CE + RoHS
Noise Level 30 dB
Max Ambient Temperature 30 °C
Water Reservoir Capacity 3 Litres
Ice Basket Capacity Approx 1kg
7.2 Electrical Diagram

8. WARRANTY
8. Warranty Information
Think Gizmos, Unit 19, Lawson Hunt Industrial Park,
Broadbridge Heath, West Sussex, RH12 3JR
Tel.: +44/(0)203 384 8304
help@thinkgizmos.com ● www.thinkgizmos.com
What is Covered:
This warranty covers any defects in materials or workmanship, with the exceptions stated
below.
How Long Coverage Lasts:
This warranty runs for 1 Year from the date your Ice Maker is delivered.
What is not covered:
Any problem that is caused by abuse, misuse, or an act of God (such as a ood) are not
covered.
What We Will Do:
If the Product proves defective during the warranty period, we will provide you with the
instructions for the return, and we will take one of the following actions: (i) replace the
Product with a product that is the same or equivalent to the Product you purchased; (ii)
repair the Product; or (iii) refund to you the whole of or part of the purchase price of the
Product.
How To Get Service:
To obtain instructions on how to obtain service under this warranty, contact our customer
service by phone or email. You will nd the contact details of our customer service below.
Customer service may ask you questions to determine your eligibility under this warranty,
and if you are eligible you’ll be given instructions for returning the defective Product. If
we send you a replacement or repair your Product, we will pay the cost of delivering the
replacement or repaired Product to you.
Do not return the item to the original place of purchase, please contact Think
Gizmos direct.
11

TG20 EIS-HERSTELLER
WIR GRATULIEREN ZUM KAUF DIESES TG20 EIS-HERSTELLER.
BITTEL LESEN SIE SICH DIESE BEDIENUNGSANLEITUNG VOR DER
VERWENDUNG DURCH UND BEWAHREN SIE SIE AUF, DA SIE
WICHTIGE SICHERHEITSHINWEISE ENTHÄLT.
Bedienungsanleitung
English p 2
Deutsch p 12
Francais p 23
Italiano p 34
Español p 45

DEUTSCH BEDIENUNGSANLEITUNG INHALTSVERZEICHNIS
1.
2.
3.
4.
1.1 Wichtige Sicherheitshinweise ...........................................................................15
3.1 Ihre Eiswürfelmaschine kennenlernen .......................................................... 17
3.2 Das Bedienfeld .................................................................................................. 17
2.1 Wichtige Sicherheitstipps ................................................................................ 16
4.1 Ihre Eiswürfelmaschine auspacken ................................................................. 18
4.2 Gefahren des Stromschlags ............................................................................. 18
WICHTIGE SICHERHEITSHINWEISE
IHRE EISWÜRFELMASCHINE KENNENLERNEN
IHRE EISWÜRFELMASCHINE VORBEREITEN
IHRE EISWÜRFELMASCHINE ZUR VERWENDUNG VORBEREITEN
13
5.
5.1 Reinigung und Wartung der Eiswürfelmaschine .......................................... 19
5.2 Bedienung Ihrer Eiswürfelmaschine ............................................................... 19
IHRE EISWÜRFELMASCHINE BEDIENEN
6.
6.1 Probleme, Mögliche Ursachen und Lösungen .............................................. 20
FEHLERBEHEBUNG
7.
7.1 Technische Eigenschaften ............................................................................... 21
7.2 7.2 Schaltplan ................................................................................................... 21
TECHNISCHE SPEZIFIKATIONEN
8.
8.1 Garantieinformationen .................................................................................... 22
GARANTIE
Wählen Sie Größe des Eis
Verwenden Sie die Ice-Schaltäche auswählen, um die
erforderliche Eis-Größe auszuwählen.
KURZANLEITUNG
14
Anschließen die Eis-Hersteller
Stecker des Netzkabels in eine geerdete Steckdose.
1.
3.
Genießen
Nach 8 bis 12 Minuten, je nach Einstellung der
Eiswürfelgrösse, erhalten Sie die ersten 9 Eiswurfel
5.
Mit Wasser füllen
Füllen Sie den Wassertank bis zur Füllung-Zeile.
2.
Maschine einschalten
Drücken Sie den Netzschalter, um das Gerät
einzuschalten.
4.
1. 1. WICHTIGE SICHERHEITSHINWEISE
15
1.1 Wichtige Sicherheitshinweise
Wir haben in dieser Bedienungsanleitung und auf der Maschine viele Sicherheitshinweise
bereitgestellt. Lesen und befolgen Sie alle Sicherheitshinweise.
Ihre Sicherheit und die Sicherheit anderer sind sehr wichtig.
Das Gefahrensymbol
Alle Sicherheitshinweise sind mit dem Gefahrensymbol oder den Worten “Gefahr” oder
“Warnung” begleitet.
GEFAHR
WARNUNG
Diese Worte bedeuten:
Sie könnten getötet oder schwer verletzt werden, wenn Sie die Anweisungen nicht
umgehend befolgen.
Alle Sicherheitshinweise unterrichten Sie über die potentielle Gefahr, wie Sie das Risiko
von Verletzungen reduzieren und was passieren könnte, wenn die Anweisungen nicht
befolgt werden.

2. IHRE EISWÜRFELMASCHINE VORBEREITEN
16
2.1 Wichtige Sicherheitstipps
Wenn Sie elektrische Geräte verwenden sollten allgemeine Sicherheitsvorkehrungen befolgt
werden, um die Risiken von Feuer, Stromschlag, Verletzungen und der Beschädigung von
Gegenständen zu reduzieren.
Lesen Sie alle Anweisungen, bevor Sie ein Gerät verwenden.
● Bedienen Sie dieses oder andere Geräte nicht, wenn das Stromkabel beschädigt ist.
● Schließen Sie das Gerät ausschließlich an ordnungsgemäß installierte Steckdosen an.
● Kein anderes Gerät sollte an die gleiche Steckdose angeschlossen sein. Versichern Sie
sich, dass der Stecker vollständig in die Steckdose eingesteckt ist.
● Verlegen Sie das Kabel nicht über Teppiche oder andere Wärmeisolatoren. Decken Sie
das Kabel nicht ab. Halten Sie das Kabel von Bereichen fern, die oft genutzt werden und
tauchen Sie es nicht in Wasser ein.
● Die Verwendung eines Verlängerungskabels wird von uns nicht empfohlen, da dieses
überhitzen und ein Feuerrisiko darstellen könnte. Sollten Sie ein Verlängerungskabel
verwenden müssen, verwenden Sie ein Kabel mit einer minimalen Größe von Nr.14
AWG, das mit mindestens 1875 Watt bewertet ist.
● Stecken Sie die Eiswürfelmaschine aus, bevor Sie sie reinigen oder Reparaturen oder
Wartungen durchführen.
● Seien Sie vorsichtig und beaufsichtigen Sie Kinder, wenn die Maschine in der Nähe von
Kindern verwendet wird.
● Verwenden Sie Ihre Eiswürfelmaschine nicht im Freien. Setzen Sie Ihre
Eiswürfelmaschine nicht direktem Sonnenlicht aus und versichern Sie sich, dass
zwischen der Rückseite der Maschine und der Wand mindestens 10cm Abstand sind.
Halten Sie mindestens 10cm rund um die Maschine frei von anderen Gegenständen.
● Verwenden Sie keine andere Flüssigkeit als Wasser, um Eiswürfel herzustellen.
● Reinigen Sie Ihre Eiswürfelmaschine nicht mit entammbaren Flüssigkeiten. Die Dämpfe
können zu einem Feuerrisiko oder Explosion führen.
● Kippen Sie das Gerät nicht um.
● Sollte die Eiswürfelmaschine im Winter von draußen nach innen gebracht werden, geben
Sie ihr ein paar Stunden zum Aufwärmen, bevor Sie sie anschließen.
Um Gefahren durch Instabilität des Geräts zu vermeiden, muss es
auf ebenem oder achem Untergrund aufgestellt werden.
3. IHRE EISWÜRFELMASCHINE KENNENLERNEN
17
3.1 Ihre Eiswürfelmaschine kennenlernen
In der untenstehenden Abbildung sehen Sie die Bestandteile Ihrer Eiswürfelmaschine.
3.2 Das Bedienfeld
A Eiswürfel Größe Zeigt die gewählte Größe der
Eiswürfel an
B Wasser nachfüllen Zeigt an, dass der Wasserbehälter
leer ist
C Eis Zeigt an, dass der Eiswürfelbe-
hälter voll ist
D Stromanzeige Zeigt an, dass das Gerät einges-
chaltet ist
E An/Aus Schalter Schaltet das Gerät ein oder aus
F Eiswürfel Wähltaste Wählt die Größe der Eiswürfel
(S/M/L)
Sichtfenster
Klappe
Eissensor
(Thermostat)
Verdampfer
Eisauangkorb
Kippschale
waagrecht
Kippschale
gekippt
Anzeige +
Tasten
Wasser-
entleerstutzen
Wasservor-
ratsbecken
Gehause
isoliert
 Loading...