

THIEYE i60 User Manual
4K Action Camera i60
User Manual

01. Packaging
2
3
4
7
8
11
19
20
21
23
02. The Basics
03. Getting Started
04. Camera Menus
05. Camera Modes
1
06. Settings Mode
07. App Connecting
08. Battery
09. Frequently Asked Questions
10. Optional Accessories
1
CONTENTS
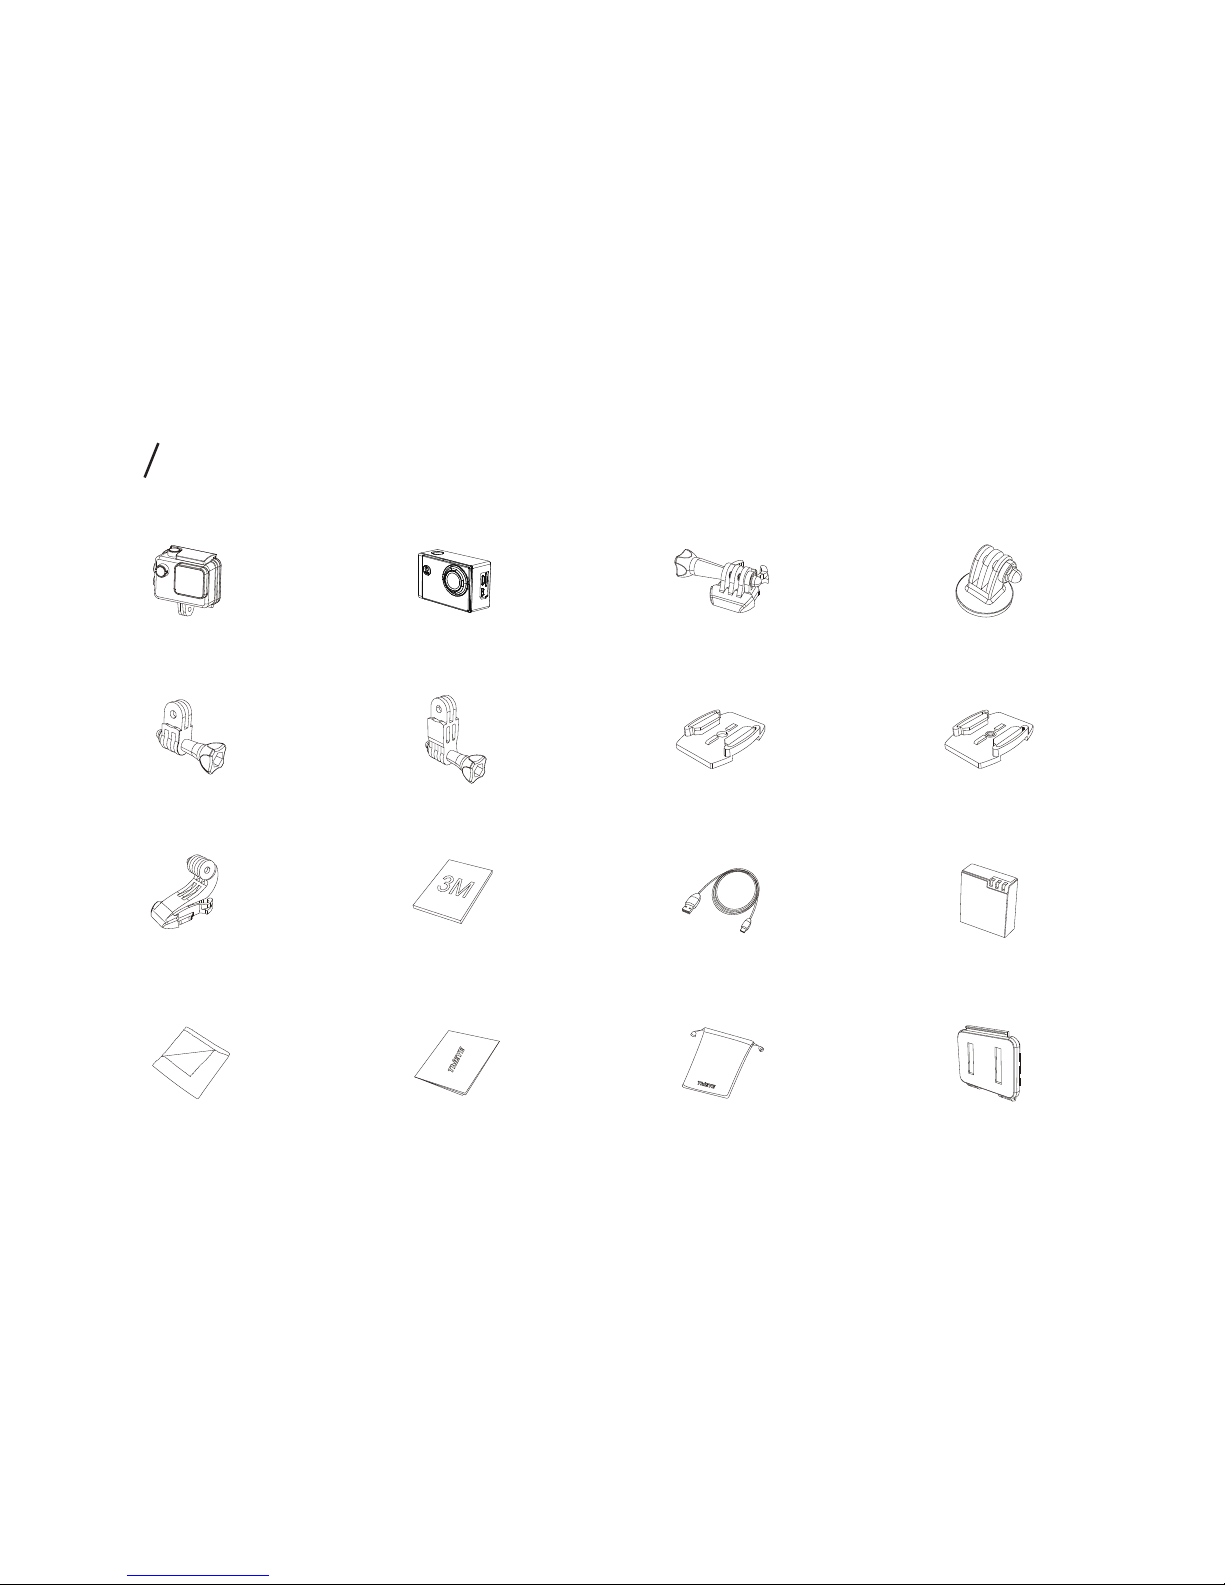
Vertical Quick
Release Buckle
Adhesive Sticker×2 Rechargeable Battery USB Cable
Flat Adhesive Mount Curved Adhesive Mount 3-way Arm B
3-way Arm A
Wiper
Additional Skeleton Backdoor
Quick Start Guide
Cloth Bag
4K Action Camera i60
Waterproof Housing Quick Release Buckle 1/4’Tripod Mount Adapter
01 Packagings
2
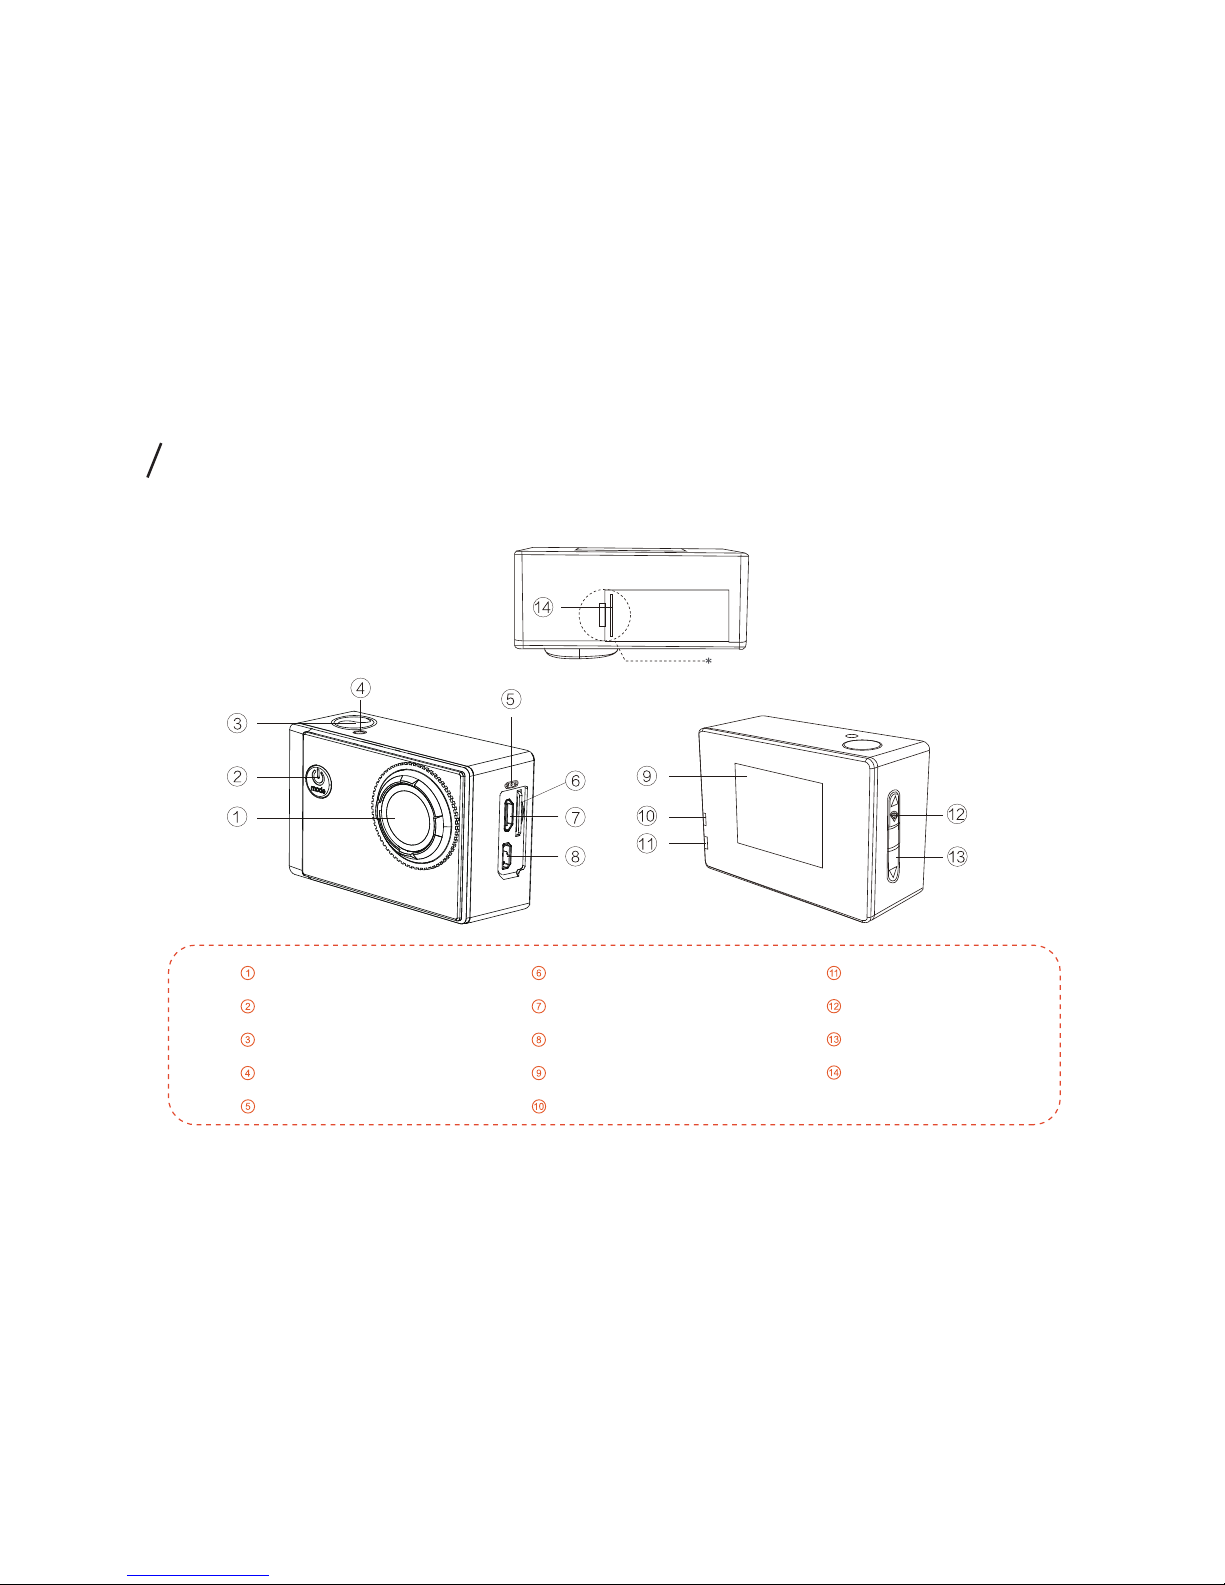
Lens
Power/Mode Button
Shutter/Select Button
Indicator Light
MIC
Status Indicator
Up/Wi-Fi Button
Down Button
Battery Cover
Micro SD Slot
USB Slot
HDMI Slot
1.5’’LCD
Charging Indicator
Please install the battery cover in this way
02
The Basics
3
DefaultedSettings
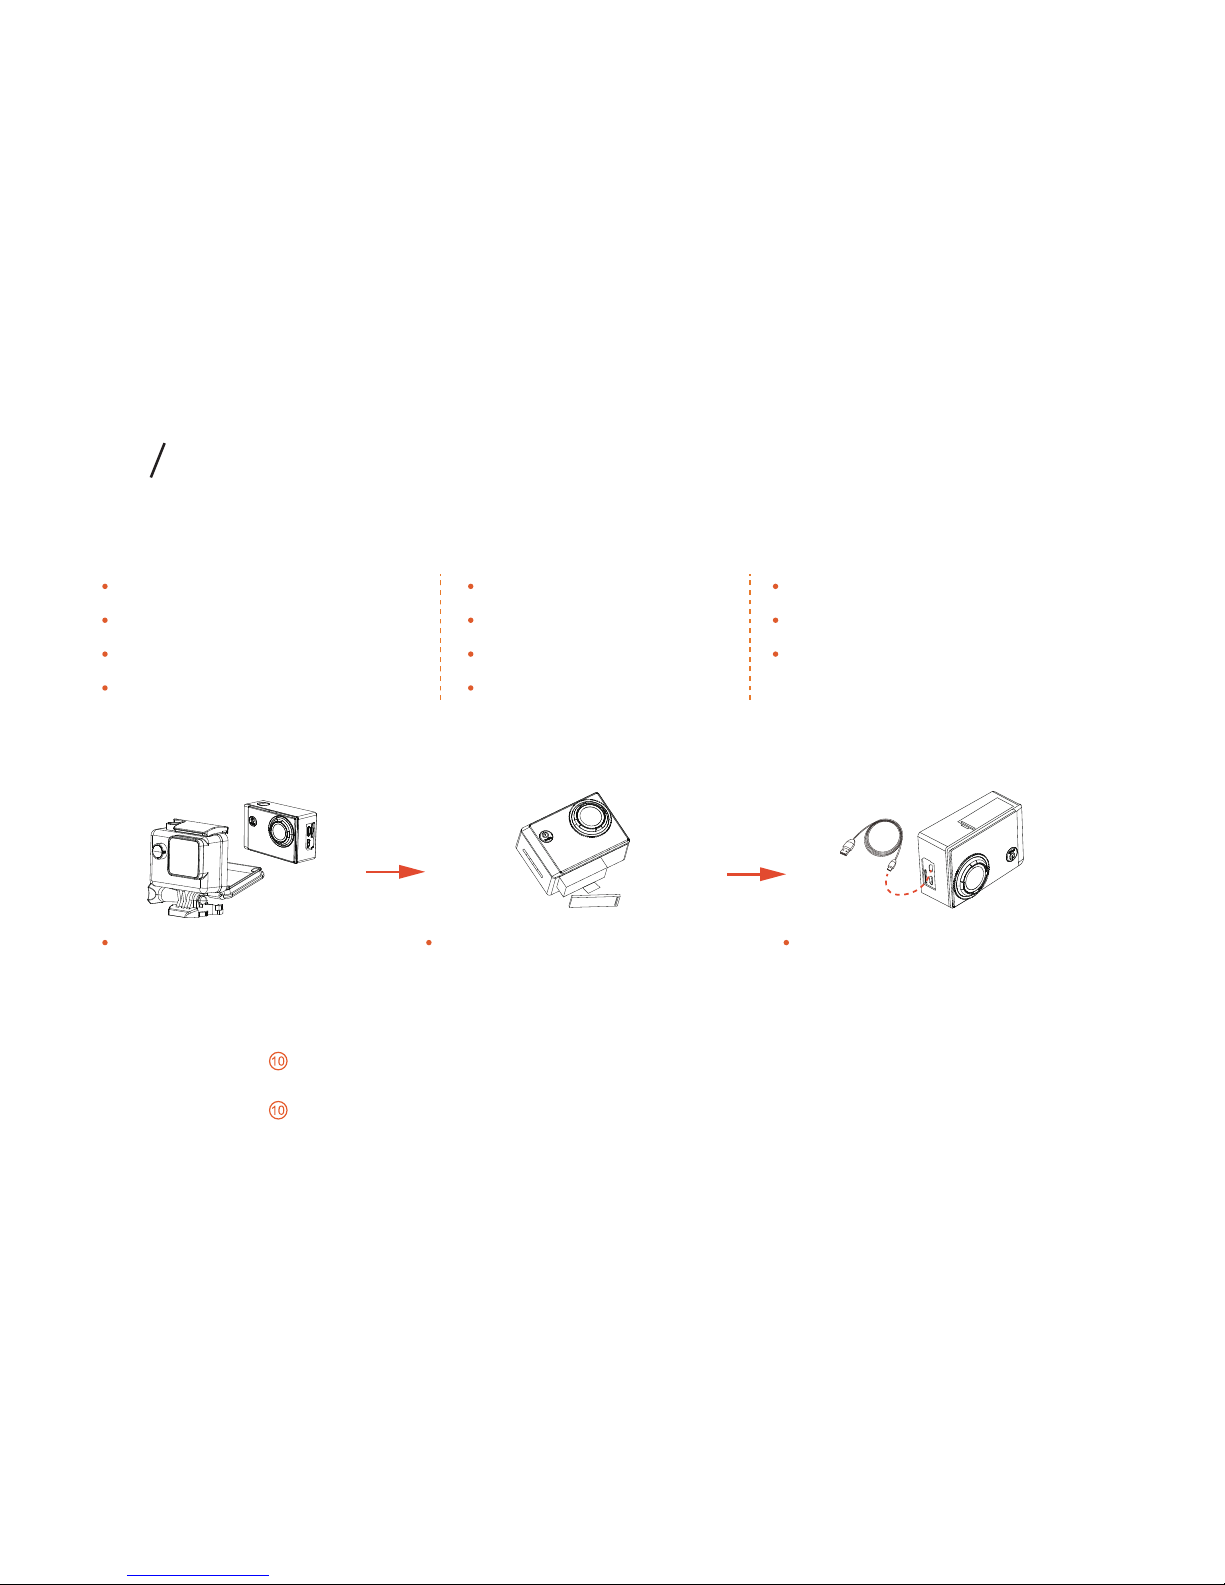
Charging the Battery
Open the backdoor of the
housing and take the camera
out.
NOTICE: It won’t damage the camera and the battery to use the battery before it’s fully charged since it has some power.
Open up battery cover, insert the
battery and buckleup the battery
cover.
When the camera turns on :
The Indicator Light turns on during charging and turns off when charging is over.
When the camera turns off :
The Indicator Light turns on during charging and turns off when charging is over.
Charge the battery by connecting
the camera to a computer or other
USB charging adapter (5V,1A) with
the included USB cable.
OFF
OFF
OFF
English
OFF
ThiEYE*i60
1234567890
Self-Timer
Photo Burst
Timelapse Photo
Language
Wi-Fi
Wi-Fi Name
Wi-Fi password
Video Resolution
Photo Resolution
Timelapse Video
Slow Motion
1080P 60fps
12M
OFF
OFF
03 Getting Started
4
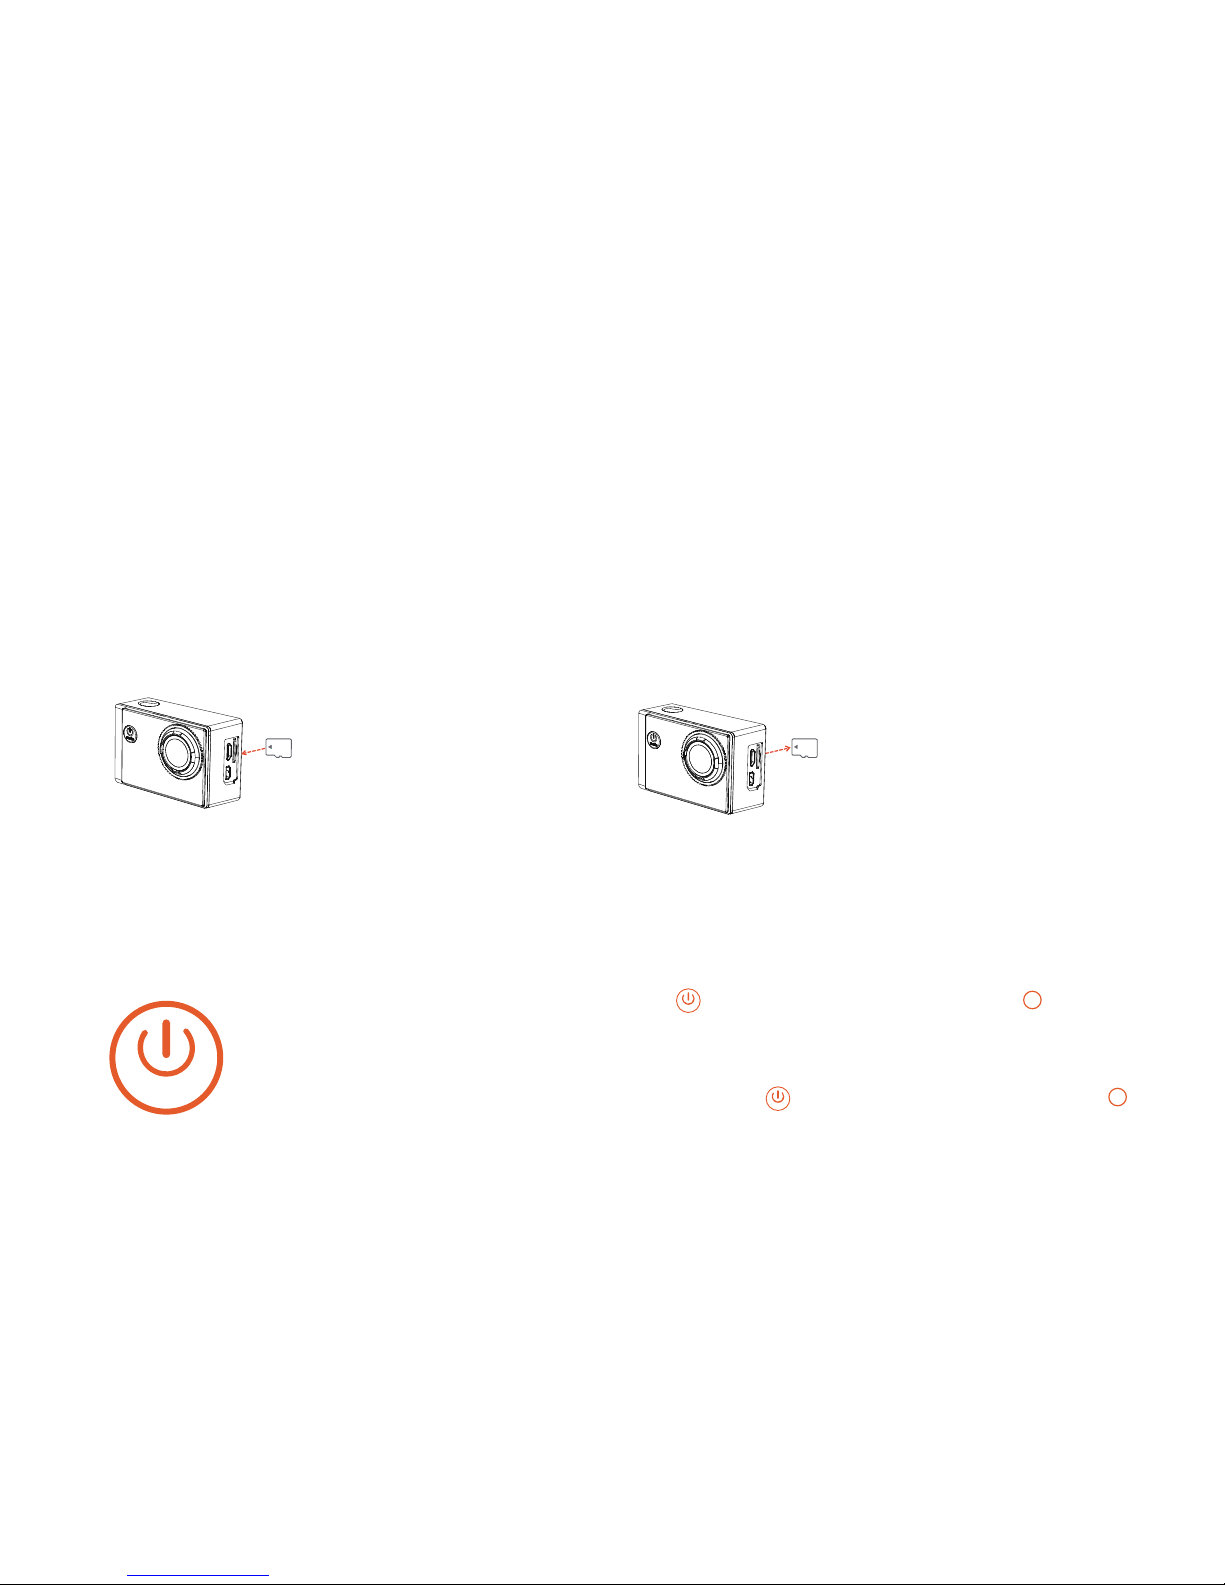
Inserting + Removing Micro SD Cards
Powering on + off
The camera i60 is compatible with microSD, microSDHC, and microSDXC memory cards (sold separately) from
4GB to 64GB capacity. You must use a microSD card with a Class 10 or a UHS-1 rating. ThiEYE recommends
using brand name memory cards for maximum reliability in high-vibration activities.
NOTICE: When the camera is tested without a card, “No Card” will show up on the screen. Use care when handling memory
cards. Avoid liquids, dust, and debris. As a precaution, power off the camera before inserting or removing the card.
To Power On : Press the Power/Mode Button“ ”for 3 seconds. The Indicator Light flashes
and the sound indicator emits beeps and then your camera is on. And the defaulted mode
to start up is Video Recording Mode.
To Power Off : Press and hold the Power/Mode Button“ ”for 3 seconds. The Indicator Light
turns off and the sound indicator emits beeps and then your camera is off.
To Insert the micro SD Card:
Slide the memory card into the
card slot with the label facing
the screen on the back of the
camera. When fully inserted, the
card clicks into place.
To Remove the micro SD Card:
Place your fingernail against the
edge of the memory card and
lightly press it further into the
camera. The card springs out far
enough to be removed.
4
4
mode
mode
mode
5
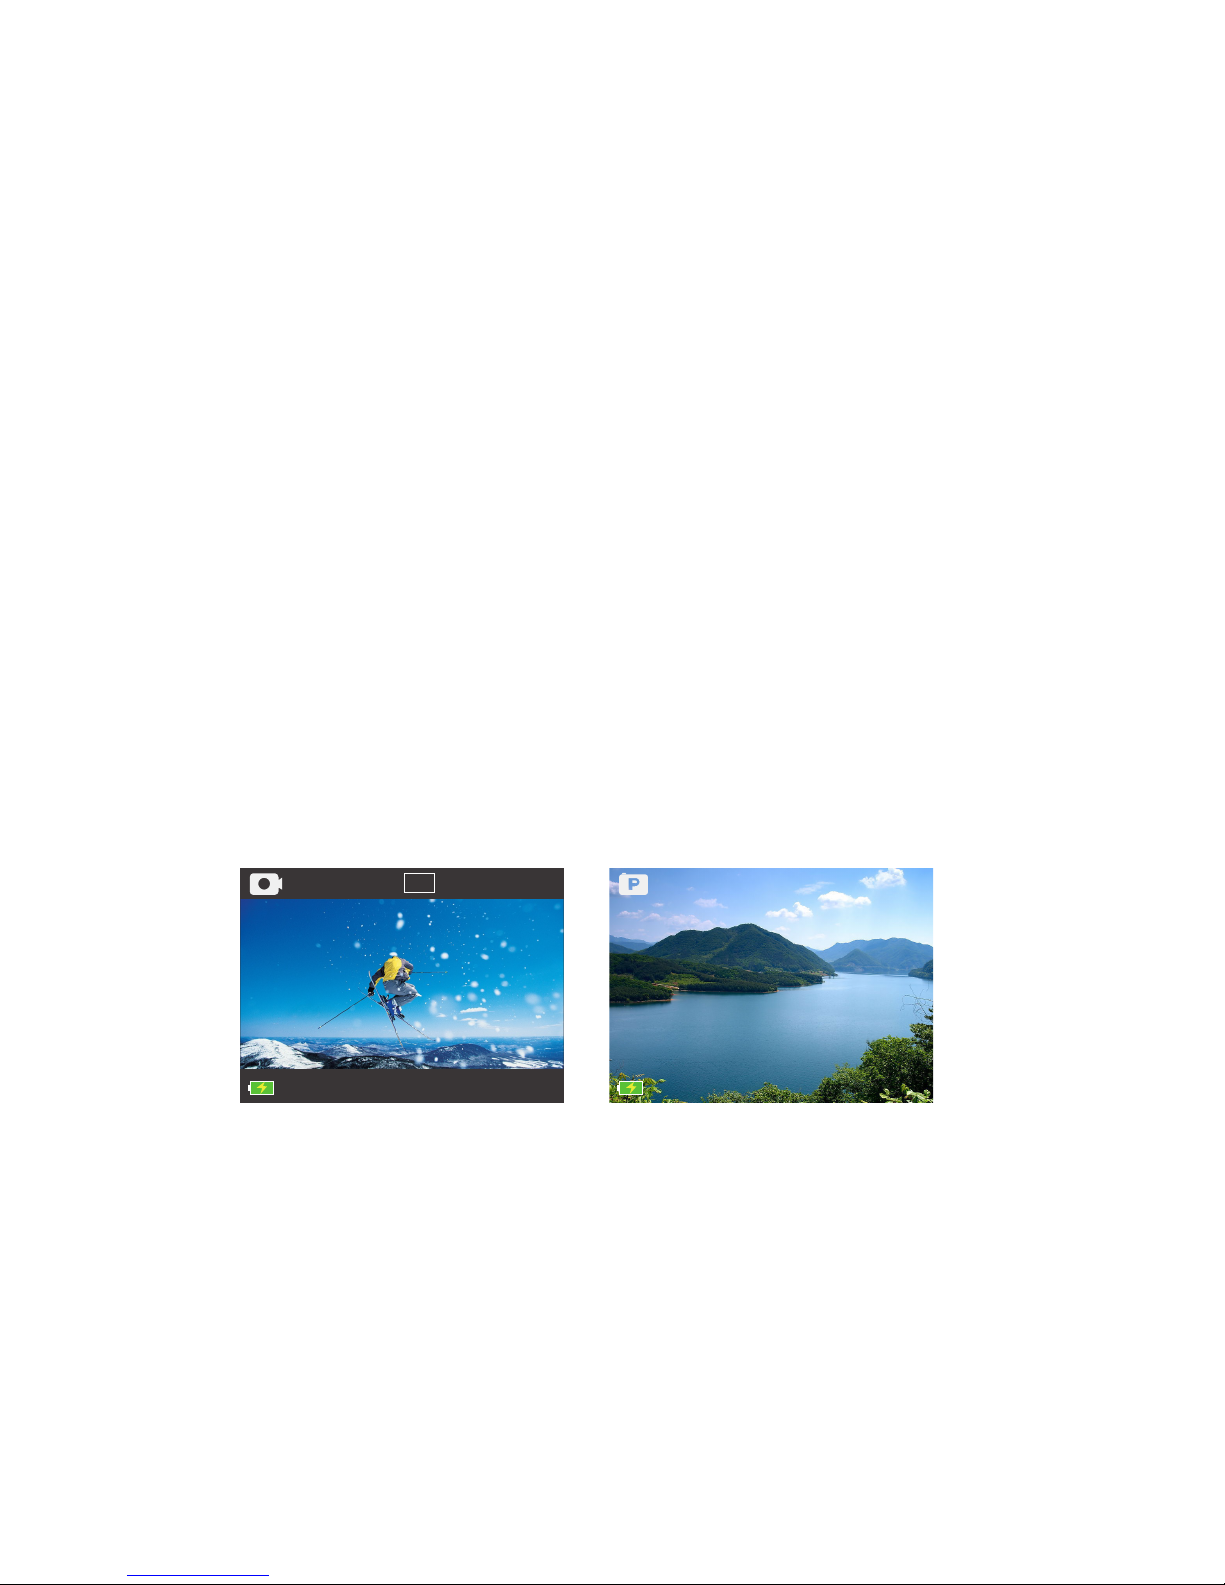
Video Recording Photo Taking
Screen
Screen on + off
With a built-in 1.5 inch LCD screen you can frame shots, change settings, and play back the videos and the
photos. You can take it as a viewfinder , so it‘ll be easy for you to view and reset.
When you turn on/off the camera, the screen will turn on/off automatically.
NOTICE: To make the battery work longer, you can set up the time of Display Off. For more information, see “Display Off” in
Settings Mode.
30fps 2.7K
15:03:56
6
12M
1256
HDR

Video Settings Photo Settings System Settings
Display Off
Volume
180° Turnover
Wi-Fi Name
Wi-Fi Password
Date & Time
Date Stamp
Language
Power Frequency
White Balance
System
Format
Factory Reset
System Info
Card Info
Photo Resolution
Self-Timer
Photo Burst
Timelapse Photo
Image Stabilizer
HDR
Exposure
ISO
Video Resolution
Timelapse Video
Slow Motion
Quick Shooting
Looping Record
Car Mode
Car Plate
Car Play Display
Voice Recording
04
Camera Menus
Video
Recording
Photo
Taking
Files
Camera
Settings
7
 Loading...