

Page 1
Water Solenoid Valve Replacement
RV Toilet Service Parts
for Aria/Aria Deluxe
Tools needed
• Phillips Screwdriver
• Adjustable Wrench
• Small, Flat-blade screwdriver
• Pliers, both regular and needle-nose
• Small Clippers
Note:
• Read all instructions before beginning work.
To Remove Toilet From Floor
1. Turn off RV water supply per RV Owner’s Manual.
2. Press both keypad buttons at the same time,
twice, to open blade and drain bowl of water.
3. Pry off Bolt Caps with Flat-blade screwdriver. Use
wrench to remove 1/2-inch Lag Screws.
4. Swivel Toilet to gain access to back.
5. Turn off RV’s power supply to the Toilet.
6. Disconnect Water Supply Line with Adjustable
Wrench.
7. Disconnect Toilet’s 12-volt power hookup to RV.
8. Place an old towel or soft cloth on work surface.
Remove Toilet from floor and place upright, with
back facing you, on work surface.
9. Remove old Closet Flange Seal (may be found in
toilet or in floor at Closet Flange). Discard.
10. Cover Holding Tank opening to contain odor.
To Remove Old Part
1. Using Needle-nose pliers, disconnect 4 Wiring
Harness Spade Connectors from Solenoid terminals.
3. To release Tubes connected to Solenoid Valve, use
pliers to unclamp Hog Rings. Pinching Clamp
ends together, ease Clamps upward on Tubes.
4. Ease off Tubes from Solenoid Valve.
5. Rock Solenoid Valve away from Metal Bracket.
Discard.
Part #19620
3. Firmly reconnect each of the 4 Spade Connectors onto terminals. Left to right: blue, white, brown.
4. Tuck in Overflow Tube if necessary.
To Replace Toilet To Floor
1. Secure new Closet Flange Seal, lip side up, to Toilet.
2. Position Toilet over flange.
3. Reconnect Water Supply Line.
4. Reconnect 12-volt power supply to Toilet.
5. Reconnect RV’s power supply to the Toilet.
6. Turn on RV’s water supply. Press Toilet flush button to close
blade and to flush test.
7. Secure to floor with Lag Screws. Tighten.
8. Resecure Bolt Caps.
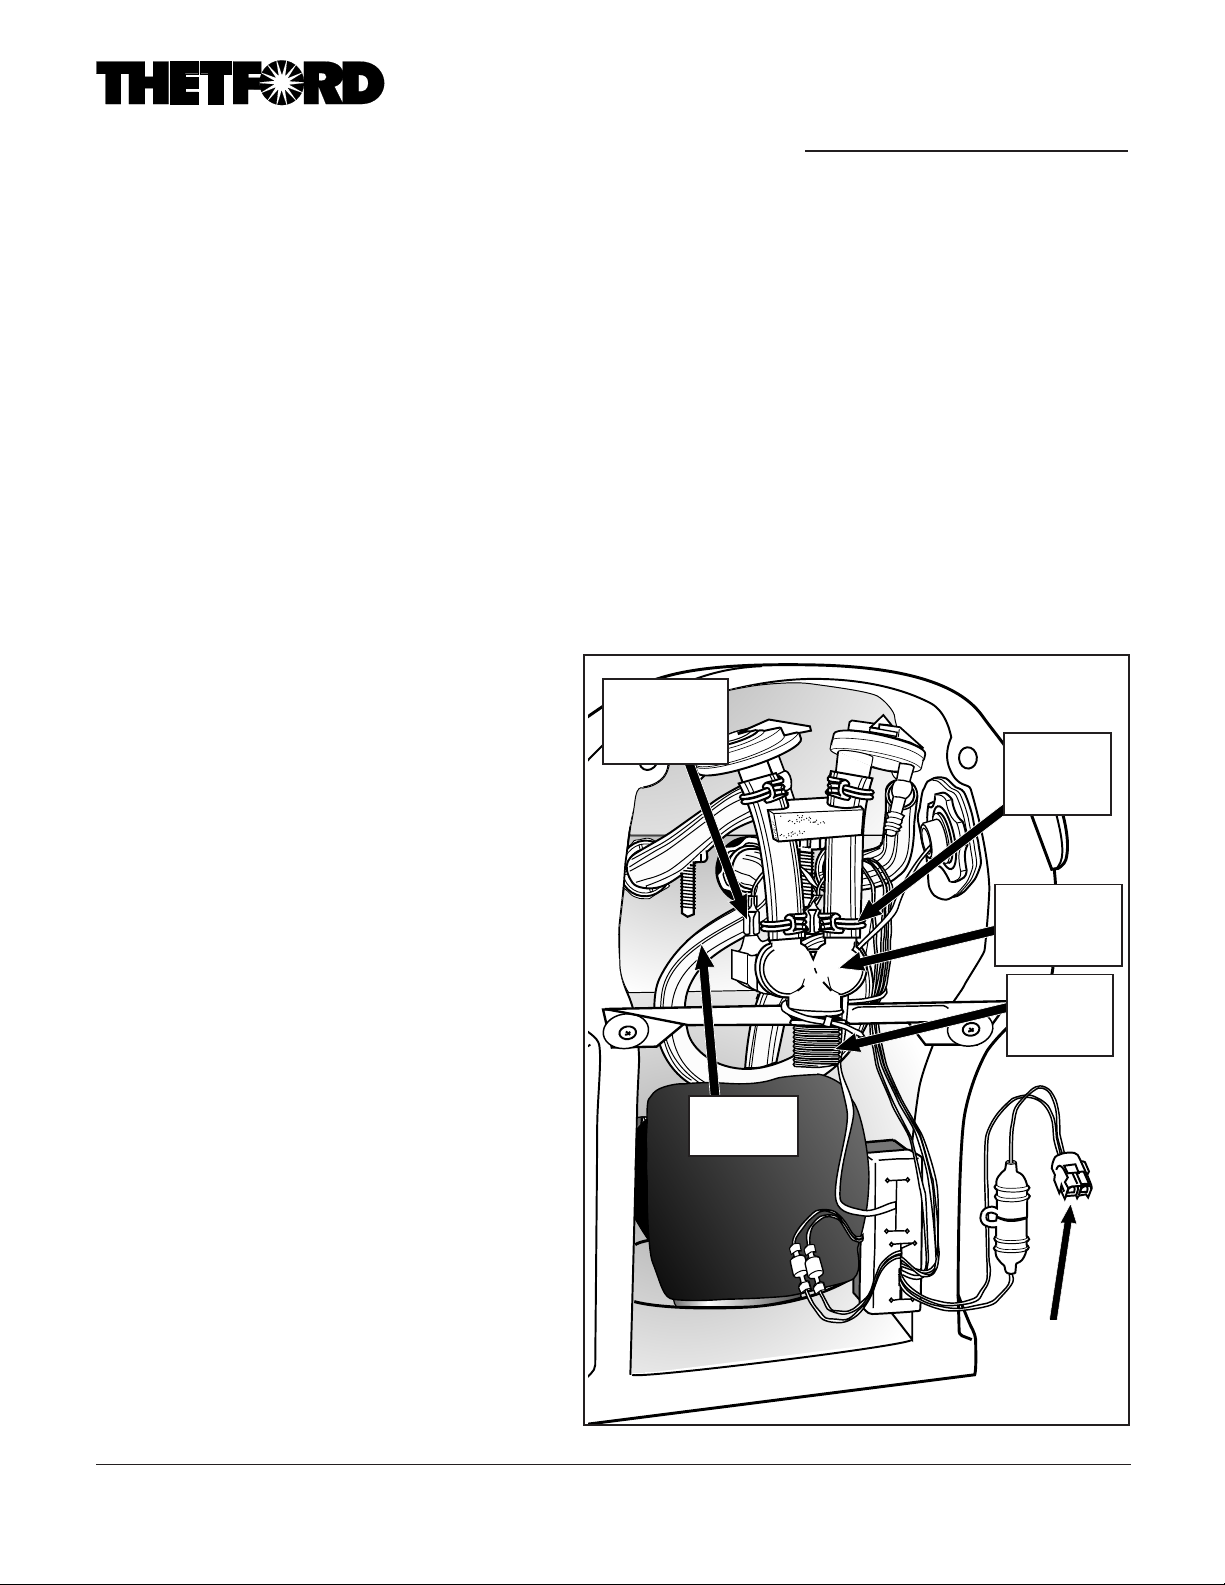
Spade
Connector
(1 of 4)
Overflow
Tube
Hog
Ring
Clamp
Water
Solenoid
Valve
Water
supply
hookup
To Replace Part
1. With electrical terminals facing into toilet, press
new Solenoid Valve into Metal Bracket. Seat firmly.
2. Reattach Tubes to Solenoid Valve with Solenoid
toward toilet. Using Pliers, move Hog Ring Clamps
in position below barbs on Solenoid Valve.
Form #19638 Rev. 8.20.01
Power
supply
connector
 Loading...