

The Singing Machine STVG888W Instruction Manual
The Singing Machine® is a registered trademark or The Singing Machine Co., Inc.
STVG888W
INSTRUCTION MANUAL
www.singingmachine.com
STVG888-ENG-v2_Layout 1 10/9/13 12:00 PM Page 1
1
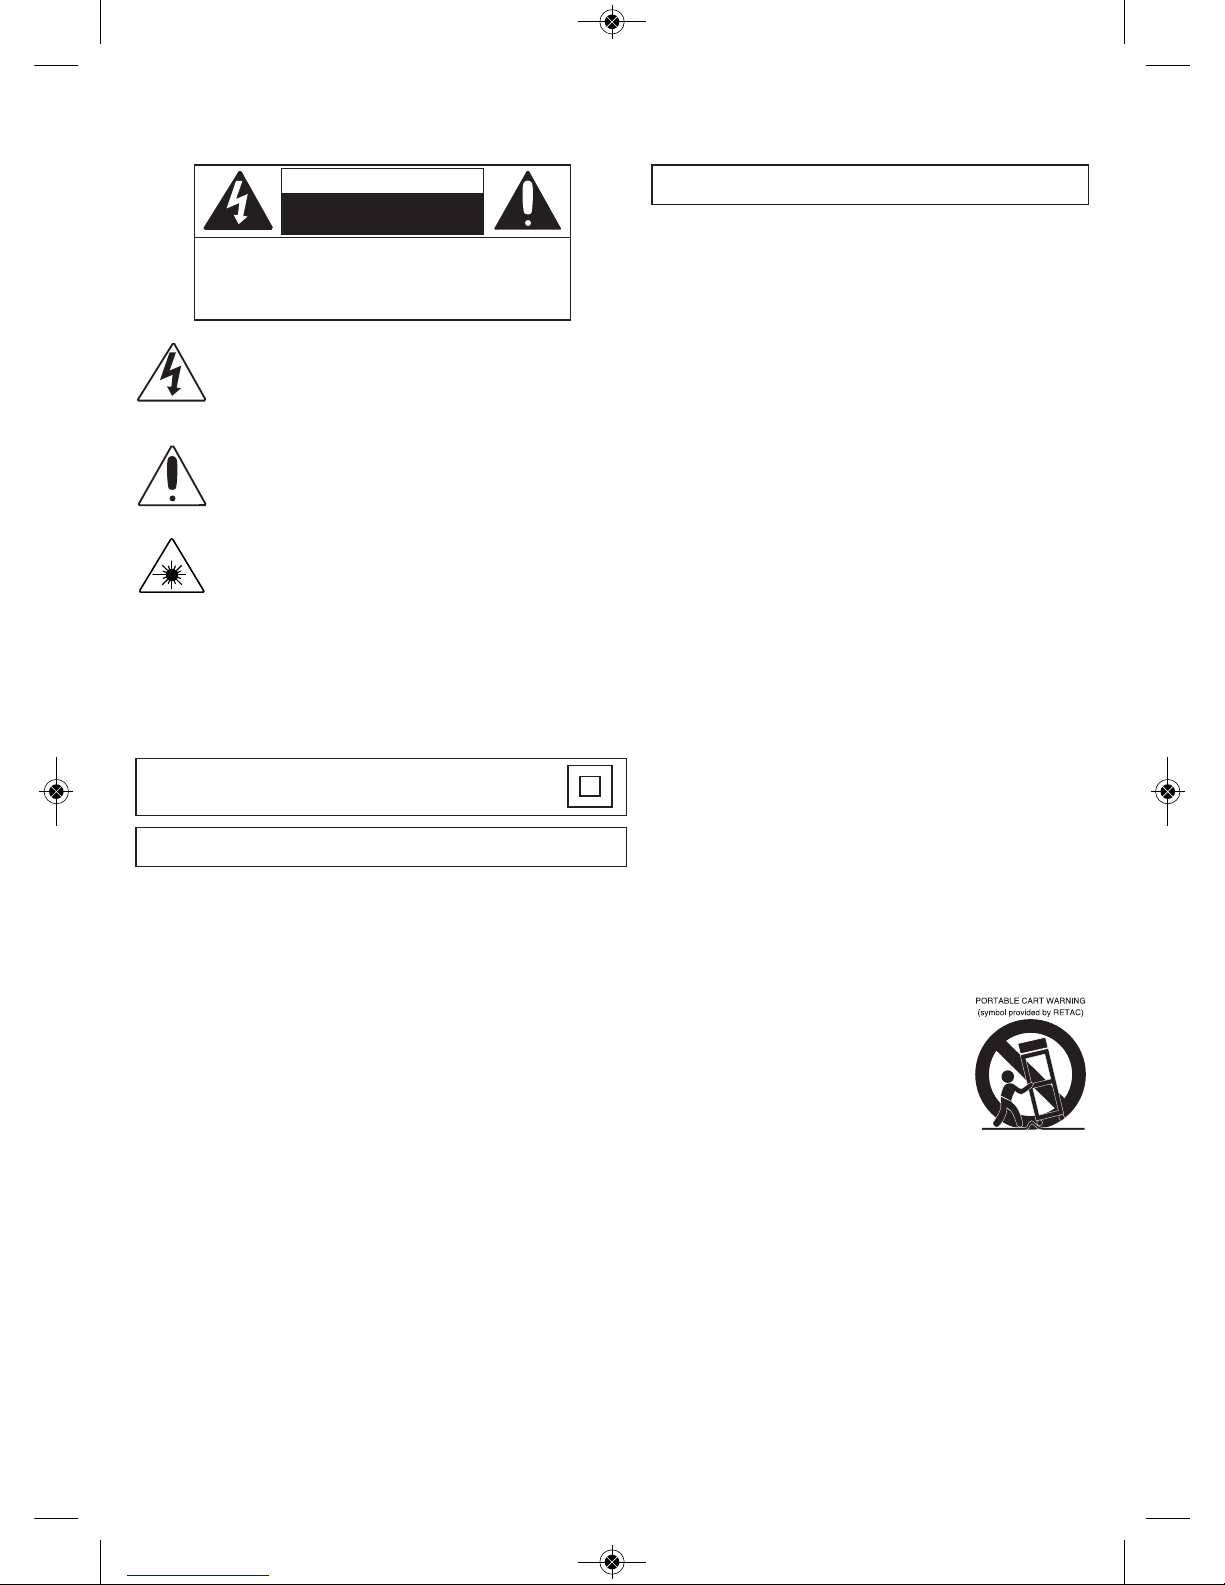
Warnings
CAUTION: TO REDUCE THE RISK OF ELECTRIC SHOCK, DO NOT
REMOVE COVER (OR BACK). NO USER-SERVICEABLE PARTS
I
NSIDE. REFER SERVICING TO QUALIFIED SERVICE PERSONNEL.
The Caution marking is located on the bottom panel.
CAUTION
R
ISK OF ELECTRIC SHOCK
DO NOT OPEN
DANGEROUS VOLTAGE: The lightning flash with arrowhead symbol
within an equilateral triangle is intended to alert the user to the
p
resence of uninsulated dangerous voltage within the product’s
enclosure that may be of sufficient magnitude to constitute a risk of
electric shock to persons.
CAUTION: TO PREVENT ELECTRIC SHOCK, MATCH WIDE BLADE OF PLUG TO
WIDE SLOT AND FULLY INSERT.
WARNING: TO PREVENT FIRE OR SHOCK HAZARD, DO NOT EXPOSE
T
HIS UNIT TO RAIN OR MOISTURE.
Class II equipment symbol.
This symbol indicates that the unit has a double insulation system.
ATTENTION: The exclamation point within an equilateral triangle is
intended to alert the user to the presence of important operating and
m
aintenance (servicing) instructions in the literature accompanying
this product.
DANGER: This symbol is intended to alert the user to the risk of
e
xposure to invisible and hazardous laser radiation if the cover or back
is opened, the interlock fails or is defeated. Direct exposure to the
beam may damage your eyesight.
FCC WARNING: This equipment may generate or use radio frequency
e
nergy. Changes or modifications to this equipment may cause harmful
interference unless the modifications are expressly approved in the
instruction manual. The user could lose the authority to operate this
e
quipment if an unauthorized change or modification is made.
T
his device complies with part 15 of the FCC Rules. Operation is subject
to the following two conditions: (1) This device may not cause harmful
interference, and (2) this device must accept any interference received,
i
ncluding interference that may cause undesired operation.
LASER SAFETY: This unit employs a laser. Only qualified service personnel
should attempt to service this device due to possible eye injury.
CAUTION: USE OF CONTROLS, ADJUSTMENTS OR PERFORMANCE
PROCEDURE HEREIN MAY RESULT IN HAZARDOUS RADIATION
EXPOSURE.
INDUSTRY CANADA NOTICE:
This device complies with Industry Canada Iicense-exempt RSS standard(s).
Operation is subject to the following two conditions:
1. This device may not cause interference, and
2. This device must accept any interference, including interference that
may cause undesired operation of the device.
D
RIPPING WARNING: This product shall not be exposed to dripping or splashing,
and no objects filled with liquids, such as vases, shall be placed on the product.
VENTILATION WARNING: The normal ventilation of the product shall not be
impeded for intended use.
SAFETY VERIFICATION: This device is made and tested to meet safety standards of
the FCC, requirements and compliance with safety performance of the U.S.
Department of Health and Human Services and also with FDA Radiation Performance
Standards 21 CFR Subchapter.
N
OTE: This equipment has been tested and found to comply with the limits
for a Class B digital device, pursuant to part 15 of the FCC Rules. These
limits are designed to provide reasonable protection against harmful
i
nterference in a residential installation. This equipment generates, uses and
can radiate radio frequency energy and, if not installed and used in
accordance with the instructions, may cause harmful interference to radio
c
ommunications. However, there is no guarantee that interference will not
occur in a particular installation. If this equipment does cause harmful
interference to radio or television reception, which can be determined by
t
urning the equipment off and on, the user is encouraged to try to correct
the interference by one or more of the following measures:
• Reorient or relocate the receiving antenna.
•
Increase the separation between the equipment and receiver.
• Connect the equipment into an outlet on a circuit different from that to
which the receiver is connected.
•
Consult the dealer or an experienced radio/TV technician for help.
• The rating information is located at the bottom of the unit.
Important Safety Information
1. Read these Instructions.
2. Keep these Instructions.
3. Heed all Warnings.
4. Follow all Instructions.
5. Do not use this apparatus near water.
6. Clean only with a dry cloth.
7. Do not block any of the ventilation openings. Install in accordance
with the Manufacturer’s instructions.
8. Do not install near any heat sources such as radiators, heat
registers, stoves, or other apparatus (including amplifiers) that
produce heat.
9. Do not defeat the safety purpose of the polarized or groundingtype plug. A polarized plug has two blades with one wider than the
other. A grounding type plug has two blades and a third grounding
prong. The wide blade or the third prong are provided for your
safety. When the provided plug does not fit into your outlet, consult
an electrician for replacement of the obsolete outlet.
10. Protect the power cord from being walked on or pinched
particularly at plugs, convenience receptacles, and the point where
they exit from the apparatus.
11. Only use attachments/accessories specified by the manufacturer.
12. Use only with a cart, stand, tripod, bracket, or table specified by
the manufacturer, or sold with the apparatus. When a cart is used,
use caution when moving the cart/apparatus
combination to avoid injury from tip-over.
13. Unplug this apparatus during lightning storms
or when unused for long periods of time.
14. Refer all servicing to qualified service
personnel. Servicing is required when the
apparatus has been damaged in any way,
such as power-supply cord or plug is
damaged, liquid has been spilled or objects
have fallen into the apparatus, the apparatus has been exposed to
rain or moisture, does not operate normally, or has been dropped.
15. WARNING: To reduce the risk of fire or electric shock, do not expose
this apparatus to rain or moisture. Do not place objects filled with
water, such as a vase, on the apparatus.
16. The AC mains plug is used as the power disconnect device and it
should remain readily accessible and operable during intended use.
In order to completely disconnect the apparatus from power, the
mains plug should be completely removed from the AC outlet
socket.
17. CAUTION: To reduce the risk of fire or explosion, do not expose
batteries to excessive heat such as sunshine, fire or other heat
sources.
CAN ICES-3(B)/NMB-3(B)
STVG888-ENG-v2_Layout 1 10/9/13 12:00 PM Page 1
2
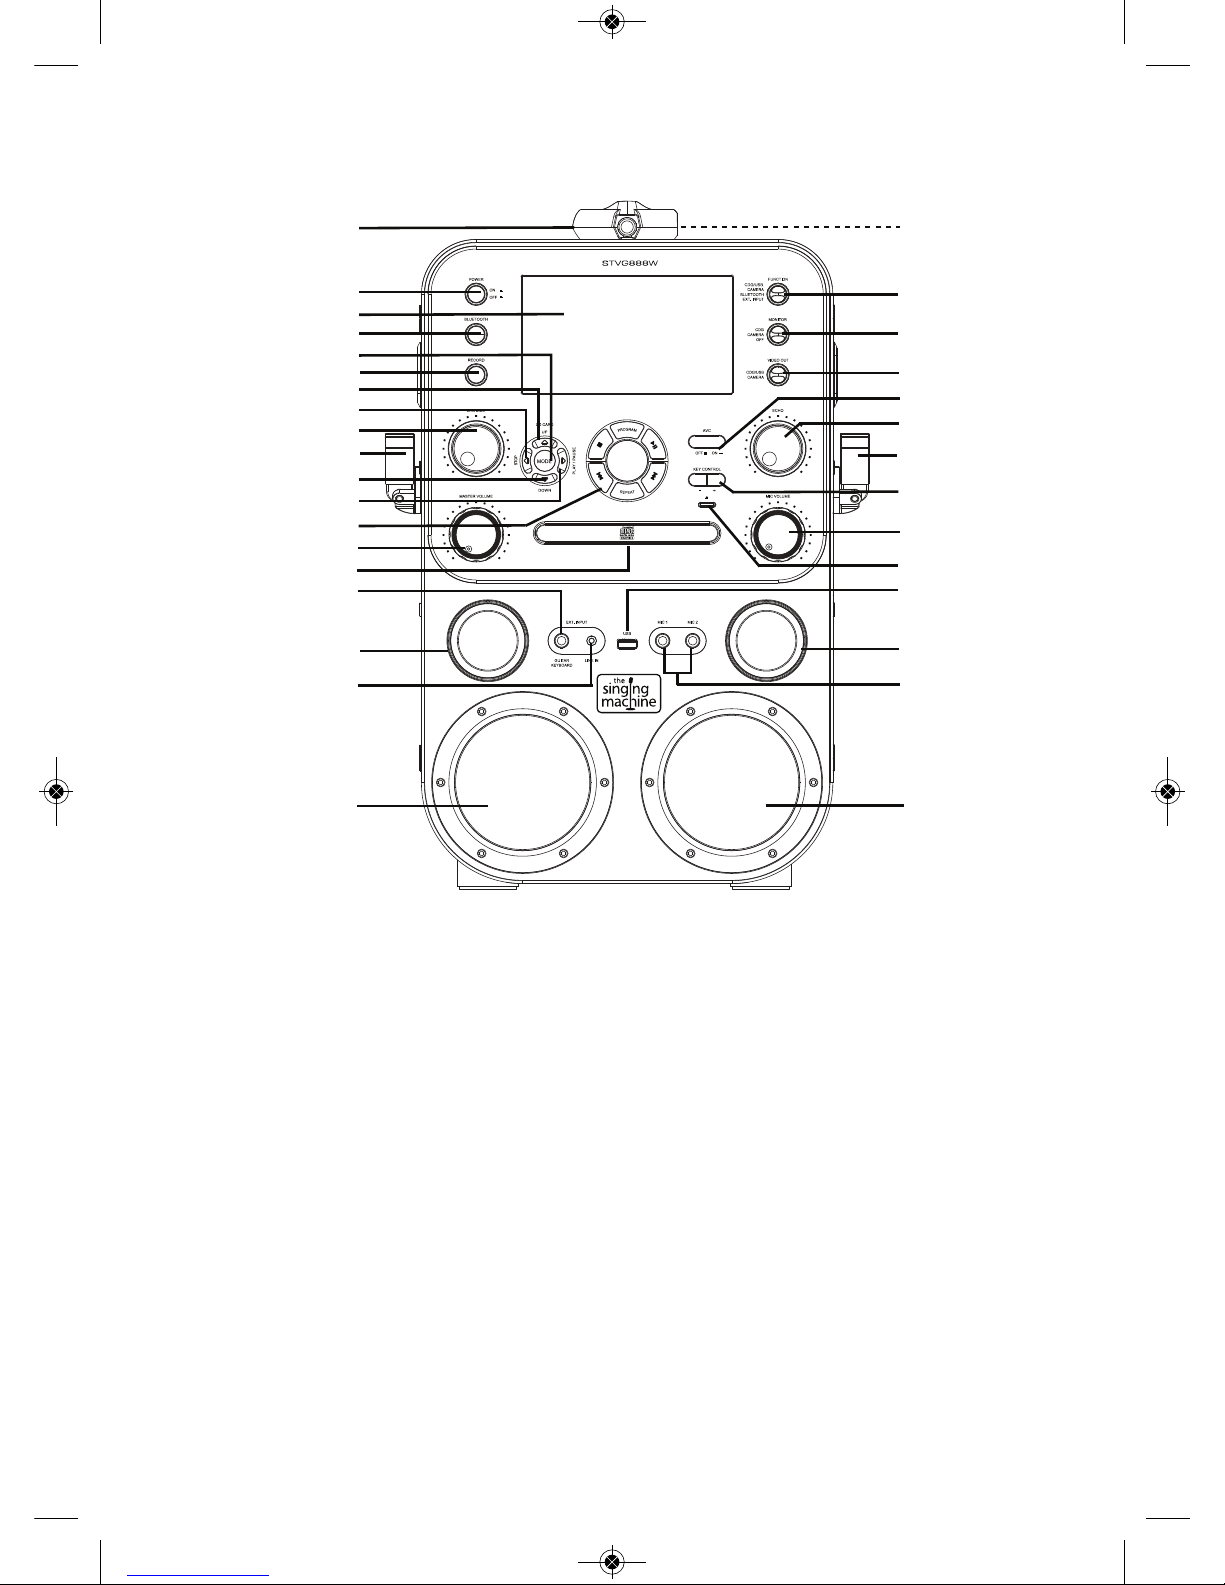
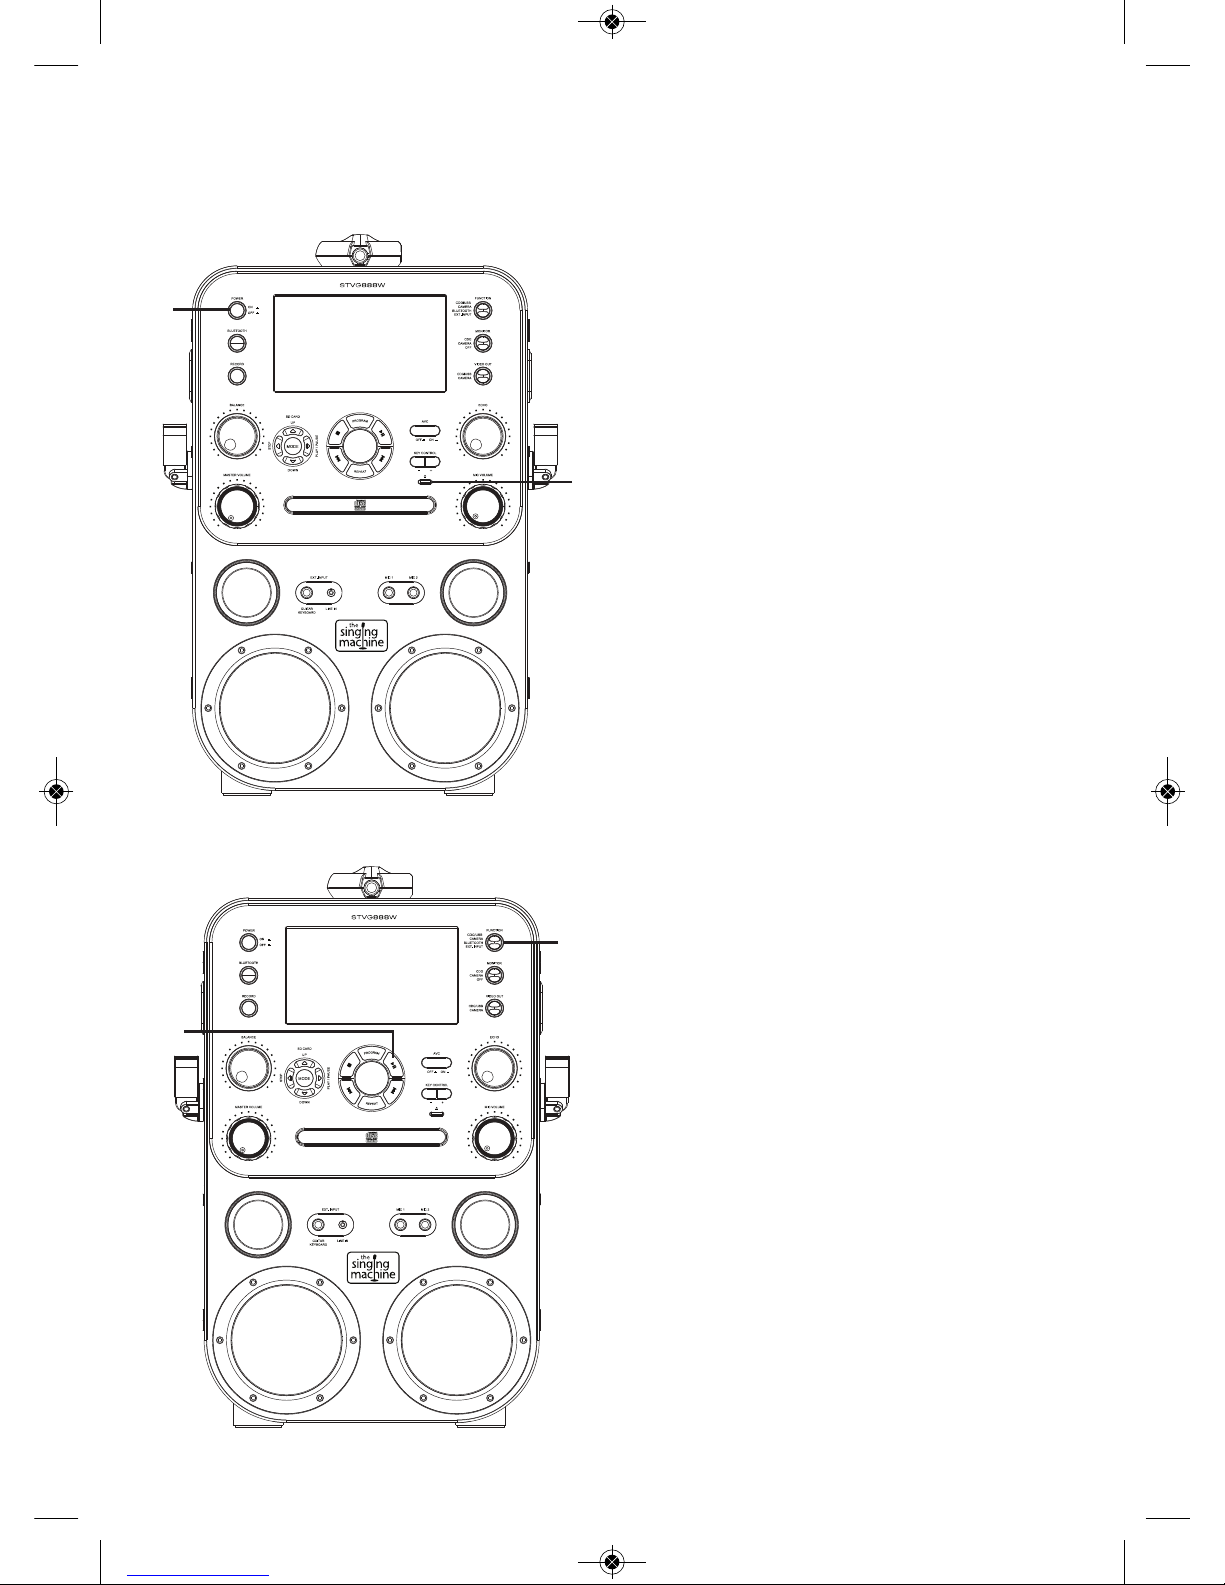
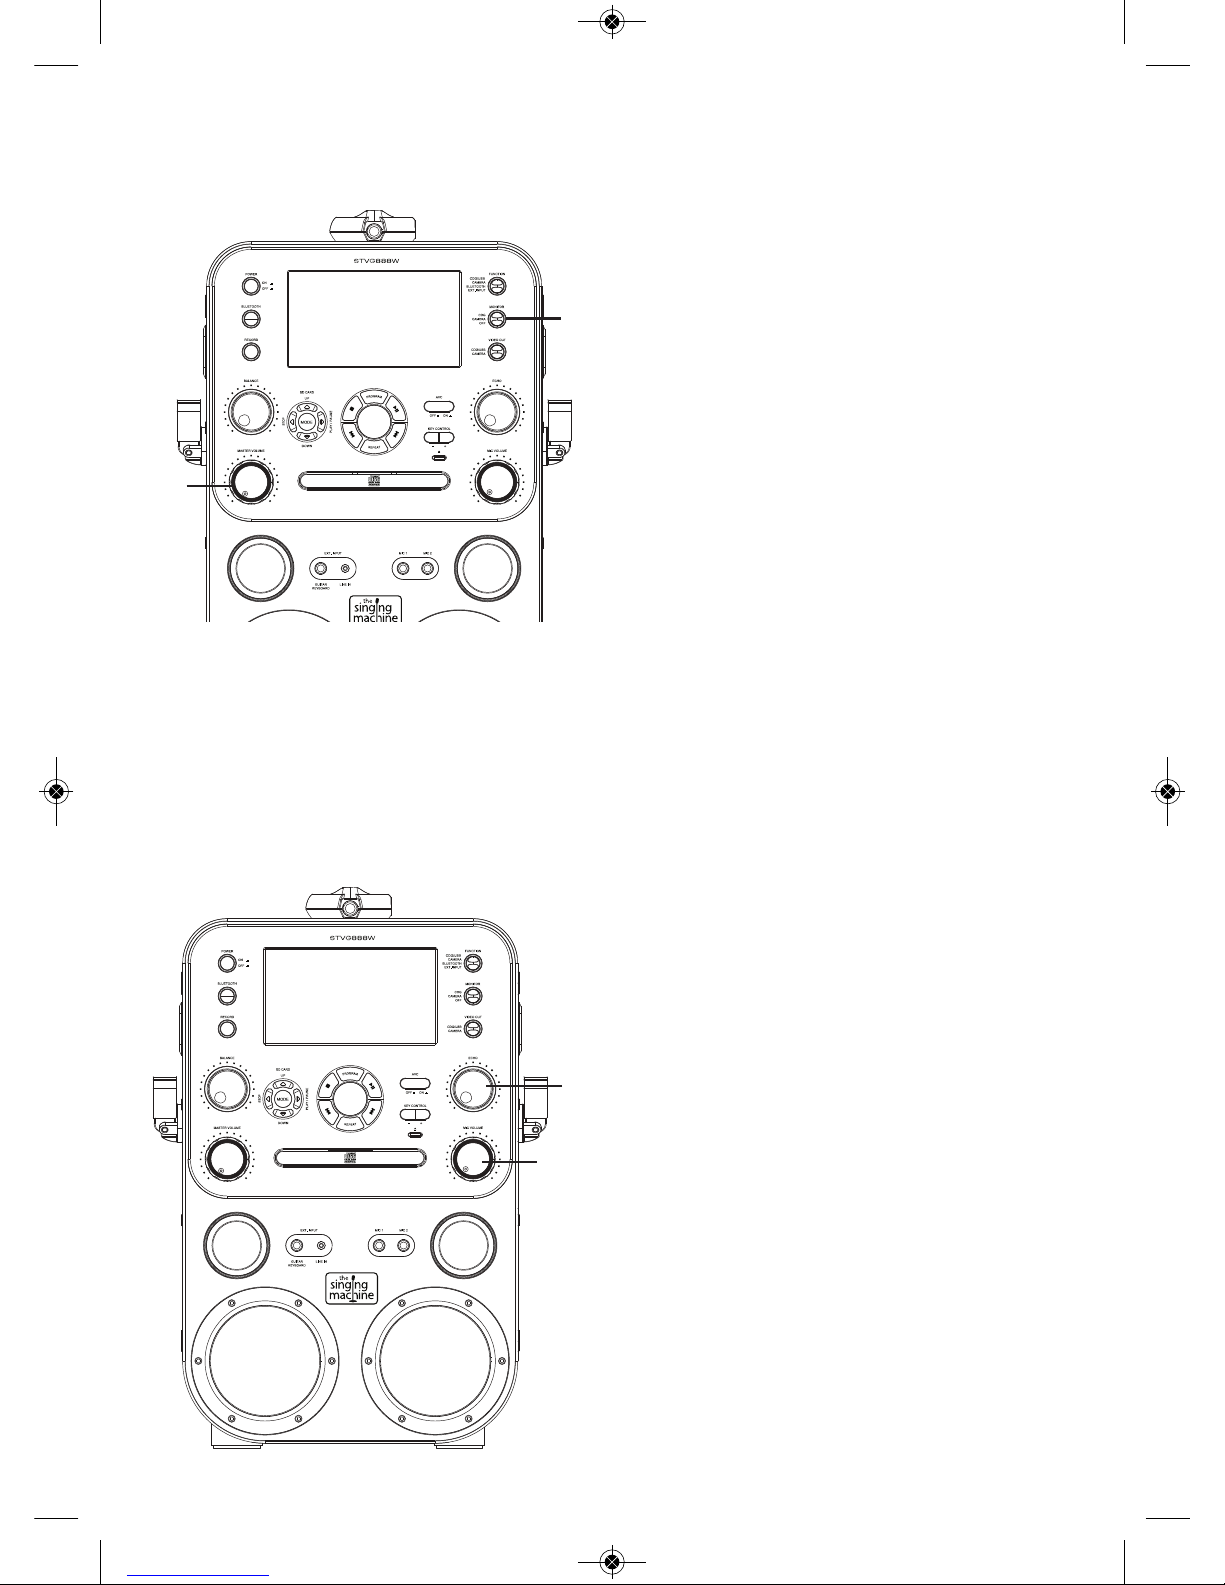
Location of Controls
1. Camera
2. POWER ON/OFF Button
3. Screen
4. BLUETOOTH Button
5. MODE Button
6. RECORD Button
7. SD CARD Up Button
8. SD CARD Left/STOP
Button
9. BALANCE Control
10. Mic Holders
11. SD CARD Down Button
12. SD CARD Right/PLAYPAUSE Button
13. Listed clockwise, from
top:
PROGRAM
Play/Pause 4; Button
Skip/Search Forward :
Button
REPEAT Button
Skip/Search Back 9
Button
Stop < Button
14. MASTER VOLUME
Control
15. CD Compartment
16. GUITAR/KEYBOARD IN
Jack
17. Tweeters
18. LINE IN Jack
19. Speakers
20. SD Card Slot
21. FUNCTION Control
22. MONITOR Control
23. VIDEO OUT Control
24. AVC (Auto Voice Control)
ON/OFF Button
25. ECHO Control
26. KEY –/+ Buttons (for
MP3 and MP3+G only)
27. MIC VOLUME Control
28. CD Open/Close Button
29. USB Port
30. MIC 1/MIC 2 In Jacks
1
20
21
22
23
24
25
10
26
27
28
17
29
30
19
2
3
5
4
6
9
8
7
10
11
12
13
14
15
16
17
18
19
Front
STVG888-ENG-v2_Layout 1 10/9/13 12:00 PM Page 2
3
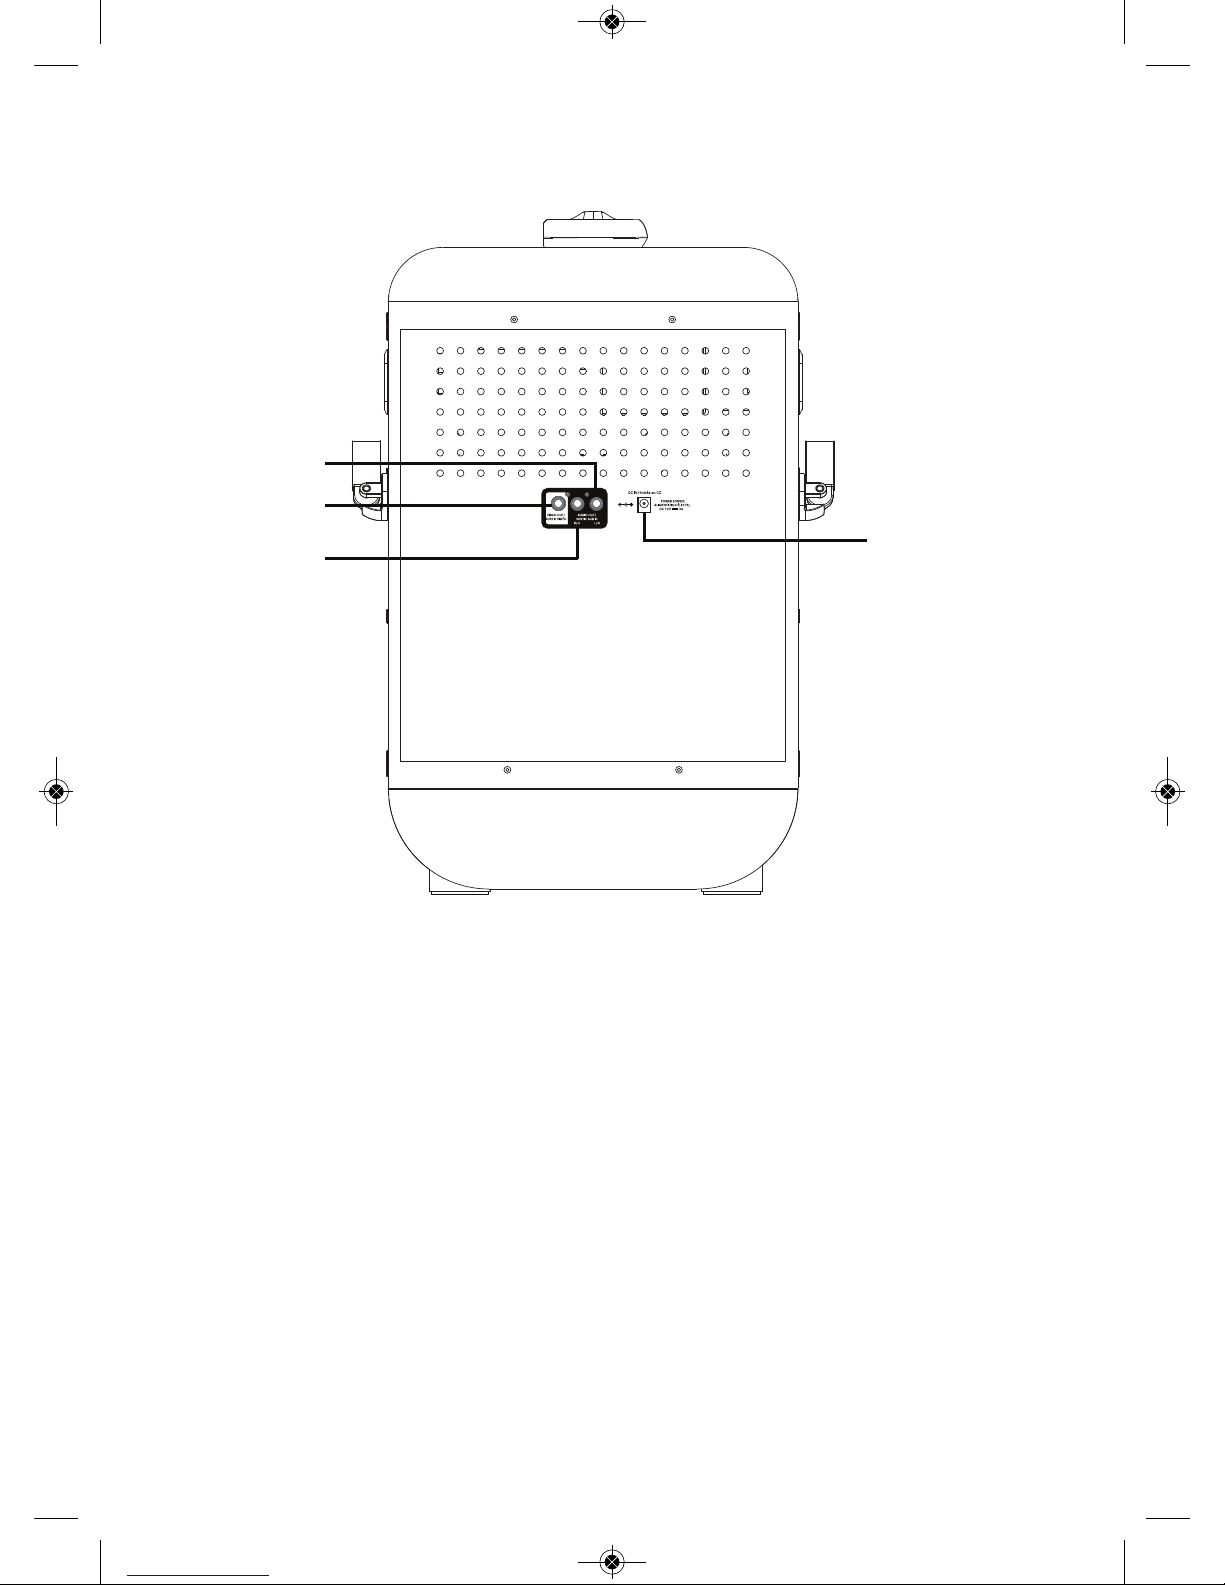
Location of Controls
1. AUDIO OUT Left Jack
2. VIDEO OUT Jack
3. AUDIO OUT Right Jack
4. DC IN Jack
4
3
2
1
Rear
STVG888-ENG-v2_Layout 1 10/9/13 12:00 PM Page 3
4
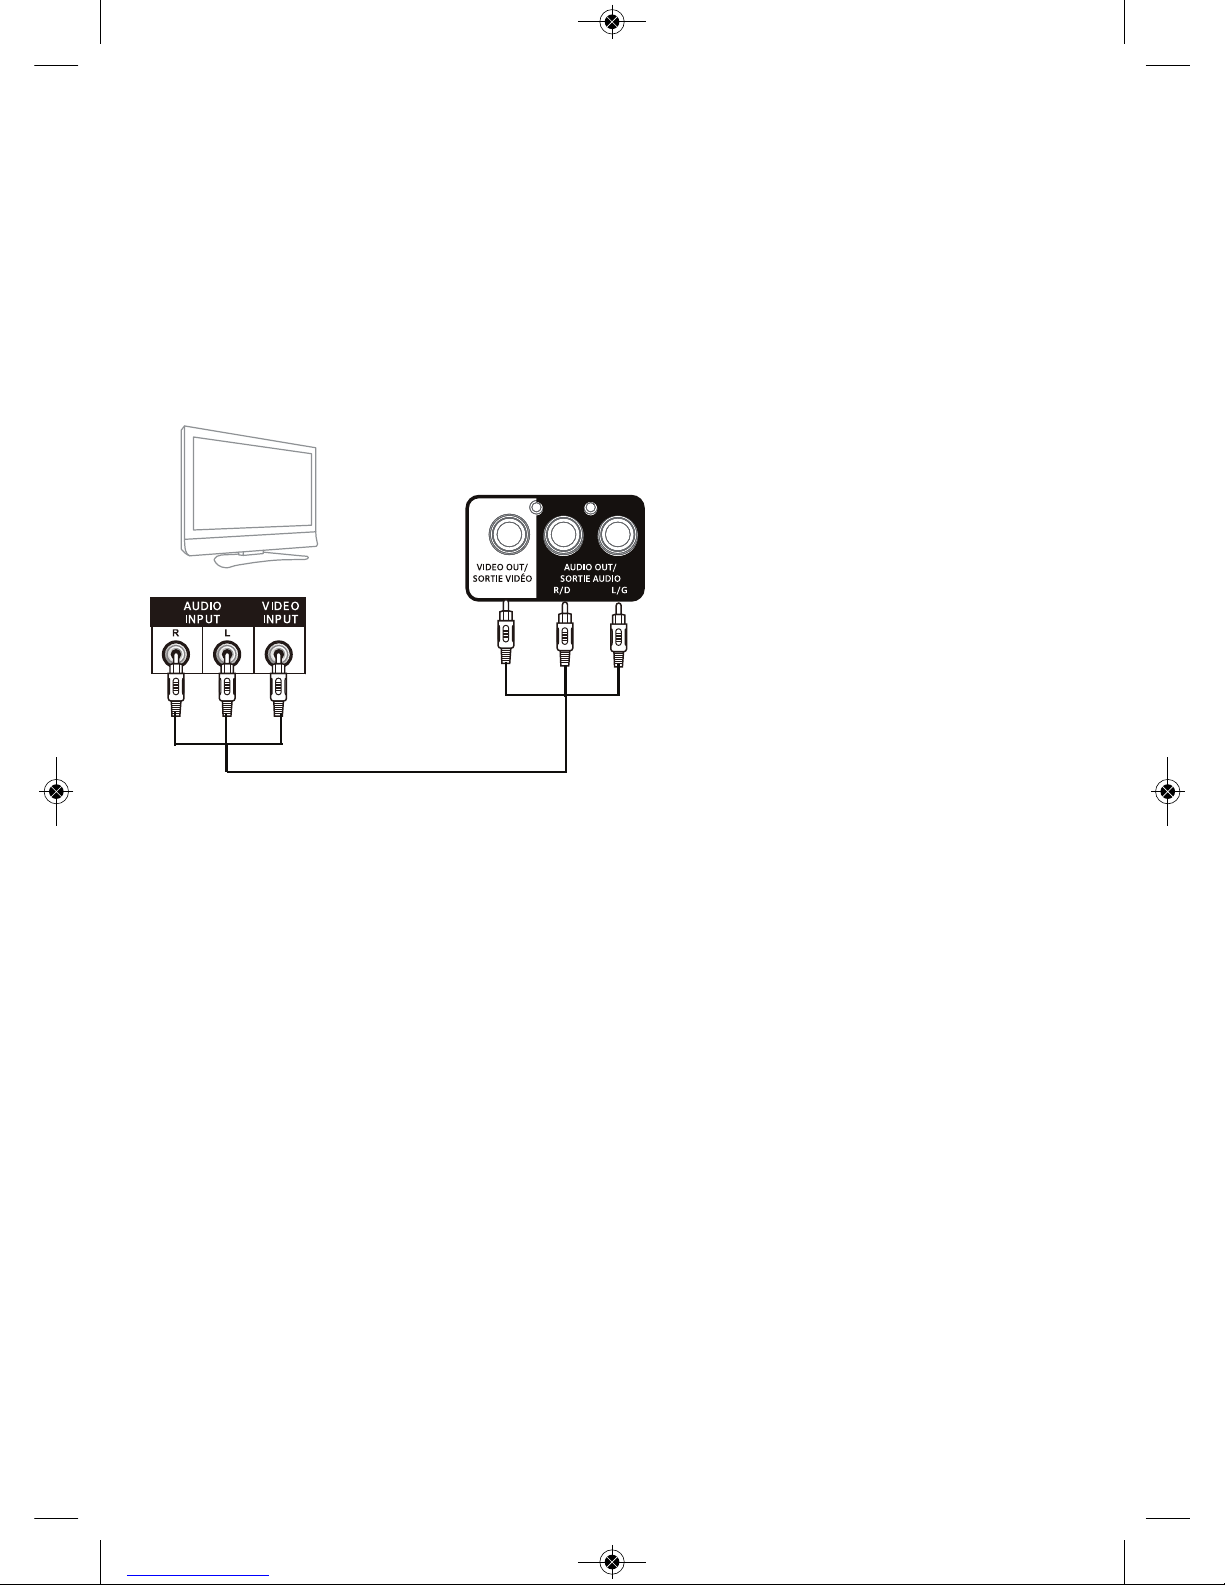
Connection
RCA CABLE INCLUDED
R
EAR VIEW OF THE STVG888
R
EAR OF TV
Yellow
White
Red
Yellow
White
Red
Your Singing Machine is designed to
connect to your TV the same way you
would connect most video cameras, DVD
players or video game consoles, as follows:
1
Connect the Audio/Video cable’s
yellow plug to the yellow VIDEO
OUT jack on the STVG888W and
the other end to the external unit’s
yellow Video In jack.
2
Connect the Audio/Video cable’s
red and white plugs to the red and
white AUDIO OUT jacks on the
STVG888W and the other ends to
the external unit’s red and white
Audio In jacks.
If left unconnected, the audio will
just play through this unit’s speakers.
Notes:
• This unit can be used with or without
a TV.
• To see the lyrics, you must use a CD+G
disc or MP3+G and an external TV.
• Also refer to the TV’s or external unit’s
User Guide.
• Audio/Video cables are included.
• Rotate the FUNCTION control to the
CDG/USB position and the VIDEO OUT
control to the CDG/USB position to
utilize the Karaoke function when using
an external TV.
Connecting the Unit to an External TV, Stereo, etc.
STVG888-ENG-v2_Layout 1 10/9/13 12:00 PM Page 4
5
Connection
Connecting the Microphone
Insert a microphone’s plug into the Mic 1
jack u. Insert another microphone’s plug
into the Mic 2 jack v (if desired). One
microphone is included.
Note: Do not drop or tap the mic, as damage
to the mic or speakers may occur. Do not
spin the microphone around for the same
reason.
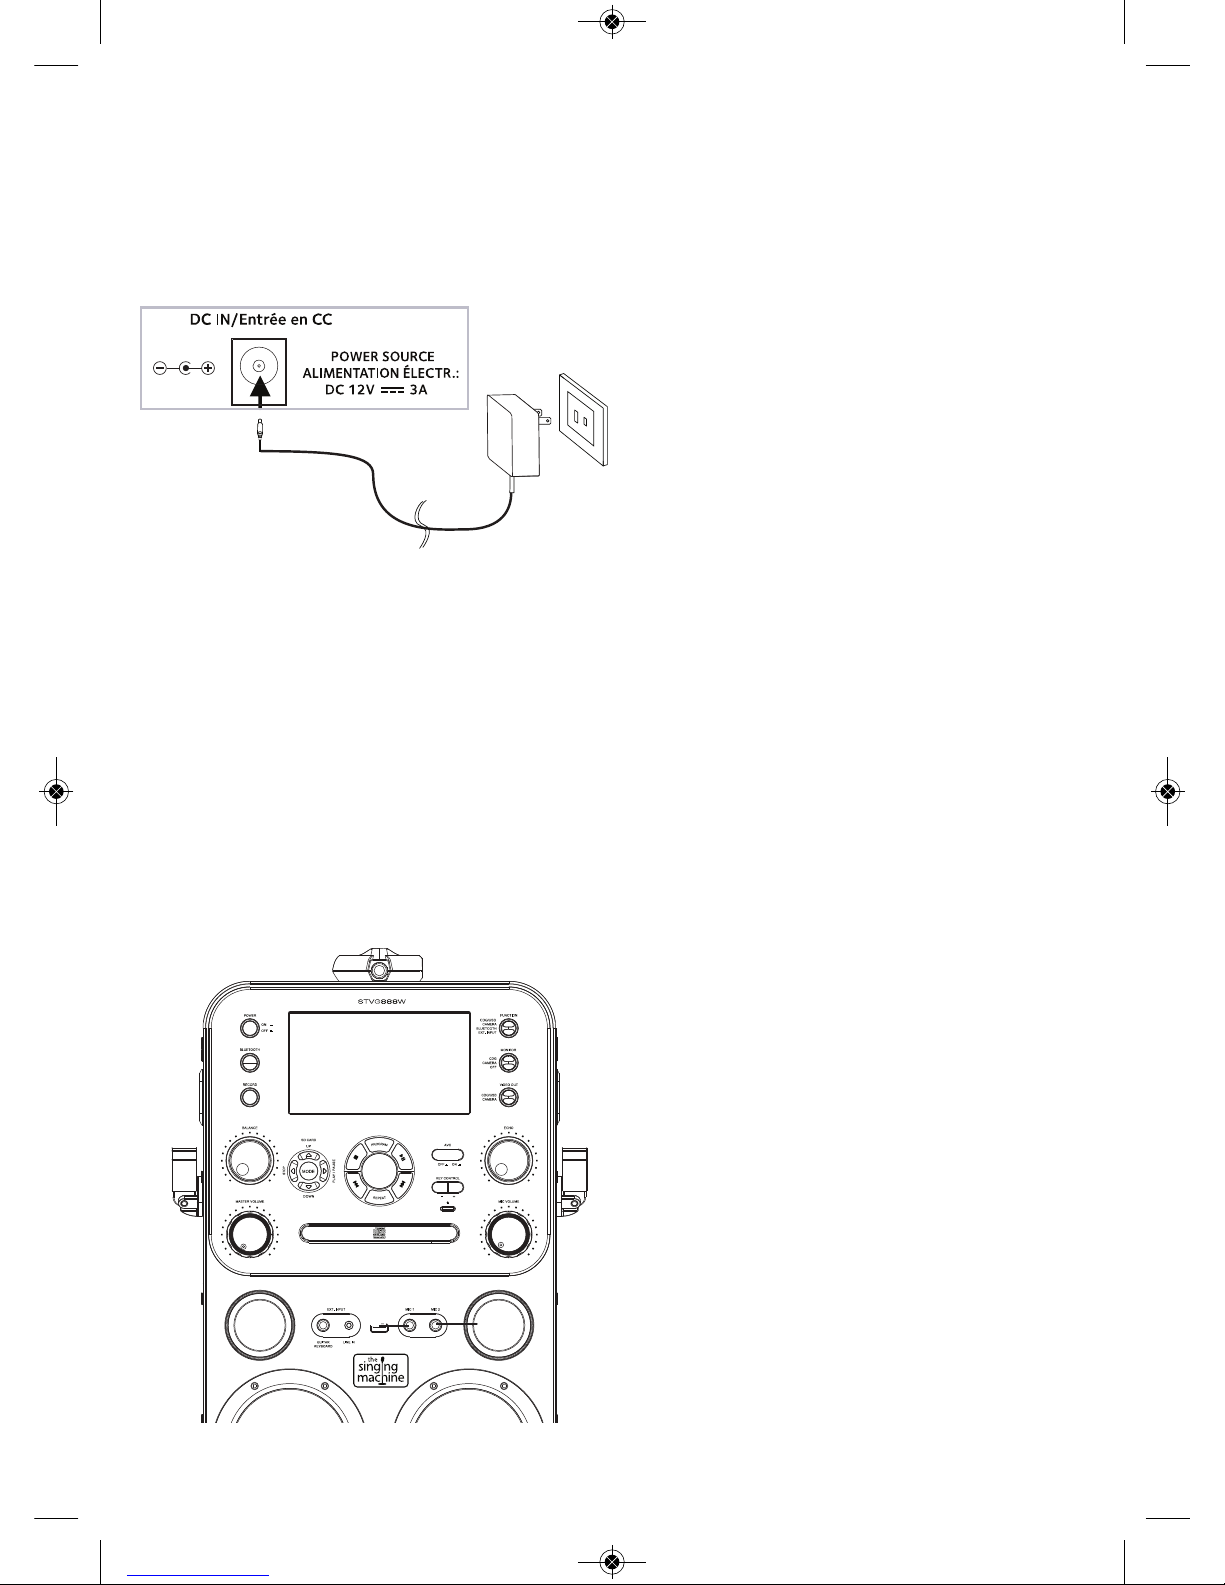
Insert the small end of the AC adapter into
the DC IN jack on the rear of the unit. Insert
the other end (with the 2 blades) into a
conveniently located AC outlet having
110-240V AC, 50/60Hz.
Notes:
• Only use the supplied AC adapter. Failure to
do so may cause a fire or damage the unit.
• The AC adapter included with this unit is
for its use only. Do not use it with other
equipment.
• Turn off the unit before unplugging the AC
adapter from the unit to avoid damaging
the unit.
• When the unit is not going to be used for
a long time, disconnect the AC adapter
from the AC outlet.
• Never use an AC adapter that is damaged.
Route power lead in a safe manner and
make sure it is not subjected to trapping
or pinching. If the power lead is damaged,
refer to a qualified service agent.
u
v
STVG888-ENG-v2_Layout 1 10/9/13 12:00 PM Page 5
6
Operation
1
Connect the unit as described
previously. Press the POWER ON/OFF
button to the in position to turn the
unit on; the POWER ON/OFF button
will light.
2
CD: Press the CD Open/Close button
to open the CD door and then insert a
CD (with standard or MP3+G files) or
a CD+G. Close the CD door by pressing
the CD Open/Close button again.
USB: If using the USB drive with
MP3+G files, insert the USB into the
USB port. To use the USB drive, there
cannot be a CD in the CD compartment
and the compartment must be closed.
(Always turn on the unit before
inserting your USB Flash Drive.)
FAQs
• What is a CD+G?
A CD+G (CD+Graphics), is the standard
format for most karaoke discs that will
display the words on the screen.
• What is an MP3+G?
MP3+G is the newest format for karaoke
music utilizing the MP3’s small file size. It
will display the words on the screen. See page
19 to order and download MP3+G files.
3
Rotate the FUNCTION control to the
CDG/USB position to select the
CDG/CD or USB mode.
4
Press the Play/Pause 4; button to
start playback.
Playing a CD (with or without MP3+G files), CD+G or USB Drive
u
v
x
w
STVG888-ENG-v2_Layout 1 10/9/13 12:00 PM Page 6
7
Operation
5
If listening to an MP3+G or CD+G
files, view as follows:
To view the image and lyrics on the
screen, rotate the MONITOR control to
the CDG position.
To view the image and lyrics on an
external TV (if connected), rotate the
VIDEO OUT control to the CDG/USB
position.
6
Adjust the volume to a comfortable
level using the MASTER VOLUME
control.
Notes:
• Never place anything other than a CD in
the compartment, as foreign objects can
damage the unit.
• If no disc is inserted, “NO DISC” will appear
in the display.
• If connected to a TV or other audio source,
the sound will come from this unit and the
TV, so adjust either Volume as desired.
7
Connect microphone(s) as shown on
page 5, and slide the ON/OFF switch
to the ON position.
8
Adjust the MIC VOLUME control as
desired. Increasing this control will
increase the volume of the respective
microphone.
9
Adjust the Echo control to add an echo
effect to your voice.
Playing a CD (with or without MP3+G files), CD+G or USB Drive
W
X
U
y
PLEASE PROVIDE
PICTURE OF MIC
STVG888-ENG-v2_Layout 1 10/9/13 12:00 PM Page 7
 Loading...