

Page 1
THE LEADER IN HOME KARAOKE AND BEYONDTHE LEADER IN HOME KARAOKE AND BEYOND
STVD-919
DVD / CD+GRAPHICS WITH BUILT-IN 13.5” COLOR TV AND VIDEO
CAMERA KARAOKE SYSTEM
Please read before using this unit.
Page 2

WARNINGSWARNINGS
ENGLISH
The CAUTION marking is located on the rear panel.
WARNING: TO REDUCE THE RISK OF FIRE OR
SHOCK HAZARD, DO NOT EXPOSE THIS PRODUCT TO
RAIN OR MOISTURE.
CAUTION
RISK OF ELECTRIC SHOCK
DO NOT OPEN
CAUTION: TO PREVENT THE RISK OF
ELECTRIC SHOCK, DO NOT REMOVE COVER
OR BACK. NO USER-SERVICEABLE PARTS
INSIDE. REFER SERVICING TO QUALIFIED
PERSONNEL.
This symbol is intended to alert youto the
presence of uninsulated dangerous
voltage within the product's enclosure
that might be of sufficient magnitude to
constitute a risk of electric shock. Do not
open the product'scase.
This symbol is intended to inform you
that important operating and
maintenance instructions are included in
the literature accompanying this product.
This device complies with Part 15 of the FCC Rules.
Operation is subject to the following two conditions: (1)
This device may not cause harmful interference, and
(2) this device must accept any interference received,
including interference that may cause undesirable
operation.
This DVD/CD+G player is made and tested to meet
safety standards of the FCC, requirements and
compliance with safety performance of the U.S.
Department of Health and Human Services, and also
with FDA Radiation Performance Standards 21 CFR
Subchapter J.
Warnings:
This DVD/CD+G player employs a laser light beam.
!
Only a qualified service person should remove the
cover or attempt to service this device, due to possible
eye injury.
!
The use of controls, adjustments, or procedures other
than those specified herein might result in hazardous
radiation exposure.
!
The apparatus shall be used in an openarea.
CAUTION
This DVD/CD+G player is classified as a CLASS 1
LASER product.
The CLASS 1 LASER PRODUCT label is located on
the rear panel.
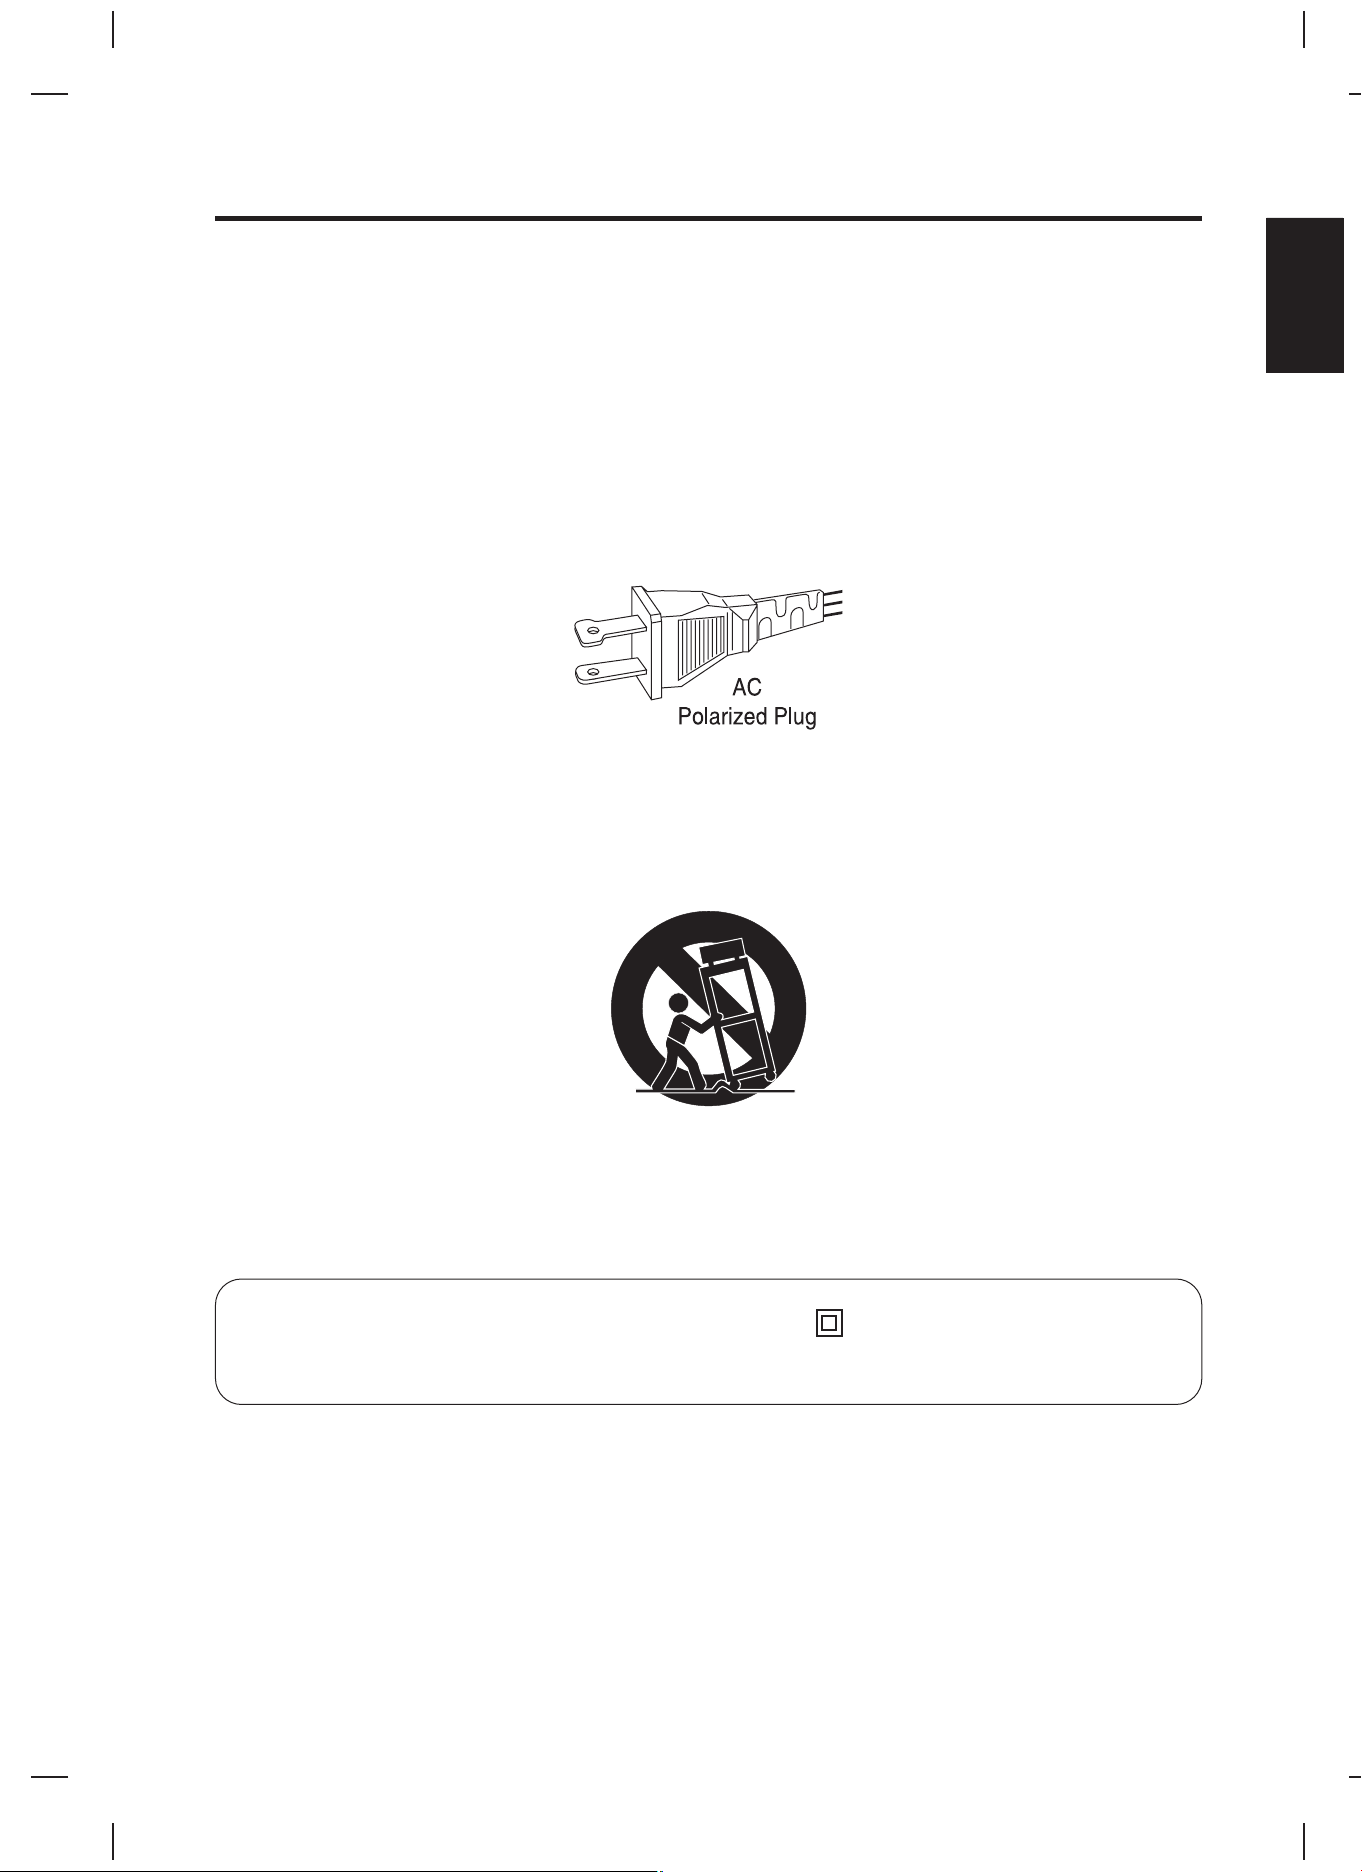
CAUTION
TO PREVENT ELECTRONIC SHOCK, DO NOT USE
THIS (POLARIZED) PLUG WITH AN EXTENSION
CORD, RECEPTACLE OR OTHER OUTLET UNLESS
THE PLUG CAN BE FULLY INSERTED WITHOUT
EXPOSINGANY PARTS OF THE BLADES.
WARNING
To prevent fire or shock hazard, do not expose this
appliance to rainor moisture.
The apparatus shall not be exposed to dripping or
slashing and that no objects filled with liquids, such as
vases, shall beplaced on the apparatus.
The ventilation should not be impeded by covering the
ventilation openings with items, such as newspapers,
table-cloths, curtains, etc.
No naked flame sources, such as lighted candles,
should be placedon the apparatus.
CAUTION!
Invisible laser radiation when open and interlocks are
defeated.Avoid exposure to beam.
IMPORTANT
Since CD circuitry may cause interference to other
radio tuners nearby, switch this unit off when not in use
or move itaway from the affected radiotuner.
This class[B] digital apparatus complies with
Canadian ICES-003.
WARNING
NOTE: This digital apparatus does not exceed the Class B limitsfor radio noise emissions from the digital apparatus
as set out in the Radio Interference Regulations of Industry in Canada. These limits are designed to provide
reasonable protection against harmful interference ina residential installation. This equipment generates, uses and
can radiate radio frequency energy and, if not installed and used in accordance with the instructions, may cause
harmful interference to radio communications. However, there is no guarantee that interference will not occur in a
particular installation. If this equipment does cause harmful interference to radio or television (which can be
determined by turning the equipment off), the user is encouraged to try to correct the interference by one or more of
the following measures:
!
Reorient or relocatethe receiving antenna.
!
Increase the separation between theequipment and receiver.
!
Connect the equipmentinto an outlet on a circuitdifferent from that to which the receiveris connected.
!
Consult the dealeror an experienced radio / TV technician for help.
AUTOMATIC DEGAUSSING
All color television receivers are sensitive to magnetic influences, usually caused by either moving the receiver from
one place to another or using certain electrical appliances near the receiver. The residual magnetism as it is called,
sometimes causes distortion which gives rise to “blotchy” areas of color in the picture. To avoid these effects the
receiver incorporates an automatic degaussing circuit which operates for a short while immediately each time the
receiver is switched on using the main switch. This circuit removes any residual magnetism in the metal parts of the
picture tube and therefore ensures that each time the receiver is switched on. If the set is moved or faced in a
different direction, the main switch mustbe switched off for atleast 10 minutesin order for the automatic degaussing
circuit to operateproperly.
E1
Page 3
IMPORTANT SAFETY INSTRUCTIONS
1. Read these instructions.
2. Keep these instructions.
3. Heed all warning.
4. Follow Instructions.
5. Do not use this apparatus near water.
6. Clean only with a dry cloth.
7. Do not block any of the ventilationopenings.
Install in accordance with manufacturer's instructions.
8. Do not install near any heat source
amplifiers) that produceheat.
9. Do not defeat the safety purpose
with one wider than the other. A grounding type plug has two blades and a third grounding prong. The wide
blade or the third prong are provided for your safety. If the provided plug does not fit into your outlet, consult an
electrician for replacementof the obsolete outlet.
such as radiators, heat registers, stoves, or other apparatus (including
of the polarized or grounding-type plug. A polarized plug has two blades
ENGLISH
10. Protect the power cord
the point wherethey exit from the apparatus.
11. Only use attachments/accessories
12. Use only with a cart
When a cartis used, use caution when moving the cart/apparatus combination toavoid injury from tipover.
13. Unplug this apparatus
14. Refer all servicing
damaged in any way, such as if the power-supply cord or plug is damaged, liquid has been spilled or objects
have fallen intothe apparatus, or when theapparatus has been
from being walked on or pinched, particularly at plugs, convenience receptacles, and
specified by themanufacturer.
, stand, tripod, bracket, or table specified by the manufacturer or sold with the apparatus.
during lightning stormsor when unused for long periodsof time.
to qualified service personnel. Servicing is required when the apparatus has been
Class II equipment symbol
Class II equipment symbol
This symbol indicates that the unit has a double insulation system.
E2
Page 4

TABLE OF CONTENTS
ENGLISH
FEATURES
NOTES ON DISCS
INTRODUCTION
CONTROL LOCATIONS
FRONT VIEW
REAR VIEW
REMOTE CONTROL
CONNECTIONS
CONNECTING TO A VIDEO SYSTEM
CONNECTING TO AN AUDIO SYSTEM
BASIC OPERATIONS
BASIC SETUP
BASIC FUNCTIONS
TV FUNCTION
DISC FUNCTION SETUP
DISC FUNCTION
CARE AND MAINTENANCE
TROUBLE SHOOTING GUIDE
E4
E5
E8
E9
E10
E11
E12
E15
E16
E17
E18
E19
E21
E24
E25
SPECIFICATIONS
THE SINGING MACHINE KARAOKE GLOSSARY OF TERMS
E27
E28
E3
Page 5

FEATURES
Lift up camera lens to display your imageon The Singing Machine’s monitor and/or another video component.
13.5” Color TV
Built-in color monitorprovides television and/or on-screen lyrics.
Dolby Digital Sound
This player can handle Dolby Digital surround sound having 5.1 channels when connected to a Dolby Digital
Decoder.
Still/Fast/Slow/Step Playback
Various playback modesare available including still pictures, fastforward/reverse, slow motion and step frames.
Programmable Playback forDVD and Audio CD
You can program the tracksto play them in any desiredorder.
DVD Menu ina Desired Language
You can display DVD menusin a desired language, if availableon a DVD.
Screen Saver
The screen saverprogram starts when thereis no input from the playerfor 5 minutes in the stopmode.
Subtitles in aDesired Language
You can select a desiredlanguage for the display subtitles, ifthat language is available on adisc.
Selecting DVD Viewing Angle
You can select the desiredDVD viewing angle, if a disccontains sequences recorded from different angles.
Choices for Audio Languageand Sound Mode
You can select the desired audio language and sound mode, if different languages and modes are available on a
disc.
Parental Lock
You can set the controllevel to limit playback of discswhich may not be suitablefor children.
ENGLISH
Automatic Detection ofDiscs
This player automaticallydetects if a loaded discis DVD, audio CD, MP3or image disc.
Playing an MP3and JPG image Disc
You can enjoy MP3 andJPG image discs which are recordedon CD-R/RW or DVD R/ RW.
On-Screen Display
Information about the current operation can be displayed on the screen, allowing you to confirm the currently active
functions (such asprogram playback), on the screen using the remotecontrol.
Direct Search
You can search the desiredtitle, chapter, or track with numericbutton during playbackor in stop mode.
Search
Chapter search: Searchfor the chapter designated by user is possible.
Title search: Search forthe title designatedby user is possible.
Track search: Search forthe track designatedby user is possible.
Time search: Search forthe time designatedby user is possible.
Repeat
Chapter: Repeated playbackof the chapter of the discbeing played is possible.
Title: Repeated playback ofthe title ofthe disc being played is possible.
Track: Repeated playback ofthe track ofthe disc being played is possible.
Disc: Repeated playbackof the entire disc being playedis possible.
A-B: The part between A and B designated by user is possible.
Zoom
2-times, 3-times, and4-times ma
DRC (Dynamic RangeControl)
You can control the dynamicrange of sound volume.
gnified screen canbe displayed.
CDG,
E4
Page 6
NOTES ON DISCS
ENGLISH
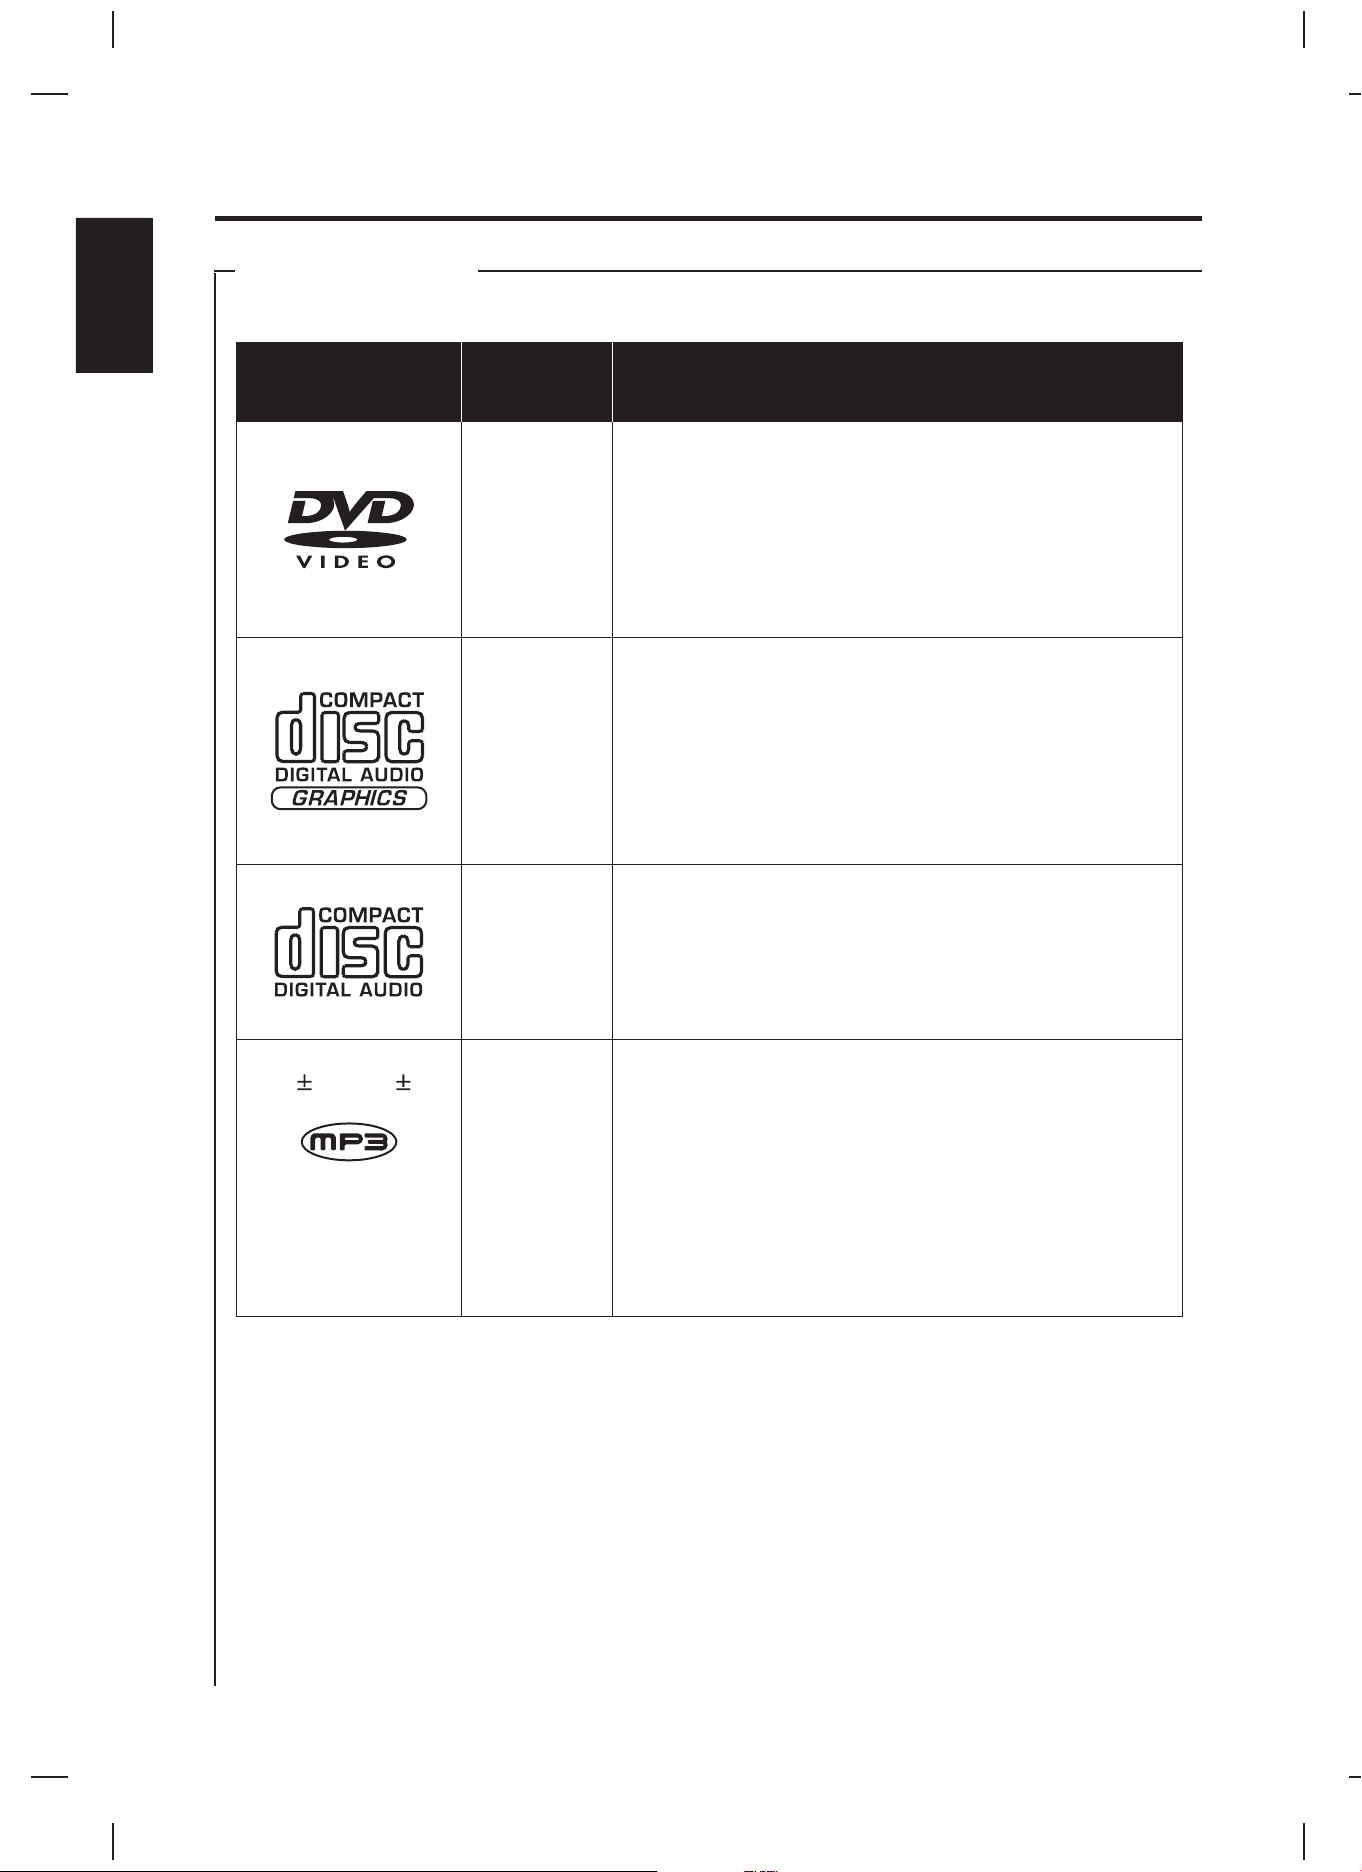
PLAYABLE DISCS
This DVD Player compatible with the following discs.
Disc Types
(Logos)
DVD
CDG
AUDIO-CD
Recording
Types
AUDIO
+
VIDEO
AUDIO
+
SIMPLE
GRAPHICS
AUDIO
Characteristics
! DVD contains excellent sound and video due to Dolby
Digital and MPEG-2 system.
Various screen and audio functions can be easily
!
selected through theon-screen menu.
! Compact Disc + Graphics is a regular audio CD with
information stored on a data track simultaneous to music.
In the case of karaoke, the graphics are used to store
song lyrics anddisplay in synch with music.
! An LP is recorded as an analog signal with distortion. CD
is recorded as a digital signal with better audio quality,
less distortion and less deterioration of audio quality over
time.
CD-R / CD-RW /
DVD R / DVD RW
JPG
AUDIO
IMAGE
!
MP3 (MPEG-1 audio layer 3) is recoreded in digital
signal which providesone of the best sound quality levels
with the smallestfile size (lower bitrate).
JPG (JPEG - Joint Photographic Experts Group) is an
!
image format which provides one of the best image
qualities with the smallest file size. It is a standard image
format on theweb.
E5
Page 7
NOTES ON DISCS
PLAYABLE DISCS
This Singing Machine is designed only for the playback of discs with
Region Code 1, or for the discs that do not contain Region Code information. If there is any other Region Code
encoded on adisc, the disc will not play and themessage “WRONG REGION” will appear onthe screen.
!
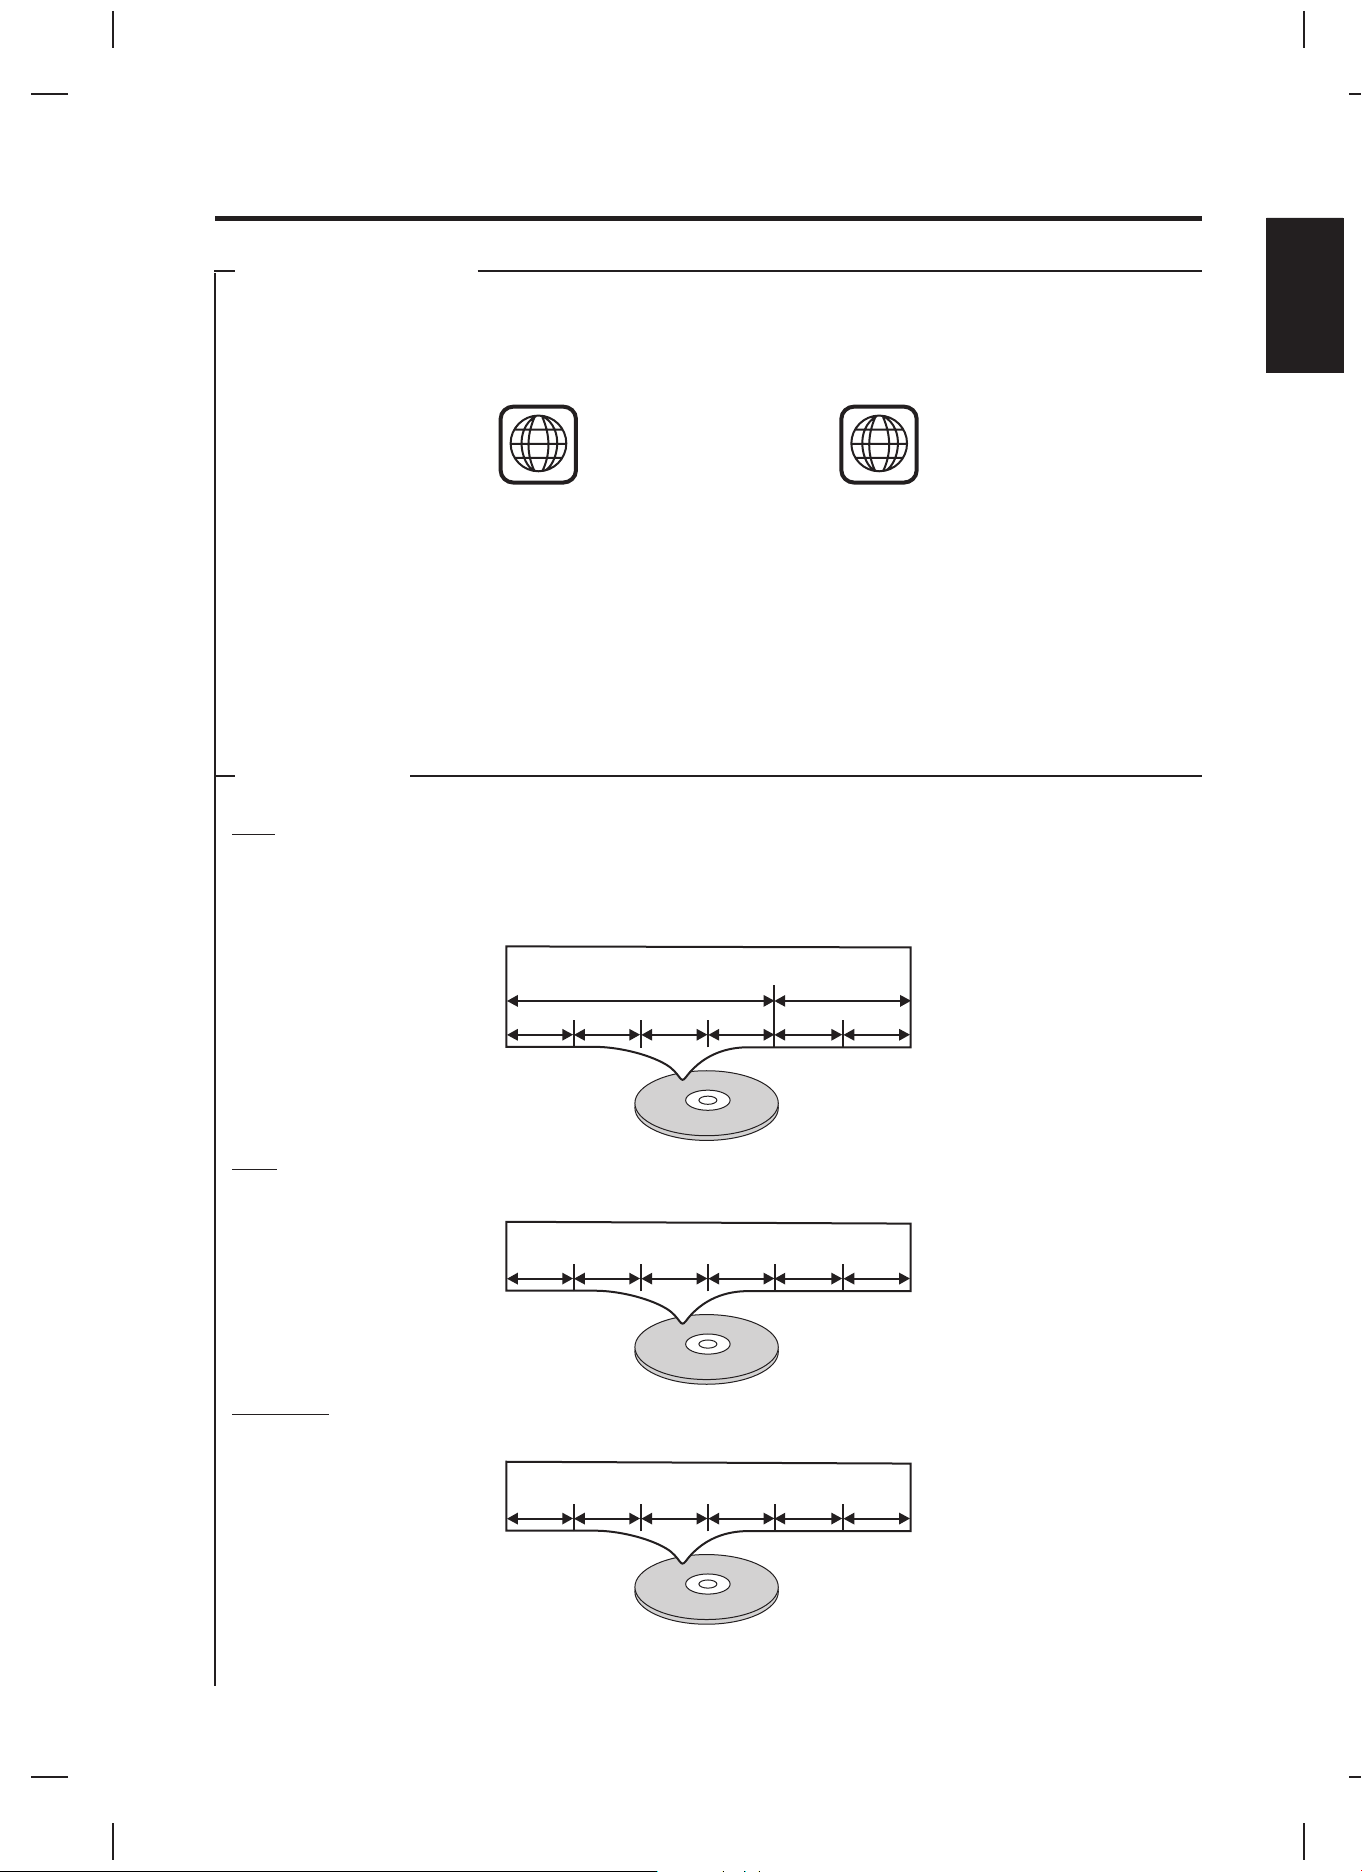
Some discs includeregion codes as shown below.
!
The number inside the symbol refers to a region of the world, and a disc encoded in a specific region format
can only beplayed back on DVD players with the sameregion code.
The following discscannot be played back on thisDVD player.
DVD with regioncodes other than 1 orALL.
!
DVD-ROM
!
DVD-RAM (Never playback, otherwise malfunction may result.)
!
VSD
!
CDV (Only playsback the audio part.)
!
CD-I (Never playback, otherwise malfunction may result.)
!
SACD
!
conforms to the NTSC color system and
1
ALL
DISC TYPES
DVD
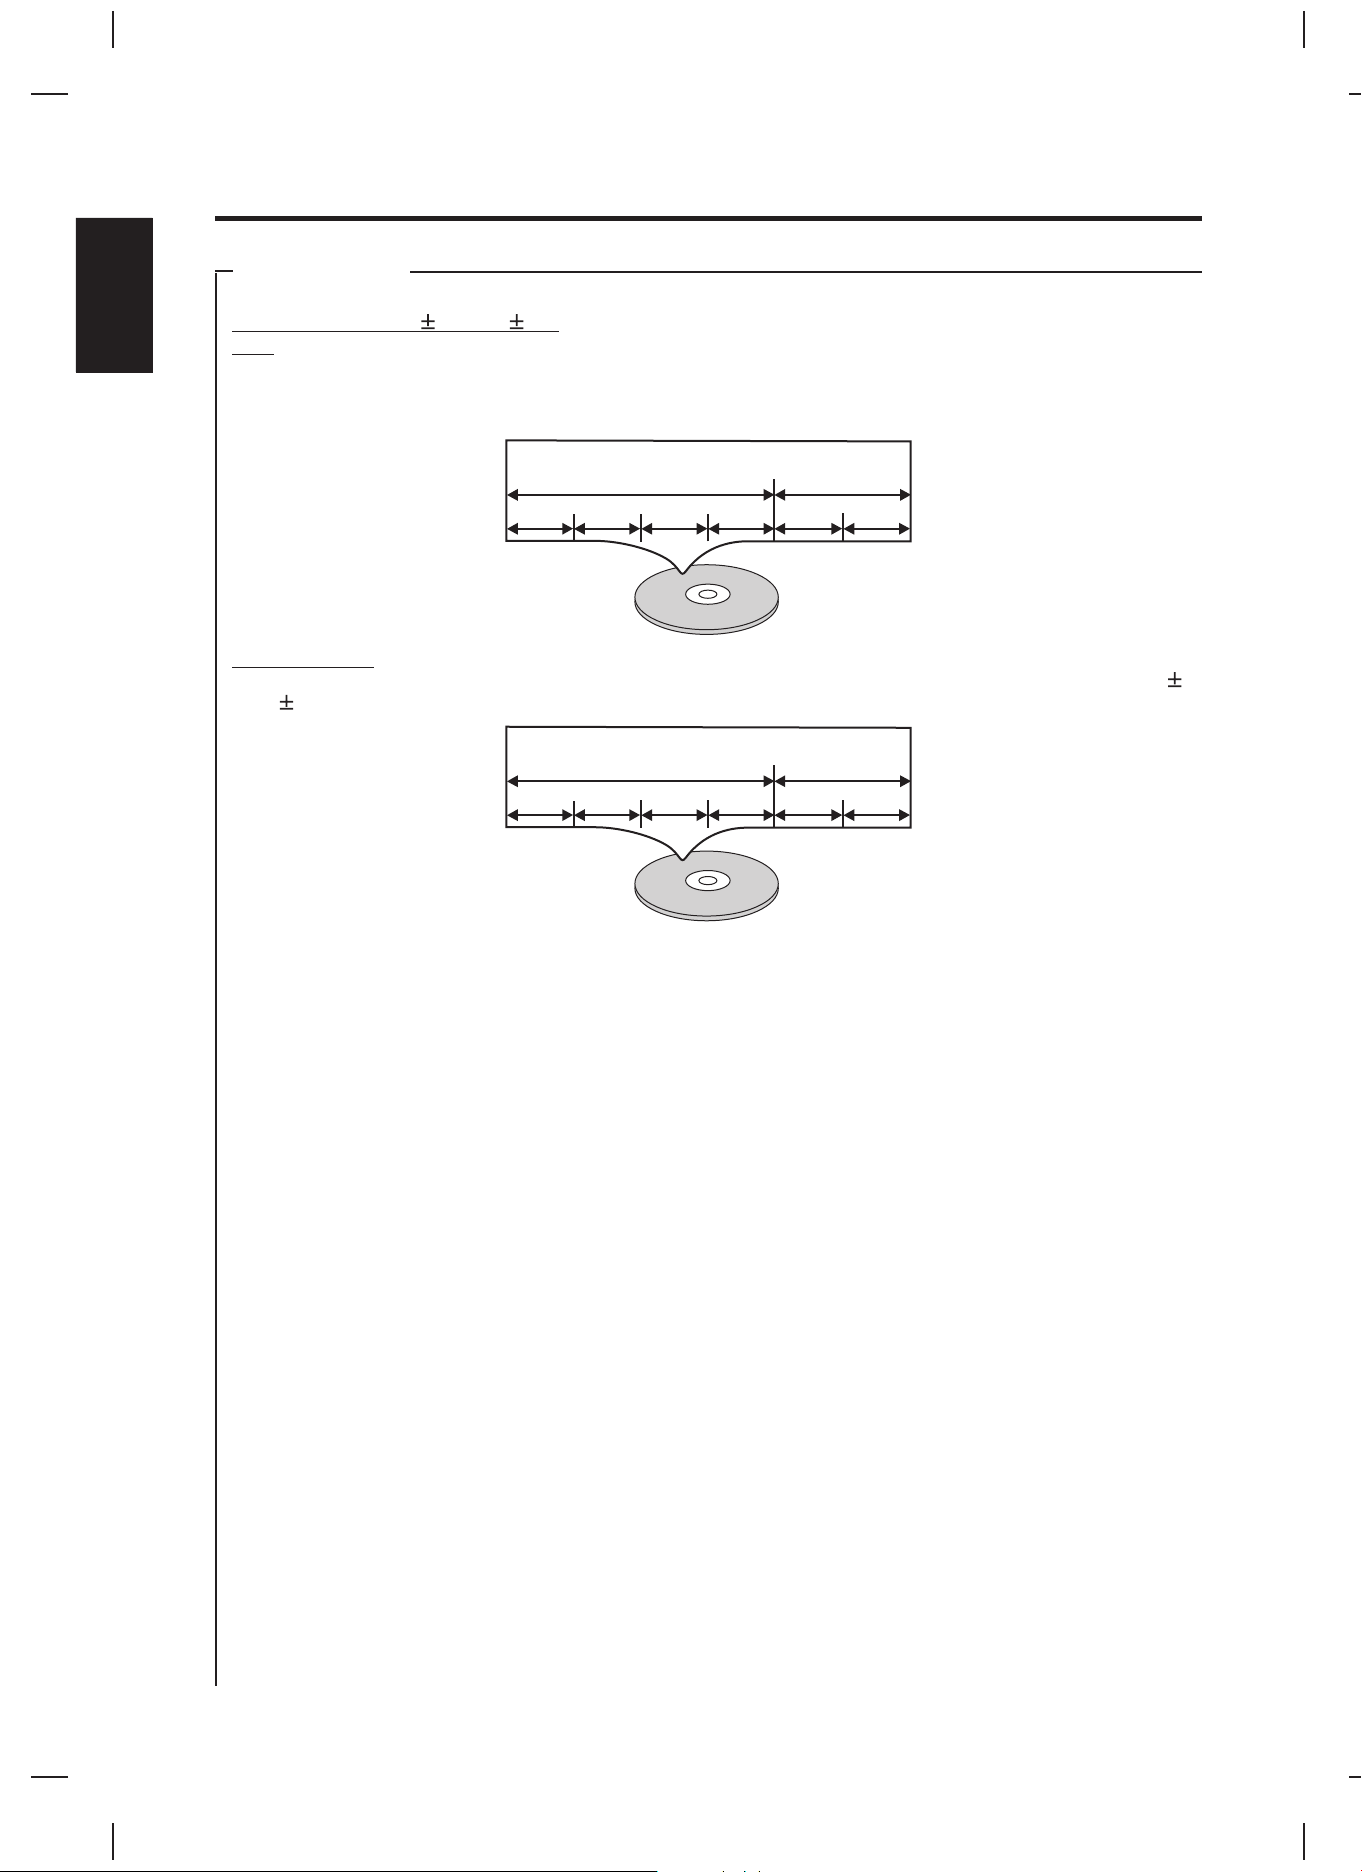
Data on a DVD is divided into sections called "titles", and then into subsections called "chapters", each of which is
given a title or chapter number. Playback conditions are preset on some DVD video discs. These playback
conditions take priority over user operation on this player. If a function you select does not run as desired, refer to
the manual accompanying the disc.
ENGLISH
Example
Title 1Title 1 Title 2Title 2
Chapter 1Chapter 1 Chapter 2Chapter 2 Chapter 3Chapter 3 Chapter 4Chapter 4 Chapter 1Chapter 1 Chapter 2Chapter 2
CDG
Data on a CDG is divided into sectionscalled “tracks”, each of which isgiven a track number.
Example
Track 1Track 1 Track 2Track 2 Track 3Track 3 Track 4Track 4 Track 5Track 5 Track 6Track 6
AUDIO CD
Data on an AUDIO CD issimilar to CDG.
Example
Track 1Track 1 Track 2Track 2 Track 3Track 3 Track 4Track 4 Track 5Track 5 Track 6Track 6
E6
Page 8
NOTES ON DISCS
DISC TYPES
ENGLISH
CD-R / CD-RW / DVD R / DVD RW
MP3
Data on a MP3 is divided into sections called "albums", and then into subsections called "tracks", each of which is
given an albumor track number. When you makeMP3 data, you refer to the manual accompanying the disc.
Example
Album 1Album 1 Album 2Album 2
Track 1Track 1 Track 2Track 2 Track 3Track 3 Track 4Track 4 Track 1Track 1 Track 2Track 2
JPG IMAGE CD
Images stored in digital format and are able to record on a different media such as a CD-R, CD-RW, DVD R,
DVD RW etc.
Example
Album 1Album 1 Album 2Album 2
Picture 1Picture 1 Picture 2Picture 2 Picture 3Picture 3 Picture 4Picture 4 Picture 1Picture 1 Picture 2Picture 2
COMPATIBILITY INFORMATION
The CD-R orCD-RW must be ISO 9660 level 1compatible.
!
Files should beMPEG1Audio Layer 3format, 32 kHz, 44.1 kHz (recommended) or 48 kHz, 32 kbps - 320 kbps
!
(128 kbps recommended). Incompatible fileswill not play.
This system onlyplays tracks that are named with the fileextension “.mp3” or “.MP3” and “.jpg”or “.JPG”.
!
The disc isfinalized in order prior to play.
!
E7
Page 9
INTRODUCTION
Your DVD / Compact Disc+Graphics with a built-in 13.5” color TV and Video Camera Karaoke System
you with fun and entertainment.
recordings and hearyour voice with the music throughthe system’s speakers.
Before you attempt to use your unit, please read this manual thoroughly to familiarize yourself with all the features
available and the sections of the manual that describe their operation.
operation you wishto perform.
For your easyreference, listed here are some of the mainfeatures of this karaoke system:
Lyrics on Screen
Auto Voice Control (A.V.C.)
prerecorded, multiplex karaoke disc is played. To activate, just Mic
Volumeto a comfortable listening level.
Balance Control
use a multiplexkaraoke disc.
Echo Control
Master Volume Control
component.
- displays thelyrics with the tempo of music when playingCD+G discs.
- lets you adjust the balance between the prerecorded original singer's voice and the music if you
- lets you add an echo to enrichyour voice for a concert halleffect.
- adjust themaster volume up and down buttons until desiredvolume level is obtained.
- camera lens allows you to display your image on the Singing Machine’s monitor or another video
This system will allow you to be the “star” as you sing along with your favorite
Next, go to the section for the specific
- lets you replace the original singer's voice with your own voice when any
switch on the Auto Voice Control and tune
will provide
ENGLISH
Built-In Speakers
Individual DVD and Camera output jacks
performances through thecamera.
Auxiliary Output Jacks
Headphone Jack
Guitar or Keyboard Jack - Guitar or Keyboard can be connected to this unit by using guitar or keyboard jack. The
volume of guitar or keyboard coming from the unit can be adjusted by turning the guitar or keyboard’s volume
control.
Symbols Used inthis Manual
The below symbolsappear in some headings and noteswith the following meanings:
TV
AV
DVD
- allows youto share the music with your family and/orfriends.
- connect another video components to share movies and singing
- connect anotheraudio output component, such as anequalizer or a PA system.
- connect headphones to yoursystem instead of using the built-in speakers.
- Description refersto operation of TV
- Description refersto operation of AV
- Description refersto playback of DVD-video discs
CDG
CD
- Description refersto playback of CD+Graphics discs
- Description refersto playback of Compact Discs
E8
Page 10
CONTROL LOCATIONS
ENGLISH
1
10
11
2
18
3
4
5
6
7
19
20
21
22
23
8
9
24
25
26
12
13
14
15
16
17
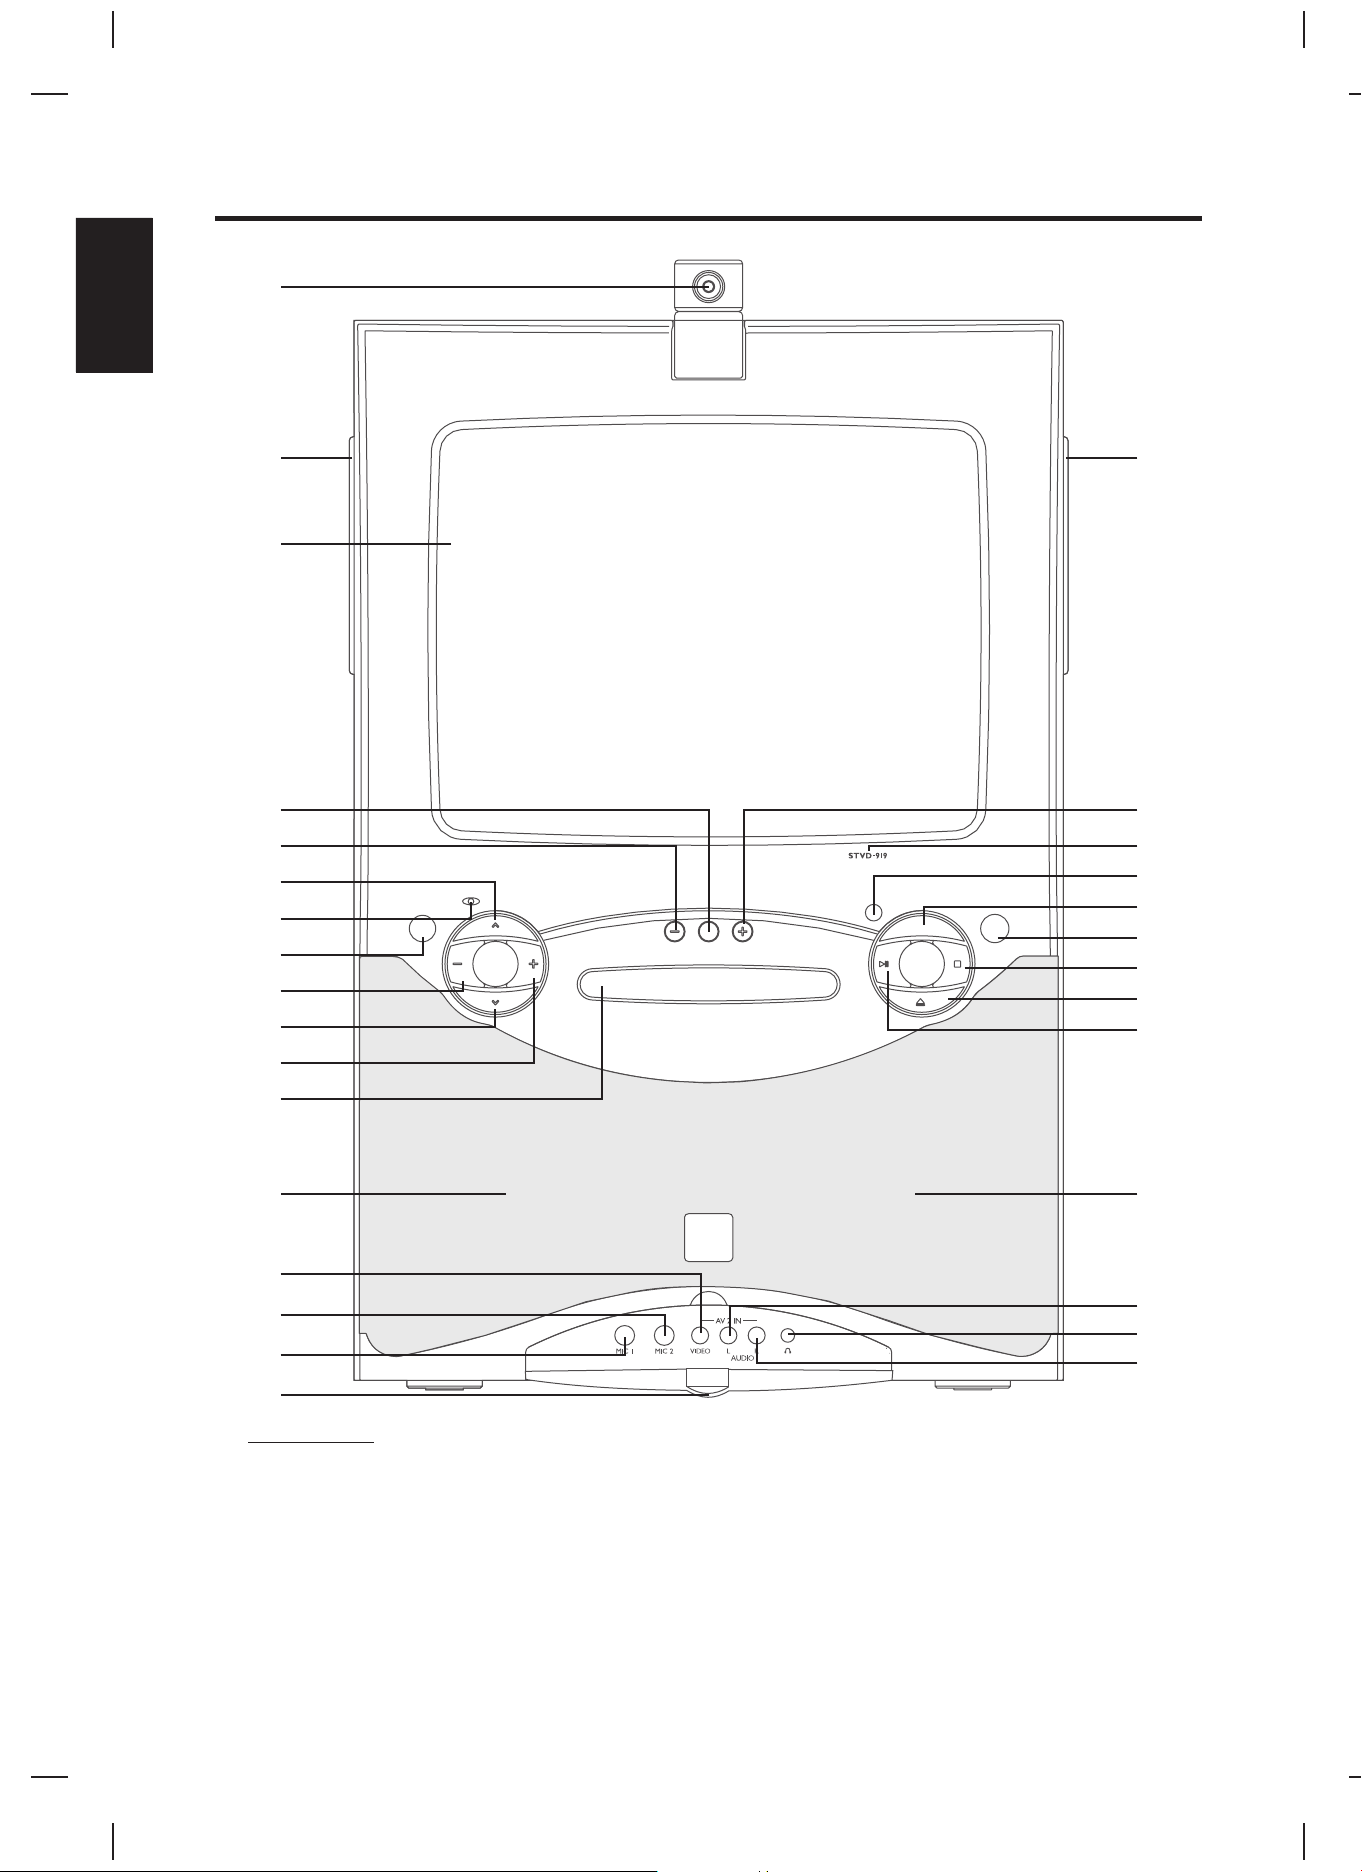
FRONT VIEW
1. Adjustable Camera Lens
2. Handle
3. Monitor
4. Karaoke Function button
5. Karaoke Function “-” button
6. CHANNEL UP button
7. POWER LED
8. POWER button
9.
Volume DOWN button
10. CHANNEL DOWN button
LR
11. Volume UP button
12. DVD Door
13. Loudspeaker
14. VIDEO IN 2 Jack
15. MIC 2 Jack
16. MIC 1 Jack
17. Jacks Door
18. Handle
19. Karaoke Function “+” button
20. Model Number
27
28
29
30
21. Remote Sensor
22. Function Selector (TV/AV/DVD)
23. MENU button
24. STOP button
25. OPEN/CLOSE button
26. PLAY/PAUSE button
27. Loudspeaker
28. AUDIO IN 2 (L) Jack
29. Headphone Jack
30. AUDIO IN 2 (R) Jack
E9
Page 11

CONTROL LOCATIONS
ENGLISH
SIDE VIEW
31. KEYBOARD VOLUME control
32. GUITAR VOLUME control
33. GUITAR Jack
34. KEYBOARD Jack
31
32
33
34
REAR VIEW
35. Antenna adaptor
36.
CAMERA VIDEO OUT Jack
37.
AUDIO IN 1 (L) Jack
38.
AUDIO IN 1 (R) Jack
39.
VIDEO IN 1 Jack
40.
Antenna Jack
41.
VIDEO OUT Jack
42.
AUDIO OUT (R) Jack
43.
AUDIO OUT (L) Jack
44.
DVD VIDEO OUT Jack
45. DIGITAL AUDIO OUT Jack
46. AC POWER CORD
E10
Page 12

REMOTE CONTROL
ENGLISH
10
11
12
13
14
15
16
17
18
19
1
2
20
21
22
43
3
23
24
25
26
4
5
27
28
29
6
7
8
9
30
31
32
33
34
35
36
37
38
39
40
41
42
BATTERYINSERTION
Remove the battery compartment
cover. Then insert 2 pieces “AAA” or
“R03” batteries as illustrated and
replace the battery compartment
cover.
REMOTE CONTROL
1. TV/AV1/AV2 button.
2. / ON button
3. Number buttons (0-9, -/--)
4. CAMERA button
5. CHANNEL UP/DOWN buttons
6. CURSOR buttons
7. DVD MENU button (PBC
button)
8. STEP button
9. PLAY/PAUSE button
10. ZOOM button
11. STOP button
12. SUBTITLE button
13. REPEAT button
14. SETUP button
15. SEARCH button
16. PROGRAM button
17. CLEAR button
18. Auto Voice Control button
19. Karaoke Function “-” button
20. TV/DVD button
21. OPEN/CLOSE button
22. SLEEP button
23. CALL button
24. MUTE button
25. MENU CURSOR buttons
26. Personal Preference (PP)
button
27. MENU button
28. Volume UP/DN buttons
E11
29. ENTER button
30. Number button (+10)
31. SCAN button
32. SCAN button
33. PREVIOUS (PREV) button
34. NEXT button
35. A-B button
36. ANGLE button
37. MARK button
38. AUDIO button
39. SLOW button
40. DISPLAY button
41. Karaoke Function “+” button
42. Karaoke Function button
43. Battery Compartment
Page 13

CONNECTIONS
CONNECTING POWER
You can power the systemfrom a standardAC outlet byusing the supplied power cord.
CAUTION:
The supplied AC power cord has a polarized plug that fits into the wall outlet only one way. If the plug
does not fitproperly, turn it over and try again. Donot force it.
CONNECTING TO YOUR HEADPHONE
A headphone jack is provided for using headphones instead of the built-in speakers. (Headphones are sold
separately.)
CONNECT YOUR GUITARAND KEYBOARD
1. Connect the guitar or keyboard to guitar input jackor keyboard input jack.
2. Press the POWER buttonto turn the unit on.
3. The sensitivity and loudness could be adjusted as required by turning the guitar or keyboard volume control
and/or the mastervolume control.
PRIOR TO CONNECTING
!
Always turn off the Singing Machine, TV and other components before connecting or disconnecting any cables.
!
Please refer to the instructions below along with the instruction manual for the other component if connection
problems occur ormore information is needed.
CONNECTING TO A VIDEO SYSTEM
CONNECTING A VIDEO COMPONENT FOR OUTPUT
Please follow thesteps below to share yourSinging Machine display on another videosystem:
(1) Locate themulticolor RCA patch cords.
(2) Connect yellow video cable to the Video Output jack, red audio cable to the Audio Right channel Output jack
and white audiocable to the Audio Left channelOutput jack respectively on the back of theSinging Machine.
(3) Connect the other end of the cords to the Video Input jack, AUX Right/Left channel Input jacks on your video
system relatively.
REAR VIEW OF
SINGING MACHINE
AV 1
AUDIO
VIDEO
IN
LR
REAR VIEW OF
VIDEO SYSTEM
R
L
ENGLISH
OUT
VIDEO
IN
AUX IN
R
(Red Jack)
AUX IN
(White Jack)
AUX IN
L
Audio/AUX Right and Left channel
R
AUDIO
LR
AUDIO OUT
L
(White Jack)
VIDEO IN
(Yellow Jack)
. The audio signal will originate from thebuilt-in speakers on the unit.
VIDEO
VIDEO OUT
(Yellow Jack)
NOTE
: To display only the image on another video system, disconnect the
AUDIO OUT
(Red Jack)
(Red and White)Output RCA cables
Please use the provided CDG disc to test the connections. The lyrics and music of songs on the disc will be
displayed on theSinging Machine.
COMMON WAYS TO CONFIGURE YOUR TV OR VCR
If you have never used the video input RCA jack or coaxial cable on your TV/VCR you should consult your
TV/VCR user guide. If you don’t have your manual, please contact your TV/VCR manufacturer for information
either by phone or by viewing their website for online assistance. They will be able to tell you very quickly how to
configure your TV or VCRto display thevideo connection.
The three mostcommon ways to set up the TV/VCR are:
1) A ‘Video’ button may be on the TV/VCR or on the remote control. Pressing ‘Video’ may display the input from
your Singing Machine.
2) Try looking for a ‘Video’ channel between the regular channels on your TV/VCR. Dothis by setting the channel
on the TV/VCR to channel 2 then pressing the ‘Down’ channel button to see if there is a ‘Video In’ or ‘Line In’
between the lowestchannel and the highest channel onyour system.
3) The configuration may also be located in the set-up menu on the TV/VCR. Look for a section on ‘Input
Selection’ where you mightbe able tochoose the input source i.e.’Cable/Ant.’, ‘Video 1’, ‘Line In’ or ‘Video In’.
E12
Page 14

CONNECTIONS
ENGLISH
CONNECTING TO A VIDEO SYSTEM
CONNECTING A VIDEO COMPONENT FOR INDEPENDENT DVD VIDEO OR FOR INDEPENDENT CAMERA VIDEO
OUTPUT
There are 2separate Video Output jacksfor Camera and DVD.
(1) Locate the multicolored RCA patch cords.
(2) Connect yellow video cable to your desired Video Output (CAMERA/DVD) jack on the back of the Singing
Machine.
(3) Connect theother end of the cords to the Video Input jack on your videosystem.
(4) Press the to DVD. (In order to display the camera output, the camera must
need to lift up andcamera cap has to be removed.)
Function Selector (TV/AV/DVD)
FOR INDEPENDENT CAMERAVIDEOOUPUT
REAR VIEW OF
SINGING MACHINE
VIDEO
OUT
CAMERA
DVD
CAMERA
VIDEO OUT
(Yellow Jack)
VIDEO IN
(Yellow Jack)
REAR VIEW OF
VIDEO SYSTEM
VIDEO
IN
FOR INDEPENDENT DVDVIDEO OUTPUT
REAR VIEW OF
SINGING MACHINE
VIDEO
OUT
CAMERA
DVD
Note: It is possible to connect one video system for auxiliary video output with lyrics and connect another video
D
DVD
VIDEO OUT
(Yellow Jack)
VIDEO IN
(Yellow Jack)
system for camerareal-time display.
REAR VIEW OF
VIDEO SYSTEM
VIDEO
IN
E13
Page 15

CONNECTIONS
CONNECTING TO A VIDEO SYSTEM
CONNECTING A VIDEO COMPONENT FOR INPUT
There are 2 individual group input jacks (AV1 and AV2) to connect another video component for input. Please
follow the steps below toshare the display on the Singing Machine’s monitor from the video source:
(1) Locate themulticolored RCA patch cords.
(2)
Connect the yellow video cable to the Video Input Jack, red audio cable to the Audio Right channel Input jack
and white audio cable to the Audio Left channel Input Jack respectively located on the front of your system
when the jack door is opened (Please refer to page E9 Control Location # 17).The other option is to connect
the respective cablesto the back of your Singing Machine asillustrated below.
(3)
Connect the other end of the cords to the Video Output Jack, AUX Right/Left channel Output jacks on your
video system, asillustrated below.
(4) Press the to switch to AV2 for front panel input connection or switch to AV1
for the backof the Singing Machine input connection.
Function Selector (TV/AV/DVD)
FOR AV1
FOR AV2
OUT
AV 1
AUDIO
AUDIO
LR
LR
VIDEO
IN
VIDEO
REAR VIEW OF
VIDEO SYSTEM
R
VIDEO
OUT
L
AUX OUT
Note: In order to input the audio source, the video connection be connected. If the video connection is
D must
not completed, therewill be no audio output.
E14
Page 16

CONNECTIONS
ENGLISH
CONNECTING TO AN AUDIO SYSTEM
CONNECTING AN AUDIO COMPONENT FOR OUTPUT
Connect the Singing Machine to your home stereo system using the White and Red supplied RCA cords. Plug
the white end of the RCA cord into the white Audio Output jack on the Singing Machine. Plug the red RCA cord
into the red Audio output jack on the Singing Machine. Now connect the other end of the cable's white (left
channel) and red(right channel) plugs to your homestereo'sAUX Input jacks as illustratedbelow.
REAR VIEW OF
SINGING MACHINE
AV 1
AUDIO
AUDIO
LR
LR
VIDEO
IN
OUT
VIDEO
ANOTHER AUDIO
COMPONENT
R
AUX IN
L
AUDIO OUT
R
(Red Jack)
AUDIO OUT
L
(White Jack)
AUX IN
R
(Red Jack)
AUX IN
L
(White Jack)
CONNECTING AN AMPLIFIER AND DOLBY DIGITALAUDIO DECODER FOR OUTPUT
As some users may want to use their own Dolby Digital Audio Decoder for supreme audio output. The Singing
Machine provides a Digital Audio Output Jack located at the rear panel of the unit.
Connect one end of the
coaxial cable to the DigitalAudio Output Jack on the Singing Machine, connect the other end to the input jack of
the Digital Audio Decoder.You cannow enjoy a supreme sound effect from the amplifier.
ANTENNA CONNECTION
1. Connect an indoor or outdoor antenna to the antenna jackat the rear panel.
2. External antenna adaptor.
VHF Rod Antenna
Screw Driver
VHF 300 ohm
Flat Wire
300 to 75 ohm
Adapter
300 to 75 ohm
Adapter
75 ohm
Antenna Terminal
E15
Page 17

BASIC OPERATION
BASIC SETUP
The MENU button on the front of the Singing Machine
or on the remote control can be accessed to change
functions on this unit. The menu is divided into three
main categories: PICTURE,PRESET and SETUP.
PICTURE PRESET SETUP
Note:
- After pressing MENU button on the front of the
Singing Machine, the CHANNEL UP/DOWN
buttons and Volume UP/DOWN buttons can act
as MENU CURSORbuttons.
PICTURE
TV AV
The CONTRAST, BRIGHTNESS, COLOR,
SHARPNESS AND TINT of the display can be
selected and changed by pressing the MENU
CURSOR buttons. The levels can be setfrom 0-99.
DVD
MEMORIZE CHANNELS
TV
Channels can be searched automatically and saved
into the SingingMachine's memory.
Note:
CHANNEL, SKIP, RECEPTION AND
-
MEMORIZED CHANNELS are accessible in the
TV function modeonly.
SETUP
Note:
- The defaultsystem picture is all in level 50.
PRESET
PRESET
LANGUAGE
CHANNEL
SKIP
RECEPTION
MEMORIZE CHANNELS
LANGUAGE
TV AV
The language menu can be changed by pressing the
MENU CURSOR buttons. There are 3 languages to
choose from.
ENGLISH SPANISH
CHANNEL
TV
Select a channelto set for your preference.
SKIP
TV
If a double image/interference appears on a preset
channel it can be removed from the listing by
accessing the SKIP Mode displayed on the PRESET
menu.
RECEPTION
TV reception method can be chosen from AIR or from
CATV ( .
CommunityAntenna Television)
ENGLISH
2
ON
AIR
DVD
FRENCH
CLOSED CAPTION
TV
Closed caption are words that can be displayed on
your Singing Machine in DVD mode to assist the
hearing impaired. There are several choices available
as long asthe DVD includes recorded captions.
C1 and C2 = CAPTIONS: Usually follows the action on
screen, providing a written version of the dialog,
narration and soundeffects.
TEXT 1 and TEXT 2: It is not usually related to action
on screen, often providing information such as news or
weather.
V-CHIP
This helps parents to set the standard for the programs
their children are going to watch. It needs a password
to enter the parental control menu. The default
password is set at " " when theunit is shipped.
1111
In the parental control menu, the desired Movie/TV
rating can beselected.
Note:
- The TV guidelines set the standard for TV
programs excluding sports and news.
- The Movie Ratings set the standard for movie,
video and othermedia excluding TV programs.
CHANGE THE PASSWORD
The password can be changed on your Singing
Machine by using the MENU CURSOR buttons.
Select CHANGE PASSWORD and use the numbered
buttons (0-9). First enter the old password to confirm
authorization. Once confirmation has been completed
the new password has to entered twice to confirm. A
confirmation display will appear on your Singing
Machine.
BLUE BACK
Blue background can be switched ON/OFF for TV/AV
function mode whenthere is no input signal.
Page 18

BASIC OPERATION
ENGLISH
BASIC FUNCTIONS
There are several functions that operate at all function
modes. They are the basic operations of the Singing
Machine.
TURNING POWER ON/OFF
To turn on the karaoke system, press the POWER
button, the POWER LED will light up. To turn off the
system, press the POWER button again,the POWER
LED will turnoff.
Press the STANDBY/ON button on the remote control
once to switch off the Singing Machine during
operation. Press it again and it will allow the unit to
operate.
PERSONAL PREFERENCE (PP) PICTURE EFFECT
There are several picture effects preset on your
Singing Machine. Press the PP button on the remote
control to selecta preferred picture effect.
PERSONAL STANDARD VIVIDSOFT
PERSONAL EFFECT
There is currently a preset picture setting on the
menu. Any setting selected will automatically be
saved to thepersonal effect on the system.
SOFT EFFECT
TV / AV SWITCHING
In order to display video/audio from another source
onto your Singing Machine the function on your
Singing Machine must be accessed by pressing the
TV/AV1/AV2 button on your remote control as
illustrated below:
TV AV1 AV2
TV / DVDSWITCHING
In order to use your Singing Machine as a Disc Player,
function has to be switched by the TV/DVD button on
the remote control.
TV DVD
TV / AV / DVD SWITCHING
Function modes can also be switched by pressing the
TV/AV/DVD button onthe front of the Singing Machine.
TV AV1 AV2 DVD
VOLUME CONTROL
Pressing VOL or VOL buttons on the front of your
Singing Machine or the VOLUME on the remote
control will adjustthe system's audio output.
SLEEP TIME SETTING
Pressing the SLEEP button on the remote control to
select a predetermined playing time. After this time
interval, the Singing Machine will turn off.
The sleep
time can beset to count down from 5to 120 minutes, by
5-minute intervals.
CALL FUNCTION MODE
Press the CALL button on the remote control to display
current function mode and channel information on the
screen. Muting status and Sleep timer will be displayed
if they areset.
PICTURE
CONTRAST
BRIGHT
COLOR
SHARPNESS
TINT
SELECT ADJUST EXIT
STANDARD EFFECT
PICTURE
CONTRAST
BRIGHT
COLOR
SHARPNESS
TINT
SELECT ADJUST EXIT
VIVID EFFECT
PICTURE
CONTRAST
BRIGHT
COLOR
SHARPNESS
TINT
SELECT ADJUST EXIT
35
40
38
38
50
MENU
50
50
50
50
50
MENU
74
65
80
80
50
MENU
MUTING
Pressing the MUTE button on the remote control
mutes the audio out
put of the Singing Machine.
Pressing the mutebutton again will restore the sound.
E17
Page 19

TV FUNCTION
Prior to power your Singing Machine on, connect your TV aerial Antenna Jack (75 ohm) located on the back of
the unit.
Press the POWER button, the power LED indicator will illuminate. After a few seconds the screen will display a
picture along withthe audio. The Singing Machine requires tuning to selectan available TV station in your area.
ENGLISH
PRE-SETTING THE TV STATIONS ONTO
THE SINGING MACHINE MEMORY
Note: - Preset tuning can only be completed in TV
function.
- If the Singing Machine is not in the TV function
mode, press the Function selector button on
the front of the system or press TV/AV1/AV2
or TV/DVD on the remote control to switch to
TV mode.
MEMORIZE CHANNELS
TV channels can be searched automatically.
are up to181 channels that can be set.
1. During MENU > PRESET menu, press the
MENU CURSOR buttons to select the
MEMORIZE CHANNELS.
PRESET
LANGUAGE
CHANNEL
SKIP
RECEPTION
MEMORIZE CHANNELS
SELECT ADJUST EXIT
ENGLISH
2
ON
AIR
MENU
There
BASIC OPERATION OF TV
CHANNEL SELECT
Channel can be selected by pressing the CH /
buttons on the system or CHANNEL /
buttons on theremote control.
Specific channel selection can be achieved by
pressing the Number buttons (0-9, -/--) on the remote
control.
Note:
- -/-- buttonwill only work in TVfunction mode.
Press the MENU CURSOR, select the right
2.
direction button to start the automatic scanning
process. The scanning will begin from VHF
through to UHF. The TV stations will
automatically store onto the memory of the
system.
MEMORIZE ALL
AIR CHANNELSAIR CHANNELS
3.
When scanning is completed, the system will
tune itself to the lowest channel.
4. When ending the auto search, press the MENU
CURSOR down button.
5. To exit the menu pressthe MENU button.
E18
Page 20

DISC FUNCTION SETUP
The SETUP button, CURSOR buttons and ENTER
button on the remote control will allow different function
settings while in Disc function. The menu is divided into
ENGLISH
four main categories: SYSTEM SETUP, LANGUAGE
SETUP, VIDEO SETUP and DIGITAL SETUP.
Once the SETUP button is selected, the system's
screen will display four setup categories, as illustrated
below:
SYSTEM SETUP
SCREEN SAVER
While the Singing Machine is in disc function and has
been in idle for five minutes, the screen saver will
appear to protect the screen. It can be switched
ON/OFF in thismenu.
TV TYPE
The aspect ratio of the display in disc function can be
changed by selectingone of the following options.
SYSTEM SETUPSYSTEM SETUP
SCREEN SAVER
TV TYPE
PASSWORD
RATING
DEFAULT
EXIT SETUP
NORMAL/ 4:3PS
If both Singing Machine and DVD disc do not support
wide screen viewing, a wide picture is displayed on
the whole screenwith a portion automatically cut off.
RATING
This function limits the playback of DVDs based on the
Motion Picture Association ofAmerica's rating assigned
to each movie.
Parent’s can specify the ratings that
require a password to view. The rating listed from low to
high, KID SAFEis the lowest and ADULT is the highest.
Note:
- When changing the RATING PASSWORD, the
current password must be unlocked.
SYSTEM SETUPSYSTEM SETUP
SCREEN SAVER
TV TYPE
PASSWORD
RATING
DEFAULT
EXIT SETUP
1 KID SAFE
2G
3PG
4 PG13
PG-R
6R
7 NC-17
8 ADULT
DEFAULT
The SYSTEM SETUP can be restored to default by
pressing the ENTERbutton on this selection.
LANGUAGE SETUP
LANGUAGE SETUPLANGUAGE SETUP
OSD LANGUAGE
AUDIO LANG
SUBTITLE LANG
MENU LANG
EXIT SETUP
NORMAL/ 4:3LB
If the DVD supports wide screen, wide black bands
will be displayed on the upper and lower portions of
the Singing Machinescreen.
WIDE / 16:9
For a wide screen TV set, choose this setting. (The
wide screen TV will set to “FULLsize”.)
PASSWORD
The password is locked by the default setting, therefore
a rating limit or password change cannot be
accomplished. In order for the Rating feature to work in
the DVD function the password mode must be turned
on. If you want to set the ratings limit, you will need to
enter the default password, which is , then press
“0000”
ENTER button toconfirm.
OSD (On-Screen Display) language, Audio language,
subtitle language and menu language can be changed
for your preference.
E19
Page 21

DISC FUNCTION SETUP
VIDEO SETUP DIGITAL SETUP
DOWN MIX
VIDEO SETUPVIDEO SETUP
BRIGHTNESS
CONTRAST
HUE
SATURATION
EXIT SETUP
BRIGHTNESS
Use CURSOR buttons to move/scroll and adjust the
brightness in 12levels.
CONTRAST
Use CURSOR buttons to move/scroll and adjust the
contrast in 12levels.
HUE
Use CURSOR buttons to move/scroll and adjust the
HUE in (+6to -6) 12 levels.
SATURATION
Use CURSOR buttons to move/scroll and adjust the
saturation in 12levels.
DIGITAL SETUP
DOWNMIX
AUDIO OUT
DYNAMIC RANGE
EXIT SETUP
LT/RT
Choosing this setting when the original movie was
recorded in ProLogic Dolby Digital format will
pronounce a movietheater sound effect.
STEREO (default)
AUDIO OUT
SPDIF/RAW (default)
Choose this setting, if your DVD player is connected to a
power amplifer with a coaxial cable or an optical cable.
When playing a disc recorded with Dolby Digital, DTS
and MPEG audio formats, the corresponding digital
signals will be output from the Coaxial Output jack. This
player’s digital output jacks are designed for a
connection to a Dolby Digital, DTS or MPEG receiver or
decoder.
ENGLISH
SPDIF/PCM
(Sony-Philips Digital Interface Format
/Pulse code modulation)
Choose this setting, if your DVD player is connected to a
2-channel digital stereo amplifier. When playing a disc
recorded with Dolby Digital and MPEG audio formats,
the audio signal will be modulated into a 2-channel PCM
signal and it will be output from the Coaxial Output jack
or Optical Outputjack.
DOLBY DIGITALSETUP
DIGITAL SETUP
DOWNMIX
AUDIO OUT
DYNAMIC RANGER
EXIT SETUP
FULL
6/8
4/8
2/8
OFF
When LINE OUT is selected, choose this setting to
adjust the line out ratio and get different effects. If
adjusting to FULL, the audio signal peak volume will be
minimum, while adjusting to OFF, value will be
maximized.
E20
Page 22

DISC FUNCTION
BEFORE PLAYING
!
!
ENGLISH
Please check “Playable Discs” on page E5 to make sure the disc is playable.
Make sure the Singing Machine is connected to the components properly and the power of the Singing Machine
is on.
BASIC PLAYBACK
PLAY A DISC
DVD
1. Press POWER button on the front panel to turn on
the Singing Machine
2. Press the TV/AV/DVD Function Selector button
on the machine or TV/DVD button on the remote
control until DVD mode screen displays on
Singing Machine
3. Press the OPEN/CLOSE button on the system or
on the remotecontrol to open the disc door.
4. Place a disc into the compartment and press
OPEN/CLOSE button again to close the disc
door. Insure the disc is positioned properly
(displaying the labelside up).
5. Press the PLAY/PAUSE button on the front of the
system or on the remote control to begin playing a
disc.
Note:
1.
For some discs, playback will start from the first
chapter or trackof the disc automatically.
2. When you playback the DVD which a title menu
is recorded, it may appear on the screen. In this
case, use CURSOR buttons on the remote
control to selectyour choice.
3. For MP3 discs, playback will begin from the first
mp3 file.
4. For JPG image discs, a slide show will begin
automatically or ifthe play button is pressed.
CAUTION:
Keep your fingers away from the disc tray
as it is closing. Neglecting to do so may cause serious
personal injury.
STOP/ RESUME
1. Press the STOP button on the front of the system
or on the remote control to stop the disc from
playing. A blue screen with The Singing Machine
logo will appearon the screen.
2.
Press PLAY/PAUSE button to resume playback.
The playback starts from where the STOP button
is pressed.
Note:
1. Pressing the STOP button again after the disc
stops playing will clear the location index stored
in memory.
DVD - Playback starts from the beginning of the
current title.
CDG/CD - Playback starts from the beginning of
the disc.
2. For MP3 and JPG discs, folder view will be
displayed if theSTOPbutton is pressed.
PLAY/ PAUSE
1. Press the PLAY/PAUSE button during playback.
2. Press the PLAY/PAUSE button again to resume
playback.
Note:
1. This function is availablefor all discs.
2. The sound is mutedduring pause mode.
REMOVE DISC
1. Press STOP button twice to confirm disc is not
spinning.
2. Press OPEN/CLOSE button to access the disc.
3. Remove the disc from the compartment.
screen .
DVD
DVD
DVD
CDG
CD
CDG
CDG
CD
CD
CD
your
the
4. Press the OPEN/CLOSE button again to close the
compartment.
PREVIOUS/ NEXT
For a DVD disc: Pressing the PREVIOUS (PREV)
1.
or the NEXT button will enable the next or
aaa aaa
DVD
CDG
CD
previous chapter todisplay.
2 For CDG/CD/MP3/JPG discs: Pressing PREV
.
or NEXT button will enable you to go to
aaa aaa
the previous ornext track/file on the disc.
Note:
1. When the PRE button is pressed once during
normal playback of a DVD, the chapter being
played will beplayed from the beginning.
2. Input the index of the chapter or track by
pressing the NUMBER buttons during the
normal playback, the playback will go to that
chapter or track directly. But -/-- button will not
work in thisfunction mode.
SCAN FORWARD/ REVERSE
DVD
CD
1. During normal playback of the DVD, CD or MP3,
press SCAN buttons on the remote
-
control to fastreverse and fast forward.
2. Each time you press either button it will change
the playback speed. The following sequence will
appear on screen.
FWD: 2X 4X 8X 20X Normal Play (It will
not display onscreen)
REV: 2X 4X 8X 20X Normal Play (It will
not display onscreen)
The rate and direction of playback is indicated on
the display.
3. Press PLAYbutton to return to normalplayback.
Note:
1. This function is not available for CDGs or JPG
discs.
2. The Singing Machine omits the subtitle and
mutes sound during fast forward or fast reverse
mode during DVDand mp3 playback.
3. The resultant speed of the fast forward or fast
reverse may differ depending on the disc.
SLOW MOTION
DVD
The SLOW button when pressed repeatedly adjusts
the speed to the desired slow motion. T
he following
sequence will beshown on screen.
1/3 1/4 1/5 Normal Play
aa aa aa aa
DVD
1/6 1/7
STEP
Repeatedly pressing or holding down the STEP
button will allow the picture to advance forward frame
by frame. To return to normal play, press the play
button.
E21
Page 23

DISC FUNCTION
OTHER FUNCTIONS
REPEAT
This function is activated to repeat a particular
chapter/title/track.
The following sequence will
display on the screen when pressing this button
repeatedly.
For DVD disc: CHAPTER TITLE ALL
Repeat
OFF
For CDG andCD discs: Repeat 1 ALL OFF
For MP3 and JPG disc: Repeat 1 Repeat Directory
(DIR) RepeatAll OFF
REPEAT A-B
DVD
CD
This function allows a desired portion of the playback
to repeat. The following is the sequence, which will
appear on the screen if the A-B button is pressed
repeatedly on yourremote control.
1. Press A-B button on the remote control to select
the desired chapter in the “Repeat Playback”
mode in order for the DVD to start the chapter
from the beginning.
2. Press the A-B button again at the end of the
desired chapter, in the “Repeat Playback”mode.
A-B
“ ” will appear on the screen and the desired
“Repeat Playback” will start automatically and
repeatedly until theA-B buttonis pressed again.
Note
:
1. This function works for DVD, MP3 and CD
except CDG andJPG discs.
2. For CD and MP3, the start andend point of the AB selection mustbe within the same track.
PROGRAM
DVD
CDG
CD
The user can control the playback order as desired by
pressing PROGRAM button on the remote control.
This unit is equipped with 16 programs.After pressing
the PROGRAM button on the remote control, the
screen will displayas follows:
PROG
TC
5900
1
2
3
4
TC
5
6
7
8
PLAY CLEAR
TC
9
10
11
12
TC
13
14
15
16
Use the CURSOR buttons to select the first entry.
Press number buttonsand +10 button to enter desired
title (T) andchapter(C) you wanted to see.
You can start by selecting “Play” on the program
interface. Press PROGRAM button again or CLEAR
button on the remote control if you want to cancel the
program. And then choose “Play” to continue normal
playing.
Note
:
- The programming interface of the program
function of CDG and CD are similar to the DVD.
The main difference is the input parameter of
DVD is the index of title/chapter, the input
parameter of CD is the index of track.
MARKING
DVD
MARK TT 1 CH 1 0 0 01 171
Movies can be marked with tag (5 tags) by pressing
MARK button on the remote control. The marked tag
can call back the saved scene by CURSOR button
selection and pressing PLAY button. The marked tag
can be removed by pressing CLEAR button on the
remote control.
DVD MENU
DVD
DVD menu can be display when pressing the DVD
MENU button on the remote control during DVD
pla
yback.
Note:
1. DVD menu has to be prerecorded in the DVD by
disc manufacturer.
2. During VCD playbace, this button will function as
PBC (Playback Control)button.
ZOOM
DVD
This unit has six different zoom modes. Pressing the
ZOOM button on the remote control repeatedly will
display as shownbelow on your TV screen:
2X 3X 4X X X 1/4X Normal
aa aa aa aa aa aa
1/2 1/3
Play
Note
:
- The enlarged picture can be moved by pressing
CURSOR buttons on the remote control. The
position of the picture will move and be shown on
another display onthe TV screen.
ANGLES
DVD
Some DVD discs contain scenes which have been
shot simultaneously from a number of different
angles. Therefore, the same scenes can be viewed
from different angles by pressing ANGLE button on
the remote control repeatedly. (The recorded angles
differ from disc to disc.)
Note:
- If the DVD disc is recorded with only one angle,
this function willnot be available.
ENGLISH
E22
Page 24

DISC FUNCTION
ENGLISH
OTHER FUNCTIONS
DVD
DVD
DVD
DVD
CDG
CDG
CDG
CD
CD
CD
SUBTITLE
Pressing SUBTITLE button repeatedly allows
different subtitle languages to display on screen one
by one.
Note
:
This function onlyworks for DVD.
-
- For somediscs, subtitle can not be removed.
- Different discs differ in the language ofsubtitles.
AUDIO
Pressing the AUDIO button repeatedly will display
different audio modes and will appear on thescreen
DISPLAY
Press the DISPLAY button on the remote during DVD
playback, different information will display on the
screen by each successive pressing of DISPLAY
button.
Current title, chapter and playing time will show as a
bar on thescreen by pressing DISPLAY button once.
When the DISPLAY button is pressed again,
information regarding subtitle, audio channel and
angle appear onyour screen.
The next mode that appears is title, chapter and
playing time inthe particular chapter being viewed.
The next mode that appears is title, chapter and total
playing time inthe particular title being viewed.
The last mode that appears is title, chapter and total
playing time remained in the particular title being
viewed.
The Display mode will turn off if the DISPLAY button is
pressed during thelast mode.
Note:
- This function is not available for JPG image CD
and MP3 disc.
- For CDG and CD discs, the display sequence is
different from the above.
SEARCH
User can access a specific location or a specific track
by keying in the target time or the chapter/track
number.
1. Press the SEARCH button to enter searchmode.
2. Input the target time/chapter/track by keying
number buttons (0-9) and press the ENTER
button. The player will jump to the target location
immediately.
KARAOKE FUNCTION
In order to perform karaoke function, the Singing
Machine must be in disc function mode and disc has
to be loaded.
MIC VOL/ ECHO/KEY (+/-)
DVD
Press Karaoke Function button on the front of the
Singing Machine or on the remote control can let the
user to adjust the MIC VOL/ECHO/KEY effects being
produced from the Singing Machine. Pressing the
button in the middle for the first time will display “MIC
VOL” on thetop left corner of thescreen
Pressing Karaoke Function +/ - button on the front of
the Singing Machine or on the remote control will
adjust the microphone volume of the system audio
output.
Pressing the Karaoke Function button again will
change the display to “ECHO” on the top left corner of
the screen. Adjust the echo effect by pressing
Karaoke Function +/- buttons.
Pressing the Karaoke Function button again will
display “KEY” on the top left corner of the screen.
Adjust different ranges by pressing +/ - buttons.
AUTO VOICE CONTROL
CDG
Pressing the AVC button on the remote control while
playing a CDG track with both music and vocals will
remove the lead singer's voice from the track being
played while usinga microphone.
KARAOKEVISION
DVD
CDG
During the disc function mode, KARAOKEVISION
can be switched on for real-time performance appear
on the SingingMachine’s screen.
1. Lift up the cameraup to an upright position.
2.
Adjust the camera position by moving it slightly up
or down tothe desired angel.
3. Press the CAMERA button on the remote control
to switch on the CAMERA mode. The your image
will show onthe screen.
4. To focus the camera display, the camera lens
must be adjusted by rotating until a clear image
appears on screen.
Note:
- Independent CAMERA video output can be
connected through the CAMERA VIDEO OUT
jack that located at the rear panel of the Singing
Machine.
CDG
CD
CD
E23
Page 25

CARE AND MAINTENANCE
POWER SWITCH
After using the unit, turn off the power by pressing the
POWER button.
CLEANING THE UNIT
To clean the exterior of the unit, simply wipe with a soft
clean cloth moistenedwith plain lukewarm water.
CLEANING THE CDLASER LENS
For the Best Results: Use a CD-lens cleaning disc
according to the cleaning disc manufacturer
instructions.
If a lens cleaning disc is not available, use a clean,
soft, dry cotton cloth to gently wipe the small, glass,
fish-eye laser lenslocated in the CD players.
To prevent fire or shock hazard,
disconnect your stereo system from
the AC power plugwhen cleaning.
COMPACT DISC
Handling Disc
Although the music tracks on the disc are
covered with a protective layer, it is still
advisable to treat the disc carefully. Ensure that
you always pick up discs by the edge, and put
them back in their holders immediately after
use.
CLEANING DISC
Cleaning will not normally be necessary.
However, should fingerprints, dust or dirt
appear, you can wipe them off with a soft, lintfree cloth. Wipe the disc in a straight line from
center to edge. You can moisten the disc first
with ordinary tap water if necessary.
NOTE: Do not use detergent or
abrasive cleaning agents as they
can damage the disc.
CD PLAYER
The player mechanism is fitted with selflubricating bearings and must not be oiled or
greased.
ENGLISH
E24
Page 26

TROUBLE SHOOTING GUIDE
If you have followed the instructions and are having difficulty operating the unit, locate the PROBLEM in the left
column below. Check the corresponding POSSIBLE CAUSEcolumn to locate and remedy theproblem.
ENGLISH
PROBLEM
No power whenthe unit is on.
No sound.
No sound fromTV or PA.
POSSIBLE CAUSE
No power plug connection at the AC
outlet.
Volumecontrol is set to minimum.
Muting button ispressed.
TV or PA system is setto minimum.
TV or PA system is poweredoff.
The wrong functionis selected.
The vocal or audio setting is not
correct.
Patch cords are not connected
securely.
Video cable is not connected to the
Video input jack.
Disc is insertedupside down.
Disc is dirty.
SOLUTION
Insert the powerplug into the AC outlet.
Turn up the volume.
Press Muting buttonagain.
Turn up the volumeon the TV or PA system.
Power the TV or PA system on.
Select the correctfunction.
Select the correctvocal or audio setting.
Ensure white and red patch cords are
securely inserted into both The Singing
Machine and theTV/PA system.
Connect Video cable to Video input jack
with the Audio connections.
Insert disc correctly.
Wipe clean withsoft cloth.
Disc function mode
cannot work normally.
No sound - when audio is
connected to ahome stereo.
No sound - If audio is going
through VCR.
Disc is scratched.
Disc is warped.
Anonstandard disc is inserted.
Moisture has formed inside the disc
compartment.
Singing Machine needsto be reset.
Source selection on your home
stereo is notset properly.
Improper connection to stereo
system or PA.
Patch cords are not connected
securely.
Source selection on VCR is not
correct.
Patch cords are not connected
securely.
Use a newdisc.
Use a newdisc.
Only use discs bearing standard logo as
described on page E5.
Wait about 20 to30 minutes tolet it dry out.
Disconnect the machine from power
source for 30seconds then reconnect.
Select AUX IN as the source for your home
stereo.
Follow instructions on page E15 for
“Connecting to anaudio system”.
Ensure white and red patch cords are
securely inserted into both The Singing
Machine and thehome stereo system.
Follow instructions on page E12 for
“Connecting to avideo system”.
Ensure white and red patch cords are
securely inserted into both The Singing
Machine and theVCR.
While playing CDG and
singing with the microphone,
the music orvocal cuts out.
AVC is activatedunintentionally.
Playing music onlytrack.
Audio channel isset to LEFT.
E25
Deactivate the AVC.
Play track thatincludes music and vocal.
Press AUDIO button on the remote control
to restore STEREOsetting.
Page 27

TROUBLE SHOOTING GUIDE
PROBLEM
No song lyrics appear on the
screen when connected to
another video component.
The player does not respond
to the remotecontrol.
POSSIBLE CAUSE
Video cable is not connected
properly to thevideo component.
Source selector on video
component is notset to VIDEO.
The another video component
does not havevideo line input.
Remote control is not pointing to the
Remote Sensor directly.
The remote control is too far from
the Singing Machine.
Batteries are depleted.
SOLUTION
Connect the video cable (Yellow) to the
Singing Machine’s VIDEO OUT and to the
video component VIDEOIN.
Using your video component remote
control to select VIDEO input or select the
proper VIDEO input on the TV itself. (Refer
to page E12 under Common ways to
configure your TV or VCR)
Connect from VIDEO OUT of the system
to the VIDEO IN of your VCR or connect to
an RF Modulator and then to the video
component input. Refer to “Connecting to
a video system” on page E12. Check the
disc to besure it is compatible.
Aim the remote control directly at the
Remote Sensor onthe front of the player.
Reduce the distance between eachother.
Replace the batteriesin the remote control.
ENGLISH
No image displays on the
system when attempting to
use the camera.
Image is blurry.
Song lyrics display a double
image while playing.
Batteries incorrectly inserted.
The Singing Machine is not in the
Disc function mode.
The camera lensis down.
The Singing Machine is not in
camera mode.
Lens cap ison the camera.
Camera has notwarmed up.
Camera lens isdirty
Camera lens isout of focus
Operating play-pause-play-pause
continuously on a song selection
will cause doubleimage.
Re-insert the batteries with their polarities
(+/- signs) as indicated inside the battery
compartment.
Press TV/AV/DVD button or TV/DVD
button to switch to DVD mode first. Then
press CAMERA button to camera mode.
Lift up a camera lens and remove the lens
cap.
Press camera button on the remote control
to set SingingMachine to camera mode.
Remove lens capbefore using camera.
Wait a minute forthe camera towarm up.
Clean the cameralens.
Adjust the lens of the camera by slightly
rotating either left or right until the display is
clear.Do not overturn the lens.
Return to the beginning of the song
selection.
E26
Page 28

SPECIFICATIONS
ENGLISH
AUDIO SECTION:
SPEAKER OUTPUT POWER (MAX.)
OUTPUT IMPEDANCE
DVD PLAYER SECTION:
FREQUENCY RESPONSE
SIGNAL - TO - NOISE RATIO
D - A CONVERSION
NUMBER OF PROGRAMS
DIGITAL OUTPUT
TV SECTION:
SYSTEM
LO VHF CHANNEL
HI VHF CHANNEL
UHF CHANNEL
CATV
TUNER TYPE
5WATTS+5WATTS(RMS)
8 OHMS
20 Hz - 20kHz 3dB
80 dB (A-WTD)
16 bits
16 STEPS RANDOM ACCES
SPDIF COAXIAL
NTSC
2-6
7-13
14-69
A1 - A5, A8, A - W, W+1 - W+84
181 CHANNELS, FS TUNING
S PROGRAMMING
MICROPHONE
POWER SECTION
DIMENSIONS (HxWxD)
WEIGHT
ACCESSORIES
Specifications are typical, individual units might vary. They are subject to continuous improvement without notice
and without incurringany obligation.
-74dB 600OHMS IMPEDANCE WITH
6.3mm DYNAMIC MICROPHONEÆ
AC 110-120V~60Hz
22.5 x 15.6 x 15.0 Inches / 57.1 x 39.5 x 38 cm
36.4 lbs / 16.5 kgs
1.
REMOTE CONTROL
2. AV (RCA) CABLE
3.
DYNAMIC MICROPHONE
4.
PRE-RECORDED KARAOKE CD+G DISC
5. ANTENNA AND ADAPTOR
E27
Page 29

THE SINGING MACHINE KARAOKE GLOSSARY OF TERMS
In addition to all of the terminology associated with consumer electronics products, a few additional terms are used
almost exclusively in karaoke. These terms are meant to familiarize you with the world of Karaoke. The features
listed below necessarily pertain to the particular model Singing Machine that you have. The following are
some brief explanationsof karaoke terms:
Echo:
Echo adds depth and resonance to a singer's voice without affecting the music. This echo is produced by creating
minor controlled feedbackin the singer's voice.
Multiplex:
Our multiplex recordings contain 2 copies of the same song. One version is a stereo recording of the song without
the lead singer. The second version is recorded with the music and background vocals on the left channel and the
lead singer recorded on the right channel. This ‘split track’ recording allows you to control the volume of the lead
singer by adjusting the balance control. You can sing a duet with the lead singer or use the lead singer as a guide as
you learn the song, gradually fading them out with the balance control until you are able to sing the song on your
own.
Auto Voice Control (A.V.C.):
When the AVC function is activated, the vocals on a multiplex recordings are eliminated as soon as the singer
begins singing into the microphone. When the singer stops singing, the vocals on the multiplex recording are
automatically re-activated. This useful function isused primarily duringpractice sessions whilea singer is learning a
song. Please notethat the AVC function only workswith multiplex recording and not withstandard audio recordings.
Key Controller:
Key Controller changesthe key of the CD/CDG, MP3, DVD,Cassette music to adjust to the singer’s voice.
may not
ENGLISH
CDG:
This is an acronym for Compact Disc plus Graphics. You will also see variations CD+G, and CD+Graphics. This is a
regular audio CD with information stored on a data track simultaneous to music. In laymen's terms, CDG has a
video output for simple graphics (not full motion video). In the case of karaoke, the graphics function is used to store
song lyrics, and display the lyrics in synch with music. In most cases, CDG software displays lyrics which change
color as theyare to be sung. A regular television is all that isrequired to display CDG lyrics.
Standard audio discs and cassette tapes will not display lyrics on your TV. Audio CDs do not contain the software
necessary to displaylyrics.
E28
Page 30

Page 31

Page 32

The Singing Machine Company, Inc.
919-0606-ENG01
6601 Lyons Road, Bldg. A7, Coconut Creek, FL33073-9902, USA.
TEL: (954) 596-1000 FAX: (954) 596-2000
VISIT OUR WEBSITE www.singingmachine.com
PRINTED IN CHINA
 Loading...