

The Singing Machine SMDigital iSM-1010 Instruction Manual
WARNINGS
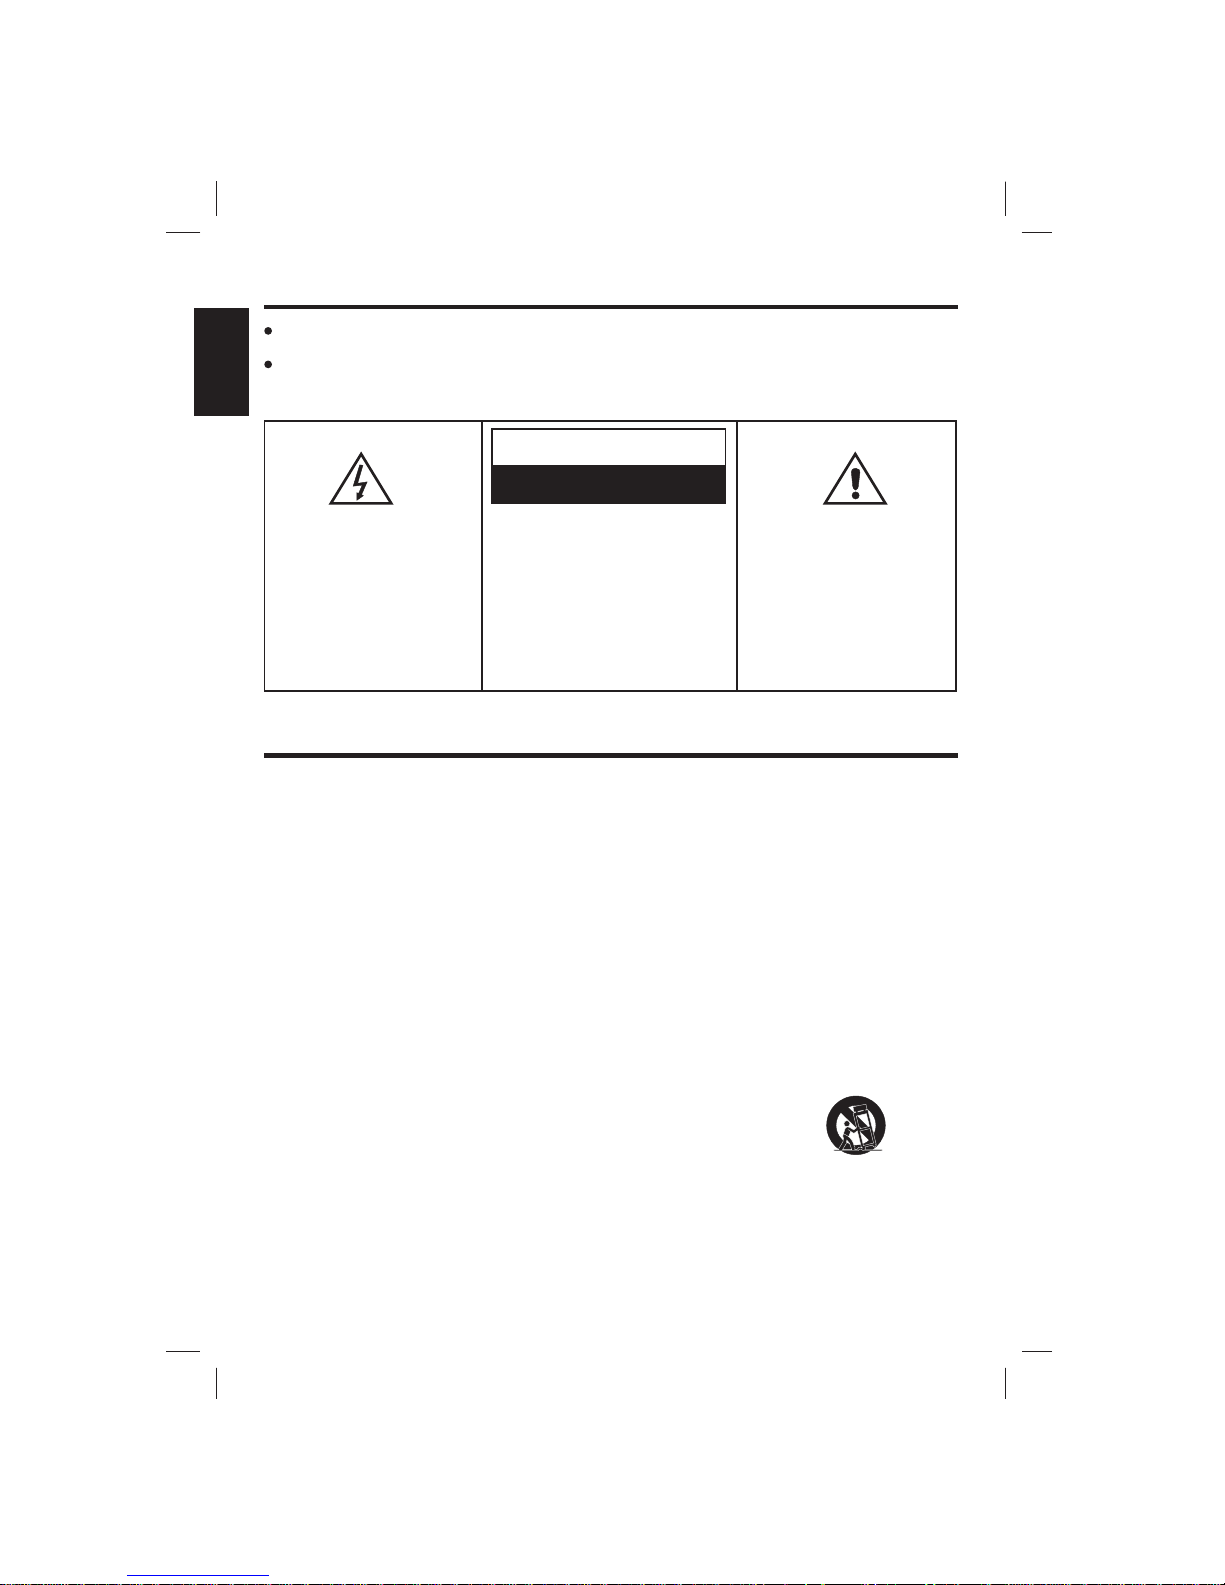
CAUTION
RISK OF ELECTRIC SHOCK
DO NOT OPEN
E1
TO PREVENT FIRE OR SHOCK HAZARD. DO NOT EXPOSE THIS APPLIANCE TO RAIN
OR MOISTURE.
THIS APPLIANCE SHALL NOT BE EXPOSED TO DRIPPING OR SPLASHING WATER AND
THAT NO OBJECT FILLED WITH LIQUIDS SUCH AS VASES SHALL BE PLACED ON
APPARATUS.
The lightning flash with
arrowhead symbol, within an
equilateral tr ian gle , is
intended to alert the user to
the presence of unisulated
“dangerous voltage” within the
product’s enclosure that may
be of sufficient magnitude to
constitute a risk of electric
shock to people.
WARNING: TO REDUCE THE
RISK OF ELECTRIC SHOCK, DO
NOT REMOVE COVER (OR
BACK). NO USER-SERVIC-ABLE
PA R TS I N SI D E. R E FE R
SERVICING TO QUALIFIED
SERVICE PERSONNEL.
The exclamation point within
an equilateral triangle is
intended to alert the user to
the presence of important
operating and maintenance
(servicing) instructions in the
literature accompanying the
appliance.
IMPORTANT SAFETY INSTRUCTIONS
1. Read these instructions.
2. Keep these instructions.
3. Heed all warnings.
4. Follow all instructions.
5. Do not use this apparatus near water.
6. Clean only with dry cloth.
7. Do not block any ventilation openings. Install in accordance with the manufacturer's
instructions.
8. Do not install near any heat sources such as radiators, heat registers, stoves, or other
apparatus (including amplifiers) that produce heat.
9. Do not defeat the safety purpose of the polarized or grounding-type plug. A polarized plug
has two blades with one wider than the other. A grounding type plug has two blades and a
third grounding prong. The wide blade or the third prong are provided for your safety. If the
provided plug does not fit into your outlet, consult an electrician for replacement of the
obsolete outlet.
10. Protect the power cord from being walked on or pinched particularly at plugs, convenience
receptacles, and the point where they exit from the apparatus.
11. Only use attachments/accessories specified by the manufacturer.
12. Use only with the cart, stand, tripod, bracket, or table specified by the
manufacturer, or sold with the apparatus. When a cart is used, use
caution when moving the cart/apparatus combination to avoid injury
from tip-over.
13. Unplug this apparatus during lightning storms or when unused for long periods of time.
14. Refer all servicing to qualified service personnel. Servicing is required when the apparatus
has been damaged in any way, such as power-supply cord or plug is damaged, liquid has
been spilled or objects have fallen into the apparatus, the apparatus has been exposed to
rain or moisture, does not operate normally, or has been dropped.
ENGLISH
E2
15. Grounding or Polarization - This product may be equipped with a polarized alternating-
current line plug (a plug having one blade wider than the other). This plug will fit into the
power outlet only one way. This is a safety feature. If you are unable to insert the plug
fully into the outlet, try reversing the plug. If the plug should still fail to fit, contact your
electrician to replace your obsolete outlet. Do not defeat the safety purpose of the
polarized plug.
Alternate Warnings - This product is equipped with a three-wire grounding-type plug, a
plug having a third (grounding) pin. This plug will only fit into a grounding-type power
outlet. This is a safety feature. If you are unable to insert the plug into the outlet, contact
your electrician to replace your obsolete outlet. Do not defeat the safety purpose of the
grounding-type plug.
16. Ventilation - Slots and openings in the cabinet are provided for ventilation and to ensure
reliable operation of the product and to protect it from overheating, and these openings
must not be blocked or covered. The openings should never be blocked by placing the
product on a bed, sofa, rug, or other similar surface. This product should not be placed
in a built-in installation such as a bookcase or rack unless proper ventilation is provided
or the manufacturer's instructions have been adhered to.
17. The MAINS plug or an appliance coupler is used as the disconnect device, the disconnect
device shall remain readily operable.
IMPORTANT SAFETY INSTRUCTIONS
CAUTION: USE OF ANY CONTROLS, ADJUSTMENTS, OR PROCEDURES OTHER THAN
THOSE SPECIFIED HEREIN MAY RESULT IN HAZARDOUS RADIATION
EXPOSURE
Class ll equipment symbol
This symbol indicates that the unit
has a double insulation system.
CAUTION: Invisible laser radiation when open and inter locks defeated. Avoid exposure to beam.
Warning: Changes or modifications to this unit not expressly approved by the party responsible
for compliance could void the user's authority to operate the equipment.
NOTE: This equipment has been tested and found to comply with the limits for a Class B digital
device , pursuant to Part 15 of the FCC Rules. These limits are designed to provide reasonable
protection against harmful interference in a residential installation. This equipment generates,
uses, and can radiate radio frequency energy and, if not installed and used in accordance with the
instructions, may cause harmful interference to radio communications. However, there is no
guarantee that interference will not occur in a particular installation. If this equipment does cause
harmful interference to radio or television reception, which can be determined by turning the
equipment off and on, the user is encouraged to try to correct the interference by one or more of
the following measures:
-Reorient or relocate the receiving antenna.
-Increase the separation between the equipment and receiver.
-Connect the equipment into an outlet on a circuit different from that to which the receiver is
connected.
-Consult the dealer or an experienced radio TV technician for help.
ENGLISH

INTRODUCTION
Your Singing Machine Pedestal CD/CDG Karaoke System will provide you with fun and
entertainment. You will be the “star” while singing with your favorite recordings as well as
listening to your voice with the music through the system’s speakers.
This karaoke center is compact and designed to include many features, yet it is easy to use.
After just a few simple instructions, you will become an expert. Before you attempt to use your
unit, please read this manual thoroughly to familiarize yourself with all the features available and
the sections of the manual that describe their operation. Next, go to the section for the specific
operation you wish to perform.
For your easy reference, listed here are some of the main features of this karaoke center:
Lyrics on TV screen - displays the lyrics with the tempo of the music when playing CD+G discs.
Auto Voice Control (A.V.C.) - allows you to replace the original singer's voice with your own
voice when any prerecorded, multiplex disc is played. To activate, just rotate mic volume to a
comfortable listening level, and Auto Voice Control for the best balance between playback and
microphone levels.
Balance Control - allows you to adjust the balance between the prerecorded original singer's
voice and the music when using a multiplex karaoke disc.
Echo Control - allows you to add an echo to enrich your voice for a concert hall effect.
Master Volume Control - allows you to turn the volume control clockwise or counter - clockwise
until desired volume level is obtained.
built-in camera lens will display your image on the Singing Machine’s monitor or
TV.
Built - In Speaker - allows you to share the music with your family or friends.
Auxiliary Output Jacks - allows you to connect another audio output component, such as an
equalizer/booster or a PA system.
Headphone Jacks - allows you to connect headphones as an alternative for listening through
the system's built-in speaker.
iPod Docking Station - the iPod docking station is compatible with iPod with video models, the
cradle audio system for the iPod allows you to simply plug in and press play to stream the entire
library of stored music from your iPod music player. Your Singing Machine's speaker system will
provide a pleasurable sound.
-
E3
ENGLISH
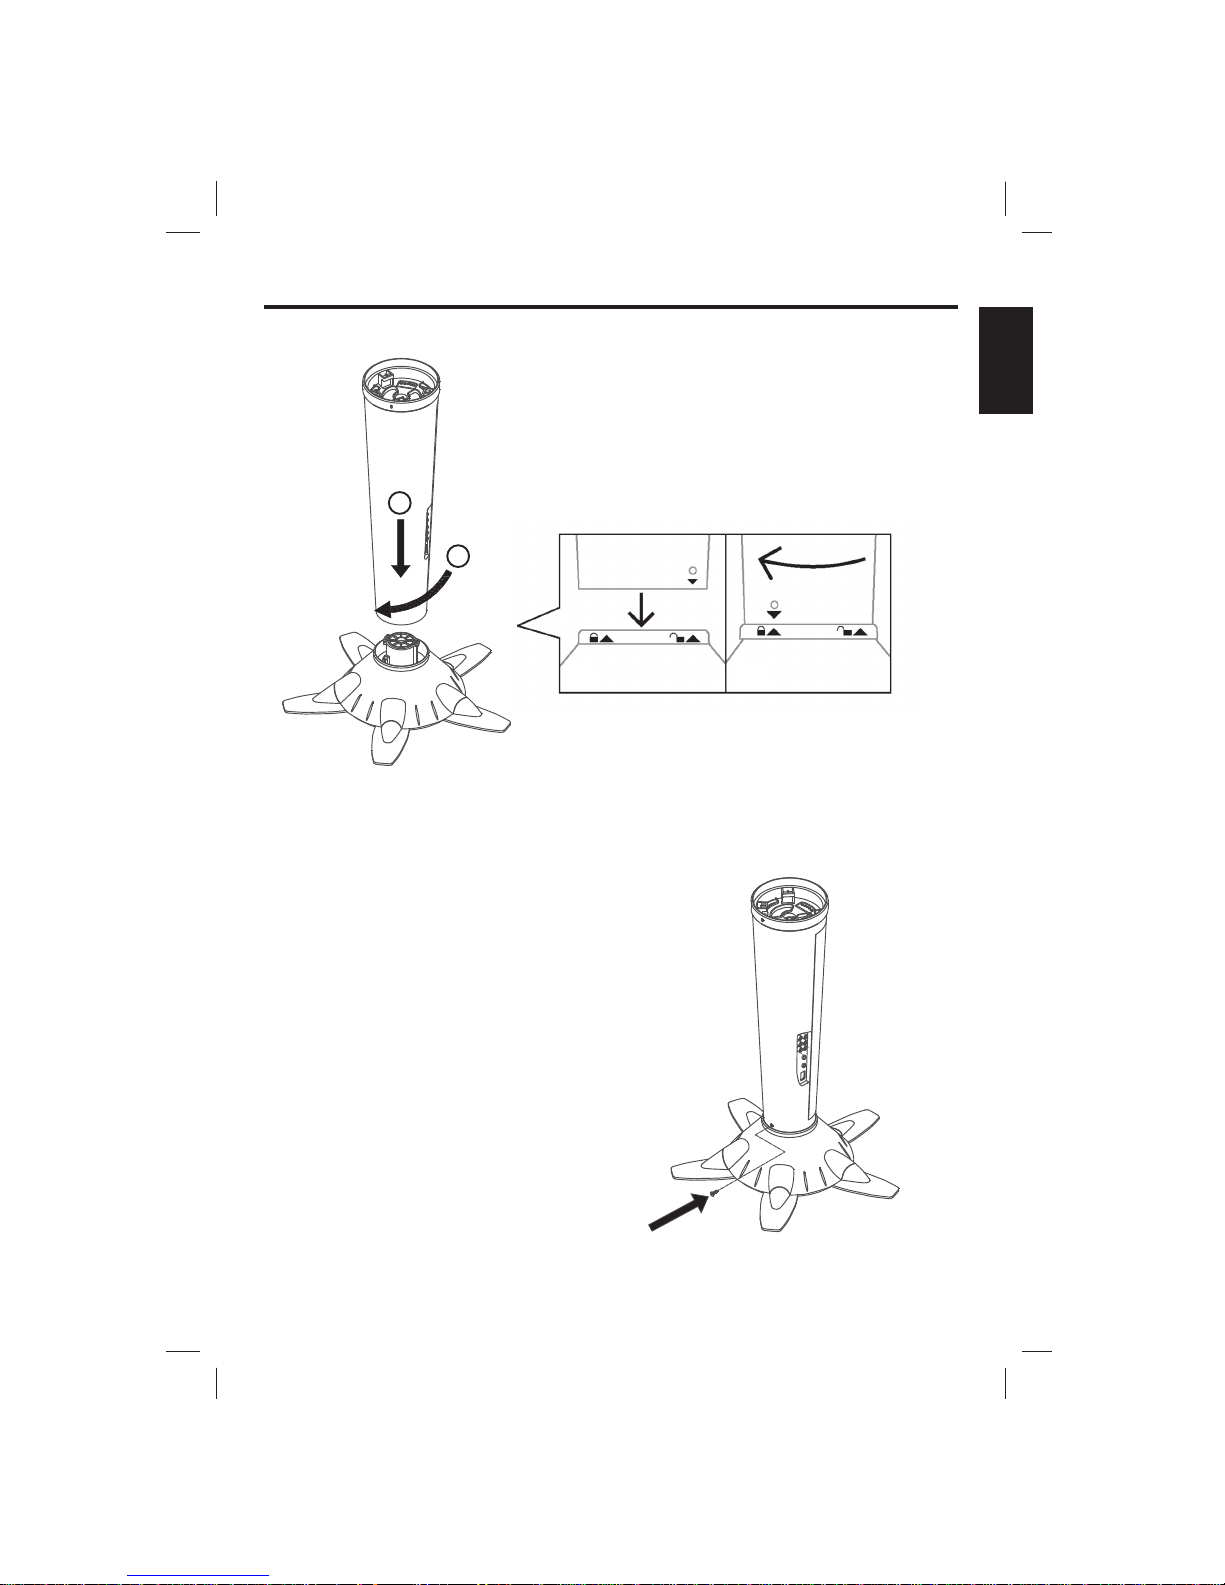
INSTALLATION
E4
1.Join the speaker (middle) into the stand
(bottom) according to the installation
illustration.
2.Tighten a self tapping screw at the bottom of
the speaker (middle).
STEP 1
1
2
STEP 2
ENGLISH
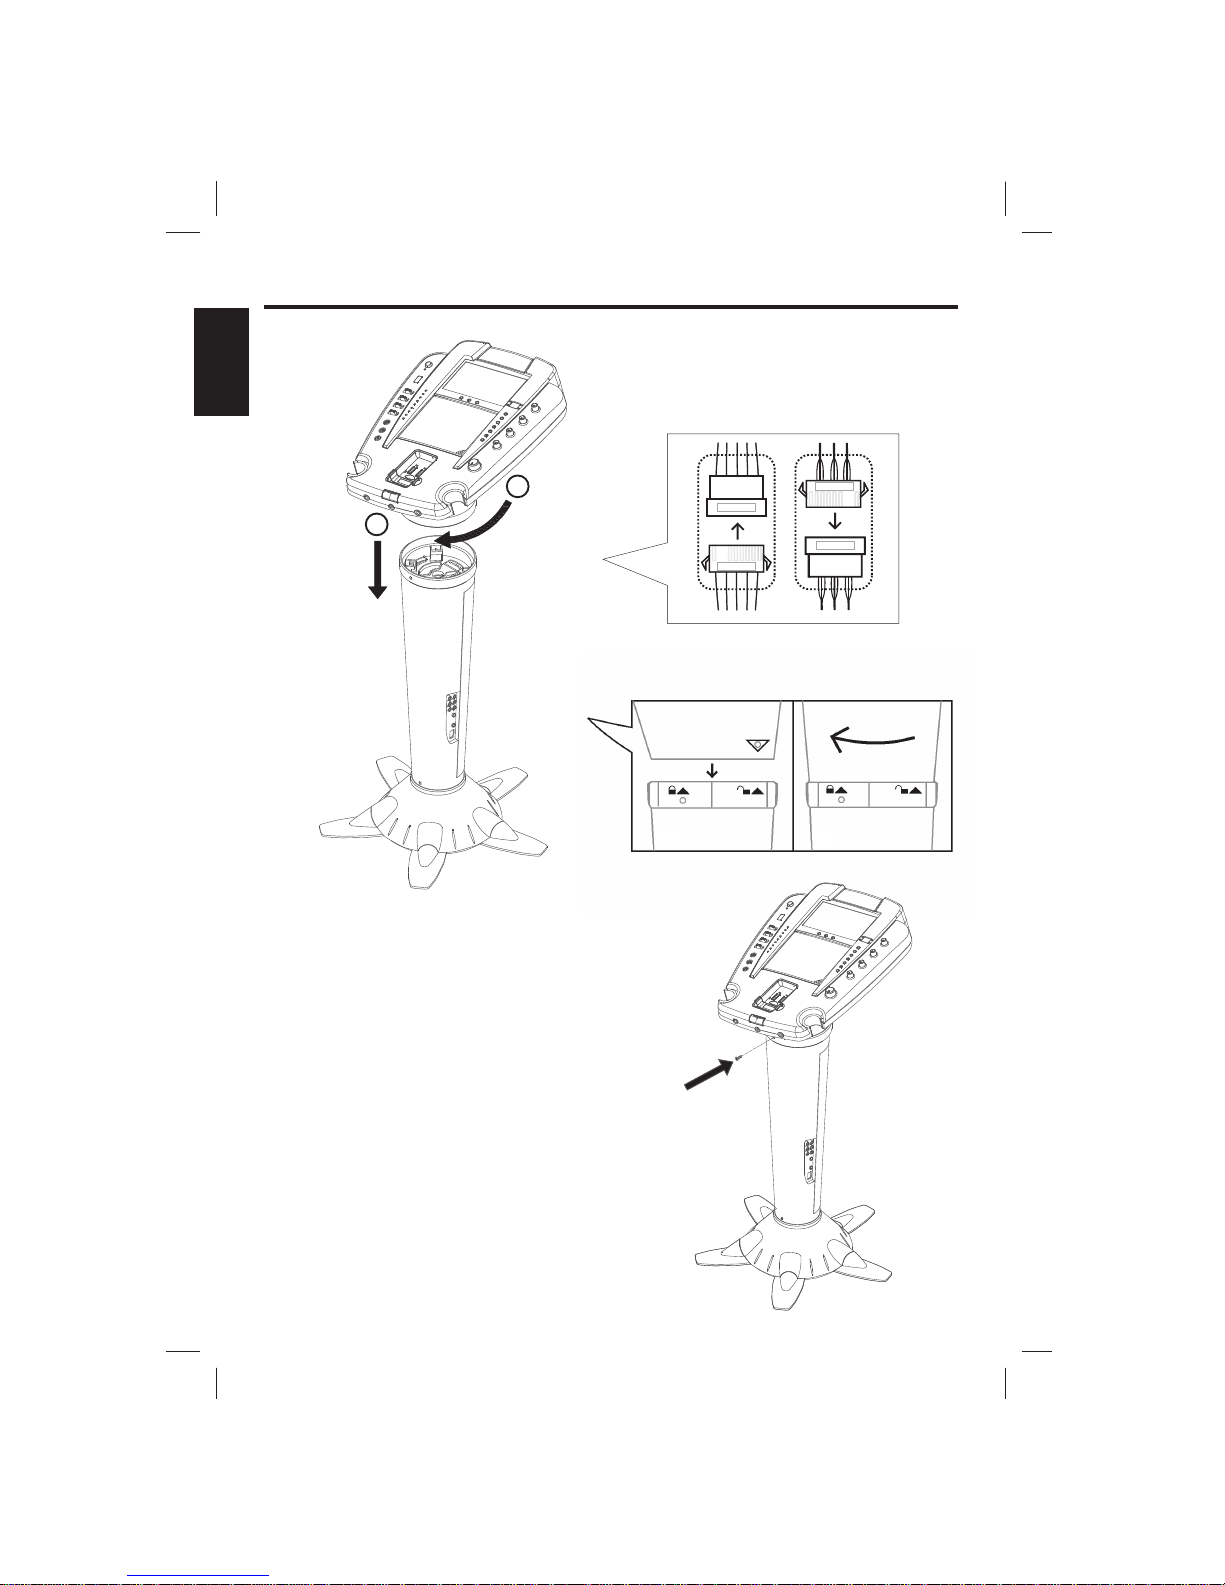
3.Join the control panel (top) into the speaker
(middle) according to the installation
illustration.
Following the labels (A to A & B to B) to plug the
connectors.
INSTALLATION
E5
STEP 3
STEP 4
4.Tighten a self tapping screw at the control
panel (top).
AB
B
B
1
2
A
A
ENGLISH
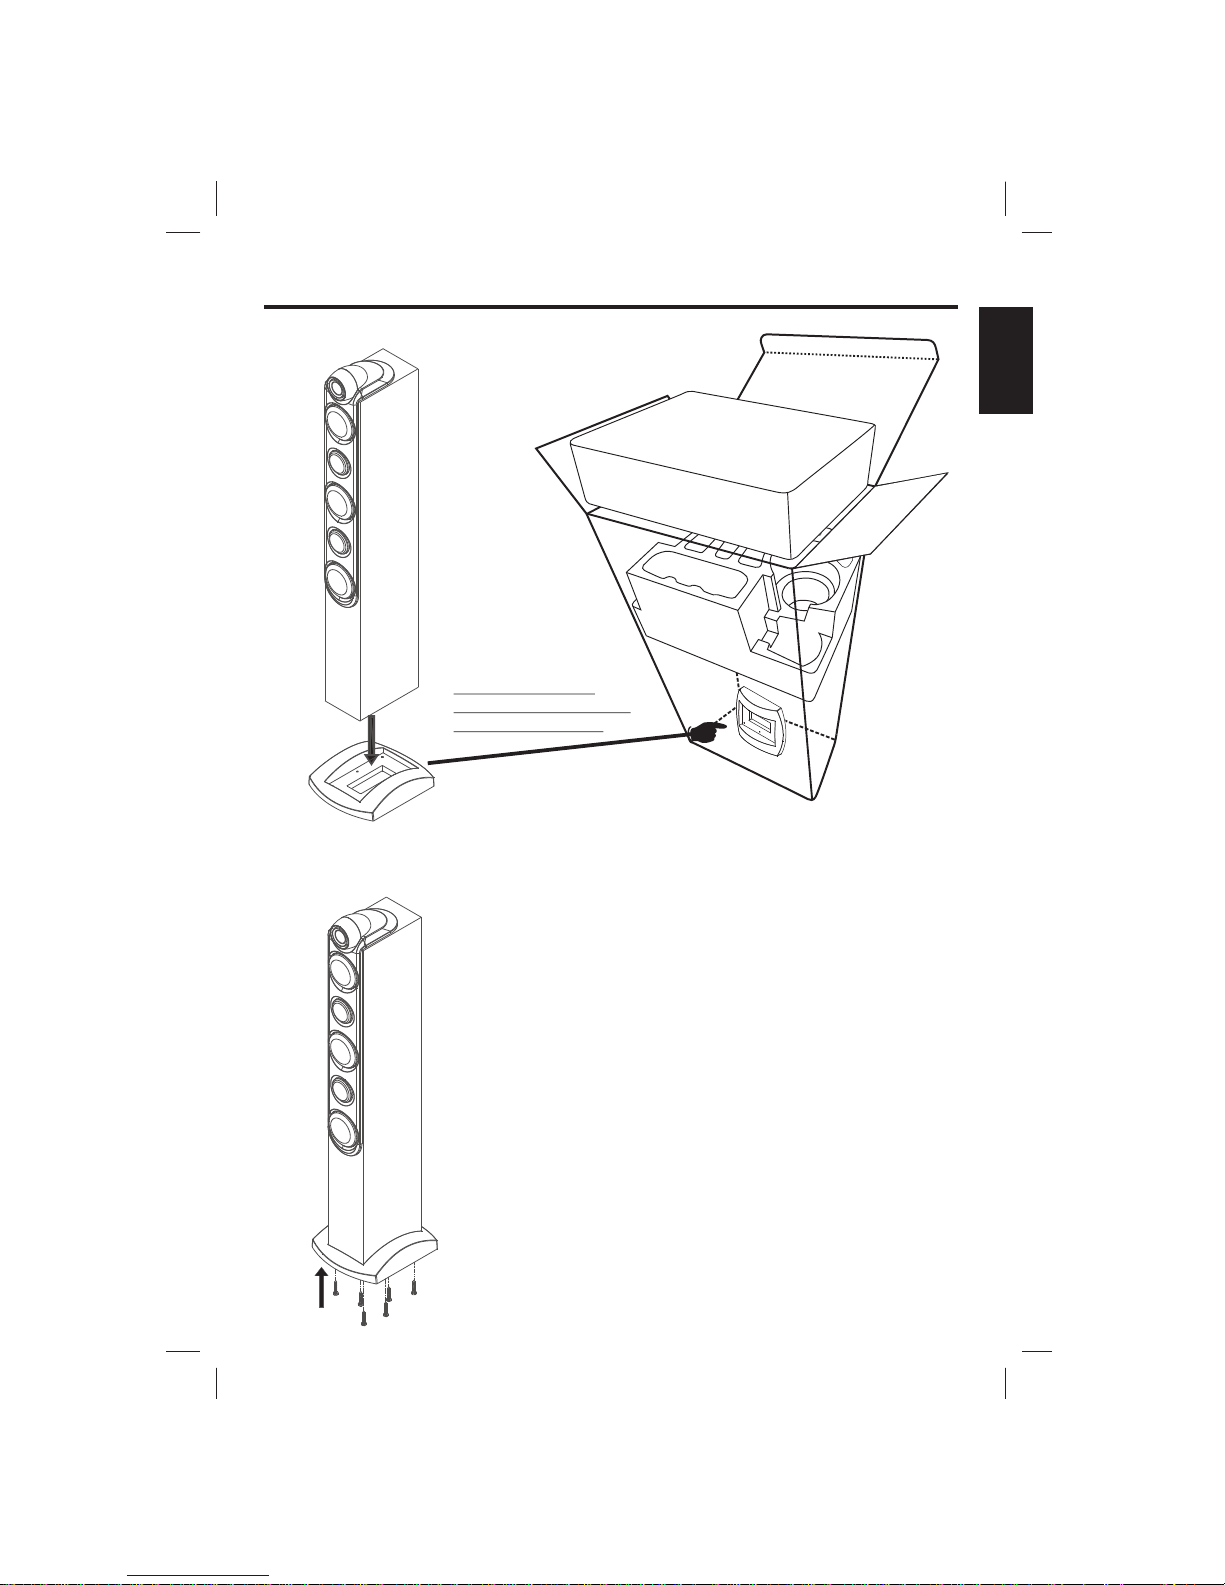
INSTALLATION INSTRUCTIONS FOR TOWER SPEAKERS
5.Join the speaker into the stand according to
the installation illustration.
STEP 5
6.Tighten six screws at the bottom of the
speaker.
STEP 6
E6
Stands are located
at the bottom of gift box
under the polyfoam.
Gift Box
Polyfoam at the top
Polyfoam at
the bottom
Stands
ENGLISH
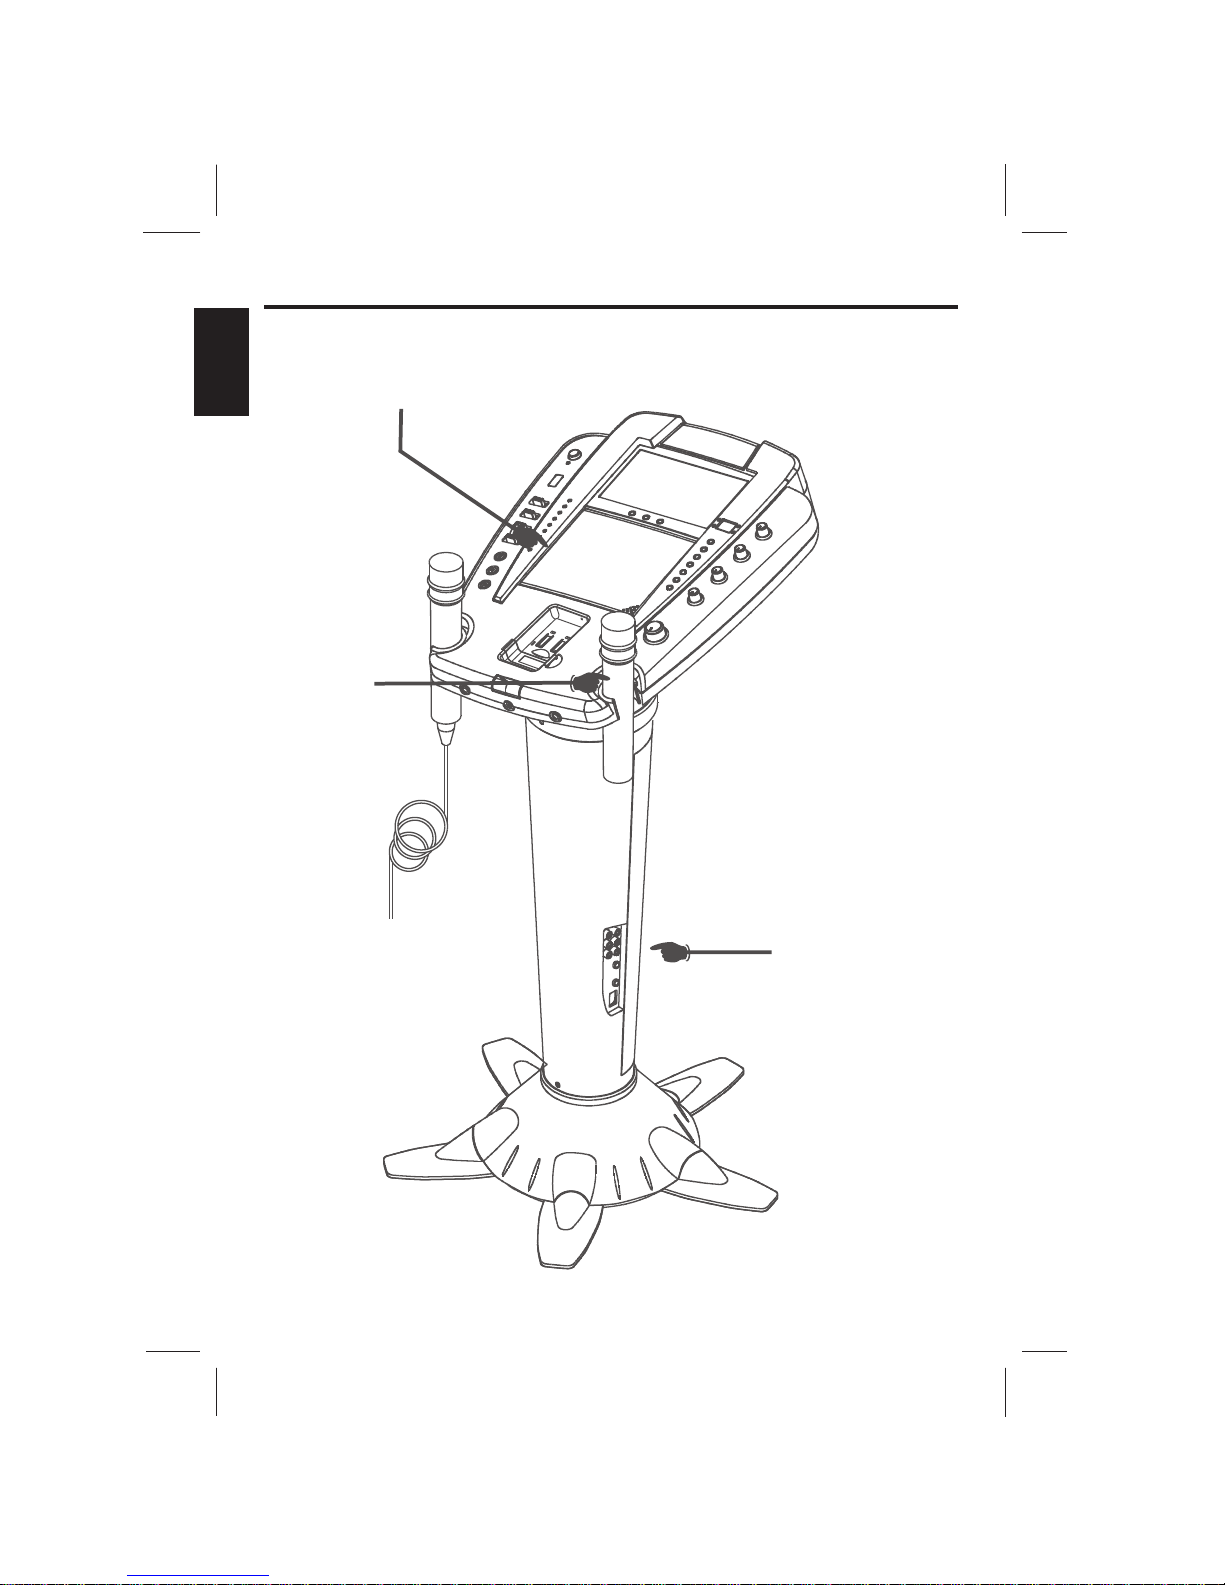
See control locations as indicated on the next few pages.
CONTROL LOCATIONS
E7
FRONT VIEW
WIRELESS
MICROPHONE
SIDE VIEW
ENGLISH
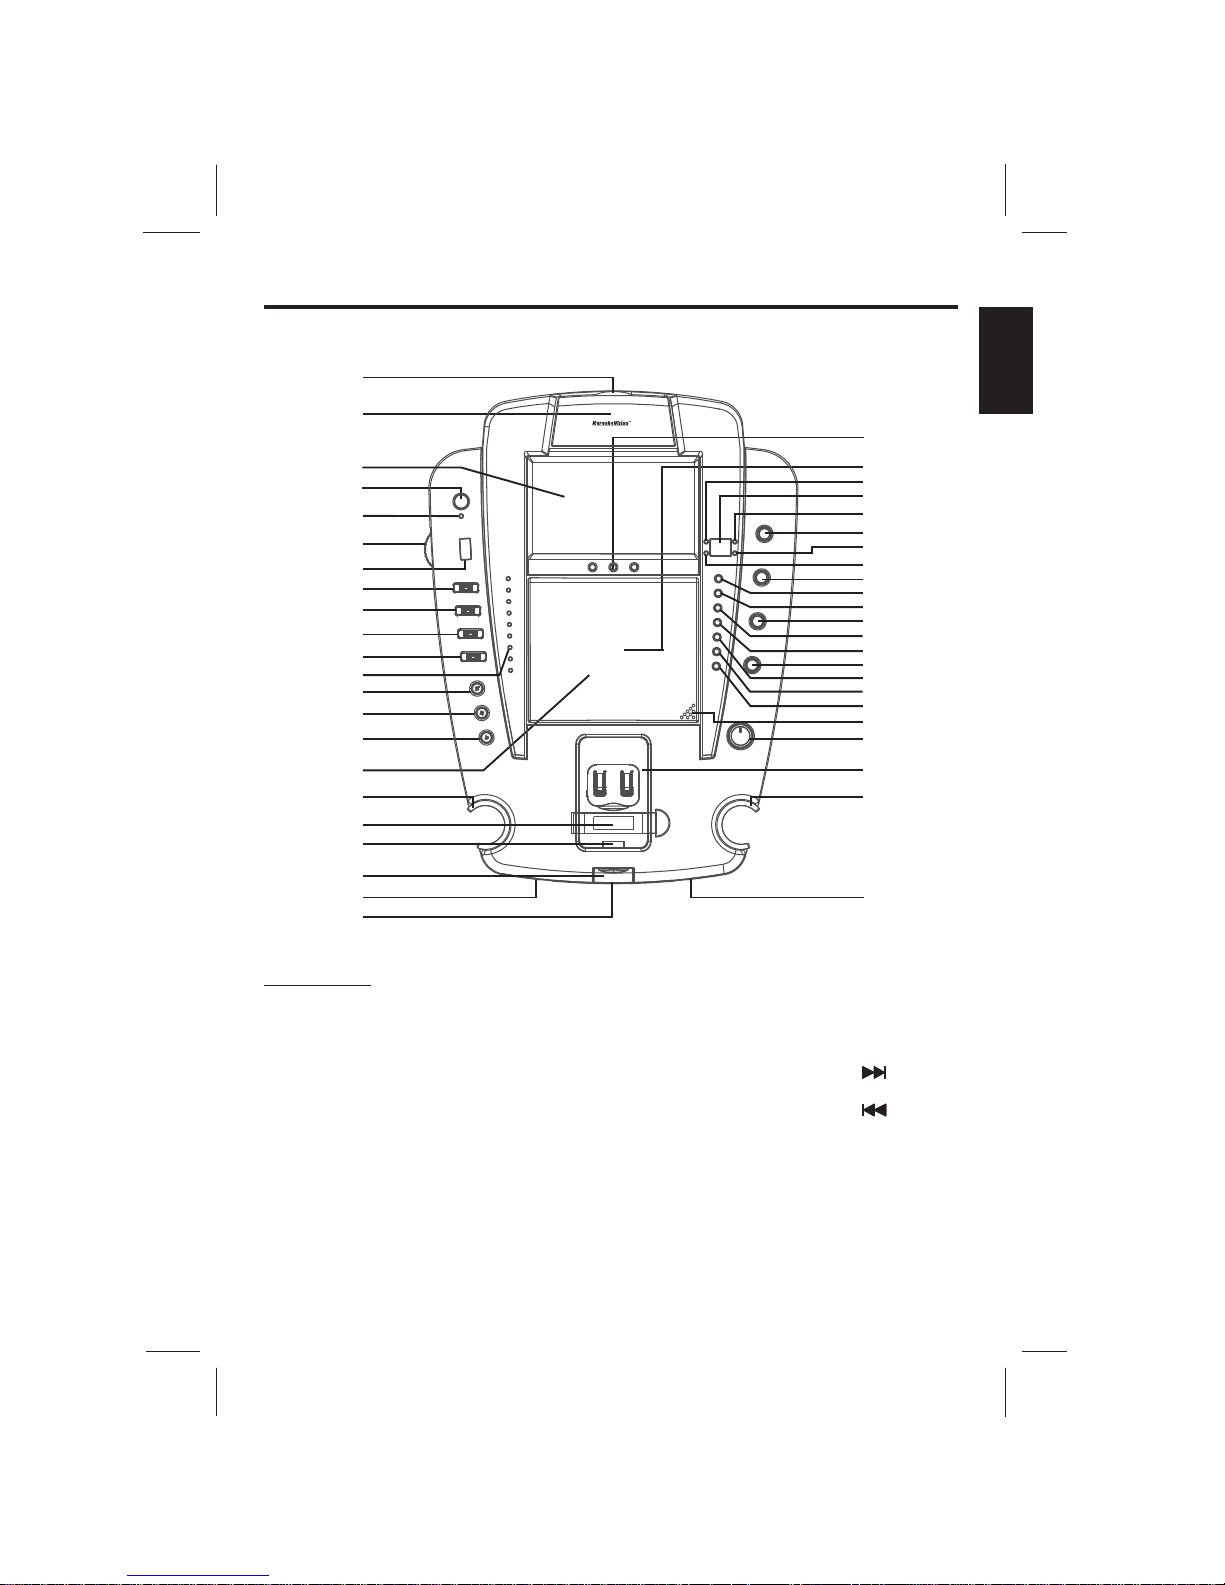
CONTROL LOCATIONS
FRONT VIEW
1.Camera Lens Open 16.CD Door32.REPEAT Button
Button17.MIC Holder33.PROGRAM Button
2.Adjustable Camera Lens18. Release iPod Buckle 34.AUTO VOICE CONTROL
19.iPod Docking Station35.RANDOM Button
3.7" TFT LCD Color Screen
36.SKIP Button
20. iPod dock Releaser
4.ON/OFF Button
37.BALANCE Control
5.ON/OFF LED21.MIC 1 Jack
38.SKIP Button
6.TUNING Knob22.HEADPHONE Jack
39.STOP Button
7.Dial Pointer23.LCD ADJ. Buttons
40.PLAY/PAUSE Button
8.BAND Selector 24.Model Number
41.OPEN/CLOSE Point
9.Monitor Selector25.PROGRAM LED
42.MASTER VOLUME
10.Video Out Selector26.LED Display
Control
11.Function Selector 27.PLAY/PAUSE LED
43.iPod Compartment
12.Key Control LEDs28.MIC VOLUME Control
44.MIC Holder
13.Key High29.CDG LED
45.MIC 2 Jack
14.Key Flat30.REPEAT LED
15.Key Low31.ECHO Control
E8
1
2
4
5
6
7
8
9
10
11
12
14
15
16
17
21
22
23
24
25
27
28
29
31
32
33
34
35
36
37
38
39
40
41
43
44
45
iSM-1010
13
26
30
3
18
19
20
42
ENGLISH
 Loading...