

Page 1
SMB-635
PORTABLE CD PLAYER
WITH STEREO RADIO
CASSETTE RECORDER
Instruction Manual
Please read before using this unit.
Page 2
PRECAUTIONS
Please take go od note of the following instructions :
The unit must be connected to the power voltage
which is the same as the local area. If not, there
is a danger of "burning " the unit that causes a
fire.
Do not expose to th e temperature higher than
O
35
C.
Avoid installation near heaters or in areas
subjected to direct sunlight.
Ensure good air circulation.
Protect the unit from dust, moisture and water.
Avoid strong magnetic f ields, e.g. near TVs or
Speakers for other units.
Avoid using strong chemical agents to clean.
Do not grease or oil components, running
mechan isms, etc. The CD player is designed to
be main tenanc e free.
Take the unit to approved service point for
servicing.
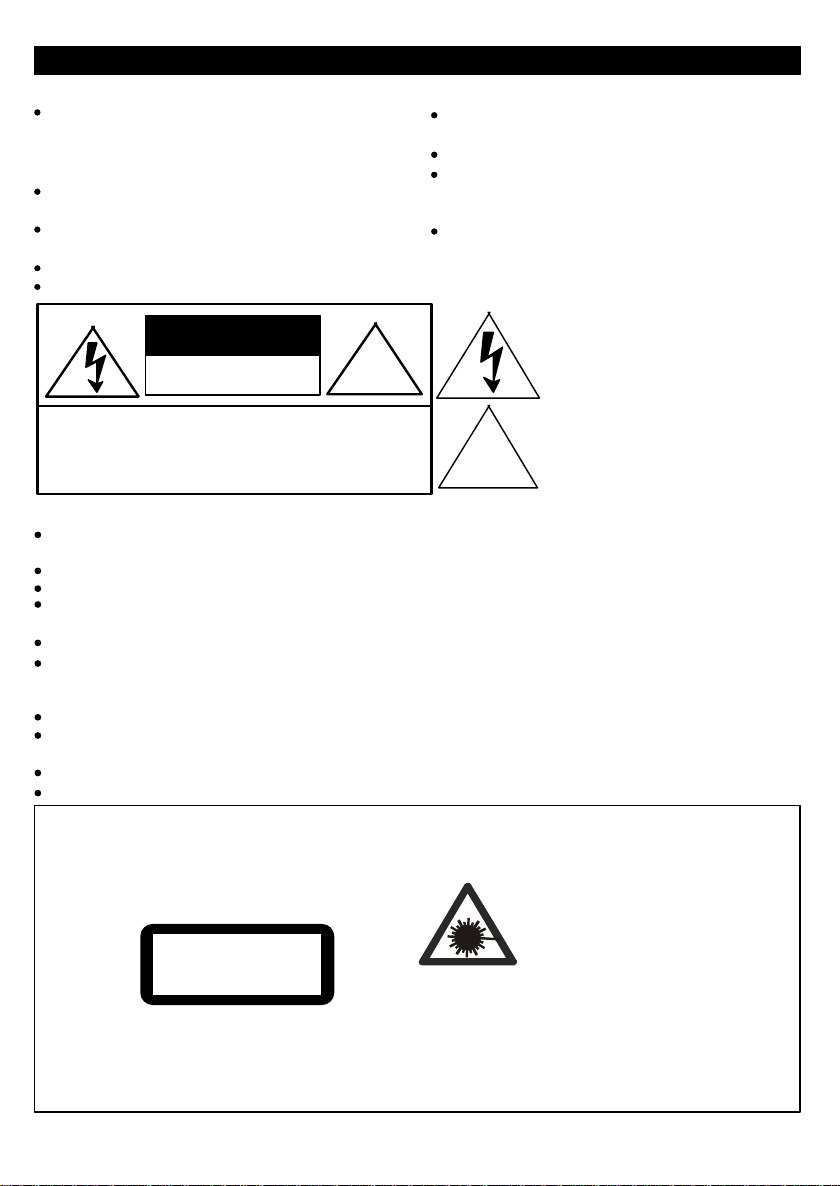
CAUTION
RISK OF ELECTRIC SHOCK
DO NOT OPEN
CAUTION: TO REDUCE THE RISK OF ELECTRIC SHOCK,
REFER SERVICING TO QUALIFIED SERVICE PERSONNEL
CAUTION:
The product shall not be exposed to dripp ing or splashing and that no object s filled with liquids, such as
vases, shall be placed on the product.
The normal ventilation of the product shall no t be impeded for intended use.
Do naked flame sources, such as lighted candles, should be place on the apparatus.
The ventilation should not be impeded by covering the ventilat ion open ings with items, such as
newspapers, table-cloths, curtains, etc.
Do not place the product in close d bookcases or racks witho ut proper ventilation.
Where the mains plug or an appliance coupl er is used as the disconnect device , the disconnect device
shall remain re adily operable. (for example: main plug is used as the connection , so it should always
remain ready operate.)
Minimum distances around the apparatus for sufficient ventilation;
Before scrapping the appliance, remove the batteries and place them in the appropriate battery
collec tion container.
Batteries (battery pack or batteries installed) shall no excessive heat such as sunshine, fire or the like.
Excess ive soun d pressure from earphones and head hearing loss.
CAUTION
CLASS 1 LASER PRODUCT
Use of C ontrols or adjustments or perf ormance
of procedures other than those specified herein
may result in hazardous radiation exposure.
CAUTION
CLEANING:
DO NOT REMOVE COVER.
NO USER-SERVICEABLE PARTS INSIDE.
CLASS 1 LASER PRODUCT
LUOKAN 1 LASERLAITE
KLASS 1 LASERAPPARAT
Always disconnect unit from power supply before attempting to clean it.
Use soft cloth mo istened with soapy water , w ipe gently.
Do not use solvents or abrasive materials.
!
!
LASER SAFETY
This unit employs a laser. Only qualified service
personnel should attempt repair.
This symbol indicates that
dangerous voltage const ituting a
risk of elec tr i c sh oc k is pr es e nt
within this unit.
This s ymbol indicates that there are
important operating and
mainte na nc e instruc tions in th e
literature accompanying this unit.
DANGER: INVISIBLE LASER
RADIATION WHEN OPEN AND
INTERLOCK FAILED OR
DEFEATED. AVOID DIRECT
EXPOSURE TO BEAM.
CAUTION: HAZARDOUS LASER
RADIATION WHEN OPEN AND
INTERLOCK DEFEATED.
1
1
Page 3

SOME DO'S AND DON'TS ON THE SAFE USE OF EQUIPMEN T
This equipment has been designed and manufactured to meet s afety standards but like any electrical
equipm ent, care must be taken if you are to obtain the best results and safety is to be assured.
DO read the operating in structions before you attempt to use the equipment.
DO ensure that al l electrical connections ( including the mains plug, ext ension leads an d interconnections
between piece of equipment ) are properly made in accordance with the supplied instructio ns. Switch off
and withdraw the mains pl ug when making or cha nging connections.
DO consult your dealer if you are ever in doubt about the installation, operation, or safety of your equipment.
DO be careful with glass panels or doors on equipment.
DON'T co ntinue to operate the equipment if you are in any doubt about it working normally, or if it is
damaged , in any wa y - switch off, withdraw the mains plug and consult your dealer.
DON'T remove any fixed cover as this may expose dan gerous voltages.
DON'T le ave equipment switched on when it is unat tended unless it is specifically stated that it is designed
for unattended operation or has a standb y mode. Switch off using the switch on the equipment and make
sure that your family knows how to do this. Special arrangements may need to be made for infirm or
handicapped people.
DON'T listen to headphones at high volume, as such use can permanently damage your hearing.
DON'T obstruct the ventilation of the equipment, for example with curtains or soft furnishings. Overheating
will cause damage and sho rten the life of the equipment.
DON'T allow electrical equipment to be expos ed to rain or moisture.
Above all
NEVER let anyone, especially children, push anything into holes, slots or any other openings in the
case. This could result in a fatal electric shock.
NEVER guess or take chances with electrical equipment of an y kind.
It is better to be safe than sorry!
Note : If energy saving lamps (Fluorescent) are used in the
same room as the unit, erratic operation may occur.
You can help prote c t the environment!
Please remember to respect the loca l regulations: hand in t he non-working electri c al
equipme nts to an appropr iate wast e dispo s al center.
2
Page 4

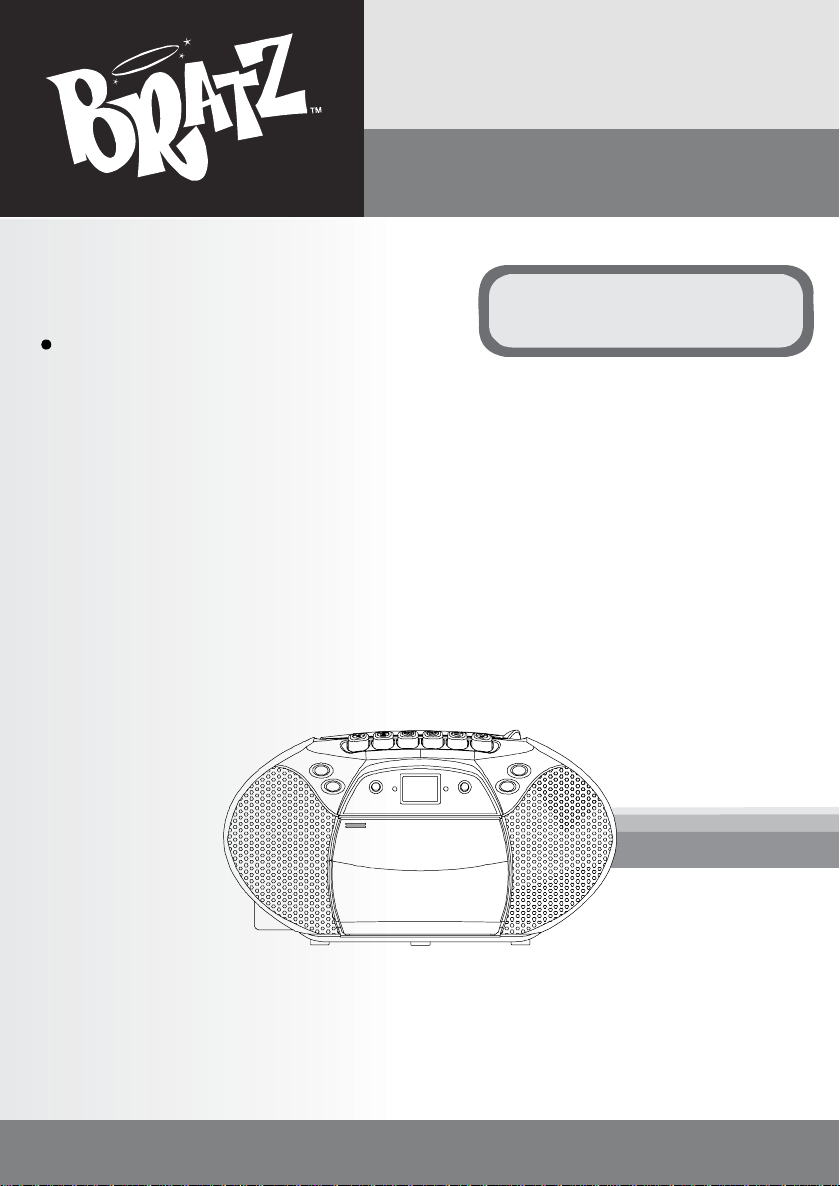
LOCATION OF CONTROLS
TOP VIEW
1. FUNCTION Switch (CD/FM/AM/TAPE(OFF))
2. CD Door
3. FM Rod Antenna
4. Handle
5. Dial Scale Indicator
6. Tuning Control
7. Volume Control
8. CD Door OPEN lid
9. Cassette Control Buttons
FRONT VIEW
10. CD SKIP BACK Button
11. CD SKIP NEXT Button
12. CD REPEAT Button
13. POWER ON LED Indicator
14. FM S T . L ED Indica to r
15. CD PROG/MEM Button
16. CD PLAY/PAUSE Button
17. CD STOP Button
18. Loudspeakers
19. Cassette Door/Compartmen t
20. CD Track Display
1
2
10
3 4 5
9
111213
141516
8
17
7
6
BACK VIEW
21. AC Input socket
22. Stereo Headphone Jack
23. Battery Door/Compartment
1818 1920
21 2322
3
Page 5

INTRODUCTION
Please read these instructions carefully before using this product and retain them in a
safe place for future reference.
POWER SUPPLY
This Product can be powered by either AC240V~50H z Mains supply or by 6 R14 (C size)
Alkaline batteries.
AC OPERATION
Remove the AC cord which is packed inside the produc t.
1.
Connect the cord to the AC input socket.
2.
Connect the mains plug to a household AC socke t.
3.
BATTERY OPERATION
Insert 6 R14 (C-size) batteries (not supplied) Alkaline type recommended into the battery
1.
compartment observing the corre ct polar ity as indicated .
Ensure compartment cover is secu rely fitted.
2.
Product will only function from batteries once the AC cord is removed from the unit.
3.
When replacing flat batteries, ensure all batteries are replaced at the same time with the
4.
same type.
5.
If the product is not to be used for an extended period of time the batteries should be
removed to prevent any possible damage to the produc t.
USING THE RADIO
Switch the FUNCTION selector to either FM or AM as required.
1.
FM BAND
If FM is selected ensure the telescopic antenna is fully extended and positioned vertically.
2.
Turn the TUNING control until the desired station is located.
3.
If the station is broa dcas ting in stereo, the stereo in d ic a to r will illuminate. To liste n to a
4.
broadcast in stereo.
5.
To achieve optimum reception adjust the position of the telescopic ant enna.
AM BAND
For AM reception the product has a built-in antenna, to achieve best reception the
6.
product should be rotated, until the strongest signal is obtained.
GENERAL
Once the required station has been located, adjust the VOLUME control to the desired levels.
7.
USING THE CASSETTE
NORMAL PLAYBACK
Switch the function selector to TAPE.
1.
Press the STOP/EJECT key to open the cassette compartment and insert a prerecorded
2.
tape, with the exposed portion of the tape upwards and the full spool on the right Gently
push the door to close.
3.
Press the PLAY key to start playbac k.
Adjust the VOLUME control to the desire d leve ls.
4.
To briefly suspend playback press the PAU SE key, releasi ng it resu mes playback.
5.
To advance or rewind the tape rapidly use the FAST FORWAR D or REWI ND key s.
6.
To stop playback press the STOP/EJECT key, press it fully down to eject the cassette.
7.
Note: When the cassette reaches it's end during playback or recording, the
mechanism will stop and the keys return to their normal positions.
4
Page 6

RECORDING
Please note Chrome or Metal tapes are not recommended for use in this product.
1.
Select desired function (CD or AM/FM) or TAPE for voice recording via internal condenser
microphone.
2.
Insert a blank tape with recording tabs intact into the cassette compar tmen t.
3.
Operate the desired function and select the material to be recorded.
4.
Press the RECORD key, the PLAY key will automati cally engage.
5.
The product has a built-in ALC circuit which automatically adjusts the recor d level for quality
recording.
6.
To temporarily stop or edit the recording press the PAUSE button.
To stop recording press the STOP/EJECT button.
7.
RECORDING FROM CD
1.
Set the Function Selector to the CD position.
2.
Press the Record Key and the Play Key at the same time .
3.
Press the CD Play/Pause button.
4.
To stop recording, press the Stop button of CD player. Then press the Stop/Eject key
of the cassette deck.
USING THE CD PLAYER
Switch the function selector to CD.
1.
2.
Press the CD OPEN button to open the CD door and insert a disc with the label
facing uppermost . Close the lid. (Ensure the disc is correct ly mounted on the spindle
and locked in place)
After a few seconds, the product will scan the disc and the display w ill show the total
3.
number of tracks on the disc. If the disc is incorrectly inserted or defecti ve the display
will show "--".
Press PLAY/PAUSE button to start playback, then adjust the VOLUME control to
4.
desired levels. Current track being played w ill be shown in the disp lay.
To temporarily pause playback press the PLAY/PAU SE but ton, the play indic ator
5.
flashes in the display. To resume playback press this button again.
To stop playback press the STOP button. The display will show the total number of
6.
tracks on the display. This remai ns in the display until either the disc is rem oved or
another function is selected.
To skip up or down tracks on the disc use either ">>I or I<<" skip button.
7.
Note: CD-R/CD-RW can be playable.
REPEAT PLAY
1.
To repeat the track currently being played press the REPEAT button once. "REP." will
show in the display.
To repeat the entire disc (continuous play) press the REPEAT button twice. "REP. A" will
2.
show in the display.
To return to normal play mode press REPEAT button until "REP. A" disappears from the
3.
display.
5
Page 7

PROGRAMMED PLAY
Up to 20 tracks can be programmed for playback in any desired order .
Ensure CD is in the stop mode.
1.
2.
Press the PROG/MEM button, "PROG " and "00" will show in the display and flash.
Using the SKIP buttons >>I or I<< select the first track to be memorized.
3.
4.
Press the PROG/MEM button. This track is now placed in the memory.
Repeat the above process up to a maximum of 20 tracks. If more than 20 tracks ar e
5.
entered, "PROG" and " - - " will flash in the display to indicate the program is full and no
further tracks should be entered.
6.
To play the programmed selection, press the PL AY/PAU SE button.
7.
To cancel Programmed play and resume normal playback, press the STOP button at
program mode.
The selected programmed track is deleted from the program when either the CD lid is
8.
opened or another function is selected Tape, Radio etc.
9.
This function can also be used when making a recording from CD.
10.
To recall the programmed selection (providing the CD door has not been opened or
another function selected) press PRO G/M EM button twice.
CARE AND MAINTENANCE (CD PLAYER)
Treat the disc carefully. Handle the disc only by its edges. Never allow your fingers to contact
with th e shiny, unprinted side of the disc.
Do not attach adhesive tape, stickers etc., to the disc label.
Clean the disc periodically with soft, lint-free, dry cloth. Never use detergents or adhesive
cleane rs to clean the disc. If necessary, use a CD cleaning kit.
If disc skips or gets stuck on a section of the disc, it is probably dirty or damaged (scratched).
When cleaning the disc, wipe in straight li nes from the centre of the disc to the edge of the disc.
Never wipe in circular motions.
To remo v e a di sc fr om its s tor age case , p ress dow n on the c en tre of th e cas e an d l ift th e d isc
out, holding it carefully by the edges.
Fingerprints and dust should be carefully wiped off the disc's recorded surface with a soft cloth.
Unlike conve ntional recor ds. compact dis c has no groove to collect dust and mi croscopic
debris, so gentl y wiping with a soft cloth should remo ve most particles .
POWER SUPPLY
AC:
Batteries:
RADIO FREQUENCY COVERAGE
FM:
AM (MW):
AC240V ~ 50Hz
DC 9V
6 x R14 or equivalent
88 - 108MHz
530 - 1600KHz
SPECIFICATION
RECORDI NG SYSTEM
Recording Sys t em:
Eras ing System:
GENERAL
Speaker:
CD PLAYER
Pick Up:
Encoding:
6
DC Bias
Magnet Erase
8 Ohms
3-Beam, Semiconductor Laser
1 Bit DA Convertor
8 Time Oversampling
Page 8

GUARANTEE
WHAT’S COVERED
H.E. Group Pty Ltd guarantees the BRATZ Boom Box CD Player for a full replacement for a
period of 12 months from the date of purchase, which is only valid with the presentation of the
original proof of purchase receipt. This guarantee cover s materia ls and workm anshi p defect s only.
WHAT IS NOT COVERED
This guarantee does not apply to defects arising from abuse, alteration or unreasonable use of the
product. In addition, it does not cover general deterioration due to usage.
This guarantee does not apply to the accessories, due to general wear and tear.
WHAT H.E. GROUP PTY LTD WILL DO
H.E. Group Pty Ltd wil l replace the product , if a defect is discover ed whilst under the guaranteed
period, subject to verification of defect or malfunction , date and proof of purchase.
CUSTOMER CARE
All enquiries may be directed to our toll free customer service number:
1800 079 124 or via email info@hegroup.com.au
www.bratz.com
C
TM & MGA Entertainment,Inc.
All Right Reserved. Used under license by
The Singing Machine C o., Inc.
The Singing Machine Company, Inc.
6601 Lyons Road, Bldg. A7, Coconut Creek, FL33073-9902, USA.
TEL: (954) 596-1000 FAX: (954)596-2000
VISIT OUR WEBSITE www.singingmachine.com
635-0706-ENG01
PRINTE D IN CHINA
 Loading...