

The Singing Machine SDL9030DB Instruction Manual
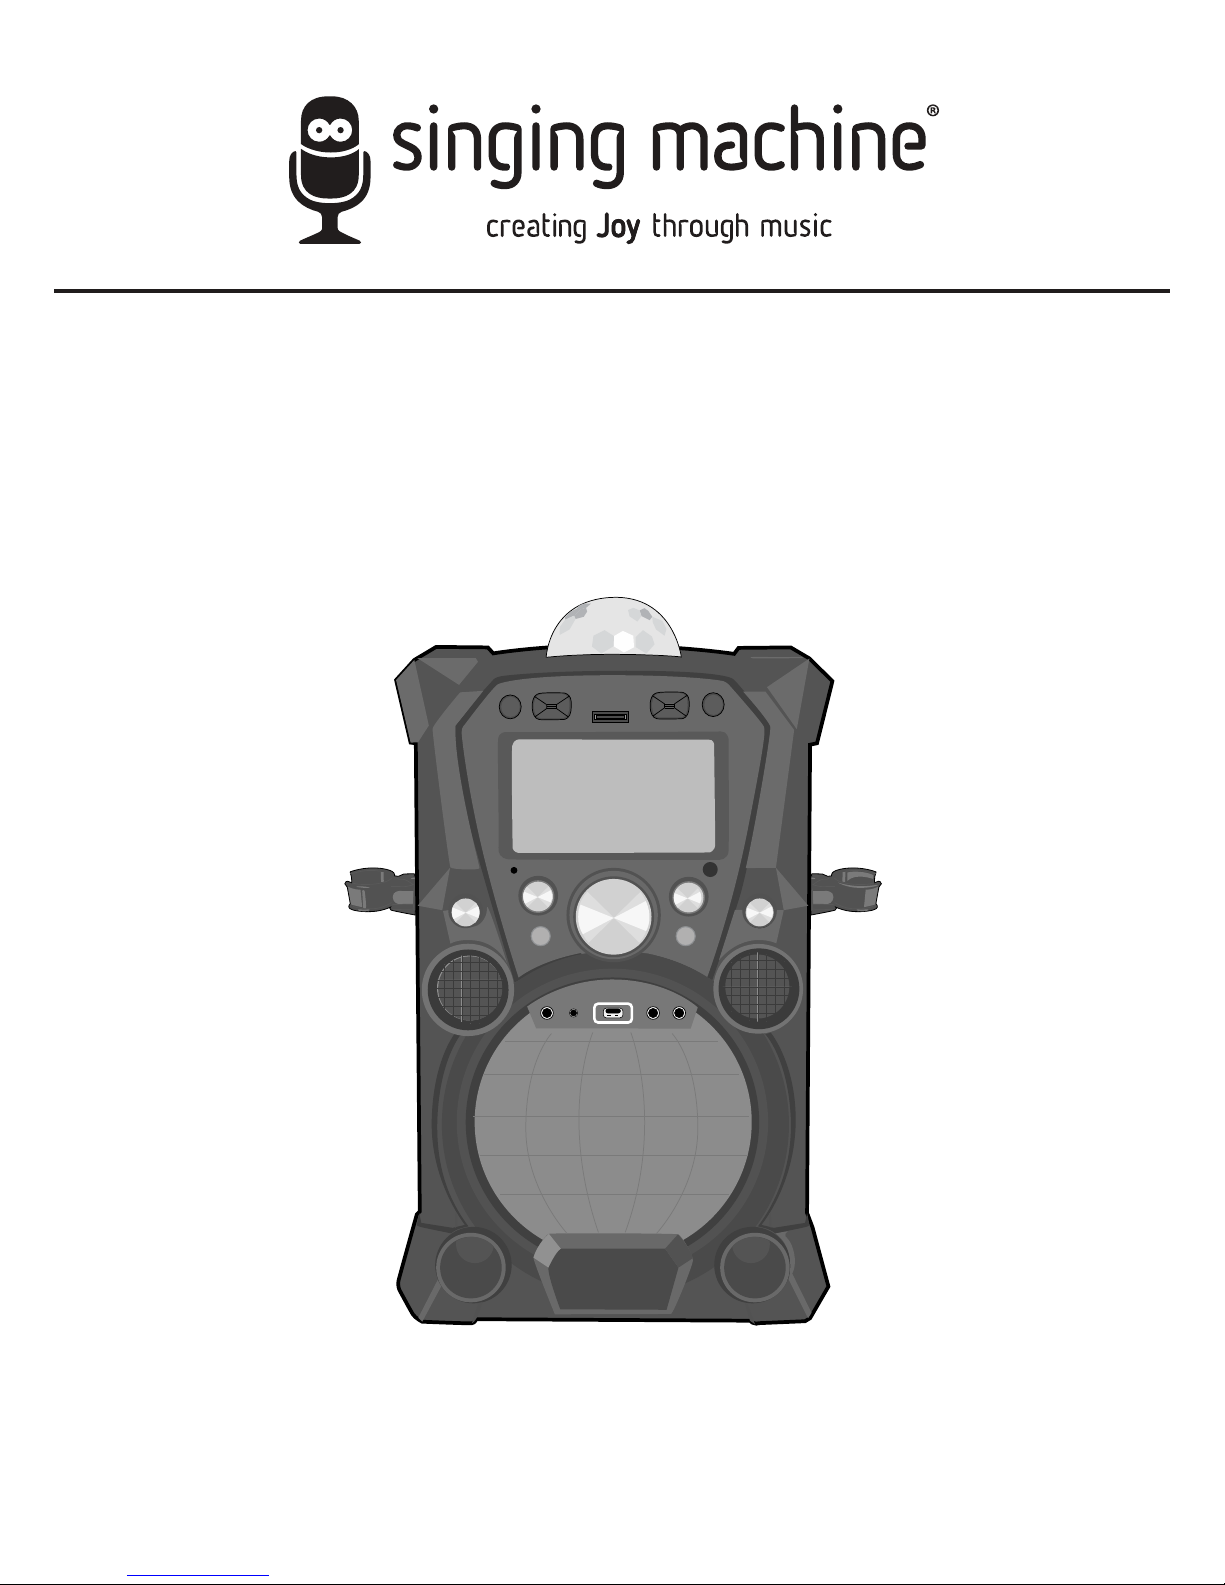
SDL9030DB
INSTRUCTION MANUAL
www.singingmachine.com
The Singing Machine® is a registered trademark of The Singing Machine Co., Inc.
— 1 —
Warnings
CAUTION: TO REDUCE THE RISK OF ELECTRIC SHOCK, DO NOT
REMOVE COVER (OR BACK). NO USER-SERVICEABLE PARTS
INSIDE. REFER SERVICING TO QUALIFIED SERVICE PERSONNEL.
The Caution marking is located on the bottom panel.
DANGEROUS VOLTAGE: The lightning flash with arrowhead
symbol within an equilateral triangle is intended to alert the
user to the presence of uninsulated dangerous voltage within
the product’s enclosure that may be of sufficient magnitude to
constitute a risk of electric shock to persons.
CAUTION: TO PREVENT ELECTRIC SHOCK, MATCH WIDE BLADE OF
PLUG TO WIDE SLOT AND FULLY INSERT.
WARNING: TO PREVENT FIRE OR SHOCK HAZARD, DO NOT EXPOSE
THIS UNIT TO RAIN OR MOISTURE.
ATTENTION: The exclamation point within an equilateral
triangle is intended to alert the user to the presence of
important operating and maintenance (servicing) instructions
in the literature accompanying this product.
FCC WARNING: This equipment may generate or use radio frequency
energy. Changes or modifications to this equipment may cause harmful
interference unless the modifications are expressly approved in the
instruction manual. The user could lose the authority to operate this
equipment if an unauthorized change or modification is made.
This device complies with part 15 of the FCC Rules. Operation is subject
to the following two conditions: (1) This device may not cause harmful
interference, and (2) this device must accept any interference received,
including interference that may cause undesired operation.
INDUSTRY CANADA NOTICE:
This device complies with Industry Canada Iicense-exempt RSS standard(s).
Operation is subject to the following two conditions:
1. This device may not cause interference, and
2. This device must accept any interference, including interference that
may cause undesired operation of the device.
DRIPPING WARNING: This product shall not be exposed to dripping or
splashing, and no objects filled with liquids, such as vases, shall be placed
on the product.
VENTILATION WARNING: The normal ventilation of the product shall not be
impeded for intended use.
SAFETY VERIFICATION: This device is made and tested to meet safety
standards of the FCC, requirements and compliance with safety
performance of the U.S. Department of Health and Human Services and
also with FDA Radiation Performance Standards 21 CFR Subchapter.
NOTE: This equipment has been tested and found to comply with the
limits for a Class B digital device, pursuant to part 15 of the FCC Rules.
These limits are designed to provide reasonable protection against harmful
interference in a residential installation. This equipment generates, uses
and can radiate radio frequency energy and, if not installed and used in
accordance with the instructions, may cause harmful interference to radio
communications. However, there is no guarantee that interference will
not occur in a particular installation. If this equipment does cause harmful
interference to radio or television reception, which can be determined by
turning the equipment off and on, the user is encouraged to try to correct
the interference by one or more of the following measures:
• Reorient or relocate the receiving antenna.
• Increase the separation between the equipment and receiver.
• Connect the equipment into an outlet on a circuit different from that to
which the receiver is connected.
• Consult the dealer or an experienced radio/TV technician for help.
• The rating information is located at the bottom of the unit.
Important Safety Information
1. Read these Instructions.
2. Keep these Instructions.
3. Heed all Warnings.
4. Follow all Instructions.
5. Do not use this apparatus near water.
6. Clean only with a dry cloth.
7. Do not block any of the ventilation openings. Install in
accordance with the Manufacturer’s instructions.
8. Do not install near any heat sources such as radiators, heat
registers, stoves, or other apparatus (including amplifiers) that
produce heat.
9. Do not defeat the safety purpose of the polarized or groundingtype plug. A polarized plug has two blades with one wider than
the other. A grounding type plug has two blades and a third
grounding prong. The wide blade or the third prong are provided
for your safety. When the provided plug does not fit into your
outlet, consult an electrician for replacement of the obsolete
outlet.
10. Protect the power cord from being walked on or pinched
particularly at plugs, convenience receptacles, and the point
where they exit from the apparatus.
11. Only use attachments/accessories specified by the
manufacturer.
12. Use only with a cart, stand, tripod, bracket,
or table specified by the manufacturer, or
sold with the apparatus. When a cart is
used, use caution when moving the cart/
apparatus combination to avoid injury
from tip-over.
13. Unplug this apparatus during lightning
storms or when unused for long periods of
time.
14. Refer all servicing to qualified service personnel. Servicing is
required when the apparatus has been damaged in any way,
such as power-supply cord or plug is damaged, liquid has been
spilled or objects have fallen into the apparatus, the apparatus
has been exposed to rain or moisture, does not operate
normally, or has been dropped.
15. WARNING: To reduce the risk of fire or electric shock, do not
expose this apparatus to rain or moisture. Do not place objects
filled with water, such as a vase, on the apparatus.
16. The AC mains plug is used as the power disconnect device
and it should remain readily accessible and operable during
intended use. In order to completely disconnect the apparatus
from power, the mains plug should be completely removed
from the AC outlet socket.
17. CAUTION: To reduce the risk of fire or explosion, do not expose
batteries to excessive heat such as sunshine, fire or other
heat sources.
CAN ICES-3(B)/NMB-3(B)
CAUTION
RISK OF ELECTRIC SHOCK
DO NOT OPEN

— 2 —
Included
Please make sure the following items are included.
HDMI Cable
Main Unit
Singing Machine Flash Drive
AC Adapter
Manual
Wired Interactive Microphone
Wired Microphone
— 3 —
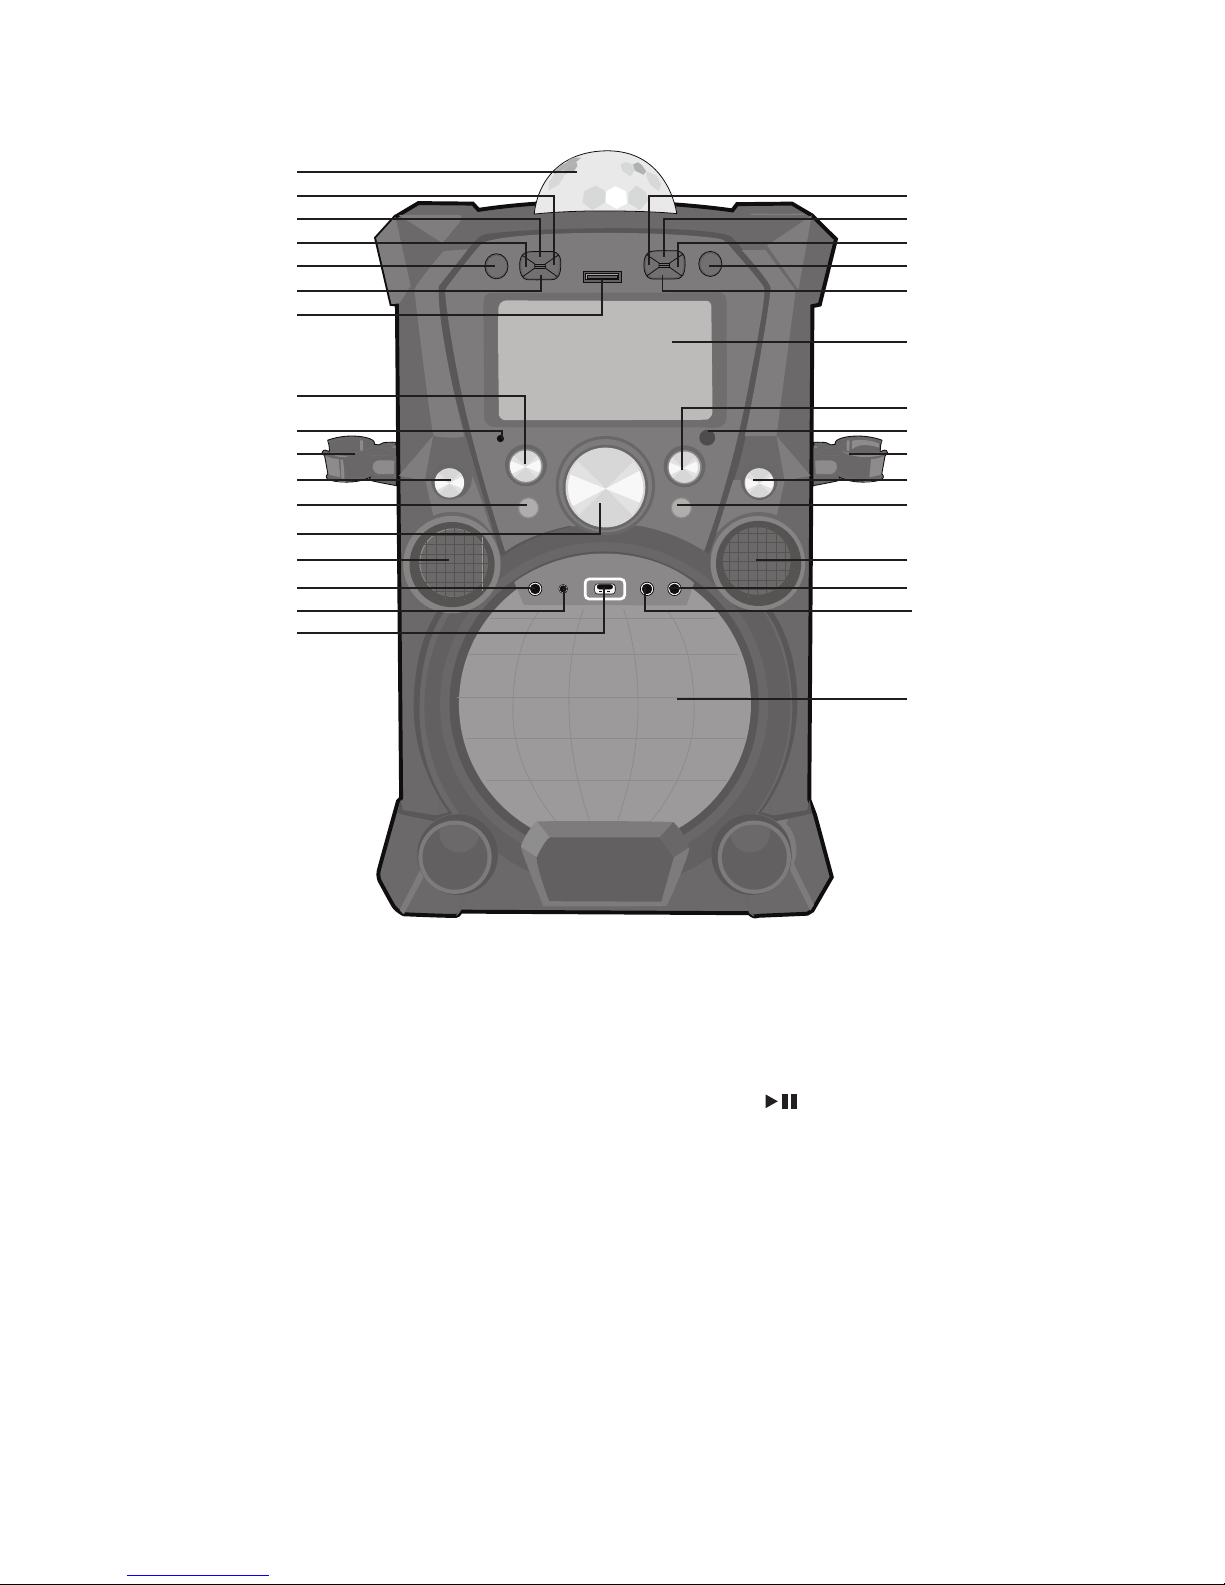
Location of Controls (Top/Front)
1
5
6
7
4
3
2
21
23
22
20
19
18
9
10
11
8
12
15
16
17
14
13
26
27
25
24
28
32
30
31
29
1. Disco Ball
2. MENU Button
3. FUNCTION Button
4. VOCAL/PAIR Button
5. ON/OFF Button
6. RECORD n Button
7. SD Card Slot (for Record only)
8. MIC 1 VOLUME Control
9. Bluetooth Indicator
10. MIC 1 Holder
11. EXTERNAL INPUT VOLUME Control
12. DISCO BALL Button
13. MASTER VOLUME Control
14. Tweeter
15. EXTERNAL INPUT Jack
16. LINE IN Jack
17. SMC USB Slot
18. Navigation LEFT Button
19. Navigation UP 5 Button
20. Navigation RIGHT Button
21. ENTER/ Button
22. Navigation DOWN Button
23. TFT LCD Color Screen
24. MIC 2 VOLUME Control
25. Remote Sensor
26. MIC 2 Holder
27. ECHO Control
28. LIGHT MODE Button
29. Tweeter
30. MIC 2 Jack
31. MIC 1 Jack
32. Speaker/Lights
— 4 —
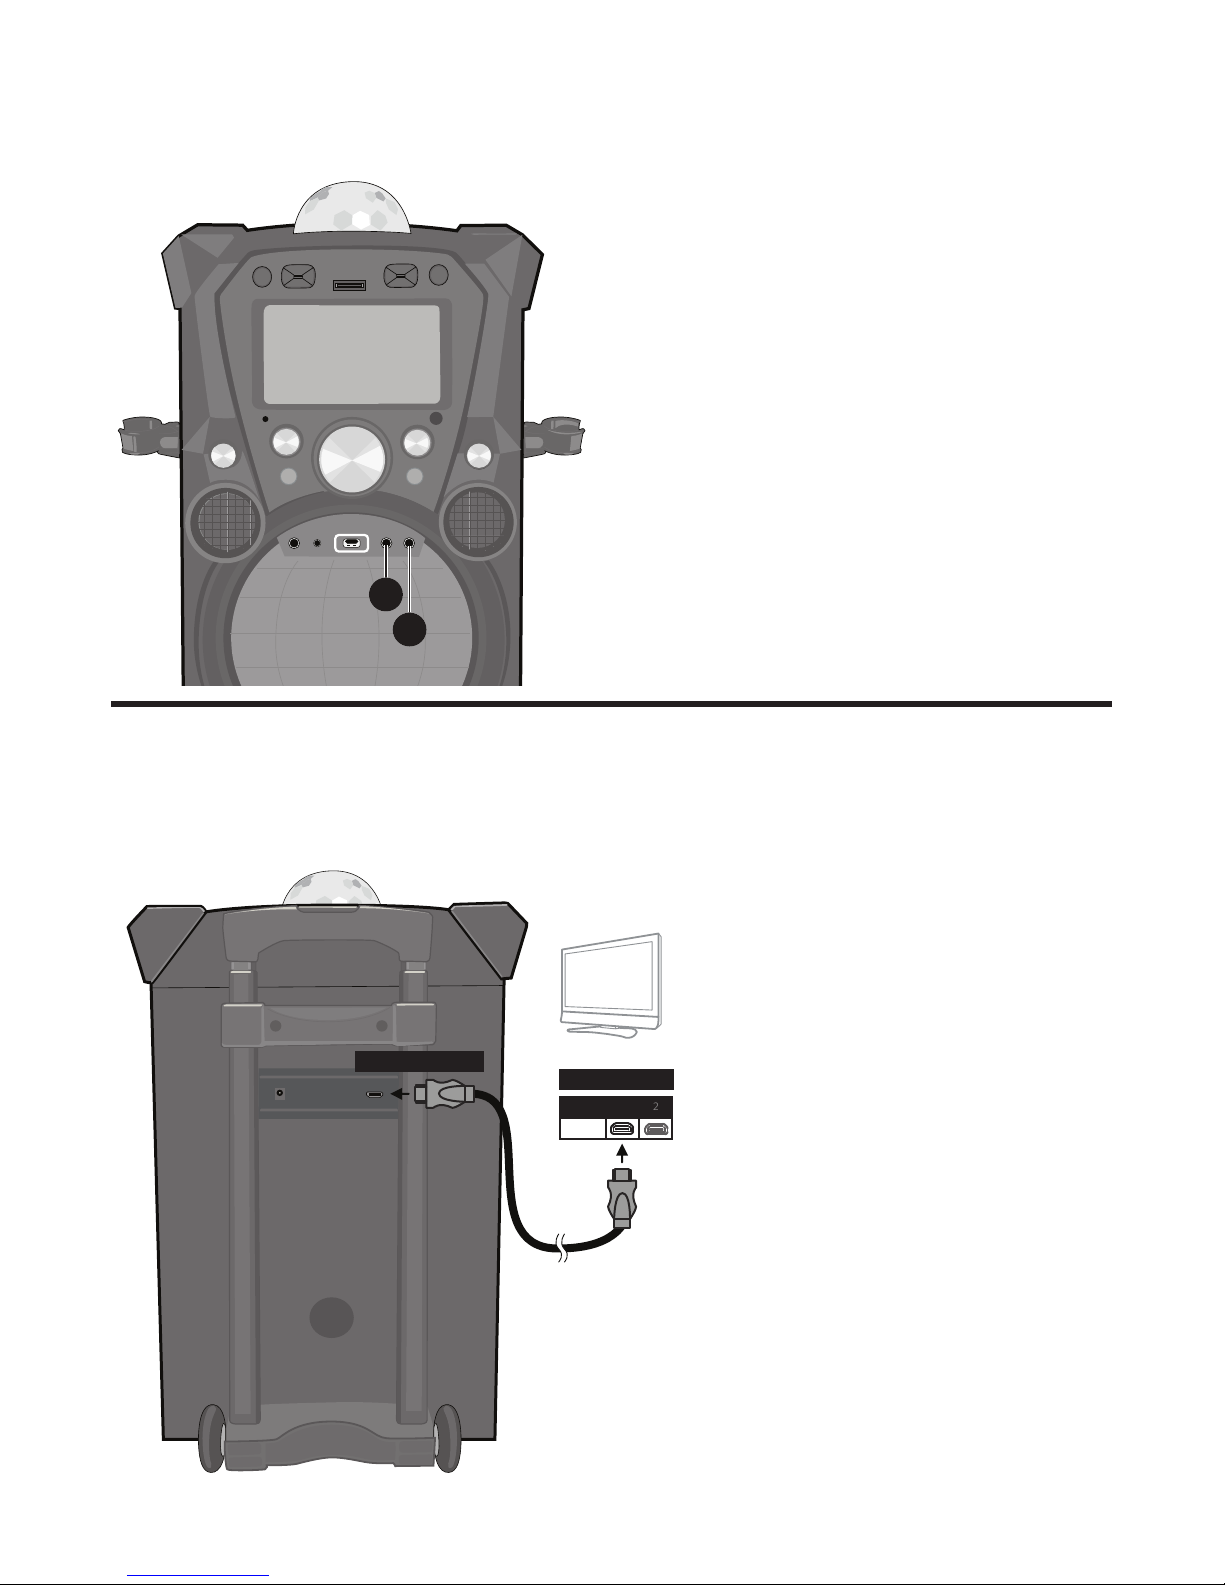
Location of Controls (Rear)
32
1
2
3
4
5
1. Adjustable Handle
2. DC IN Jack
3. Wheels
4. Handle Release
5. HDMI Jack
— 5 —
1
4
32
1
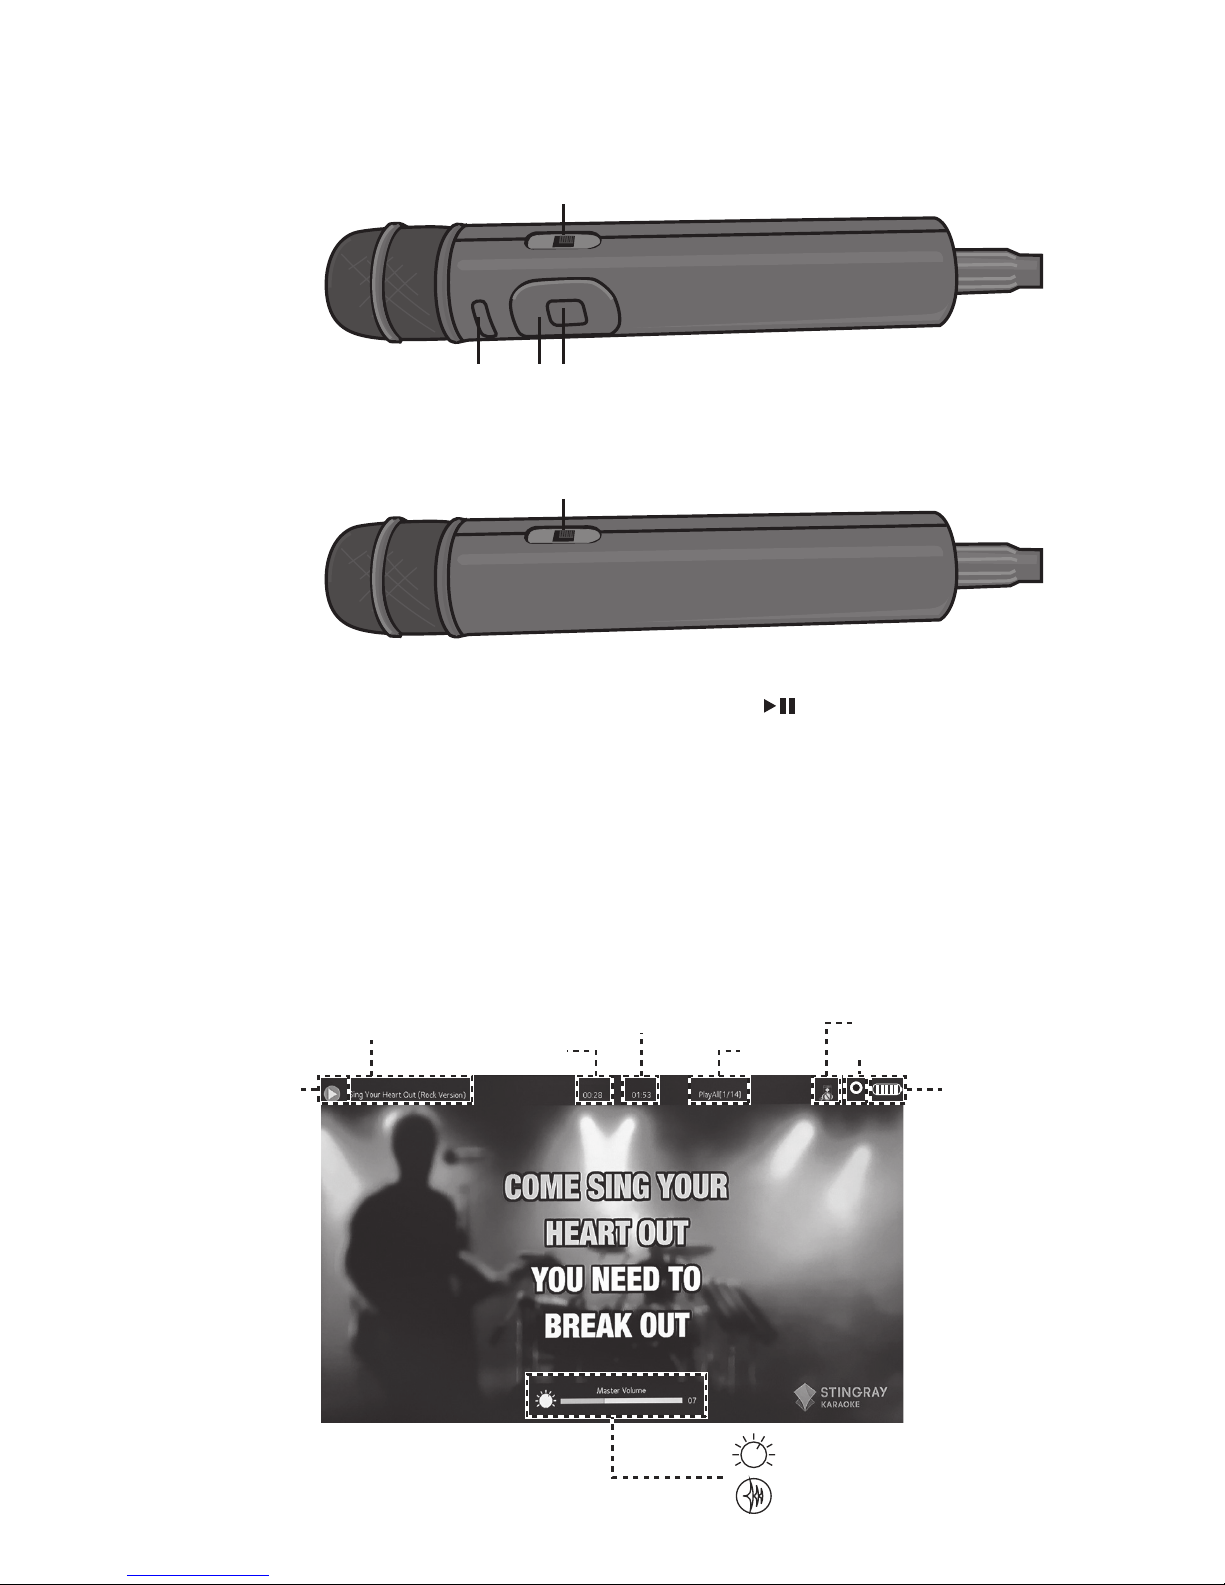
1. Mic ON/OFF Switch
2. MENU Button
3. Navigation Buttons
4. ENTER/ Button
5. Battery Compartment (Rear)
6. Remote Transmitter (Rear)
Location of Controls (Playback Display)
1. Right Tower Speaker Jack 4. HDMI Jack
5. LINE IN Jack2. Left Tower Speaker Jack
3. AC Power Cord
Master Volume: 0-20
Record Status
Battery
Status
Lead Vocal Status
Current
Playlist
Song
Elapsed Time
Echo Control: 0-8
Song
Total Time
Song Title
Playback Status
4
5
2
1
3
Location of Controls (Microphones)
Interactive Microphone
Standard Microphone
— 6 —
Connection
Connecting the Microphone(s)
Microphones:
Connect a microphone into Mic jack 1 u
and the other microphone into Mic jack 2
v (if desired).
Note: Do not drop or tap the Mic as
damage to the Mic or speakers may occur.
Do not twirl the microphone by cord as it
will cause damage to the encased wiring.
1
2
Connection
Connecting the Unit to a TV
HDMI Cable
Rear of External TV
HDMI Jack (Out)
HDMI Jack (In)
HDMI IN 1
2
The video and lyrics will be
displayed on the built-in screen.
You may also want to connect a
TV to display a larger image and
additional sound; follow the steps
below:
Plug the HDMI cable (included)
into the HDMI Jack on the back of
the unit. Plug the other end of the
HDMI cable into the HDMI input
on your TV.
Notes:
• This unit can be used with or
without a TV.
• Also refer to the TV’s or external
unit’s User Guide.
— 7 —
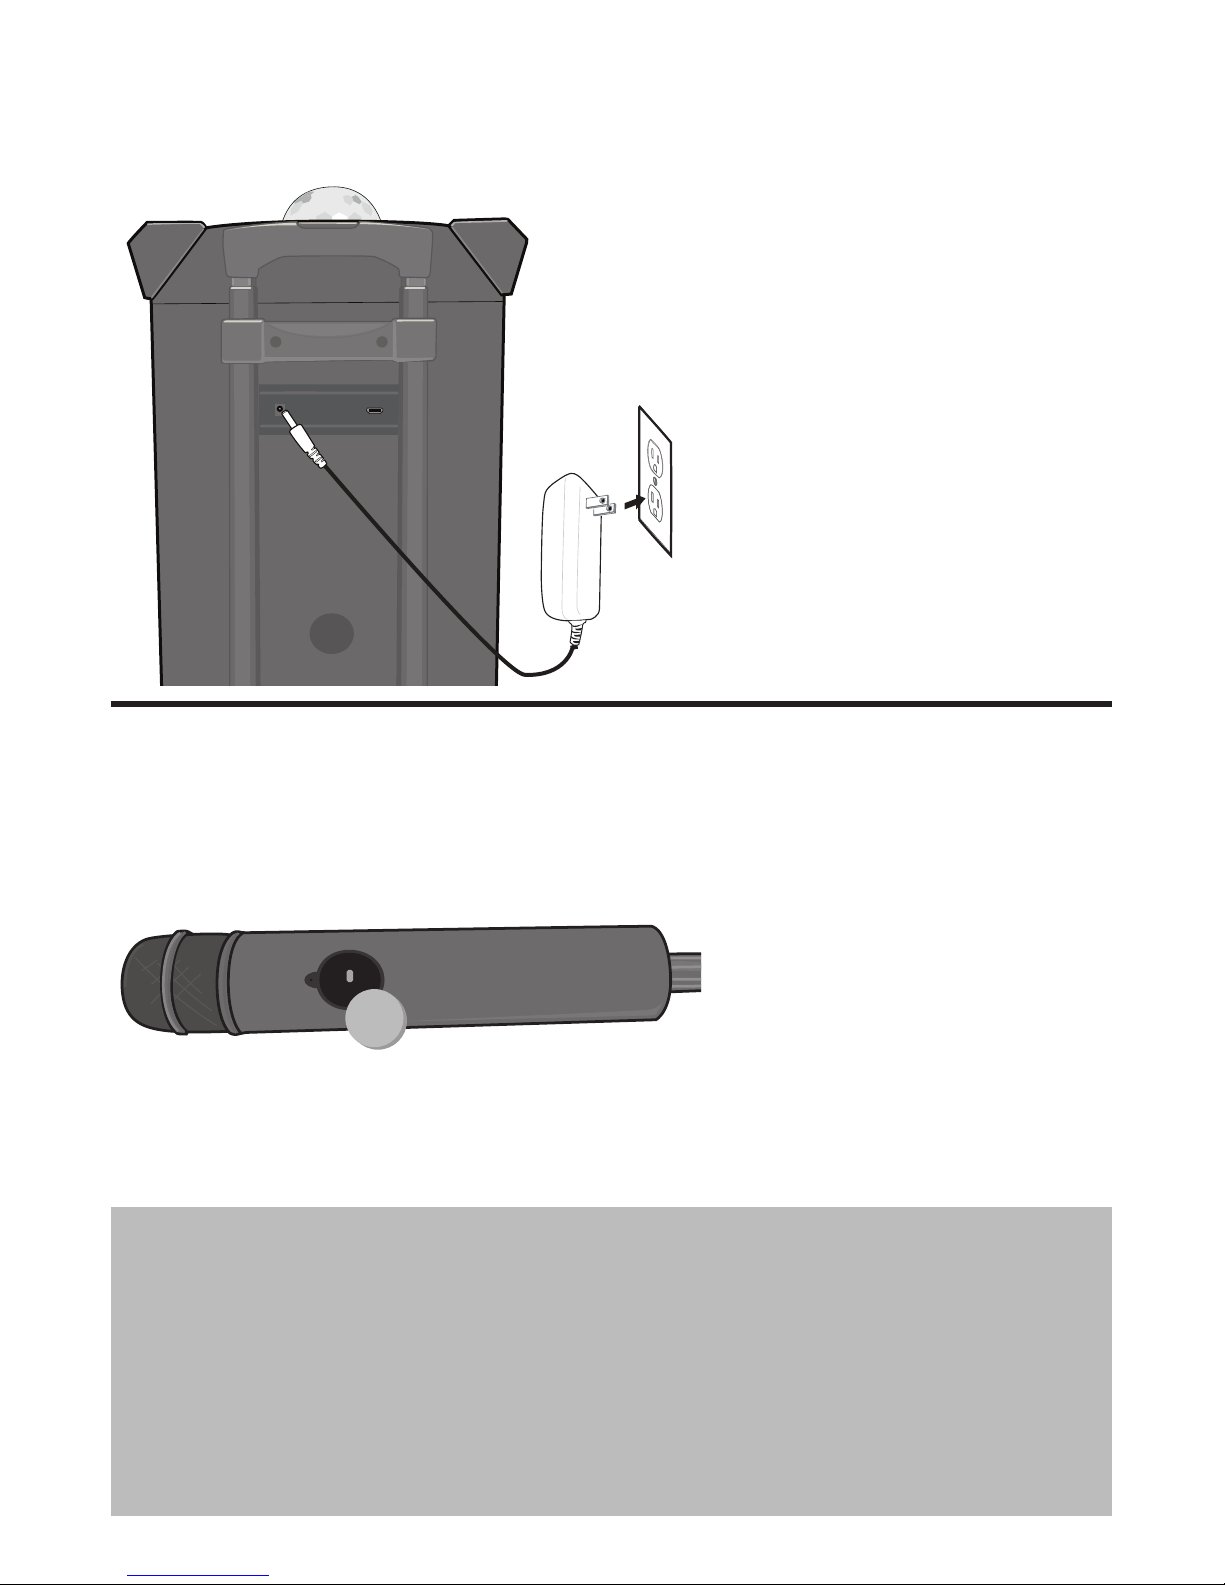
Connection
Connecting to AC Power
Changing the Interactive Microphone’s Battery
1
Insert the AC power cord
into a conveniently located
AC outlet having 120V AC,
60Hz.
Note:
Make all connections before
connecting to AC power.
When performance suffers,
change the batteries as follows:
1
Unscrew the Battery
Compartment screw and
remove the door.
2
Replace battery with
CR2025 button cell battery.
3
Replace Battery
Compartment and screw.
32
CR2025
BATTERY PRECAUTIONS:
Follow these precautions when using batteries in this device:
1. Warning – Danger of explosion if battery is incorrectly replaced. Replace only with the same or equivalent type.
2. Use only the size and type of batteries specified.
3. Be sure to follow the correct polarity when installing the batteries as indicated in the battery compartment. A reversed battery
may cause damage to the device.
4. If the device is not to be used for a long period of time, remove the batteries to prevent damage or injury from possible battery
leakage.
5. Do not try to recharge a battery not intended to be recharged; it can overheat and rupture. (Follow battery manufacturer’s
directions.)
6. Remove batteries promptly if consumed.
— 8 —
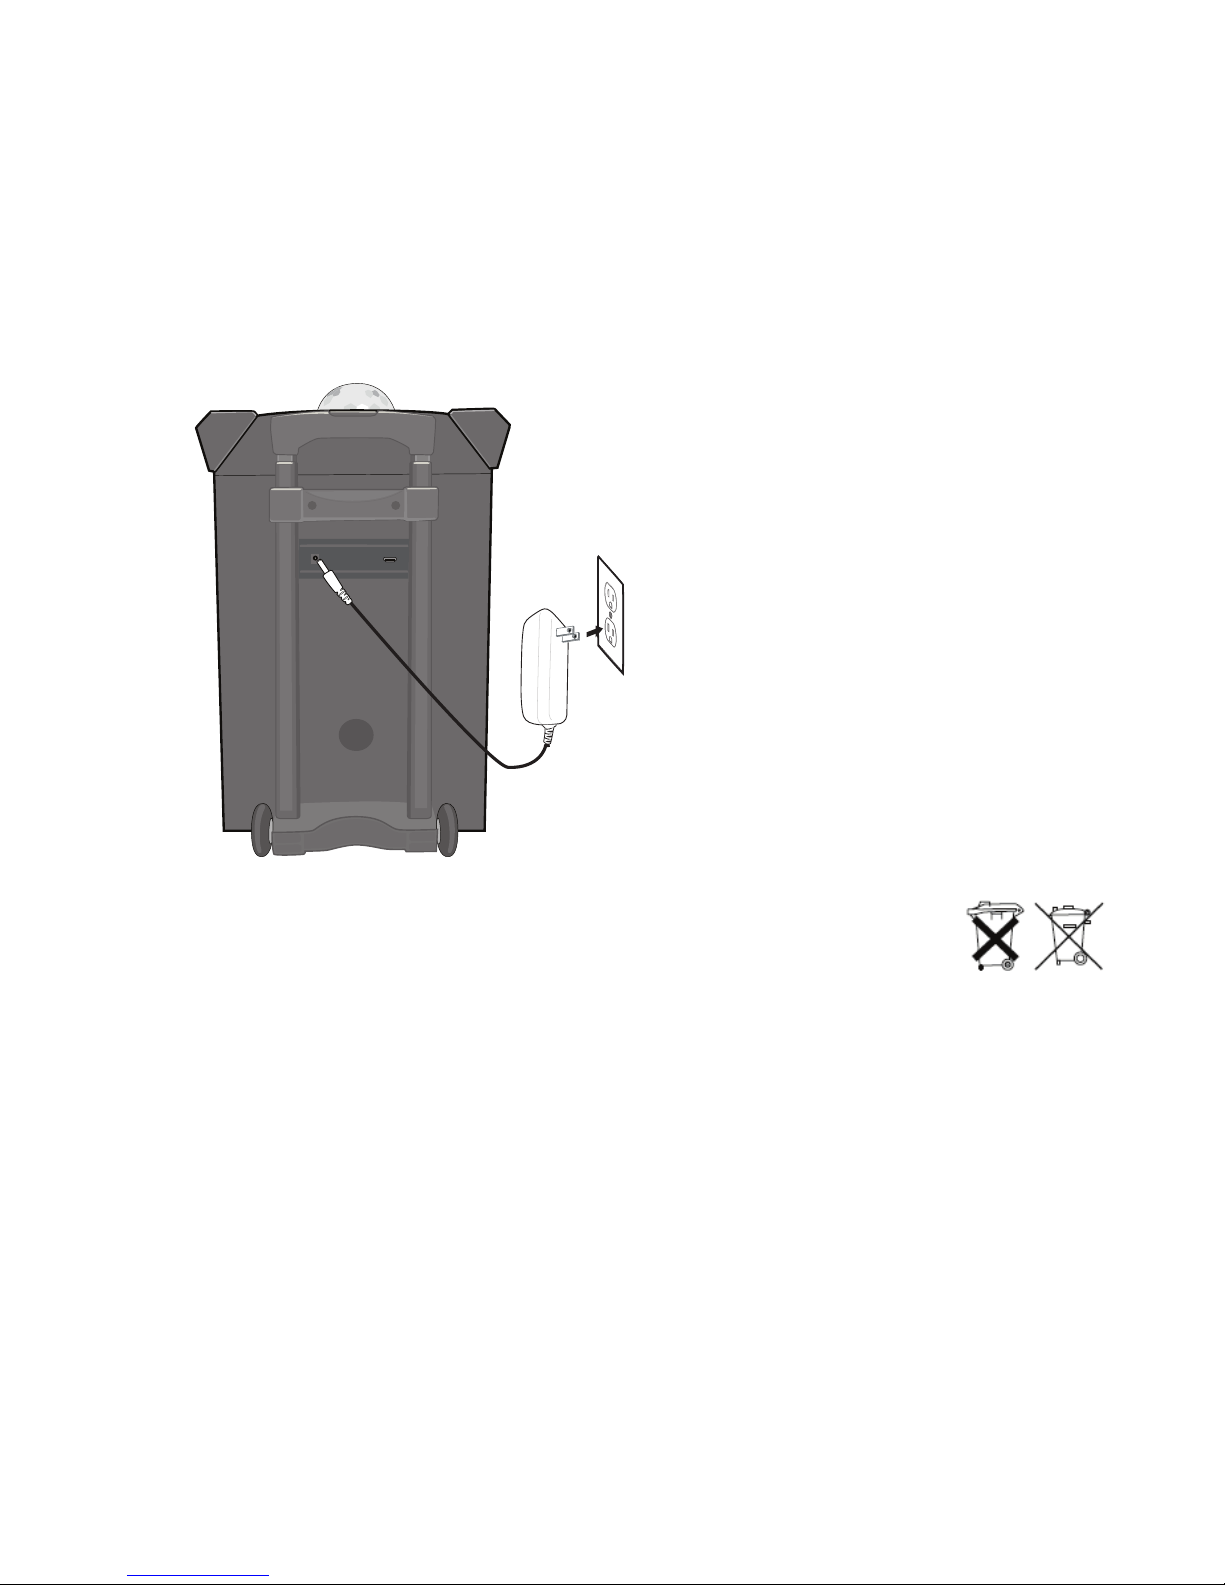
Rechargeable Battery
This unit comes with a built-in rechargeable battey pack that will allow the unit to be used
without being connected to AC power. The Battery indicator (top right of the display) will
show the battery charge left, indicated by the amount of bars.
The rechargeable battery
pack is not user-replaceable.
When the battery icon starts blinking red, recharge as shown below:
1
Insert the AC power cord
into a conveniently located
AC outlet having 120V AC,
60Hz .
2
Allow the unit to charge for
approximately ten hours for
a full charge.
3
Disconnect the AC cord and
the fully charged unit can be
used for approximately eight
hours.
32
Recycling and Disposal Information:
• Do not dispose of electronic devices or any of their components
(especially batteries and LCD displays) in your municipal trash collection.
• Consult your local waste management authority or a recycling
organization like Earth911.com to find an electronics recycling facility in your area.
CAUTION: Rechargeable batteries must be recycled or disposed of properly.
Lithium-Polymer Battery Warning
• This equipment contains a rechargeable lithium-polymer battery.
• Do not charge the battery in temperatures below 32° F (0° C) or higher than 113° F
(45° C).
• Do not open or mutilate the battery.
• The rechargeable batteries contained in this equipment may explode if disposed of in
a fire.
• Do not short-circuit the battery.
• Do not charge the rechargeable battery pack used in this equipment with any charger
other than the one designed to charge this battery pack, as specified in the owner’s
manual. Using another charger may damage the battery pack or cause the battery pack
to explode.
— 9 —
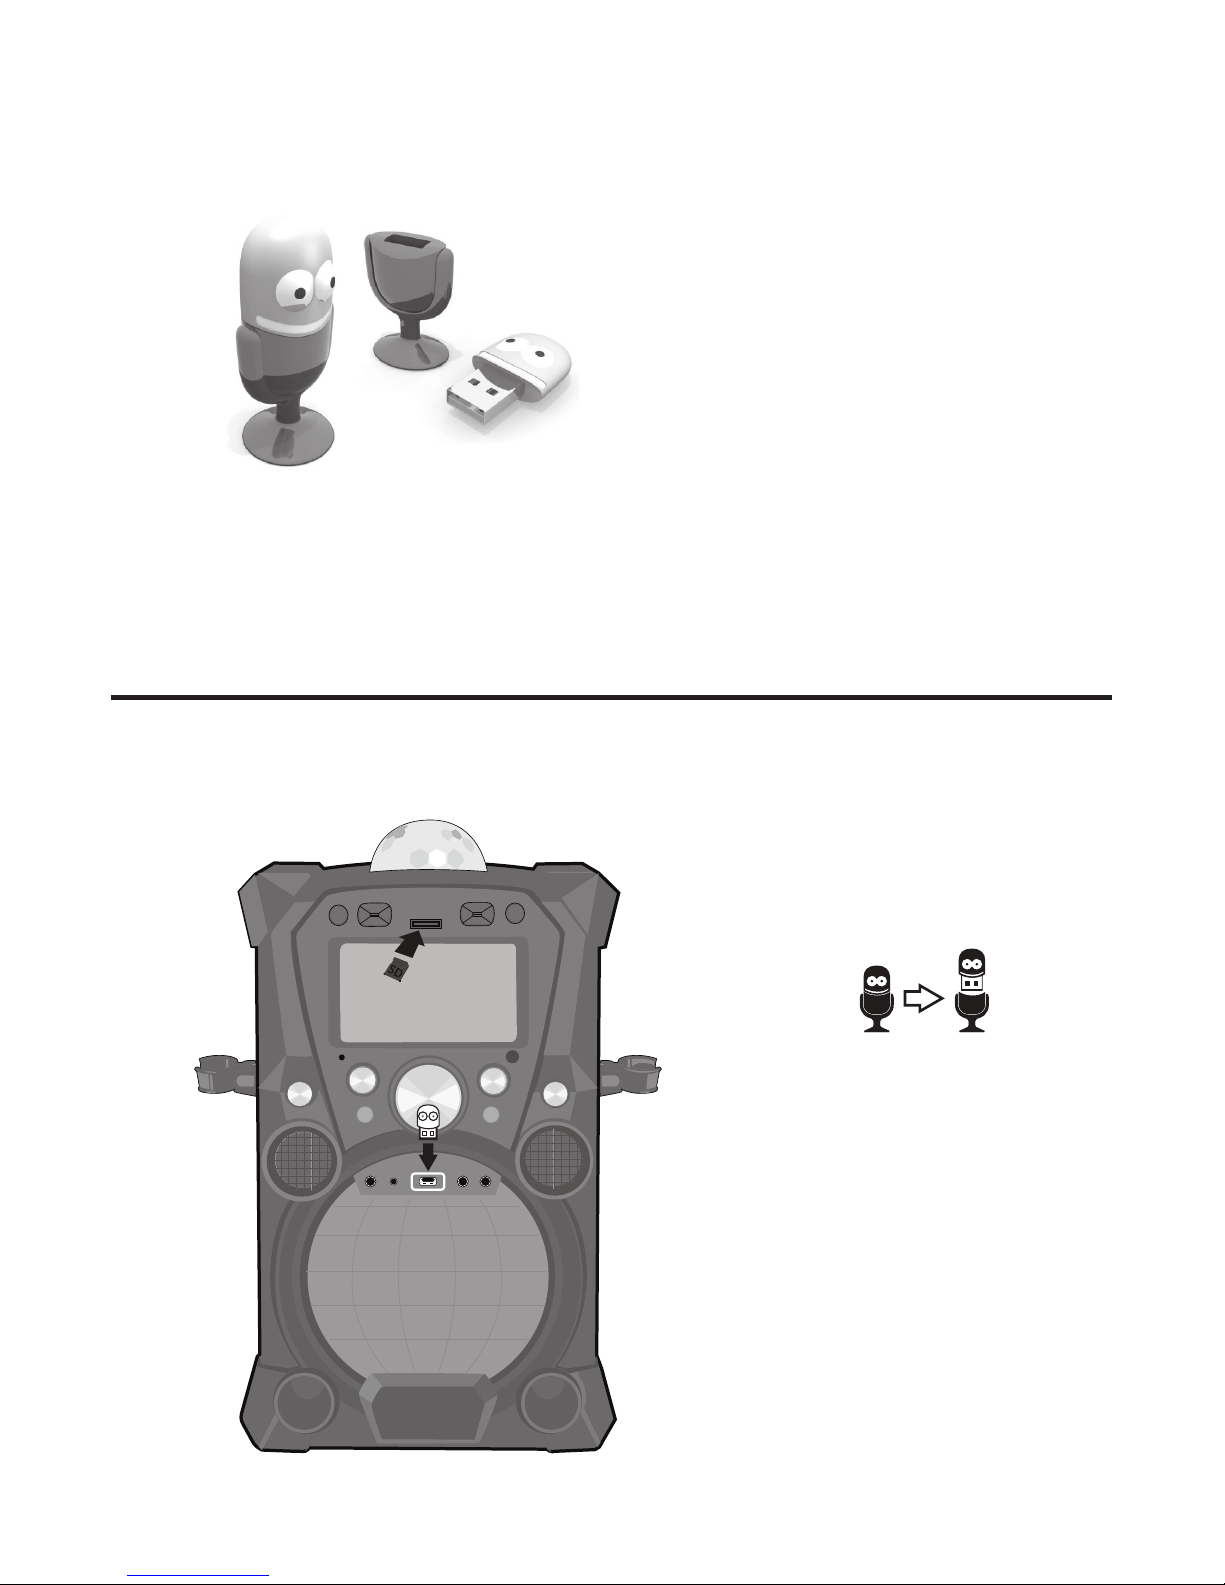
Singing Machine USB Flash Drive
Inserting the USB Flash Drive or an SD Card
Included with the system
is a Singing Machine USB
Flash Drive, which is used for
storing Karaoke songs as well as
recordings from this unit.
There are two songs included on
the Singing Machine USB Flash
Drive, but you can access the
Karaoke Store for many more
songs. Just follow the Welcome
Kit Instructions!
Before you insert the Singing
Machine USB Flash Drive, make
sure to remove it from its stand
which will reveal the USB plug.
Insert it into the USB slot on the
unit with the face towards the
top of the unit. If you would like
to have more memory capacity
for the recording function, you
can insert an SD Card with up to
32 GB (not included) to store the
recorded files as well.
Note: If both an SD Card and a
USB Flash Drive are inserted, the
unit will automatically record onto
the SD card.
 Loading...