

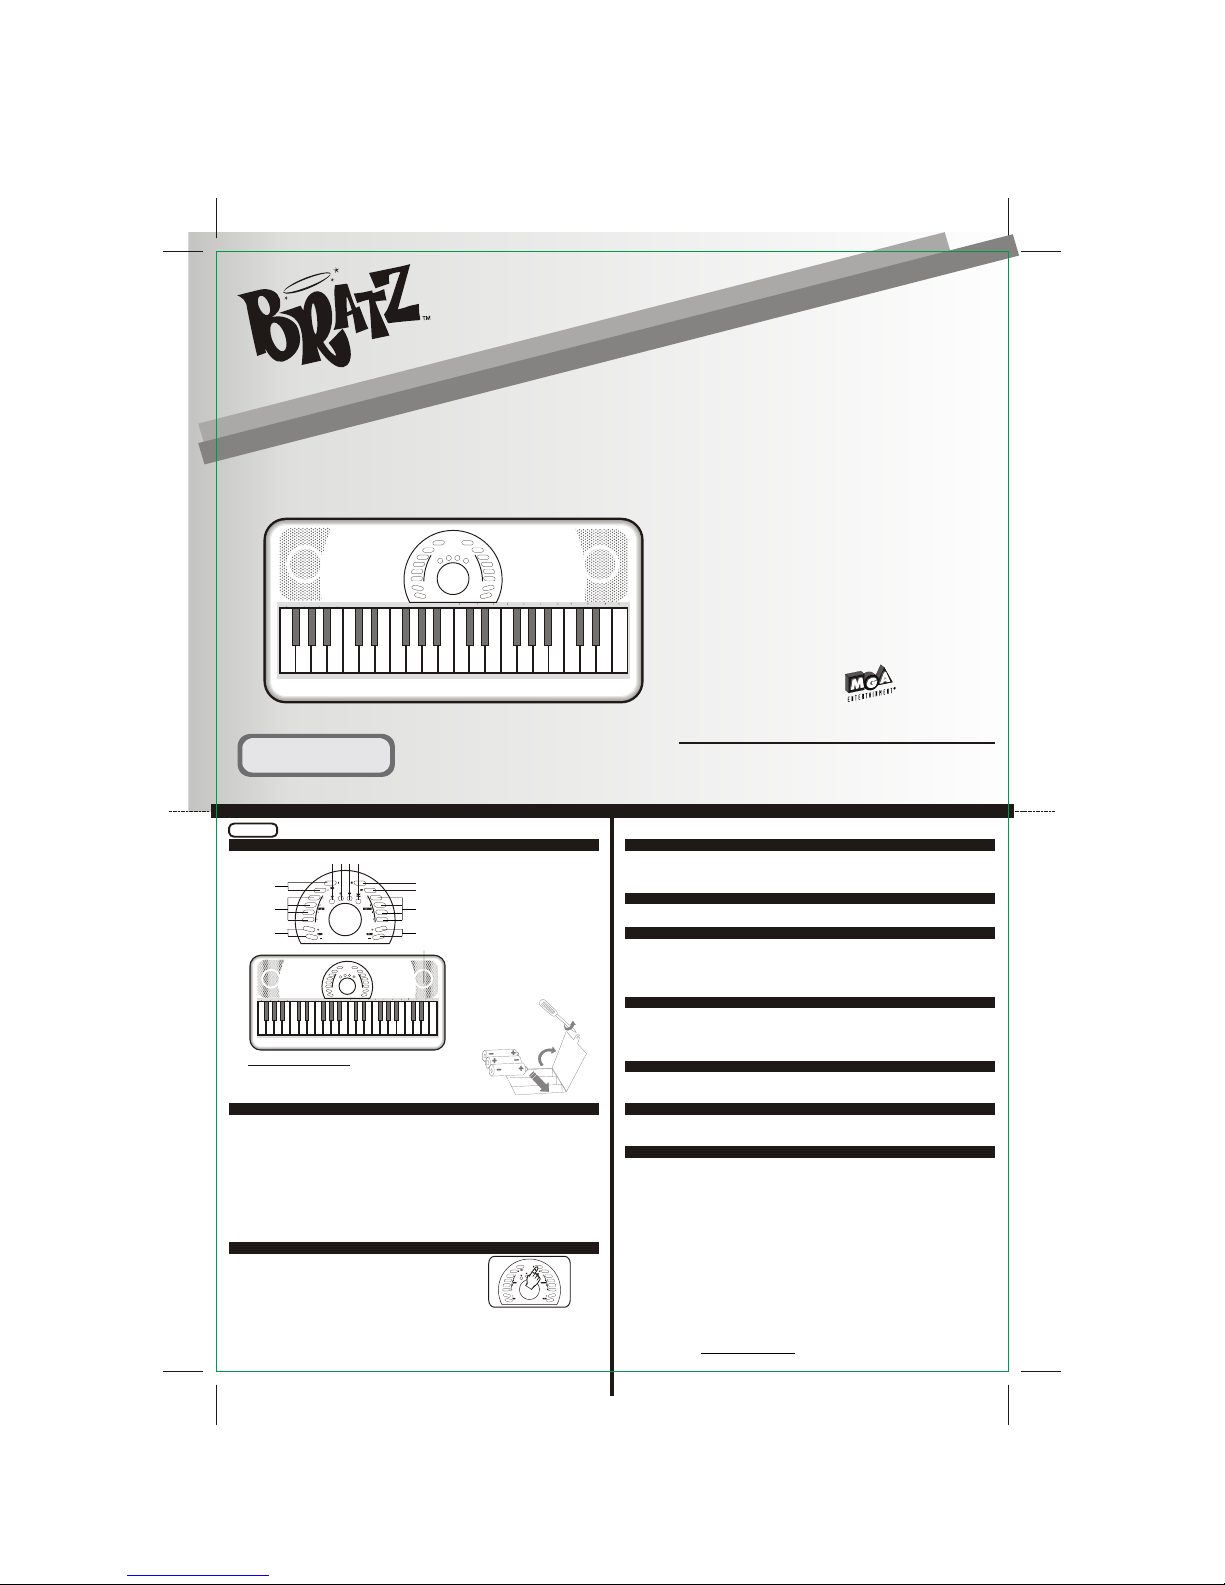
The Singing Machine Electronic 37-Key Keyboard SMB-541, Bratz SMB-541 Instruction Manual
Please read before using this unit.
Lea antes de usar esta unidad.
Veuillez lire avant d'utiliser cet appareil.
4 5 6 7 1 2 3 4 5 6 7 1 2 3 4 5 6 7 1 2 3 4
Sound
Effect
PLAY
STOP
REC
VOLUME
INSTRUMENT
ON
OFF
2
1
3
4
SONG
1
2
RHYTHM
2
1
3
4
TEMPO
6601 Lyons Road, Bldg. A7, Coconut Creek, FL33073-9902, USA. OE087WA5511
TEL: (954) 596-1000 FAX: (954) 596-2000
The Singing Machine Company, Inc.
VOLUME CONTROL
TEMPO CONTROL
INSTRUMENT SELECTION
RECORD & PLAY BUTTONS
SOUND EFFECT
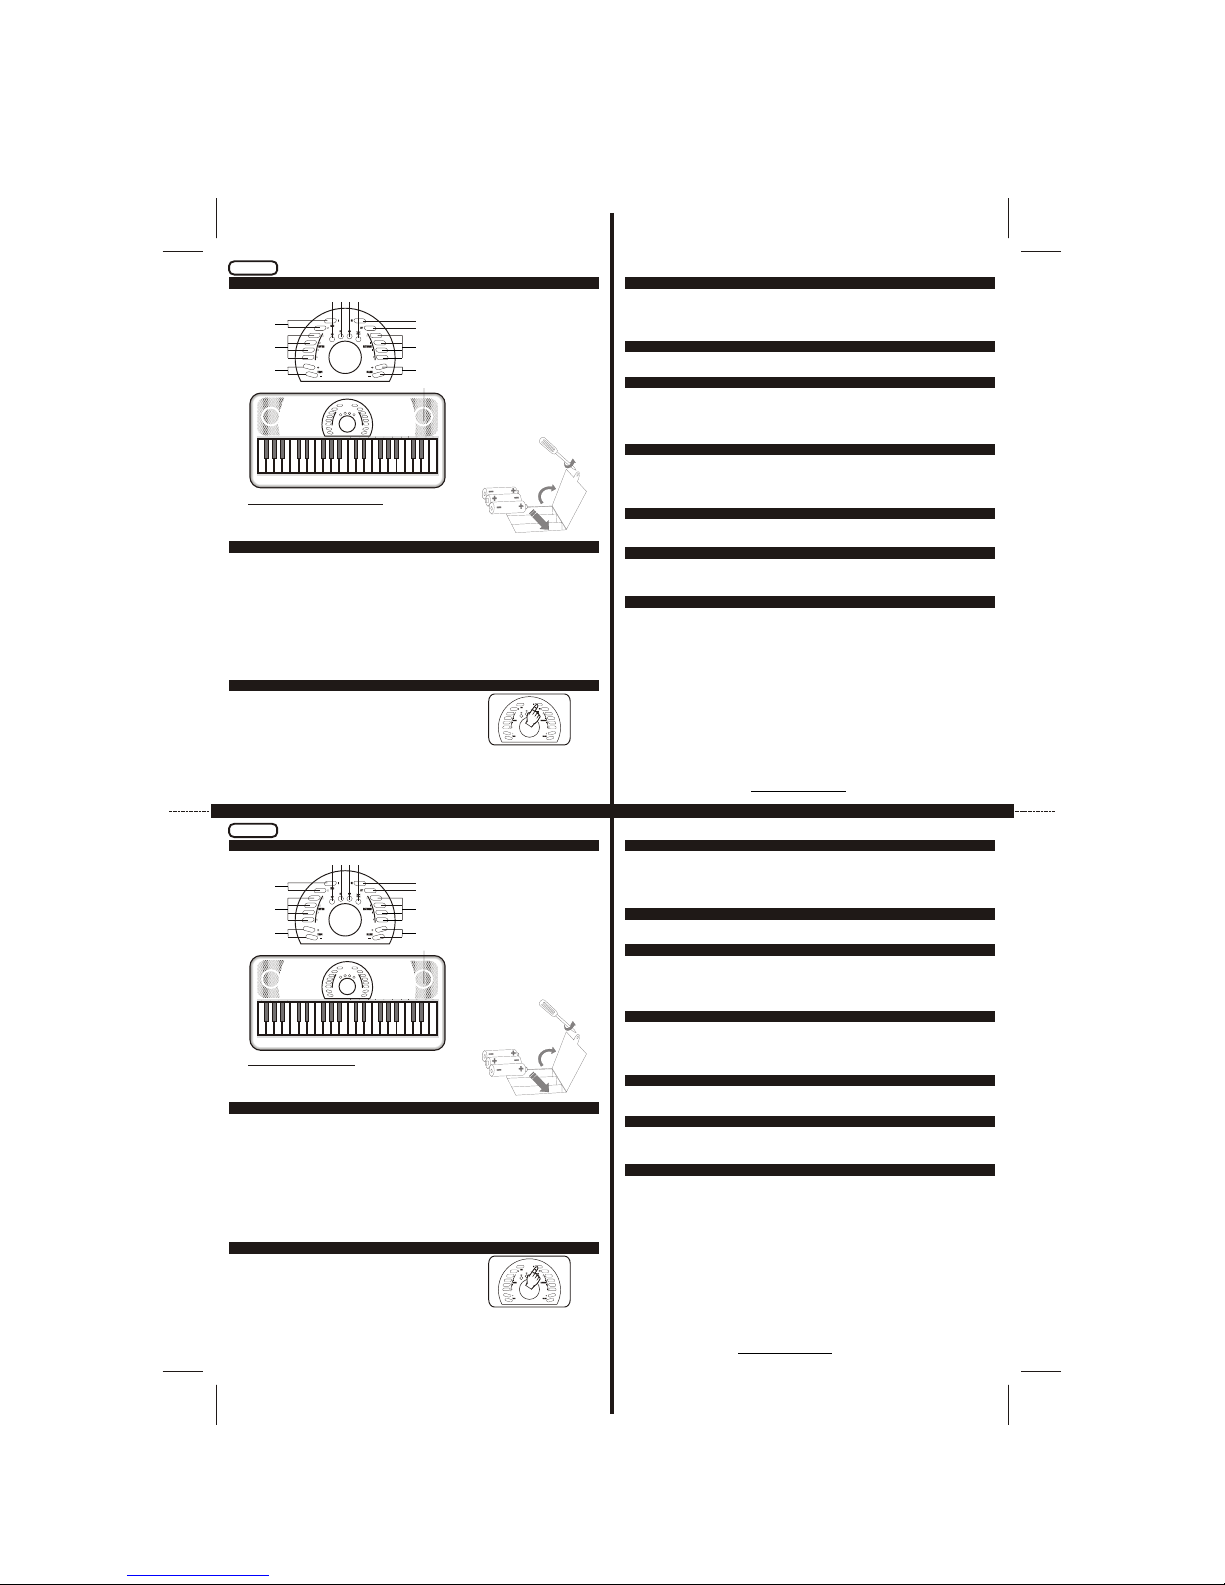
1. STOP
2. RECORD
3. PLAY
4. SOUND EFFECT
5. SONG
6. RHYTHM SELECTION
7. TEMPO CONTROL
8. POWER ON
9. POWER OFF
10. INSTRUMENT SELECTION
11. VOLUME CONTROL
12. SPEAKER
FUNCTION LIST
4 5 6 7 1 2 3 4 5 6 7 1 2 3 4 5 6 7 1 2 3 4
Sound
Effect
PLAY
STOP
REC
VOLUME
INSTRUMENT
ON
OFF
2
1
3
4
SONG
1
2
RHYTHM
2
1
3
4
TEMPO
12
1 2 3 4
5
6
7 11
10
9
8
BATTERY INSTALLATION
1. Unscrew battery door.
2. Open battery door.
3. Install 3 “AA” batteries.
4. Close battery door and replace screw.
BATTERY PRECAUTIONS
The precautions below should be followed when using batteries in this device:
1. Use only the size and type of batteries specified.
2. Be sure to follow the correct polarity when installing the batteries as indicated in the battery
compartment. Reversed batteries may cause damage to the device.
3. Do not mix different types of batteries together (e.g. Alkaline and Carbon Zinc) or old batteries
with fresh ones.
4. If the device is not to be used for a long period of time, remove the batteries to prevent damage
or injury from possible battery leakage.
5. Do not try to recharge batteries not intended to be recharged, they can overheat and rupture
(Follow battery manufacturer’s directions).
6. Rechargeable batteries are to be removed from the product before being charged.
7. Rechargeable batteries are only to be charged under adult supervision.
8. Exhausted batteries are to be removed from the product.
9. The supply terminals are not to be short-circuited.
Insert 3 “AA” batteries properly into the battery compartment,
press the “ON” key (#8 on the illustration) and the following
series of sounds will be heard “do….do….do”.
HOW TO PLAY
SONG SELECTION
By pressing the “SONG” keys (#5 on the illustration) 24 demonstration songs are accessible. When no
keys are pressed during playing the selected song, it will last for 20 seconds and the unit will automatically
power off in approximately 40 seconds. Pressing the “STOP” key (# 1 on the illustration) will exit this mode.
RHYTHM SELECTION
ENGLISH
VISIT OUR WEBSITE www.singingmachine.com
PRINTED IN CHINA
When the “RECORD” key is pressed (#2 on the illustration) a “do” sound is heard from the instrument. The
user is able to play tunes by using the black and white keys. There are a total of 24 recordable music notes
available. When the recording function is full, the following series of sounds will be produced from the
keyboard “do…do…do” to alert the user. To listen to the recorded tunes press the “PLAY” button (#3 on the
illustration).
By pressing the “SOUND EFFECT” function (#4 on the illustration) an ECHO is produced. Please note, this
effect is only available while playing the BLACK and WHITE keys.
The Volume Control (#11 on the illustration) includes Volume + and Volume -. The volume is maximized at
level #5. When the keyboard is powered “ON” the volume automatically defaults to level #3.
The Tempo Control (#7 on the illustration) includes Tempo + and Tempo -. The tempo level is maximized at
level #5. When the keyboard is powered “ON”, the tempo automatically defaults to level #3.
By pressing these 4 keys in the “INSTRUMENT SELECTION” (#10 on the illustration) 16 rhythms are
accessible.
(1) Electric Piano ; (2) Celesta ; (3) Vibraphone ; (4) Soprano Sax ; (5) Muted Electric ; (6) Overdrive Guitar;
(7) Electric Bass ; (8) Alto Sax ; (9) Trumpet ; (10) Agogo ; (11) Harp ; (12) Church Organ ; (13) Synth bass 1;
(14) Percussive Organ ; (15) Reed Organ and (16) Jazz Guitar
By pressing these 4 keys in the “RHYTHM SELECTION” (#6 on the illustration) 20 rhythms are accessible.
SMB-541
! ELECTRONIC 37-KEY KEYBOARD
! TECLADO ELECTRÓNICO DE 37 TECLAS
! CLAVIER ELECTRONIQUE À 37 TOUCHES
Instruction Manual
Manual De Instrucción
Manuel D'instruction
www.bratz.com
TM & MGA Entertainment, Inc.
All Right Reserved. Used under license by
The Singing Machine Co., Inc.
©
541-0704-ENG-SPA-FRE02
INSTALACIÓN DE LAS BATERÍAS
1. Desatornille la tapa de las baterías.
2. Abra la tapa.
3. Inserta 3 baterías “AA”
4. Cierre la tapa y atornille.
PARA TOCAR
Ponga 3 baterías “AA” correctamente y apriete la tecla “ON”.
Una serie de “do...do...do” es tocada.
EDICIÓN DE SONIDO
CONTROL DE VOLUMEN
CONTROL DE TEMPO
BOTONES DE GRABACIÓN Y PLAY-BACK
SELECCIÓN DE INSTRUMENTO
LISTA DE LAS FUNCIONES
SELECCIÓN DE RITMO
ESPAÑOL
4 5 6 7 1 2 3 4 5 6 7 1 2 3 4 5 6 7 1 2 3 4
Sound
Effect
PLAY
STOP
REC
VOLUME
INSTRUMENT
ON
OFF
2
1
3
4
SONG
1
2
RHYTHM
2
1
3
4
TEMPO
1 2 3 4
5
6
7 11
10
9
8
1. STOP
2. GRABACIÓN
3. LAYBACK
4.
5. CANCIÓN
6.
7.
8. POWER ON
9. POWER OFF
10.
11. VOLUME CONTROL
12. ALTAVOZ
P
EFECTO SONORO
SELECCIÓN DE RITMO
CONTROL DE TEMPO
SELECCIÓN DE INSTRUMENTO
PRECAUCIONES CON LA BATERÍA
Las precauciones abajo deben ser obedecidas, cuando usen baterías, en este dispositivo:
Use solamente baterías del tamaño y tipo especificados.
Esté seguro, de estar obedeciendo a las polaridades correctas de la batería al instalarlas, como
indicado, en su compartimiento.Invertir las baterías puede damnificar el aparato.
No mezcle pilas distintas (por ejemplo Alcalinas con Carbono-Zinc) ni pilas viejas con nuevas.
Sí el dispositivo no debe ser usado por un largo período de tiempo, remueva las bate rías para
evitar daños o heridas debido un vaciamiento de la batería.
No intente recargar las baterías que no sean recargables. Ellos (ellas) pueden tener un súper-
calentamiento y romperse (Siga las instrucciones del fabricante de la batería).
Las pilas recargables deber ser retiradas del equipo antes de la recarga.
Las pilas recargables deben ser recargadas por un adulto.
Pilas descargadas deben ser retiradas del equipo.
Los terminales de alimentación de energía no deben ser colocados en corto circuito.
1.
2.
3.
4.
5.
6.
7.
8.
9.
Apretando estas 4 teclas de "RHYTHM SELECTION" (#6 en la ilustracion), puedese obtener 20 ritmos.
SELECCIÓN DE MELODÍA
El músico puede apretar la tecla “CANCIÓN” para “DEMOSTRACIÓN DE RITMOS”. Apriete una vez para
escoger 1 ritmo de demostración.Al todo hay 24 “RITMOS DE DEMOSTRACIÓN”. Cuando no se aprieta
ninguna tecla en modo “CANCIÓN”, el ritmo toca durante 20 segundos. El aparato desconecta
automáticamente después de 40 segundos aproximadamente. Apriete la tecla “STOP” para dejar este modo.
Cuando se aprieta el botón “GRABAR” un sonido “do” es tocado. El músico puede escoger
las melodías apretando las teclas blancas y negras. Al todo hay 24 teclas de
grabación. Cuando la grabación es completa, un sonido “do..do” es tocado para avisar el músico. El
músico puede apretar la tecla “PLAY” para oír su grabación.
El Control de Volumen es Volumen + y Volumen -. Hay #5 niveles de volumen. Cuando el teclado es
encendido (ON) el valor de volumen programado es #3.
Las Teclas de Control de tempo son Tempo + y Tempo -. Hay #5 niveles de tempo. Cuando el
teclado es encendido (ON) el valor de ritmo programado es #3.
IMPRESO EN CHINA
VISITE NUESTRO SITIO INTERNET www.singingmachine.com
Teclas 1, 2, 3, 4 de selección de instrumentos. Cada llave consiste en 4 instrumentos.
(1) Pianol Eléctrico ; (2) Celesta ; (3) Vibraphone ; (4) Soprano Sax ; (5) Eléctrico Silenciado ;
(6) Guitarra De la Sobremarcha ; (7) Bajo Eléctrico ; (8) Alto Sax ; (9) Trompeta ; (10) Agogo ; (11) Arpa ;
(12) Órgano De la Iglesia ; (13) Bajo 1 De Synth ; (14) Órgano De Precussive ; (15) Órgano De lámina y
(16) Guitarra Del Jazz
12
Apretando "SOUND EFFECT" funcion (#4 ) puedese obtener el efecto de ECO. Nota:
Este efecto es solamente disponible cuando se toca con las teclas blancas y negras.
en la ilustracion
En appuyant sur ces 4 touches "RHYTHM SELECTION" (#6 sur l'illustration), on peut obtenir 20 rythmes.
INSTALLATION DES PILES
1. Dévissez le couvercle des piles.
2. Ouvrez le couvercle.
3. Insérez 3 piles « AA ».
4. Refermez le couvercle et revissez.
POUR JOUER
Placez 3 piles « AA » correctement et appuyez sur la touche
« ON ». Une série de « do...do...do...do » se fait entendre.
LISTE DES FONCTIONS
SELECTION DE RYTHME
BOUTONS D'ENREGISTREMENT ET LECTURE
SELECTION DE L'INSTRUMENT
EDITION DE SON
CONTROLE DE VOLUME
CONTROLE DE TEMPO
FRANÇAIS
4 5 6 7 1 2 3 4 5 6 7 1 2 3 4 5 6 7 1 2 3 4
Sound
Effect
PLAY
STOP
REC
VOLUME
INSTRUMENT
ON
OFF
2
1
3
4
SONG
1
2
RHYTHM
2
1
3
4
TEMPO
1 2 3 4
5
6
7 11
10
9
8
1.
2. ENREGISTRER
3. LECTURE
4.
5. CHANSON
6.
7.
8. ALLUME
9. ETEINT
10.
11.
12.
ARRET
EFFET SONORE
SELECTION DE RYTHME
CONTROLE DE TEMPO
SELECTION DE L’INSTRUMENT
CONTROLE DE VOLUME
HAUT-PARLEUR
PRÉCAUTIONS POUR LES PILES
Les précautions ci-dessous doivent être suivies quand vous utilisez des piles dans cet appareil:
1. Utilisez seulement la taille et le type de piles spécifiées.
2. Ayez soin de respecter la polarité quand vous placez les piles comme indiqué dans le
compartiment des piles. Les piles inversées peuvent causer des dégâts à l'appareil.
3. Ne pas mélanger différents types de piles (par exemple Alcaline et Carbone-Zinc) ou de
vieillespiles avec des neuves.
4. Si vous n'utilisez pas l'appareil pendant une longue période, retirez les piles pour éviter
les dégâts ou blessures qui pourraient être causés par la fuite des piles.
5. Ne pas essayer de recharger les piles qui ne sont pas rechargeables. Ils peuvent
surchauffer et casser (Suivez les instructions du fabricant des piles).
6. Retirez les piles rechargeables de l'appareil avant de les recharger.
7. Les piles rechargeables doivent être rechargées sous la surveillance d'un adulte.
8. Retirez les piles usées de l'appareil.
9. Ne pas court-circuiter les bornes d'alimentation.
SELECTION DE MELODIE
Le musicien peut appuyer sur la touche « CHANSON » pour la « DEMONSTRATION DE RYTHMES ».
Appuyez une fois pour choisir 1 rythme de démonstration.En tout il y a 24 « RYTHMES DE
DEMONSTRATION » Appuyez sur la touche « STOP » pour quitter ce mode. Quand on n'appuie sur
aucune touche en mode « CHANSON », le rythme jouera pendant 20 secondes. L'appareil s'éteint
automatiquement en environ 40 secondes.
Touches 1, 2, 3, 4 de sélection d'instruments. Chaque clef se compose de 4 instruments.
(1) Pianol Électrique ; (2) Celesta ; (3) Vibraphone ; (4) Soprano Sax ; (5) Électrique Amorti ;
(6) Guitare De Surmenage ; (7) Basse Électrique ; (8) Alto Sax ; (9) Trompette ; (10) Agogo ; (11) Harpe ;
(12) Organe D'Église ; (13) Basse 1 De Synth ; (14) Organe De Precussive ; (15) Organe Tubulaire et
(16) Guitare De Jazz
Quand on appuie sur le bouton « ENREGISTREMENT » un son « do » se fait entendre. Le musicien peut
choisir les mélodies en appuyant sur les touches blanches et les touches noires. En tout il y a 24 touches
d'enregistrement. Quand l'enregistrement est complet, un son « do ... do » se fait entendre pour avertir le
musicien. Le musicien peut appuyer sur la touche « Lecture » pour écouter son enregistrement.
Le Contrôle de Volume est Volume + et Volume -. Il y a #5 niveaux de volume. Quand l'appareil est
allumé (ON), la valeur par défaut est le niveau #3.
Les Touches de Contrôle de tempo sont Tempo + et Tempo -. Il y a #5 niveaux de tempo. Quand
l'appareil est allumé, le tempo par défaut est niveau #3.
IMPRIMÉ EN CHINE
VISITE NOTRE SITE INTERNET www.singingmachine.com
12
En appuyant sur "SOUND EFFECT" fonction (#4 ) on obtient un effet d' ECHO. Remarque:
Cet effet n'est disponible que lorsque l'on joue avec les touches blanches et noires.
sur l'illustration
 Loading...