

Page 1
Page 2
TABLE OF CONTENTS
Introduction
2
Technical data
4
Safety Measures
4
6
Floor heater ThermoUp Floor
Operation, storage, and maintenance
10
Possible malfunctions and solutions
10
Warranty obligations
11
Product sertication
12
Certicate of Sale
12
Warranty Card
13
EN
INCORPORATED SYMBOLS
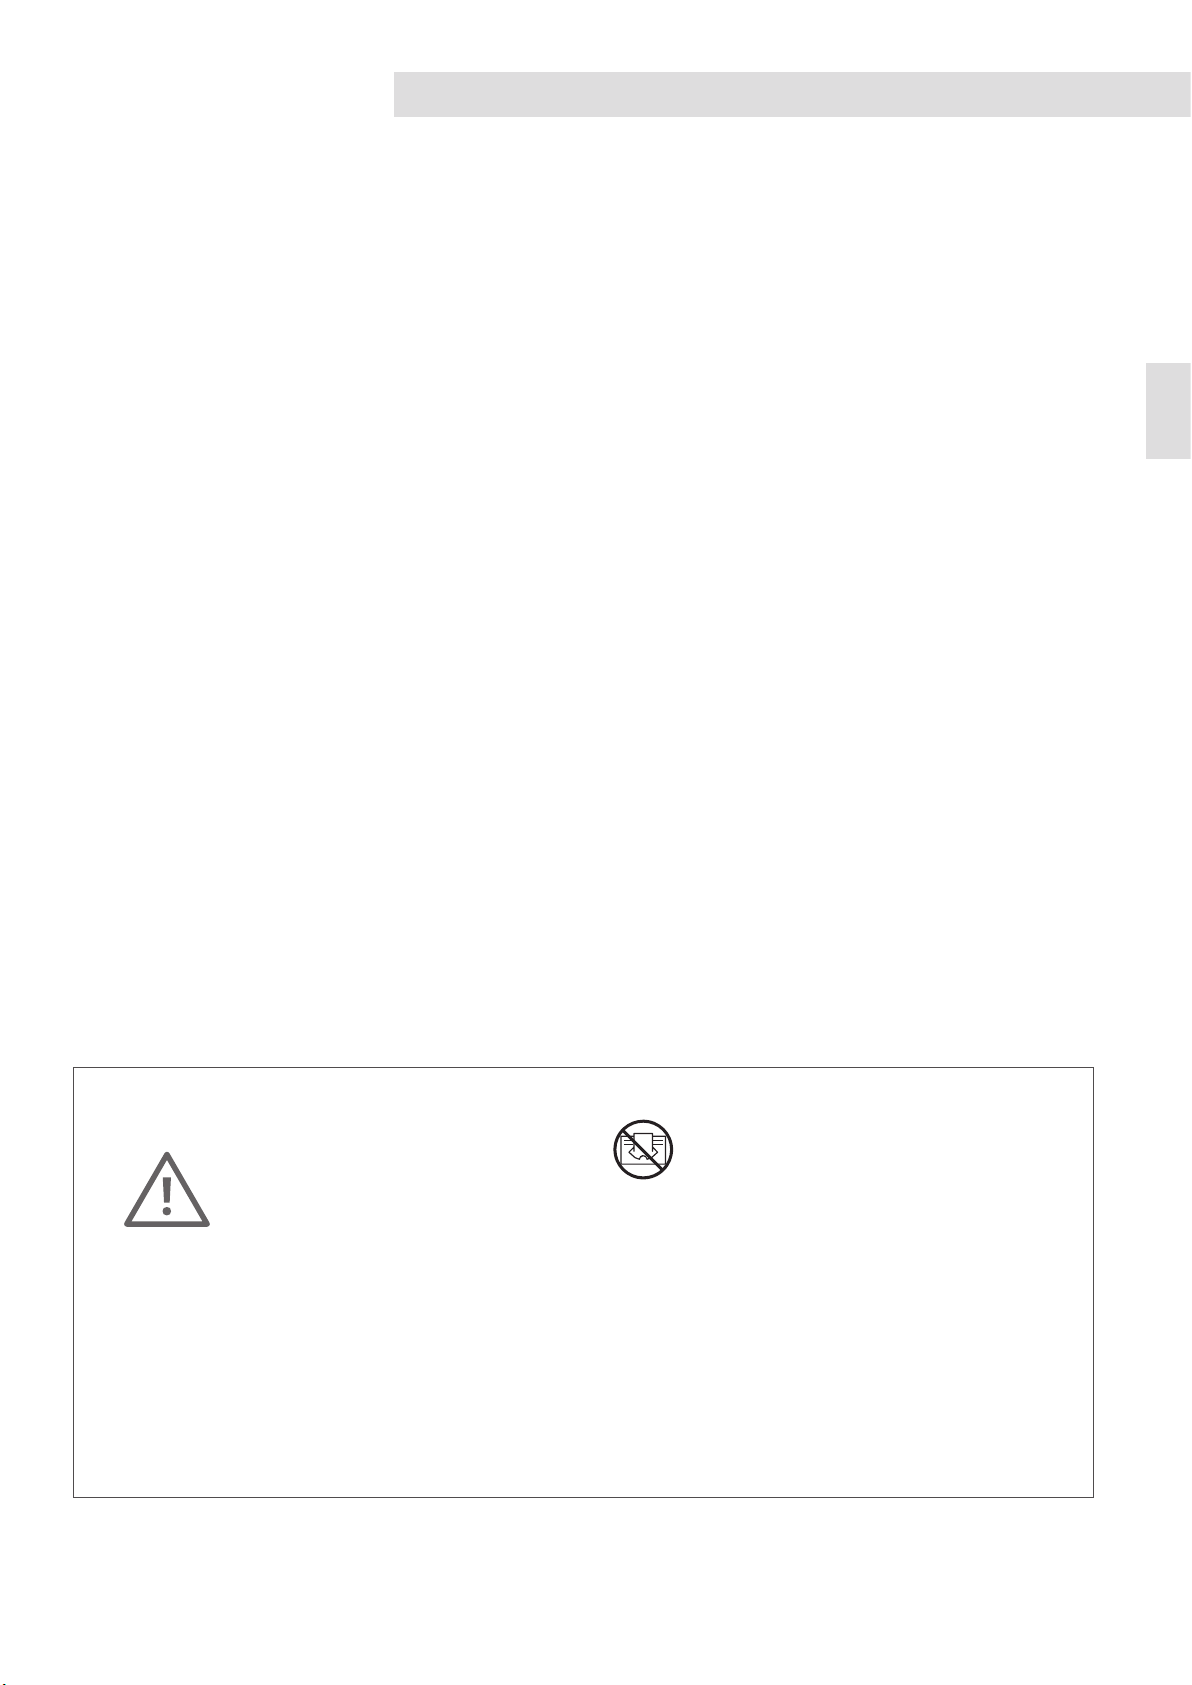
WARNING!
CAUTION!
Failure to comply with these requirements may result in severe injury or device damage.
Failure to comply with these requirements may result in severe injury or death.
NOTE
• If the power cable is damaged, it must be replaced by the manufacturer,
an authorized service center or another qualied person to avoid serious
injury.
• The heater must be installed in compliance with existing local codes and
regulations for electrical network operation.
• After installing the heater, the plug must be accessible at all times.
• The heater power class (as indicated on the nameplate) is based on tests
carried out under a specic load.
• There might be typos and printing errors in the manual.
• If after reading the manual you still have questions regarding the device,
please contact the seller or a specialized service center.
• The device has a nameplate, which provides technical data as well as other
useful information about the device.
Page 3
INTRODUCTION
INTRODUCTION
Dear Customer!
EN
Thank you for purchasing the ThermoUp heater!
ThermoUp is an innovative heating system for your home, ofce or business space.
ThermoUp heaters quickly warm up your space to the desired temperature and keep it warm for a long time.
The thoughtful design and the reliable control system will impress even the most demanding customer. This is
the ideal solution for your home or ofce.
ThermoUp heaters function with a principle of combined heat irradiation: along with thermal radiation, the
heater is able to produce a convective airow that distributes hot air through a specic area. The radiative
surface is made of tempered heat-resistant glass which resists sharp temperature uctuations, as well as
accidental mechanical affects and loads.
Comfort
Environmental Compatibility
Cost effectiveness
ThermoUp is faster than other kinds
of heaters and it creates comfortable
temperature conditions. 80% infrared
radiation combined with 20% natural
convection guarantee the perfect
temperature in 5-7 minutes!
ThermoUp is a green and
environmentally friendly heating.
ThermoUp heaters don’t burn oxygen,
therefore the air doesn’t feel dry,
and there is no smell or sound. It is
medically proven that this type of
heater is better for the human body.
Thanks to the long-wave infrared
radiation, you warm yourself up, not
the cold air. There is no useless heat
distribution, and heat waste is reduced.
This innovative heater signicantly
reduces the costs of electricity by ~
50-60%.
2
Page 4
INTRODUCTION
There are three kinds of heaters in the ThermoUp innovative line:
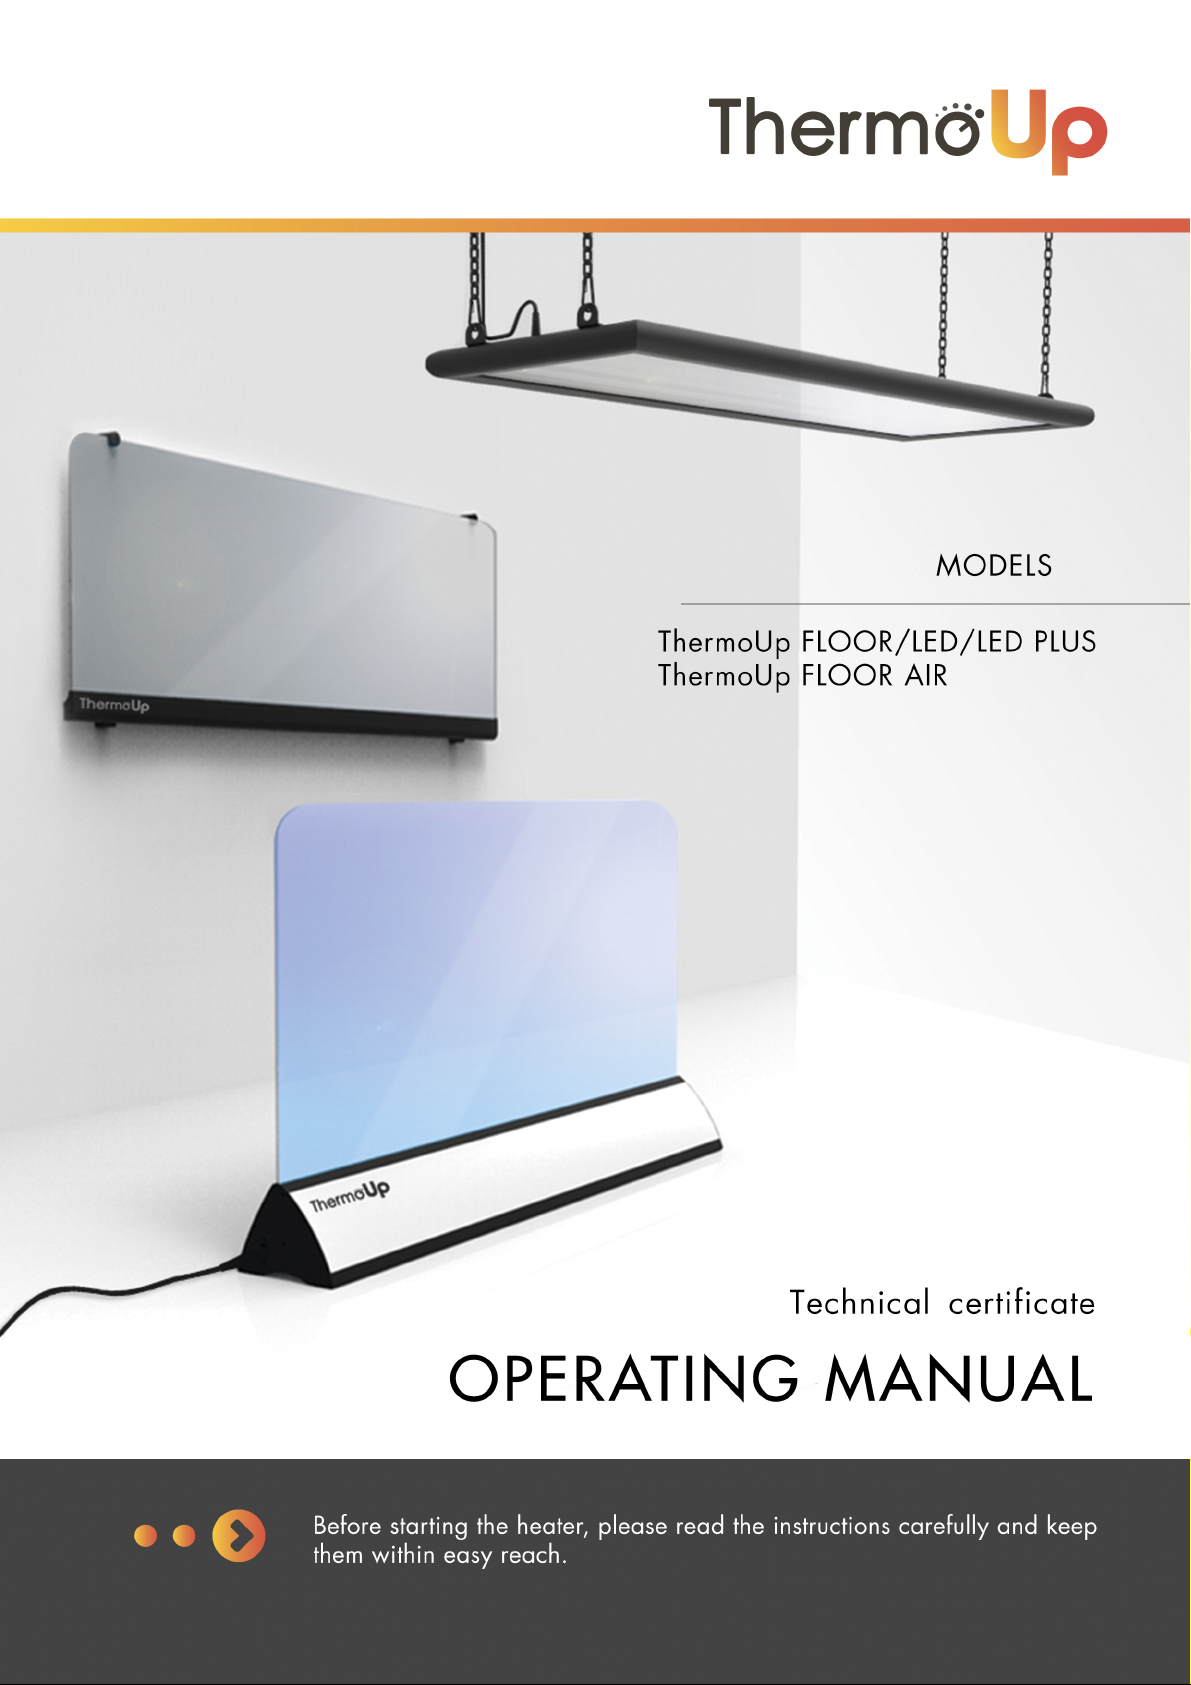
• Floor heater – ThermoUp Floor/LED/LED Plus/Air
• Wall heater – ThermoUp Wall
• Ceiling heater – ThermoUp Top 700/1100/1500
EN
Functionality
This is a new generation device, which
combines both functionality and style.
The smooth glass nish is very elegant
and it blends in perfectly in any home,
business space, and ofce interior.
Practicality
The reliable control system allows
to simply and easily adjust the
heater’s temperature, the interface is
user-friendly and there are detailed
installation and operating manuals.
The heater is protected from dust and
moisture, it is easy to clean, and it lasts
for a very long time - more than 15
years.
Safety
ThermoUp’s glass panel has
high shock resistance thanks to
the tempered glass and triplex
structures, which resist sharp
temperature uctuations, as well as
accidental mechanical affects and
loads.
3
Page 5
EN
TECHNICAL DATA
GENERAL TECHNICAL DATA
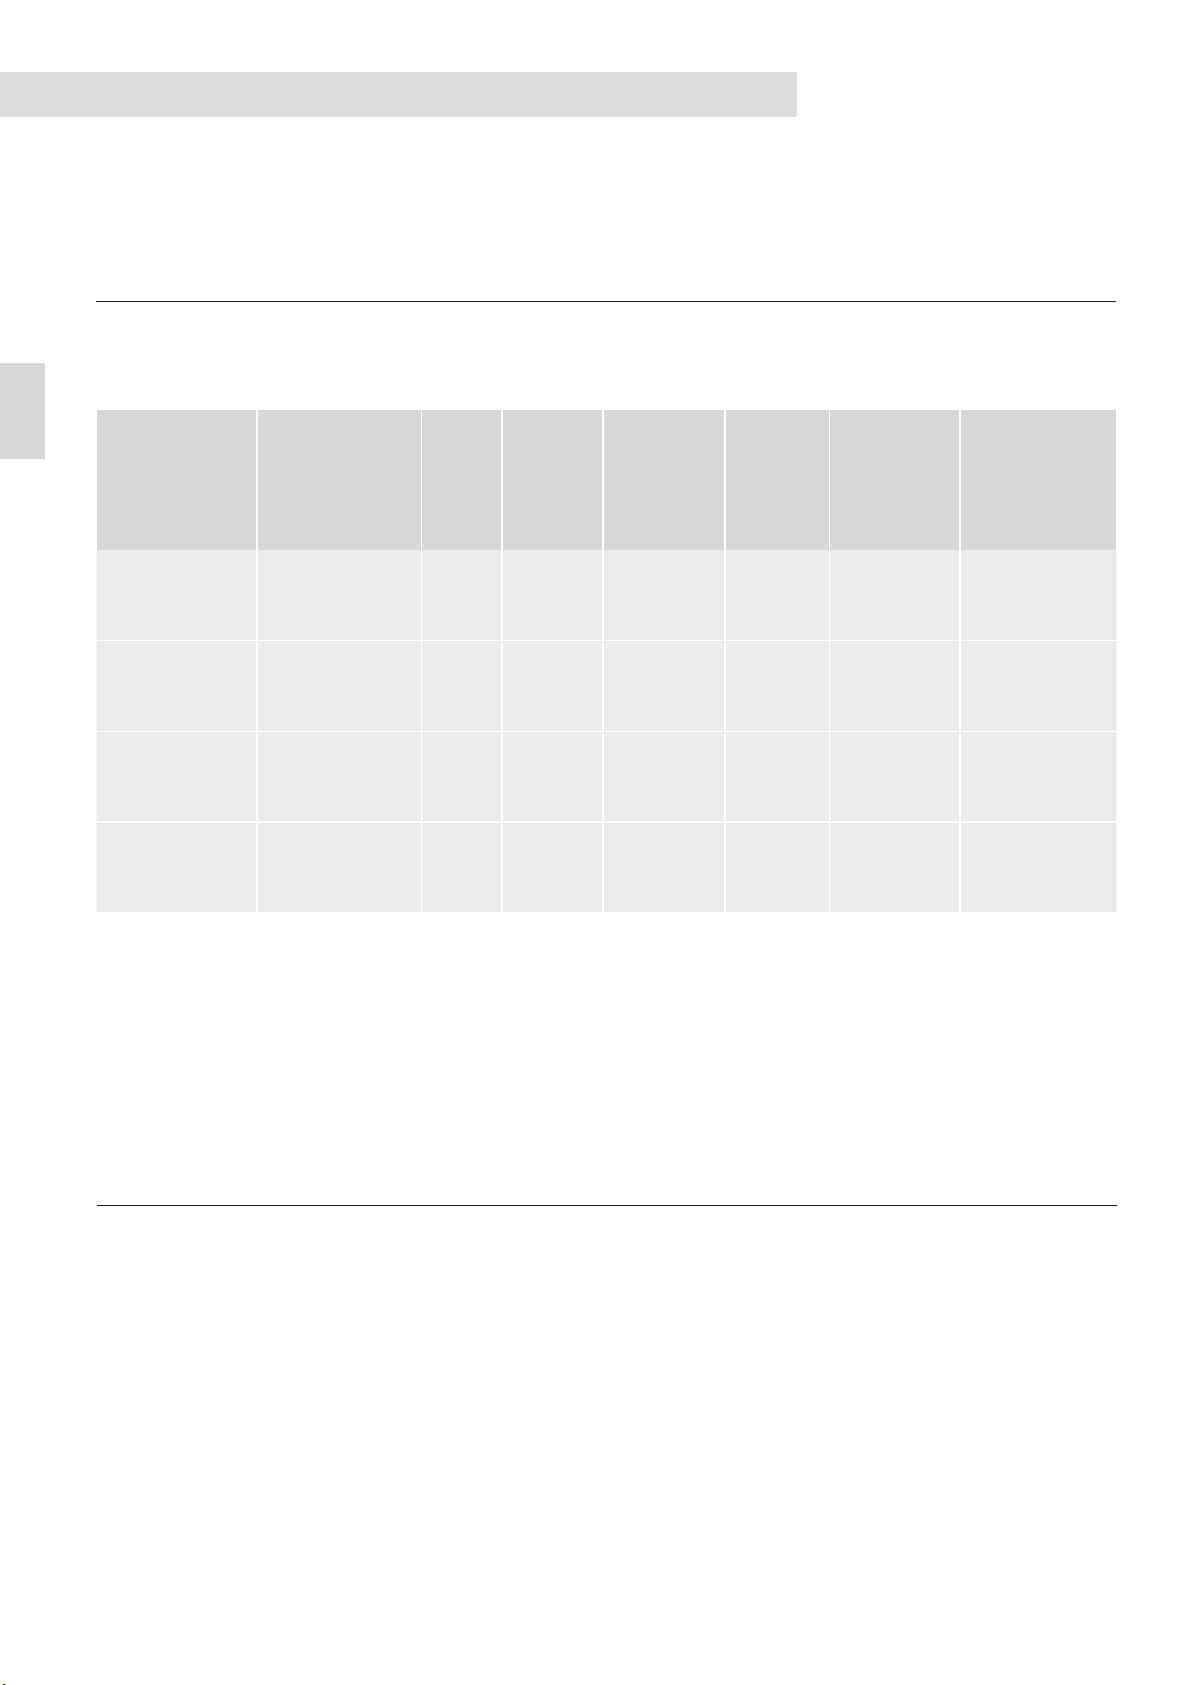
Table 1. ThermoUp Floor heaters technical data
Model Size, mm
Weight,
kg
Power,
W
Voltage,
V
Current,
A
Heated area,
2
m
Maximum
temperature
of glass panel
heating,
о
С
ThermoUp Floor
ThermoUp Floor
LED
ThermoUp Floor
LED Plus
ThermoUp Floor
Air
1010х569х148
1010х569х148
1010х569х148
1010х569х148
15 500 230 2.2 12 80
15 500 230 2.2 12 80
15 500 230 2.2 12 80
15 500 230 2.2 12 80
SAFETY MEASURES
1. The heater is an electronic device and it should be
protected against shock, dust and moisture.
2. Use the heater for its designated purpose only.
3. The heater can be used by kids older than 8 years of
age and people with mental and physical disabilities in
case they are in the presence of the person responsible
for them and their safety, or if they have been instructed
on how to use the device safely and they understand the
possible dangers that may occur if the device is used in
an improper way. In all other cases, kids and people with
disabilities should use the device only with the supervision
of an adult. Kids must not play with the device.
4
4. Children under 3 years should not be allowed to be close
to the device if nobody is supervising them.
5. Children from 3 to 8 years old can only turn the heater
on and off if it is installed in accordance with all the rules
and requirements for the normal operation of the device
and they are supervised or instructed to use the device
safely and understand the possible dangers. Children from
3 to 8 years should not connect, adjust, clean, or use the
device.
6. Heaters should be placed in accordance with the
installation requirements specied in the Installation and
Page 6
SAFETY MEASURES
Connection section of this manual. It is prohibited to place
the heater directly under the sockets.
7. The ThermoUp Floor/LED/LED Plus and ThermoUp
Wall thermoelectric element heats up up to 80 degrees.
Try to avoid prolonged contact with the heater during
operation. It is not recommended to leave the heater on
unattended. Special attention should be paid to children
and vulnerable people.
8. The device must be located away from ammable or
easily deformable objects.
9. The power cord must not come into contact with the hot
surfaces of the heater.
10. It is forbidden to cover the heater during its operation and
to use it to dry clothes and any other objects - this can
lead to overheating and damage to the device. This type
of failure will be considered a non-warranty case.
11. Do not immerse the heater in water or other liquids. The
ThermoUp Floor heater must not be used in the immediate
vicinity of a bath, shower or swimming pool.
12. Disconnect the heater when not in use and before washing
it.
13. Make sure the heater is completely cold before putting it in
its packaging for long-term storage.
14. Do not disassemble the device yourself.
15. Do not make changes to the design of the heater! Any
changes will void the warranty.
16. In case of violation of the correct operation of the device,
contact the authorized service center of the manufacturer
nearest to you for consultation and repair.
EN
ATTENTION!
Do not cover the heater to avoid overheating!
ATTENTION!
The heater should not be used if the glass panels are damaged.
ATTENTION!
The device is not equipped with a room temperature control device. Do not use the device in small
rooms if they are occupied by people who are unable to leave the room on their own and they are
not under constant supervision.
ATTENTION!
When you rst turn on the heater, it may cause an unpleasant odor associated with the technological
features of the production of the heater. This smell will disappear in the process of using the device.
5
Page 7
6
EN
FLOOR HEATER THERMOUP FLOOR/LED/LED PLUS
FLOOR HEATER THERMOUP
FLOOR/LED/LED PLUS
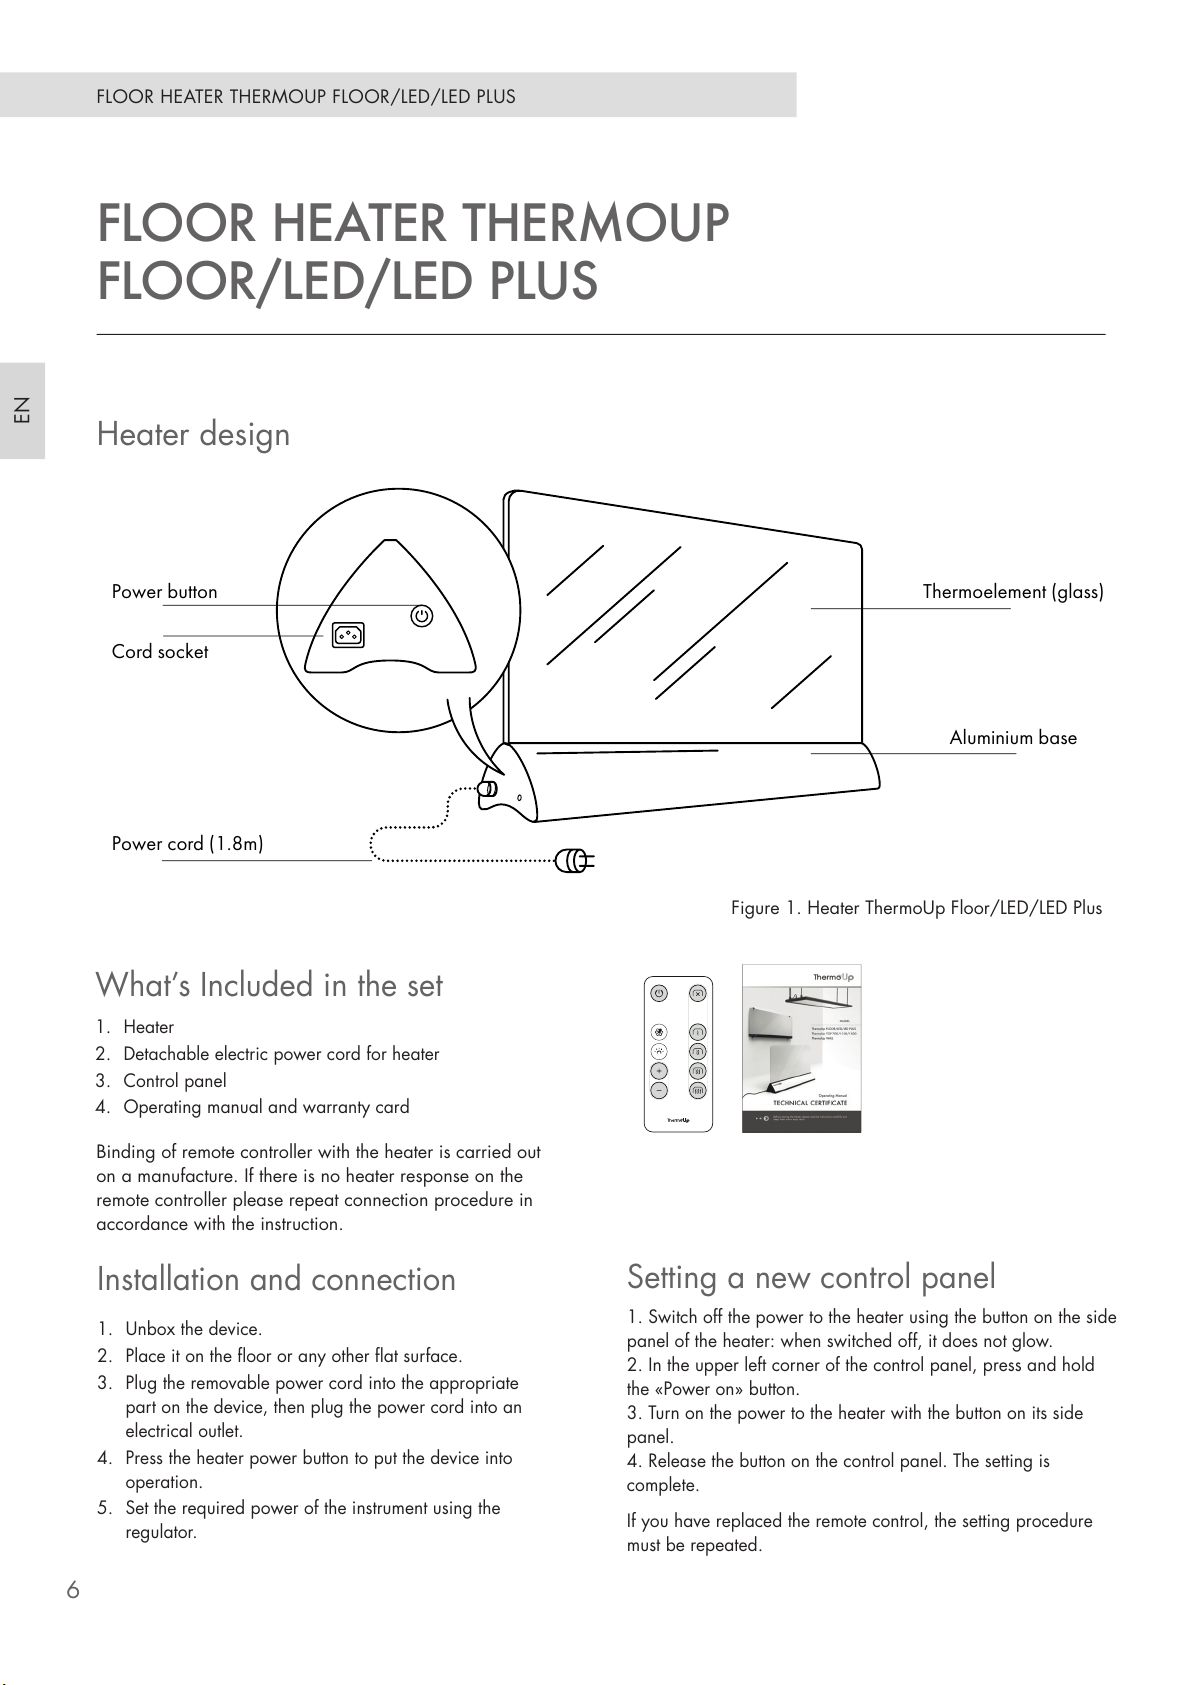
Power cord (1.8m)
Cord socket
Power button
Thermoelement (glass)
Aluminium base
Figure 1. Heater ThermoUp Floor/LED/LED Plus
Heater design
What’s Included in the set
1. Heater
2. Detachable electric power cord for heater
3. Control panel
4. Operating manual and warranty card
Setting a new control panel
1. Switch off the power to the heater using the button on the side
panel of the heater: when switched off, it does not glow.
2. In the upper left corner of the control panel, press and hold
the «Power on» button.
3. Turn on the power to the heater with the button on its side
panel.
4. Release the button on the control panel. The setting is
complete.
If you have replaced the remote control, the setting procedure
must be repeated.
Installation and connection
1. Unbox the device.
2. Place it on the oor or any other at surface.
3. Plug the removable power cord into the appropriate
part on the device, then plug the power cord into an
electrical outlet.
4. Press the heater power button to put the device into
operation.
5. Set the required power of the instrument using the
regulator.
Binding of remote controller with the heater is carried out
on a manufacture. If there is no heater response on the
remote controller please repeat connection procedure in
accordance with the instruction.
Page 8
FLOOR HEATER THERMOUP FLOOR/LED/LED PLUS
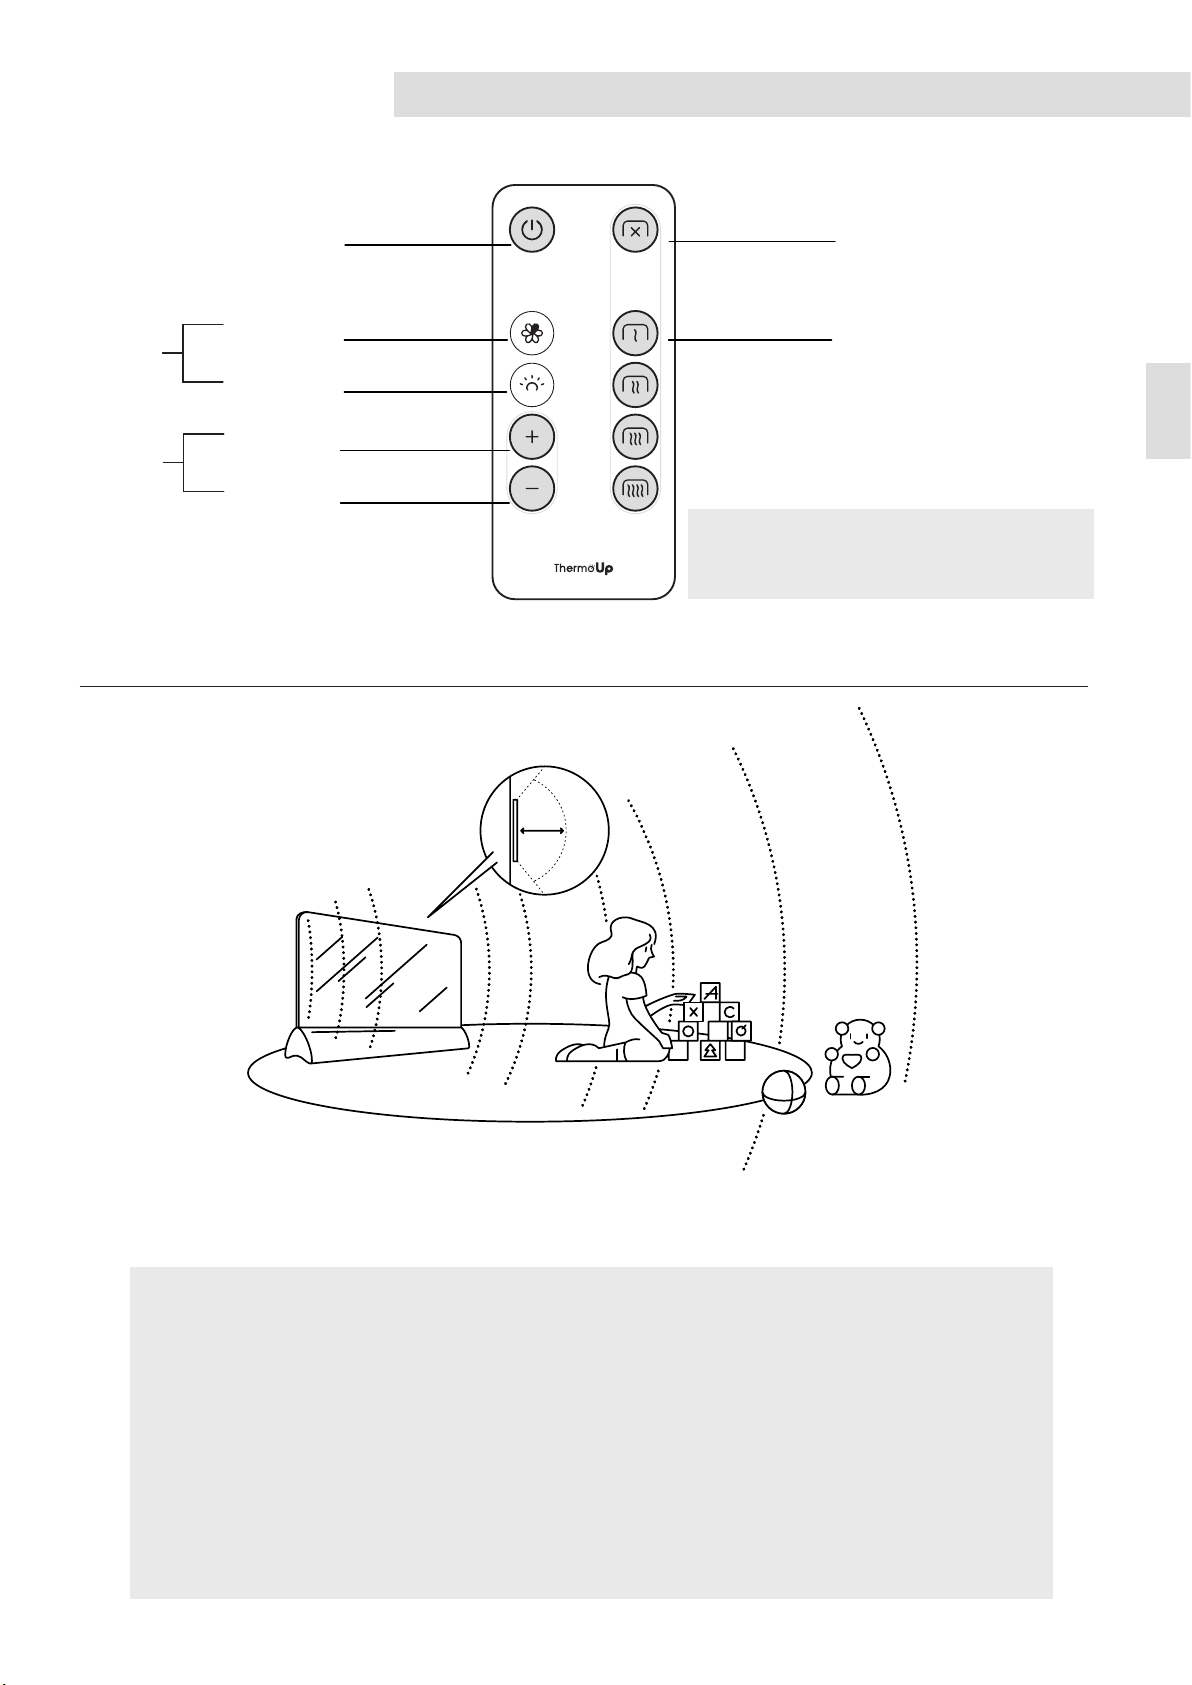
Power button
Lighting color
*
Lighting source
Brightness up
**
Brightness down
* The buttons are active only in the model ThermoUp Floor LED Plus.
**Buttons are active in models ThermoUp Floor LED/LED Plus.
Turn off the heating
Heater mode
EN
Operations using the
remote controller
120°
3 m
Figure 2. ThermoUp Floor/LED/LED Plus heater radiation
In order to use the device as efciently and safely as possible, the
following recommendations should be considered.
• Install the heater near those items that need additional heating (not more than 3 m).
• For comfortable use of the heater, it is recommended to install it at a distance of at least
50 cm from places occupied by people and animals for long periods of time.
• The device must not be covered, and should not get in contact with water.
• It is recommended to connect the device directly to the power source, without extension cords.
7
Page 9
8
EN
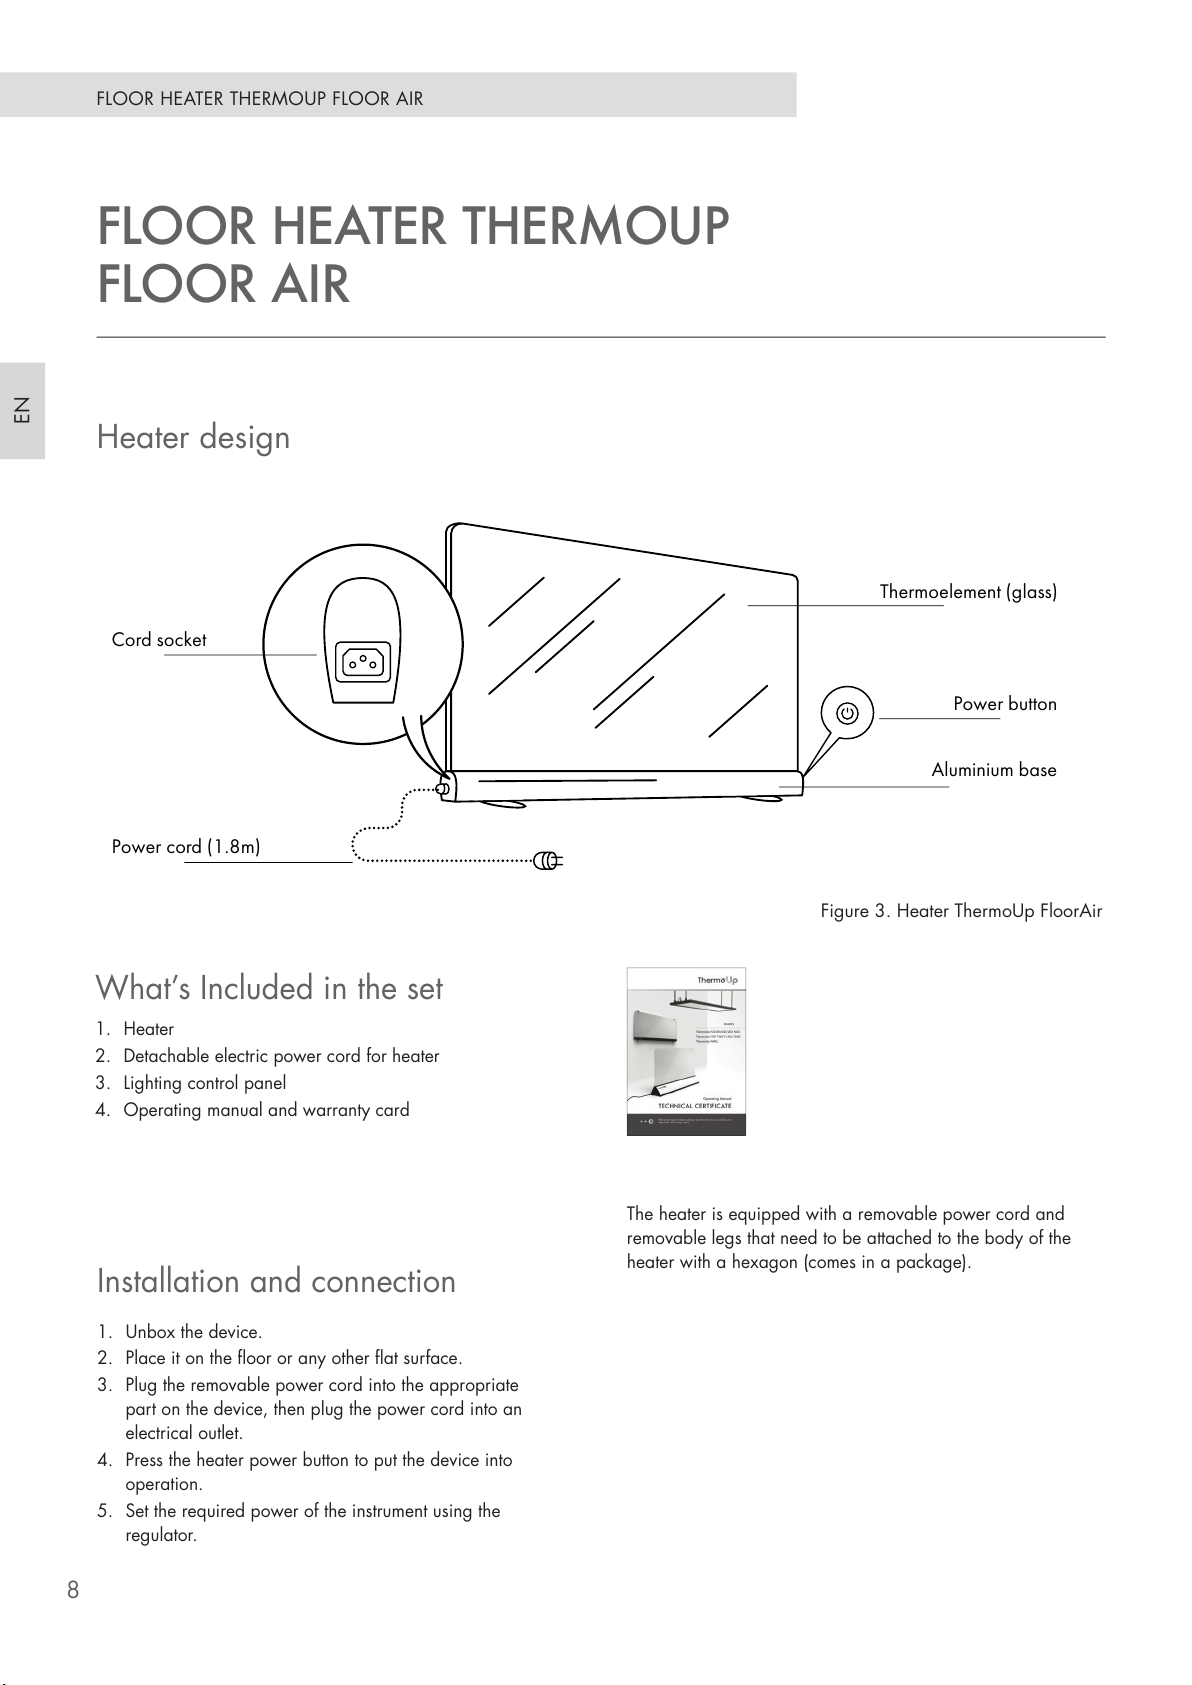
FLOOR HEATER THERMOUP FLOOR AIR
FLOOR HEATER THERMOUP
FLOOR AIR
Power cord (1.8m)
Cord socket
Thermoelement (glass)
Power button
Aluminium base
Figure 3. Heater ThermoUp FloorAir
Heater design
What’s Included in the set
1. Heater
2. Detachable electric power cord for heater
3. Lighting control panel
4. Operating manual and warranty card
The heater is equipped with a removable power cord and
removable legs that need to be attached to the body of the
heater with a hexagon (comes in a package).
Installation and connection
1. Unbox the device.
2. Place it on the oor or any other at surface.
3. Plug the removable power cord into the appropriate
part on the device, then plug the power cord into an
electrical outlet.
4. Press the heater power button to put the device into
operation.
5. Set the required power of the instrument using the
regulator.
Page 10
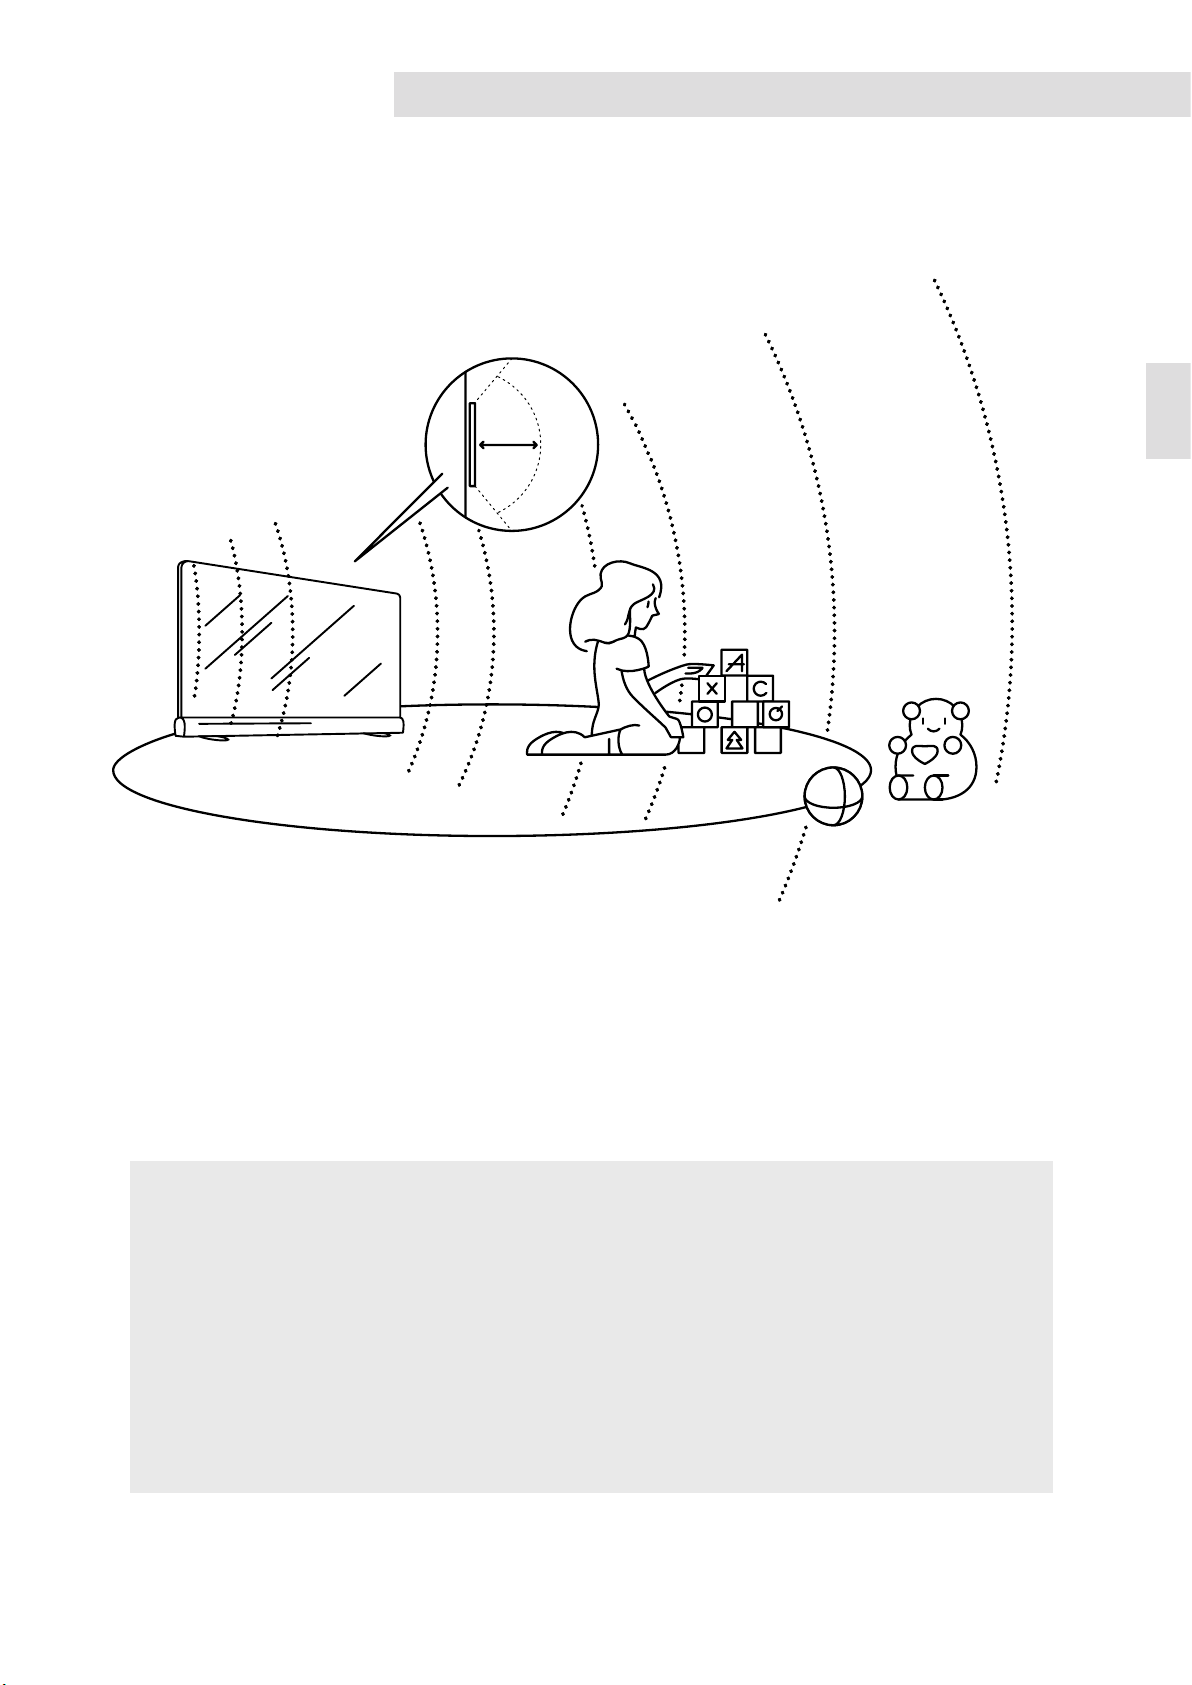
3 m
FLOOR HEATER THERMOUP FLOOR AIR
EN
120 °
Figure 4. ThermoUp Floor Air heater radiation
In order to use the device as efciently and safely as possible, the
following recommendations should be considered.
• Install the heater near those items that need additional heating (not more than 3 m).
• For comfortable use of the heater, it is recommended to install it at a distance of at least
50 cm from places occupied by people and animals for long periods of time.
• The device must not be covered, and should not get in contact with water.
• It is recommended to connect the device directly to the power source, without extension cords.
9
Page 11

OPERATION, STORAGE AND MAINTENANCE, POSSIBLE FAULTS
OPERATION, STORAGE AND
MAINTENANCE
EN
ThermoUp heaters do not require special maintenance.
The device should be periodically cleaned with a soft
cloth or a damp sponge. Do not use abrasive detergents,
pastes, metal brushes and other hard objects. With any
heater, you should regularly check the condition and
integrity of the power cable. The lifetime of the device
is more than 10 years, if the rules on installation and
operation were followed.
The device can be operated and stored in the following
conditions:
• Room air temperature from -50 °C to +70 °C;
• Relative air humidity up to 80% at a temperature of
• Store the heater in its original packaging.
The device must be protected from shock, dust and
moisture. At the expiration of the life of the device must be
disposed of in accordance with the rules, regulations and
methods applicable at the disposal site.
OPERATION, STORAGE,
POSSIBLE FAULTS
+25 °C;
10
Possible Malfunctions Remedies
• Check for line voltage and power cable integrity; if necessary, replace the
There is no radiated heat
The temperature of the heated
surfaces is below the proper level
faulty cable
• Check the position of the thermostat knob, its operation
• Contact an authorized dealer for professional diagnostics and device repair
• Check the temperature of the thermostat
• Check the voltage value at the heater terminals; during its operation the
voltage should be 230 V
Page 12

WARRANTY OBLIGATIONS
WARRANT Y OBLIGATIONS
The manufacturer guarantees the correct operation of the heater for 3 years from the date of purchase. If during the warranty
period there are defects in the work of the device due to the manufacturer’s fault, the seller, whose name is in the certicate of
sale, will repair this product free of charge or replace it with the conditions below.
EN
1. The warranty is valid only upon presentation of the
original documents conrming the fact of purchase.
2. The warranty card must be lled out completely and
correctly, and must be stamped by the seller. In the
absence of a stamp and the date of sale (or cash voucher
with the date of sale), the warranty period of the product
is calculated from the date of its manufacture.
3. All claims for the appearance and completeness of the
product must be made to the seller upon purchase of the
product.
4. In the event of a device malfunction due to the
manufacturer’s fault, the buyer has the right to appeal
to the seller. Responsibility for the malfunction of the
device due to the fault of the organization that carried
out the installation of the device rests with the installation
organization. In this case it is necessary to contact the
organization that installed the device.
This warranty is not valid in the event of:
5. Changes may be made to the design, assembly, or
technology of the product, in order to improve its technical
characteristics. Such changes are made to the product
without prior notice to customers and do not entail
obligations on the change/improvement of previously
released products.
6. This warranty does not entitle you to a refund and cover
damage resulting from alteration of the product without the
prior written consent of the manufacturer in order to bring
it in accordance with local technical and safety standards.
7. Warranty repair of the product is carried out in a period
not exceeding 45 days. In the event that during the
elimination of deciencies of the goods it becomes obvious
that they will not be eliminated within the term specied by
the agreement of the parties, the parties may conclude an
agreement on a new term for the elimination of the defects
of the goods.
• Changes in product design by the buyer;
• Improper use, use of the product for other purposes or
not in accordance with the manufacturer’s instructions
for operation and maintenance, as well as installation
or operation of the product in violation of technical
standards and safety standards;
• The presence of mechanical damage on the product
(chips, cracks, etc.), effects of excessive force on
the product, chemically aggressive substances, high
temperatures, high humidity/dust, concentrated
vapors, if any of the above has caused the product to
malfunction;
• Repairs made by unauthorized service centers or
dealers;
• Accidents, lightning strikes, ooding, re and other
causes beyond the control of the manufacturer that
have caused damage to the product;
• Defects obtained during the transportation of the
device by the customer (except for cases when
it is manufactured by authorized dealers or the
manufacturer);
• Defects in the system in which this product was used;
• Operation at increased voltage (more than 10%
of nominal) and humidity more than 80% at a
temperature of +25 °C.
11
Page 13
PRODUCT CERTIFICATION, CERTIFICATE OF SALE
PRODUCT CERTIFICATION
EN
Product was certified on the Customs Union territory by
the certification body RA.RU.10AD75
PRODUCT CB «ExpertAutoTest» LLC «Certication of machines
and equipment».
Address: RF, 156019, Kostroma, Stankostroitelnaya str., bldg.
3, prem. 1
Phone: +7 (4942) 46-60-08
E-mail: [email protected]
Product conforms with requirements of regulatory documents
TR CU 004/2011
TR CU 020/2011
GOST IEC 60335-1-2015 (Part 1)
GOST IEC 60335-2-30-2013 (Part 2-30)
GOST 30805.14.1-2013
GOST 30805.14.2-2013
GOST 30804.3.2-2013
GOST 30804.3.3-2013
Certificate No
NoTC RU C-RU.AD75.B.00437
Series RU No0633803
Term of validity: from 08.11.2017 to 07.11.2022
Certificate of conformity with the following European
Directives
Registred No.: 1805604715E/L18/46120
Low Voltage Directive 2014/35/EU
Date of issue 2018-09-25
Expire date 2023-09-24
Applocant: Phototech LLC
Russian Federation, 152025, Yaroslavl Region, PereslavlZalessky, Mendeleev Square, 2/34a
Standards: LVS EN 60335-2-30:2010 + A11:2012
LVS EN 60335-1:2012 + A11:2014
TUV NORD Baltik LLC
Reg № 40003121062
3 Saremas Street, Riga, Latvia, LV 1005
Phone: +371-67370391
E-mail: [email protected]
www.tuv-nord.lv
Manufacturer: Phototech LLC
Address: Russia, 152025, Yaroslavl Region, Pereslavl-Zalesky,
Mendeleeva square, bldg. 2, facil. 34A
CERTIFICATE OF SALE
Seller Company
Address
Date of sale Seller signature
M.P.
12
Page 14
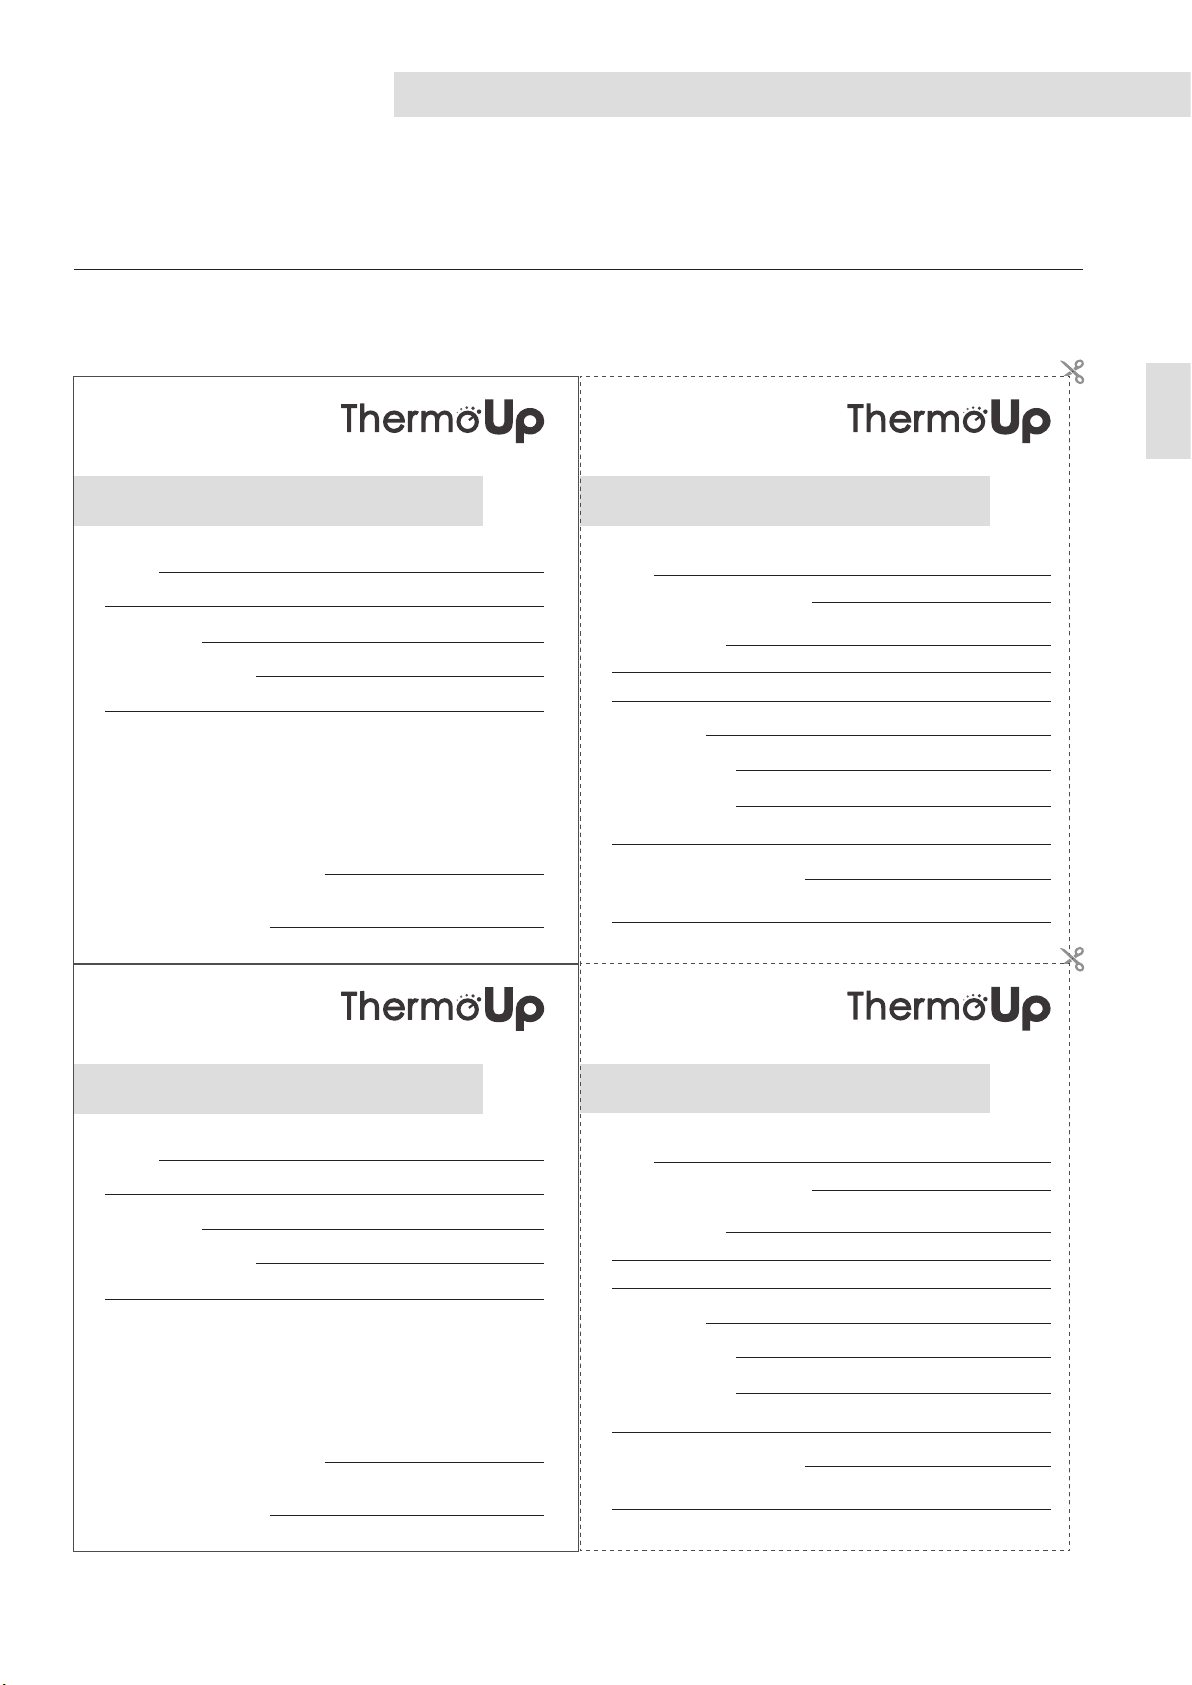
WARRANTY CARD
WARRANT Y CARD
Dear Customer! Should you find a heater malfunction, please contact us with via phone: +7 495 152-65-60 or via
e-mail: [email protected]
Filled by seller Remains in the Service Center
WARR ANTY CARD 1- 1 WARR ANTY CARD 1- 2
EN
Model
Date of sale
Sales organization
Date of transfer in SC for repair
Date of receipt from SC
Filled by seller
WARR ANTY CARD 2- 1
M.P.
Model
Date of entry to the SC for repair
Nature of the fault
Name of client
The client’s address
The client’s address
I received the device, I have no
complaints
ll in if the device needs to be delivered after repair
Customer date and signature
Remains in the Service Center
WARR ANTY CARD 2- 2
Model
Date of sale
Sales organization
Date of transfer in SC for repair
Date of receipt from SC
M.P.
Model
Date of entry to the SC for repair
Nature of the fault
Name of client
The client’s address
The client’s address
I received the device, I have no
complaints
ll in if the device needs to be delivered after repair
Customer date and signature
13
Page 15

 Loading...