

Page 1

THERMO TECHNOLOGIES
4
Thermo Alarm
Revision
Installation and
User’s Guide
Thermo Technologies
August 2002
Page 2
INSTALLATION
Installing the Base
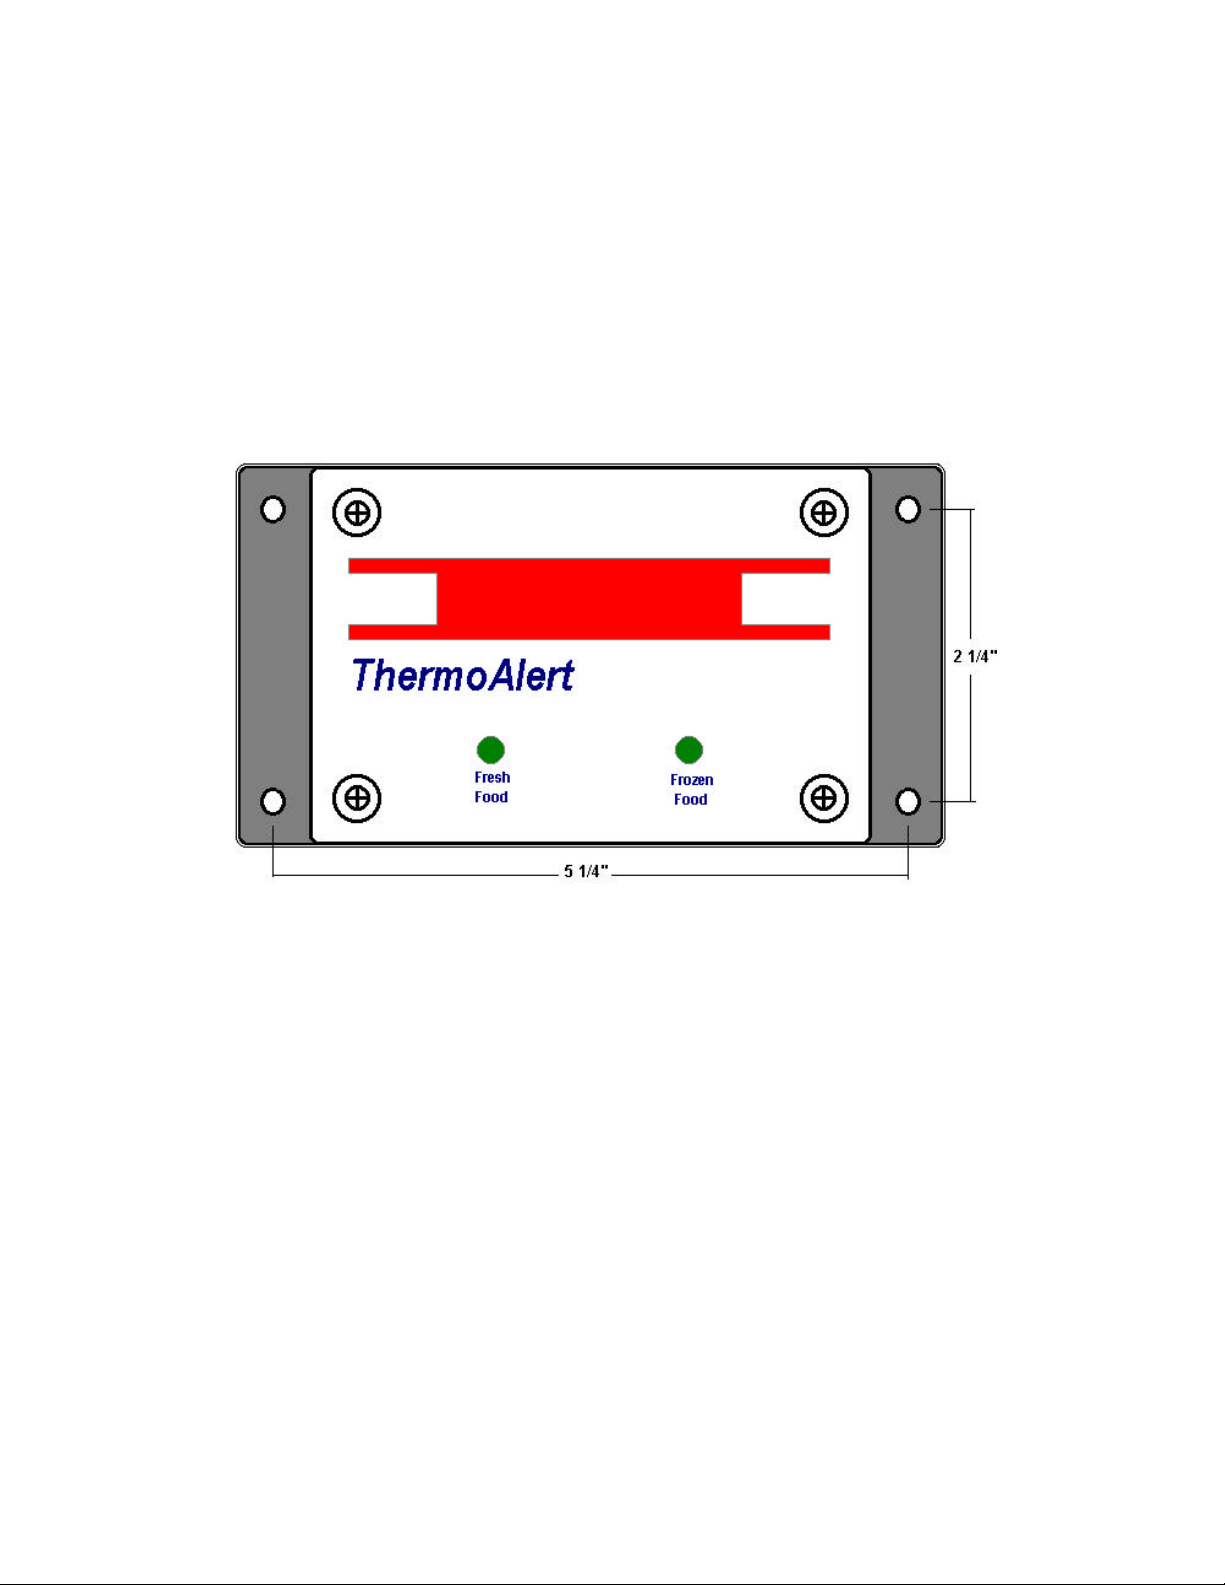
Locate a visible 4” x 5” space outside the food container to mount the
ThermoAlert base unit. Make sure that the area does not limit access
to the maintenance panels. Mount the base unit with 1/8” bolts with
plain and spring washers using the diagram below as a guide.
Installing Sensors
Drill a ½” hole through the container wall next to the based unit. Push
sensors carefully through the hole one at a time. Fasten one of the
sensors near the top and the other one near the bottom of the
container. Sensors are identical and are both calibrated for the same
temperature range. Fill the hole with a water resistance silicon paste.
Wiring the Unit
Locate the main power switch of refrigeration unit. Locate positive
and negative poles of the switch. Make sure that you have power in
these poles even if the safety switch turns off the main power. You
may need to replace the main switch with a DPDT (Double-Pole,
Double-Throw) switch. Connect the red wire of ThermoAlarm’s power
cable to the positive and the black wire to the negative pole of the
Thermo Technologies
August 2002
Page 3

switch. The large amber LED will blink if the power is connected
correctly and the temperature of monitored room is outside the range.
A small green light comes on showing operation mode of the unit.
Wiring the Alarm
While the large amber LED blinks, the internal relay is on (Black and
White wires). This contact is dry and potential free. It is designed to
give a signal to alarm devices such as auto-dialer or a Piezo
Siren/Alarm.
Calibrations
ThermoAlarm is delivered in Fresh Produce Mode and calibrated at
the factory as follows:
• Frozen Food –20 F to +10 F
• Fresh Food +33 F to +45 F
Thermo Technologies
August 2002
Page 4

Exact temperature reading depends on sensor location. It is
recommended to calibrate desired temperature range to match
refrigeration calibration scale. Following procedure allows qualified
personnel to adjust the unit’s calibration. There are two adjustments
for each mode (Fresh/Frozen). One is for high temperature alarm and
the other one is for low temperature alarm. Both sensors are identical
with 1% accuracy.
After opening the cover, you will see four adjustable pots as shown in
the above photo. Pot 1 and 4 are adjusting frozen food ranges while
2 and 3 are responsible for fresh food calibration. Furthermore, pot 1
and 2 are for low limit while 3 and 4 setting the high limit. These pots
are set at the factory for following temperatures:
• Frozen Food Mode - Pot 1 setting for low limit is –20 F, Pot 4
setting for high limit is +10 F
• Fresh Food Mode - Pot 2 setting for low limit is + 33 F, Pot 3
setting for high limit is +45 F
Temperature of ThermoAlarm in fresh food mode ranges from + 26 F
to + 68 F and in frozen food mode from + 26 F to – 20 F. Qualified
operators should follow the following steps to change (calibrate) the
factory settings for fresh food (for example + 30 F to + 50 F):
1. Make sure that sensors mounted in desired locations.
2. Turn Pot 2 counter clockwise and Pot 3 clockwise all the way.
The amber LED light flashes if container temperature is more
than + 68 F or less than + 26 F.
3. Wait until the chamber reaches and settles at the desired high
temperature of + 50 F.
4. Gradually turn Pot 3 counter clock wise until the amber LED
flashes, let the system cool down more. The LED should be off
after a while.
5. Monitor the temperature fall until it settles at the desired low
point.
6. Now turn Pot 2 clockwise until LED flashes again.
AFTER INITIAL INSTALLATION AND RANGE CHANGES, MAKE
SURE TO TEST THAT THE SYSTEM WORKS CORRECTLY IN
THE DESIRED RANGE!
Thermo Technologies
August 2002
 Loading...