

www.thermosense.co.uk
1
www.thermosense.co.uk
2
HT-625 INSTRUCTION MANUAL
Humidity & Temperature Meter &
Wet Bulb Temperature
Dew Point Temperature
HOLD
+
HOLD
%RH
CEM
DT-625
TEMP.
MAX
MIN
REL MAX MIN
BAT
TABLE OF CONTENTS
TITLE
1. INTRODUCTION
2. FEATURES
3. SPECIFICATIONS
4. PANEL DESCRIPTION
5. HUMIDITY AND AIR TEMPERATURE
MEASUREMENTS
6. BATTERY REPLACEMENT

www.thermosense.co.uk
3
www.thermosense.co.uk
4
1. INTRODUCTION
The HT-625 Thermo-hygrometer has been designed to
combine the functions of a Humidity Meter, Temperature Meter,
Wet Bulb Temperature and Dew Point Temperature Meter.
The Meter is simple to operate and is commonly used in a
variety of applications which include laboratory, industrial,
engineering and professional use.
The Humidity & Temperature Meter uses a humidity &
temperature semiconductor sensor. This operation manual
contains general information and specification.
2. FEATURES
Fast Response Time %RH: 10S (90% at 25℃ still air)
High Accuracy
Dew Point Temperature (-30℃~100℃/-22°F~199°F)
Wet Bulb Temperature ( 0℃~80℃/32°F~176°F)
Resolution 0.1%RH, 0. 1℃/0. 1°F
Max Hold and Data Hold Function
Micro Processor-based Design
Dual Display Temperature & Humidity
Shutdown time digitally adjustable from 1 to 120
Backlight
3. SPECIFICATIONS
Display: Large 4-1/2 dual digital LCD display with backlight
Sensor Type: A single chip relative humidity and temperature
multi sensor module comprising a calibrated
digital output.
Response Time: %RH:10S (90% at +25℃ still air)
Accuracy Note: Accuracy is specified for the following ambient
temperature range: 64 to 82°F (18 to 28°C)
Sampling Rate: 2.5 samples per second
Polarity: Automatic, (-) negative polarity indication.
Over-range: “OL” mark indication.
Low Battery Indication: The “ ” is displayed when the
battery voltage drops below the
opera-ting level.
Operating Conditions: 32 to 104oF (0 to 40oC); < 80% RH
non-condensing
Storage Conditions: 14 to 140oF (-10 to 60oC); <80% RH non-
condensing

www.thermosense.co.uk
5
www.thermosense.co.uk
6
Non-Automatic /Auto Power Off: Firstly press humidity hold
button, then press power button. After the full display appears,
release both buttons. Icon“ ” will not show on the LCD. The unit
will not auto power off now.
Directly press the power on/off button. The Meter will
automatically shut down after adjustment time inactivity (Sleep
Mode).
Adjustable Shutdown Time: The shutdown time is digitally
adjustable from 1 to 120 minutes. Firstly press the humidity
max/min button, then press the power button. After the full display
appears, release both buttons. icon“ ” and the current
shutdown time on the LCD. And then respectively press C and F
key to upward and downward to set the time period.
Power: One standard 9V, NEDA1604 or 6F22 battery.
Dimensions/Wt.: 150mm*72mm*35 mm/210g
Humidity / Temperature Measurement Range:
Humidity: 0%~100%RH
Temperature: –30℃~ 100℃, -30℉~ 199℉
Resolution : 0.01% RH, 0.01℃/℉.
Humidity Accuracy: + 2%RH (at 25℃, 20%~80% RH).
+ 2.5%RH (at other ranges)
Note: The measuring range is from 0% to 100%, but above 80%
and below 20% the deviation is not specified.
Air Temperature Accuracy: + 0.5℃/+ 0.9℉(at 25℃)
+ 0.8℃/+ 1.5℉(all other ranges)
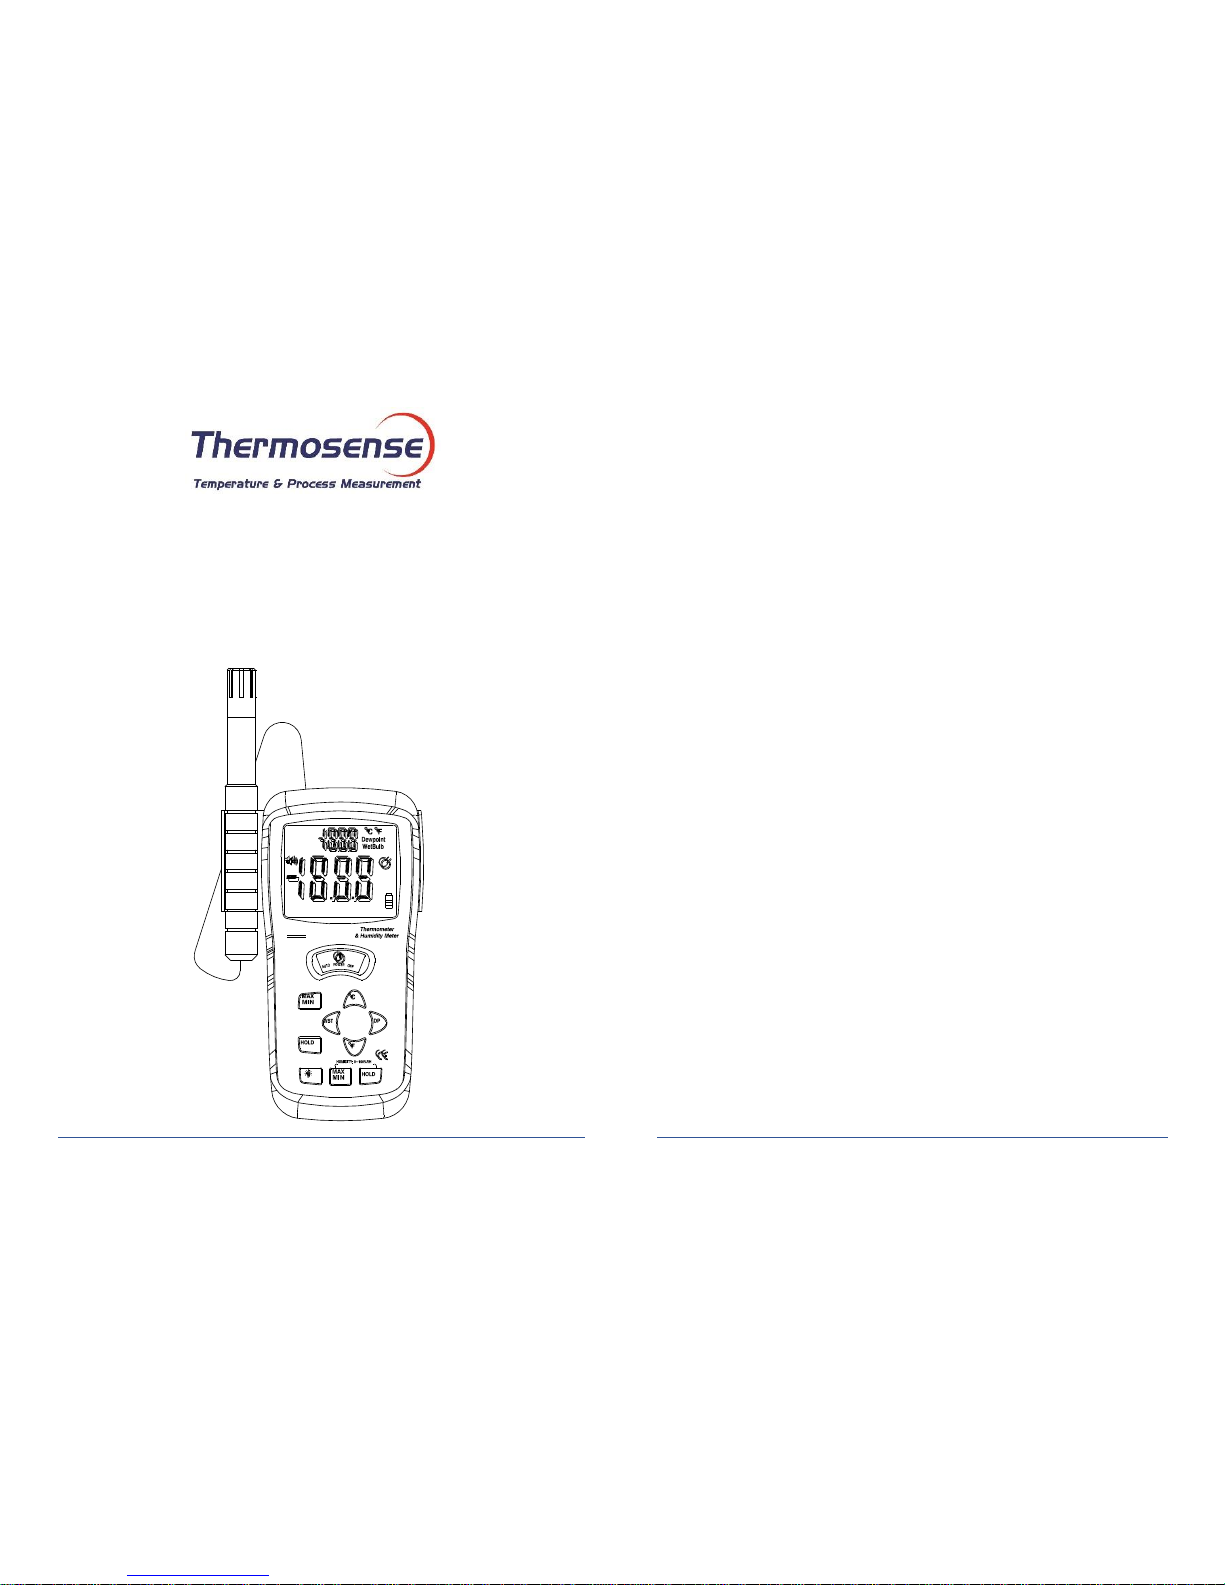
4. PANEL DESCRIPTION
HOLD
+
HOLD
%RH
3
4
5
6
7
CEM
DT-625
TEMP.
MAX
MIN
REL MAX MIN
BAT
1
2

www.thermosense.co.uk
7
www.thermosense.co.uk
8
① Temperature Display
② Humidity Display
③ Power ON/OFF Button: Turn the meter power
ON/OFF.
④ ℃: Factory set ºC. Press to change to ‘ºF’ to ‘ºC’.
⑤ Dew Point Button: Dew Point Measurement.
⑥ ’℉: Factory set ºC. Press to change to ‘ºC’ to ‘ºF’.
⑦ Temperature MAX/ MIN Button: Press MAX/MIN
button to enter MAX, MIN Recording mode (manual
range only). Select the proper range before selecting
MAX MIN to ensure that the MAX/MIN reading will not
exceed the testing range. Pressing the max/min
button once for Max or twice for Min function.
⑧ WBT Button: Wet Bulb Measurement.
⑨ Temperature HOLD Button: Press the Hold Button
to enter the hold function. The Temperature reading
will be held when the Data Hold button is pressed.
⑩ Backlight Button: Press to backlight on / off
⑪ Humidity HOLD Button
⑫ Humidity MAX/ MIN Button
⑬ Humidity / Air Temperature Probe: Humidity &
Temperature Semiconductor Sensor inside.
5. HUMIDITY AND AIR TEMPERATURE
MEASUREMENTS
1. Hold the probe in the area to be tested & allow adequate
time for readings to stabilise.
2. Press ℉,℃, dew point, WBT Button to enter ℉,℃, dew
point Wet Bulb Measurement
3. Read the Relative Humidity and Air Temperature, dew
point temperature wet bulb temperature.
IMPORTANT NOTE:
Do not immerse the probe into liquid; it is intended for use in air
only.
Warning:
Do not expose the sensor to direct sunlight.
Do not touch or manipulate the sensor.
6. BATTERY REPLACEMENT
If the sign “ ” appears on the LCD display, it indicates
that the battery should be replaced. Open the battery case and
replace the exhausted battery with a new battery.
(1 x 9V battery NEDA 1604, 6F22 or equivalent).
 Loading...