

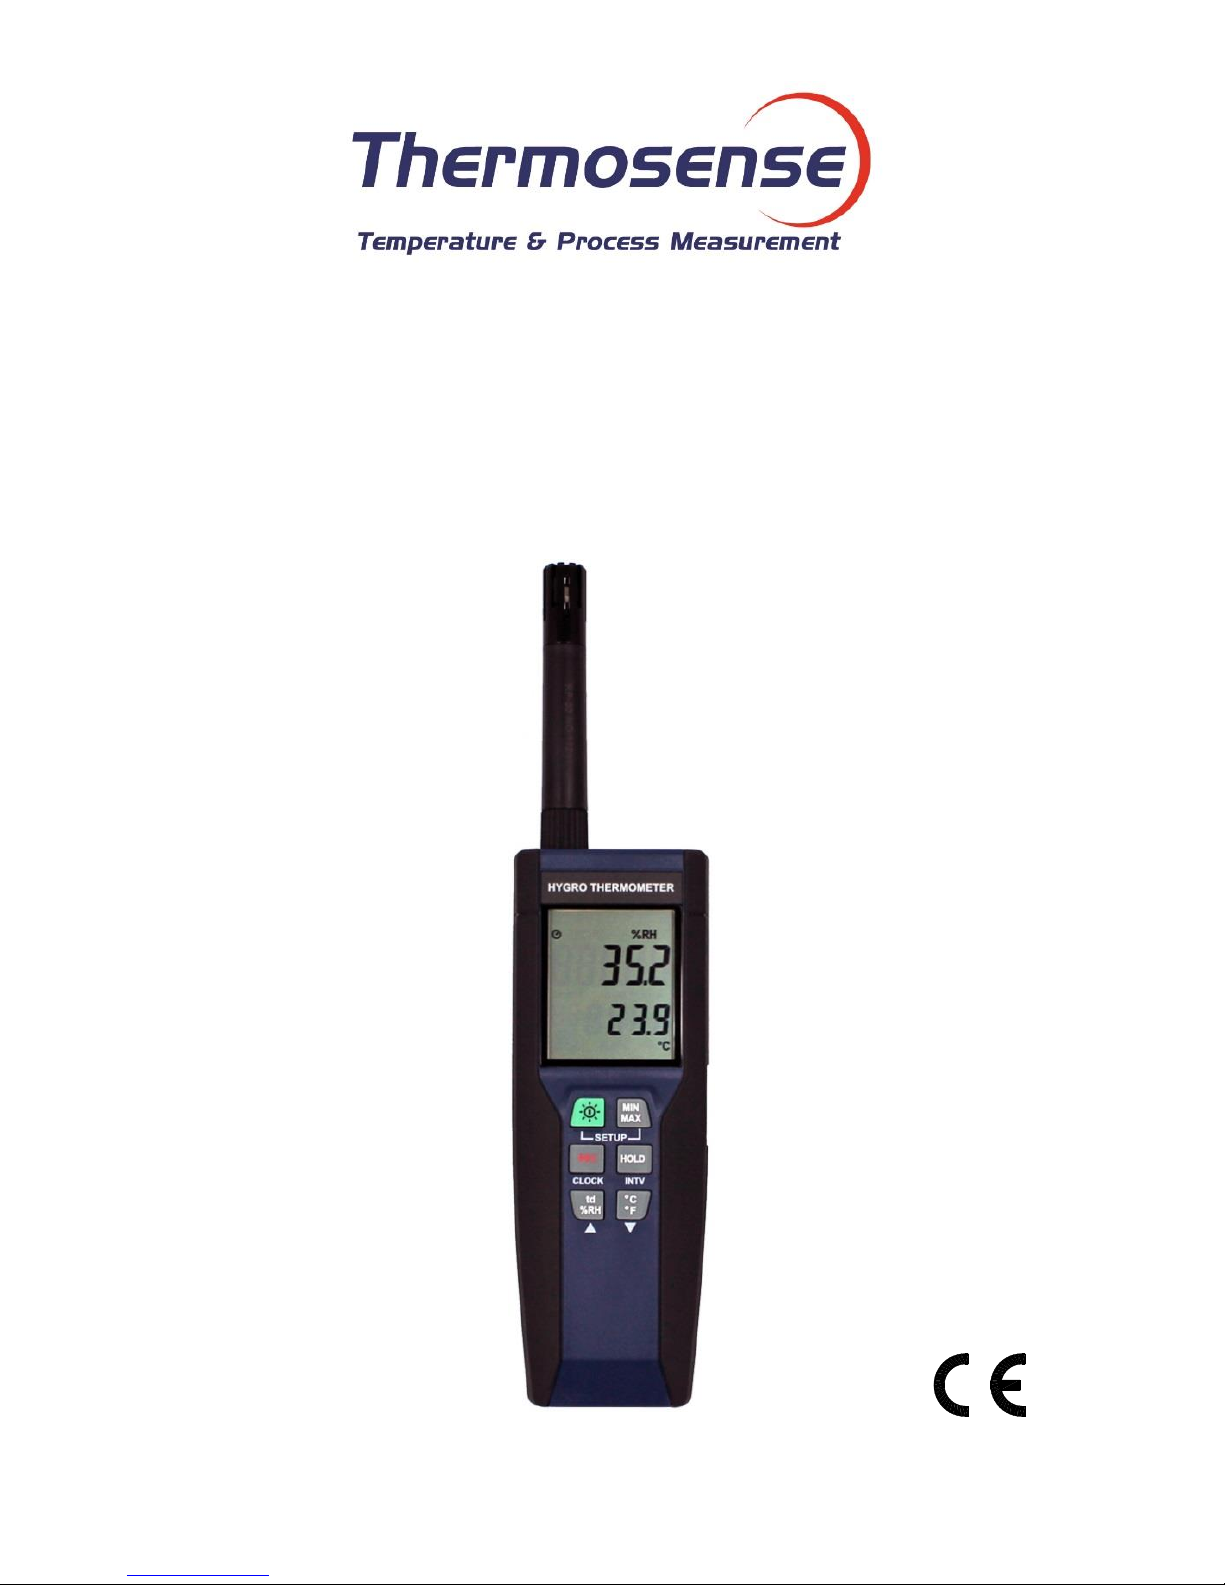
HDT-318
Thermo-Hygrometer with Data Logger
(Air Humidity/Temperature)
Instruction Manual

HDT-318 Thermo-Hygrometer with Data Logger Instruction Manual v1.0
Thermosense Limited
www.thermosense.co.uk
Page 1
CONTENTS
1. SAFETY INFORMATION ................................................................................................................. 2
2. GENERAL DESCRIPTION .............................................................................................................. 2
3. FEATURES ...................................................................................................................................... 2
4. SPECIFICATIONS ........................................................................................................................... 3
5. SYMBOL BUTTONS AND FUNCTIONS ......................................................................................... 4
6. DATA LOGGER ............................................................................................................................... 7
7. SETTING THE TIME ........................................................................................................................ 8
8. POWER PREPARATION ................................................................................................................. 8
9. COMMUNICATION WITH A PC ....................................................................................................... 9
TESTLINK SE-318 SOFTWARE ..................................................................................................... 9
10. MAINTENANCE .......................................................................................................................... 13
11. CONNECTION BETWEEN PROBE AND DEVICE ...................................................................... 13
HDT-318 Thermo-Hygrometer with Data Logger Instruction Manual v1.0
Thermosense Limited
www.thermosense.co.uk
Page 2
1. SAFETY INFORMATION
Read the following safety information carefully before attempting to operate or service the meter.
Use the meter only as specified in this manual; otherwise the protections provided by the meter may
be impaired.
ENVIRONMENT CONDITIONS:
Altitude up to 2000 meters
Relatively humidity: 90% max
Operation ambient temperature: 0 to 40°C
MAINTENANCE & CLEARING:
Repairs or servicing not covered in this manual should only be performed by qualified personnel.
Periodically wipe the case with a dry cloth. Do not use abrasives or solvents on this instrument.
SAFETY SYMBOLS:
Comply with EMC
When servicing, use only specified replacement parts.
2. GENERAL DESCRIPTION
Thank you for choosing our Thermo-Hygrometer Data Logger. To ensure the safety and the best
performance of this instrument, we recommend you read and follow the manual carefully before any
operation.
Measurement settings and results are shown on the backlit LCD panel.
Data can be stored in the meter or directly saved on a computer through the PC interface. Recorded
data can be further processed on a computer.
3. FEATURES
High accuracy
Thermistor sensor for temperature measurement, fast response time
Backlit dual display
Dew point measurement
Records up to 16,000 records
PC Interface
Free Windows software
Auto power off for battery saving
HDT-318 Thermo-Hygrometer with Data Logger Instruction Manual v1.0
Thermosense Limited
www.thermosense.co.uk
Page 3
4. SPECIFICATIONS
Sensor type: Electronic capacitance polymer film sensor / NTC
Relative humidity range: 0 to 100%RH
Temperature range: -20 to 60°C (- 4 to 140°F)
Dew point temperature range: -20 to 60°C (- 4 to 140°F)
Resolution: 0.1%RH, 0.1°C, 0.1°F
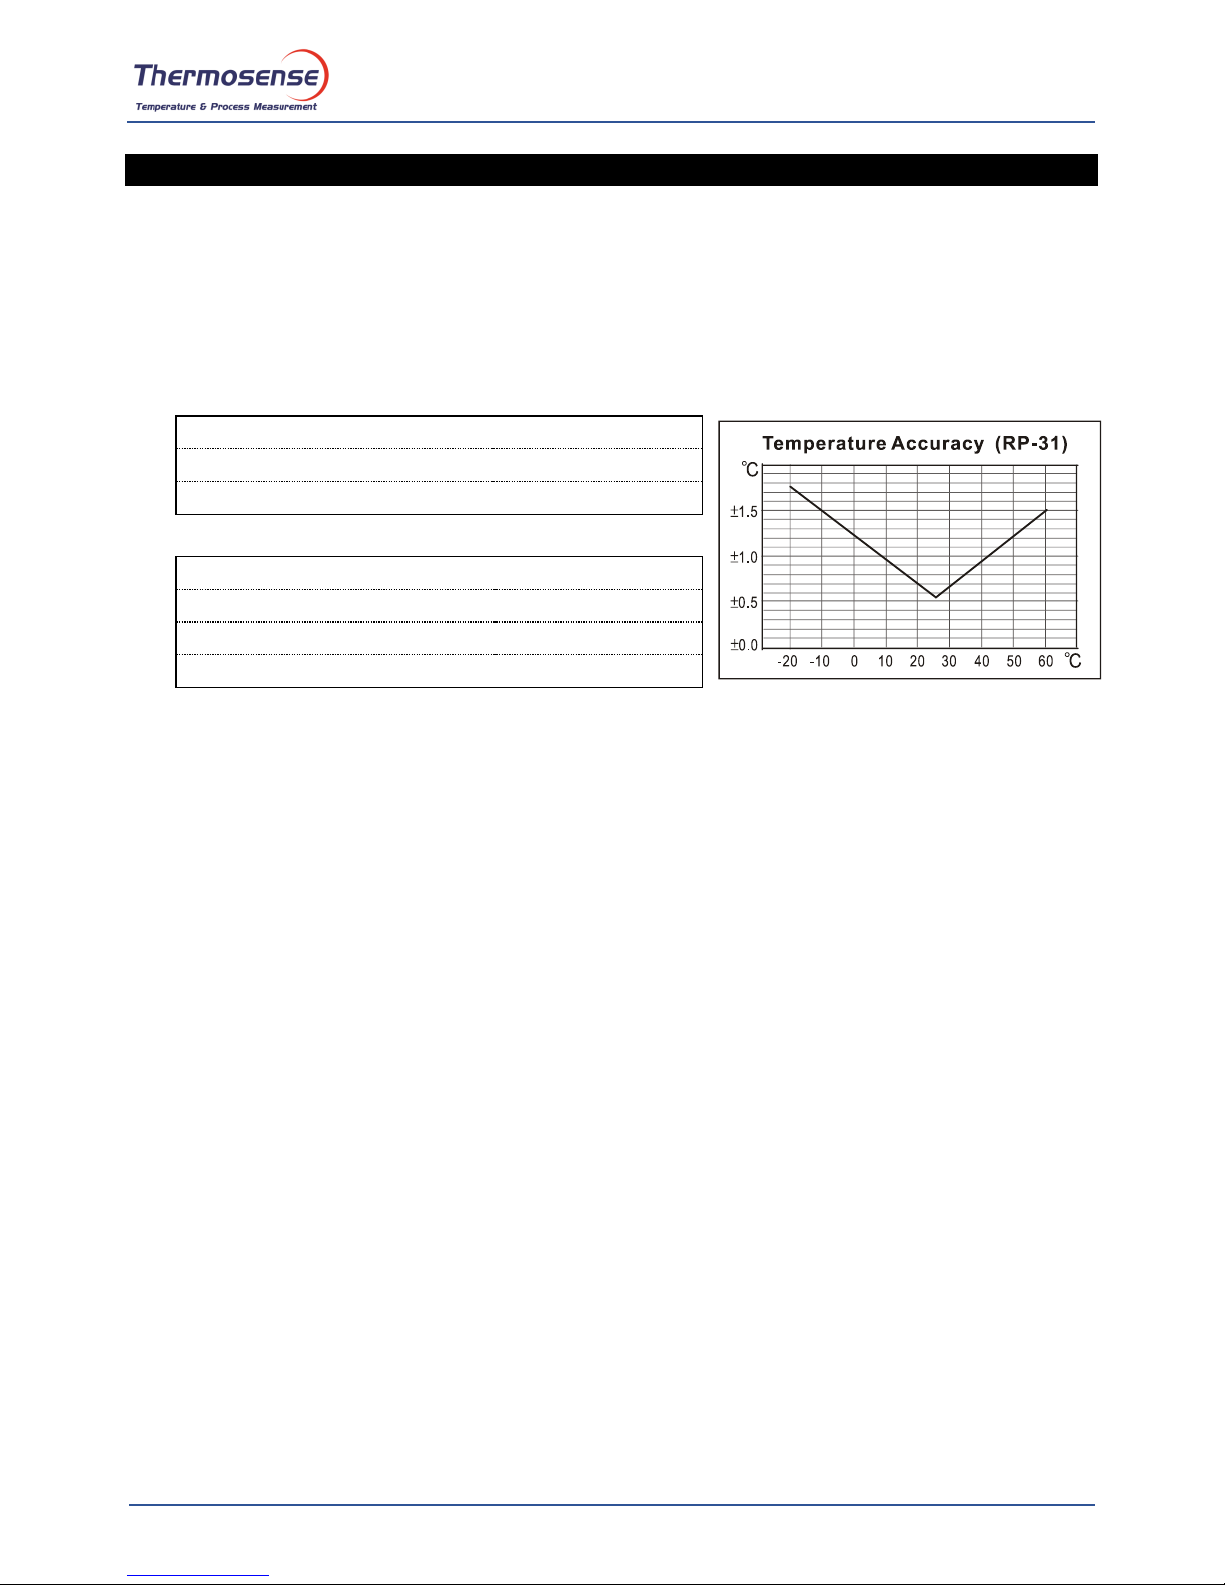
Accuracy: (at 23°C)
<Probe: RP-32>
<10%RH, >90%RH
±4.0%RH
10%RH to 90%RH
±2.0%RH
-20 to 60°C (-4 to 140°F)
±0.8°C (±1.5°F)
<Probe: RP-31>
<10%RH, >90%RH
±5.0%RH
10%RH to 90%RH
±3.0%RH
15 to 35°C (60 to 95°F)
±0.8°C (±1.5°F)
<15°C (60°F), >35°C (95°F)
Refer to chart
Response time: (@ t90; in slowly moving air) ; Humidity: 60 sec. ; Temperature: 10 sec.
Sensor hysteresis: <1.5%RH
Temperature coefficient: 0.1 x (specified accuracy) per 1°C (<23°C or >23°C)
Sample rate: 2 times per second
Battery type: 9V Battery
Battery lifetime: Approx. 80 hours (alkaline battery)
AC adapter: 9V DC(7~10V Max.)/20mA Min (Plug Diameter: 3.5mmx1.35mm)
Operation temperature: 0 to 40°C (32 to 104°F)
Operation humidity: 10 to 90%RH
Storage temperature: -10 to 60°C (14 to 140°F)
Storage humidity: 10 to 75%RH
Dimensions:
Meter: 185mm(L) × 65mm(W) × 36mm(H)
Probe: RP-32: 15mm Diameter x 94mm(L); RP-31: 15mm Diameter x 82mm(L)
Weight: Approx. 285g
Standard Accessories:
Instruction manual, 9V Battery, windows software, carrying case, USB cable.
Optional Accessories:
AC adapter, RS-232 Cable, Extension cables, 33%RH/ 75%RH humidity standard.
HDT-318 Thermo-Hygrometer with Data Logger Instruction Manual v1.0
Thermosense Limited
www.thermosense.co.uk
Page 4
5. SYMBOL BUTTONS AND FUNCTIONS
: Low battery indicator
: Auto power off indicator
: Minimum / maximum indicator
: Relative Humidity reading
: Recording data logger indicator
: Dew point temperature
: Data hold indication
: Month-day
: Hour: minute
: Temperature reading
: Temperature measurement units

HDT-318 Thermo-Hygrometer with Data Logger Instruction Manual v1.0
Thermosense Limited
www.thermosense.co.uk
Page 5
FUNCTIONS:
○
1
Sensor probe
○
2
Display screen
○
3
Power / Backlight button
Power on/off:
Press the button to turn on the unit. To turn the unit off, press and hold button down
until the screen shows “OFF 3, 2, 1, 0,” then the LCD screen goes off.
Note:
When the unit is on, the LCD will show the following initial information before entering the main
function: Available memoryCurrent dateCurrent timeEntering main function
LCD backlight on/off:
Press button to turn on the LCD backlight, making it easier to read in dark environment.
Press button again to turn off backlight. The backlight will turn itself off automatically after
30 seconds to save battery power.
Auto power off:
To save battery life, by default, every time the unit is powered on, it is under auto power off mode.
The unit will power itself off after 30 minutes if no key operation.
Auto power off will be automatically disabled under the following 2 circumstances:
When connecting to PC.
When data logger function is in process.
Disabled auto power off:
(1) Turn off the unit.
(2) Press and hold button, and keep holding button.
(3) Press button to turn on the unit.
(4) The LCD shows the initial information and then enters main function.
(5) Release button.
(6) Make sure the auto power off symbol disappears from display screen.
○
4
REC button
Press button to start recording data. The REC symbol will display on the screen. To stop
recording, press button again.
○
5
Relative Humidity/Dew Point Temperature switch
By default, the LCD displays Relative Humidity when the unit is powered on. To display dew point
(DP) temperature, press
button. Press
button again to switch back to Relative
Humidity.
○
6
MAX/MIN mode
Under this mode, the unit simultaneously monitors and stores the maximum and minimum value
(both humidity and temperature) in the memory. The unit will keep updating/refreshing the data.

HDT-318 Thermo-Hygrometer with Data Logger Instruction Manual v1.0
Thermosense Limited
www.thermosense.co.uk
Page 6
To start:
(1) Press button. MAX symbol lights up on LCD, the reading shows the maximum data.
(2) Press button again to show minimum data; the MIN symbol lights up on LCD.
(3) Press button again, the MAX and MIN symbol blinks together. The reading shows
present humidity and temperature.
(4) Press button again, MAX symbol lights up, and the mode returns to (1).
To exit:
Press and hold button for 2 seconds to stop storing maximum and minimum data.
Note: When the unit is in the MAX/MIN mode,
button is disabled.
○
7
Data-Hold mode
Press button to freeze the data shows on the LCD screen. Press again to exit Data-Hold
mode.
Note: When the unit is in the Data-Hold mode, the
, , and buttons are disabled.
○
8
Selecting temperature units
By default, each time the unit is powered on, the scale is set to the Celsius (°C). Press the
button to switch between Celsius (°C) and Fahrenheit (°F).
○
9
PC Interface
The PC jack signal output is a 9600 bps N 8 1 serial
interface. Use the USB cable (standard accessory) to
connect with a computer.
○
10
External DC 9V power supply jack
Connect the AC adapter (optional accessory) to use external power.
○
11
Tilt stand
○
12
Battery Compartment

HDT-318 Thermo-Hygrometer with Data Logger Instruction Manual v1.0
Thermosense Limited
www.thermosense.co.uk
Page 7
6. DATA LOGGER
This section will explain how to store data (data logger) in memory and how to recall data from
memory.
6.1 SETTING INTERVAL TIME FOR DATA STORING:
(1) Turn off the unit.
(2) Enter SETUP mode by pressing and holding button and then press
power button to turn on the unit. “SEt” blinks on the LCD screen.
(3) Press INTV ( ) button to set interval time.
(4) Press ▲ ( ) or ▼ ( ) to adjust the interval minute, press INTV ( )
button again to adjust second.
(5) When finished, press INTV ( ) button to exit SETUP mode.
Note: To abort during the process, press power button to exit SETUP mode.
6.2 START DATA LOGGER (STORING DATA IN THE MEMORY):
(1) Press button to start data logger (storing the measured values in built-in memory).
(2) REC symbol lights up on LCD screen.
(3) Press button again to stop recording.
Note:
During recording period, most of the buttons are disabled, such as the td %RH, °C/°F, etc.
All other settings must be made before starting the data logger function.
When the memory is full (16000 recorders), REC symbol will blink on the LCD screen. The
data logger stops.
When battery power low
symbol lights up on the screen), data logger cannot be
started. If during data logger, the battery starts running low, data logger will stop
automatically.
(3) CLEARING DATA:
(1) Turn off the unit.
(2) Press and hold button and then press power button to turn on the unit.
(3) Keep holding button, then LCD will show "CLr" and “SURE 5, 4…1, 0” until clean the
memory. (To abort, release button before “SURE 0”.)

HDT-318 Thermo-Hygrometer with Data Logger Instruction Manual v1.0
Thermosense Limited
www.thermosense.co.uk
Page 8
7. SETTING THE TIME
The unit incorporates a clock so that the data logger function can also record the data and time along
with the measurement value in the memory.
7.1 SETTING DATE AND TIME:
(1) Turn off the unit.
(2) Enter SETUP mode by pressing and holding button and then press
power button to turn on the unit. “SEt” blinks on the LCD screen.
(3) Press CLOCK ( ) button to set clock.
(4) Press ▲ ( ) or ▼ ( ) to adjust year, press CLOCK( ) button to
adjust next value (month datehourminute).
(5) When finish, press CLOCK ( ) button to exit SETUP mode.
Note:
To abort during the process, press power button to exit SETUP
mode.
An internal backup battery supplies power for the clock.
8. POWER PREPARATION
8.1 Battery Loading
Remove the battery cover on the back
and insert one 9V battery.
8.2 Battery Replacement
When the battery voltage drops below
the operating voltage, Low battery
indicator
will appear. Replace a
9 Volt battery immediately to ensure the
unit functions properly.
8.3 AC Adapter Connection
When the AC adapter is used, insert the plugs of the adapter into the DC9V connector on the side
panel.
Note:
When the AC adapter is connected while battery is inserted, the unit will be
powered from the adapter (the AC adapter has priority).

HDT-318 Thermo-Hygrometer with Data Logger Instruction Manual v1.0
Thermosense Limited
www.thermosense.co.uk
Page 9
9. COMMUNICATION WITH A PC
Users can transfer data from the built-in memory on the instrument to a PC through the SE318 software.
The communication requires a USB or RS-232 serial connection.
TESTLINK SE-318 SOFTWARE
(1) The SE-318 package contains:
80mm CD
Custom designed USB cable for SE318
(2) System Required:
Windows NT 4.0/ NT2000/ XP/ VISTA/ Windows 7
(3) Minimum Hardware Required:
PC or NoteBook with Pentium 800MHz or higher, 128 MB RAM
At least 50 MB hard disk space available to install SE318
Recommended screen resolution 1024X768 or above
(4) Install SE-318 and USB-120 connector driver:
1. We recommend you close all other applications before installing SE318.
2. Insert the setup CD disk and it should automatically display the install screen. You may also
manually run MainSetup.exe from within the directory of the CD.
3. Click Install to begin installation.
4. The software will install the USB-120 connector driver first:
5. While installing, it will show this window below, just click “next” to continue.(see Fig.1)
6. Select “Launch the CP210x VCP Driver Installer” option, and then click Finish. (see Fig.2)
(Fig.1) (Fig.2)
7. Click Install.

HDT-318 Thermo-Hygrometer with Data Logger Instruction Manual v1.0
Thermosense Limited
www.thermosense.co.uk
Page 10
8. Once the USB-120 connector driver has installed it will
install the SE318 software automatically.
9. Once installation has finished, connect the USB cable
to the device and computer and switch the device on.
Launch the SE318 software.
10. The software should detect which COM port the device
is connected to. If it doesn’t it will display “No
Connection”. To manually find the COM port launch
Device Manager:
11. Launching Device Manager will vary depending on your
computer’s Windows operating system version:
a. Most versions: Start Menu -> Search for “Device Manager”.
b. Windows 7 -> Control Panel -> System and Security, Windows Vista -> Control Panel -> System and
Maintenance, Windows XP-> Control Panel -> Performance and Maintenance.
12. Once Device Manager has loaded click the “+” symbol on the left side of Ports (COM &LPT).
If the device “CP2101 USB to UART Bridge Controller (COMx)” is in the list, the COM port
is shown and the connector is ready to work. If not, try reconnecting the device to a different
USB port on the computer. Note: ensure the device is switched on.
(5) Main menu and buttons:
Open - Retrieve files from the disk
Save - Save the present data to the disk
Print - Send data in the present table to the printer
Pause - Stop data recording
Run - Start data recording
Output To Graph - Send tabular data to another graph
New - Reset all the data
Option - set attributes of graph. (You can also double click on the graph.)

HDT-318 Thermo-Hygrometer with Data Logger Instruction Manual v1.0
Thermosense Limited
www.thermosense.co.uk
Page 11
Sampling Rate - Time interval between each data to be recorded. If you want to change it, move
mouse cursor to the digit you want to change and click, then input the new sampling rate. The
change will be effective immediately. It will keep up to 5000 data points, when data points exceed
this limit, the oldest 100 points will be replaced sequentially.
(6) Real Time Graph:
You can Zoom a graph by using the mouse:
To Zoom:
1. Press and hold the Shift key
2. Press the left mouse button and drag the cursor to select the new extents
3. Release the mouse button
To Undo the Zoom:
Press the Alt+U key or click the Undo Zoom button
Note: Zooming method is not allowed in Real Time Graph Window.
(7) Tabular:

HDT-318 Thermo-Hygrometer with Data Logger Instruction Manual v1.0
Thermosense Limited
www.thermosense.co.uk
Page 12
The Tabular window can be used to record real time data in a table format. The maximum number
of records that the Tabular window can keep will be depending on how many available memory
and hard disk space of the connected computer.
(8) Data Logger
When you have thermometer connected to
computer, select "Load Data" to start loading the
recorded data from the thermometer. There will
be a progress indicator to show the loading
progress.
If error occurs, just click "Load Data" again.
After the data has been successfully loaded to
computer, the left side window shows how many
data sets were loaded and their detailed
information (start date, start time, recording rate,
and record numbers).
For example:
It will transfer the first data set to graph and
tabular on the right side window once you finish
loading recorded data from the thermometer. You
can click on at any data set to show its graph and
tabular on the right side window.
You can choose a rectangle area on the graph to
zoom in for detail.
The vertical dash line in the graph will match the
highlight row in the tabular. When clicking on
another row in the tabular, the vertical dash line
will move to the corresponding position to match
the time.
(9) Frequently Asked Questions:
Q: I have connected the thermometer to the computer turned it on but it still shows "NO
CONNECTION"?
A: It could be caused by all COM ports being occupied by other applications. Close all application,
restart your computer, and run SE318 again.
Q: In TABULAR window, I saved a file. Can I use EXCEL to open this file?
A: CSV (comma separated values) files can saved and opened in Excel. However, if your
computer’s regional settings use the comma as a decimal separator this will cause problems
when opening the data within Excel. In this case you can use TXT files instead which use tabs to
separate data, not commas.

HDT-318 Thermo-Hygrometer with Data Logger Instruction Manual v1.0
Thermosense Limited
www.thermosense.co.uk
Page 13
Q: How do I uninstall the SE318 software?
A: You can uninstall SE318 software using the uninstall link within the start program menu on
your computer. Alternatively launch the Add/Remove Programs application in the Windows
Control Panel, highlighting the SE318, and clicking on the Add/Remove... button.
10. MAINTENANCE
In order to ensure the accuracy of the thermometer for a longer period of time you should calibrate
it once a year.
Clean the device and the window of the display with a clean, lint-free, antistatic and dry cleaning
cloth.
Do no use cleaning agents that contain carbon or benzenes, alcohol or anything
similar to clean the product since these substances damage the surface of the
measuring instrument. Moreover, these fumes are hazardous to health and explosive.
Do not use tools with sharp edges, screwdrivers, metal brushes or anything similar to
clean the device.
11. CONNECTION BETWEEN PROBE AND DEVICE
The probe can be connected or disconnected from the device by the
fastening screw as shown in the graph. Rotate only the fastening screw
rather than the probe body to prevent damage the probe.

Thermosense Limited
11 Eghams Court, Boston Drive, Bourne End, Bucks, SL8 5YS, UK
Telephone: +44 (0)1628 531166 Fax: +44 (0)1628 531499
Email: sales@thermosense.co.uk Web: www.thermosense.co.uk
 Loading...