

Thermo Scientific Fisher Scientific Fisherbrand GT1R Centrifuge, Fisher Scientific Fisherbrand GT1 Centrifuge Instruction Manual

Instruction manual
Fisherbrand GT1 Centrifuge
Fisherbrand GT1R Centrifuge
50156465_a • 05 / 2018
15878722
15868722

IMPORTANT Read this instruction manual. Failure to follow the instructions in this manual can result in
damage to the unit, injury to operating personnel and poor equipment performance.
CAUTION All internal adjustments and maintenance must be performed by qualified service personnel.
Material in this manual is for informational purposes only. The contents and the product it describes are
subject to change without notice. Fisher Scientific makes no representations or warranties with respect to this
manual. In no event shall be held liable for any damages, direct or incidental, arising from or related to the use
of this manual.
HIGHConic™, CLINIConic™, MicroClick™ and Auto-Lock™.
All trademarks are the property of Thermo Fisher Scientific Inc. and its subsidiaries unless otherwise specified.
© 2018 Fisher Scientific Inc. All rights reserved.

Contents
Preface ........................................................................ 1
Items Supplied ......................................................... 1
Intended Use............................................................ 1
Precautions.............................................................. 1
Symbols used on the Centrifuge............................... 2
Technical Specifications............................................... 3
Technical Data ......................................................... 3
Directives, Standards and Guidelines ...................... 4
Mains Supply ........................................................... 4
Rotor Selection ........................................................ 4
Transport and Set Up .................................................. 6
Before Setting Up..................................................... 6
Location................................................................... 6
Transporting............................................................. 6
Leveling.................................................................... 6
Mains Connection .................................................... 7
Storage .................................................................... 7
Shipping................................................................... 7
Control Panel............................................................... 8
Control Panel ........................................................... 8
Keys......................................................................... 8
Operation..................................................................... 9
Switching on the Centrifuge ..................................... 9
Open the Centrifuge Door ........................................ 9
Close the Centrifuge Door ........................................ 9
Rotor Installation ...................................................... 9

Acceleration / Deceleration Rates............................. 10
Programs ................................................................. 12
Centrifugation........................................................... 12
Short-term Centrifugation......................................... 13
Removing the Rotor ................................................. 13
Aerosol-Tight Rotors ................................................ 14
Switch off Centrifuge................................................ 14
System Menu............................................................... 15
Flowchart System Menu........................................... 15
Maintenance and Care................................................. 16
Cleaning Intervals ..................................................... 16
Basics...................................................................... 16
Cleaning................................................................... 16
Disinfection .............................................................. 17
Decontamination ...................................................... 18
Autoclaving .............................................................. 18
Service of Fisher Scientific........................................ 18
Shipping and Disposal.............................................. 19
Troubleshooting........................................................... 20
Mechanical Emergency Door Release ...................... 20
Troubleshooting by Guide ........................................ 21
When to contact Customer Service.......................... 22
Chemical Compatibility Chart ...................................... 23

Preface
Before starting to use the centrifuge, read through this
instruction manual carefully and follow the instructions.
Failure to follow the instructions and safety information in this
instruction manual will result in the expiration of the sellers
warranty.
Items Supplied
Items Quantity Check
Centrifuge GT 1 / 1R 1
Power supply cable 1
Instruction manual 1
CD 1
If any parts are missing, contact your nearest Fisher Scientific
representative.
Intended Use
This centrifuge is designed to separate sample mixtures of
different densities like chemicals, environmental samples and
other non-human body samples.
• Turn OFF the centrifuge at the main switch. The mains
plug must be freely accessible at all times.
Press the STOP key to shut down the centrifuge.
Pull out the power supply plug or disconnect the power
supply in an emergency.
• As safety zone maintain a clear radius of at least 30 cm
around the centrifuge.
Do not place any dangerous substances within this
security zone.
• Set up in a well-ventilated environment, on a horizontally
leveled and rigid surface with adequate load-bearing
capacity.
Preparation
• It is the obligation of the operator to make sure, that the
proper protective clothing is used. Mind the “Laboratory
Biosafety Manual” of the World Health Organization
(WHO) and the regulations in your country.
• Do not make any changes to the mechanical
components of the rotor.
• Do not touch the electronic components of the centrifuge
nor alter any electronic or mechanical components.
• Use only with rotors which have been properly installed.
Follow the instructions on the Thermo Scientific™
Auto-Lock™ rotor exchange in section Rotor
Installation.
Precautions
Observe the safety instructions. Not following these
instructions can cause damage.
The centrifuge is to be used for its intended use only.
Improper use can cause damages, contamination, and
injuries with fatal consequences.
The centrifuge should be operated by trained specialists only.
In order to ensure safe operation of the Fisherbrand GT 1 / 1R
centrifuge, general safety regulations must be followed. Mind
the regulations in your country.
Set Up Conditions
• Plug the centrifuge only into sockets which have been
properly grounded.
Centrifuge GT 1 / 1R Preface | 1
• Do not use rotors, buckets or accessories which show
any signs of removed protective coating, corrosion or
cracks. Contact customer service for further advice or
inspections.
• Use only with rotors which have been loaded properly.
• Never overload the rotor.
• Always balance the samples.
• Use only rotors and accessories for this centrifuge which
have been approved by Fisher Scientific. Exceptions to
this rule are commercially available glass or plastic
centrifuge labware, provided they have been designed to
fit rotor or adapter cavities and are approved for the
speed or the RCF value of the rotor.
• Make sure the rotor is locked properly into place before
operating the centrifuge.
• Implement measures which ensure that no one can
approach the centrifuge for longer than absolutely
necessary while it is running.
• If used for foodstuffs machinery, for cosmetics or
pharmaceutical products, only use closed or aerosoltight containers for centrifugation.
Hazardous Substances
• Do not place anything on top of the centrifuge during a
run.
• Never open the centrifuge door until the rotor has come
to a complete stop and this has been confirmed in the
display.
• The emergency door release may be used in
emergencies only to recover the samples from the
centrifuge, e.g. during a power failure (refer to the section
Mechanical Emergency Door Release).
• Especially when working with corrosive samples (salt
solutions, acids, bases), the accessory parts and vessel
have to be cleaned thoroughly.
• Do not centrifuge explosive or flammable materials or
substances.
• The centrifuge is neither inert nor protected against
explosion. Never use the centrifuge in an explosion-prone
environment.
• Do not centrifuge toxic or radioactive materials or any
pathogenic micro-organisms without suitable safety
precautions.
If centrifuging any hazardous materials mind the “Laboratory
Biosafety Manual” of the World Health Organization (WHO)
and any local regulations. When centrifuging microbiological
samples from the Risk Group II (according to the “Laboratory
Biosafety Manual” of the World Health Organization (WHO)),
aerosol-tight biological seals have to be used. Look on the
internet page of the World Health Organization (www.who.int)
for the “Laboratory Biosafety Manual”.
For materials in a higher risk group, extra safety measures
have to be taken.
• If toxins or pathogenic substances have contaminated
the centrifuge or its parts, appropriate disinfection
measures have to be taken (refer to the section
Disinfection).
• Extreme care should be taken with highly corrosive
substances which can cause damage and impair the
mechanical stability of the rotor. These should only be
centrifuged in fully sealed tubes.
• If a hazardous situation occurs, turn off the power supply
to the centrifuge and leave the area immediately.
Do not open the centrifuge, while it is running.
In any case of severe mechanical failure, such as rotor or
bucket crash, the centrifuge is not aerosol-tight.
In case of rotor failure the centrifuge can be damaged. Leave
the room. Inform customer service.
Maintenance
The centrifuge housing is not to be opened by the operator.
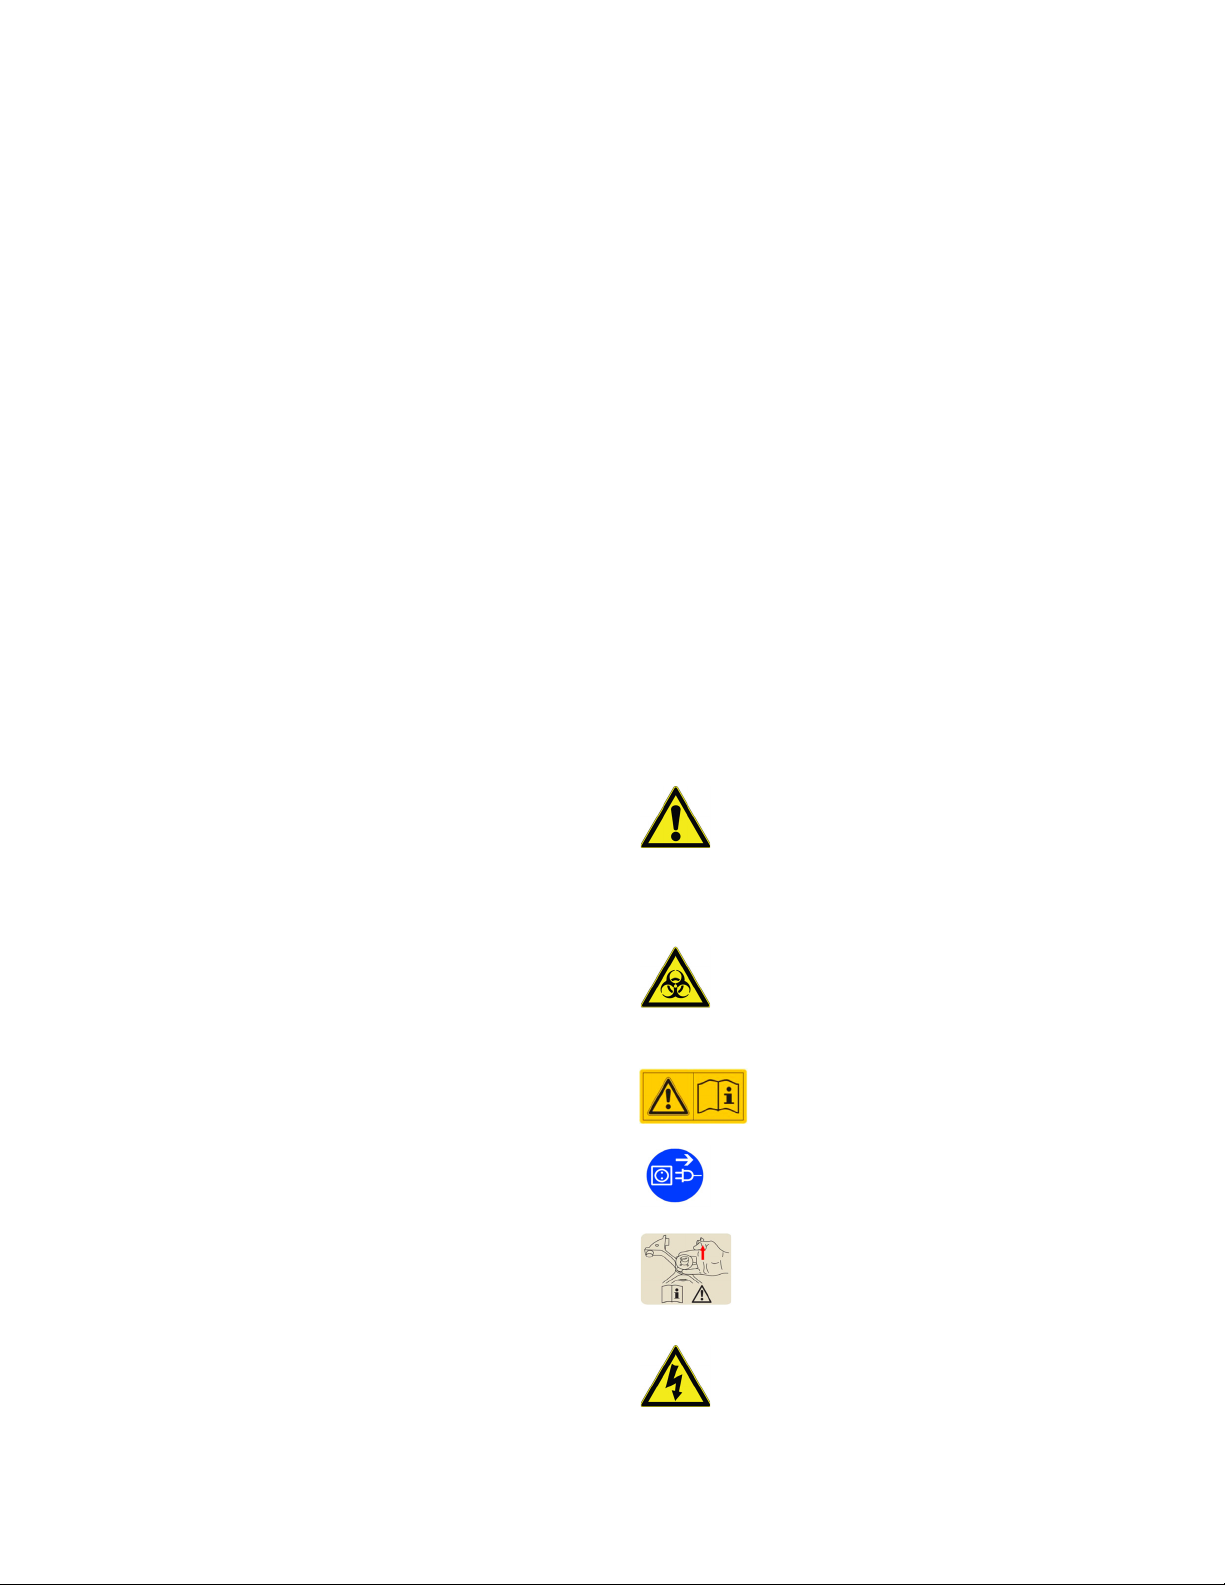
Symbols used on the Centrifuge
This symbol refers to general hazards.
CAUTION means that material damage
could occur.
WARNING means that injuries or material
damage or contamination could occur.
This symbol refers to biological hazards.
Observe the information contained in the
instruction manual to keep yourself and
your environment safe.
This symbol refers to information on
hazards, described within the manual.
This symbol demands to disconnect mains
before transporting or servicing the
centrifuge.
Operating
• Never use the centrifuge if parts of its cover panels are
damaged or missing.
• Never start the centrifuge when the centrifuge door is
open.
• Do not move the centrifuge while it is running.
• Do not lean on the centrifuge.
2 | Preface Centrifuge GT 1 / 1R
This symbol demands to check, if the rotor
is installed correct by lifting it slightly at the
handle. Refer to the section Rotor
Installation.
This symbol refers to electrical hazards.

Technical Specifications
Technical Data
The technical data of the Fisherbrand GT 1 / 1R Centrifuge is listed in the following table.
Table 1. Technical Data Fisherbrand GT 1 / 1R Centrifuge
Feature GT 1 GT 1R
Use in interior spaces
Environmental conditions
Environmental Conditions during Storage and
Shipping
Permissible Ambient Temperature during
Operation
Heat Dissipation
Overvoltage Category II II
Pollution Degree 2 2
IP 20 20
Running Time 99 h 59 min 50 sec, hold 99 h 59 min 50 sec, hold
Maximum Speed n
Minimum Speed n
Maximum RCF Value at n
Noise Level at Maximum Speed
Maximum Kinetic Energy 8.12 kJ 10.1 kJ
Temperature Setting Range -10 °C to +40 °C
Dimensions
Height (open door / closed door)
Width
Depth
Weight without rotor 35 kg 74 kg
1
max
min
max
1
Altitudes of up to 2
Max. relative humidity 80 % up to 31 °C; decreasing linearly up to
50 % relative humidity at 40 °C.
Temperature: -10 °C to +50 °C
Humidity: 15 % to 85 %
+2 °C to +35 °C +2 °C to +35 °C
Ventilated Refrigerated
230 V 230 V
1 060 Btu/h; 1 170 Btu/h;
16 000 rpm 17 850 rpm
300 rpm 300 rpm
24 328 x g 30 279 x g
< 58 dB (A) (measured with a
TX-150 rotor); < 61 dB (A)
(measured with a MicroClick™
24x2 rotor)
660 mm / 310 mm
370 mm
490 mm
000 m above sea level
Temperature: -10 °C to +50 °C
Humidity: 15 % to 85 %
< 56 dB (A) (measured with a TX-150
rotor)
700 mm / 320 mm
460 mm
670 mm
1
Front Side Measurement, 1 m in front of the instrument at 1.6 m height
Centrifuge GT 1 / 1R Technical Specifications | 3

Directives, Standards and Guidelines
Table 2. Directives, Standards and Guidelines
Region Directive Standard
Europe
220-230 V
50 / 60 Hz
2006/42/EC Machinery
2014/35/EU Low Voltage
(Protective Goals)
2014/30/EC Electromagnetic Compatibility (EMC)
2011/65/EC RoHS
Directive on the Restriction of the use of certain Hazardous
Substances in electrical and electronic equipment
EN 61010-1, 2nd Edition
nd
IEC 61010-2-020, 2
EN 61326-1
EN ISO 14971
EN ISO 9001
Edition
Mains Supply
The following table contains an overview of the electrical connection data. This data is to be taken into consideration, when
selecting the mains connection socket.
Unit
Fisherbrand GT 1 Centrifuge 230 V 50 / 60 Hz 2 A 310 W 5 AT 16 AT
Fisherbrand GT 1R Centrifuge 230 V 50 / 60 Hz 4 A 750 W 15 AT 16 AT
Mains
Vol t age
Frequency
Rated
Current
Power
Consumption
Equipment
Fuse
Building
Fuse
Rotor Selection
Various rotors are available to choose from the following:
75005701 TX-150 swinging bucket rotor
75005702 TX-150 round buckets
75005703 TX-150 50mL conical buckets
75005704 TX100S clinical swinging bucket rotor with sealed carriers
75005705 TX100 clinical swinging bucket rotor with carriers
75005706 M10 microplate swinging bucket rotor
75005723 M10 buckets
75005721 M10 sealed buckets
75005600 MT12 microtube swinging bucket rotor
75005709 HIGHConic™ III fixed angle rotor
75003623 CLINIConic™ fixed angle rotor
4 | Technical Specifications Centrifuge GT 1 / 1R

75005715 MicroClick™ 24x2 microtube rotor
75005719 MicroClick™ 30x2 microtube rotor
75005720 8x8 PCR Strip rotor
75003694 8 x 50 mL Individually Sealed rotor (only usable in the Centrifuge GT 1R)
75005765 MicroClick™ 18x5 microtube rotor (only usable in the Centrifuge GT 1R)
75003602 Microliter 48x2 microtube rotor
For further details on rotor use and safety, additional accessories, adapters and spare parts, refer to the rotor manual.
For more information visit our website at http://www.thermofisher.com/centrifuges
Centrifuge GT 1 / 1R Technical Specifications | 5
Transport and Set Up
Before Setting Up
1. Check the centrifuge and the packaging for any shipping
damage. Inform the shipping company and Fisher
Scientific immediately if any damage is discovered.
2. Remove the packaging.
3. Check, if the items supplied are complete. Refer to the
section Items Supplied. If the items supplied are
incomplete, please contact Fisher Scientific.
Location
The centrifuge is only to be operated indoors.
The set-up location must fulfill the following requirements:
• A safety zone of at least 30 cm must be maintained
around the centrifuge. People and hazardous substances
must be kept out of this safety zone while centrifuging.
• The supporting structure must be stable and free of
resonance.
• The supporting structure must be suitable for horizontal
setup of the centrifuge.
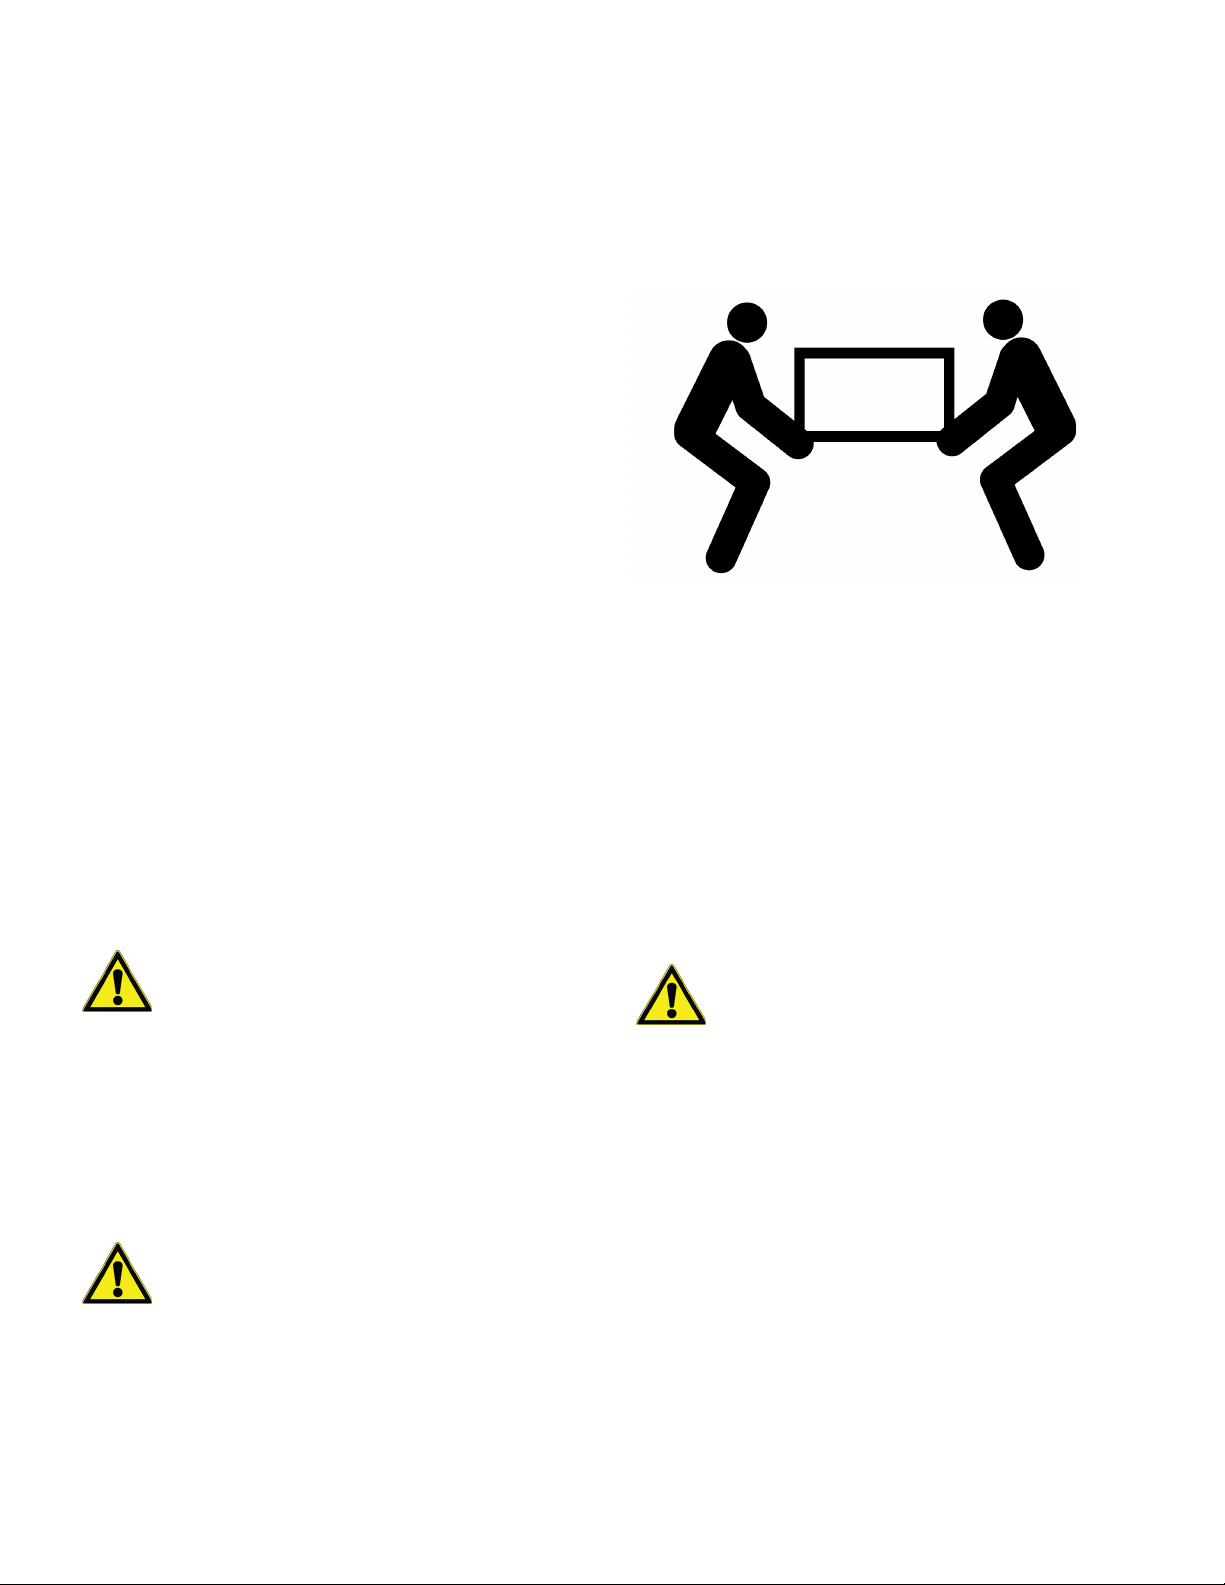
• To prevent possible injuries, at least two people should lift
and carry the centrifuge by holding it at the bottom from
opposite sides.
Figure 1. Lifting the centrifuge at both sides.
• Transport the centrifuge and accessories upright within
the associated packaging, if possible.
Note: Store the original centrifuge packaging. Contact a
shipping company or the customer service for the transport.
Always remove the rotor before moving the centrifuge. If you
do not remove the rotor you might damage the centrifuge
drive or centrifuge spindle.
• The centrifuge is not to be exposed to heat and strong
sunlight.
WARNING: UV rays reduce the stability of
plastics.
Do not subject the centrifuge, rotors and plastic
accessories to direct sunlight.
• The set-up location must be well-ventilated at all times.
Tra nsportin g
WARNING: Always lift the centrifuge from both
sides. Never lift the centrifuge by its front panel,
its back panel or at its door.
Always remove the rotor before moving the
centrifuge.
Leveling
CAUTION: If the centrifuge isn’t leveled,
imbalances can occur and the centrifuge can be
damaged.
Do not place anything under the centrifuge feet to
level the centrifuge.
The centrifuge must be placed on horizontal and level
supporting structures or benching.
Horizontal level must be checked when moving the centrifuge
to a new location.
6 | Transport and Set Up Centrifuge GT 1 / 1R
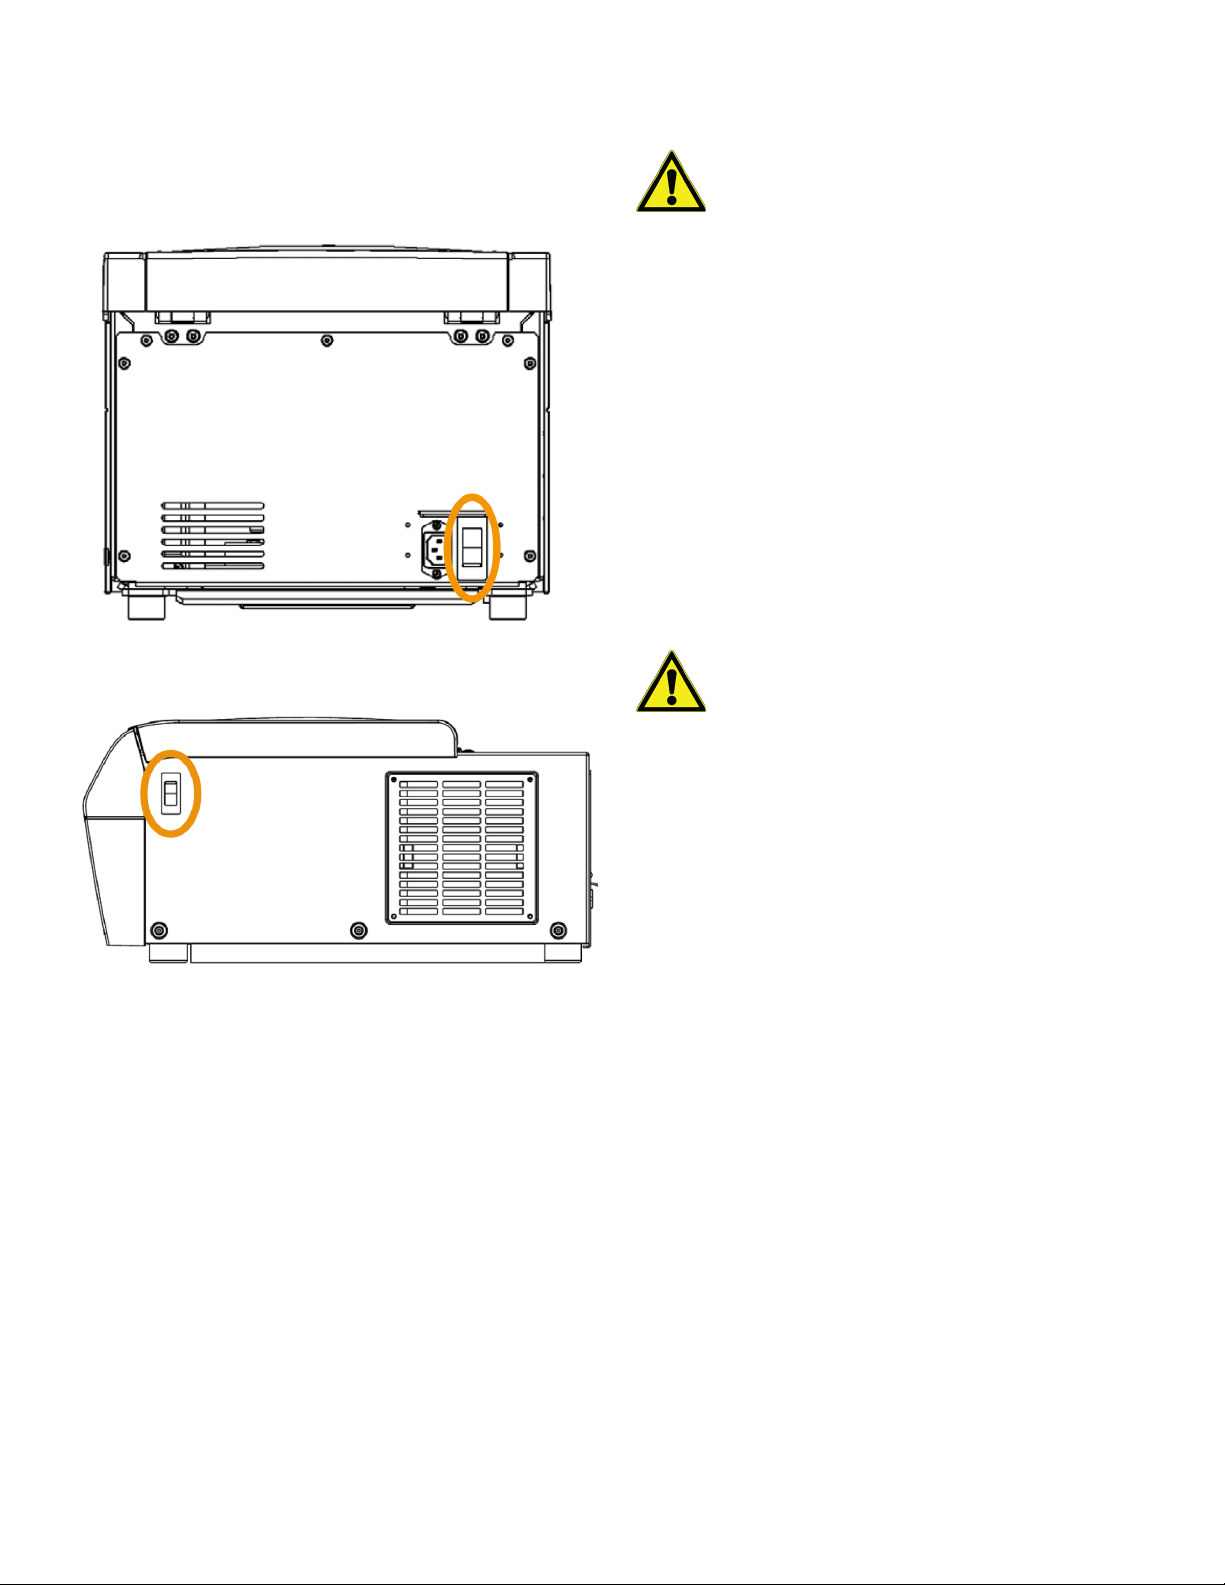
Mains Connection
Storage
Note: Plug the centrifuge into grounded electrical sockets
only.
1. Turn off the power supply switch.
Figure 2. Power supply switch on the backside of
the Centrifuge GT 1
WARNING: When removing the centrifuge and
accessories from use if necessary clean, disinfect
or decontaminate the entire system. In doubt
contact the Fisher Scientific customer service.
• Before storing the centrifuge and the accessories, it must
be cleaned and if necessary disinfected and
decontaminated.
Centrifuge, rotors, buckets and accessories have to be
thoroughly dried before storage.
• Store the centrifuge in a clean, dust-free location.
• Be sure to place the centrifuge on its feet.
• Avoid direct sunlight.
Shipping
WARNING: Before shipping the centrifuge and
accessories you have to clean and if necessary
disinfect or decontaminate the entire system. In
doubt contact the Fisher Scientific customer
service.
Figure 3. Power supply switch on the right side of
the Centrifuge GT 1R
2. Check whether the cable complies with the safety
standards of your country.
3. Make sure that the voltage and frequency correspond to
the figures on the rating plate.
4. Establish the connection to the power supply with the
connecting cable.
Before shipping the centrifuge please bear the following in
mind:
• The centrifuge must be clean and decontaminated.
• The decontamination must be confirmed in a
decontamination certificate. Contact customer service for
more details.
Centrifuge GT 1 / 1R Transport and Set Up | 7
 Loading...