

Page 1
Thermo Fisher Scientific
Thermo Scientific Novus SCP/MCP User Manual 1
Finnpipette® Novus
Single Channel & Multichannel
Instructions for Use
User Manual
Page 2

2 Thermo Scientifi c Novus SCP/MCP User Manual
Thermo Fisher Scientifi c
CONTENT
PRODUCT DESCRIPTION . . . . . . . . . . . . . . . . . . . . . . . . . . . . . . . 4
Raw materials . . . . . . . . . . . . . . . . . . . . . . . . . . . . . . . . . . . . . . . . . . . . . . . . . . . . . . . . . . . . . . . . . . . . 5
Description of tips . . . . . . . . . . . . . . . . . . . . . . . . . . . . . . . . . . . . . . . . . . . . . . . . . . . . . . . . . . . . . . . . . 5
PACKAGE . . . . . . . . . . . . . . . . . . . . . . . . . . . . . . . . . . . . . . . . . . . . . . 5
GETTING STARTED . . . . . . . . . . . . . . . . . . . . . . . . . . . . . . . . . . . . . 5
Power supply . . . . . . . . . . . . . . . . . . . . . . . . . . . . . . . . . . . . . . . . . . . . . . . . . . . . . . . . . . . . . . . . . . . . 5
Power Requirements . . . . . . . . . . . . . . . . . . . . . . . . . . . . . . . . . . . . . . . . . . . . . . . . . . . . . . . . . . . 5
Power plug adapters . . . . . . . . . . . . . . . . . . . . . . . . . . . . . . . . . . . . . . . . . . . . . . . . . . . . . . . . . . .5
Installing the battery . . . . . . . . . . . . . . . . . . . . . . . . . . . . . . . . . . . . . . . . . . . . . . . . . . . . . . . . . . . . . . 6
Charging the battery . . . . . . . . . . . . . . . . . . . . . . . . . . . . . . . . . . . . . . . . . . . . . . . . . . . . . . . . . . . . . . 7
Adjusting the trigger position . . . . . . . . . . . . . . . . . . . . . . . . . . . . . . . . . . . . . . . . . . . . . . . . . . . . . . . 7
Tip ejection . . . . . . . . . . . . . . . . . . . . . . . . . . . . . . . . . . . . . . . . . . . . . . . . . . . . . . . . . . . . . . . . . . . . . . 7
Shelf hanger . . . . . . . . . . . . . . . . . . . . . . . . . . . . . . . . . . . . . . . . . . . . . . . . . . . . . . . . . . . . . . . . . . . . . 7
PIPETTE OPERATION . . . . . . . . . . . . . . . . . . . . . . . . . . . . . . . . . . 9
Choosing pipetting functions and speed . . . . . . . . . . . . . . . . . . . . . . . . . . . . . . . . . . . . . . . . . . . . . . . 9
The Menu Map . . . . . . . . . . . . . . . . . . . . . . . . . . . . . . . . . . . . . . . . . . . . . . . . . . . . . . . . . . . . . . . . . . 10
Pipette (Forward technique) . . . . . . . . . . . . . . . . . . . . . . . . . . . . . . . . . . . . . . . . . . . . . . . . . . . . . . . . 10
Rpipet (Reverse & Repetitive) . . . . . . . . . . . . . . . . . . . . . . . . . . . . . . . . . . . . . . . . . . . . . . . . . . . . . . . 11
Reverse technique . . . . . . . . . . . . . . . . . . . . . . . . . . . . . . . . . . . . . . . . . . . . . . . . . . . . . . . . . . . . . . . . 11
Repetitive technique . . . . . . . . . . . . . . . . . . . . . . . . . . . . . . . . . . . . . . . . . . . . . . . . . . . . . . . . . . . . . . 11
Stepper (multi dispensing) . . . . . . . . . . . . . . . . . . . . . . . . . . . . . . . . . . . . . . . . . . . . . . . . . . . . . . . . . 12
Dilute . . . . . . . . . . . . . . . . . . . . . . . . . . . . . . . . . . . . . . . . . . . . . . . . . . . . . . . . . . . . . . . . . . . . . . . . . .12
Program . . . . . . . . . . . . . . . . . . . . . . . . . . . . . . . . . . . . . . . . . . . . . . . . . . . . . . . . . . . . . . . . . . . . . . . . 13
Additional functions in program mode . . . . . . . . . . . . . . . . . . . . . . . . . . . . . . . . . . . . . . . . . . . . . . . . 13
Mix + Pipette . . . . . . . . . . . . . . . . . . . . . . . . . . . . . . . . . . . . . . . . . . . . . . . . . . . . . . . . . . . . . . . . . 13
Pipette + Count . . . . . . . . . . . . . . . . . . . . . . . . . . . . . . . . . . . . . . . . . . . . . . . . . . . . . . . . . . . . . . . 13
Seq stepper . . . . . . . . . . . . . . . . . . . . . . . . . . . . . . . . . . . . . . . . . . . . . . . . . . . . . . . . . . . . . . . . . . 14
Mix + Dilute . . . . . . . . . . . . . . . . . . . . . . . . . . . . . . . . . . . . . . . . . . . . . . . . . . . . . . . . . . . . . . . . . 14
Manual . . . . . . . . . . . . . . . . . . . . . . . . . . . . . . . . . . . . . . . . . . . . . . . . . . . . . . . . . . . . . . . . . . . . . 15
Seq + Aspirate . . . . . . . . . . . . . . . . . . . . . . . . . . . . . . . . . . . . . . . . . . . . . . . . . . . . . . . . . . . . . . . 15
Options . . . . . . . . . . . . . . . . . . . . . . . . . . . . . . . . . . . . . . . . . . . . . . . . . . . . . . . . . . . . . . . . . . . . . 16
Calibrate . . . . . . . . . . . . . . . . . . . . . . . . . . . . . . . . . . . . . . . . . . . . . . . . . . . . . . . . . . . . . . . . . . 16
Service . . . . . . . . . . . . . . . . . . . . . . . . . . . . . . . . . . . . . . . . . . . . . . . . . . . . . . . . . . . . . . . . . . .16
Language . . . . . . . . . . . . . . . . . . . . . . . . . . . . . . . . . . . . . . . . . . . . . . . . . . . . . . . . . . . . . . . . . 16
Name. . . . . . . . . . . . . . . . . . . . . . . . . . . . . . . . . . . . . . . . . . . . . . . . . . . . . . . . . . . . . . . . . . . . . 16
Power . . . . . . . . . . . . . . . . . . . . . . . . . . . . . . . . . . . . . . . . . . . . . . . . . . . . . . . . . . . . . . . . . . . . 16
Buzzer . . . . . . . . . . . . . . . . . . . . . . . . . . . . . . . . . . . . . . . . . . . . . . . . . . . . . . . . . . . . . . . . . . . . 16
Version . . . . . . . . . . . . . . . . . . . . . . . . . . . . . . . . . . . . . . . . . . . . . . . . . . . . . . . . . . . . . . . . . . . 16
Backlight . . . . . . . . . . . . . . . . . . . . . . . . . . . . . . . . . . . . . . . . . . . . . . . . . . . . . . . . . . . . . . . . . . 16
Page 3

Thermo Fisher Scientifi c
Thermo Scientifi c Novus SCP/MCP User Manual
3
CALIBRATION . . . . . . . . . . . . . . . . . . . . . . . . . . . . . . . . . . . . . . . . . 17
Device requirements and test conditions . . . . . . . . . . . . . . . . . . . . . . . . . . . . . . . . . . . . . . . . . . . . . 17
Calibration Counter . . . . . . . . . . . . . . . . . . . . . . . . . . . . . . . . . . . . . . . . . . . . . . . . . . . . . . . . . . . . . . 17
Checking the calibration . . . . . . . . . . . . . . . . . . . . . . . . . . . . . . . . . . . . . . . . . . . . . . . . . . . . . . . . . . 17
Procedure . . . . . . . . . . . . . . . . . . . . . . . . . . . . . . . . . . . . . . . . . . . . . . . . . . . . . . . . . . . . . . . . . . .17
Adjustment . . . . . . . . . . . . . . . . . . . . . . . . . . . . . . . . . . . . . . . . . . . . . . . . . . . . . . . . . . . . . . . . . . . . . 18
Two point calibration . . . . . . . . . . . . . . . . . . . . . . . . . . . . . . . . . . . . . . . . . . . . . . . . . . . . . . . . . . 18
One point calibration . . . . . . . . . . . . . . . . . . . . . . . . . . . . . . . . . . . . . . . . . . . . . . . . . . . . . . . . . . 19
Formulas for calculating results . . . . . . . . . . . . . . . . . . . . . . . . . . . . . . . . . . . . . . . . . . . . . . . . . . . . . 19
Conversion of mass to volume . . . . . . . . . . . . . . . . . . . . . . . . . . . . . . . . . . . . . . . . . . . . . . . . . . .19
Inaccuracy (systematic error) . . . . . . . . . . . . . . . . . . . . . . . . . . . . . . . . . . . . . . . . . . . . . . . . . . . . 20
Imprecision (random error) . . . . . . . . . . . . . . . . . . . . . . . . . . . . . . . . . . . . . . . . . . . . . . . . . . . . . 20
MAINTENANCE . . . . . . . . . . . . . . . . . . . . . . . . . . . . . . . . . . . . . . . 21
Daily checking . . . . . . . . . . . . . . . . . . . . . . . . . . . . . . . . . . . . . . . . . . . . . . . . . . . . . . . . . . . . . . . . . . . 21
Short-term Service Single Channel pipettes . . . . . . . . . . . . . . . . . . . . . . . . . . . . . . . . . . . . . . . . . . .21
Long-term service Single Channel pipettes . . . . . . . . . . . . . . . . . . . . . . . . . . . . . . . . . . . . . . . . . . . .22
Short-term Service Multichannel pipettes . . . . . . . . . . . . . . . . . . . . . . . . . . . . . . . . . . . . . . . . . . . . . 24
Long-term service Multichannel pipettes . . . . . . . . . . . . . . . . . . . . . . . . . . . . . . . . . . . . . . . . . . . . . . 25
Service Instructions for Multichannel Pipette Tip Cones . . . . . . . . . . . . . . . . . . . . . . . . . . . . . . . . . . 26
Replacing the battery . . . . . . . . . . . . . . . . . . . . . . . . . . . . . . . . . . . . . . . . . . . . . . . . . . . . . . . . . . . . . 26
Opening the Version 1 battery lid . . . . . . . . . . . . . . . . . . . . . . . . . . . . . . . . . . . . . . . . . . . . . . . . 26
Opening the Version 2 battery lid. . . . . . . . . . . . . . . . . . . . . . . . . . . . . . . . . . . . . . . . . . . . . . . . . 26
Sterilization Single Channel pipettes . . . . . . . . . . . . . . . . . . . . . . . . . . . . . . . . . . . . . . . . . . . . . . . . . 27
Sterilization Multichannel pipettes . . . . . . . . . . . . . . . . . . . . . . . . . . . . . . . . . . . . . . . . . . . . . . . . . . 27
TROUBLE SHOOTING . . . . . . . . . . . . . . . . . . . . . . . . . . . . . . . . . . 28
TECHNICAL DATA . . . . . . . . . . . . . . . . . . . . . . . . . . . . . . . . . . . . . 30
SPARE PARTS SCP . . . . . . . . . . . . . . . . . . . . . . . . . . . . . . . . . 31-33
SPARE PARTS MCP . . . . . . . . . . . . . . . . . . . . . . . . . . . . . . . . . 34-37
WEEE Compliance:
This product is required to comply with the European Union’s Waste Electrical
& Electronic Equipment (WEEE) Directive 2002/96/EC. It is marked with the
following symbol:
Thermo Scientifi c has contracted with one or more recycling/disposal companies
in each EU Member State, and this product should be disposed of or recycled
through them. Further information on Thermo Scientifi c’s compliance with these
Directives, the recyclers in your country, and information on Thermo Scientifi c
products which may assist the detection of substances subject to the RoHS
Directive are available at
www.thermoscientifi c.com/WEEERoHS
Product specifi cations are subject to change without prior notice. Finnpipette®
and Finntip® are registered trademarks of Thermo Scientifi c.
See the latest version at www.thermofi sher.com
Page 4

4 Thermo Scientifi c Novus SCP/MCP User Manual
Thermo Fisher Scientifi c
PRODUCT DESCRIPTION
The different models of Finnpipette Novus pipettes cover a volume range from
1 μl to 10 ml.
The different models of Finnpipette Novus pipettes cover a volume range from
1 μl to 1200 μl.
The Finnpipette Novus is an electronically assisted pipette for a wide range
of liquid handling operations. Thanks to the electronic motor and electronic
control, pipetting is easy and comfortable, yet still fast and accurate. It operates
on the air displacement principle (i.e. an air interface) and uses detachable,
disposable tips, which are easy to remove with a soft touch tip ejector.
The adjustable, index fi nger operated pipetting trigger uses natural hand
movement, increasing comfort and reducing the risk of repetitive stress injuries.
The Finnpipette Novus provides many functions which are very practical for
daily use in laboratory work, such as forward-, reverse- and repetitive pipetting,
stepper and diluting modes.
The guiding and easy user-interface is very fast to learn. The adjusted delivery
volume is clearly indicated in the LCD display on top of the handle. The long
lasting Lithium-Ion -battery is always charged with rapid charge technique. If
needed, the battery can be charged over the lunch hour.
Order No. Channel Volume Range Finntip
46300000 8 1 µl to 10 µl Flex 10, 10, 20, 50
46300100 12 1 µl to 10 µl Flex 10, 10, 20, 50
46300200 8 5 µl to 50 µl Flex 200, 250 Univ., 200 Ext
46300300 12 5 µl to 50 µl Flex 200, 250 Univ., 200 Ext
46300400 8 30 µl to 300 µl Flex 300, 300
46300500 12 30 µl to 300 µl Flex 300, 300
46300700 16 5 µl to 50 µl 50
46300800 8 100 µl to 1200 µl Flex 1200
Order No. Volume Range Finntip
46200000 1 µl to 10 µl Flex 10, 10, 20, 50
46200100 1 µl to 10 µl Flex 200, 250 Univ., 200 Ext, 300
46200200 5 µl to 50 µl 50
46200300 5 µl to 50 µl Flex 200, 250 Univ., 200 Ext, 300
46200400 10 µl to 100 µl Flex 200, 250 Univ., 200 Ext, 300
46200500 30 µl to 300 µl Flex 300, 300
46200600 100 µl to 1000 µl Flex 1000, 1000, 1000 Ext
46200700 0,5 ml to 5 ml 5 ml
46200800 1 ml to 10 ml 10 ml, Flex 10 ml Ext
Page 5
Thermo Fisher Scientific
Thermo Scientific Novus SCP/MCP User Manual 5
The Finnpipette Novus is made of mechanically durable and chemically
resistant materials. The tip cone modules can be repeatedly autoclaved at
121°C.
Note The 1200 µl module is NOT autoclavable.
Finntips are recommended for use with the Finnpipette Novus.
They are made of natural colour polypropylene, generally regarded as the only
contamination free material suitable for tips. Finntips are also autoclavable
(121°C).
Package
The complete Finnpipette Novus package contains:
1. Finnpipette Novus
2. Charger
3. Shelf hanger (Order No. 2206040)
4. Piston removal tool
5. Instructions for use
6. Bag of grease 1g (Order No. 3300200)
7. Sample Finntips
getting started
Remove the content from the package and verify that all items listed above are
included. Inspect for possible shipping damage. Make sure that the pipette is
desired volume range and that the voltage of the charger is correct.
Note If the device is not used according to manufacturers instructions the
protection provided by the device cannot be guaranteed.
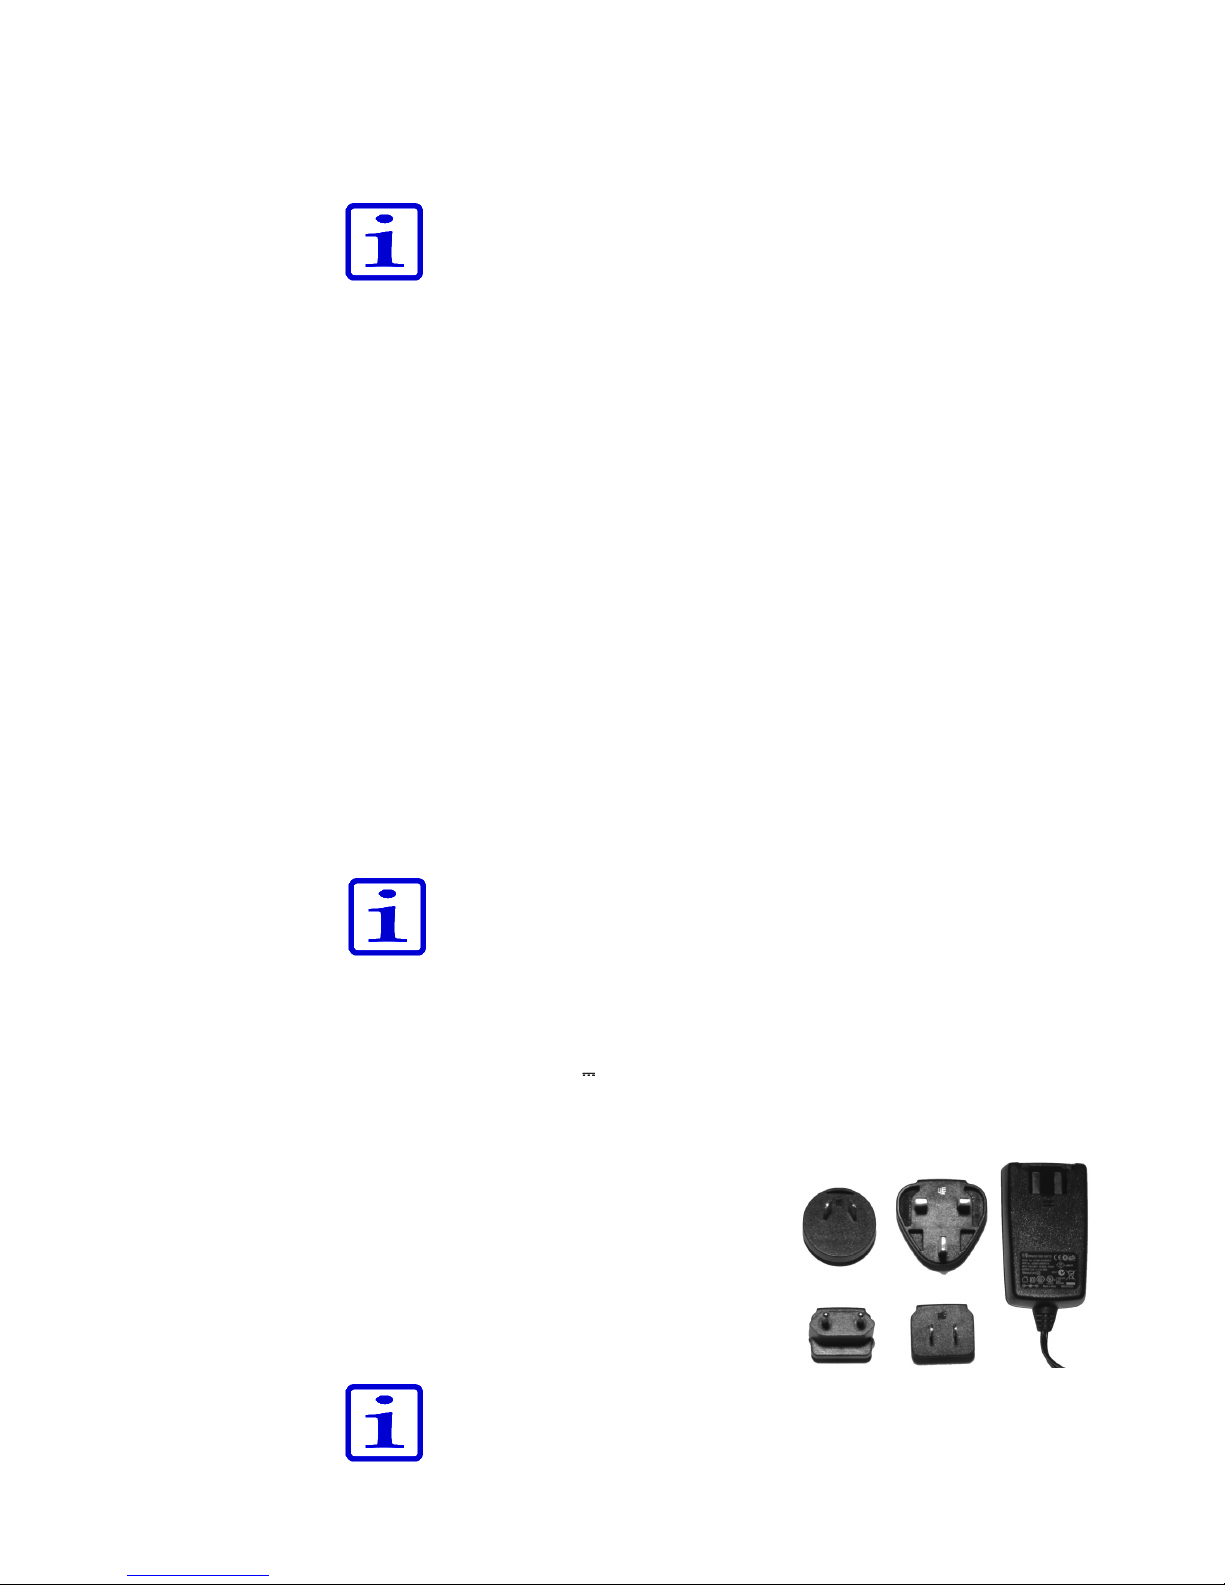
Power Requirements
- INPUT: 100-240V~50/60Hz, 150mA
- OUTPUT: 5,0V 0,5 A max
Power plug adapters:
1. Australia
2. Europe
3. United Kingdom
4. USA / Japan
5. Power supply unit
Insert the country specific power plug
adapter into the power supply unit.
Note The charger’s plug must be inserted in a socket that is easy to reach and
from which it can be easily unplugged in case of emergency.
Raw materials
Description of tips
Power supply
3
1
4
2
5
Page 6
6 Thermo Scientific Novus SCP/MCP User Manual
Thermo Fisher Scientific
Warning Use of incorrect power supply units may result in fatal
injuries and damage to the device.
Use of incorrect power supply units may results in
overheating, burning, melting, short-circuiting of
the Thermo Scientific Finnpipette Novus pipette or
similar damage.
Only use the supplied power supply unit for charging the pipette. You can
recognize the correct power supply by the Thermo Scientific logo and the
pipette name on the power supply unit.
Do not charge the pipette in a hot location (>40°C)
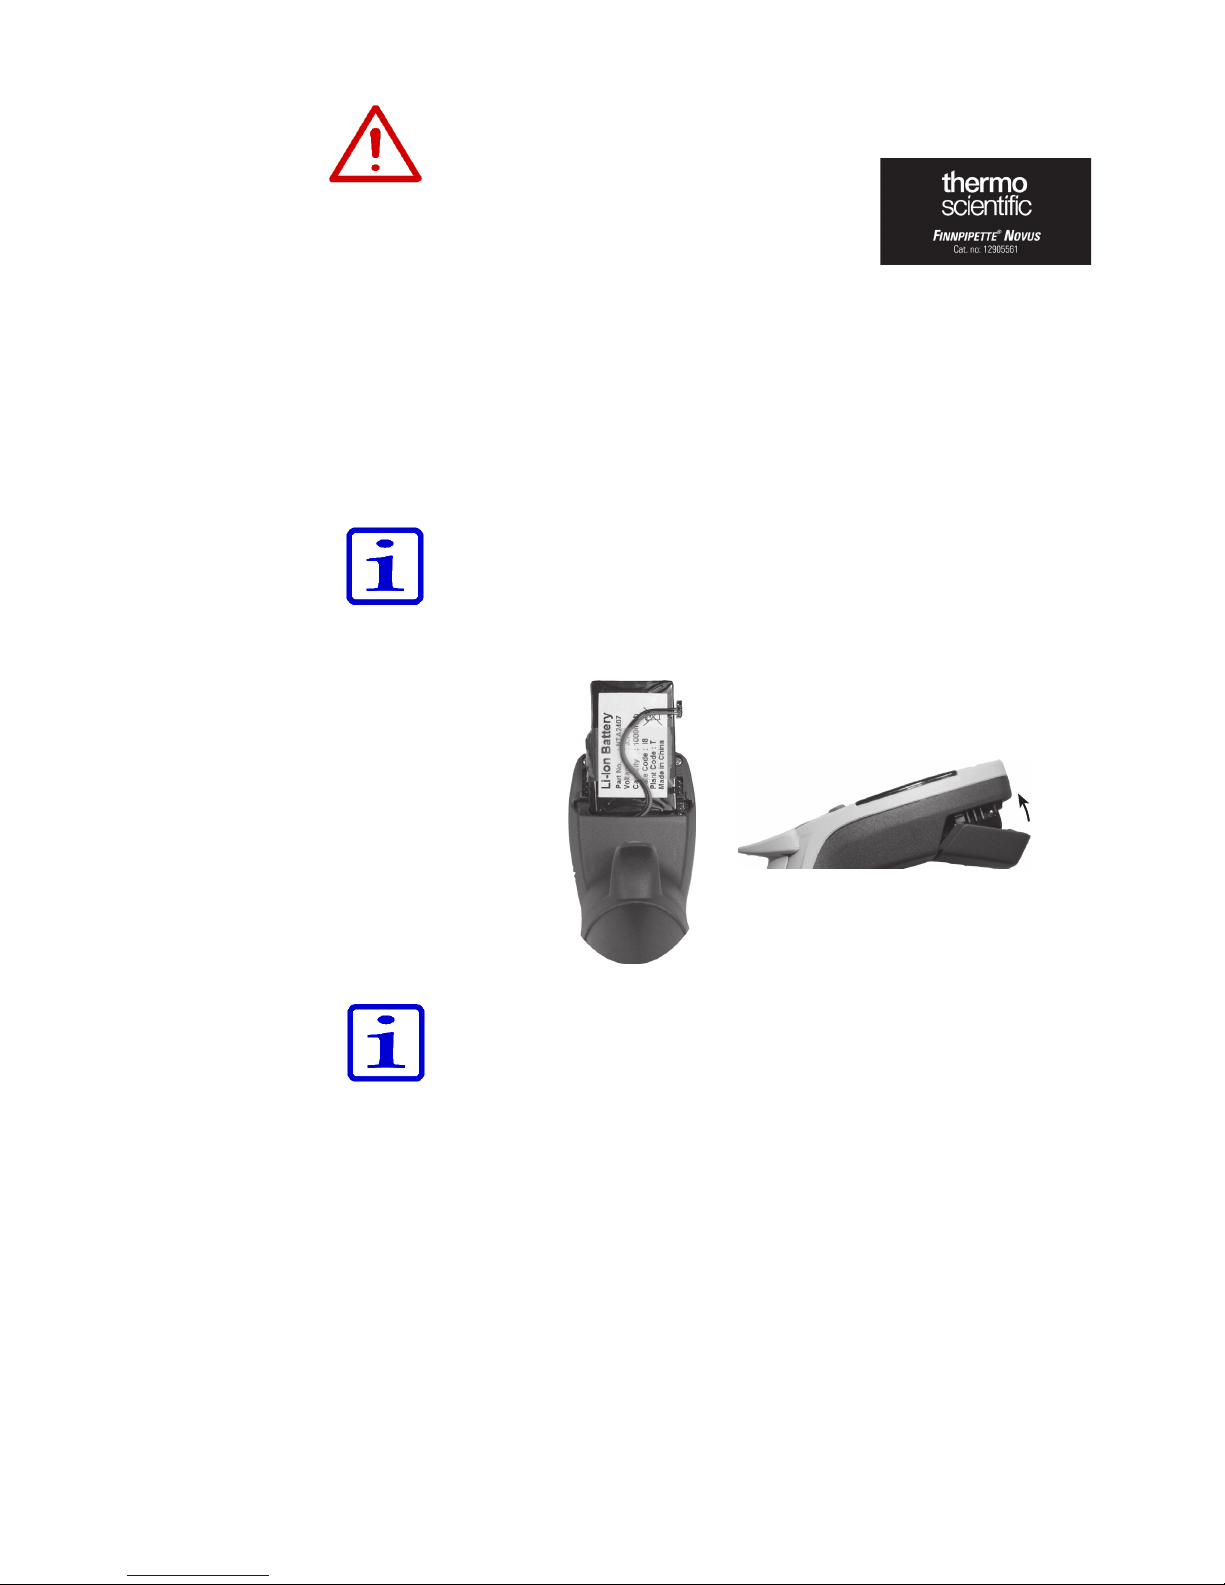
Note If the pipette is supplied with the battery attached the below
installation is not needed.
- Check, that the battery wires are as shown in the picture.
Note Do not remove the tape that is holding the wires
- Slide in the battery (label side visible)
- Connect the battery connector.
- Ensure that the wires are flat, not twisted
- Attach the battery lid as shown in the picture
Installing the
battery
Page 7

Thermo Fisher Scientifi c
Thermo Scientifi c Novus SCP/MCP User Manual
7
Warning Use only the original Finnpipette Novus charger and battery
pack.
The pipette battery may be empty when delivered and must be charged before
initial use. Connect the lead of charger to the socket on the back of pipette.
Then connect the charger to an AC wall socket. If the battery is completely
empty, it may take a few minutes before the pipette will turn on. You can use
the pipette while the charger is connected. The charging time is typically less
than one hour. An indicator in the LCD display shows the charge level of the
battery.
When the indicator shows empty battery, pipetting is no more possible, and the
pipette has to be charged again. To extend battery life cycle, it’s recommended
to charge the pipette every two months even if/ even though the pipette is not
used daily. A typical Finnpipette Novus battery lasts for around 500 charging
cycles. Please note that an old battery can cause the pipette to malfunction.
We recommend that you change the battery every 3 years.
The index fi nger operated trigger, which activates the piston movement, can
be adjusted by rotating it 60 degrees to both directions of the center position.
Usually right handed operators turn it left (counter clockwise) to get the best
possible position for the thumb to eject the tip. See picture on page 9.
To help eliminate the risk of contamination, each pipette is fi tted with a tip
ejector system.
The tip ejector system consists of a soft-touch tip ejector and specially designed
gearing mechanism. To release the tips, point the pipette at suitable waste
receptacle and press the tip ejector with your thumb.
You can attach the pipette shelf hanger on a counter, pipette stand or anywhere
where you want to hang your pipette. Clean the area where you plan to attach
the shelf hanger. Apply two stickers to the underside of the shelf hanger. Press
the shelf hanger fi rmly into place — on a shelf, countertop or pipette stand. To
use, hang the grippy fi nger rest on the shelf hanger.
Charging the
battery
Adjusting the
trigger position
Tip ejection
Shelf hanger
Page 8

8 Thermo Scientifi c Novus SCP/MCP User Manual
Thermo Fisher Scientifi c
Safety Precautions
Warning Novus pipette contains a Li-Ion battery and a potential malfunction
of the battery (short circuit, mechanical damage, overheating etc) may cause
explosion.
Warning Incorrect handling of the battery or pipette may cause personal injury.
Do not drop the battery. Do not expose battery to any kind of mechanical stress
or extreme temperatures: above 60 °C (45 °C when charging) or under 0 C°.
Warning Do not immerse the unit in liquid and do not clean the upper part of
the pipette by spraying. Fluid seepage can damage internal components and
may cause a safety risk.
Warning Follow the Novus pipette instructions presented in the user manual
in part , Technical Data. If the instructions are not followed it may cause a
safety risk.
Page 9

Thermo Fisher Scientifi c
Thermo Scientifi c Novus SCP/MCP User Manual
9
PIPETTE OPERATION
To choose the pipetting function press Menu (left selection key). Scroll the
function list and select the desired function with OK (right selection key). In
most cases the volume can be selected simply by pressing the scroll key up or
down. Accept the volume with OK. In some cases the initial piston position has
to be changed and a text PRESS TRIGGER appears on display. Press the trigger
to move the piston to the new initial position.
Pipetting speeds can be selected with the right selection key whenever the text
SPEED is displayed. Press SPEED and the speed in starts to blink. Select the
speed with scroll key and accept with OK. Now the speed out starts to blink.
Select the speed with scroll key and accept with OK.
Choosing pipetting
functions and
speed
Function
Left Selection Key
Volume indicator
Right Selection Key
Scroll Key
Tip Ejector Lever
Battery indicator
Speed indicator
Speed in / out
Trigger and fi nger
rest adjustable
Trigger
Page 10

10 Thermo Scientifi c Novus SCP/MCP User Manual
Thermo Fisher Scientifi c
Choose the PIPETTE function as described above.
Select the pipetting volume simply by pressing the scroll key up or down.
Accept the volume with OK. Optionally press SPEED and the speed in starts to
blink. Select the speed with scroll key and accept with OK. Select the speed out
with scroll key and accept with OK.
1. Dip the tip under the surface of the liquid in the reservoir and press the
trigger. The liquid is drawn in to the tip.
2. Wait until the liquid is not moving in the tip and withdraw the tip from the
liquid touching it against the edge of the reservoir to remove excess liquid.
3. To deliver the liquid press the trigger and hold it down. The blow-out is also
included to empty the tip.
4. Release the trigger to return to the ready position.
If necessary, change the tip and continue pipetting.
The Menu Map
Pipette (Forward
technique)
PIPETTE
RPIPET
STEPPER
DILUTE
PROGRAM
OPTIONS
PIPETTE
MIX+PIPETTE
PIPETTE+COUNT
RPIPET
STEPPER
SEQ+STEPPER
DILUTE
MIX+DILUTE
MANUAL
SEQ+ASPIRATE
CALIBRATE
SERVICE
LANGUAGE
NAME
POWER
BUZZER
VERSION
BACKLIGHT
PROG 1
PROG 2
.
.
.
PROG 9
TWO POINTS
ONE POINT
COUNTER
Page 11

Thermo Fisher Scientifi c
Thermo Scientifi c Novus SCP/MCP User Manual
11
With RPIPET function both reverse and repetitive techniques are possible.
Choose the RPIPET function as described above.
Select the pipetting volume simply by pressing the scroll key up or down. Accept
the volume with OK. Press SPEED and the speed in starts to blink. Select the
speed with scroll key and accept with OK. Select the speed out with scroll key
and accept with OK.
The reverse technique is suitable for dispensing liquids that have a high
viscosity or a tendency to foam easily. The technique is also recommended for
dispensing very small volumes.
Fill a clean reagent reservoir with the liquid to be dispensed.
1. Dip the tip under the surface of the liquid in the reservoir and press the
trigger. This action will fi ll the tip.
2. Withdraw the tip from the liquid touching it against the edge of the reservoir
to remove excess liquid.
3. Deliver the preset volume by shortly pressing the trigger. Some liquid
will remain in the tip and this should not be included in the delivery. A text
BLOWOUT is displayed.
4. To empty the tip, press trigger again.
If necessary, change the tip and continue pipetting.
The repetitive technique offers a rapid and simple procedure for repeated
delivery of the same volume. Fill a clean reagent reservoir with the liquid to
be dispensed.
1. Dip the tip under the surface of the liquid in the reservoir and press the
trigger. This action will fi ll the tip.
2. Withdraw the tip from the liquid touching it against the edge of the reservoir
to remove excess liquid.
3. Deliver the preset volume by pressing and holding the trigger down.
Some liquid will remain in the tip and this should not be included in the
delivery.
4. Dip the tip again to reagent reservoir and release the trigger. This action will
fi ll the tip again.
5. Continue pipetting by repeating steps 3 and 4.
6. To empty the tip completely, dispense by shortly pressing the trigger.
Some liquid will remain in the tip and this should not be included in the
delivery. A text BLOWOUT is displayed.
7. To empty the tip completely, press trigger again.
If necessary, change the tip and continue pipetting.
Rpipet (Reverse &
Repetitive)
Reverse technique
Repetitive
technique
Page 12

12 Thermo Scientifi c Novus SCP/MCP User Manual
Thermo Fisher Scientifi c
With STEPPER function repeated dispensing of selected volume is possible.
Choose the STEPPER function as described above.
Select the pipetting volume simply by pressing the scroll key up or down. The
display shows always the maximum number of steps during volume selection.
Accept the volume with OK. Next choose the number of steps with scroll key
and accept with OK.
Optionally select the speed. Press SPEED and the speed in starts to blink. Select
the speed with scroll key and accept with OK. Select the speed out with scroll
key and accept with OK.
Fill a clean reagent reservoir with the liquid to be dispensed.
1. Dip the tip under the surface of the liquid in the reservoir and press the
trigger. This action will fi ll the tip.
2. Withdraw the tip from the liquid touching it against the edge of the reservoir
to remove excess liquid.
3. Deliver the preset volume by pressing the trigger. The display shows the
number of steps left.
4. Continue dispensing by repeating step 3. After last step a text BLOWOUT is
displayed.
5. To empty the tip completely, press trigger and hold it down.
6. Release the trigger.
If necessary, change the tip and continue pipetting.
Note The pipette can be emptied at any time by pressing CANCEL (left
selection key)
With DILUTE function dispensing of two selected volume is possible.
Choose the DILUTE function as described above. First volume (VOL 1) is shown
on display.
Select the pipetting fi rst volume simply by pressing the scroll key up or down.
Accept the volume with OK. Next select the second volume (VOL 2) with scroll
key and accept with OK.
Optionally select the speed. Press SPEED and the speed in starts to blink.
Select the speed with scroll key and accept with OK. Select the speed out with
scroll key and accept with OK.
Stepper (multi
dispensing)
Dilute
Page 13

Thermo Fisher Scientifi c
Thermo Scientifi c Novus SCP/MCP User Manual
13
1. Dip the tip under the surface of the fi rst liquid in the reservoir and press the
trigger. The fi rst volume is drawn in to the tip. A text AIR appears on display.
2. Withdraw the tip from the liquid touching it against the edge of the reservoir
to remove excess liquid. Press trigger again to aspirate air buffer.
3. Dip the tip under the surface of the second liquid and press the trigger. The
second volume is drawn in to the tip.
4. Withdraw the tip from the liquid.
5. To deliver the both volumes, press the trigger and hold it down. The blow out is also included to empty the tip.
6. Release the trigger to return to the ready position.
If necessary, change the tip and continue pipetting.
Programs are stored settings, that can be edited, stored and retrieved.
Additional functions as mixing, counter etc. are available in program mode.
To retrieve a program, choose PROGRAM from menu as described above. The
display shows the fi rst program (PROG1). Select the desired program with
scroll key and accept with OK.
If you want to change the settings, press EDIT. Select the function with scroll
key and accept with OK. Note that there are additional functions available
compared to main menu. After selecting the function, set the volumes, speeds
etc. as described in the function instruction above.
When working with programs, the scroll key selects the program and it is a very
fast way to switch between different settings.
Mix + Pipette
This function adds automatic mixing after normal pipetting. First select the
desired volume with scroll key and accept with OK. Then select pipetting
speeds accordingly. After dispensing the volume a text MIX appears on display.
By pressing trigger the pipette starts to pipette ca. 70 % of the selected volume
several times as long as the trigger is held pressed. After releasing the trigger
the pipettes stops after next dispensing and a text BLOWOUT appears to
display. A normal blowout function is done by pressing the trigger and pipette
is again ready for next pipetting.
Pipette + Count
This function adds automatic count number to pipetting. First select the desired
volume with scroll key and accept with OK. Then select pipetting speeds
accordingly. Next choose the max. number of pipettings, the default value is
999. After the max. number of pipettings is reached, the counter returns to zero.
The counter can be reset at any time to zero by pressing SCROLL DOWN ; OK ;
SCROLL UP ; OK.
Program
Additional
functions in
program mode
Page 14

14 Thermo Scientifi c Novus SCP/MCP User Manual
Thermo Fisher Scientifi c
Seq stepper
The sequential stepper mode enables serial dispensing of different volumes (in
normal stepper mode only fi xed volume). First choose the amount of dispensings
(max. 20) with SCROLLKEY and accept with OK. Vol 1 appears to display and
highest possible volume is fl ashing. Select the fi rst volume with SCROLLKEY
and accept with OK. Now Vol 2 appears to display and highest possible volume
left is fl ashing. Select the second volume with SCROLLKEY and accept with
OK. After selecting the last volume the total volume is shown on display and
speed in is fl ashing. Select the pipettings speeds and the pipette is ready for
pipetting.
1. Dip the tip under the surface of the liquid in the reservoir and press the
trigger. This action will fi ll the tip and the fi rst volume appears on the display.
2. Withdraw the tip from the liquid touching it against the edge of the reservoir
to remove excess liquid.
3. Deliver the fi rst volume by pressing the trigger. The display shows the next
volume.
4. Continue dispensing by repeating step 3. After last step a text BLOWOUT is
displayed.
5. To empty the tip completely, press trigger.
6. If necessary, change the tip and continue pipetting.
Note The pipette can be emptied at any time by pressing CANCEL (left selection
key)
Mix + Dilute
Select the fi rst pipetting volume by pressing the scroll key up or down. Accept
the volume with OK. Next select the second volume (VOL 2) with scroll key and
accept with OK. Then select the pipetting speeds.
1. Dip the tip under the surface of the fi rst liquid in the reservoir and press the
trigger. The fi rst volume is drawn in to the tip. A text AIR appears on display.
2. Withdraw the tip from the liquid touching it against the edge of the reservoir
to remove excess liquid. Press trigger again to aspirate air buffer.
3. Dip the tip under the surface of the second liquid and press the trigger. The
second volume is drawn in to the tip.
4. Withdraw the tip from the liquid.
5. To deliver the both volumes, press the trigger. A text MIX appears on the
display.
6. By pressing trigger the pipette starts to pipette ca. 70 % of the total volume
several times as long as the trigger is held pressed.
7. After releasing the trigger the pipette stops after next dispensing and a text
BLOWOUT appears to display.
8. Withdraw the tip from the liquid and press the trigger and hold it down to
empty the tip.
9. Release the trigger to return to the ready position.
10. If necessary, change the tip and continue pipetting.
Page 15

Thermo Fisher Scientifi c
Thermo Scientifi c Novus SCP/MCP User Manual
15
Manual
With manual mode it is possible to measure volumes. In manual mode only
slower speeds are available to ensure a quick stop. First select a limit for total
volume, the default is the max. volume. Then select the pipetting speeds and
zero volume appears to the display.
1. Dip the tip under the surface of the liquid in the reservoir and press the
trigger. The liquid is drawn in to the tip and the actual volume is shown on
the display.
2. The pipetting direction can be changed with IN/OUT key (Left selection key).
3. To deliver the liquid selected the down direction and press the trigger.
4. To deliver out the rest of the liquid, press the trigger and hold it down.
5. If necessary, change the tip and continue pipetting.
Note
The volume display can be reset to zero at any time by pressing RESET
with right selection key.
Seq + Aspirate
The sequential aspirate mode enables serial aspirating of different volumes.
First choose the number of volumes (max. 20) with SCROLLKEY and accept with
OK. Vol 1 appears to display and highest possible volume is fl ashing. Select
the fi rst volume with SCROLLKEY and accept with OK. Now Vol 2 appears to
display and highest possible volume left is fl ashing. Select the second volume
with SCROLLKEY and accept with OK. After selecting the last volume the total
volume is shown on display and speed in is fl ashing for selecting the pipetting
speeds. After selecting the speeds the fi rst volume is shown on the display and
the pipette is ready for pipetting.
1. Dip the tip under the surface of the liquid and press the trigger. This action
will take up fi rst volume and the next volume appears on the display.
2. Withdraw the tip from the liquid touching it against the edge of the reservoir
to remove excess liquid.
3. Dip the tip under the surface of the next liquid and press the trigger. This
action will take up current volume and the next volume appears on the
display.
4. Repeat steps 2. and 3. until last volume is drawn in to the tip. The total
volume is shown on the display.
5. Deliver the total volume by pressing the trigger and hold it down. The
blowout volume is included in the delivered volume.
6. Release the trigger to return to the ready position.
7. If necessary, change the tip and continue pipetting.
Note The pipette can be emptied at any time by pressing CANCEL (left
selection key)
Page 16

16 Thermo Scientifi c Novus SCP/MCP User Manual
Thermo Fisher Scientifi c
Options
Calibrate
Calibration mode. See chapter calibration.
Service
The piston can be disconnected and reconnected in Service mode. For details
see chapter Maintenance.
Language
Name
This function enables user to set a name to the pipette. The name is always
shown on the display when the pipette is in sleep mode. To change the default
name choose NAME from the menu and press edit. The fi rst digit starts to fl ash.
Change the digit with SCROLLKEY and accept and move to next digit with OK.
When the last digit is accepted the name is changed.
Power
With this function the power can be turned off. Pressing any key turns on the
power.
Buzzer
The buzzer can be turned on and off with this function.
Version
The software version is displayed.
Backlight
With this function the backlight can be turned on/off.
Page 17

Thermo Fisher Scientifi c
Thermo Scientifi c Novus SCP/MCP User Manual
17
CALIBRATION
All Finnpipettes are factory calibrated and adjusted to give the volumes as
specifi ed with distilled or deionized water. Normally, the pipettes do not need
adjustment, but they are constructed to permit recalibration and adjustment for
liquids of different temperature and viscosity.
An analytical balance must be used. The scale graduation value of the balance
should be chosen according to the selected test volume of the pipette:
Volume readable Precision Uncertainty of
range graduation repeatability(s) measurement
and linearity
under 10 μl 0.00 1mg 0.001mg 0.002μl
10-100 μl 0.01 mg 0.02mg 0.02μl
above 100 μl 0.1 mg 0.2mg 0.2μl
If the uncertainty of measurement of the balance is known, this may be used
instead of the repeatability and linearity.
Test liquid: Water, distilled or deionized, “grade 3” water conforming ISO 3696.
Tests are done in a draft-free room at a constant (±0.5°C) temperature of water,
pipette and air between 15°C to 30°C.
The relative humidity must be above 50%. Especially with volumes under 50μl
the air humidity should be as high as possible to reduce the effect of evaporation
loss. Special accessories, such as the evaporation trap, are recommended.
By selecting MENU -> OPTIONS -> CALIBRATE -> COUNTER the number of
pipetttings since last calibration is shown on the display. The counter is reset
to zero when calibration is performed.
The pipette is checked with the maximum volume (nominal volume) and with
the minimum volume. A new tip is fi rst pre-wetted 3-5 times and a series of
ten pipettings are done with both volumes. A pipette is always adjusted for
delivery (Ex) of the selected volume. Measuring volumes taken from balance
is not allowed.
Procedure:
1. Do 10 pipettings with the minimum volume.
2. Do 10 pipettings with the maximum volume.
3. Calculate the inaccuracy (A) and imprecision (cv) of both series.
4. Compare the results to the limits in the Table 1.
If the calculated results are within the selected limits, the adjustment of the
pipette is correct.
Device
requirements and
test conditions
Calibration
Counter
Checking the
calibration
Page 18

18 Thermo Scientifi c Novus SCP/MCP User Manual
Thermo Fisher Scientifi c
TABLE1: Maximum permissible errors according ISO 8655
Two point calibration
Normally the two-point calibration should be used.
1. Do the pipetting series with both max. and min. volumes.
2. Calculate the actual results.
3. Press MENU and select options with SCROLLKEY and accept with OK.
4. Select CALIBRATE and press OK.
5. Select two points and confi rm with OK. The target max. and target min.
volumes are shown on the display.
6. Press EDIT and change the actual max. volume with the SCROLLKEY and
accept with OK.
7. Change the actual min. volume with the SCROLLKEY and accept with OK.
8. A text SAVE? appears on the display.
9. Accept with YES
10. The adjustment has been changed.
Adjustment
Range Volume Inaccuracy Imprecision
µl µl % s.d. µl cv%
1-10 µl 10 ±0.120 ±1.2 0.080 0.8
1 ±0.120 ±12 0.080 8.0
5-50 µl 50 ±0.50 ±1.0 0.20 0.4
5 ±0.50 ±10 0.20 4.0
10-100 µl 100 ±0.80 ±0.8 0.30 0.3
10 ±0.80 ±8.0 0.30 3.0
30-300 µl 300 ±4.0 ±1.3 1.5 0.5
30 ±4.0 ±13 1.5 5.0
100-1000 µl 1000 ±8.0 ±0.8 3.0 0.3
100 ±8.0 ±8.0 3.0 3.0
0,5-5 ml 5000 ±40.0 ±0.8 15.0 0.3
500 ±40.0 ±8.0 15.0 3.0
1-10 ml 10000 ±60.0 ±0.6 30.0 0.3
1000 ±60.0 ±6.0 30.0 3.0
Range Channel Volume Inaccuracy Imprecision
µl µl % s.d.µl cv%
1-10 µl 8, 12 10 ±0.24 ±2.4 0.16 1.6
1 ±0.24 ±24 0.16 16
5-50 µl 8, 12, 16 50 ±1.0 ±2.0 0.4 0.8
5 ±1.0 ±20 0.4 8.0
30-300 µl 8, 12 300 ±8.0 ±2.7 3.0 1.0
30 ±8.0 ±26.7 3.0 10.0
100-1200 µl 8 1200 ±32 ±2.7 12 1.0
100 ±32 ±32 12 12
Page 19

Thermo Fisher Scientifi c
Thermo Scientifi c Novus SCP/MCP User Manual
19
One point calibration
The one point calibration can be used if a single specifi c volume must be
calibrated. The calibration volume can be selected from the entire volume range.
Note that the inaccuracy of other volumes changes also and the performance
for other volumes cannot be assured.
1. Do the pipetting series with calibration volume.
2. Calculate the results.
3. Press MENU and select options with SCROLLKEY and accept with OK.
4. Select CALIBRATE and press OK.
5. Select one point and confi rm with OK. The calibration volume is shown on
the display.
6. Press EDIT and change the calibration volume with the SCROLLKEY and
accept with OK.
7. Change the actual volume with the SCROLLKEY and accept with OK.
8. A text SAVE? appears on the display.
9. Accept with YES
10. The adjustment has been changed.
Conversion of mass to volume
V = (w + e) x Z V = volume (μl)
w = weight (mg)
e = evaporation loss (mg)
Z = conversion factor for μl/mg conversion
Evaporation loss can be signifi cant with low volumes. To determine mass loss,
dispense water to the weighing vessel, note the reading and start a stopwatch.
See how much the reading decreases during 30 seconds (e.g. 6mg = 0.2mg/s).
Compare this to the pipetting time from tareing to reading. Typically pipetting
time might be 10 seconds and the mass loss is 2 mg (10s x 0.2mg/s) in this
example. If an evaporation trap or lid on the vessel is used the correction of
evaporation is usually unnecessary.
The factor Z is for converting the weight of the water to volume at test
temperature and pressure. A typical value is 1.0032μl/mg at 22°C and 95 kPa.
See the conversion table on page 29.
Formulas for
calculating results
Page 20

20 Thermo Scientifi c Novus SCP/MCP User Manual
Thermo Fisher Scientifi c
Inaccuracy (systematic error)
Inaccuracy is the difference between the dispensed volume and the selected
volume of a pipette.
A =
- V0 A = inaccuracy
= mean volume
V
0
= nominal volume
Inaccuracy can be expressed as a relative value:
A% = 100% x A / V
0
Imprecision (random error)
Imprecision refers to the repeatability of the pipettings. It is expressed as
standard deviation (s) or coeffi cient of variation (cv)
s = standards deviation
= mean volume
n = number of measurements
Standard deviation can be expressed as a relative value (CV)
CV = 100% x S /
Page 21

Thermo Fisher Scientifi c
Thermo Scientifi c Novus SCP/MCP User Manual
21
MAINTENANCE
When the Finnpipette Novus is not in use, make sure it is stored in an upright
position. We recommend a Finnpipette stand for this purpose.
The part # refer to exploded views beginning at page 31.
The pipette should be checked at the beginning of each day for dust and dirt on
the outside surfaces of the pipette. Particular attention should be paid to the
tip cone. No other solvents except 70 % ethanol should be used to clean the
pipette.
If the pipette is used daily it should be checked and lubricated every three
months. The servicing procedure starts with choosing the Service-mode from
the menu (Menu -> Options -> Service).
Pipettes up to 1000 µl
1. Remove the lower tip ejector sleeve 13 by pulling it out (snap fi tting).
2. Push down the ejector button and take the upper ejector top 11
between fi ngers.
3. Release the ejector button to up position, but hold the tip ejector top 11 in
down position with the fi ngers.
4. Remove the tip cone by pulling it out (snap fi tting).
5. Press and hold the trigger down to drive out the piston.
6. Insert the special piston removal tool and pull out the piston 14. The number
2 end is for 300μl and 1000μl pistons, the number 1 end for all the smaller
volumes. See picture. Release the trigger.
7. Check the tip cone for foreign particles.
8. Grease the cleaned parts with the lubricant that comes with the pipette.
9. Reassemble the pipette components.
10. Insert carefully the piston to the tip cone.
11. Push the tip cone back to the handle while holding the ejector top 11 down,
until you hear a “click”.
12. Press trigger to reconnect
the piston to drive
mechanism.
13. Press READY to return
from service mode.
Daily checking
Short-term Service
Single channel
pipettes
1
2
1
2
Page 22

22 Thermo Scientifi c Novus SCP/MCP User Manual
Thermo Fisher Scientifi c
5 ml and 10 ml pipettes
1. Pull down the lower tip ejector sleeve.
2. Note that the tip ejector button is in fully up position.
3. Remove the tip cone by pulling it out (snap fi tting).
4. Remove the ejector sleeve by pulling it to two parts (snap fi tting).
5. Push the snap joints to release and remove the cylinder 14.
6. Push forward and clean the piston with a dry napless cloth.
7. Check the tip cone for foreign particles.
8. Grease the cleaned parts with the lubricant that comes with the pipette.
9. Reassemble the pipette components in reverse order.
10. Push the tip cone back to the handle while holding the ejector top 11 down,
until you hear a “click”
11. Press trigger to reconnect the piston to drive mechanism.
12. Press READY to return from service mode.
If the pipette is used daily it should be serviced every six months. The servicing
procedure starts with the disassembly of the pipette.
Pipettes up to 1000 µl
1. Remove the lower tip ejector sleeve 13 by pulling it out (snap fi tting).
2. Push down the ejector button and take the upper ejector top 11 between
fi ngers.
3. Release the ejector button to up position, but hold the tip ejector top 11 in
down position with the fi ngers.
4. Remove the tip cone by pulling it out (snap fi tting).
5. Press and hold the trigger down to drive out the piston.
6. Insert the special piston removal tool and pull out the piston 14. The number
2 end is for 300μl and 1000μl pistons, the number 1 end for all the smaller
volumes. See picture on page 21. Release the trigger.
7. Remove spring hatch 25 by pressing it down and in the same time turning
90 degrees. Take out the spring 16.
8. Remove the rest of the parts from tip cone with the piston.
9. Clean the parts with a dry napless cloth.
10. Check the tip cone for foreign particles.
11. Grease the cleaned parts with the lubricant that comes with the pipette.
5 ml and 10 ml pipettes
The long-term service for 5ml and 10ml pipettes is the same as short-term
service.
Long-term service
Single channel
pipettes
Page 23

Thermo Fisher Scientifi c
Thermo Scientifi c Novus SCP/MCP User Manual
23
Reassembly:
1-10 µl pipettes
1. Put the spring hatch 25, the spring 16, spring support 17 and the tube 18
back on the piston.
2. Slide the bigger O-ring 19, smaller O-ring 20 and tube 21 on the piston.
3. Slide the small spring 22, spring support 23 and O-ring 24 on the tube 21.
4. Carefully slide the entire assembly into the tip, then push the spring hatch
25 down and turn it 90 degrees.
5. Take the upper ejector top 11 between fi ngers and pull it down.
6. Push the tip cone into the handle while holding the ejector top 11 down, until
you hear a “click”.
7. Reassemble the lower tip ejector sleeve 13 (snap fi tting).
8. Press trigger to reconnect the piston to drive mechanism.
9. Press READY to return from service mode.
5-50 µl pipettes:
1. Put the spring hatch 25, the spring 16, spring support 17 and the tube 18
back on the piston.
2. Slide the bigger O-ring 19, smaller O-ring 20 and O-ring support 21 on the
piston.
3. Slide the small spring 22 on the piston.
4. Carefully slide the entire assembly into the tip, then push the spring hatch
25 down and turn it 90 degrees.
5. Take the upper ejector top 11 between fi ngers and pull it down.
6. Push the tip cone into the handle while holding the ejector top 11 own, until
you hear a “click”.
7. Reassemble the lower tip ejector sleeve 13 (snap fi tting).
8. Press trigger to reconnect the piston to drive mechanism.
9. Press READY to return from service mode.
10-100 µl pipette:
1. Put the spring hatch 25, the spring 16, spring support 17 and the O-ring 20
back on the piston.
2. Carefully slide the entire assembly into the tip, then push the spring hatch
25 down and turn it 90 degrees.
3. Take the upper ejector top 11 between fi ngers and pull it down.
4. Push the tip cone into the handle while holding the ejector top 11 down, until
you hear a “click”.
5. Reassemble the lower tip ejector sleeve 13 (snap fi tting).
6. Press trigger to reconnect the piston to drive mechanism.
7. Press READY to return from service mode.
Page 24

24 Thermo Scientifi c Novus SCP/MCP User Manual
Thermo Fisher Scientifi c
30-300 µl pipette:
1. Put the spring hatch 25, the spring 16, spring support 17 and the O-ring 20
back on the piston.
2. Carefully slide the entire assembly into the tip, then push the spring hatch
25 down and turn it 90 degrees.
3. Take the upper ejector top 11 between fi ngers and pull it down.
4. Push the tip cone into the handle while holding the ejector top 11 down, until
you hear a “click”.
5. Reassemble the lower tip ejector sleeve 13 (snap fi tting).
6. Press trigger to reconnect the piston to drive mechanism.
7. Press READY to return from service mode.
100-1000 µl pipettes:
1. Put the spring hatch 25, the spring 16, spring support 17 and the O-ring 20
back on the piston.
2. Carefully slide the entire assembly into the tip cone.
3. Push the spring hatch 25 down and turn it 90 degrees.
4. Take the upper ejector top 11 between fi ngers and pull it down.
5. Push the tip cone into the handle while holding the ejector top 11 down, until
you hear a “click”.
6. Reassemble the lower tip ejector sleeve 13 (snap fi tting).
7. Press trigger to reconnect the piston to drive mechanism.
8. Press READY to return from service mode.
If the pipette is used daily it should be checked and lubricated every three
months. The servicing procedure starts with choosing the Service-mode from
the menu (Menu -> Options -> Service).
1. Note that the tip ejector button is in fully up position.
2. Pull down the tip ejector part of the module and remove the tip cone module
by pulling it out (snap fi tting).
3. Pull out the Colour Ring 15. Open the upper end of the tip ejector slightly
and remove the tip ejector. Pull out the module spring and clip 22.
4. Use a screwdriver to remove the four/six screws in the module cover and lift
off the cover.
5. Remove the piston bar and clean the pistons and tip cones with a dry nap–
free cloth.
6. If needed, replace the o-rings as described in Long-term Service
7. Grease cleaned pistons with the lubricant provided in the pipette package.
8. Install the piston bar with pistons and tip cones in the cover and close the
cover with the four/six screws. Insert the clip 22.
9. Place the tip ejector and module spring on the neck of the module. Press the
spring below the tip ejector. Close the tip ejector with the Colour Ring.
10. Push the tip cone module back to the handle while holding the ejector down,
until you hear a “click”.
11. Press trigger to reconnect the piston to drive mechanism.
12. Press READY to return from service mode.
Short-term Service
Multichannel
pipettes
Page 25

Thermo Fisher Scientifi c
Thermo Scientifi c Novus SCP/MCP User Manual
25
If the pipette is used daily it should be serviced every six months. The servicing
procedure starts with the disassembly of the pipette. The servicing procedure
starts with choosing the Service-mode from the menu (Menu -> Options ->
Service).
1. Note that the tip ejector button is in fully up position.
2. Pull down the tip ejector part of the module and remove the tip cone module
by pulling it out (snap fi tting).
3. Pull out the Colour Ring 15. Open the upper end of the tip ejector slightly
and remove the tip ejector. Pull out the module spring and clip 22.
4. Use a screwdriver to remove the four/six screws in the module cover and lift
off the cover.
5. Remove the piston bar and clean the pistons and tip cones with a dry nap–
free cloth.
6. 100-1200 µl: Pull out the tip cones from the pistons. Clean the cylinders 30,
pistons and seal rings. If the seal ring is damaged, the whole piston assembly
31 must be replaced.
Grease the seal rings and cylinders, avoid using too much lubricant. Install
the cylinders back on the pistons.
30-300 µl & 5-50 µl: Open the tip cone by carefully releasing the cover
ring from its snap joint with the screwdriver. Remove all the parts from the
tip cone. Clean all the parts. If needed, replace the o-rings Take one piston.
Slide cover ring 32 (larger hole), (support ring 35 30-300μl), spring 33,
support ring 35, o–ring 37 bigger and o–ring 36 (smaller) onto the piston.
Grease the o–ring with the lubricant provided in the pipette package. Slide
all the parts into the tip cone and close the snap joint of the cover ring.
1–10 µl: Open the tip cone by carefully releasing the cover ring from its
snap joint with the screwdriver. Remove all the parts from the tip cone.
Clean all the parts. If needed, replace the o-rings Take one piston. Slide
cover ring 32 (larger hole), support 35, o–ring 36 (bigger), o–ring 37 (smaller)
and o–ring support 38 onto the piston. Then slide spring 39, spring support
40 (sharp edges fi rst) and o–ring 41 onto the o–ring sup port 38.
Grease the o–rings with the lubricant provided in the pipette package. Slide
all the parts into the tip cone and close the snap joint of the cover ring.
7. Install the piston bar with pistons and tip cones in the cover. Place aligning
studs to the same side when assembling the module. Close the cover with
the four screws. Insert the clip 22.
8. Place the tip ejector and module spring on the neck of the module. Press the
spring below the tip ejector. Close the tip ejector with the Colour Ring.
9. Push the tip cone module back to the handle while holding the ejector down,
until you hear a “click”.
10. Press trigger to reconnect the piston to drive mechanism.
11. Press READY to return from service mode.
Long-term service
Multichannel
pipettes
Page 26

26 Thermo Scientifi c Novus SCP/MCP User Manual
Thermo Fisher Scientifi c
To ensure even performance between all channels in a multichannel pipette,
all tip cones have to be changed at the same time, if any of them needs to
be changed. Don’t mix tip cones of different packages, because one bag
contains a matched set of tip cones. Place aligning studs to the same side
when assembling the module. See picture on page 35.
There are two versions of battery lids in Finnpipette Novus Pipettes
- Follow the instructions below according to the battery lid version
Opening the Version 1 battery lid
- Use a small fl at screwdriver for opening the battery lid.
- Put the head of the screwdriver into the slot and rotate it to open the lid.
- Disconnect the battery connector and pull out the battery.
Opening the Version 2 battery lid
- Open the battery lid by pressing and pulling the lid as shown in the picture.
- Disconnect the battery connector and pull out the battery.
See page 6 for installing the battery.
Note Do not reuse version 1 style battery lid
Service
Instructions for
Multichannel
Pipette Tip Cones
Replacing the
battery
1
2
Version 1 Version 2
Page 27

Thermo Fisher Scientifi c
Thermo Scientifi c Novus SCP/MCP User Manual
27
Single Channel pipettes
The tip cone module can be sterilized by autoclaving it at 121°C (252°F) (2 ata)
for 20 minutes. You can use steam sterilization bags if needed.
1. Remove the lower tip ejector sleeve 13 by pulling it out (snap fi tting).
2. Push down the ejector button and take the upper ejector top 11 between
fi ngers.
3. Release the ejector button to up position, but hold the tip ejector top 11 in
down position with the fi ngers.
4. Remove the tip cone by pulling it out (snap fi tting).
5. Press and hold the trigger down to drive out the piston.
6. Insert the special piston removal tool and pull out the piston 14. The number
2 end is for 300 μl and 1000 μl pistons, the number 1 end for all the smaller
volumes. See picture on page 21. Release the trigger.
7. Remove spring hatch 25 by pressing it down and in the same time turning
90 degrees. Take out the spring 16.
8. Autoclave all module parts at 121°C (252°F) for 20 minutes.
9. Let the parts cool down to room temperature for at least two hours.
10. With pipettes up to 100 μl reassemble the plate 25 and spring 16.
With pipettes 300 μl and 1000 μl reassemble the spring 16.
11. Attach the module back to the pipette as described in Maintenance section.
After autoclaving the module must be cooled to room temperature for at least
two hours. Before pipetting, make sure that the module is dry. We recommend
that you check the calibration after every sterilization cycle.
Multichannel pipettes
The tip cone module can be sterilized by autoclaving it at 121°C (252°F) (2 ata)
for 20 minutes. You can use steam sterilization bags if needed.
Note The 1200 μl module is NOT autoclavable.
Remove and attach the module back to the pipette as described in Maintenance
section. After autoclaving the module must be cooled to room temperature for
at least two hours. Before pipetting, make sure that the module is dry. We
recommend that you check the calibration after every sterilization cycle.
Sterilization
Sterilization
Page 28

28 Thermo Scientifi c Novus SCP/MCP User Manual
Thermo Fisher Scientifi c
Defect
Leakage
Inaccurate
dispensing
Inaccurate
dispensing with
certain liquids
No dispensing
Possible reason
Tip incorrectly attached
Foreign particles between tip and tip cone
Foreign particles between the piston, the
O-ring and the cylinder
Insuffi cient amount of grease on cylinder
and O-ring
O-ring damaged
Incorrect operation
Tip incorrectly attached
Calibration altered: caused by misuse,
for example
Unsuitable calibration
High viscosity liquids may require
recalibration
Pistons stuck or not connected
Solution
Attach fi rmly
Clean tip cones attach new tips
Clean and grease O-ring and cylinder.
Grease accordingly
Change the O-ring
Follow instructions carefully
Attach fi rmly
Recalibrate according to instructions
Recalibrate with the liquids in question
Remove tip cone module. Move piston by
hand or with piston removal tool. Attach the
module in service mode.
TROUBLE SHOOTING
The table below lists possible problems and their solutions.
Caution The Finnpipette is designed to allow easy in-lab service. If you
would prefer to have us or your local representative service your pipette,
please make sure that the pipette has been decontaminated before you send
it to us.
Please note that the postal authorities in your country may prohibit or restrict
the shipment of contaminated material by mail.
Page 29

Thermo Fisher Scientifi c
Thermo Scientifi c Novus SCP/MCP User Manual
29
Conversion Table
Value of the conversion factor Z (μl/mg), as a function of temperature and pressure, for distilled water.
Temperature Air pressure
°C kPa
80 85 90 95 100 101.3 105
15.0 1.0017 1.0018 1.0019 1.0019 1.0020 1.0020 1.0020
15.5 1.0018 1.0019 1.0019 1.0020 1.0020 1.0020 1.0021
16.0 1.0019 1.0020 1.0020 1.0021 1.0021 1.0021 1.0022
16.5 1.0020 1.0020 1.0021 1.0021 1.0022 1.0022 1.0022
17.0 1.0021 1.0021 1.0022 1.0022 1.0023 1.0023 1.0023
17.5 1.0022 1.0022 1.0023 1.0023 1.0024 1.0024 1.0024
18.0 1.0022 1.0023 1.0023 1.0024 1.0025 1.0025 1.0025
18.5 1.0023 1.0024 1.0024 1.0025 1.0025 1.0026 1.0026
19.0 1.0024 1.0025 1.0025 1.0026 1.0026 1.0027 1.0027
19.5 1.0025 1.0026 1.0026 1.0027 1.0027 1.0028 1.0028
20.0 1.0026 1.0027 1.0027 1.0028 1.0028 1.0029 1.0029
20.5 1.0027 1.0028 1.0028 1.0029 1.0029 1.0030 1.0030
21.0 1.0028 1.0029 1.0029 1.0030 1.0031 1.0031 1.0031
21.5 1.0030 1.0030 1.0031 1.0031 1.0032 1.0032 1.0032
22.0 1.0031 1.0031 1.0032 1.0032 1.0033 1.0033 1.0033
22.5 1.0032 1.0032 1.0033 1.0033 1.0034 1.0034 1.0034
23.0 1.0033 1.0033 1.0034 1.0034 1.0035 1.0035 1.0036
23.5 1.0034 1.0035 1.0035 1.0036 1.0036 1.0036 1.0037
24.0 1.0035 1.0036 1.0036 1.0037 1.0037 1.0038 1.0038
24.5 1.0037 1.0037 1.0038 1.0038 1.0039 1.0039 1.0039
25.0 1.0038 1.0038 1.0039 1.0039 1.0040 1.0040 1.0040
25.5 1.0039 1.0040 1.0040 1.0041 1.0041 1.0041 1.0042
26.0 1.0040 1.0041 1.0041 1.0042 1.0042 1.0043 1.0043
26.5 1.0042 1.0042 1.0043 1.0043 1.0044 1.0044 1.0044
27.0 1.0043 1.0044 1.0044 1.0045 1.0045 1.0045 1.0046
27.5 1.0045 1.0045 1.0046 1.0046 1.0047 1.0047 1.0047
28.0 1.0046 1.0046 1.0047 1.0047 1.0048 1.0048 1.0048
28.5 1.0047 1.0048 1.0048 1.0049 1.0049 1.0050 1.0050
29.0 1.0049 1.0049 1.0050 1.0050 1.0051 1.0051 1.0051
29.5 1.0050 1.0051 1.0051 1.0052 1.0052 1.0052 1.0053
30.0 1.0052 1.0052 1.0053 1.0053 1.0054 1.0054 1.0054
Page 30

30 Thermo Scientifi c Novus SCP/MCP User Manual
Thermo Fisher Scientifi c
TECHNICAL DATA
Battery
Type: Li-ion battery
Capacity: 950 mAh
Charging time: Approx. 1 h
Charging temperature: 0 to +45°C
Power supply unit
Type: Switching power supply
Input voltage: 100-240 V ~50/60 Hz, 180 mA
Output voltage: 5.0 V
0.5 A
Finnpipette Novus
Type:
Weight with battery
148
Single channel pipette 210 g max.
(tip not included):
Operation:
Altitude:
Multichannel pipette 315 g max.
Indoor use only
Up to 2000 m
Operating temperature: +15 to +35°C
Air humidity during operation: 20 to 85% rel. humidity
Storage temperature: ≤ 1 month -20 to +45°C
(60±25% Rel. humidity)
> 1 month -10 to +35°C
(60±25% Rel. humidity)
It is recommended to charge the pipette
every two months even if the pipette is
not used.
Page 31

Thermo Fisher Scientifi c
Thermo Scientifi c Novus SCP/MCP User Manual
31
SPARE PARTS
Single Channel pipette
1-10ml 2209580
1. 2209680
10. 1062620
11. 1132390
12. 2209600
13. 1033050
14. 1060510
15. 1060530
0,5-5ml 2209570
1. 2209670
10. 1062610
11. 1132390
12. 2209590
13. 1030230
14. 1060790
15. 1060810
100-1000μl 2209560
1. 2209660
10. 1062030
11. 1062600
12. 1132180
13. 1062060
14. 1062360
16. 1132620
17. 1060630
20. 1030020
25. 1061350
1-10 ml
1
10
12
13
14
15
10
11
14
20
10
12
13
17
12
13
14
15
11
11
25
16
0,5-5 ml
100-1000 μl
Page 32

32 Thermo Scientifi c Novus SCP/MCP User Manual
Thermo Fisher Scientifi c
30-300 μl 10-100 μl 5-50 μl, 5-50 μl Micro
1-10 μl, 1-10 μl Micro
14
20
10
12
13
17
11
25
16
14
20
10
12
13
17
11
25
16
14
26
10
12
13
17
11
25
16
14
24
10
12
13
17
11
25
16
22
21
20
19
26
22
21
20
19
18
23
Page 33

Thermo Fisher Scientifi c
Thermo Scientifi c Novus SCP/MCP User Manual
33
5-50μl 2209530
5-50μl Micro 2209520
1. 2209700
1. 2209630 Micro
10. 1062010
10. 1062000 Micro
11. 1062570
11. 1062580 Micro
12. 1132180
13. 1062050
13. 1062040 Micro
14. 1062310
16. 1132620
17. 1060600
19. 1030500
20. 1033060
21. 10593500
22. 1132000
22. 1132340 Micro
25. 1060890
26. 1061410
30-300μl 2209550
1. 2209650
10. 1062020
11. 1062590
12. 1132180
13. 1062050
14. 1062250
16. 1132620
17. 1060620
20. 1033180
25. 1061430
10-100μl 2209540
1. 2209640
10. 1062020
11. 1062570
12. 1132180
13. 1062050
14. 1062260
16. 1132620
17. 1060610
20. 1030510
25. 1061420
1-10μl 2209510
1-10μl Micro 2209500
1. 2209690
1. 2209620 Micro
10. 1062000
11. 1062570
11. 1062560 Micro
12. 1132180
13. 1062050
13. 1062040 Micro
14. 2207990
16. 1132620
17. 1060600
18. 1060740
19. 1030380
20. 1030060
21. 10593290
22. 1131800
23. 10593360
24. 1030170
25. 1060910
26. 1061390
Page 34

34 Thermo Scientifi c Novus SCP/MCP User Manual
Thermo Fisher Scientifi c
SPARE PARTS
Multichannel pipette
8-channel
14. 1062470
15. 1062460
16. 1062450
17. 1062380
18. 1062390
19. 1132470
21. 4x0202040
22. 1132490
23. 2x1062400
24. 2x1061300
12-channel
14. 1062470
15. 1062460
16. 1062440
17. 1062420
18. 1062410
19. 1132480
20. 2x0202020
21. 4x0202040
22. 1132500
23. 2x1062430
24. 3x1061300
16-channel
1. 2209790
14. 1062470
15. 1062460
16. 1062450
17. 1062380
18. 1062390
19. 1132470
21. 4x0202040
22. 1132490
23. 2x1062401
31. 2x11072010
32. 10593840
33. 2x1132130
34. 1132150
35. 2x10593500
36. 2x1030170
37. 10593870
42. 2207950 8 pcs
1-10μl
1. 2209760
31. 2209870
32. 1061020
34. 1131630
35. 10593280
36. 1030380
37. 1033160
38. 10593290
39. 1131900
40. 10593360
41. 1030170
42. 2209110 12 pcs
5-50μl
1. 2209770
31. 2208880
32. 1061020
33. 1131400
34. 1131630
35. 10589500
36. 1030480
37. 1030160
42. 2209090 12 pcs
30-300μl
1. 2209780
31. 10589170
32. 10589490
33. 1132810
34. 1131630
35. 1061980
36. 1033330
37. 1030550
42. 2212700 12 pcs
1
Page 35

Thermo Fisher Scientifi c
Thermo Scientifi c Novus SCP/MCP User Manual
35
1-10μl 8-ch 2209800
1-10μl 12-ch 2209810
5-50μl 8-ch 2209820
5-50μl 12-ch 2209830
1-10μl
5-50μl
15
14
18
19
40
32
17
16
39
31
35
34
36
37
38
41
30
42
21
21
22
23
24
32
31
35
33
36
37
30
42
34
Picture / Abbildung / Illustration /
Imagen / Bild / Immagine / 図
Page 36

36 Thermo Scientifi c Novus SCP/MCP User Manual
Thermo Fisher Scientifi c
5-50μl 16-ch 2209860
30-300μl 8-ch 2209840
30-300μl 12-ch 2209850
32
31
35
33
36
37
30
34
42
15
14
18
19
17
16
21
21
22
23
20
35
21
21
22
23
24
32
31
35
33
36
30
34
42
15
14
18
19
17
16
37
Page 37

Thermo Fisher Scientifi c
Thermo Scientifi c Novus SCP/MCP User Manual
37
1200 μl 8-channel
1. 2209940
14. 1062470
15. 1062460
16. 1062780
17. 1062750
18. 1062740
19. 1132480
21. 4x0202050
22. 1132630
23. 2x1062760
30. 1062720
31. 2209920
1200μl 8-ch 2209930
31
30
21
21
22
23
15
14
18
19
17
16
Page 38

38 Thermo Scientifi c Novus SCP/MCP User Manual
Thermo Fisher Scientifi c
Finntip (sterile and non-sterile) Finntip Filter (sterile)
10 Micro
10 Flex Micro
20 Micro
50 Micro
250 univ
200 ext
200 Flex
300
300 Flex
1000 Ext
1000
1000 Flex
1200 Flex
5 ml
10 ml
10 ml Flex Ext
10 Flex Micro
10 Micro
10 Univ
20 Micro
20 Univ
30 Flex
30 Univ
50 Micro
100 Flex
100 Ext
100 Univ
200 Flex
200 Ext
200 Univ
300 Flex
300
1000 Ext
1000
1000 Flex
1200 Flex
5 ml
10 ml
10 ml Flex Ext
FP Novus 1-10μl Micro
•••• •• • •
FP Novus 1-10μl
••••• • •••
FP Novus 5-50μl Micro
••
FP Novus 5-50μl
••••• •••
FP Novus 10-100μl
••••• ••••••
FP Novus 30-300μl
•• ••
FP Novus 100 - 1000 μl
•••• ••••
FP Novus 0.5-5ml
• •
FP Novus 1-10ml
•• ••
FP Novus 8-ch 1-10μl
•••• •• • •
FP Novus 12-ch 1-10μl
•••• •• • •
FP Novus 8-ch 5-50μl
••••• •••
FP Novus 12-ch 5-50μl
••••• •••
FP Novus 8-ch 30-300μl
•• ••
FP Novus 12-ch 30-300μl
•• ••
FP Novus 16-ch 5-50μl
••
FP Novus 8-ch 100-1200μl
• •
Page 39

Thermo Fisher Scientifi c
Thermo Scientifi c Novus SCP/MCP User Manual
39
Tip Ordering Information
Code Finntip Volume Qty
* 9400300 10 Micro 0,2-10 μl 10x96/rack
9400303 10 Micro sterile 0,2-10 μl 10x96/rack
* 94060100 Flex 10 0,2-10 μl 10x96/rack
94060103 Flex 10 sterile 0,2-10 μl 10x96/rack
* 9400610 20 Micro 0,2-20 μl 10x384/rack
9400613 20 Micro sterile 0,2-20 μl 10x384/rack
* 9400370 50 Micro 0,2-50 μl 10x384/rack
9400373 50 Micro sterile 0,2-50 μl 10x384/rack
* 9400130 200 Ext 5-200 μl 10x96/rack
9400133 200 Ext sterile 5-200 μl 10x96/rack
* 94060310 Flex 200 1-200 μl 10x96/rack
94060313 Flex 200 sterile 1-200 μl 10x96/rack
* 9400260 250 Univ. 0,5-250 μl 10x96/rack
9400263 250 Univ. sterile 0,5-250 μl 10x96/rack
* 9401250 300 5-300 μl 10x96/rack
9401253 300 sterile 5-300 μl 10x96/rack
* 94060510 Flex 300 5-300 μl 10x96/rack
94060513 Flex 300 sterile 5-300 μl 10x96/rack
* 9401110 1000 100-1000 μl 10x96/rack
9401113 1000 sterile 100-1000 μl 10x96/rack
* 94060710 Flex 1000 100-1000 μl 10x96/rack
94060713 Flex 1000 sterile 100-1000 μl 10x96/rack
* 9402070 5 ml 1-5 ml 5x54/rack
9402073 5 ml sterile 1-5 ml 5x54/rack
* 9402160 10 ml 1-10 ml 5x24/rack
9402163 10 ml sterile 1-10 ml 5x24/rack
94060970 Flex 10ml Ext 1-10 ml 100 pcs/bag
94060973 Flex 10ml Ext sterile 1-10 ml 50 pcs/bag
* Also available in bags
Code Finntip Filter Volume Qty
94052000 10 Micro sterile 0,2-10 μl 10x96/rack
94056980 Flex 10 sterile 0,2-10 μl 10x96/rack
94052100 10 sterile 0,5-10 μl 10x96/rack
94052020 20 Micro sterile 0,2-20 μl 10x384/rack
94052150 20 sterile 0,5-20 μl 10x96/rack
94052160 30 sterile 0,5-30 μl 10x96/rack
94056510 Flex 30 sterile 5-30 μl 10x96/rack
94052060 50 Micro sterile 0,2-50 μl 10x384/rack
94052200 100 μl sterile 0,5-100 μl 10x96/rack
94052310 100 μl Ext sterile 5-100 μl 10x96/rack
94056520 Flex 100 sterile 5-100 μl 10x96/rack
94052300 200 μl sterile 0,5-200 μl 10x96/rack
94052320 200 μl Ext sterile 5-200 μl 10x96/rack
94056380 Flex 200 sterile 1-200 μl 10x96/rack
94052350 300 μl sterile 5-300 μl 10x96/rack
94056580 Flex 300 sterile 5-300 μl 10x96/rack
94052410 1000 μl sterile 100-1000 μl 10x96/rack
94052430 1000 μl Ext sterile 100-1000 μl 5x96/rack
94056710 Flex 1000 sterile 100-1000 μl 10x96/rack
94052550 5 ml sterile 1-5 ml 5x54/rack
94052600 10 ml sterile 1-10 ml 5x24/rack
94056970 Flex 10 ml Ext sterile 1-10 ml 50/bag
Page 40

40 Thermo Scientific Novus SCP/MCP User Manual
Thermo Fisher Scientific
Thermo Fisher Scientific Oy
Ratastie 2,
01620 Vantaa
Finland
1509000-02-EN
thermofisher.com
info.pipettes@thermofisher.com
© 2017 Thermo Fisher S cientific Inc. All rights reserved. All trademarks are the property of Thermo Fisher Scientific
Inc. and its subsidiaries. Specifications, terms and pricing are subject to change. Not all products are available in all
countries. Please consult your local sales representative for details.
 Loading...