

Page 1

EASYpure®II Reservoir Feed
Water Purification System
Series 1305
Operating Manual and Parts List LT1305X1 Rev. 0
_________________________________________________________________________________
Part of Thermo Fisher Scientific
Page 2

Thermo Scientific
MANUAL NUMBER LT1305X1 (7007133)
0 -- 5/26/10 Transfer to Marietta (was LT1305X1 7/3/08) ccs
REV ECR/ECN DATE DESCRIPTION By
Preface
EASYpure II RF i
Models covered in this manual
Catalog Number (Model Number) Voltage
D7031 (7133) 100-240V
Page 3

Thermo Scientificii EASYpure II RF
Preface
Important Read this instruction manual. Failure to read, understand and follow the instructions in this manual
may result in damage to the unit, injury to operating personnel, and poor equipment performance.
s
Caution All internal adjustments and maintenance must be performed by qualified service personnel. s
Material in this manual is for information purposes only. The contents and the product it describes are subject to
change without notice. Thermo Fisher Scientific makes no representations or warranties with respect to this
manual. In no event shall Thermo be held liable for any damages, direct or incidental, arising out of or related to
the use of this manual.
©2010 Thermo Fisher Scientific. All rights reserved.
Page 4
Thermo Scientific EASYpure II RF iii
Preface
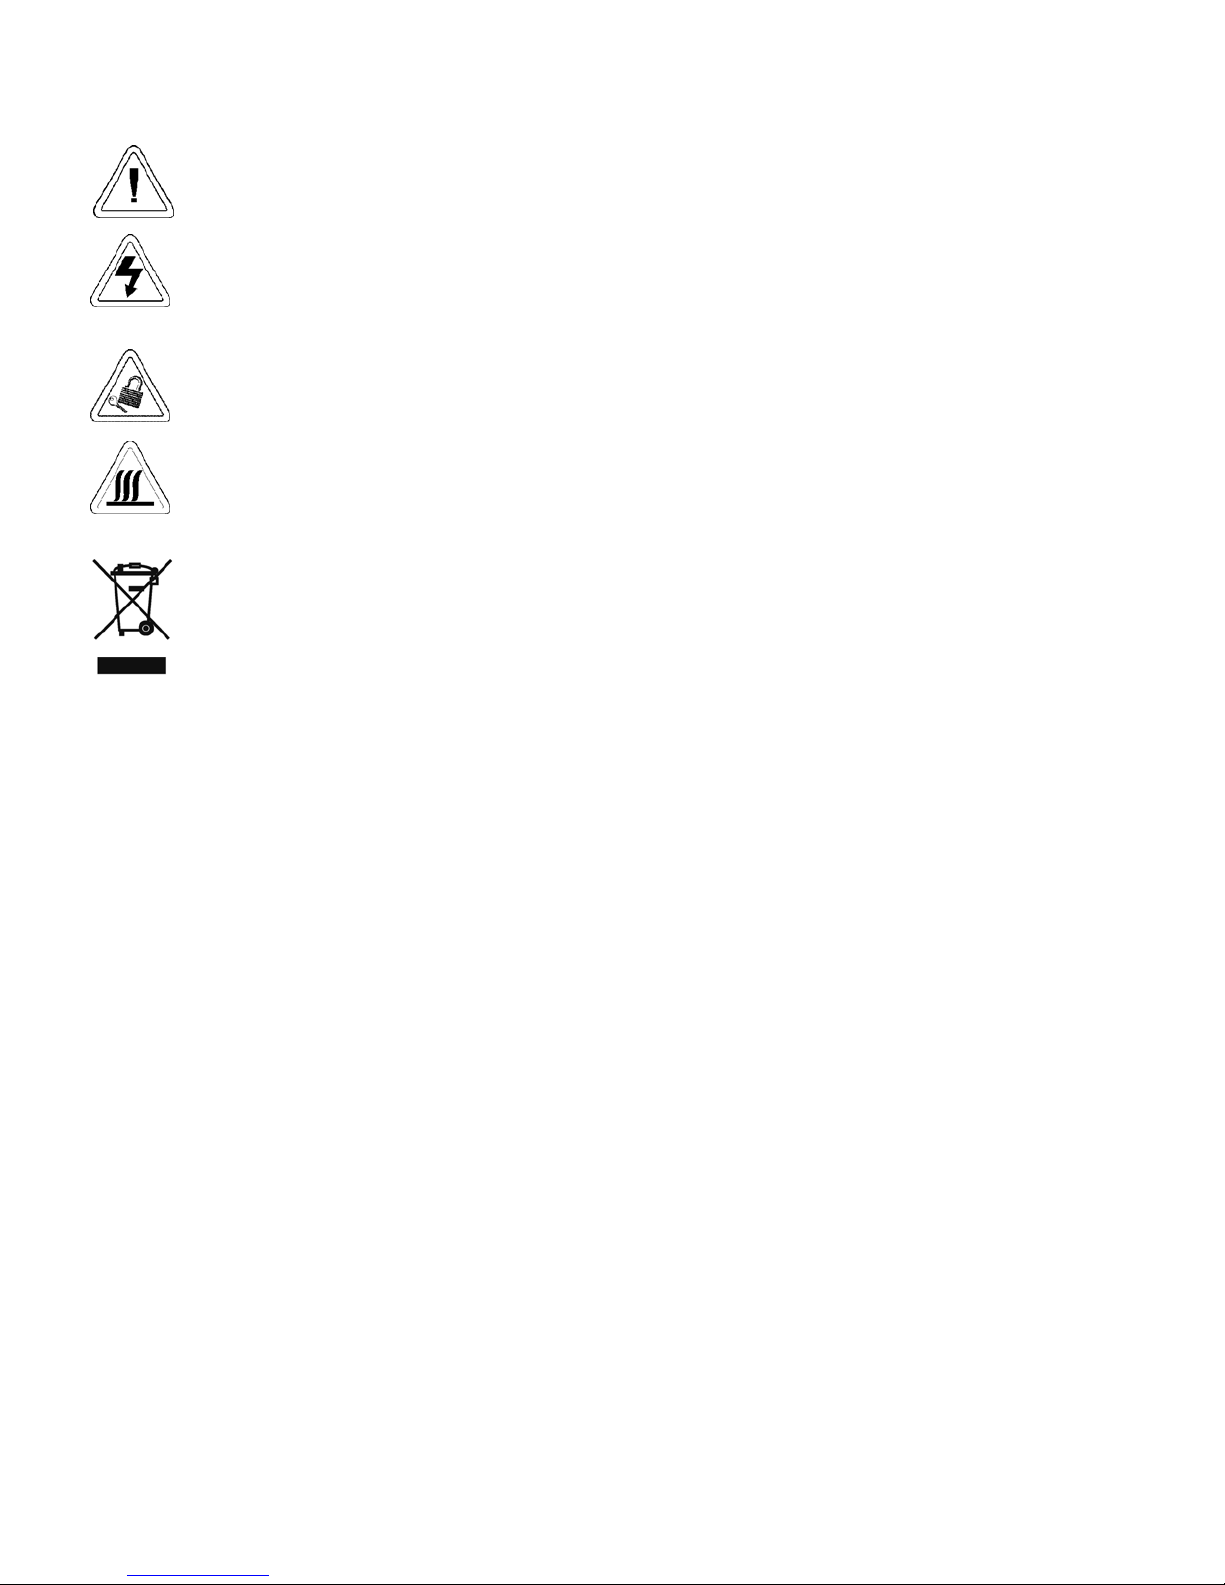
Important operating and/or maintenance instructions. Read the accompanying text carefully.
Potential electrical hazards. Only qualified persons should perform procedures associated with this
symbol.
Equipment being maintained or serviced must be turned off and locked off to prevent possible injury.
Hot surface(s) present which may cause burns to unprotected skin, or to materials which may be
damaged by elevated temperatures.
Marking of electrical and electronic equipment, which applies to electrical and electronic equipment
falling under the Directive 2002/96/EC (WEEE) and the equipment that has been put on the market
after 13 August 2005.
This product is required to comply with the European Union’s Waste Electrical & Electronic
Equipment (WEEE) Directive 2002/96/EC. It is marked with the WEEE symbol. Thermo Fisher
Scientific has contracted with one or more recycling/disposal companies in each EU Member State
European Country, and this product should be disposed of or recycled through them. Further
information on Thermo’s compliance with this directive, the recyclers in your country and
information on Thermo products will be available at www.thermofisher.com.
4 Always use the proper protective equipment (clothing, gloves, goggles, etc.)
4 Always dissipate extreme cold or heat and wear protective clothing.
4 Always follow good hygiene practices.
4 Each individual is responsible for his or her own safety.
Page 5

Thermo Scientificiv EASYpure II RF
Preface
Do You Need Information or Assistance on
Thermo Scientific Products?
If you do, please contact us 8:00 a.m. to 6:00 p.m. (Eastern Time) at:
1-740-373-4763 Direct
1-800-438-4851 Toll Free, U.S. and Canada
1-877-213-8051 FAX
http://www.thermoscientific.com Internet Worldwide Web Home Page
service.led.marietta@thermofisher.com
Sales Support
Our staff can provide information on pricing and give you quotations. We can
take your order and provide delivery information on major equipment items or make
arrangements to have your local sales representative contact you. Our products are listed on the
Internet and we can be contacted through our Internet home page.
Service E-Mail Address
Service Support
Our staff can supply technical information about proper setup, operation or
troubleshooting of your equipment. We can fill your needs for spare or replacement parts or
provide you with on-site service. We can also provide you with a quotation on our Extended
Warranty for your Thermo Scientific products.
Whatever Thermo Scientific products you need or use, we will be happy to discuss your
applications. If you are experiencing technical problems, working together, we will help you
locate the problem and, chances are, correct it yourself...over the telephone without a service
call.
When more extensive service is necessary, we will assist you with direct factory trained
technicians or a qualified service organization for on-the-spot repair. If your service need is
covered by the warranty, we will arrange for the unit to be repaired at our expense and to your
satisfaction.
Regardless of your needs, our professional telephone technicians are available to assist you
Monday through Friday from 8:00 a.m. to 6:00 p.m. Eastern Time. Please contact us by
telephone or fax. If you wish to write, our mailing address is:
Thermo Fisher Scientific
401 Millcreek Road, Box 649
Marietta, OH 45750
International customers, please contact your local Thermo Scientific distributor.
Page 6

EASYpure II RF vThermo Scientific
Table of Contents
Safety Information . . . . . . . . . . . . . . . . . . . . . . . . . . . . . . . . . . . . . . . . . . . .1-1
Introduction . . . . . . . . . . . . . . . . . . . . . . . . . . . . . . . . . . . . . . . . . . . . . . . . .2-1
General Specifications . . . . . . . . . . . . . . . . . . . . . . . . . . . . . . . . . . . . . . . .3-1
Unpacking . . . . . . . . . . . . . . . . . . . . . . . . . . . . . . . . . . . . . . . . . . . . . . . . . . .4-1
Installation . . . . . . . . . . . . . . . . . . . . . . . . . . . . . . . . . . . . . . . . . . . . . . . . . .5-1
Locating the Unit . . . . . . . . . . . . . . . . . . . . . . . . . . . . . . . . . . . . . . . .5-1
Cartridge Installation . . . . . . . . . . . . . . . . . . . . . . . . . . . . . . . . . . . . .5-2
Controls . . . . . . . . . . . . . . . . . . . . . . . . . . . . . . . . . . . . . . . . . . . . . . . . . . . . .6-1
Control Panel . . . . . . . . . . . . . . . . . . . . . . . . . . . . . . . . . . . . . . . . . . .6-1
Switches . . . . . . . . . . . . . . . . . . . . . . . . . . . . . . . . . . . . . . . . . . . . .6-1
Power Switch . . . . . . . . . . . . . . . . . . . . . . . . . . . . . . . . . . . . . . . . . . .6-1
Run Mode . . . . . . . . . . . . . . . . . . . . . . . . . . . . . . . . . . . . . . . . . . . . .6-2
Operational Modes . . . . . . . . . . . . . . . . . . . . . . . . . . . . . . . . . . . . . .6-2
Display . . . . . . . . . . . . . . . . . . . . . . . . . . . . . . . . . . . . . . . . . . . . . .6-2
Idle Mode (“IdL”) . . . . . . . . . . . . . . . . . . . . . . . . . . . . . . . . . . . . . .6-3
Standby (“SbY”) . . . . . . . . . . . . . . . . . . . . . . . . . . . . . . . . . . . . . . .6-3
Initial Operation . . . . . . . . . . . . . . . . . . . . . . . . . . . . . . . . . . . . . . . . . . . . . .7-1
Reservoir Filling and Cartridge Rinse Up . . . . . . . . . . . . . . . . . . . . . .7-1
Normal Operation . . . . . . . . . . . . . . . . . . . . . . . . . . . . . . . . . . . . . . . . . . . .8-1
Operation . . . . . . . . . . . . . . . . . . . . . . . . . . . . . . . . . . . . . . . . . . . . . .8-1
Water Draw-Off . . . . . . . . . . . . . . . . . . . . . . . . . . . . . . . . . . . . . . . . .8-1
Feedwater Replenishment . . . . . . . . . . . . . . . . . . . . . . . . . . . . . . . . . .8-2
Section 1
Section 2
Section 3
Section 4
Section 5
Section 6
Section 8
Section 7
Page 7

vi EASYpure II RF Thermo Scientific
Maintenance and Servicing . . . . . . . . . . . . . . . . . . . . . . . . . . . . . . . . . . .9-1
System Sanitation . . . . . . . . . . . . . . . . . . . . . . . . . . . . . . . . . . . . . . . .9-2
Cleaning Resistivity Cell . . . . . . . . . . . . . . . . . . . . . . . . . . . . . . . . .9-3
General Cleaning Instructions . . . . . . . . . . . . . . . . . . . . . . . . . . . . . .9-5
Cartridge Replacement . . . . . . . . . . . . . . . . . . . . . . . . . . . . . . . . . . . .9-6
Cartridge Removal . . . . . . . . . . . . . . . . . . . . . . . . . . . . . . . . . . . . .9-6
0.2 Micron Final Filter Replacement . . . . . . . . . . . . . . . . . . . . . . . . .9-7
Unit Shutdown . . . . . . . . . . . . . . . . . . . . . . . . . . . . . . . . . . . . . . . . .9-8
Fuse Replacement . . . . . . . . . . . . . . . . . . . . . . . . . . . . . . . . . . . . . . .9-8
Ventgard Cap Replacement . . . . . . . . . . . . . . . . . . . . . . . . . . . . . . . .9-8
Troubleshooting . . . . . . . . . . . . . . . . . . . . . . . . . . . . . . . . . . . . . . . . . . . . .10-1
Error Conditions . . . . . . . . . . . . . . . . . . . . . . . . . . . . . . . . . . . . . . .10-3
Replacement Parts . . . . . . . . . . . . . . . . . . . . . . . . . . . . . . . . . . . . . . . . . .11-1
Safety Stock . . . . . . . . . . . . . . . . . . . . . . . . . . . . . . . . . . . . . . . . . . .11-2
General Maintenance . . . . . . . . . . . . . . . . . . . . . . . . . . . . . . . . . . . .11-2
Ordering Procedures . . . . . . . . . . . . . . . . . . . . . . . . . . . . . . . . . . . .11-3
Wiring Diagram . . . . . . . . . . . . . . . . . . . . . . . . . . . . . . . . . . . . . . . .11-4
Table of Contents
Section 9
Section 10
Section 11
Page 8

EASYpure II RF 1-1Thermo Scientific
Section 1 Safety Information
Your Thermo Scientific EASYpure® II Reservoir Feed (RF) has been
designed with function, reliability, and safety in mind. It is the user’s
responsibility to install it in conformance with local electrical codes. For
safe operation, pay attention to Notes, Cautions, and Warnings
throughout the manual.
This manual contains important operating and safety information. The
user must carefully read and understand the contents of this manual prior
to the use of this equipment.
Water purification technology employs one or more of the following:
chemicals, electrical devices, mercury vapor lamps, steam and heated
vessels. Care should be taken when installing, operating or servicing
Thermo Scientific products. The specific safety notes pertinent to this
product are listed below.
War nin gs
To avoid electrical shock, always:
1. Use a properly grounded electrical outlet of correct voltage and current
handling capacity.
2. Do not place your EASYpure II RF directly over equipment that
requires electrical service. Routine maintenance of this unit may
involve water spillage and subsequent electrical shock hazard, if
improperly located.
3. Replace fuses only with the same type and rating of fuse.
4. Do not disassemble water lines or remove catridges where spilled water
could contact equipment that requires electrical service. Electrical
shock could result.
5. Disconnect from the power supply prior to maintenance and servicing.
Page 9

1-2 EASYpure II RF Thermo Scientific
Section 1
Safety Information
To avoid personal injury:
1. Do not use in the presence of flammable or combustible materials;
fire or explosion may result. This device contains components which
may ignite such materials.
2. Do not use in the presence of highly corrosive substances such as
bleach or acid baths; fire may result.
3. This device is to be used with water feeds only. Sanitizing/cleaning
agents must be used in compliance with instructions in this manual.
Failure to comply with the above could result in explosion and
personal injury.
4. Avoid splashing disinfecting solutions on clothing or skin.
5. Ensure all piping connections are tight to avoid chemical leakage.
6. Carefully follow manufacturer’s safety instructions on labels of
chemical containers and material safety data sheets.
7. Refer servicing to qualified personnel.
8. Ensure adequate ventilation.
9. Depressurize system prior to opening cartridge access door or
removing top cover.
Page 10

EASYpure II RF 2-1Thermo Scientific
Section 2 Introduction
The Thermo Scientific EASYpure II RF is a batch-fed water purification
system designed to provide Type I reagent-grade water with extremely low
organic carbon content. It uses a three-stage deionization process combined
with a 0.2 micron final filter to polish pretreated water (distilled,
deionized, or reverse osmosis) to produce water with a resistivity of up to
18.2 megohms-cm and with a total organic carbon content of less than 10
ppb. Water resistivity is continuously sensed by a resistivity cell and
displayed on a digital display.
The EASYpure II RF is designed to be a bench mounted unit. If wall
mounting is required, contact Technical Services for information on a wall
bracket and mounting accessory.
Figure 1-1. EASYpure II RF
Page 11

Page 12

EASYpure II RF 3-1Thermo Scientific
Section 3 General Specifications
Dimension Requirements
12" W X 19" D X 18 1/8" H (30.5 cm X 48.3 cm X 46.0 cm).
Clearance Requirements
Sides - 4" (10.1 cm) minimum to allow air flow
Above - 12" (30.5 cm) minimum for reservoir replenishment
Cartridge replacement requires that the back of the unit be accessible to
open the cartridge access door (total depth, unit + open door, = 34") (86.4
cm).
Storage Reservoir Capacity - Approximately 6.5 liters usable, 7.0 liters total
Electrical Requirements
The EASYpure II RF is equipped with two power cords and corresponding
fuses taped to each power cord to be plugged into a grounded electrical
outlet of the appropriate voltage.
Model D7031: 100-240 VAC +5% -10%, 47-63 Hz.
Feedwater Requirements
The EASYpure II RF requires water pretreated by either distillation,
deionization or reverse osmosis.
TOC . . . . . . . . . . . . . . . . . . . . .Less than 1.0 ppm
Turbidity . . . . . . . . . . . . . . . .Less than 1.0 N.T.U.
Temperature . . . . . . . .40°F - 104°F (4.4°C - 40°C)
Silica . . . . . . . . . . . . . . . . . . . . . . .Less than 1 ppm
TDS (CaCO3)
RO - Less than 50 ppm
DI - Less than 100 ppm
Distilled - Less than 2 ppm
Product Water Quality
Resistivity . . . . . . . . . . . . . . . . . . . . .ASTM Type I
TOC . . . . . . . . . . . . . . . . . . . . . . . . . . . .5-15 ppb
Flow Rate . . . . . . .>
0.8 LPM with a new final filter
Page 13

3-2 EASYpure II RF Thermo Scientific
Section 3
General Specifications
Environmental Conditions
Operating . . . . . . . . .4°C - 49°C; 20% - 80% RH, non-condensing.
Installation Category II (overvoltage) in accordance with IEC 664.
Pollution Degree 2 in accordance with IEC 664.
Altitude limit . . . . . . . . . . . . . . . . . . .3,500 meters.
Storage . . . . . -25°C - 65°C; 10% to 85% relative humidity.
Declaration of Conformity
We hereby declare under our sole responsibility that this product conforms
with the technical requirements of the following standards:
EMC
EN61000-3-2 Limits for Harmonic Current Emissions
EN61000-3-3 Limits for Voltage Fluctuations and Flicker
EN 61326-1 Electrical Equipment for Measurement, Control, and
Laboratory Use; Part I: General Requirements
Safety
EN 61010-1 Safety Requirements for Electrical Equipment for
Measurement, Control and Laboratory Use; Part I: General
Requirements
per the provisions of the Low Voltage Directive 73/23/EEC, as amended
by 93/68/EEC.
Copies of the Declaration of Conformity are available upon request.
Page 14

EASYpure II RF 4-1Thermo Scientific
Section 4 Unpacking
Remove the unit from its shipping container and ensure that the following
items are removed from the packaging materials before discarding:
a) EASYpure II RF unit
b) Ventgard® reservoir cap (CV703X4A)
c) Power cords
d) Operation Manual (LT1305X1)
Note Cartridges and the 0.2 micron final filter are not provided with the
EASYpure II RF and must be ordered separately:
• EASYpure Kit Ultra low Organics Deionized Feed (No Final Filter)
Part No. D502124
• EASYpure Kit Ultra low Organics Distilled or RO Feed (No Final
Filter) Part No. D502125
• EASYpure Kit Type I Deionized Feed (No Final Filter) Part No.
D502126
• EASYpure Kit Type I Distilled or RO Feed (No Final Filter) Part No.
D502127
• 0.2 Micron Final Filter Part No. D3750
Page 15

Page 16

EASYpure II RF 5-1Thermo Scientific
Section 5 Installation
1. Place the EASYpure II RF on a bench top convenient to your work
area, noting the Clearance Requirements. If wall mounting is required
contact Technical Services.
2. Using 1/2" I.D. tubing and tubing connectors (user supplied), connect
the overflow drain tubing (lower left corner of the rear of the unit) to
an atmospherically vented sink or floor drain. If an atmospherically
vented sink or floor drain is not accessible, a bucket or other container
may be placed on the floor beneath the EASYpure II RF’s location and
emptied when full.
Warning Do not place EASYpure II RF directly over equipment requiring
electrical service. Routine maintenance of this unit may involve water
spillage and subsequent electrical shock hazard if improperly located.
s
Warning Do not use in the presence of flammable or combustible
materials; fire or explosion may result. This device contains components
which may ignite such materials.
Warning This device is to be used with water feeds only. Sanitizing/
cleaning agents must be used in compliance with instructions in this
manual. Failure to comply could result in explosion and personal injury.
s
Figure 5-1. Front View Figure 5-2. Back View
Locating the Unit
Page 17

5-2 EASYpure II RF Thermo Scientific
Section 5
Installation
Refer to Figure 5-3 for the procedure below.
1. Open cartridge access door in the rear of the unit by pushing the door
latch down.
2. Remove a new Pretreatment cartridge from its plastic bag.
3. Wet the o-rings with water on both end caps.
4. Press the upper end cap into the pretreatment position until it bottoms
out.
5. Lower the cartridge and insert the lower end cap \into the lower socket
until it is firmly seated.
6. Repeat Steps 2 - 5 with the Ultrapure cartridge and then the EASYpure
High Purity/Low TOC or Ultrapure cartridge, placing them in
positions 2 and 3.
7. Close cartridge access door. This serves to verify the cartridges have
been properly seated.
Note The upper end cap is the one with the right-angle turn and the two
flanges. The lower end cap extends straight out from the cartridge.
Note The two flanges on the end cap should be able to slide down on each
side of the keyway wall.
Cartridge Installation
Figure 5-3. Cartridge Installation
Page 18

Section 6 Controls
The power switch on the EASYpure II RF is located on the back right side
of the unit directly above the power cord receptacle.
The EASYpure II RF control panel incorporates three switches and a
digital display.
When the main power switch is on, the three switches on the control panel
function as follows:
• START: Pressing the START switch when the unit is in either the stop
(“IdL”) or standby (“SbY”) mode will put the unit into run mode.
• STANDBY: Pressing the STANDBY switch when the unit is in either
the start (run) or stop (“IdL”) mode will put the unit into a standby
mode.
• STOP: Pressing the STOP switch when the unit is in either the start
(run) or standby (“SbY”) mode will put the unit into a stop (“IdL”)
mode.
Note On initial power-up, the display will run the following sequence:
- Model type is scrolled -RF
- The display’s LEDs will light up,
- Followed by the unit software revision,
- Finally, IdL will be displayed.
EASYpure II RF 6-1Thermo Scientific
Figure 6-1. Control Panel
Power Switch
Control Panel
Switches
STOP
STANDBY
START
Page 19

In addition to displaying the temperature compensated (25°C) resistivity in
megohms, the display also indicates operational modes and error
indicators. The following is what can appear on the display:
SbY Er1
rEC Er4
IdL Er5
Add
Note On initial start-up, the purity meter may display “Er.1”. This is
caused by air in the cell and should soon be replaced by a resistivity
reading. If “Er.1” does not go out after the pump has run for a minute. or
if it appears any time while the EASYpure II RF is in operation, refer to
the Troubleshooting section of this manual.
s
Note When the unit is first put in Run Mode, the display will show 10.0
for a few seconds. This is an arbitrary number that indicates the unit is
running. Any number that appears after 10.0 indicates purity.
s
Note If the unit is in standby and power to the unit is turned off or lost,
the unit will return to standby once power is restored.
s
Note Do not put unit into Idle Mode or turn off the EASYpure II RF
during non-work hours. Doing so will allow bacterial growth and other
contamination of the water in the system. As a result, the system will
require a lengthy rinse-up period at the beginning of the work day to
achieve high-quality product water.
s
Since not all qualities of permissible feedwater will reach maximum
resistivity after one pass through the unit’s cartridges (especially as the
cartridges near exhaustion), the EASYpure II RF has two operational
modes; run and standby.
In Run Mode, the pump continuously recirculates water through the
cartridges. It is recommended that the EASYpure II RF be left in the run
mode during the day. In Run Mode, the purity meter display indicates the
resistivity of the water available for draw off. Allow the water’s resistivity to
rise to the desired purity before drawing off water.
6-2 EASYpure II RF Thermo Scientific
Section 6
Controls
Display
Operational Modes
Run Mode
Page 20

EASYpure II RF 6-3Thermo Scientific
Section 6
Controls
In STANDBY (“SbY”) mode, the pump will restart for ten minutes out of
every hour (i.e 50 minutes off, 10 minutes on). The display reads “rEC”
which indicates recirculation. This will allow the unit to produce high
quality water quickly upon being placed in Run Mode. It is recommended
that the EASYpure II RF be placed in Standby Mode during non-work
hours. At the end of the work day, press the STANDBY switch on the
front of the EASYpure II RF to place the unit in STANDBY mode for the
night. “SbY” will appear on the display.
“IdL” indicates the unit is powered and waiting to be placed in Run or
STANDBY mode.
Standby (“SbY”)
Idle Mode (“IdL”)
Page 21

Page 22

Section 7 Initial Operation
Note Cartridge rinse up procedure must be followed after each cartridge
and/or filter replacement.
s
Note In the event that the feedwater reservoir is overfilled, allow the excess
water to drain from the reservoir through the overflow drain tubing before
replacing the Ventgard cap. This will prevent wetting the filter element.
s
Warning Use a properly grounded electrical outlet of correct voltage and
current handling capacity.
s
Warning This device is to be used with water feeds only. Sanitizing/
cleaning agents must be used in compliance with instructions in this
manual. Failure to comply could result in explosion and personal injury.
s
1. Remove the molded plastic Ventgard cap.
2. Carefully pour pretreated feedwater into the reservoir until the water is
level with the top of the sight gauge on the front of the unit (see
Figure 7-1). Replace the Ventgard cap.
3. The power connection is located on the right side of the unit, in the
upper back corner.
4. Determine which power cord you need (this will be based on your
country and outlets available in your lab). A 120V power cord with (2)
1.6 amp fuses and 240V power cords with (2) 0.63 amp fuses are
provided with the unit.
5. Remove the fuse holder, install the fuses included with the power cord
to be used, and reinstall holder.
6. Verify power switch is turned off and attach receptacle end of power
cord into the power socket.
7. Plug other end of power cord into facility power. Turn main power on
at power entry module.
EASYpure II RF 7-1Thermo Scientific
Reservoir Filling and
Cartridge Rinse Up
Page 23

7-2 EASYpure II RF Thermo Scientific
Section 7
Initial Operation
8. Place suitable container under draw-off valve. Open draw-off valve.
9. Press START and rinse one complete reservoir volume of water
through the cartridges to drain.
10. Close draw-off valve.
11. Remove hose barb connection from draw-off valve. Keep hose barb for
future use.
12. Remove the new 0.2 micron final filter assembly from its bag and
insert it into the draw-off valve. Gently tighten, turning the filter to
the right.
Note It is suggested that Teflon® tape be applied to the threads of the 0.2
micron final filter to ensure a tight seal.
s
13. Refill the reservoir with pretreated water.
14. Open the draw-off valve and flush second reservoir volume of water
through the 0.2 micron final filter.
Note For more demanding applications where low TOC water is required,
a third reservoir volume rinse of cartridges and filter may be necessary.
s
Teflon® is a registered trademark of DuPont
Filling and Rinse Up
(continued)
Page 24

Section 8 Normal Operation
Note When the unit is first put in the Run Mode, the display will show
10.0 for a few seconds. This is an arbitrary number that indicates the unit
is running. Any number that appears after 10.0 indicates purity.
s
1. Remove the Ventgard cap. Do not allow water to enter the Ventgard
cap.
2. Carefully pour pretreated feedwater into the feedwater reservoir until
the water is level with the top of the sight gauge. Replace the Ventgard
cap.
3. Turn main power on at power entry module.
4. Press the “START” button on the front of the EASYpure II RF. The
EASYpure II RF’s pump will begin to run and the purity meter will
display “10.0” followed by the number indicating the resistivity of the
water in megohm-cm.
5. Allow the water’s resistivity to rise to the desired purity before drawing
off water.
1. Remove the protective cap from the 0.2 micron final filter bell.
2. Depress the draw-off lever.
3. When draw off is complete, lift the draw-off lever and replace the
protective cap on the 0.2 micron final filter bell.
EASYpure II RF 8-1Thermo Scientific
Water Draw-Off
Operation
Page 25

8-2 EASYpure II RF Thermo Scientific
Section 8
Normal Operation
Feedwater
Replenishment
As water is drawn off from the EASYpure II RF, the feedwater reservoir
will require refilling. This will be indicated by a low water level in the sight
gauge or by the message “Add” on the display. To refill the reservoir:
1. Remove the Ventgard cap. Do not allow water to enter the Ventgard
cap.
2. Carefully pour pretreated feedwater into the feedwater reservoir until
the water is level with the top of the sight gauge. Replace the Ventgard
cap.
3. Allow the water’s resistivity to rise to the desired purity before drawing
off water.
Page 26

Section 9 Maintenance and Servicing
Frequency of cleaning is difficult to determine because of variability in
feedwater and usage. Cleaning is necessary when residual deposits are
evident inside the feedwater reservoir or if a new 0.2 micron final filter
clogs rapidly after installation even though the cartridges were properly
rinsed before the 0.2 micron final filter was installed. To sanitize the
EASYpure II RF, remove the 0.2 micron final filter and attach the hose
barb that came installed on the unit. The purification cartridges must be
removed and replaced with empty cartridges. These must be ordered
separately. Contact Technical Services to order.
Warning Disconnect from the power supply prior to maintenance and
servicing.
Do not disassemble water lines or remove cartridges where spilled water
could contact equipment that requires electrical service. Electrical shock
hazard could result.
Refer servicing to qualified personnel.
s
Note Drain plug is not attached to unit; use care when removing it over an
open drain to avoid dropping it into the drain.
s
Note The cartridges will still contain water when removed. Therefore, you
will want to have a sink, bucket or other waterproof container available to
place them in after removal.
s
Note A small amount of water will drain from the cartridge when it is
disconnected from the lower socket. Plug the cartridge’s lower opening
with your finger to minimize water spillage while you finish removing the
cartridge.
s
Note Used cartridges may be recycled. See P.U.R.E. information packed
with new cartridges.
s
EASYpure II RF 9-1Thermo Scientific
Page 27

9-2 EASYpure II RF Thermo Scientific
Section 9
Maintenance and Servicing
1. Drain the system.
a. Place the 0.2 micron final filter over a sink or place a bucket or
other suitable large container under the filter and draw off water as
described under Water Draw-Off in the Operation section of this
manual. Draw off water until the water level in the feedwater
reservoir is lowered to the point that the reservoir float switch
disables the pump. Lift draw-off valve to closed position.
b. Disconnect the power cord from the power entry module.
c. Turn the unit around to provide access to the drain plug on the
lower edge of the back panel.
d. Place the drain plug over a sink, or place a bucket or other suitable
large container under the drain plug. Remove the drain plug by
turning it while pulling until it comes out.
e. Drain remaining water from the reservoir and system.
f. Replace the drain plug, taking care to fully insert it into the drain
tubing.
g. Remove cartridges and install empty cartridge tubes according to
the instructions in Cartridge Replacement.
h. Remove 0.2 micron final filter and install the hose barb that was
shipped with the system.
2. Remove Ventgard cap and pour 6 liters of pretreated feedwater into
reservoir.
3. Add 10ml to 20ml of household chlorine bleach (5.25% sodium
hypochlorite) to reservoir.
Warning Avoid splashing disinfecting solutions on clothing or skin. Ensure
all piping connections are tight to avoid chemical leakage. Ensure adequate
ventilation. Carefully follow manufacturer’s safety instructions on labels of
chemical containers and material safety data sheets.
s
4. Reconnect power cord to the power entry module and turn unit on.
Press the “START” button and put unit into Run Mode.
5. Allow the unit to recirculate the disinfecting solution for thirty
minutes. Cycle the draw-off valve to sanitize the valve.
System Sanitation
Page 28

6. Drain the system as described in step 1 of this section.
7. Refill the reservoir with suitable feedwater and recirculate the water
through the system for ten minutes.
8. Drain the system as described in Step 1 of this procedure.
9. Remove the empty cartridge tubes according to the instructions in the
Cartridge Removal section. Drain and retain the empty cartridge tubes
for future use. Remove the hose barb from the draw-off valve.
10. Install and rinse new cartridges according to the instructions in the
Cartridge Installation section. Do not reinstall used cartridges or 0.2
micron final filter (they may contain large amounts of bacteria.)
11. Install and rinse new 0.2 micron final filter according to the
instructions in the 0.2 Micron Final Filter Replacement in this manual.
12. Reconnect power cord to the power entry module and turn unit on.
Press the “START” button.
Refer to Figure 9-1 on following page.
1. Turn off the EASYpure II RF. Remove the power cord.
2. Depressurize the system by opening the unit dispenser draw-off valve,
allowing water to drain until no more flows from the valve.
3. Remove the Ventgard cap.
4. Remove the screws securing the EASYpure II RF top cover.
Warning Depressurize system prior to opening cartridge access door.
s
Note Ensure a new o-ring is available prior to cleaning resistivity cell. s
5. Remove the cover by lifting it straight up.
6. Remove the 0.2 micron final filter. Carefully remove the front cover
screws and pull the cover off. Disconnect membrane switch lead from
the display board (see Figure 9-1).
EASYpure II RF 9-3Thermo Scientific
Section 9
Maintenance and Servicing
System Sanitation
(continued)
Cleaning Resistivity Cell
Page 29

9-4 EASYpure II RF Thermo Scientific
Section 9
Maintenance and Servicing
Figure 9-1. Disconnecting the Resistivity Cell
7. Disconnect the cell lead from the meter board, remove the EMI/RFI
suppression filter and gently pull the cable out of the EASYpure II RF
frame. Note orientation.
8. Unscrew and remove the cell.
Caution The cell electrodes are etched to improve wetting characteristics.
Do not mechanically abrade or damage this surface (i.e. do not clean with
a wire brush, sandpaper, etc.).
Do not immerse the entire cell assembly in cleaning solution, only the
electrode portion.
s
Cleaning Resistivity Cell
(continued)
EMI/RFI
Suppression Filter
(one loop around filter)
Remove Top
Cover and Screws
Cell
EMI Filter
Bushing
O-ring
Membrane Switch Lead
Display Board
Meter Board
Disconnect Membrane
Switch Lead From Here
Disconnect Cell
Lead From Here
Remove Front Cover
and Screws
Page 30

9. Carefully remove and discard the o-ring before cleaning the cell.
10. Wash the cell in a mild detergent solution followed by a 10%
Hydrochloric or 10% Sulfuric acid solution (follow acid manufacturers
warnings and recommended handling procedures found on package
labels and Material Safety Data Sheets). This may be done in an
ultrasonic cleaner or with a soft brush.
Warning Carefully follow manufacturer’s safety instructions on labels of
chemical containers and material safety data sheets.
s
11. Thoroughly rinse the cell in deionized or distilled water following the
detergent and/or acid cleaning.
12. After cleaning, reinstall with the replacement o-ring on cell.
13. Reinstall the cell and hand tighten. Reroute the cable up through the
housing, reinstall the EMI/RFI suppression filter (loop wire 1 time
around filter) and reconnect cell lead to meter board.
14. Reinstall membrane switch lead. While lifting dispense handle, replace
the front cover. Reinstall the 0.2 micron final filter.
15. Reinstall the EASYpure II RF top cover.
16. Reinstall the Ventgard cap and 0.2 micron final filter.
17. Reattach the power cord and reconnect the unit to the power supply.
18. Refill the reservoir with feedwater and operate normally.
Wipe exterior surfaces with lightly dampened cloth containing mild soap
solution.
EASYpure II RF 9-5Thermo Scientific
Section 9
Maintenance and Servicing
Cleaning Resistivity Cell
(continued)
General Cleaning
Instructions
Page 31

9-6 EASYpure II RF Thermo Scientific
Section 9
Maintenance and Servicing
The frequency with which cartridges will need to be replaced is dependent
on your feedwater characteristics, your purity requirements, and your daily
usage. Replace the cartridges when the product water purity drops below
acceptable levels of resistivity or when organic levels become too high.
Remember, used cartridges can be recycled; see P.U.R.E. information
packed with your new cartridges.
1. Turn off the EASYpure II RF and depressurize system by disconnecting
unit feedwater, opening draw-off valve and allowing water to drain
from the unit until draining ceases.
Warning Depressurize system prior to opening cartridge access door.
s
2. Open the cartridge access door in the rear of the unit by pushing back
the door latch.
3. Remove the cartridge in the pretreatment position by pulling the
cartridge straight up until the upper socket is in the keyhole of the
keyway. Next pull the cartridge straight out.
4. Remove a new Pretreatment cartridge from its plastic bag.
Cartridge
Replacement
Cartridge Removal
Figure 9-2. Cartridge Replacement
Page 32

5. Wet the o-rings with water on both end caps.
6. Press upper end cap into pretreatment position until it bottoms out.
7. Lower the cartridge and insert the lower end cap into the lower socket
until it is firmly seated.
8. Repeat Steps 3-7 with the EASYpure ULTRApure cartridge, placing it
in position 2 and the EASYpure High Purity/Low TOC cartridge,
placing it in position 3. Be sure to remove and replace one cartridge at
a time.
9. Close the cartridge access door.
10. Remove the old 0.2 micron final filter from the draw-off valve.
11. Install the hose barb into the fitting in the drawoff valve.
12. Turn unit on and open draw-off valve.
13. Press START and rinse one complete reservoir volume of water
through the cartridges to drain.
14. Close the draw-off valve.
Replace the 0.2 micron final filter whenever any of the following
conditions occur; the product water flow rate is reduced, you experience
bacteria break through when cartridges are replaced, or system is sanitized.
The 0.2 micron final filter is shipped assembled with a bell. To replace the
0.2 micron final filter assembly:
1. Remove the old 0.2 micron final filter assembly by turning it to the
left to unscrew it from the draw-off valve.
Note It is suggested that Teflon tape be applied to the threads of the 0.2
micron final filter to ensure a tight seal.
s
2. Remove the new 0.2 micron final filter assembly from its bag and
insert it into the draw-off valve. Gently tighten, turning the filter to
the right.
3. Open the draw-off valve and flush one reservoir volume of water
through the 0.2 micron final filter.
Note If a newly installed 0.2 micron final filter clogs rapidly after
installation, the EASYpure II RF may need to be sanitized to remove
bacterial contaminants. See System Sanitization.
s
EASYpure II RF 9-7Thermo Scientific
Section 9
Maintenance and Servicing
Cartridge Removal
(continued)
0.2 Micron Final Filter
Replacement
Page 33

9-8 EASYpure II RF Thermo Scientific
Section 9
Maintenance and Servicing
The purifying media and filter in the Ventgard filter element have a limited
capacity. Therefore, the Ventgard cap should be replaced every 120 days.
The Ventgard cap is shipped as a complete unit; replacement involves
simply removing the new Ventgard cap from its plastic storage bag and
placing it on the reservoir. A Ventgard cap can be stored in a cool, dry
place almost indefinitely, provided its plastic storage bag has not been
opened.
1. Disconnect the EASYpure II RF from the power supply.
2. Remove the power cord from the power entry module.
3. Pull out the fuse drawer located in the power entry module on the back
right side of the unit.
4. Remove old fuses and replace with fuses of the same type and rating.
See Replacement Parts list.
5. Replace fuse drawer.
6. Replace power cord.
7. Reconnect unit to power supply
Warning Replace fuses with those of the same type and rating.
s
If the EASYpure II RF will be inactive for a period up to a month, place
the unit in Standby. For periods of time greater than a month, disconnect
water and power sources, drain unit, close customer supplied water valve,
remove and discard cartridges and final filter. See Sanitization, Cartridge
Replacement and 0.2 Micron Final Filter Replacement procedures for
reactivation.
Ventgard Cap
Replacement
Fuse Replacement
Unit Shutdown
Page 34

EASYpure II RF 10-1Thermo Scientific
Section 10 Troubleshooting
Problem Possible Causes Action
EASYpure II RF completely inactive. (Pump not
operating, display not lit, etc.)
Note: When unit is powered and not operating,
nor in standby, “IdL” will normally be displayed.
No electrical power to EASYpure II RF.
Ensure that the EASYpure II RF power cord is
connected to a live power source and completely plugged into electrical outlet.
Membrane switch leads not connected.
Disconnect unit from power. Check and reconnect. See Figure 9-1.
Main power switch off. Place to “On” position.
Fuses blown or not installed properly.
Check to make sure proper fuses were
installed.
Replace the fuses as indicated in the Fuse
Replacement section.
Pump does not run. Display showing purity
information.
Loose wire connection to pump.
Ensure pump is properly connected to
display/control board (PC1286X3).
Display/control board is defective. Replace board. Call Technical Services.
Pump worn out or defective. Replace pump. Call Technical Services.
Recirculated water will not rinse up to desired
purity level.
Exhausted cartridge
Replace the cartridge as indicated in the
Cartridge Replacement section.
Cartridges out of order.
Install the cartridges in the proper order as
indicated in the Cartridge Installation section.
Dirty resistivity cell.
Clean resistivity cell as indicated in the
Maintenance and Servicing section.
Water path restriction.
Check tubing for constriction (kinks) or blockages.
Resistivity meter board out of tolerance. Replace board (PCX70). Call Technical Services.
Reduced or no product flow from the 0.2 filter
assembly
0.2 micron final filter clogged.
Replace the 0.2 filter assembly as indicated in
0.2 Micron Final Filter Replacement section.
Water path restriction Check tubing.
Page 35

10-2 EASYpure II RF Thermo Scientific
Section 10
Troubleshooting
Problem (cont.) Possible Causes (cont.) Action (cont.)
0.2 micron final filter clogs rapidly after
replacement.
Possible feedwater contamination.
Call Technical Service for possible feedwater
testing.
Cartridges not properly rinsed up before use
Rinse up cartridges as described in Cartridge
Rinse-Up Procedures. Replace the 0.2 micron
final filter assembly as indicated in the 0.2
Micron Final Filter Replacement section.
EASYpure II RF contaminated with bacteria.
Sanitize EASYpure II RF according to System
Sanitization section. Replace the 0.2 micron
final filter assembly as indicated in the 0.2
Micron Final Filter Replacement section.
Short cartridge life.
Cartridges being used are beyond expiration
date.
Check the expiration date. Cartridges begin to
lose capacity after being stored two years from
the date of manufacture. Replace the cartridges
with unexpired ones.
Change in feedwater characteristics.
Call Technical Service for possible feedwater
testing.
Increased product water usage. Verify usage.
Water leakage inside EASYpure II RF.
Loose connections. Tighten connections.
Tubing is not inserted completely.
Insert tubing completely. See Push-to-Connect
Tubing Installation section of this manual.
Missing or defective cartridge o-rings Install or replace cartridge o-rings.
Leak at cartridge.
Make sure cartridge access door is closed and
latched.
Water leakage at a final filter Not installed far enough.
Install or screw in further and/or add Teflon
tape.
Page 36

EASYpure II RF 10-3Thermo Scientific
Section 10
Troubleshooting
Error Conditions
Problem Possible Causes Action
Display reads “Er1”. (Purity
data error)
Air in system.
Purge air from system by
drawing off water according to
the instructions in the
Operation section.
Resistivity cell not connected
to circuit board.
Check resistivity cell lead connections. (P1 on meter board,
PCX70)
Resistivity cell dirty. Clean cell and reinstall.
Resistivity cell out of toler-
ance.
Replace resistivity cell.
Meter board out of tolerance. Call Technical Service.
Display reads “Er4”. (Cell
temperature sensor error)
Resistivity cell not connected
to circuit board.
Call Technical Service.
Resistivity cell dirty. Replace resistivity cell.
Meter board out of tolerance. Call Technical Service.
Display reads “Er5”. (Meter
board communication error)
Meter board needs to be
reset.
Turn unit “Off” and back “On”.
Meter board not connected to
display/control board.
Call Technical Service.
Page 37

Page 38

EASYpure II RF 11-1Thermo Scientific
Section 11 Replacement Parts
Consumable parts are those required to support the day-to-day operation
of this equipment. We’ve established two types of consumables; those items
that must periodically be replaced to maintain performance (filters, resin
cartridges, etc.) and other items of limited life (indicator lights, fuses, etc.)
that you can expect to replace on a more or less random basis. Where
practical, we recommend the frequency of replacement, or provides
information on life expectancy from which you may calculate a
replacement interval compatible with your usage pattern.
The replacement of consumable parts is discussed in the Maintenance and
Servicing section to assist you in accomplishing your own service.
Consumables may be ordered separately and in some cases, as an
expendables kit. Check with your Thermo Scientific representative for
additional information on the expendables kit.
1
This is reference information. Please check actual expiration dates on individual
cartridges for shelf life end dates. Cartridges used past the shelf lifetimes will exhibit
decreased capacity.
Description Catalog No.
Recommended
Quantity
Max. Shelf Life
EASYpure Kit Ultra low Organics Deionized Feed D502124 1 2 years
1
EASYpure Kit Ultra low Organics Distilled or RO Feed D502125 1 2 years
1
EASYpure Kit Type I Deionized Feed D502126 1 2 years
1
EASYpure Kit Type I Distilled or RO Feed D502127 1 2 years
1
EASYpure High Purity/Low TOC Cartridge D50229 1 2 years
1
Pretreatment Cartridge DI Feed D50230 1 2 years
1
Pretreatment Cartridge RO - Distilled Feed D50231 1 2 years
1
Ultrapure Mixed Bed Cartridge D50233 1 2 years
1
0.2 Micron Final Filter and Bell Assembly D3750 2 N/A
Fuse, Power Entry:
100-120 volt (slow blow 1.6 amp) FZX47 2 N/A
240 volt (IEC127 timelag 0.63 amp) FZX54 2 N/A
Ventgard Cap CV703X4A 1 N/A
Empty Cartridges for Sanitization D7034 1 N/A
Page 39

11-2 EASYpure II RF Thermo Scientific
Section 11
Replacement Parts
General maintenance parts are defined as laboratory level repair parts
which do not require great expertise or special tools for installation. We
recommend that you stock the general maintenance parts as an aid to
ensuring the continued operation of this equipment.
For critical applications where performance with minimum downtime is
required, we recommend that you maintain a local stock of those parts
listed in the General Maintenance parts and Safety Stock sections.
General Maintenance
Description Catalog No. Recommended Quantity
Check valve 02214 1
Hose barb fitting 05930 1
Safety Stock
Description Catalog No.
Recommended
Quantity
Replacement Control/Display PCB PC1286X2 1
Resistivity Meter Board PCX70 1
Pump and Motor Assy
100-240 Volt PU1286X1 1
Resistivity Cell E703X1A 1
Resistivity Cell O-ring GSX29 1
Draw-off Valve Assy PM1305X1 1
Float Switch SW1305X1 1
Power Supply TNX116 1
Page 40

EASYpure II RF 11-3Thermo Scientific
Section 11
Replacement Parts
Please refer to the Specification Plate for the complete model number,
serial number, and series number when requesting service, replacement
parts or in any correspondence concerning this unit.
All parts listed herein may be ordered from the Thermo Scientific dealer
from whom you purchased this unit or can be obtained promptly from the
factory. When service or replacement parts are needed, check first with
your dealer. If the dealer cannot process your request, then contact our
Technical Services Department.
Prior to returning any materials, please contact our Technical Services
Department for a “Return Materials Authorization” number (RMA).
Material returned without an RMA number will be refused.
Ordering Procedures
Page 41

11-4 EASYpure II RF Thermo Scientific
Section 11
Wiring Diagram
CABLE ATTACHES TO J2 ON
BACKSIDE OF PC1 DISPLAY BOARD
AND FUSES:
120 VAC: (2) FZX47
240 VAC: (2) FZX54
POWER ENTRY MODULE SWITCH
(RF)
REF. DESCRIPTION D7031
C1 POWER ENTRY MODULE CEX183
E1 RESISTIVITY CELL E703X1A
PC1 CONTROL/DISPLAY BOARD PC1286X3
PC3 METER BOARD PCX70
PU1 PUMP PU1286X1
PS1 POWER SUPPLY TNX116
S1 MEMBRANE SWITCH SWX200
S3 FLOAT SWITCH SW1305X1
WH1 AC POWER HARNESS WH1305X3
WH2 DC POWER HARNESS FOR PC1 WH1305X2
WH3 PUMP AND FLOAT SWITCH
EXTENSION HARNESS WH1305X1
WH5 METER BOARD HARNESS WH1286X2
Page 42

Thermo Scientific
401 Millcreek Road
Marietta, Ohio 45750
United States
www.thermofisher.com
 Loading...