

Page 1
1 Rev 1.0, Cat. no. N11468
Thermo Scientific Arktik Thermal Cycler
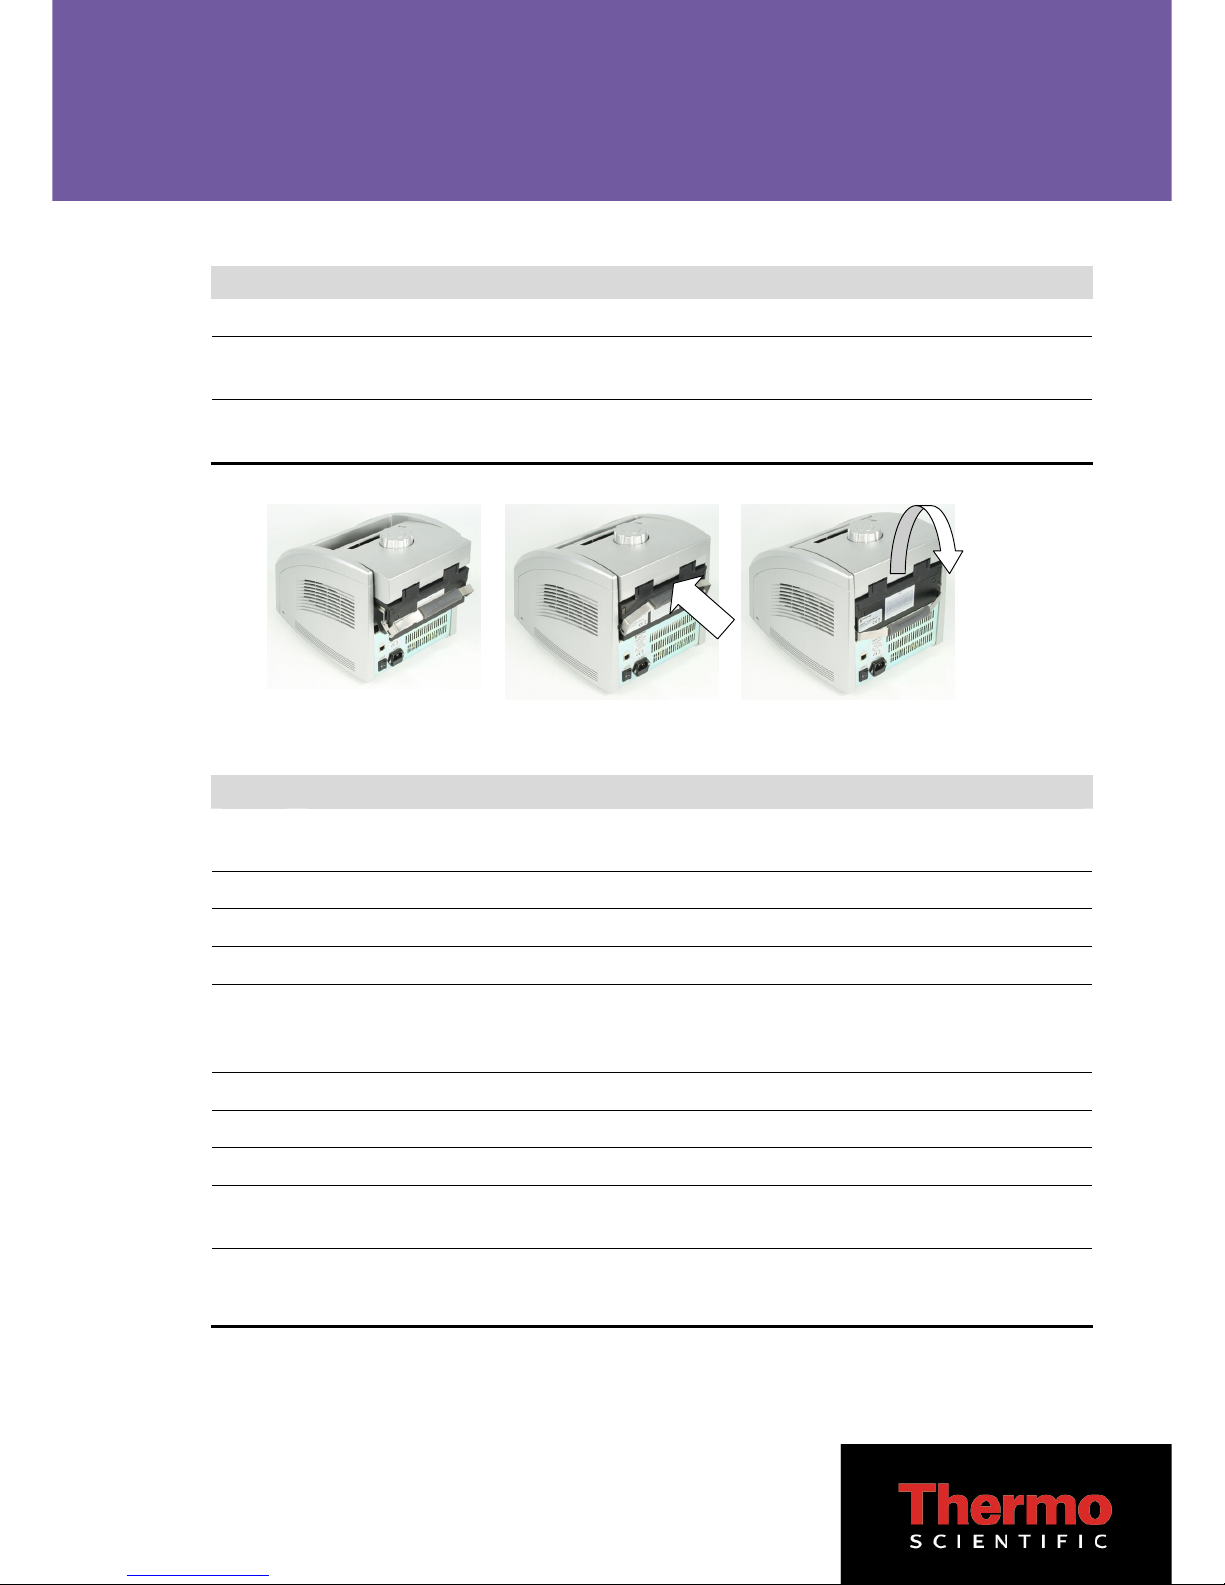
To install a block:
Step Action
1 Make sure the power is off.
2 Raise the handle at the back of the block and hold the block by the front and back edges. Lower the block into the
base unit, leaving at least 2 cm between the front edge of the block and the front of the base unit.
3 Slide the block forward as far as it will go, and push the handle down. Do not use force! The block should click
into place, and the handle should be completely horizontal.
Operation:
Step Action
1 Connect the power cable and power up the instrument (with the block in place) by switching on the power switch
on the back of the instrument.
2 Select NEW or RUN from the function keys to load or create a protocol (see the reverse side).
3 To access the sample blocks, open the lid by grasping the handle and pulling it forward.
4 Place sealed PCR vessels into the block.
5 To close the sample block, apply downward pressure on the lid while pulling the handle forward. To tighten the
lid, turn the dial clockwise. To prevent over-tightening, the lid mechanism will begin ratcheting when the proper
pressure has been achieved.
6
Monitor the run using the STATUS or TIME function key.
7 Press the CANCEL function key to cancel the run or the PAUSE function key to pause the run.
8 Once the run completes, press the MAIN function key to exit to the Main menu.
9 To open the block after a run, first turn the dial counterclockwise to raise the heated lid and then open as in
Step 3.
10
Note that in some cases, a slight expansion of the plate during thermal cycling may occur, and this may cause
difficulties in opening the lid. If this occurs, press the release button on top of the dial down while turning the dial
counterclockwise.
All cross-references refer to the Thermo Scientific Arktik Thermal Cycler User Manual, Rev 1.0 (Cat. no.
N11467).
Quick Reference Guide
Page 2
2 Rev 1.0, Cat. no. N11468
To create a new protocol:
Step Action
1 Press NEW and the default protocol will appear. The temperature for each step is represented above the line
and the time (min:sec) below the line.
2 Use the cursor keys to navigate to each step/value.
3 Modify the value with the keypad (for example, for 60.5, press 6, 0, 5). To enter an infinite hold, press [±∞].
4 To add a temperature step, press ADD and then TEMP. The steps are added to the right of the current step.
5 To add a loop:
- Highlight the last step in the loop.
- Press ADD and then GOTO.
- Use the cursor keys to move the arrow to the desired first temperature step in the loop.
- Press YES to accept or NO to cancel the GOTO step.
- Edit the number in the center of the arrow to adjust the number of repeated cycles.
6 To delete a highlighted step, press DELETE.
7 To save a protocol:
- Press SAVE and write the desired file name.
- Press SAVE again.
- Highlight the desired folder and press SELECT or press NEW to create a new folder.
- Press YES to save the protocol.
To edit an existing protocol:
Step Action
1 From the Main menu, press RUN.
2 Use the cursor keys to navigate to the desired folder and press OPEN.
3 Select the desired protocol and press OPEN.
4 Press EDIT to make changes as instructed in Steps 1–7 (above).
To run an existing protocol:
Step Action
1 From the Main menu, press RUN.
2 Use the cursor keys to navigate to the
desired folder and press OPEN.
3 Select the desired protocol and press OPEN.
4 Press START.
5 Follow on-screen instructions.
Manufactured by: Distributed by:
Thermo Fisher Scientific Oy
P.O. Box 100, FI-01621 Vantaa, Finland
Tel. +358-9-329 100, Fax +358-9-3291 0415
www.thermoscientific.com
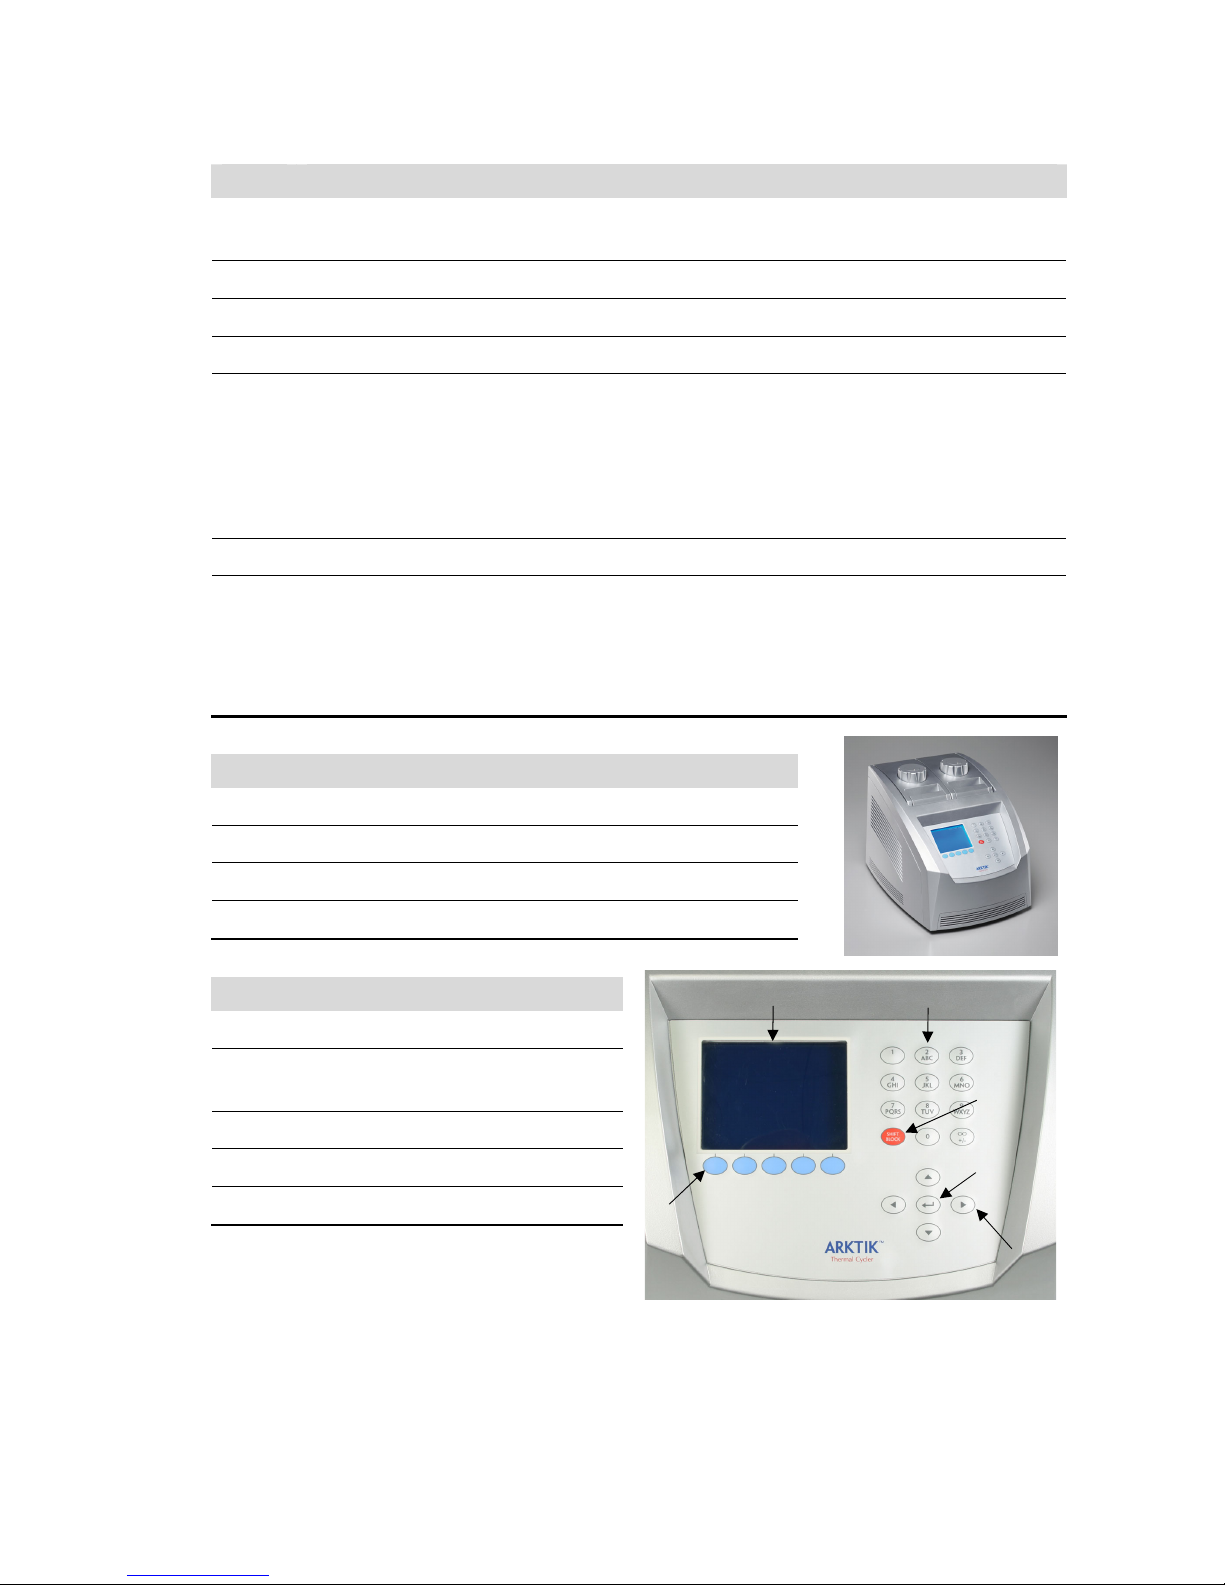
Display
Alphanumeric keypad
Five function keys
Cursor keys
Enter key
Block shift
key for
dual blocks
 Loading...