

IN/OUT Wireless Thermometer
Item No.T208604
User Manual
Thank you for purchasing T208604 IN/OUT Wireless thermometer.
Please take a moment to read this guide and store it for future reference.
11
12 10 13 16 14 15
1
6
2
3
4
5
19
7
17
8
18
9
20
21
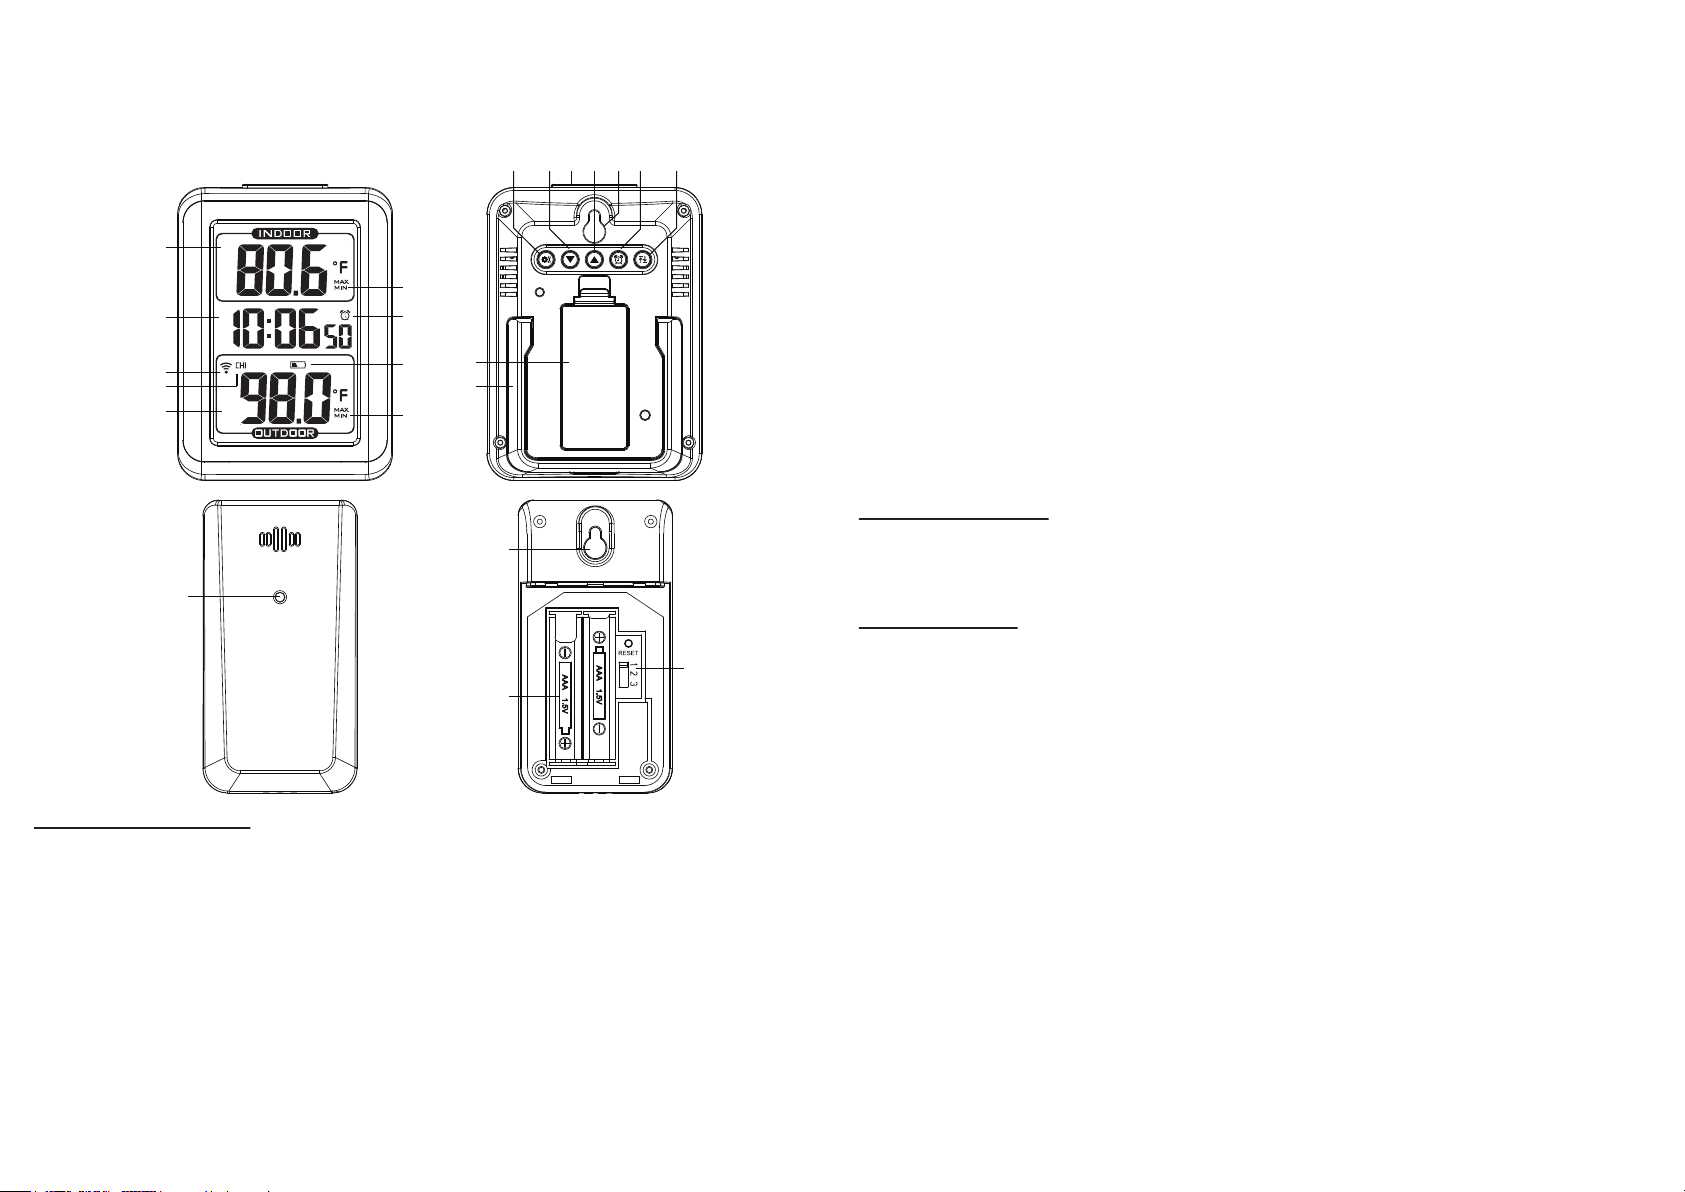
1.Controls and displays:
1. Indoor temperature
2. Time display
3. Outdoor sensor signal strength
4. Channel for external sensor
5. Outdoor temperature
6. Max. and Min. indoor temperature
7. Alarm icon
8. Outdoor sensor low battery indicator
9. Max. and Min. outdoor temperature
10. Snooze and backlight button
a. Turn on/off the backlight for 5s
b. Stop the alarm for 5 minutes
11. SET button
Hold for 3 seconds during the normal mode to enter setting mode.
12. DOWN button
a. Decrease the current setting value.
b. In normal display mode, press this button to switch between Celsius and
Fahrenheit.
13. UP button
a. Increase the current setting value.
b. Press this button to select the channel.
c. In normal display mode, press and hold to search RF.
14. ALARM button
a. Check the alarm time.
b. Set the alarm
15. Max/Min button
Check the max. and min. temperature
16. Integrated hang hole
17. Battery Compartment 2xAAA (batteries not included)
18. Stand bracket
19. Wireless signal indicator(Flashes when data is being sent to the display unit)
20. Integrated hang hole
21. Compartment 2xAAA batteries (batteries not included)
22. TX channel selector, select external sensor channel (Maximum 3 channels available)
2. Package Contents:
1. T208604 IN/OUT Wireless Thermometer
2. Outdoor remote sensor
3. Instructions Manual
3. Getting started
3.1 Inserting the batteries
22
• Place 2xAAA batteries into the T208604 IN/OUT Wireless Thermometer.
• Place 2xAAA batteries into the wireless sensor.
3.2 Replacing Batteries:
• We recommend using high quality batteries for the best product performance.
• Heavy duty or rechargeable batteries are not recommended.
• The outdoor sensor requires lithium batteries in low temperature conditions. Cold temperatures
would cause alkaline batteries work improperly.
• Do not mix old and new batteries. Do not mix alkaline, standard, and rechargeable batteries.
3.3 Low Battery Indicator:
If the low battery indicator is displayed on the LCD for outdoor sensor, please immediately change
the batteries.
3.4 Default settings
1. Default time: 12:00 (Time form: 12H)
2. Default temperature: °F
3. Default alarm: AM 12:00, default snooze time: 5min.
When you first insert batteries or plug in the device, you will hear 1 beep, then the device will go
into a self-test mode, then RF receiving mode (for outdoor sensor). This will take about 3 minutes.
4.Operation
Note:
Hold down the UP button or the Down button to select values faster.
Manually Setting the Time:
• Press and hold down the "SET" button for 2 seconds until the display begins to flash.
• Set the following information in the order listed:
• Hours
• Minutes
• To select individual values, press UP button or the DOWN button and confirm each selection by
pressing the SET button.
5.Alarm Clock:
5.1 Setting the alarm
• Hold the ALARM button for about 3 seconds to set the alarm time. The display begins to flash.
Set the following information in the order listed:
• hours
• Minutes
• To select individual values, press UP button or the DOWN button and confirm each selection by
pressing the ALARM button.
• If you do not make an entry for 20 seconds, setting mode is exited automatically.
5.2 Activating/deactivating the alarm
To turn the alarm ON or OFF, press the ALARM button to enter alarm mode, press the ALARM
button again to ON or OFF the alarm. The “图标” symbol should show next to the clock display
when alarm mode is active.
5.3 Stopping the alarm/snooze function
• When the alarm is triggered, the alarm symbol begins to flash and an alarm sounds.
• By pressing any button (except the SNOOZE/LIGHT) button to stop the alarm. Otherwise, it
will stop automatically after 2 minutes.
Note:
While the alarm signal is sounding, press the SNOOZE/LIGHT button to activate the snooze
function. The alarm will sound after 5 minutes.
6. Temperatue and humidity
6.1 Temperature
• Indoor temperature -9.9°C— +50°C(14.2°F—— +122°F), display LL.L when below -9.9°C and
display HH.H when higher than 50°C.
• Outdoor temperature -40°C ~ 60°C (-40°F ~ 140°F), display LL.L when below -40°C and
display HH.H when higher than 60°C.
• Temperature resolution: 0.1°C
• When alarm ringing, temperature test will be stopped.
Note:
Accuracy
• Temperature accuracy:
-40°C ~ -20°C: ± 4°C
-20°C ~ 0°C: ± 2°C
0°C ~ +60°C: ±1°C
6.3 Setting the Temperature Units:
To switch the temperature measurement between Celsius and Fahrenheit, press the “DOWN”
button which is also the C/F option button. You can switch between Celsius and Fahrenheit at any
time (except when setting other setting options.)
7.BackLight:
Press the SNZ / LIGHT button to active the backlight for 5 seconds.
8.Remote sensor transmission:
This thermometer is arranged to communicate with three external sensors. One of these comes
with the unit, the remaining two are optional.
• Power the thermometer as described in Getting started.
• Set the selector in the outdoor sensor to the desired transmission channel (1, 2 or 3).
Automatic data will be transmitted.
• Press the UP button more times to select the channel set on the external sensor. Sequentially
selects the channel 1, channel 2, channel 3 and sequentially display for 3 channels.
Notes:
• Place the weather station away from equipment that generates magnetic fields such as mobile
phones, televisions etc.
• In case of non receipt of the display, signal it is shown the character -. Press and hold the UP
button to receive RF signal.
• Always make sure the channel chosen on the display unit matches the channel option chosen on
the outdoor sensor.
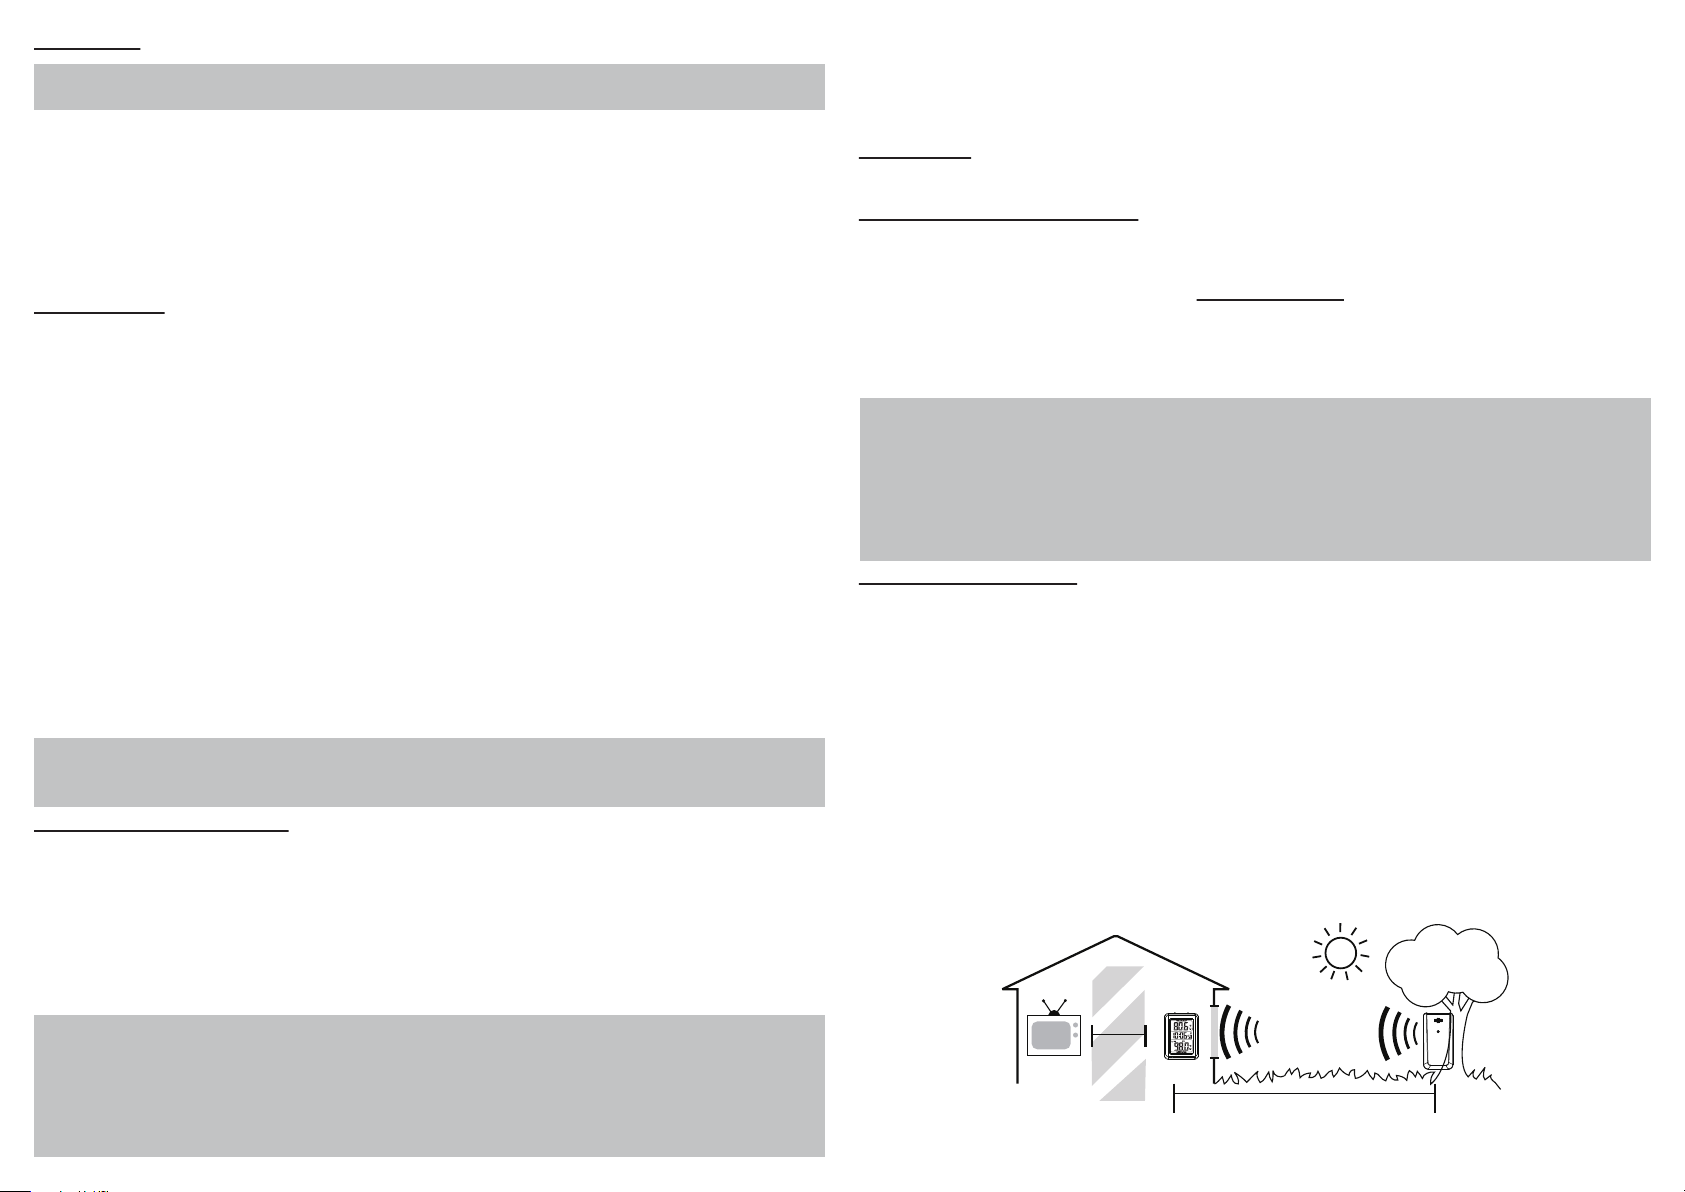
9.Care and maintenance
• Display unit and outdoor sensor must be within 150 ft. (50m) of each other.
• To maximize wireless range, place units away from large metallic items, thick walls, metal
surfaces, or other objects that may limit wireless communication.
• To prevent wireless interference, place both units at least 3ft (1 m) away from electronic devices
(TV, computer, microwave, radio, etc.
• To ensure accurate temperature measurement, place units out of direct sunlight and away from
any heat sources or vents.
• Do not clean any part of the product with benzene,thinner or other solvent chemicals. When
necessary, clean it with a soft cloth.
• Never immerse the product in water. This will damage the product.
• Do not subject the product to extreme force, shock, or fluctuations in temperature or humidity.
• Do not tamper with the internal components.
• Do not dispose of this product as unsorted municipal waste. Collection of such waste separately
for special treatment is necessary.
AT
LEAST
TV
3 feet
(0.9 m)
APART
(150 feet maximum)
(50 meters)
 Loading...