

Thermofilm Bliss euro BE1000, Bliss euro BE1500, Bliss euro BE2000, Bliss euro BE2400 Product Manual
OPERATION, INSTALLATION AND MAINTENANCE MANUAL
In d o o r C o n v e c t i v e P a n e l H e a t e r
PRODUCT MANUAL
2
CONTENTS
Rev A NOV14
1. Product Overview
2. Specification Data
3. Operations
4. Installation
5. Safety
6. Maintenance
7. Warranty
1. Product Overview
The Bliss Euro is a range of electric convective panel heaters with the following features:
• Stylish front panel and simple functionality: suitable for most indoor applications, with a European
styled front grill and a simple On/Off switch and adjustable thermostat, ensures easy operation
• Natural convective heating: gentle convective currents will quickly warm the space around you,
while ensuring minimal circulation of dust and pollens.
• Multiple mounting options: all heaters come with castor wheels and a wall mounting brackets as
standard
• Cost effective heating: the 24 hour manual timer will allow you to reduce running costs and maximise heat, only when you need it.
• Assured piece of mind: The Bliss Euro fully complies with AU/NZ electrical standards and features
a built-in auto reset thermal cut-out and electrically protected heating element.
• 2 year residential warranty
MODEL
HEATER TYPE Convective panel heater
OUTPUT Refer to model code chart above
POWER 230-240 Volts Nominal at 50 Hertz, Single Phase
CONNECTION 3 pin Australian plug
APPROVALS AUSTRALIA/NZ
MOUNTING OPTIONS FLOOR—CASTOR (all included in the box)
FLOOR—FEET
WALL—BRACKET
MOUNTING OPTIONS Suitable for wall and floor mounting.
PROTECTION RATING IP24 - protection against splashing water
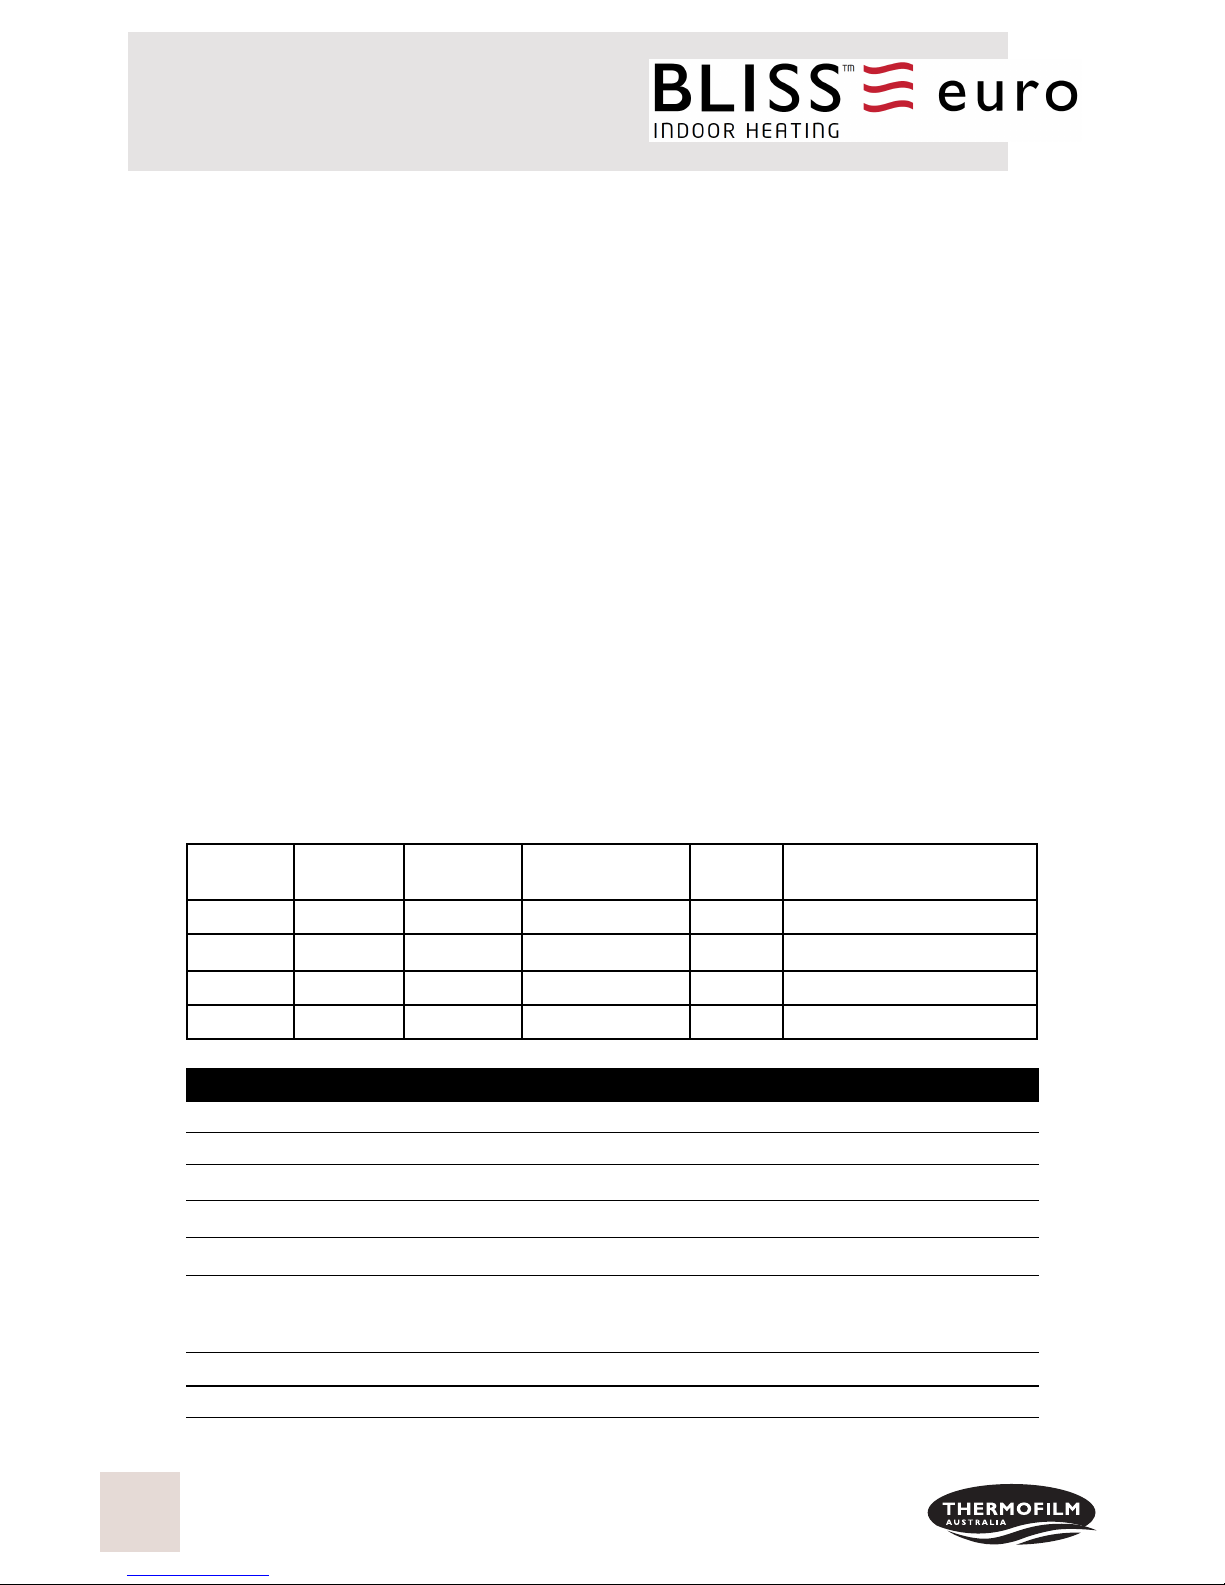
MODEL POWER
(W)
CURRENT
(AMPS)
DIMENSIONS
(mm)
APRROXIMATE HEATING
AREA (sqm)
BE1000 1000 4.2 420x440x105 11 - 14
BE1500 1500 6.2 580x440x105 15 - 20
BE2000 2000 8.3 740x440x105 20 - 25
BE2400 2400 10 1000x440x105 25 - 30
WEIGHT
(kg)
5
6.5
9
11
3
2. Operating Instructions
The control panel features an electronic thermostat and 24 hour manually set timer.
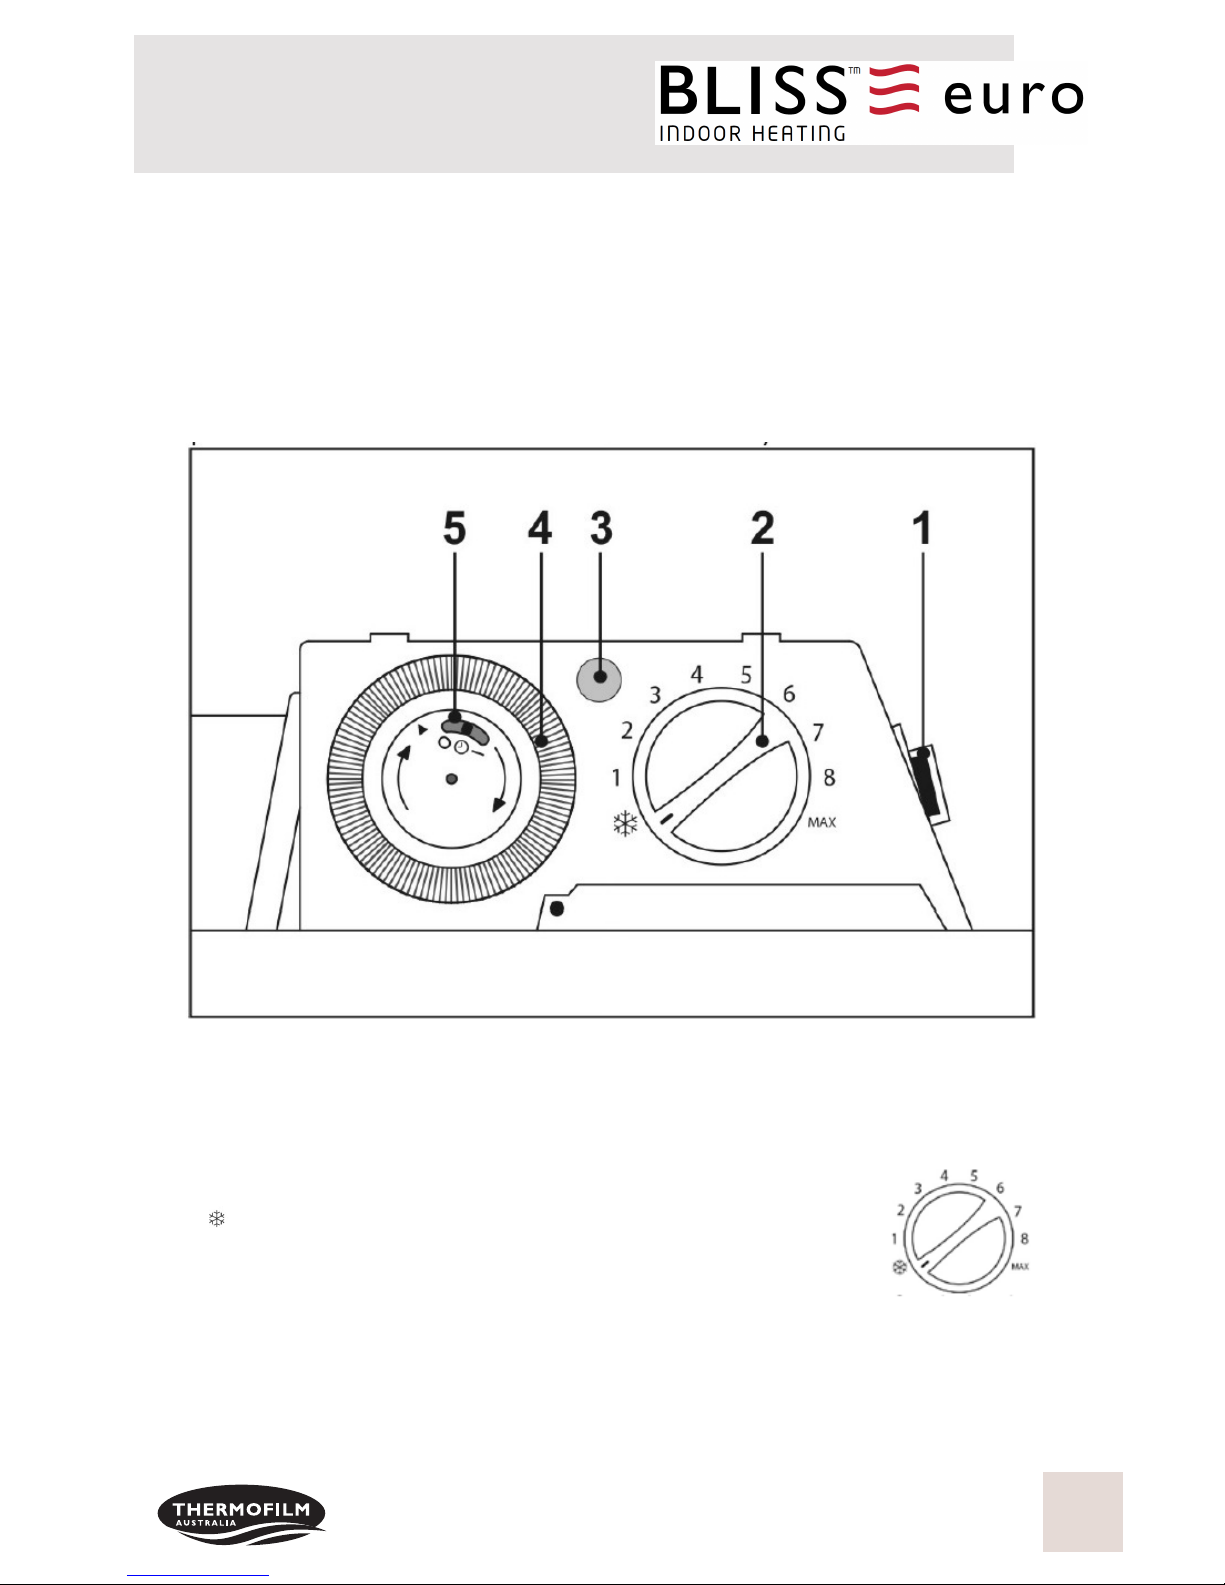
2.1 Control Panel Guide
1 - Main Power Switch (1/ O – ON / OFF)
2 - Thermostat Control Knob
3 - Heating Function Light
4 - 24 Hour Manually Set Timer
5 - Control Slide Switch
Note: A clear plastic cover fits over the control panel. This may be opened and closed by hand.
2.2 Switching On the Unit
Press the main power switch (1) on the right hand side of panel.
Setting “1” is POWER ON. Setting “O” is POWER OFF.
2.3 Heating Function
Move the control slide switch (5) from “O” (POWER OFF) to “I” (HEATING ON).
Turn the thermostat control knob (2) to the desired temperature setting.
“ ” is 5°C and “MAX” is 30°C.
The heater will produce heat and the heating function light (3) will come on, indicating
that the heater is working towards the desired temperature setting.
Once the desired temperature setting has been reached, the heater and the heating function light will switch
off. The heater and heating function light will switch on and off intermittently to maintain the desired set
temperature.
 Loading...