

THERMOBILE BX 3, BX 9, BX 15 User Manual
40.020.959 - rev. 01-2007
BX 3 / 9 / 15
GEBRUIKERSHANDLEIDING
USER MANUAL
BEDIENUNGSANLEITUNG
MANUEL DE L'UTILISATEUR
MANUAL DEL USUARIO
инструкция пользователя
motralec
4 rue Lavoisier . ZA Lavoisier . 95223 HERBLAY CEDEX
Tel. : 01.39.97.65.10 / Fax. : 01.39.97.68.48
Demande de prix / e-mail : service-commercial@motralec.com
www.motralec.com

/i
A
THERMOBILE
B
C
D
E
F
G
H
I
MODEL
VOLTS
INPUT
CURRENT
FREQUENCY
PROTECTION
PROD. NR:
Fabr.year 2006
THERMOBILE Ind. B.V. Breda, Holland
- 1 - - 2 -
1
2
3
- 3 - - 4 -
BX 3
230 V 3~
3 kW
13,2 A
50 Hz
IP X4
40.107.092
Serial nr: 49.0039
4
A
5
6
A
B
A
- 5 -
2 40.020.959 - rev. 01 - 2007 BX3 / BX9 / BX15
C
D
B
E
A
F
D
D
- 6 -
/i
G
BX3 / BX9 / BX15 40.020.959 - rev. 01 - 2007 3

Nederlands................................... 5
English .......................................12
Deutsch ......................................19
Français......................................26
Español ......................................34
Русский язык ............................ 42
4 40.020.959 - rev. 01 - 2007 BX3 / BX9 / BX15

Nederlands
All
Nederlands
Inhoud
Veiligheidsinstructies................................... 6
Introductie ................................................... 7
Voorbereidingen.......................................... 7
Gebruik ....................................................... 8
Onderhoud .................................................. 9
Storingen..................................................... 9
Reserveonderdelen................................... 10
Technische informatie ............................... 10
EG-Verklaring van overeenstemming ........11
Voorwoord
Deze handleiding bevat de
gebruiksaanwijzing voor de op de kaft
vermelde kachel. De informatie in deze
handleiding is belangrijk voor een juist en
veilig gebruik van de kachel.
Identificatie van het product (fig. 1)
Het identificatieplaatje is bevestigd op de
zijkant van de kachel. Het identificatieplaatje
bevat de volgende gegevens:
A Model
B Voltage
C Input
D Stroom
E Frequentie
F Beschermingsgraad tegen stof en vocht
G Productiecode
H Jaar van fabricage
I Serienummer
Milieu
Let op
De kachel is gemaakt van diverse
metalen en kunststoffen. De kachel
bevat tevens elektronische
onderdelen, die als elektronisch afval
moeten worden behandeld. Neem
contact op met uw dealer voor
nadere informatie.
een van toepassing in de
Europese Unie
Afvalverwijdering van elektrische
& elektronische apparatuur voor
zakelijk gebruik.
Voor nadere informatie aangaande
het wegwerpen van producten voor
zakelijke doeleinden aan het einde
van hun levensduur, wordt u verzocht
contact op te nemen met uw dealer
of distributeur in uw land. Dit product
mag niet samen met of in de vorm
van commercieel afval worden
weggegooid.
Service en technische ondersteuning
Neem voor informatie over de kachel contact
op met uw dealer of met de fabrikant.
Zorg dat u de volgende gegevens bij de hand
hebt: type en serienummer van de kachel.
Garantie en aansprakelijkheid
Voor garantie en aansprakelijkheid, zie de
algemene garantiebepalingen.
BX3 / BX9 / BX15 40.020.959 - rev. 01 - 2007 5
Nederlands
1 VEILIGHEIDSINSTRUCTIES
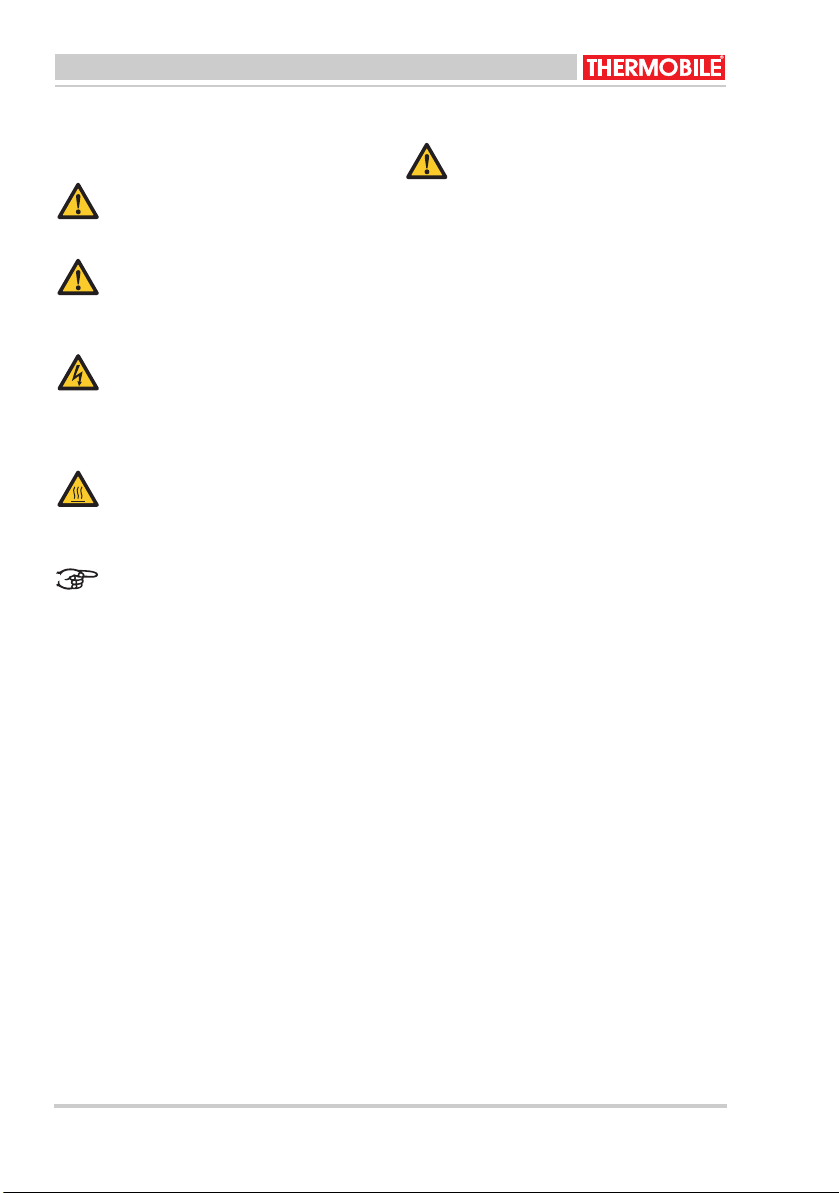
1.1 Pictogrammen in deze handleiding VOORZICHTIG
Wijst op gevaar voor beschadiging
van de apparatuur.
WAARSCHUWING
Wijst op een gevaarlijke situatie, die
de dood of ernstige verwondingen tot
gevolg kan hebben.
WAARSCHUWING
Schakel bij onderhouds- of
reparatiewerkzaamheden aan de
heteluchtkachel altijd de elektrische
stroom uit!
Heet
Sommige vlakken kunnen heet zijn!
Wacht met onderhoud totdat deze
onderdelen voldoende zijn afgekoeld.
Suggesties en tips om de uitvoering
van de betreffende taken of
handelingen te vereenvoudigen.
1.2 Gebruik dit product waarvoor het bestemd is
De in deze handleiding beschreven kachels
zijn ontworpen voor de verwarming van
bouwplaatsen en -keten, opslagplaatsen,
winkels kantoren en huizen.
1.3 Algemene instructies WAARSCHUWING
• Lees deze handleiding
zorgvuldig door, alvorens de
kachel te gebruiken.
• Bewaar dit document bij de
kachel.
• Volg de beschreven procedures.
• Sluit de kachel alleen aan op een
goed geaard stopcontact dat
voldoet aan de in het land
geldende normen. Raadpleeg bij
twijfel een deskundige.
• Zorg bij gebruik van een
verlengkabel dat deze zwaar
genoeg is voor de kachel.
• Rol een kabelhaspel volledig uit.
• Dek de kachel niet af. Laat de
lucht IN- en UITLAAT vrij.
• Steek geen voorwerpen in de
kachel.
• Plaats geen brandbare
voorwerpen voor de kachel, houd
voldoende afstand.
• Gebruik de kachel niet in
explosiegevaarlijke ruimtes of in
ruimtes met agressieve gassen
zoals ammoniak, lijm, verfverdunners.
• Voer uitsluitend reparatie- en
onderhoudswerkzaamheden uit
als de kachel voldoende is
afgekoeld, en nadat de steker uit
de contactdoos is verwijderd.
• Reinig de binnenkant van de
kachel nooit met water, maar
gebruik perslucht.
• Maak bij zichtbare gebreken de
kachel direct spanningsloos en
laat de kachel repareren door
een deskundige.
• Houd steeds rekening met de
geldende veiligheidsvoorschriften ter preventie van
gevaar en ongevallen.
6 40.020.959 - rev. 01 - 2007 BX3 / BX9 / BX15

Nederlands
2 INTRODUCTIE
2.1 Doel
Deze draagbare kachel werkt elektrisch en is
voorzien van een ventilator. De kachel is
ontworpen voor (eventueel vaste) horizontale
binnenopstelling.
2.2 Werkingsprincipe
In de kachel zijn verwarmingselementen
gemonteerd.
De ventilator blaast lucht over de
verwarmingselementen.
De ventilator kan zowel continu als
thermostatisch bestuurd worden.
Bij oververhitting schakelt de
maximaalthermostaat de kachel uit.
Oververhitting ontstaat als de luchtstroom te
laag is of als de koker aan de binnenzijde
vervuild is. Na het afkoelen schakelt de
kachel vanzelf weer in (automatische reset).
Zorg daarna voor een betere luchtstroom.
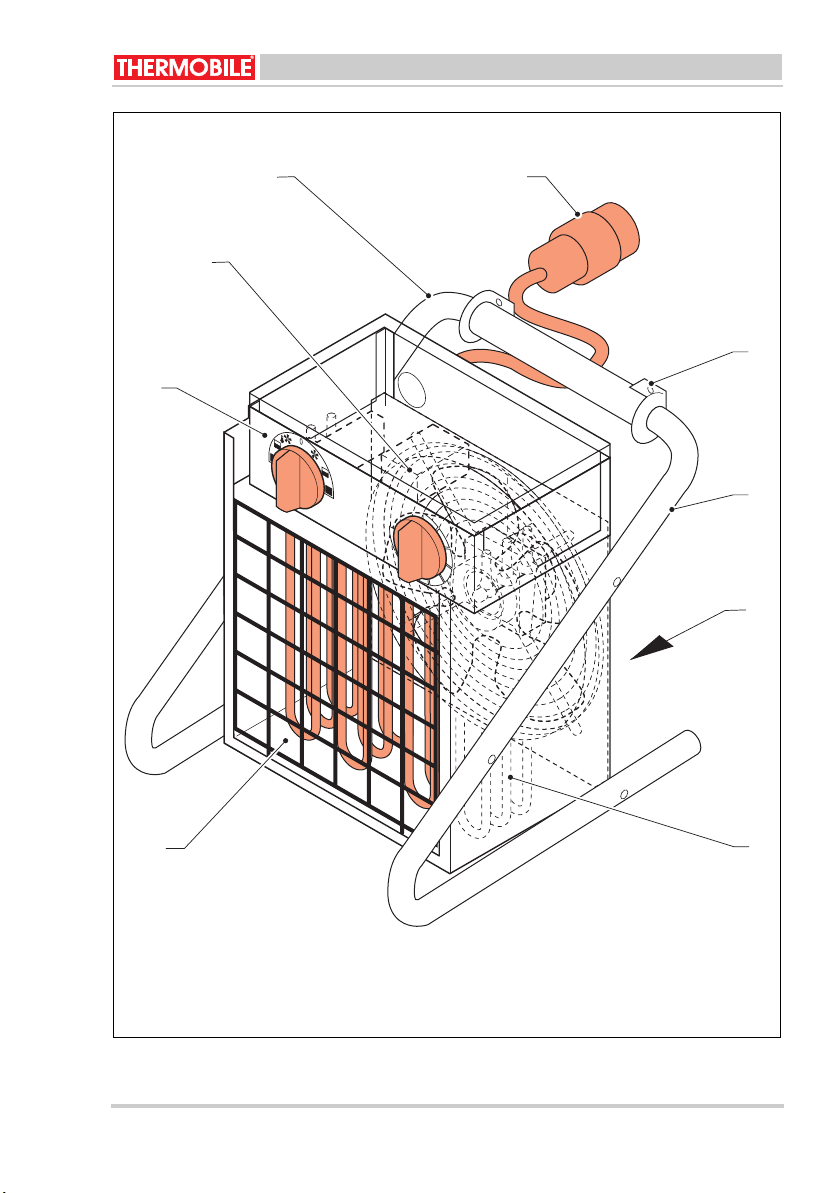
2.3 Hoofdcomponenten (Fig. 4)
A Bedieningspaneel
B ventilator
C Draagbeugel
D Netspanningssteker
E Ophangogen
F Luchtinlaatrooster
G Verwarmingselementen
H Luchtuitblaasrooster
A Keuzeschakelaar
* 0 = Uit
1 = Ventileren (BX 9 beperkte
capaciteit).
2 = Verwarmen, halve of 2/3
capaciteit. (Ventilator wordt
thermostatisch bestuurd).
3 = Verwarmen, maximale capaciteit.
(Ventilator wordt thermostatisch
bestuurd.)
4 = Ventileren, niet verwarmen.
(BX9 ventileert maximaal).
5 = Verwarmen, halve of 2/3
capaciteit. (Ventilator wordt continu
bestuurd).
6 = Verwarmen, maximale capaciteit.
(Ventilator wordt continu bestuurd).
B Regelthermostaat, traploos instelbaar
van 0 - 35 °C
3 VOORBEREIDINGEN
3.1 Verpakking verwijderen
1. Verwijder de verpakking van de kachel.
2. Controleer de inhoud op eventuele
schade.
3. Lees de gebruiksaanwijzing.
2.4 Regelthermostaat
De kachel heeft een regelthermostaat die de
kachel uitschakelt als de vooraf ingestelde
temperatuur van de omgevingslucht wordt
bereikt.
De kachels BX9 en BX15 hebben een
thermostaat met dubbele schakelcapaciteit.
2.5 Bedieningspaneel (fig. 3)
De kachel is uitgevoerd met een 7-standen
keuzeschakelaar (A) en een
regelthermostaat (B).
BX3 / BX9 / BX15 40.020.959 - rev. 01 - 2007 7
Nederlands
3.2 Installatie
1. Controleer of de kachel op de juiste
spanning / frequentie wordt aangesloten.
WAARSCHUWING
Kachel niet aansluiten indien de
spanning / frequentie afwijkt van de
waarden zoals vermeld op de
typeplaat.
2. Zorg voor een stabiele opstelling van de
kachel.
Plaats de kachel altijd horizontaal
met de voetdoppen onder.
3. Maak gebruik van de ophangogen indien
de kachel wordt opgehangen.
Respecteer in dit geval de maten die
vermeld staan op sticker (B), fig. 2 & 5.
4GEBRUIK
4.1 Inschakelen (fig. 3)
Verwarmen:
1. Zet de keuzeschakelaar (A) op stand 2 of
3 voor intermitterend verwarmen
(thermostatisch bestuurd).
2. Zet de keuzeschakelaar op 5 of 6 voor
continu verwarmen.
4.2 Uitschakelen (fig. 3)
1. Zet de keuzeschakelaar (A) op stand 0.
4.3 Temperatuur regelen (fig. 4)
1. Draai de thermostaatknop (A) in de juiste
stand voor de gewenste
omgevingstemperatuur.
Ventileren:
1. Zet de keuzeschakelaar (A) op stand 1.
(Alleen BX 9 ventileert beperkt.)
2. Zet de keuzeschakelaar op stand 4.
(Ook BX 9 ventileert nu volledig.)
Het wisselen van 2 fasedraden in de
steker heeft geen invloed op de
werking van de 3-fasen kachel.
De NUL pen van 5-polige steker niet
gebruiken.
8 40.020.959 - rev. 01 - 2007 BX3 / BX9 / BX15
Nederlands
5 ONDERHOUD
/i
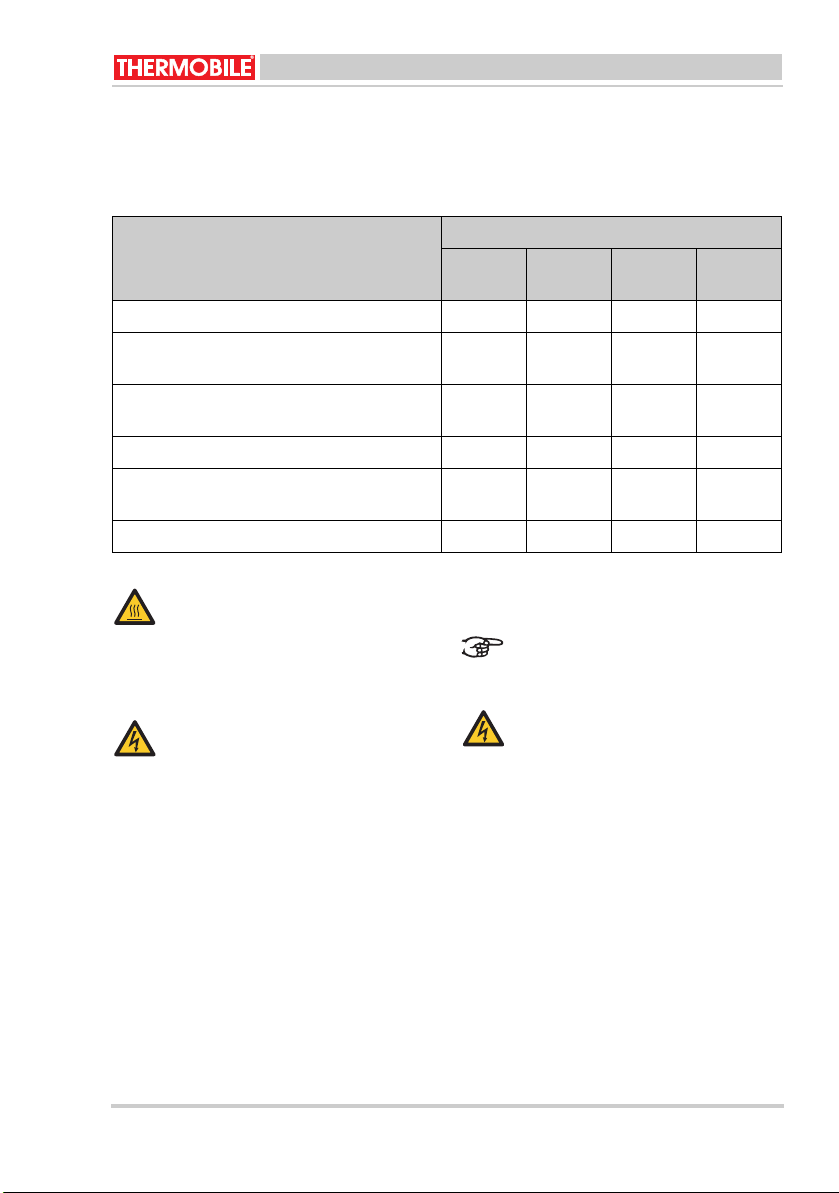
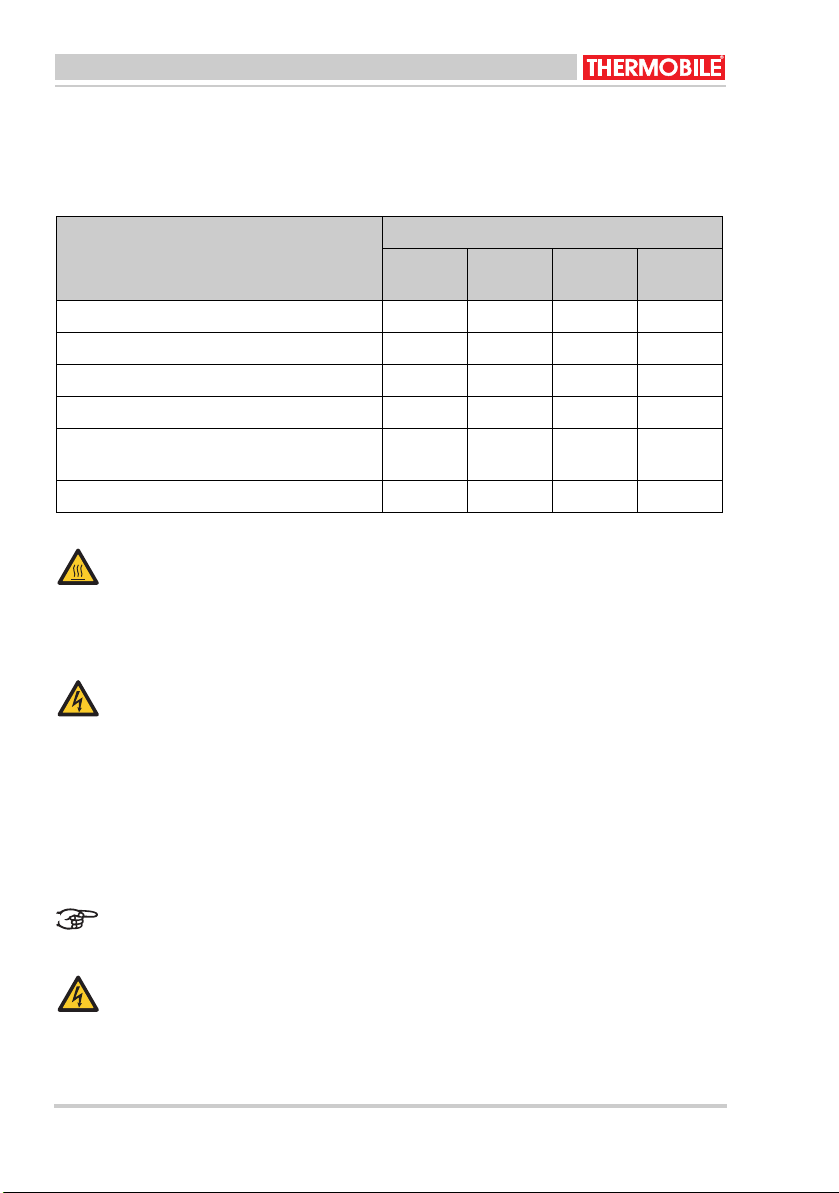
5.1 Onderhoudstabel
Registreer na elk winterseizoen het
onderhoud in de annex achterin dit boek.
Beschrijving Periode
Iedere
week
Iedere
maand
Ieder half
jaar
Ieder jaar
Verwijder stof en aanslag van de kachel. X
Controleer de kachel (in een schone
Dealer
omgeving).
Controleer de kachel (in een stoffige
Dealer
omgeving).
Controleer en reinig het inlaatrooster X
Controleer de ventilator op juiste werking, vuil
X
en beschadigingen.
Controleer de bedrading van de kachel. X
Heet
6STORINGEN
Raak het uitblaasrooster niet aan!
Wacht met het onderhoud totdat dit is
afgekoeld.
Let op als de netspanning
ingeschakeld is tijdens het
storingzoeken.
5.2 Algemeen
WAARSCHUWING
Neem de netspanningssteker uit de
contactdoos tijdens het onderhoud.
WAARSCHUWING
Neem de netspanningssteker uit de
contactdoos tijdens een reparatie.
Als de kachel voor langere tijd opgeslagen
wordt:
1. Schakel de kachel uit.
2. Neem de netspanningssteker uit de
contactdoos.
3. Reinig de kachel.
BX3 / BX9 / BX15 40.020.959 - rev. 01 - 2007 9
Nederlands
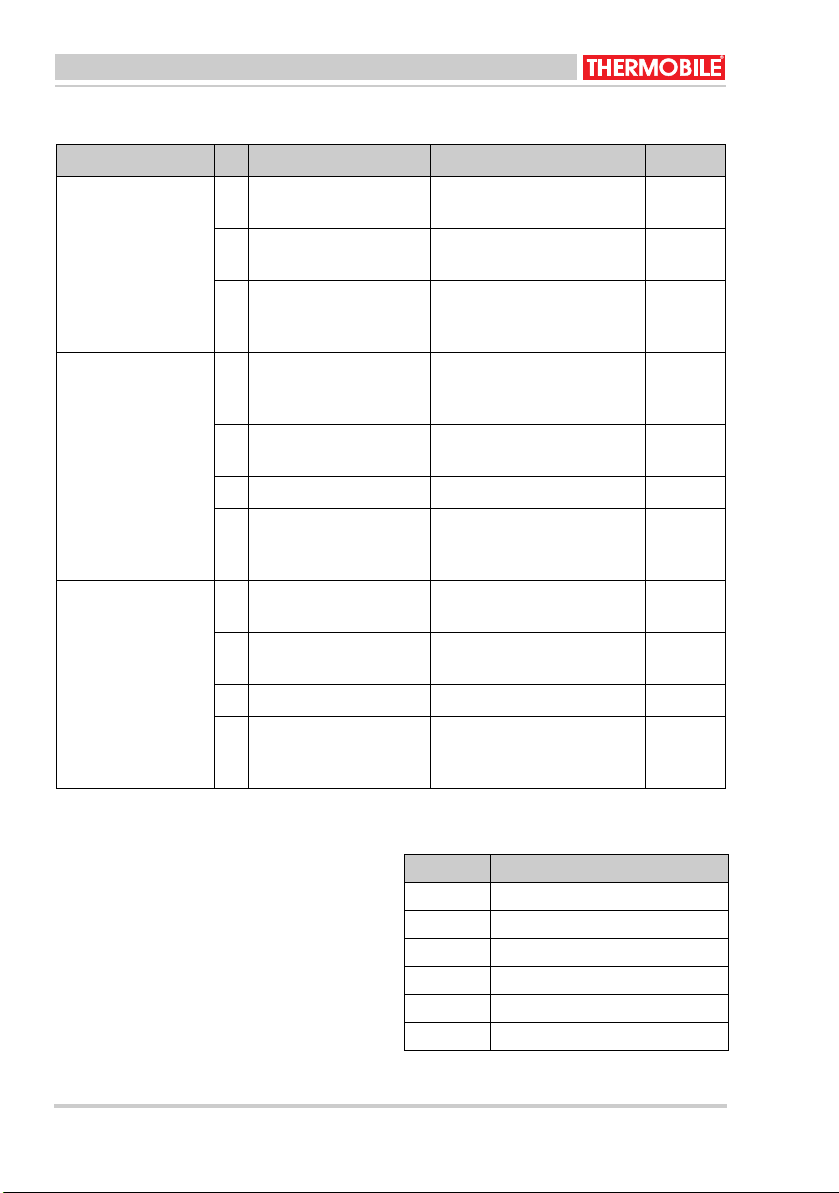
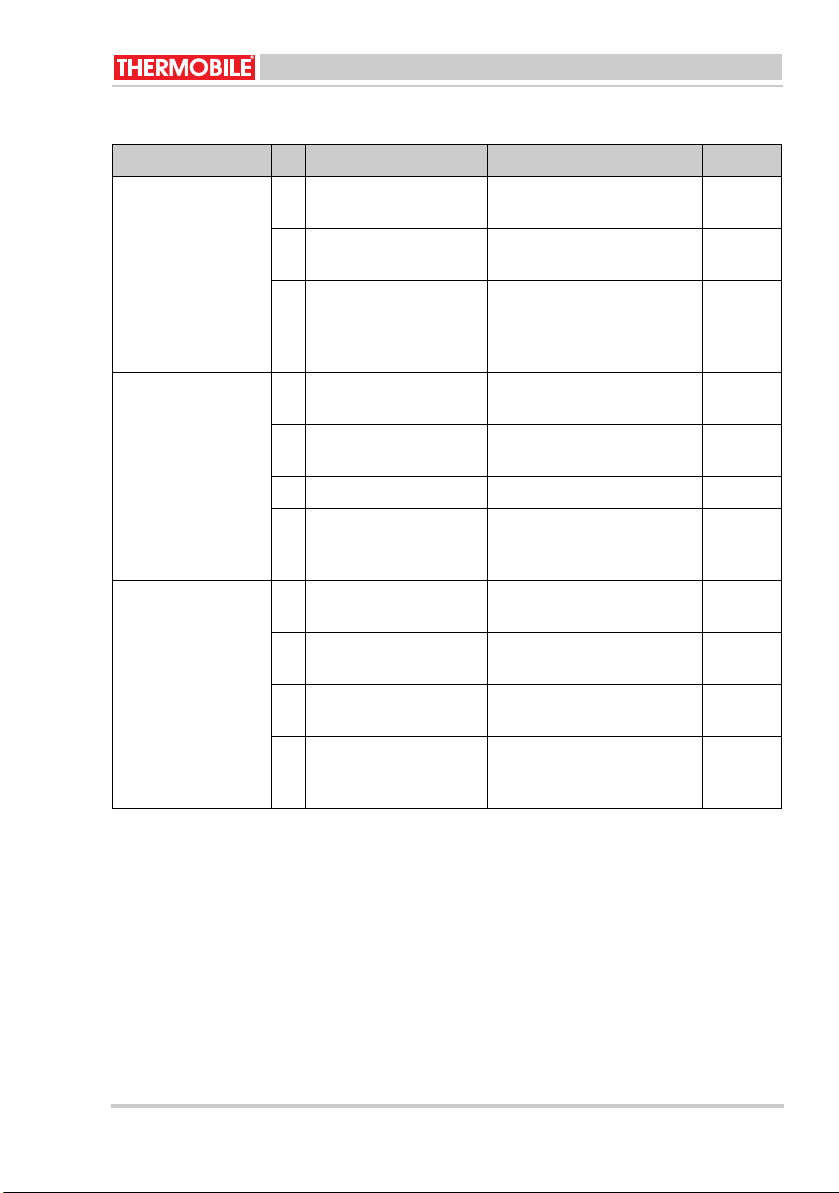
6.1 Tabel storingzoeken
/i
Storing Oorzaak Oplossing Actie
De kachel werkt niet. 1 De kachel heeft geen
spanning.
2 Defect in het bedie-
ningspaneel.
3 Fase - NUL draden ver-
Controleer de elektrische
Gebruiker
aansluiting.
Repareer of vervang het
Dealer
bedieningspaneel.
Herstel de verbinding. Gebruiker
wisseld in een 5-polige
steker/contrasteker.
Ventilator draait niet,
geen warmte.
4 De thermostaat is inge-
steld op een te lage
Corrigeer de instelling. Gebruiker
temperatuur.
5 Zekering defect in uw
installatie.
Vervang de zekering.
(Draai deze goed vast.)
Gebruiker
6 Ventilatormotor stuk. Vervang de ventilatormotor. Dealer
7 Kabel of verlengkabel
Herstel de verbinding. Gebruiker
afgekneld.
(Draad onderbroken).
Stand 2, 3: ventilator
draait normaal, weinig warmte 50%.
8 Zekering defect in uw
installatie.
9 Kabel of verlengkabel
Vervang de zekering.
Gebruiker
(Draai deze goed vast.)
Herstel de verbinding. Gebruiker
defect.
10 Kachel werkt op 2 fasen. Herstel de verbinding. Gebruiker
11 Eén losse of verbrande
Herstel de verbinding. Gebruiker
draad in de steker/contra-verlengkabel.
Noteer de onderhoudsgegevens in tabel A in
de annex achterin dit boek.
7 RESERVEONDERDELEN
Raadpleeg de dealer voor het gebruik van
reserveonderdelen.
8.1 Uitleg van het elektrische schema
/i
Pos. Beschrijving
A Verwarmingselement
B Ventilatormotor
C Keuzeschakelaar
8 TECHNISCHE INFORMATIE
• Zie voor technische specificaties tabel B
in de annex achterin dit boek.
• Zie voor het elektrische schema het
D Regelthermostaat
E Maximaalthermostaat
F Serieweerstand
schema C in de annex achterin dit boek.
10 40.020.959 - rev. 01 - 2007 BX3 / BX9 / BX15

9 EG-VERKLARING VAN
OVEREENSTEMMING
THERMOBILE INDUSTRIES B.V.,
Konijnenberg 80, NL-4825 BD BREDA,
verklaart geheel onder eigen
verantwoordelijkheid dat de producten:
ELEKTRISCHE LUCHTVERHITTERS BX3 /
BX9 / BX15
voldoen aan de volgende EG-richtlijnen:
Machinerichtlijn: 98/37/EEC
Laagspanningsrichtlijn: 72/23/EEC
EMC-richtlijn: 89/336/EEC
Nederland, Breda,
01-10-2007
R.E. Merkenhof
Managing Director
Nederlands
BX3 / BX9 / BX15 40.020.959 - rev. 01 - 2007 11

English
Onl
English
Contents
Safety instructions .....................................13
Introduction................................................14
Preparations ..............................................14
Use ............................................................14
Maintenance ..............................................16
Faults.........................................................16
Spare parts ................................................17
Technical information.................................17
EU Declaration of conformity .....................18
Foreword
This manual contains the instructions for use
of the heater shown on the cover. The
information in this manual is important for the
correct and safe use of the heater.
Identification of the product
The identification plate is attached to the side
of the heater. The identification plate contains
the following data:
A Model
B Voltage
C Input
D Current
E Frequency
F Protection level against dust and
moisture
G Production code
H Year of manufacture
I Serial number
Environment
Note
The heater is made of various metals
and synthetic materials. The heater
also contains electronic parts, which
must be treated as electronic waste.
Please contact your dealer for further
information.
y applicable to the European
Union
Waste disposal of electric &
electronic equipment for business
use.
For further information regarding the
disposal of products for business use
at the end of their life span, please
contact your dealer or distributor in
your country. This product may not
be disposed of together with
commercial waste or as commercial
waste.
Service and technical support
Please contact your dealer or the
manufacturer for information about the
heater. Make sure you have the following
data at hand: type and serial number of the
heater.
Warranty and liability
For warranty and liability, see the general
warranty regulations.
12 40.020.959 - rev. 01 - 2007 BX3 / BX9 / BX15
English
1 SAFETY INSTRUCTIONS
1.1 Pictograms in this manual Caution
Indicates risk of damage to the
appliance.
Warning
Indicates a dangerous situation that
may lead to death or serious injuries.
Warning
Always switch off power when
performing maintenance or repairs on
the convector heater!
Hot
Some surfaces may be hot! Wait until
these parts have sufficiently cooled
down before performing
maintenance.
Suggestions and tips to facilitate the
specified tasks or actions.
1.2 Use this product for its intended use
The heaters described in this manual have
been designed for heating building sites and
huts, storage places, shops, offices and
homes.
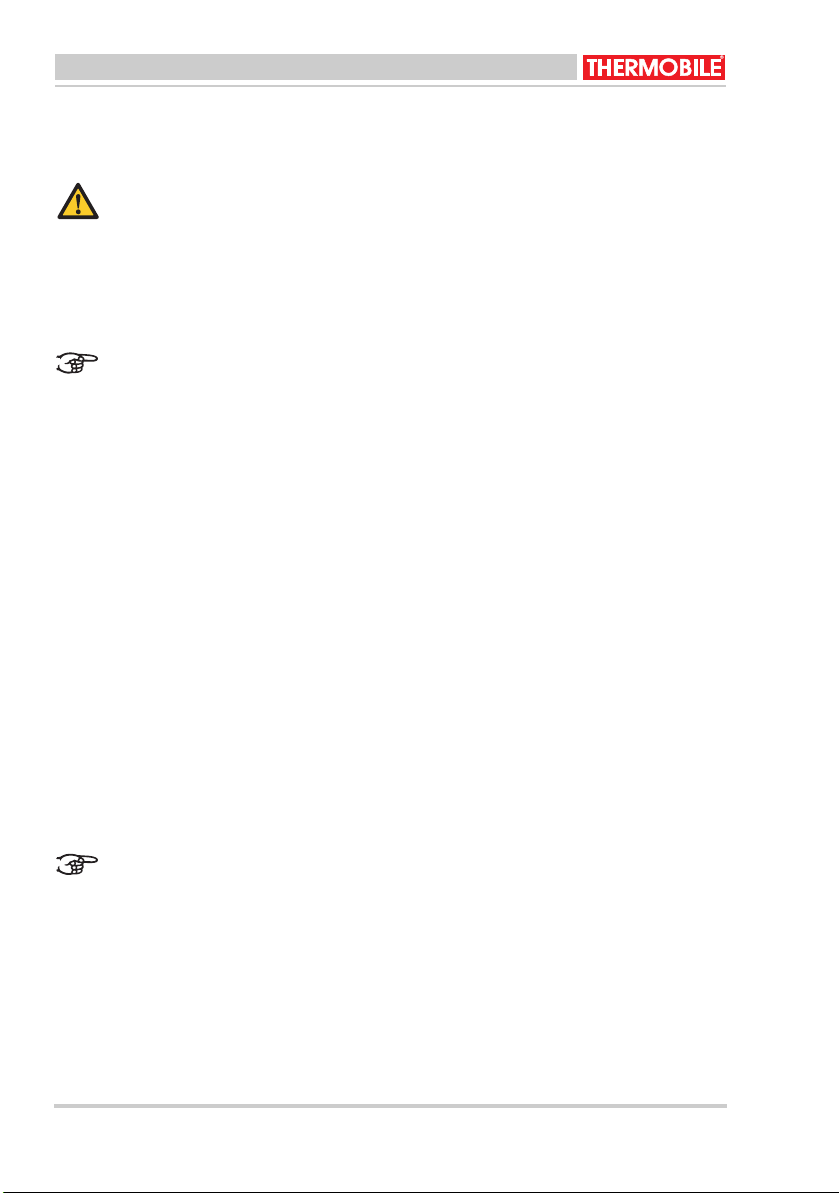
1.3 General instructions Warning
• Read this manual carefully
before using the heater.
• Keep this document with the
heater.
• Follow the described procedures.
• Only connect the heater to a
socket that has been correctly
earthed that meets the standards
that apply in the relevant country.
Consult an expert if in any doubt.
• Make sure that any extension
cable used has the required
weight for the heater.
• Fully unwind a cable reel.
• Do not cover the heater. Make
sure the air INLET and OUTLET
are not obstructed.
• Do not insert any objects into the
heater.
• Do not place any inflammable
objects in front of the heater and
make sure you keep sufficient
distance.
• Do not use the heater in rooms
where there is an explosion risk
or in rooms where there are
aggressive gases such as
ammonia, glue or paint thinners.
• Only perform repair and
maintenance activities when the
heater has sufficiently cooled
down and after removing the plug
from the socket.
• Never clean the inside of the
heater using water but use
compressed air.
• Make sure you immediately
disconnect the power supply
when there are visible faults or
defects and have the heater
repaired by an expert.
• At all times take into account the
applicable safety regulations with
regard to the prevention of
danger and accidents.
BX3 / BX9 / BX15 40.020.959 - rev. 01 - 2007 13
English
2 INTRODUCTION
2.1 Purpose
This portable heater works electrically and is
equipped with a fan. The heater has been
designed for horizontal indoor installation
(which can be permanent).
2.2 Principle of operation
Heating elements have been installed in the
heater.
The fan blows air over the heating elements.
The fan can be controlled continuously and
thermostatically.
The maximum thermostat switches off the
heater when overheated. Overheating occurs
when the air flow is too low or when the shaft
is dirty on the inside. Once it has cooled
down, the heater will switch on automatically
(automatic reset).
Make sure thereafter that there is better air
flow.
2.3 Main components (Fig. 4)
A Operating panel
BFan
C Supporting bracket
D Mains plug
E Suspension eyes
F Air-inlet grid
G Heating elements
H Air-outlet grid
2.4 Control thermostat
The heater has a control thermostat that
switches off the heater when the ambient
temperature set in advance has been
reached.
The BX9 and BX15 heaters have a
thermostat with double switching capacity.
2 = Heat, half or 2/3 capacity. (The
fan is thermostatically controlled.)
3 = Heat, maximum capacity. (The
fan is thermostatically controlled.)
4 = Ventilate, do not heat
(BX9 ventilates to full capacity)
5 = Heat, half or 2/3 capacity. (The
fan is continuously controlled.)
6 = Heat, maximum capacity. (The
fan is continuously controlled.)
B Control thermostat, infinitely variable
from 0 - 35 °C
3 PREPARATIONS
3.1 Remove packaging
1. Remove packaging from the heater.
2. Check the contents for any damage.
3. Read the instructions for use.
3.2 Installation
1. Check whether the heater is connected
to the correct voltage/frequency.
Warning
Do not connect the heater if the
voltage/frequency deviates from the
values as listed on the nameplate.
2. Make sure that the heater has a stable
set-up.
Always set the heater horizontally
with the foot caps at the bottom.
3. Use the suspension eyes if the heater is
being suspended. Respect in this case
the sizes listed on the label (B), figs. 2 &
5.
2.5 Operating panel (fig. 3)
The heater has a 7-position selector switch
(A) and a control thermostat (B).
A Selector switch
* 0 = Off
1 = Ventilate (BX 9 limited capacity).
14 40.020.959 - rev. 01 - 2007 BX3 / BX9 / BX15
4USE
4.1 Switching on (fig. 3)
Heat:

1. Set the selector switch (A) to position 2 or
3 for intermittent heating (thermostatically
controlled).
2. Set the selector switch to position 5 or 6
for continuous heating.
Ventilate:
1. Set the selector switch (A) to position 1.
(Only BX 9 ventilates to a limited degree.)
2. Set the selector switch to position 4.
(The BX 9 will now also fully ventilate.)
Exchanging 2 phase wires in the plug
will not influence the operation of the
3-phase heater.
Do not use the ZERO pin of the 5pole connector.
4.2 Switching off (fig. 3)
1. Set the selector switch (A) to position 0.
4.3 Regulating the temperature (fig. 4)
1. Turn the thermostat button (A) to the
correct position for the required ambient
temperature.
English
BX3 / BX9 / BX15 40.020.959 - rev. 01 - 2007 15
English
5 MAINTENANCE
/i
5.1 Maintenance table
Use the annex at the back of this manual to
record the maintenance after each winter.
Description Period
Weekly Monthly Every six
Annually
months
Remove dust and deposits from the heater. X
Check the heater (in a clean environment). Dealer
Check the heater (in a dusty environment). Dealer
Check and clean the inlet grid. X
Check the correct operation of the fan and
X
check for dirt and damages.
Check the heater's wiring. X
Hot
Do not touch the outlet grid!
Wait until it has cooled down before
performing maintenance.
5.2 General
Warning
Remove the mains plug from the
socket during maintenance.
For long-term storage of the heater:
1. Switch off the heater.
2. Remove the mains plug from the socket.
3. Clean the heater.
6FAULTS
Make sure that the mains voltage is
connected during troubleshooting.
Warning
Remove the mains plug from the
socket during repair work.
16 40.020.959 - rev. 01 - 2007 BX3 / BX9 / BX15
English
6.1 Troubleshooting table
/i
Fault Cause Solution Action
The heater is not
functioning.
1 The heater has no volt-
age.
2 Defect in the operating
panel.
3 Phase - exchange the
Check the electrical connec-
User
tion.
Repair or replace the operat-
Dealer
ing panel.
Repair the connection. User
ZERO wires in a 5-pole
connector/female connector.
The fan does not turn
and there is no heat.
4 The thermostat is set to
a too low temperature.
5 Fuse is faulty in your
system.
Correct the settings. User
Replace the fuse. (Make sure
User
it is tight.)
6 Fan motor is broken. Replace the fan motor. Dealer
7 Cable of the extension
Repair the connection. User
cable has been pinched.
(Wire interrupted.)
Positions 2 and 3:
The fan turns as normal but there is little
heat, 50%.
8 Fuse is faulty in your
system.
9 Cable of the extension
cable faulty.
10 Heater functions on 2
Replace the fuse. (Make sure
User
it is tight.)
Repair the connection. User
Repair the connection. User
phases.
11 One loose or burnt cable
Repair the connection. User
in the plug/counter
extension cable.
Record the maintenance details in table A in
the annex at the back of this manual.
7 SPARE PARTS
Contact the dealer for the use of spare parts.
8 TECHNICAL INFORMATION
• For technical specifications, see table B
in the annex at the back of this manual.
• For the electrical circuit diagram, refer to
diagram C in the annex at the back of this
manual.
BX3 / BX9 / BX15 40.020.959 - rev. 01 - 2007 17

English
8.1 Explanation of the electrical circuit diagram
/i
Pos. Description
A Heating element
B Fan motor
CSelector switch
D Control thermostat
E Maximum thermostat
F Series resistance
9 EU DECLARATION OF
CONFORMITY
THERMOBILE INDUSTRIES B.V.,
Konijnenberg 80, NL-4825 BD BREDA,
assumes full responsibility when declaring
that products:
BX3 /BX9 / BX15 ELECTRICAL AIR
HEATERS
meet the following EU directives:
Machine directive: 98/37/EEC
Low voltage directive: 72/23/EEC
EMC directive: 89/336/EEC
The Netherlands, Breda,
01-10-2007
R.E. Merkenhof
Managing Director
18 40.020.959 - rev. 01 - 2007 BX3 / BX9 / BX15
 Loading...