

Thermax CP3 User Manual
CP3
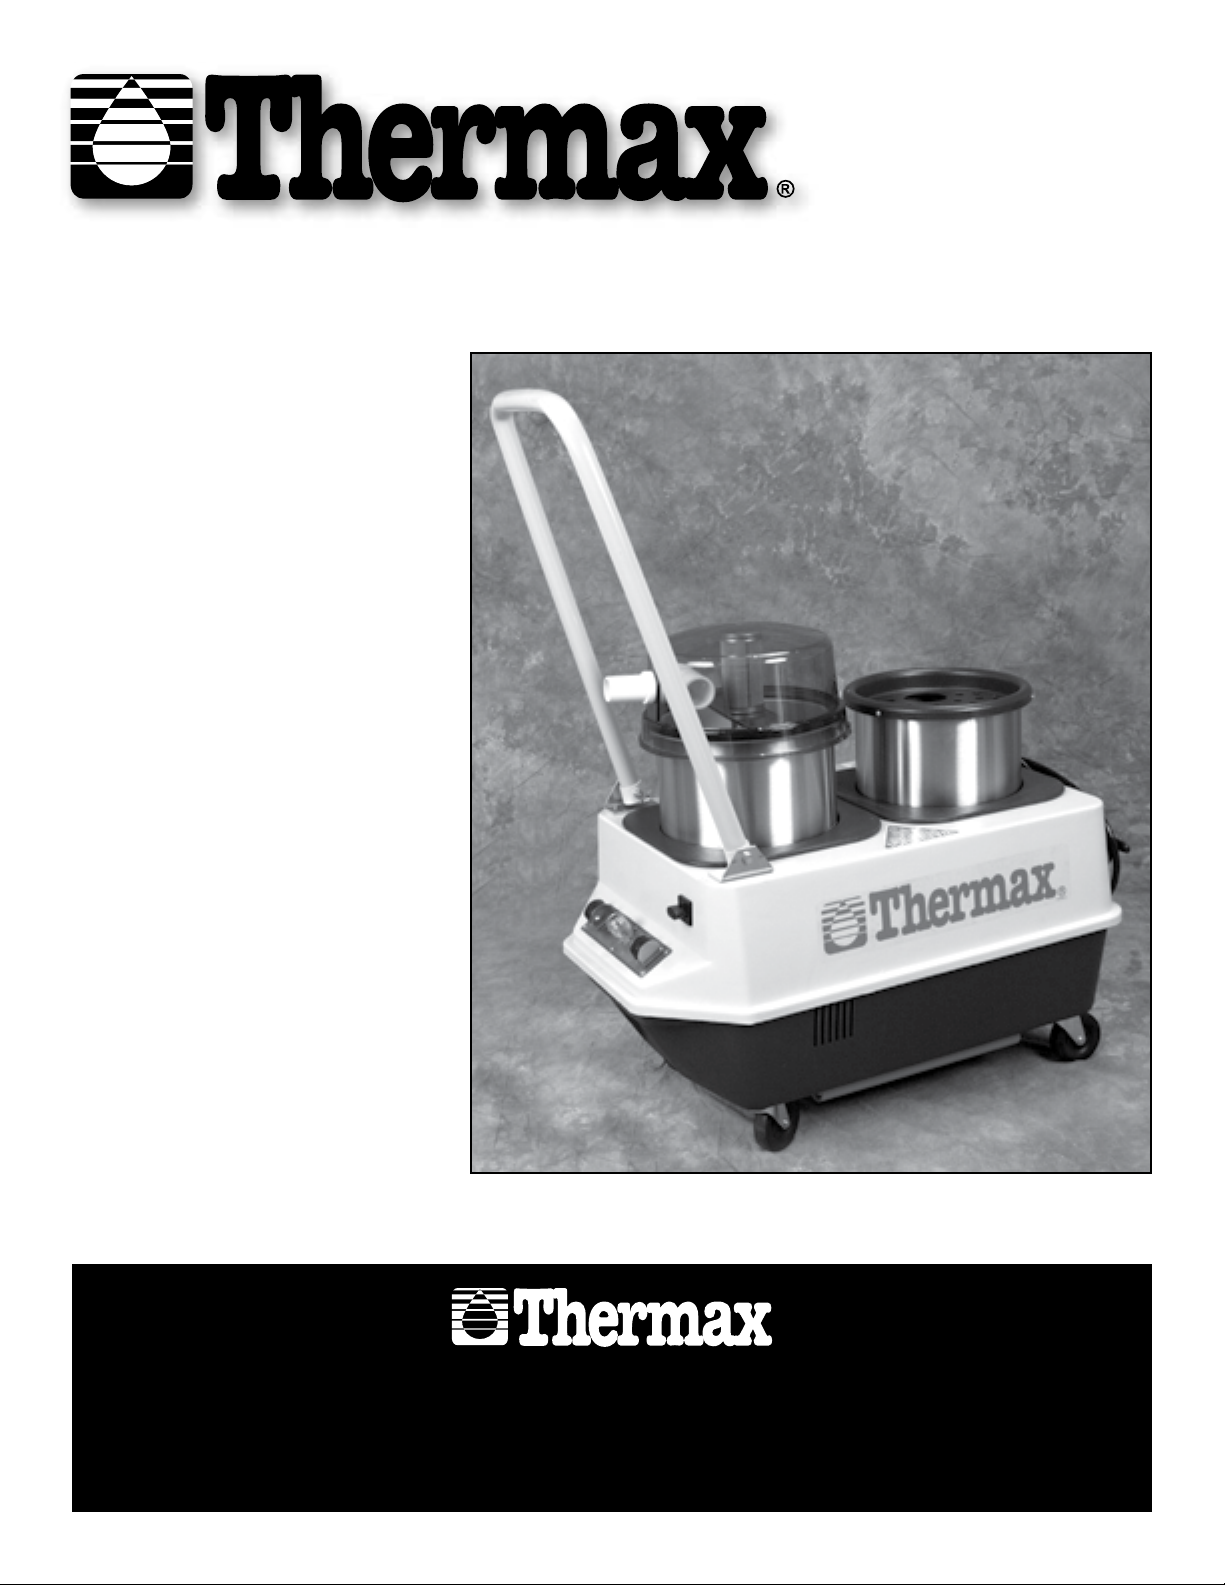
Professional Hot Water extraction cleaning system
oWner/
oPerator
manual
Products for a Healthier Indoor Environment
thermaxaf.com
1-888-764-3700

TABLE OF CONTENTS
Message from the Corporate Office ...................................................................... 2
Identifying Features ............................................................................................... 3
Inspection Upon Delivery ....................................................................................... 4
Important Safety Information ................................................................................. 4
Set-Up Procedure .................................................................................................. 5
Extraction Cleaning Procedure .............................................................................. 5
System Clean-Up .................................................................................................. 6
General System Maintenance ............................................................................... 6
Optional Package and Accessories ................................................................... 7, 8
Rental Center Benefits .......................................................................................... 9
Cleaning Solutions ............................................................................................... 10
Air Purifiers and Solutions ................................................................................... 10
CP3 Specifications .............................................................................................. 11
CP3 Wiring Diagram ............................................................................................ 11
Troubleshooting ................................................................................................... 12
CP3 Base Unit Schematic ................................................................................... 13
CP3 Base Unit Parts List ..................................................................................... 14
Floor Wand Schematic ........................................................................................ 15
Floor Wand Parts List .......................................................................................... 16
Upholstery Wand Schematic ............................................................................... 17
Upholstery Wand Parts List ................................................................................. 18
Power Brush Schematic ...................................................................................... 19
Power Brush Parts List ........................................................................................ 20
Additional Commercial Units ............................................................................... 21
Thermax Warranty .............................................................................................. 22
1

MESSAGE FROM THE CORPORATE OFFICE
Congratulations on the purchase of your new Thermax CP3
Professional Hot Water Extraction Cleaning System! In 1971,
Thermax founder Carl Parise developed the world’s first UL
approved carpet steam cleaner for the U.S. market, and has
since produced over 500,000 units sold worldwide. We have
adopted our own brand name, Thermax, which is rapidly
becoming a household name, synonymous with the industry.
In an industry full of competition and choices, we at Thermax
are grateful for your wise choice of the Thermax CP3, and
Todd Walker, CFO,
Jason Davis, CEO,
and Mark Rodie, COO
we look forward to a lasting relationship as we service all
your business needs.
Your new CP3 is a high performance workhorse. When
maintained and operated in accordance with this owner/
operator manual, it will give you years of quality service.
For over three decades, Thermax has produced fine quality,
portable, hot water extraction cleaning systems for the
home, hotel/motel, auto detail, janitorial, as well as other
commercial markets. The Thermax CP3 portable rental
system pioneered the do-it-yourself rental steam cleaner*
market, introducing America to a new way to clean carpets.
Our company and staff subscribe to the philosophy that our
relationship with you the customer doesn’t end with the sale,
it only begins. If there is any area in which we can be of
service, please call the Thermax Customer Support Center
at 1-888-764-3700.
Thank you for joining the ever-growing family of Thermax
owners. Here’s to many years of use and, most importantly,
here’s to a healthier indoor environment.
*Steam cleaning is the generic technology used to describe
the hot water extraction process of cleaning carpet.
2
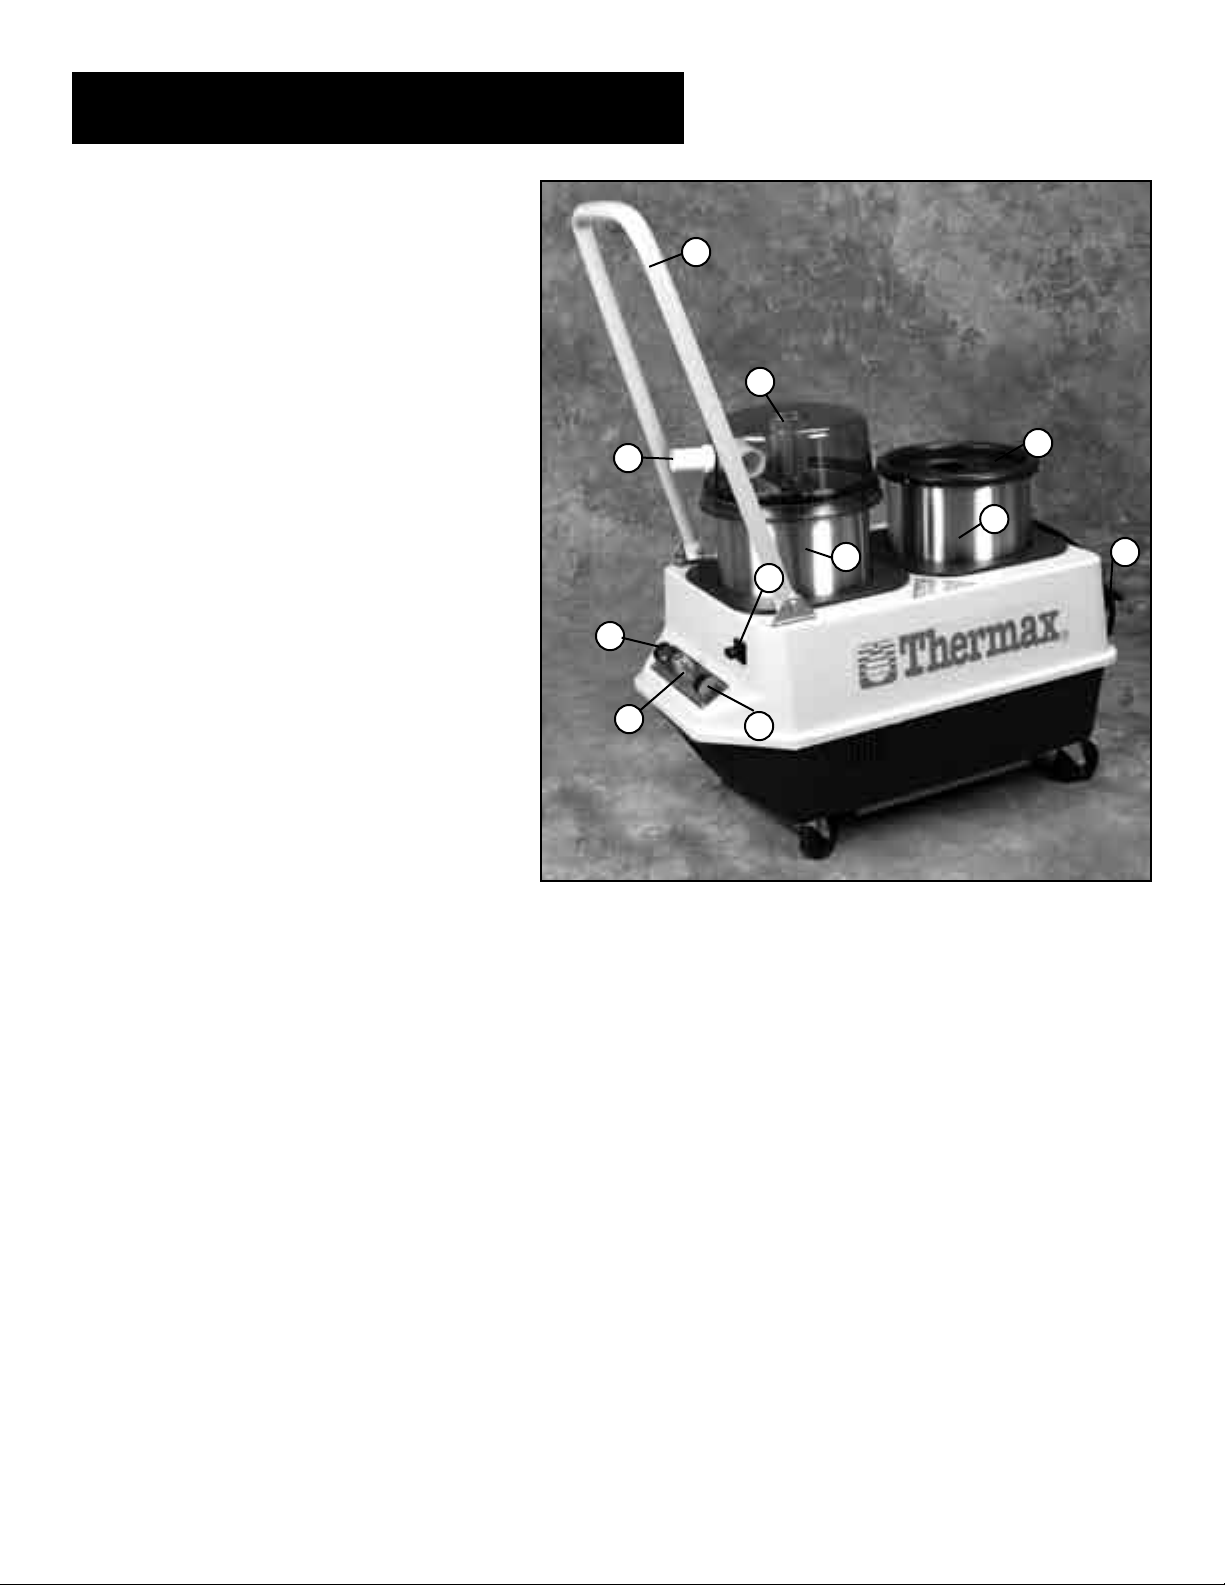
IDENTIFYING FEATURES
11
4
8
1
3
7
9
6
1) Clean Solution Tank
2) Stationary Lid with Solution Tank Fill Hole
3) Recovery Waste Tank
10
2
5
4) Recovery Tank Dome and Vacuum Seal
5) Power Cord
6) Brass Female Quick Connect Coupling
for the Solution Hose
7) Auxiliary Female Outlet for the
Optional Power Brush
8) Vacuum Inlet/Vacuum Hose Connector
9) Pump/Heater Switch
10) Vacuum Switch
11) Easy Pull Handle
3

INSPECTION UPON DELIVERY
Carefully unpack and inspect the Thermax CP3 and be sure all components
ordered are included. Orders might be packed in more than one box.
NOTE: Contact the carrier immediately regarding any damage incurred during
shipping as it is your responsibility to file a damage claim with the carrier.
IMPORTANT SAFETY INFORMATION
1) To prevent the possibility of electrical shock, always unplug the system from
the main power source before physically inspecting or attempting to repair
the system.
2) Inspect system daily, especially when used by someone else. Inspect for
damaged components such as loose wires, frayed cords, missing ground
pin, etc.
3) Only operate system when it is properly grounded. Improper grounding could
result in serious or fatal shock!
4) When operating the system around water, during flood restoration, etc.,
always outfit yourself properly with rubber-soled shoes or rubber boots and
do not set system in standing water.
5) To keep from voiding your warranty, use only those cleaning solutions
manufactured by Thermax and never use solvent based products.
6) After use, always thoroughly rinse and clean both recovery and solution
tanks. If using recovery tank to store hoses, or other miscellaneous items,
always clean items before storing them in tanks.
7) Do not operate solution pump dry.
8) Do not store where temperatures drop below freezing, as this may damage
the pump.
9) Always use defoamer in recovery tank to prevent the motor from being
damaged from overfoaming.
10) Extension cord should have a minimum rating of 12/3 (#12 cord). Extension
cord should not exceed 50 feet.
11) Never open up the system when there is water in either the solution or
recovery tank, remove the solution and waste water first.
4

SET-UP PROCEDURE
1) Pre-mix cleaning solution as required for specific application in a five gallon (19 liter) pail. Pour pre-mixed solution through
solution fill hole of system (page 3, #2).
NOTE: This system has a built-in solution heat maintenance feature, start with hot water if possible. Hot water is hygienic
and maximizes cleaning potential.
2) Add appropriate amount of defoamer to the recovery tank (page 3, #3).
3) Connect end of the vacuum hose to the vacuum inlet connector (page 3, #8).
4) Connect male end of the solution hose to female quick-connect coupling (page 3, #6), and female end of solution hose to
the male end of the cleaning wand.
5) With solution tank full and vacuum and solution hoses properly connected, plug main power cord (page 3, #5) into properly
grounded outlet.
NOTE: Plug the cord into an outlet that will be out of the way of the cleaning path, ideally a 20 amp circuit when available.
6) Your system is now ready for operation.
7) Once pre-spray, furniture removal and other carpet preparation is complete, proceed to clean carpet and/or upholstery.
NOTE: Vacuum and pump switches can now be activated to “ON” position.
EXTRACTION CLEANING PROCEDURE
1) With solution tank full and all hoses appropriately attached, activate pump switch to the “ON” position, then activate the
vacuum switch to the “ON” position.
2) Start in area of the room opposite from where you want to end.
3) Place wand about 4 feet in front of you.
4) Activate the solution spray trigger of wand.
5) Laying down an even spray of solution, pull the wand back towards you slowly.
6) Release the solution spray trigger and move the wand slowly forward over the same area just cleaned to recover additional
solution left behind. Repeat this process several times depending on the degree of carpet soiling then move over the width
of the wand, overlapping slightly to prevent streaking. For best results, work in approximately 4 foot wide sections and
always be sure to remove as much solution from the carpet as possible as this will minimize drying time.
7) When solution tank is empty and needs refilling, shut system down and repeat step 1 of “Set Up Procedure”.
8) Remove, empty and replace recovery holding tank. (page 3, #3).
NOTE: Always empty and replace recovery tank at the same time you refill the solution tank.
9) Add more defoamer into the recovery holding tank (step 2 of “Set Up Procedure”).
NOTE: With solution tank full and recovery tank empty, the system is now ready to continue cleaning. Continue the process
until cleaning is complete.
5

SYSTEM CLEAN-UP
When the carpet cleaning process is complete, it’s time to clean the system. De-activate all switches to “OFF” position.
1) Empty and rinse recovery tank.
2) Empty solution tank.
a. To empty solution tank of unused solution, turn vacuum switch to “ON” position.
b. With vacuum hose still connected to the inlet and vacuum running, drop the end of the vacuum hose (opposite the end plugged
into the vacuum inlet) down through the solution tank fill hole (page 3, #2) and SLOWLY remove the unused solution from
the solution tank until empty. The system will transfer the solution to the recovery waste tank for disposal. In the process, the
solution cleans out the inside of the vacuum hose.
NOTE
c. Deactivate and unplug the system
d. Empty the recovery tank and clean.
e. Remove vacuum and solution hose from system. Wipe down all exterior areas of the system.
3) Your CP3 system is now ready for storage until the next job!
: Take caution to remove the solution SLOWLY! Make sure to rinse solution tank with the plain hot water to minimize
chemical build-up. After rinsing solution tank, transfer rinse water in the same manner mentioned above.
GENERAL SYSTEM MAINTENANCE
DAILY (At the conclusion of each work day)
1) Empty, rinse and clean solution and recovery tanks with plain hot water thoroughly cleaning dirt and obstructions from inside the
tanks.
2) Clean vacuum and solution hoses thoroughly.
3) Run plain hot water through solution tank and pump to prevent any chemical build-up.
4) Wipe down all exterior surfaces with an all-purpose type cleaner, then apply a light coat of vinyl protectant to all exterior surfaces.
5) Lubricate couplings, hinges and wheels with silicone-type spray.
6) Inspect the solution tank filter and recovery tank dome filter for hair and debris. The filter should always be kept clean and
unobstructed.
7) Inspect electrical cord for damage or fraying and repair as necessary.
8) Store unit away from direct sunlight and freezing temperature.
MONTHLY
1) Inspect internally for:
a. Loose nuts and/or screws
b. Leaking hoses
c. Loose wiring
d. Anything that doesn’t appear correct
2) Flush the system with 2 cups white vinegar per gallon of hot water solution. Follow by circulating plain hot water through the
system via the solution tank. This helps reduce and neutralize any alkalai and chemical build-up.
NOTE: To prevent shock hazard, remember to unplug main power source before inspection or repair of the system.
ANNUALLY
We recommend that your system be inspected once a year by an authorized Thermax service technician. For the location of your
nearest Service Center, call 1-888-764-3700 or go to thermaxaf.com.
6
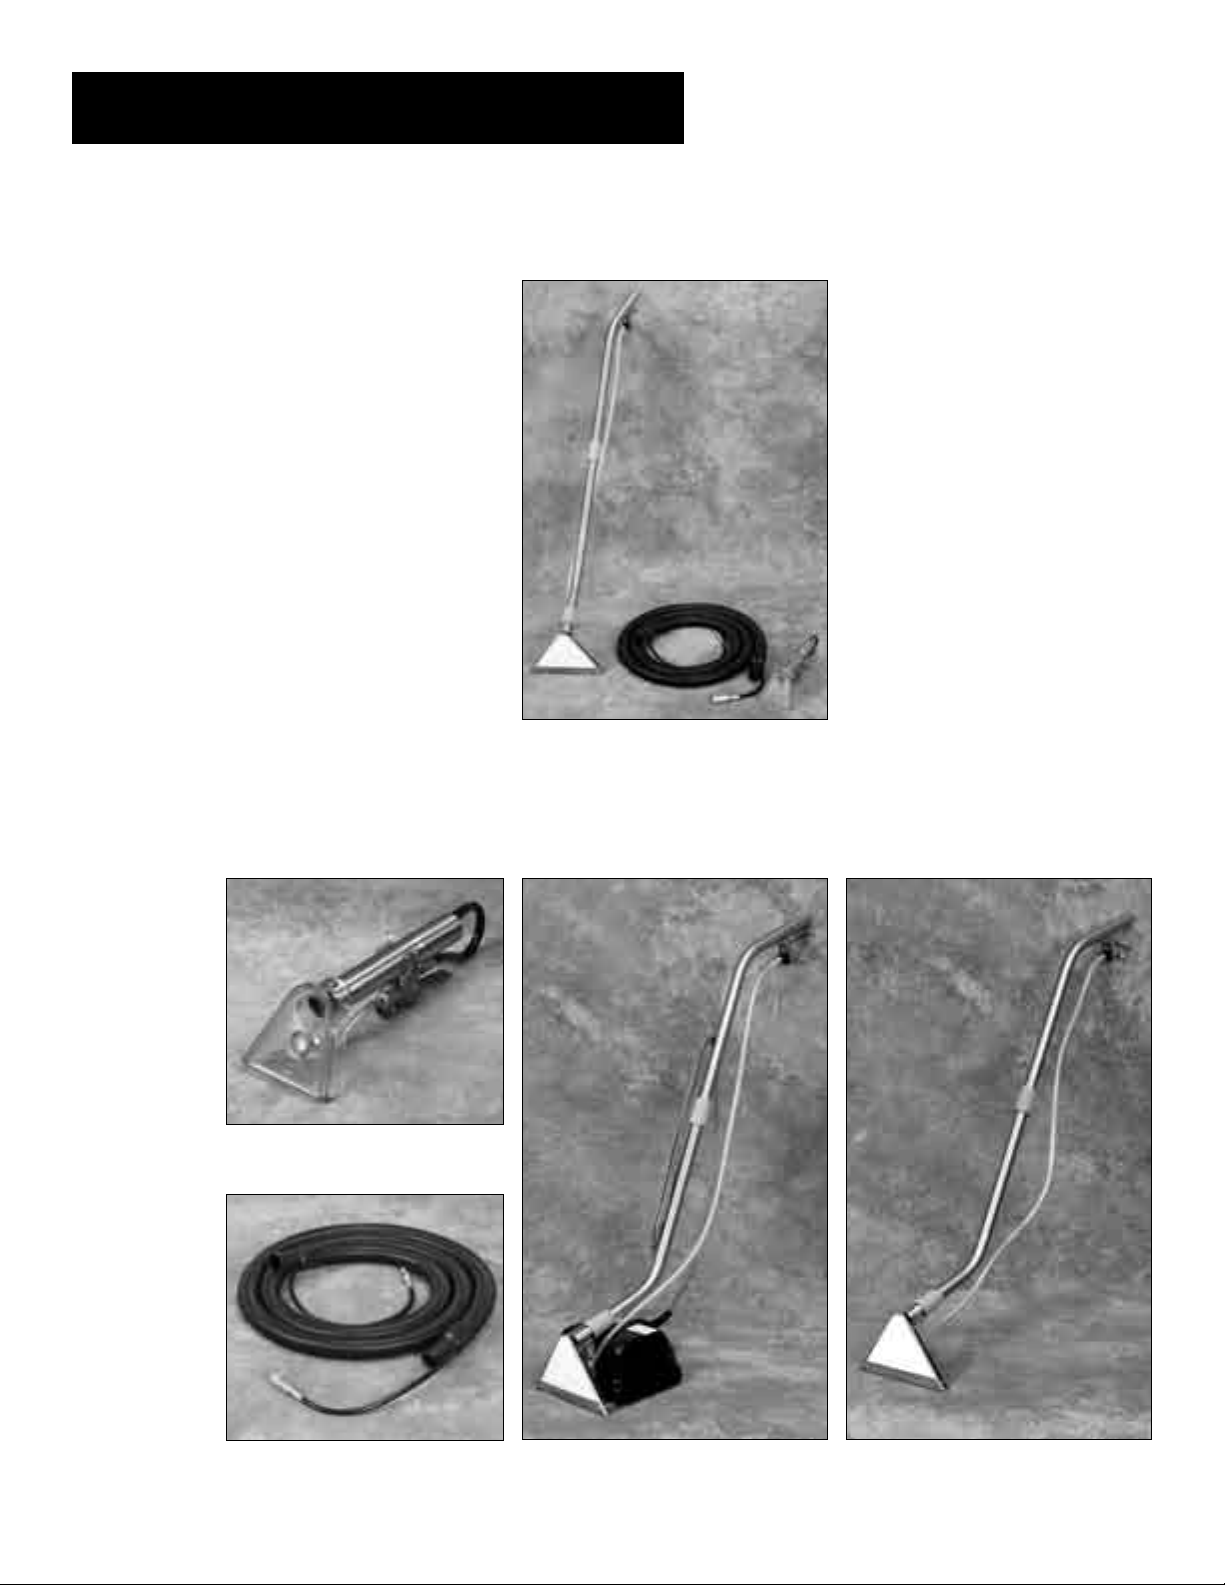
OPTIONAL PACKAGES & ACCESSORIES
The following optional packages and accessories do not come standard with your CP3. Contact
your local distributor or the Corporate Office to receive details on how to purchase these items.
CLEAR VIEW HAND WAND
PART # 35-255-004
DELUXE RENTAL PACKAGE
PART # 32-700-HAH
Includes: Clear View Floor
Wand, Upholstery Wand,
& 10’ Hide-A-Hose
10’ HIDE-A-HOSE
PART # 10-HAH-3
PB309 – OSCILLATING
POWER BRUSH
PART # 80-012-121
7
CLEAR VIEW FLOOR WAND
PART # 29-760-325-1
 Loading...