

Therma-Tru Smooth-Star, Fiber-Classic User Manual

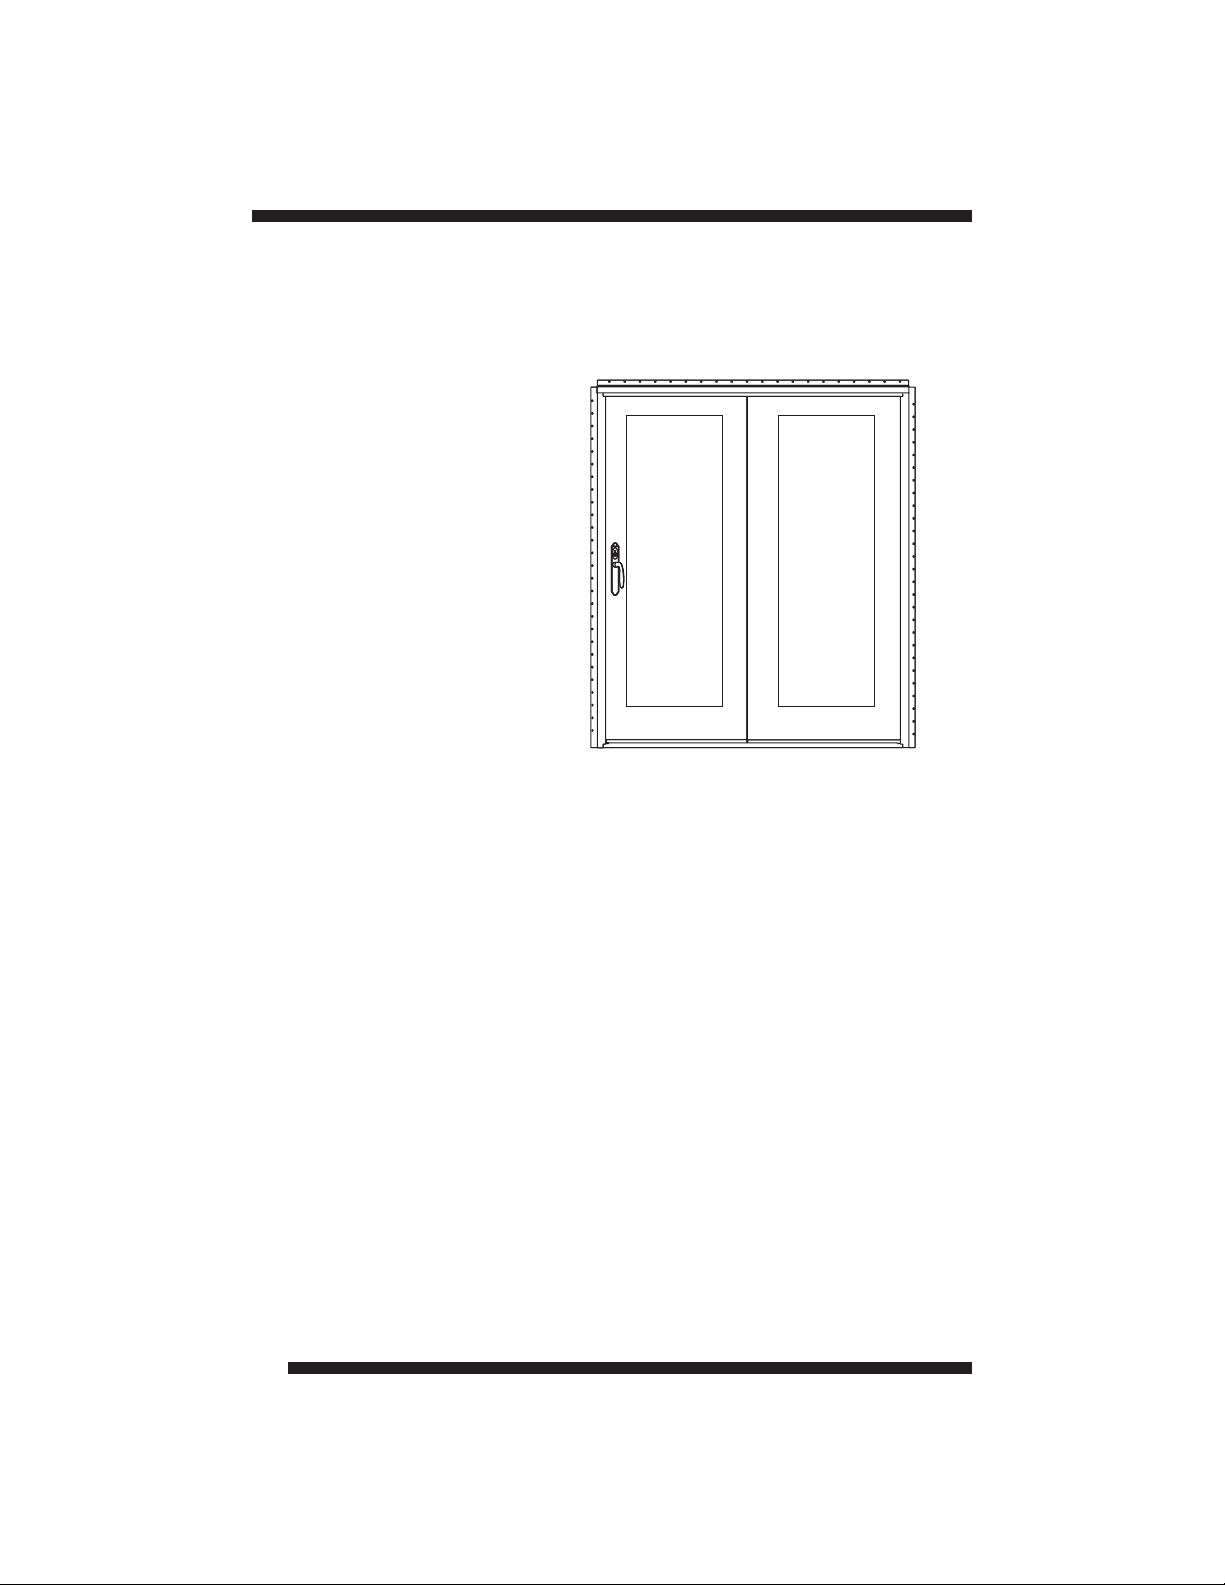
PATIO
DOOR
SYSTEMS
Therma-Tru
Fiber-Classic
and
Smooth-Star
Sliding Patio
®
®
®
Door System
Double Unit
Assembly & Installation
Read all instructions before starting.
The applicable standards for these products are governed by
the International Residential Code.
Copies of performance ratings and testing are available on our website
www.thermatru.com and our product manual.
The following packages are needed to complete the installation of your
Sliding Patio Door System.
Check all components for correct size and color.
Frame Kit
1-Head Jamb
2-Side Jambs
1-Sill
1-Active Interlock
1-Inactive Interlock
1-Panel Bumper
12-#10 x 3" Flat Head Screws
12-#8 x 3" Pan Head Screws
1- This Instruction Booklet
2- Anchor Blocks
2- #10 x 1 Pan Head Screws
2- #10 x 2 Pan Head Screws
½"
½"
Active
Panel
Inactive
Panel
1-Sill Cap Base
1-Sill Cap Top
1-Drip Cap
1-Head Sealing Fin
2-Corner Pads
1-Foot Bolt
1-Foot Bolt Keeper
1-#8 x 1 S.S. Pan Head Screw
½"
2-#8 x 1" S.S. Pan Head Screws
2-Active Panel Hole Plug
3-#8 x 9/16" Pan Head Screw
1-Jamb Cover
Touch Up Paint
Additional Parts
Strike Plate
Handle Set Kit
7 - #8 Flat Head Screws
2-Handles
1-Exterior Backplate
1-Interior Backplate
2-Keys
2-Handle Screws
3-Phillips Head Machine Screws
1-Allen Wrench
2-Backplate Gaskets
Tools and materials needed for
assembly and installation:
• 100% Silicone Sealant and Caulk Gun
• 6' Level
• Measuring Tape
• Electric Drill
• #2 Phillips Drive Bit
• Staple Gun or Brad Nails
• 1/8 Drill Bit
1-Screen (sold separately)
1-Active Panel
"
• Screwdriver
Phillips Head
• Gloves
• Safety Glasses
1-Inactive Panel
• Partial roll of nsulation
I
• Shims
•
Rubber Mallet
Therma-Tru
®
Note: Due to ongoing product development, Therma-Tru Corp. reserves the right to make changes in
1
design, materials, and specifications without notice.
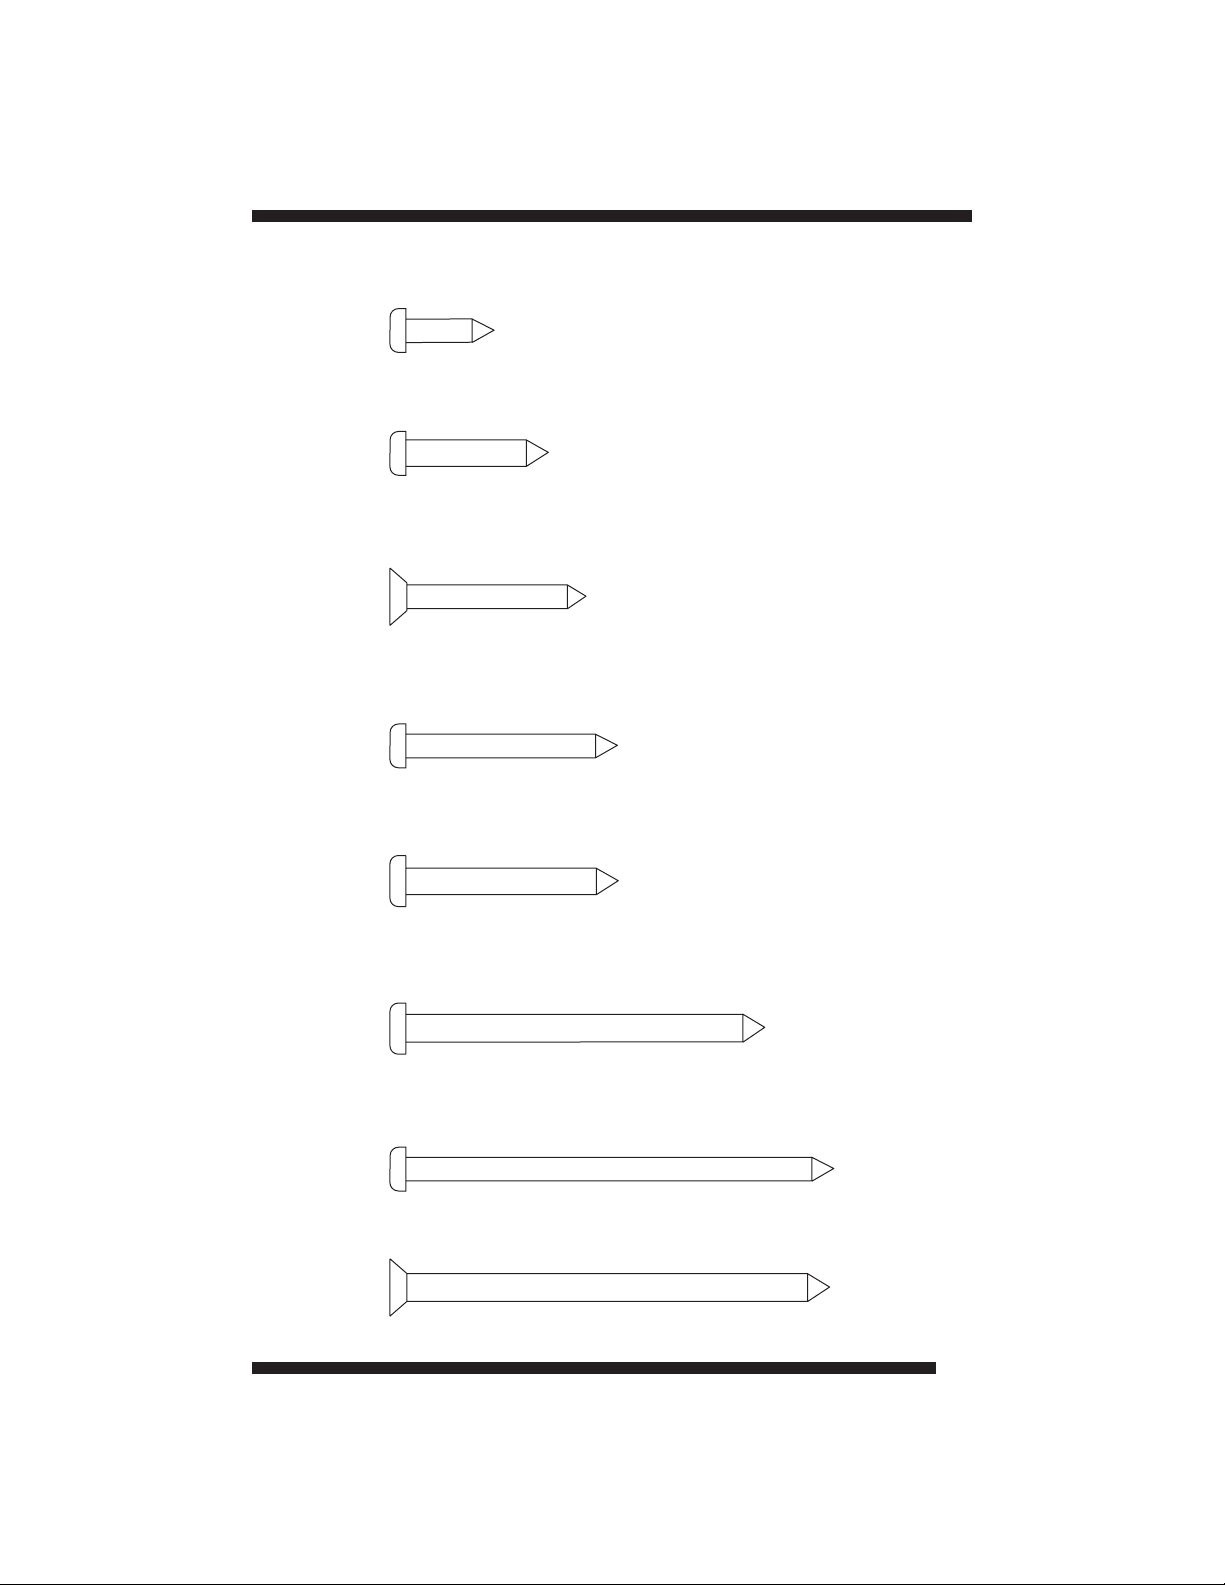
SCREW CHART
#8 x 9/16" S.S. Pan Head Screw
#8 x 1" S.S. Pan Head Screw
#8 x 1 3/8 Flat Head Screw"
#8 x 1 S.S. Pan Head Screw½"
#10 x 1 Pan Head Screw½"
#10 x 2 Pan Head Screw½
#8 x 3" Pan Head Screw
#10 x 3" Flat Head Screw
2
NOTE:
A large work area is needed to assemble the frame kit. Cover area with
cardboard from one or more door panel cartons to protect frame parts
and floor.
LAY FRAME COMPONENTS ONTO WORK AREA
1
Frame Assembly
Lay parts on floor and position sill, head,
and side jambs with exterior side up.
Exterior
IF APPLICABLE, INSTALL TOP-HUNG SCREEN
2
Side Jamb
Sill
Head Jamb
Side Jamb
TRACK
For units using the wide profile top-hung screens, install top-hung screen track and
adapter into head jamb prior to assembly.
Reference steps 1 thru 4 of the “Wide Profile” Screen Installation - Sliding Patio
instructions, included with the top-hung screen, for complete details.
INSTALL SILL CAP BASE
3
Engage groove in sill cap base with sill.
Rotate sill cap base down to snap into place.
Use a rubber mallet if necessary.
Sill cap base
3
ATTACH SILL TO JAMBS
4
NOTE: Be sure that foam pads are in place before assembling frame.
Sealant
Jamb
Sill
Pads
Apply sealant here
INACTIVE side ONLY
Apply sealant to sill and side
jambs as shown.
Fasten side jambs to sill through
pre-drilled holes using (3) #10 x 3
flat head screws. (Starting with
center screw is recommended.)
Repeat of opposite side.
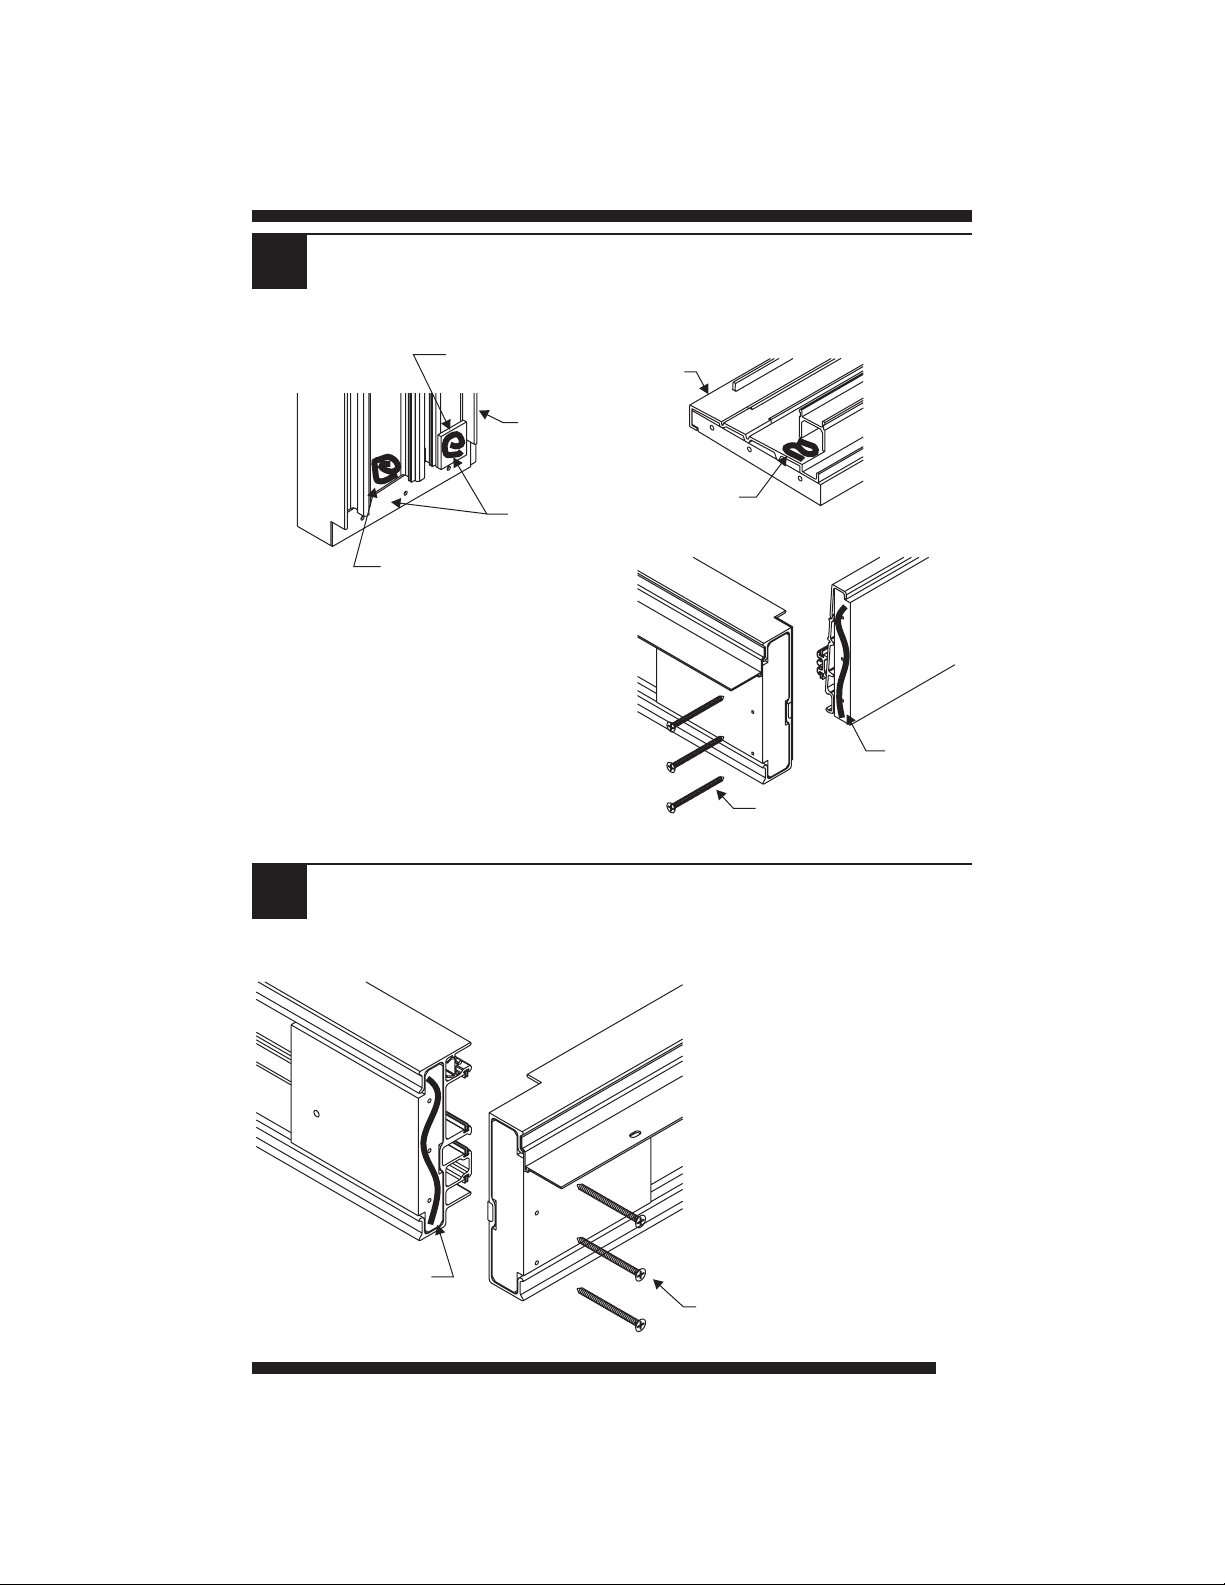
ATTACH HEAD TO JAMBS
5
Head Jamb
"
Side Jamb
Sealant
Jamb
Sill
Sealant
#10 x 3” flat head screw
Apply sealant to end of head
jamb.
Fasten side jambs to head jamb
through pre-drilled holes using
(3) #10 x 3 flat head screws.
"
(Starting with center screw is
recommended.)
Sealant
Repeat for opposite side.
#10 x 3” flat head screw
4
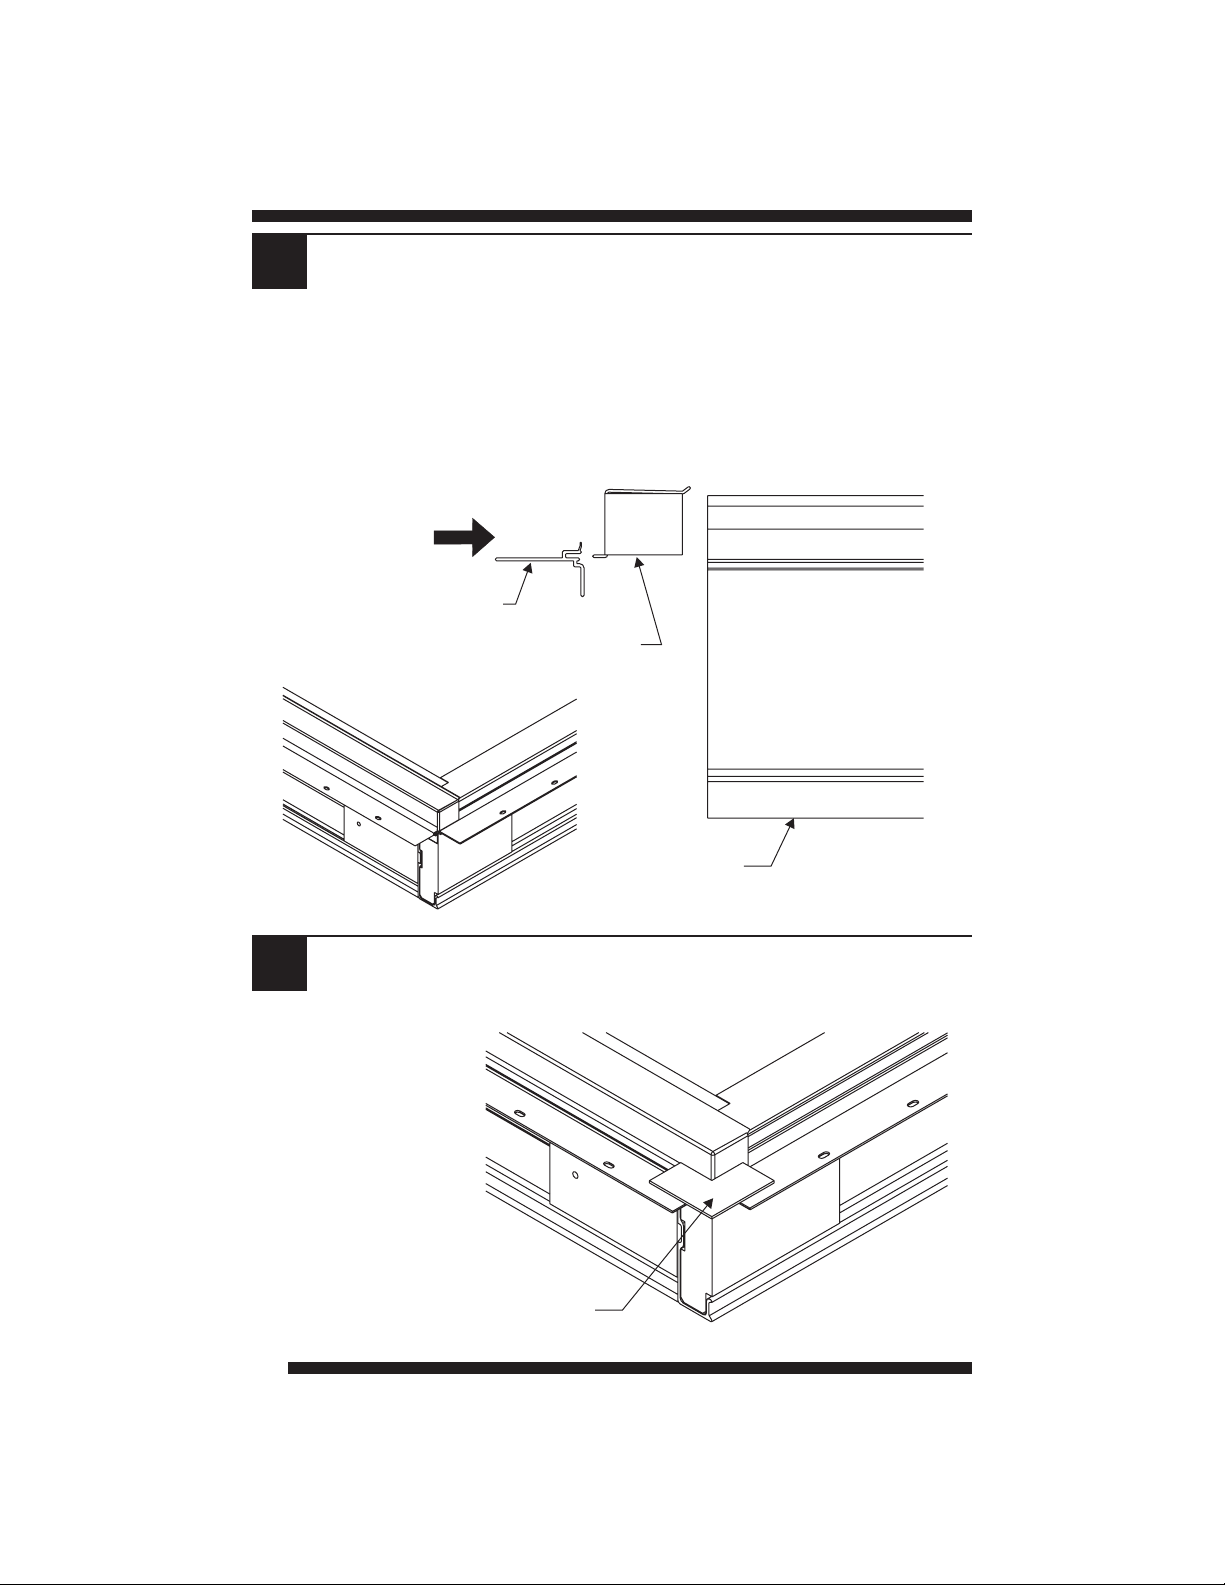
DRIP CAP INSTALLATION
6
Place drip cap on top of head jamb.
Place head sealing fin on top of drip cap, engaging slot in
sealing fin with flange on drip cap.
Staple head sealing fin to each of the anchor blocks in
head jamb using 1/2" staples, nails or screws (not provided).
Head sealing fin
Drip cap
APPLY CORNER PADS TO SEALING FIN
7
Apply corner pads to
sealing fins at top corners.
5
Side jamb
Exterior
Corner pad

Wall
straight?
Check each
side both
ways.
Frame Installation
Check rough opening as follows and correct if necessary:
• Sub-floor to be flat, level, and clean. Sill must be supported throughout
its entire length.
• All four corners to be square. Check with a framing square.
• Framing and walls to be plumb. Use a 6-foot level to check both sides
of opening.
• All wall surfaces to be straight and sides parallel.
• Opening to be correct size. Allow 3/8 on sides and at head."½"
Check floor
under sill.
Wall
straight?
Check all four
corners with
square.
6
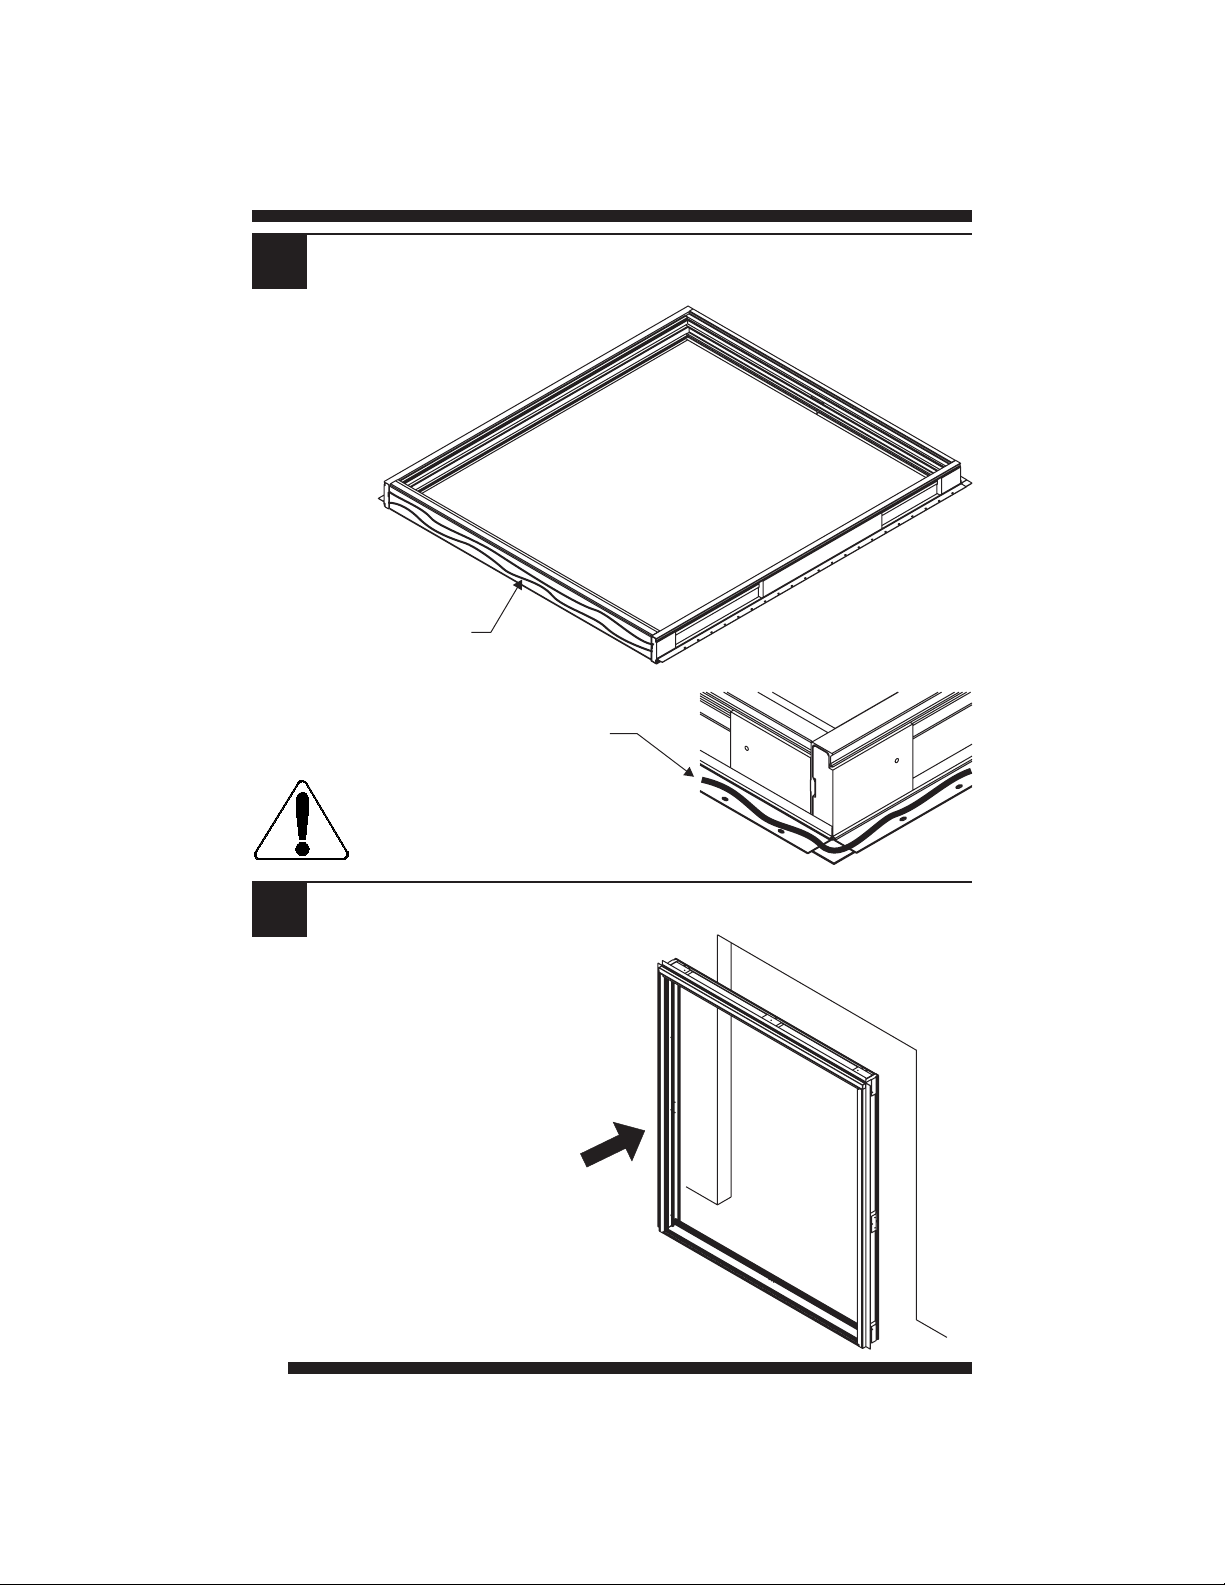
APPLY SILICONE SEALANT TO SILL AND FINS
8
Run continuous beads of sealant
across entire length of sill bottom
and around entire perimeter of
backside of sealing fin to
provide a weather-tight seal.
Sealant
Sealant
NOTE:
CONTINUOUS BEADS OF
SEALANT ARE REQUIRED.
SET UNIT INTO ROUGH OPENING
9
From outside of house, set system
into rough opening. Apply pressure
on sill to set sealant.
7
Exterior
 Loading...