

Therma-Tru Doors Repair and Replacement

SITE 5 Repair and Replacement
Repairing Therma-Tru Door Slabs ...................5.3
Sidelite Slab Replacement ................................ 5.6
Mull Post Replacement ................................... 5.13
Weatherstrip Replacement ............................. 5.21
Adjustable Sill Threshold Replacement ........ 5.23
Basic Fixed Sill
Vinyl Threshold Replacement ........................ 5.25
Doorlite Glass and Frame Replacement ........ 5.29
Storm Door Strip Application
(Continuous Sill) .............................................. 5.31
SITE 5 2014 5.1
Replacement
Repair and

Repair and
Replacement
5.2 2014 SITE 5
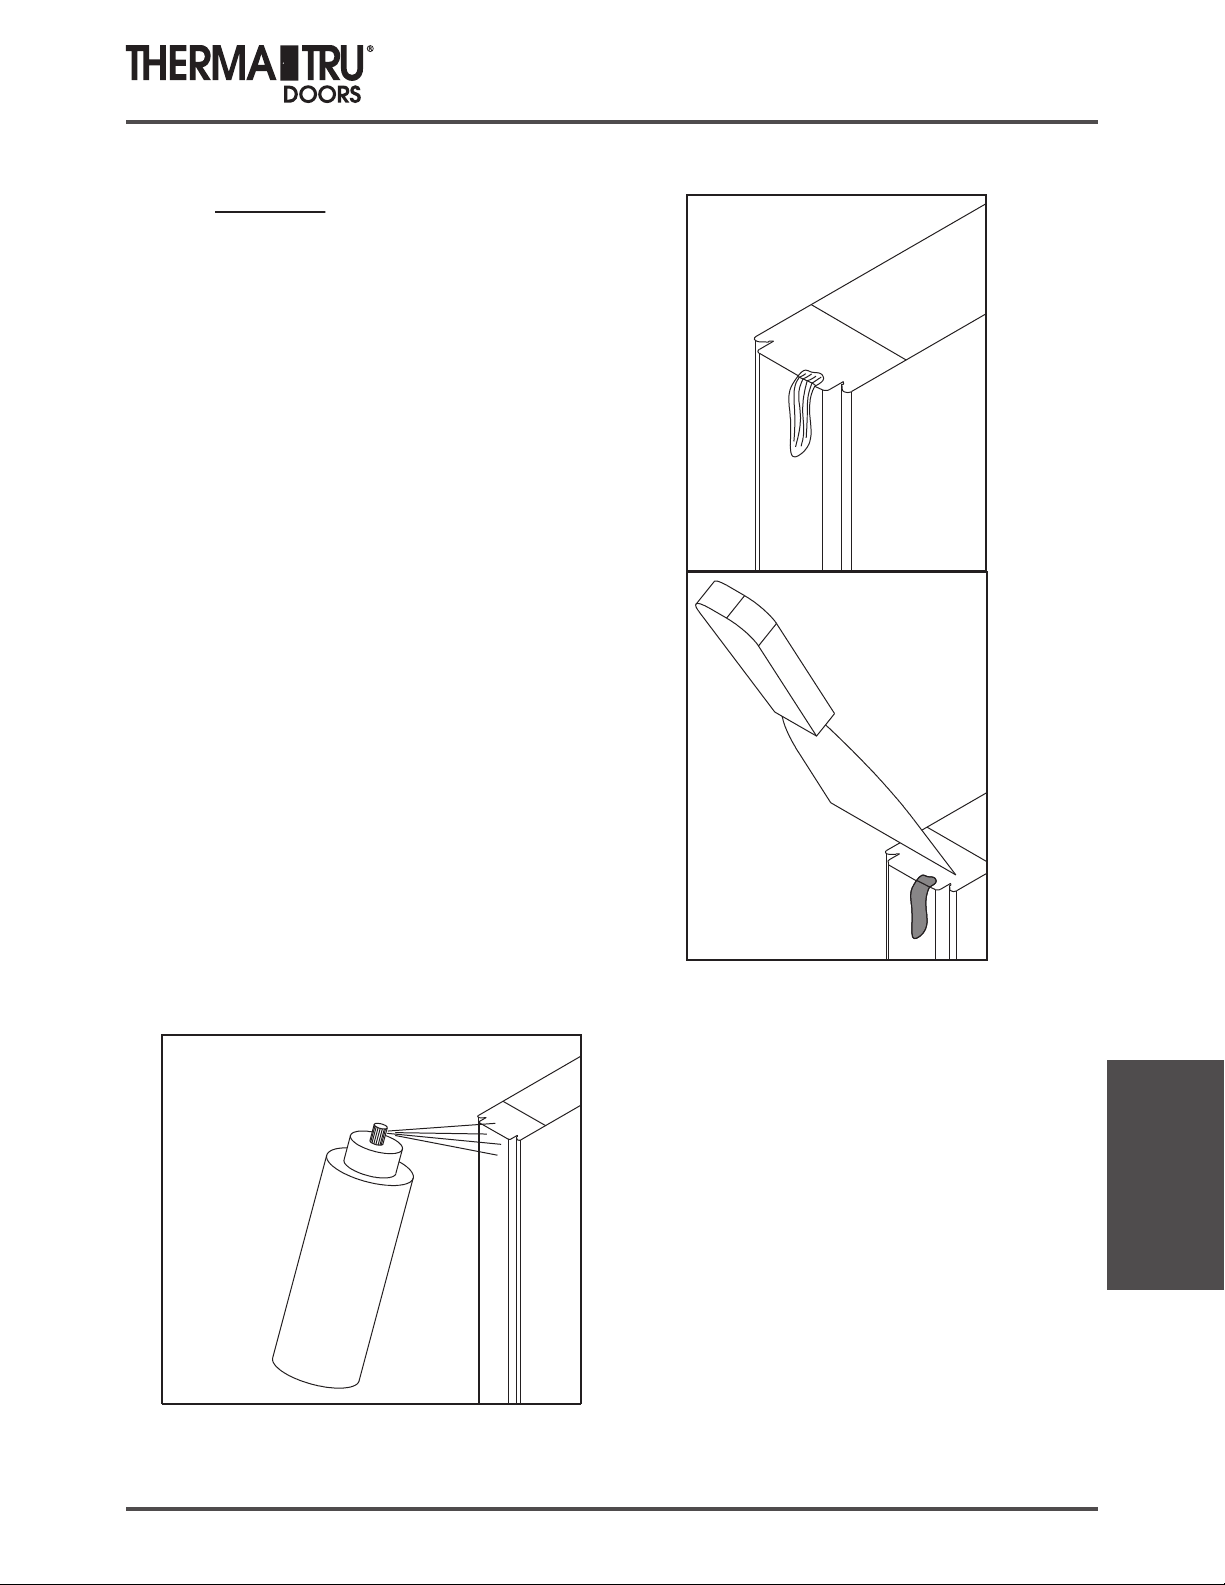
Repairing Therma-Tru Door Slabs
Stile Chips
Fill Chips and Sand Smooth
Fill minor cosmetic damage to wood
stiles with a hardening type wood putty.
File and sand smooth.
Reprime Area Using Touch-up Paint
SITE 5 2014 5.3
Replacement
Repair and
Repairing Therma-Tru Door Slabs
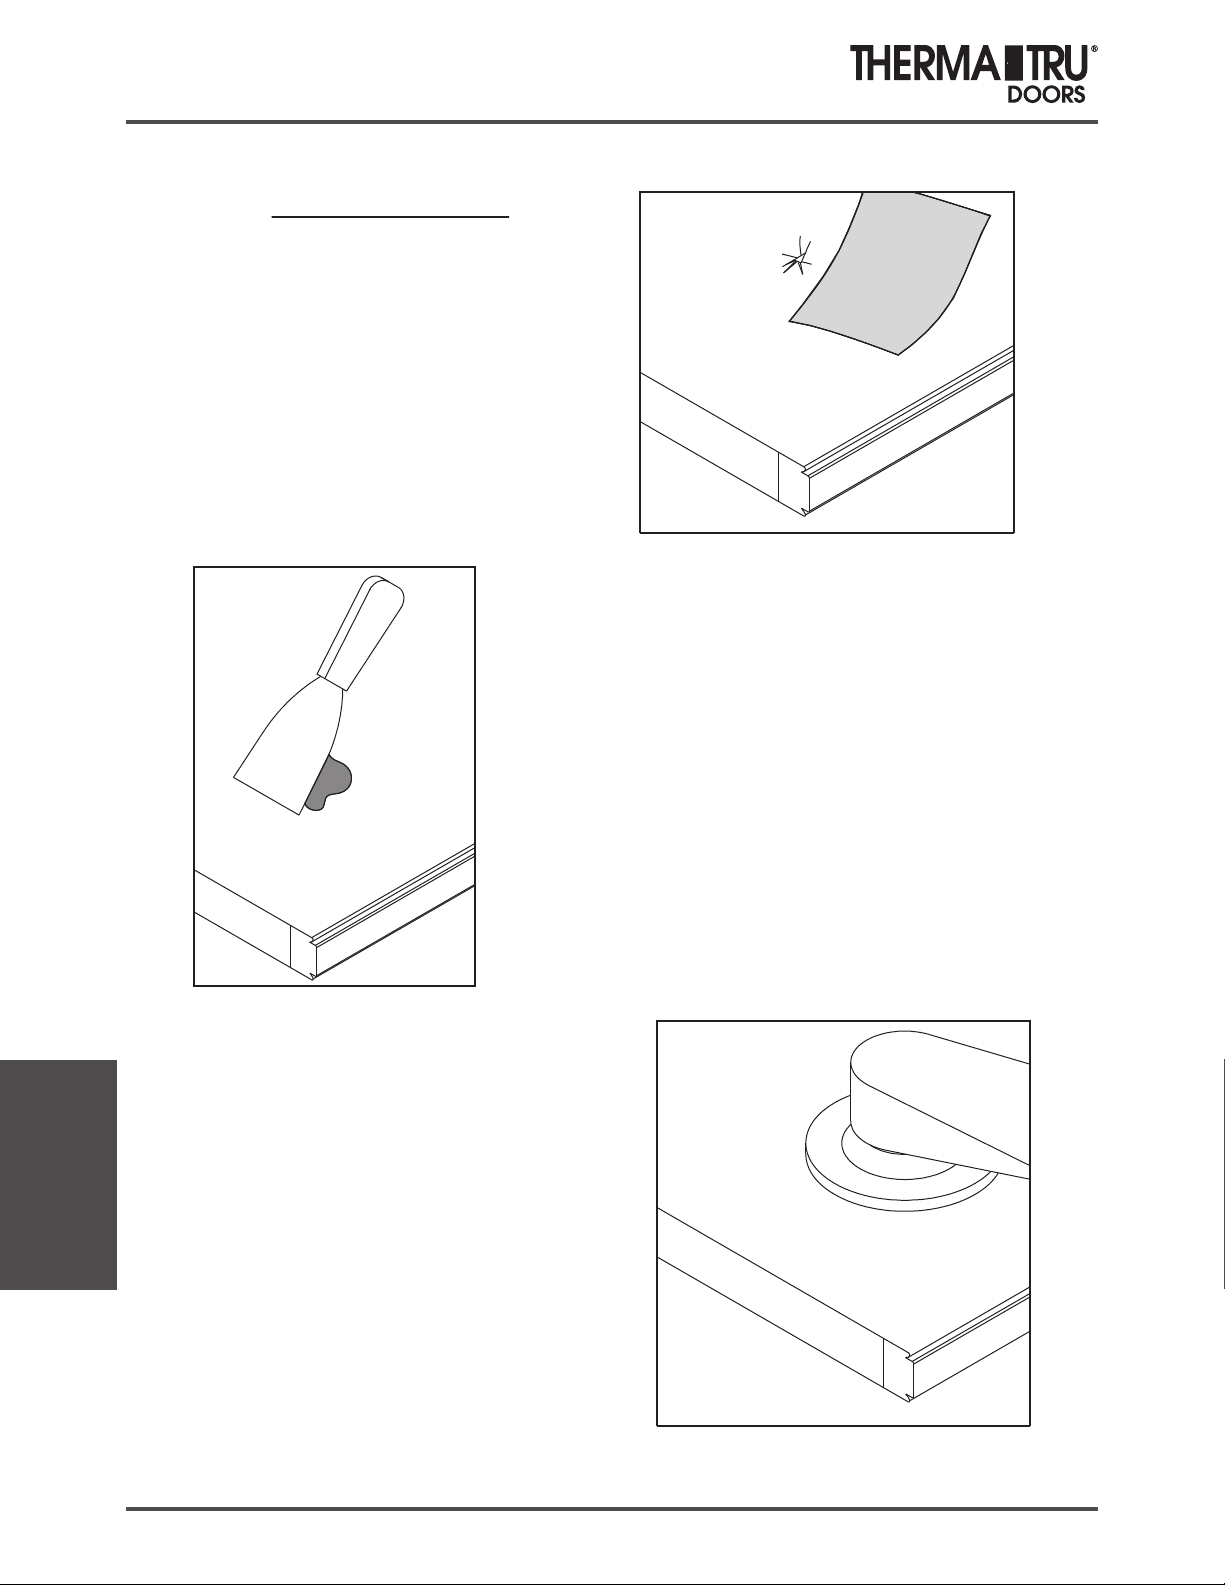
Steel Door Dent Repair
Clean and Roughen Surface
Clean surface surrounding dent.
Roughen using 100 grit sandpaper.
If possible, do not sand through
the existing factory-applied primer.
Fill Dent
Fill dent using Therma-Tru Dent Repair
Kit (Part # MS00DRK) or an automotive
body-filler compound.
Repair and
Replacement
Smooth using a wide-blade putty knife.
Overfill to account for shrinkage and
sanding.
Sand Dent Repair
Sand repair using a large sanding block
or orbital power sander with 220 grit
sandpaper.
5.4 2014 SITE 5
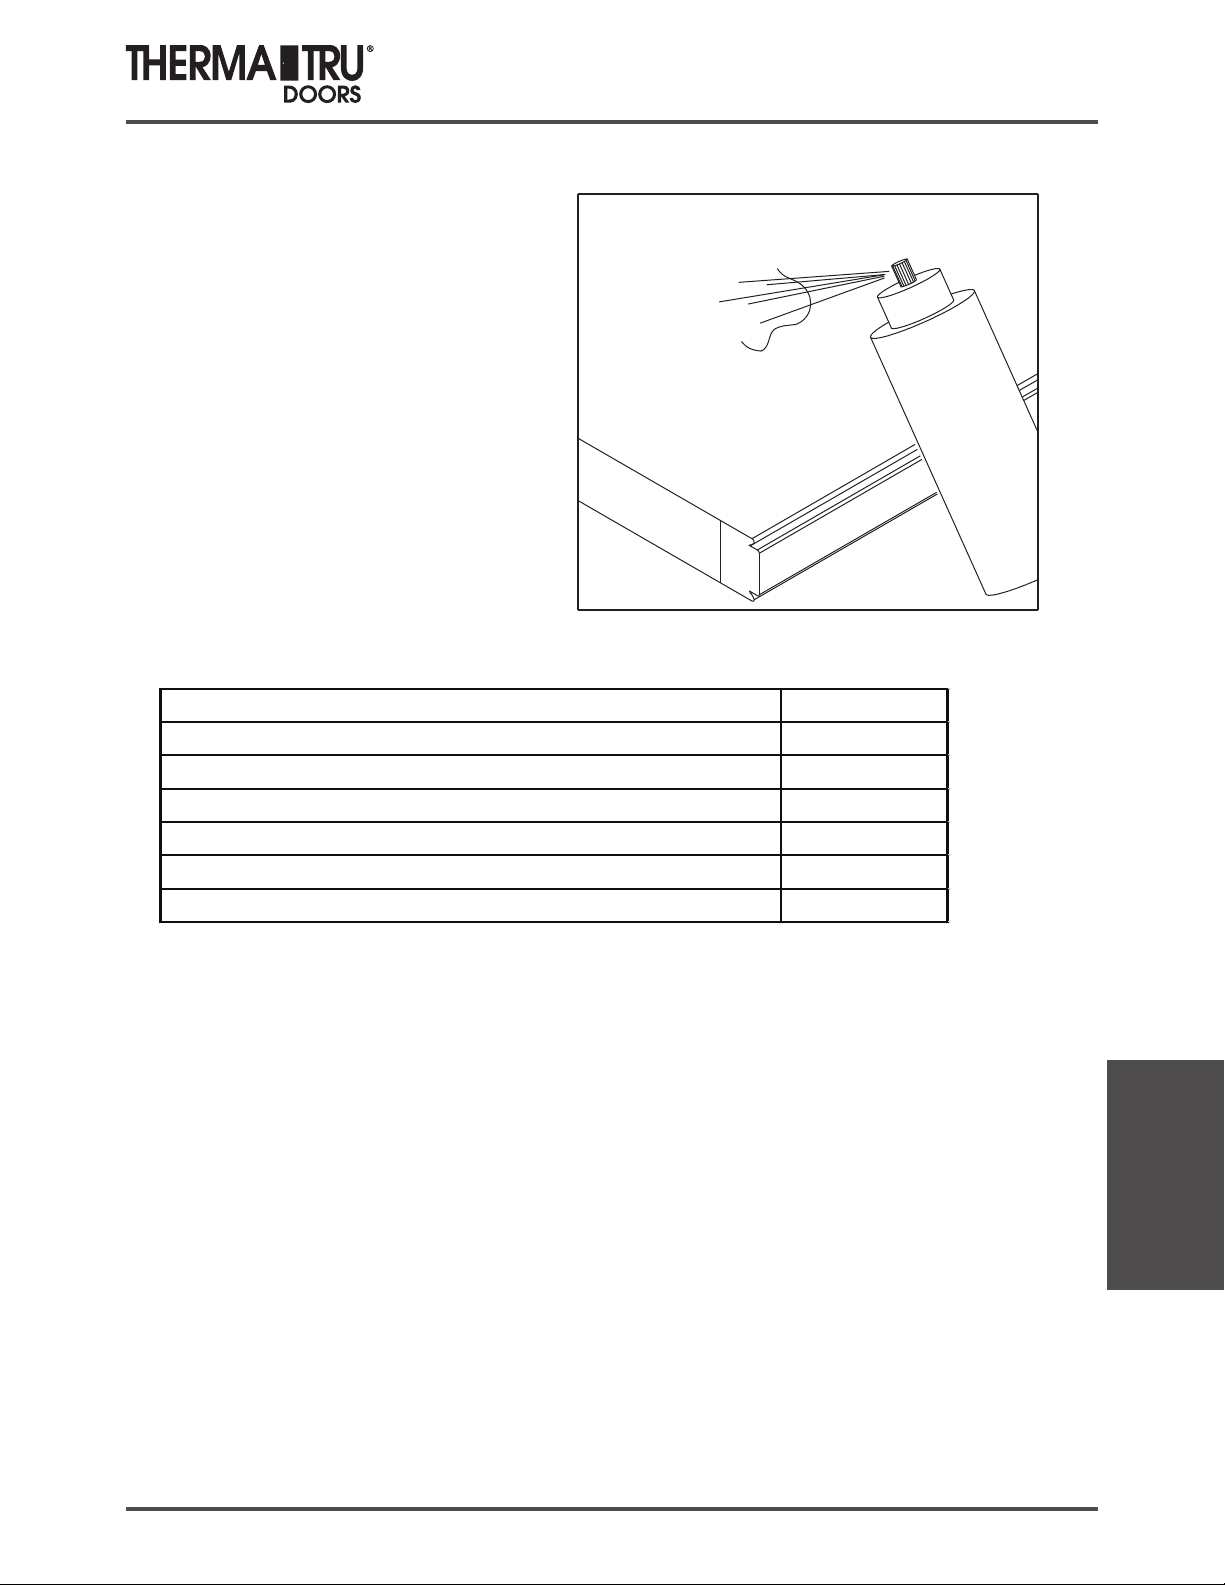
Re-prime Repair Area(s)
If bare metal was exposed, paint
entire repair area with a primer
containing rust inhibitors.
Re-prime repaired area using
Therma-Tru touch-up primer. If a
rust inhibiting primer was used, let
dry thoroughly before applying
Therma-Tru touch-up primer.
THERMA-TRU TOUCH-UP PRIMERS
Repairing Therma-Tru Door Slabs
Descripon Part Number
Steel White Primer MSWHABP-01
Classic-Cra Canvas, Oak, Rusc, and Fiber-Classic Primer MSCCAB-01
Classic-Cra Mahogany Primer MSCCMAB-01
Smooth-Star Primer MSWHSABP-03
Steel Edge Door Primer MSWHSED
Steel Frame Primer MSWHAF2
Classic-Craft, Fiber-Classic and Smooth-Star Skin Repair
For minor scratches in Classic-Craft Canvas, Oak, Rustic or Fiber-Classic doors, use Classic-Craft &
Fiber-Classic Primer (Part # MSCCAB-01) to touch up.
For minor scratches in Classic-Craft Mahogany doors, use Primer (Part # MSCCMAB) to touch up.
For minor scratches in Smooth-Star doors, use Smooth-Star White Primer (Part # MSWHSABP-03)
to touch up.
Replacement
Repair and
For deep scratches, fill with crayon or patch pencil.
Therma-Tru does not recommend any other repair procedures for composite doors.
SITE 5 2014 5.5
Sidelite Slab Replacement
Remove Cove Molding and
Inside Vertical Casing if applicable
Remove and set aside cove molding.
If post between sidelite and door is two
“mulled” jambs, remove casing there also.
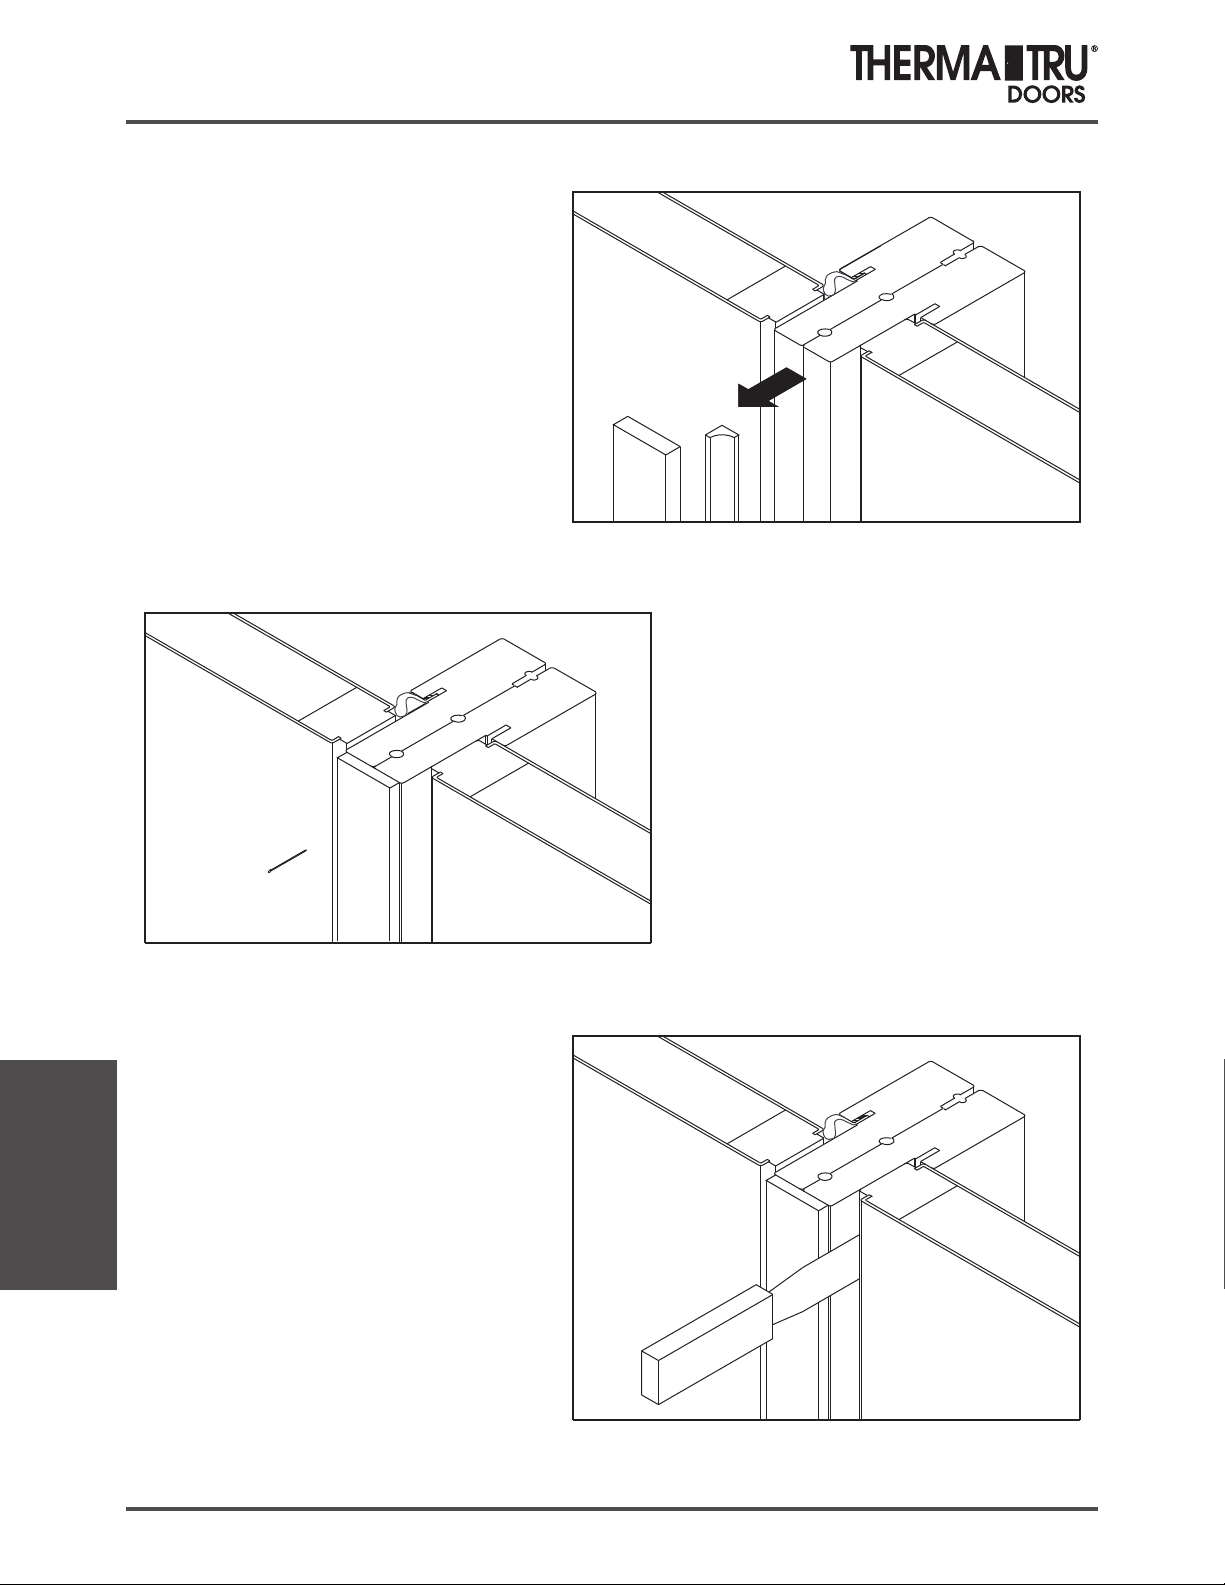
Tack on Protective Strips
Tack on softwood strips to protect jamb
and mullion faces adjacent to sidelite
slab.
Repair and
Replacement
Locate Fasteners
Find fasteners by running a putty
knife blade in the margins and
marking the locations.
5.6 2014 SITE 5
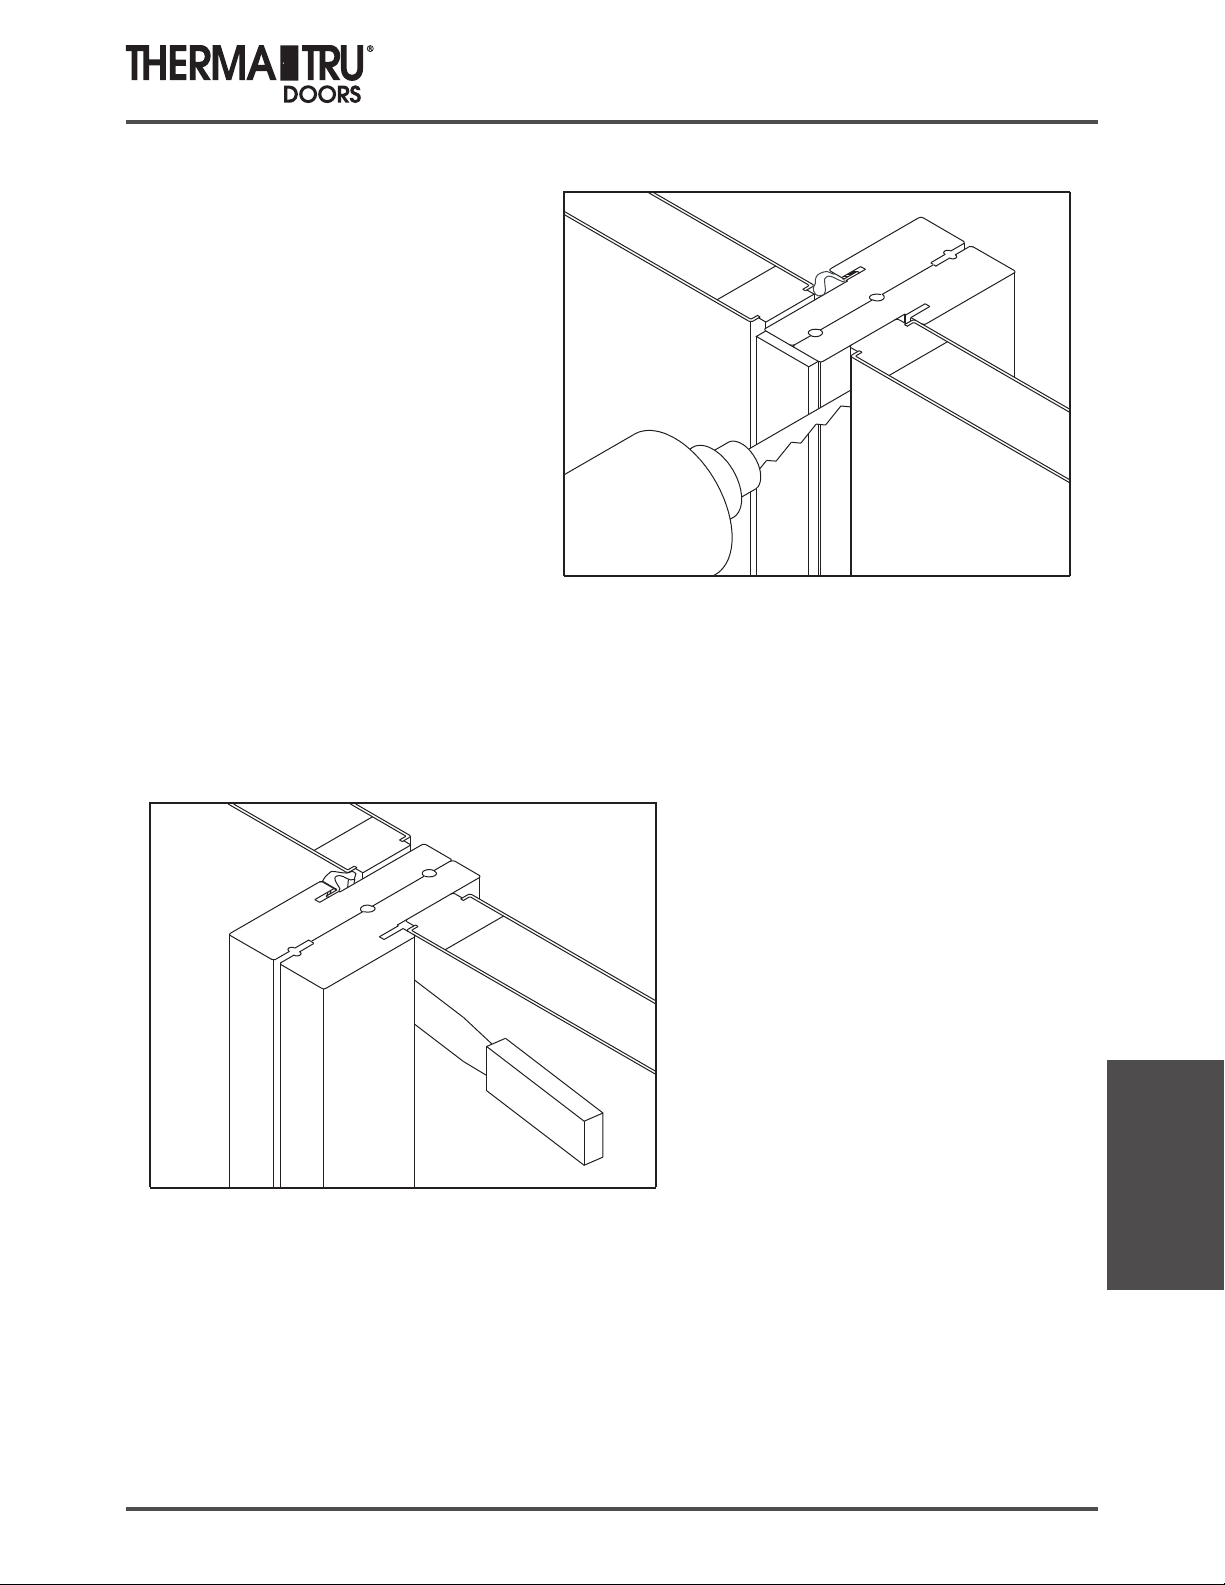
Cut Through Fasteners
Use a reciprocating saw with a metal
cutting blade to cut through fasteners.
Run sawblade in margin.
Remove softwood strip.
Sidelite Slab Replacement
Cut Sealant Joints
On outside face of unit, use putty knife
and cut through sealant joints along head
and at sides.
Replacement
Repair and
SITE 5 2014 5.7

Sidelite Slab Replacement
Remove Slab
Push slab through from outside.
Repair and
Replacement
Prepare Opening for New Slab
Cut away and clean off all old caulking.
Cut away all old fasteners flush with
Frame.
5.8 2014 SITE 5
Sidelite Slab Replacement
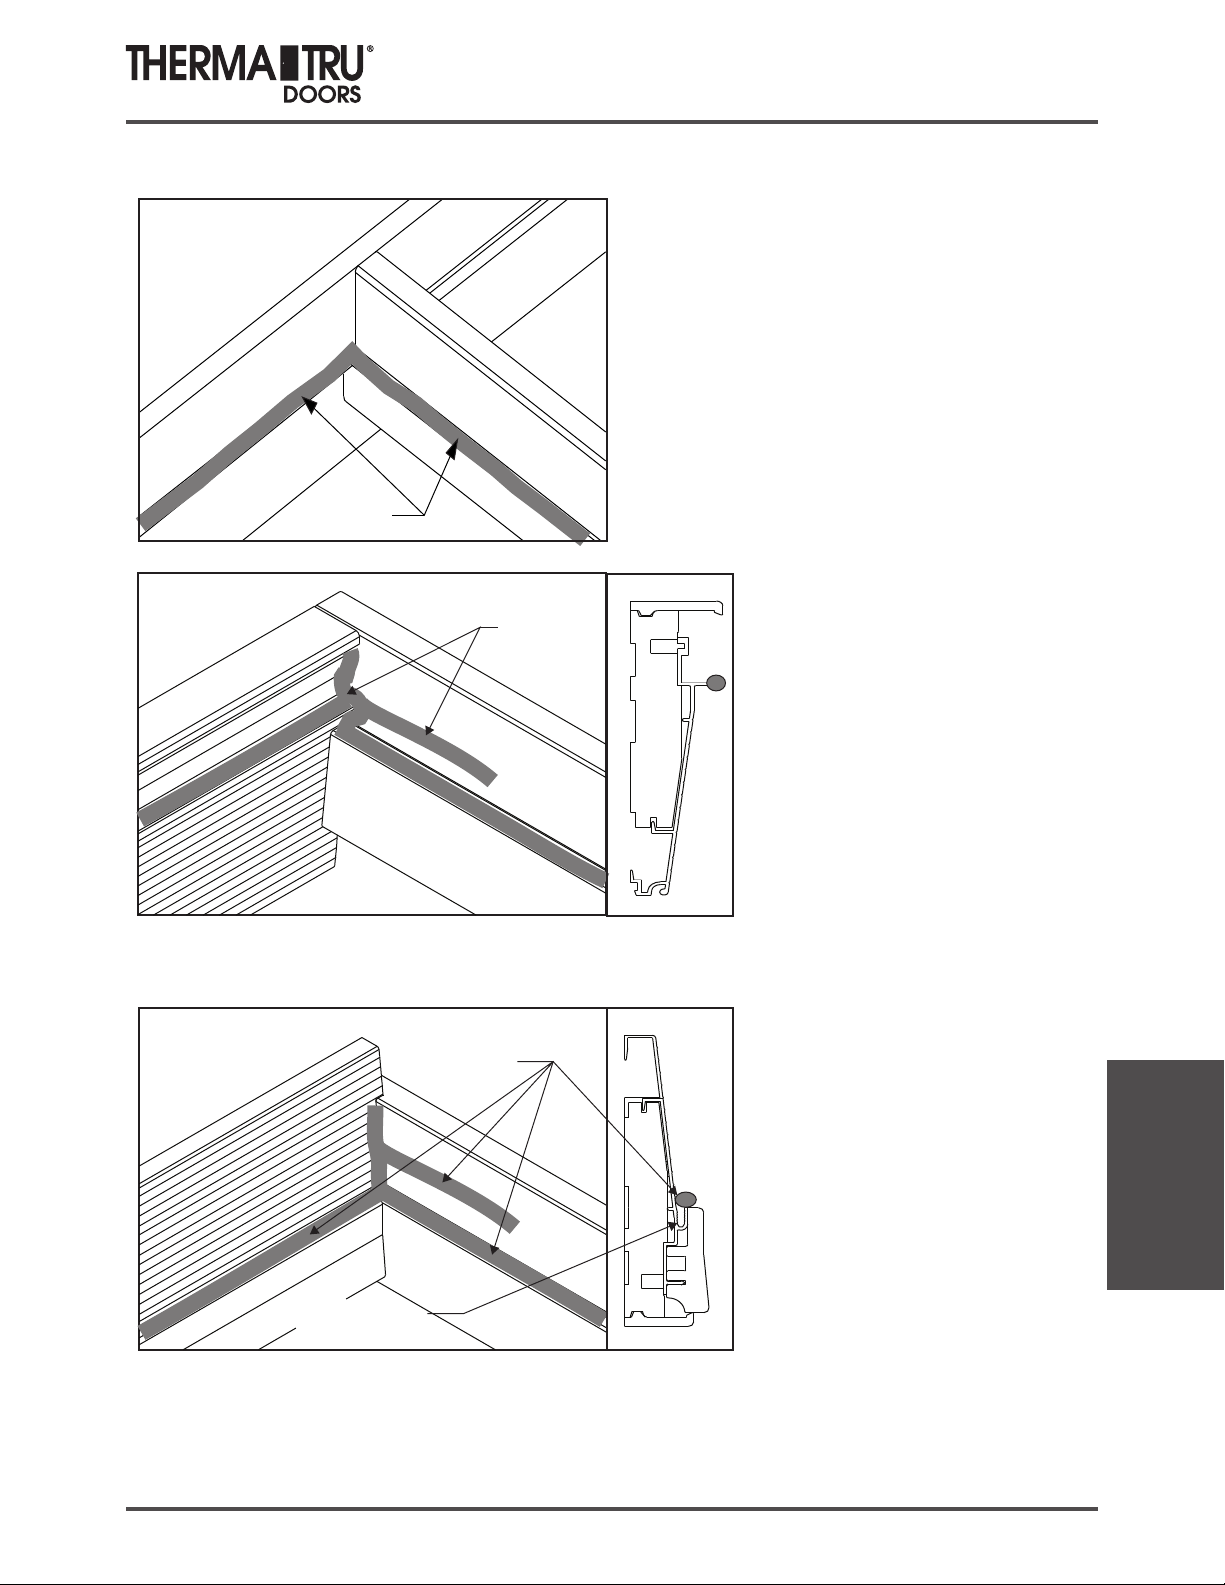
Mullion system shown
Head
Sealant
Mullion
Sealant
Seal Perimeter
Apply 1/4” bead of (Elastomeric or
Polyurethane) sealant around entire
perimeter on jamb and/or mullion stops.
Inswing Sill
Apply a generous amount of
(Elastomeric or Polyurethane)
sealant at joints where sill and
jamb/mullion meet.
Apply a 1/4” bead of (Elastomeric
or Polyurethane) sealant
approximately 1” above
weatherstrip kerf, 6” long.
Inswing
Weatherstrip
channel
Outswing
Sealant
Outswing Sill
Apply a 1/4” bead of
(Elastomeric or Polyurethane)
sealant on saddle surface that
contacts door face.
Apply a generous amount of
sealant at joints where sill and
jamb/mullion meet.
Apply a 1/4” bead of (Elastomeric
or Polyurethane)sealant approx
1” above weatherstrip kerf, 6”
long.
Replacement
Repair and
.
SITE 5 2014 5.9
 Loading...