

Page 1
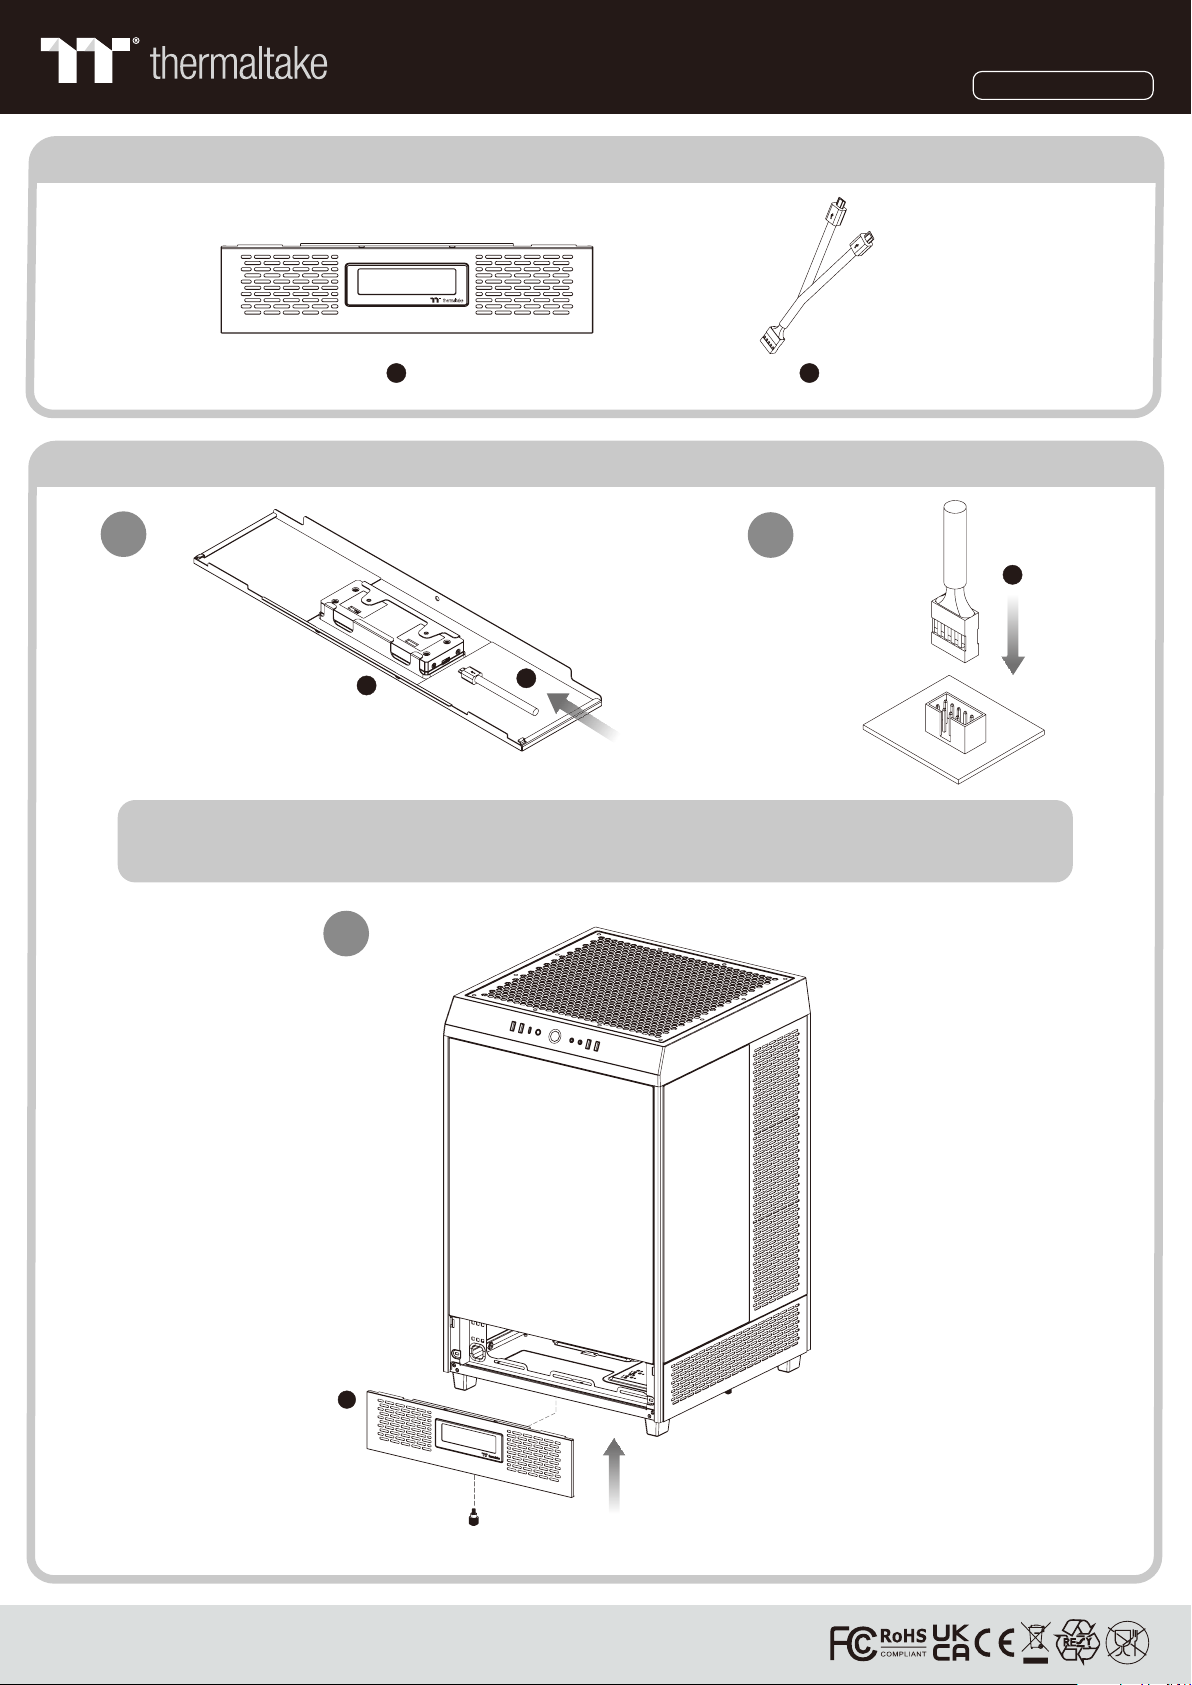
Parts List
LCD Panel Kit
For Th e To wer 5 0 0
A x 1
B x 1
Installation Guide
1
A
Note: Please connect the LCD display and motherboard with cable B to control
the display with TT RGB PLUS 2.0 Software.
B
2
3
B
A
© 2022 Th ermaltake Tech no lo gy C o. , Lt d. Al l Ri gh ts R es er ve d. w ww.therma ltake.co m
Page 2
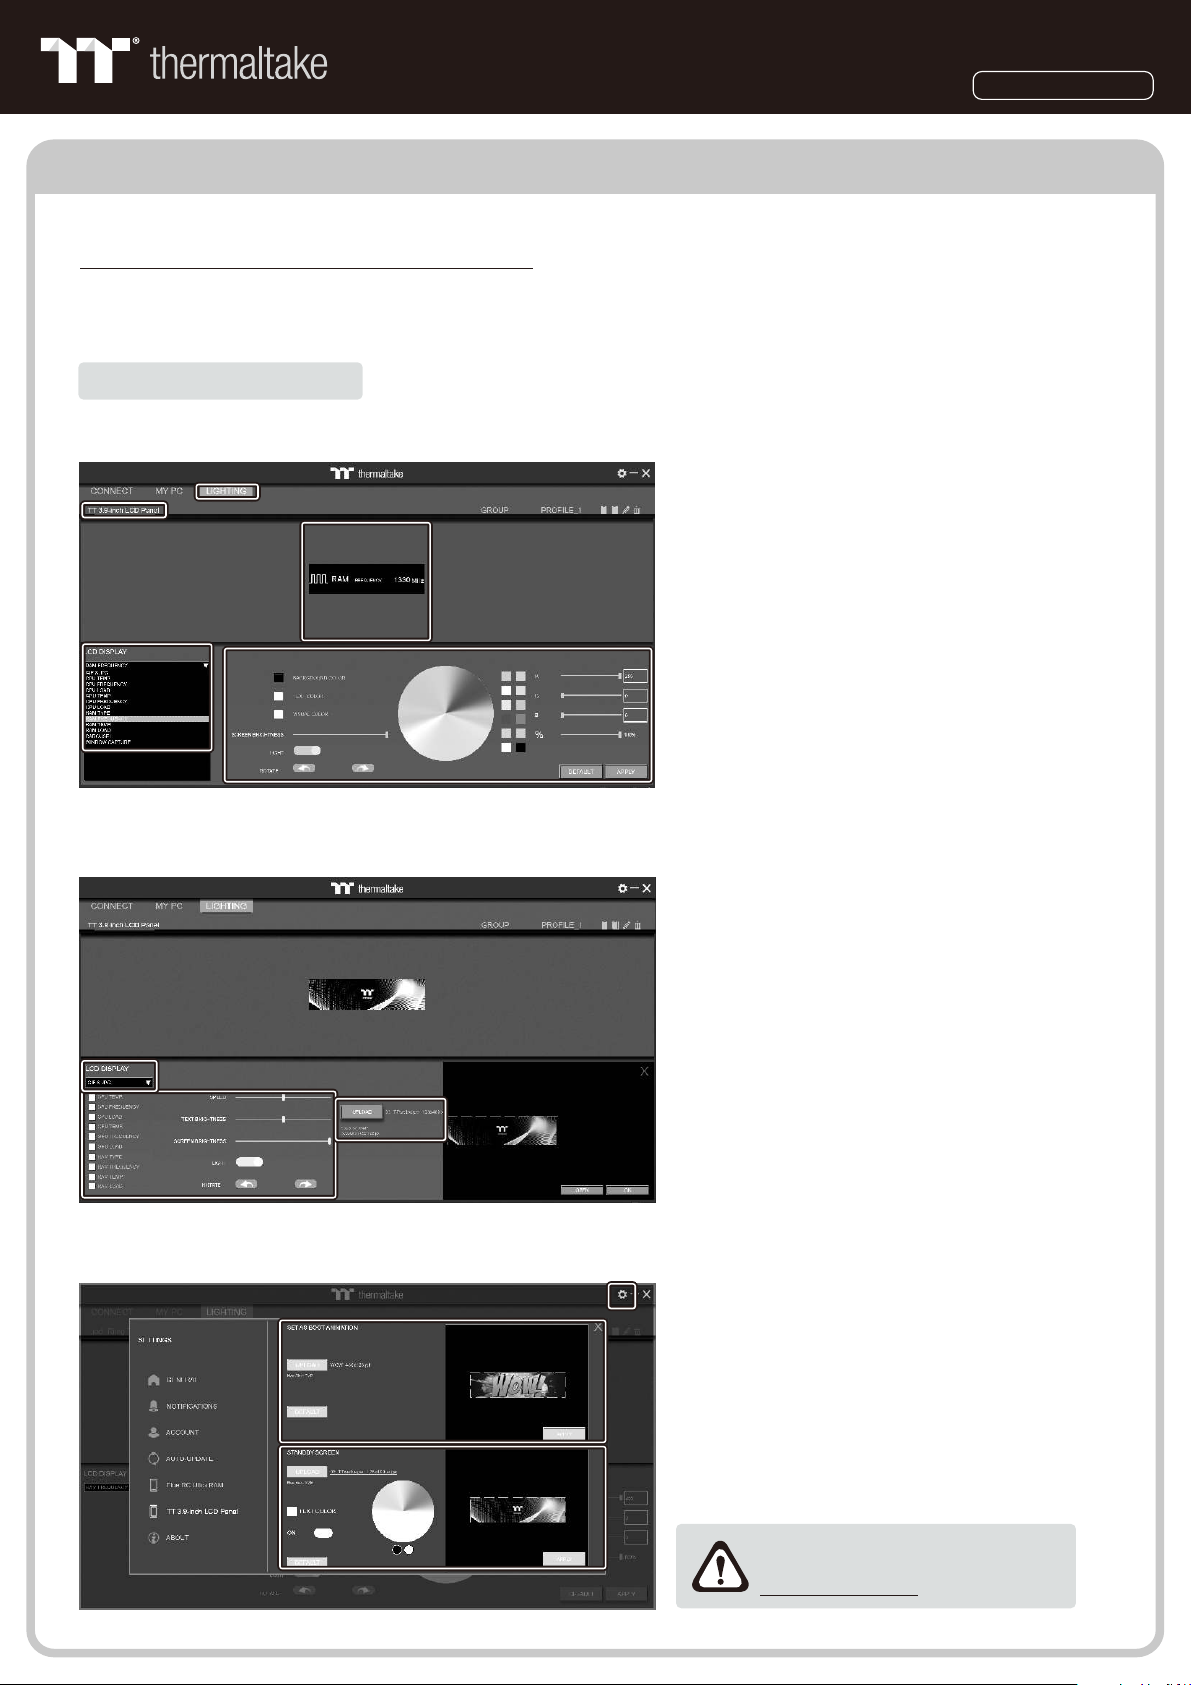
TT RGB PLUS 2.0 Software control interface
Please download TT RGB PLUS 2.0 from Thermaltake's Offici al website.
https://www.thermaltake.com/dow nloads
OS compatibility: Windows 10 / Windows 11
TT RGB PLUS 2.0 Software User Interface
TT 3.9” LCD Panel
LIGHTING
A. After installation of TT RGB PLUS 2.0, you can select
“TT 3.9-inch LCD Panel” on the “LIGHTING” page.
B. Preset the TT 3.9-inch LCD Panel.
C. LCD DISPLAY function list.
• UPLOAD FILE (Upload picture or video to LCD display)
• CPU TEMP.
• CPU FREQUENCY
• CPU LOAD
• GPU FREQUENCY
• GPU
• GPU LOAD
• RAM TYPE
• RAM FREQUENCY
• RAM TEMP.
• RAM LOAD
• CAROSUEL (Switches between PC information)
D. LCD visual effect settings.
Set LCD display background, text and visual color,
rotate the LCD screen or turn off LCD.
LCD Panel Kit
For Th e To wer 5 0 0
UPLOAD FILE
SETTINGS
A. Select “UPLOAD FILE” form “LCD DISPLAY”.
You can upload a file to show on the LCD screen.
(File type: GIF, JPG, PNG, MOV, MP4, AVI)
B. Set the LCD display text information, speed and
brightness, rotate the LCD screen or turn off LCD.
C. Click “UPLOAD” to upload the picture.
(Max size: 20MB)
A. Click the gear icon on the upper right corner to
enter the “SETTINGS” menu.
B. Upload the picture to set as LCD boot animation.
(GIF only, Max size: 5MB)
C. Upload the picture to set as LCD standby screen.
(JPG only, Max size: 5MB)
Sof tware int erfac e may vary wit h up dates ,
ple ase downl oad the la test vers ion from
www.thermalt ake.c om
 Loading...