

Page 1
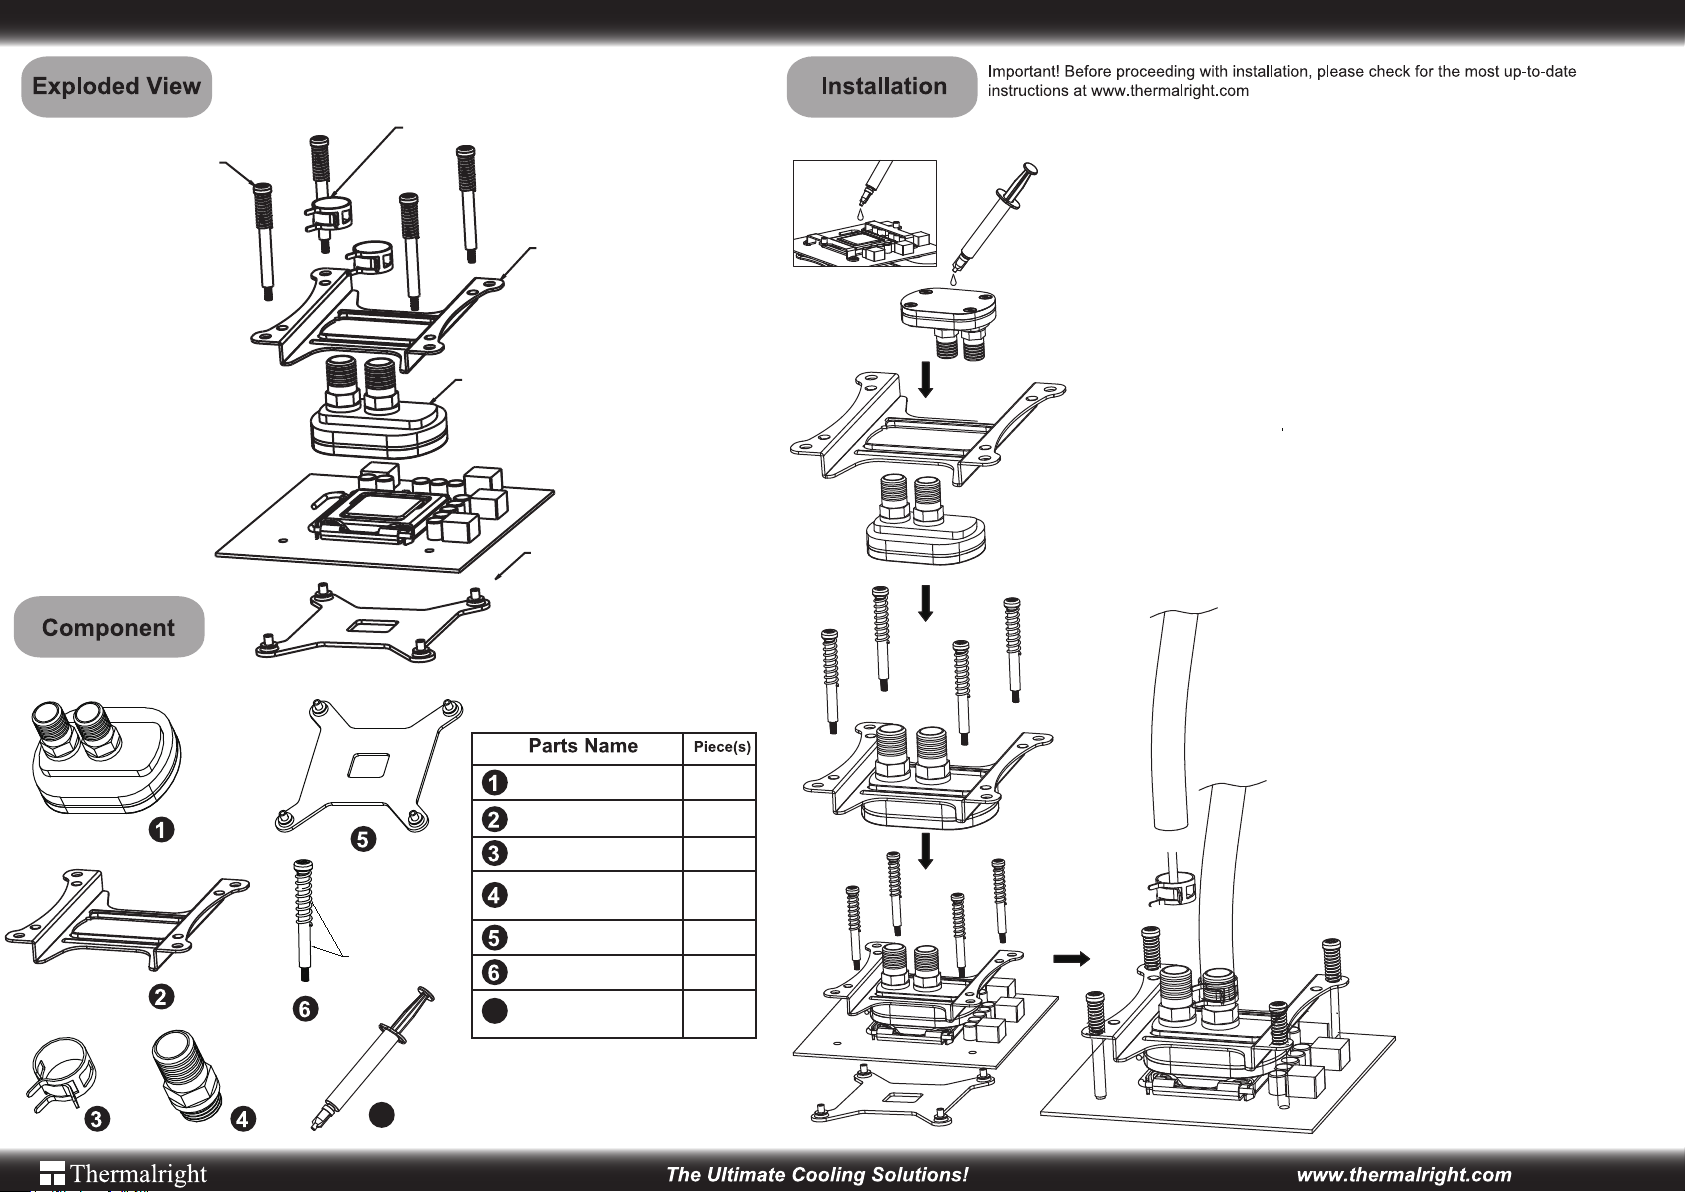
Water Block XWB-01 1366
1366 Spring-loaded Screw
Hose Clamp
Water Block
1366 Mounting Bracket
1366 Backplate
***A 24-hour LEAK TEST of XWB-01 is recommended before installation!!!***
Caution:
The use of this particular product(s) may void any warranty on your
computer and/or computer parts. You may damage your computer
if the instructions are not followed! Proceed with CAUTION! If you
are doubtful about your ability to install the XWB-01 correctly,
please seek a professional computer technician in your local area.
Disclaimer:
The installer/user of the XWB-01 product(s) assumes all responsibility for damage that may occur during installation and use.
Thermalright does not assume any liability, expressed or implied.
Step 1: Thermal Paste Application
Apply an even layer of thermal paste to the CPU
and bottom of the water block.
Step 2: Mounting Bracket Installation
Place the mounting bracket on top pf water block
and then select the appropriate spring-load
screws to insert through the mounting holes on
the mounting bracket and then through the CPU
mounting holes on the motherboard.
Step 3: Securing the Water Block
Place the 1366 backplate underneath the CPU
socket and through the screws. Tighten screws
to secure water block in place.
Nickel
plated
Step 4: Water Hose Installation
Mount the center inlet hose (with the proper
Water Block
1366 Mounting Bracket
Hose Clamp
PF 3/8 Water Inlet and
Outlet
1366 Backplate
Spring-loaded Screw
Chill Factor Thermal
7
Paste
1
1
2
2
1
4
1
width) and hose clamp and then mount the
outlet hose and hose clamp. Use a pair of
pliers to close and lock the clamps. Installation complete.
Warning:
After installation, it is crucial to run
the water block system to ensure
no leakage occurs before turning
on the computer.
7
Page 2
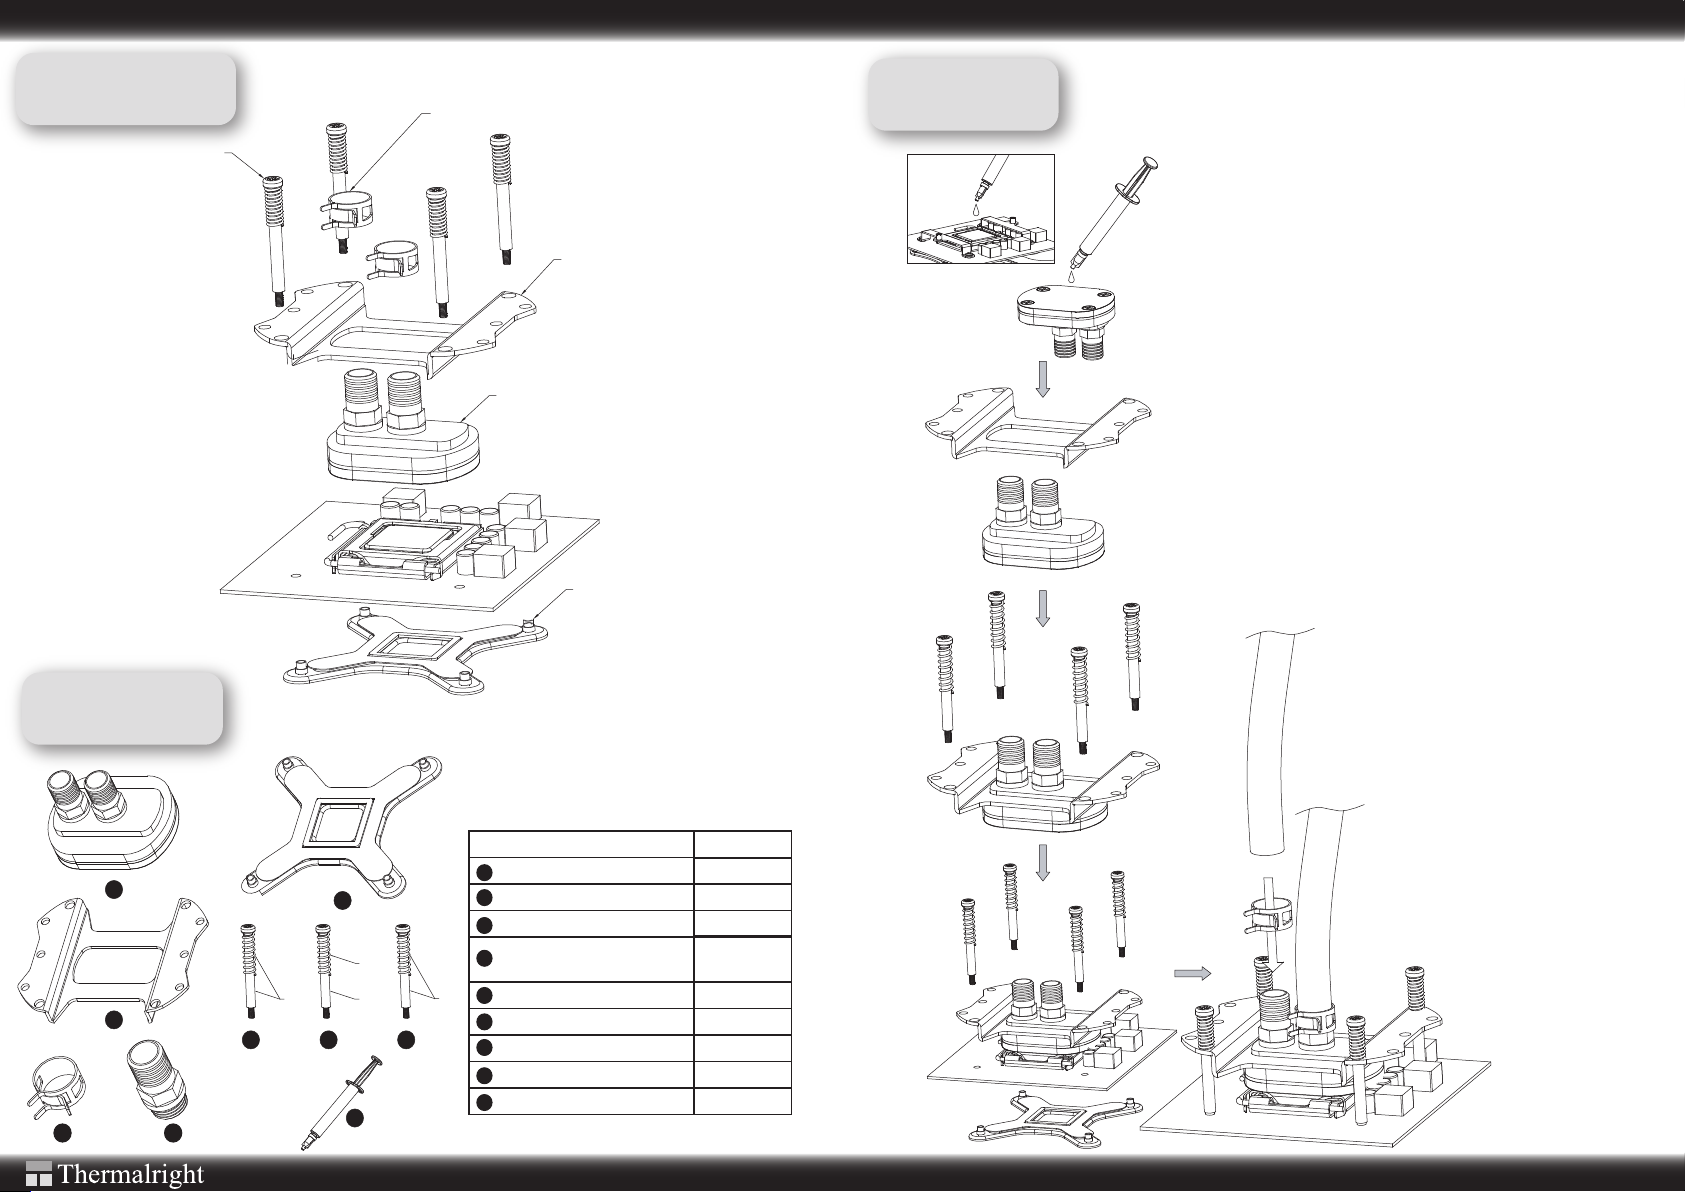
XWB-01 CPU Water Block
Exploded View
Spring-loaded Screw
Hose Clamp
Mounting Bracket
Installation
Important! Before proceeding with installation, please check for the most up-to-date
instructions at www.thermalright.com
***A 24-hour LEAK TEST of XWB-01 is recommended before installation!!!***
Caution:
The use of this particular product(s) may void any warranty on your
computer and/or computer parts. You may damage your computer
if the instructions are not followed! Proceed with CAUTION! If you
are doubtful about your ability to install the XWB-01 correctly,
please seek a professional computer technician in your local area.
Disclaimer:
The installer/user of the XWB-01 product(s) assumes all responsibility for damage that may occur during installation and use.
Thermalright does not assume any liability, expressed or implied.
Component
1
2
3
4
Water Block
Step 1: Thermal Paste Application
Apply an even layer of thermal paste to the CPU
and bottom of the water block.
Step 2: Mounting Bracket Installation
Place the mounting bracket on top pf water block
and then select the appropriate spring-load
screws to insert through the mounting holes on
the mounting bracket and then through the CPU
775 Backplate
mounting holes on the motherboard.
Step 3: Securing the Water Block
Place the 775 backplate underneath the CPU
socket and through the screws. Tighten
screws to secure water block in place.
Step 4: Water Hose Installation
Mount the center inlet hose (with the proper
width) and hose clamp and then mount the
outlet hose and hose clamp. Use a pair of
pliers to close and lock the clamps. Installation complete.
Parts Name
Water Block
1
2
5
Black
Nickel
plated
6
Nickel
plated
7 8
9
Mounting Bracket
3
Hose Clamp
PF 3/8 Water Inlet and
4
Outlet
5
Black
775 Backplate
6
775 Spring-loaded Screw
7
K8 Spring-loaded Screw
8
AM2 Spring-loaded Screw
9
Thermal Paste
Piece(s)
1
1
2
2
1
4
2
4
1
Warning:
After installation, it is crucial to run
the water block system to ensure
no leakage occurs before turning
on the computer.
The Ultimate Cooling Solutions !
www.thermalright.com
 Loading...