

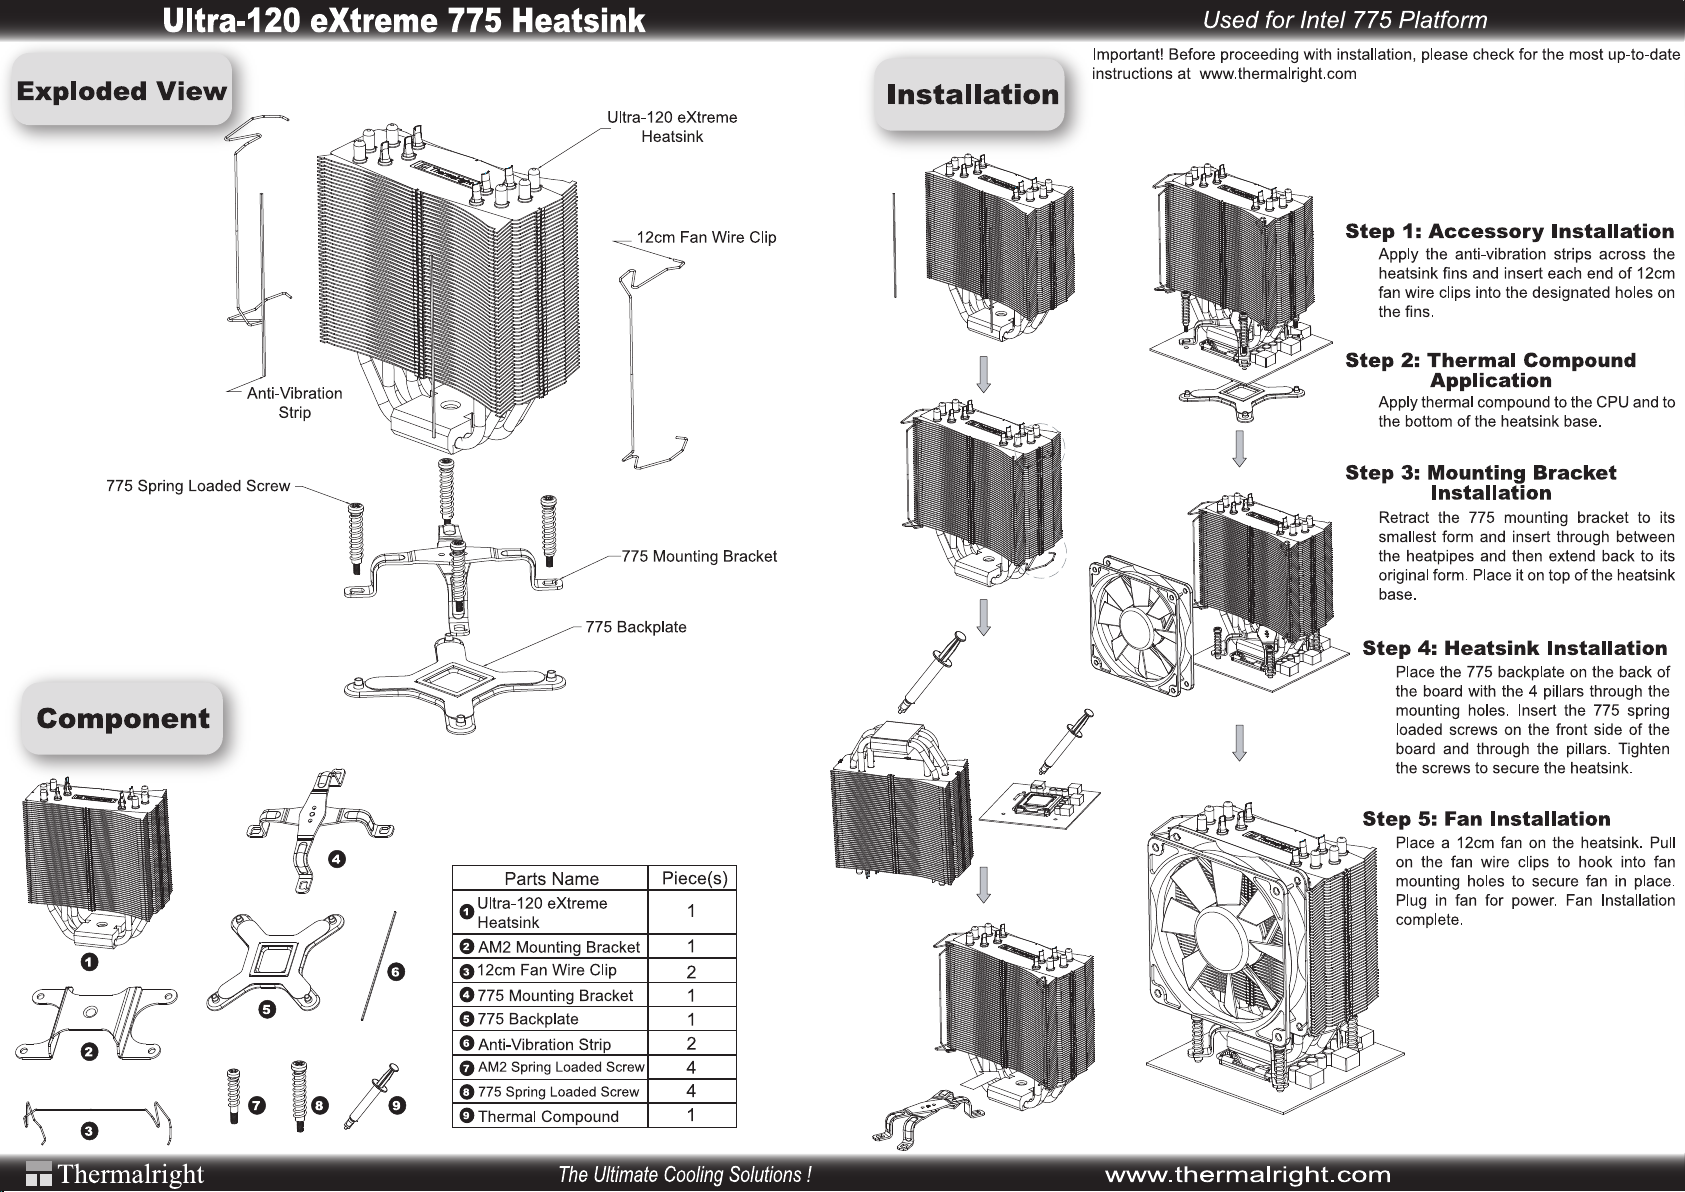
Page 1
Ultra-120A Installation Guide
5B
4D
4B
4C
Ultra-120A
4A
4C
4B
4D
3A
2A
6A
6B
2D
3D
6C
6D
5C
5A
5B
5D
3C
3B
2C
(Fig. 1)
2B
7A
7B
7C
7D
6A
4A
(Fig. 2)
6A
4A
1D
1A
1B
1C
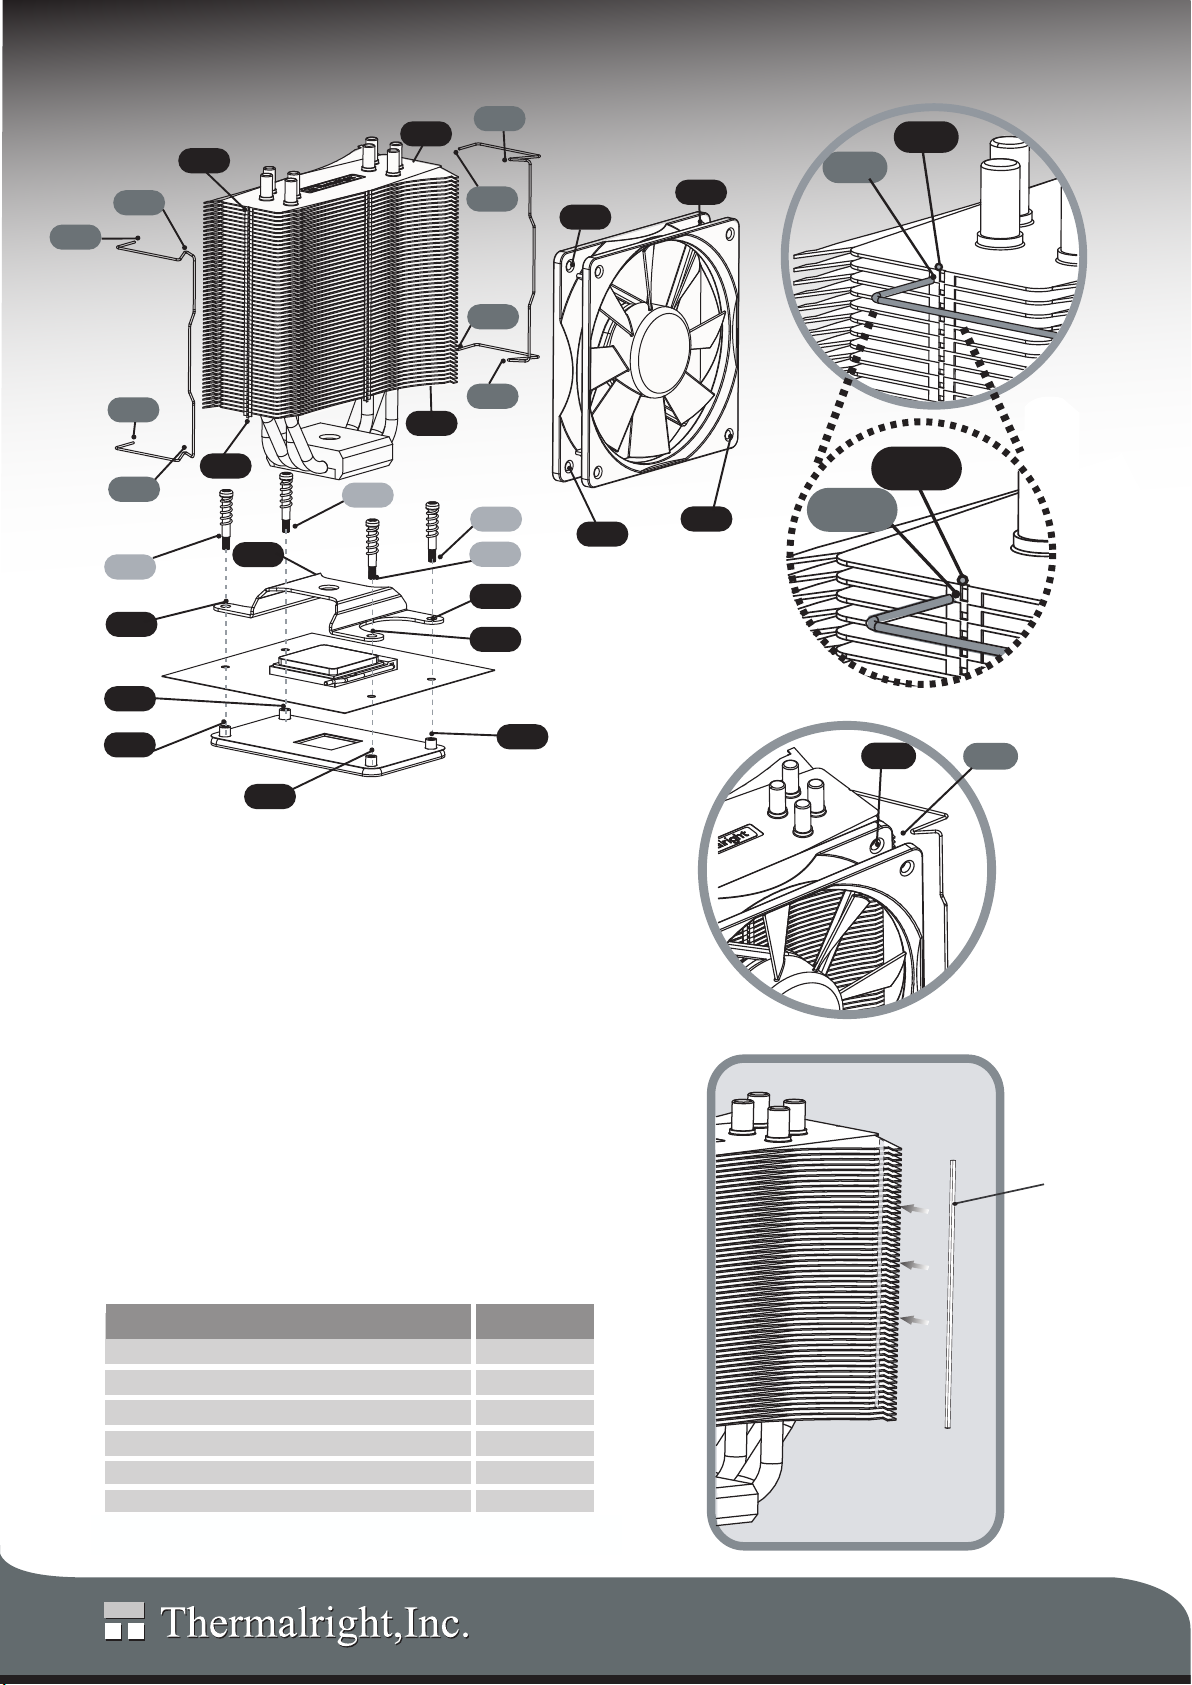
AM2 Installation for Ultra-120A
1. Place the adhesive anti-vibration fan cushion strip on the heatsink,
please refer to Figure 4.
2. Insert each end of the fan wire (Fig. 1, 4A/B, 5A/B) into the designated
holes on the heatsink (Fig. 1, 6A/B/C/D), please refer to Figure 2.
3. Place the fan closely to the heatsink, and snap the hooks (Fig 1, 4C/D,
5C/D) of the fan wire clip into the holes on the fan (Fig. 1, 7A/B/C/D),
please refer to Figure 3.
4. Apply thermal paste evenly on the CPU and on the bottom of heatsink
and then put the heatsink on top of CPU.
5. Insert the AM2 mounting bracket through the heatpipes. Using the
spring-loaded screws (Fig. 1, 3A/B/C/D) to screw secure the AM2
mounting bracket (Fig. 1, 2A/B/C/D) and the motherboard, along with
the AM2 backplate (Fig. 1, 1A/B/C/D).
6. Plug in fan for the heatsink before turning on the computer.
7C
5A 4A
5C
(Fig. 3)
Adhesive anti-vibration fan cushion strip
Ultra-120A Parts List (For AM2 Platform)
Parts List
Heat sink b od y
Fan wire cl ip
AM2
mounting bracket
AM2 spring- lo ad ed s crews
Adhesive anti-vibration fan cushion strip
Thermal pas te i n sy ringe
Quantity
1
2
1
4
2
1
(Fig. 4)
www.thermalright.com
Page 2
 Loading...