

Page 1
Installation Instructions:
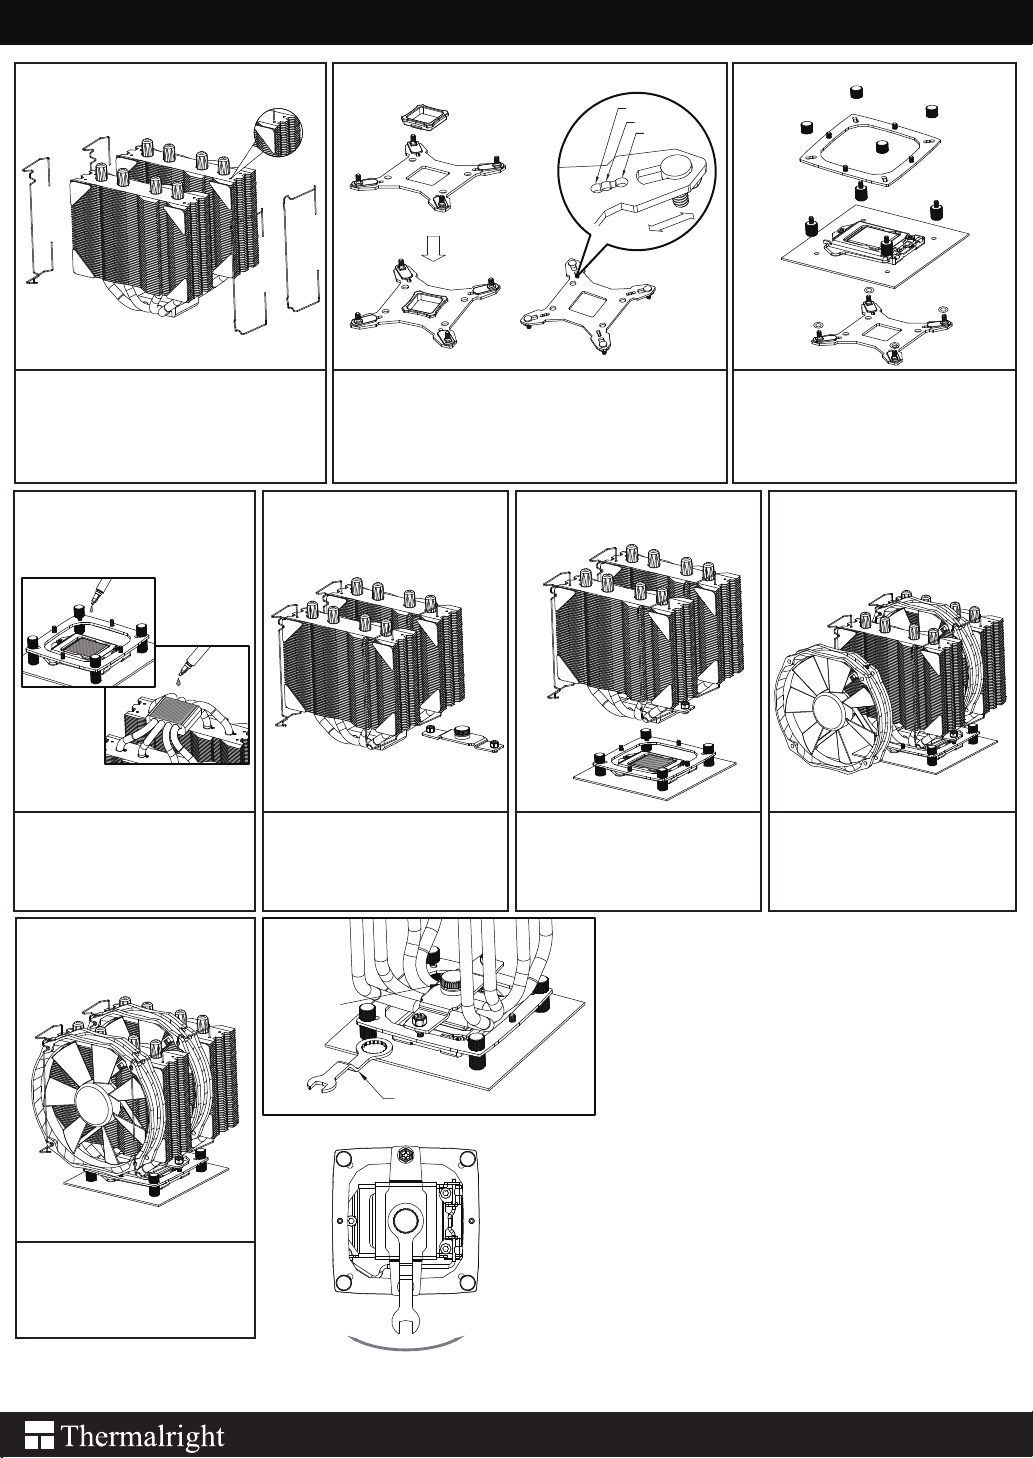
Step 1:
Step 1:Part Installation
Apply Anti-Vibration Padding to 4 corners on the
heatsink, and pull both ends of the Fan clips and make it
go through holes on the corners of the heatsink
shown in picture.
Step 2:
Step 2:775 backplate cap and adjustment for the screw pillars on the
backplate.
(1).When Installing on the 775 platform, please first insert the backplate
cap into the opening on the backplate,make sure you have the cap
facing downwards ( only for 775)
(2). Adjust the screw pillars to the platform which you are in use.
Step 4: Step 5: Step 6:
775
1156
1366
Step 3:
Step 3:Installtion the Anchoring mount
Place the multiple support Backplate under the
motherboard, and then tighten itwith the 4 screw
pillars provided, place the anchoring mount onto the
4 screw pillars thensecure it by titening it with 4
thumbscrews.
Step 7:
Step 4:Applying Thermal Paste
Apply the Thermal Paste to the base of the
heatsink and the surface of the cpu evenly.
Step 8:
Step 8:Installation completed.
Step 5:Make the Mounting plate to go
through the heatsink.
pressure
adjusting nob
Angled Wrench
Max.
+ -
70 lbs 40 lbs
Step 6:Place the heatsink on top of the
cpu, and then tighten the hexagonal screws
on both ends of the mouting plate.
Pressure Vault adjustment:
40~70 lbs. Max pressure of 70 lbs
when turned fully clockwise.
Min.
Step 7:Place the 14x16cm fan onto the
heatsink, and then secure it with the 14cm
fan clips, plug in power.
The Ultimate Cooling Solutions !
www.thermalright.com
 Loading...