

Page 1
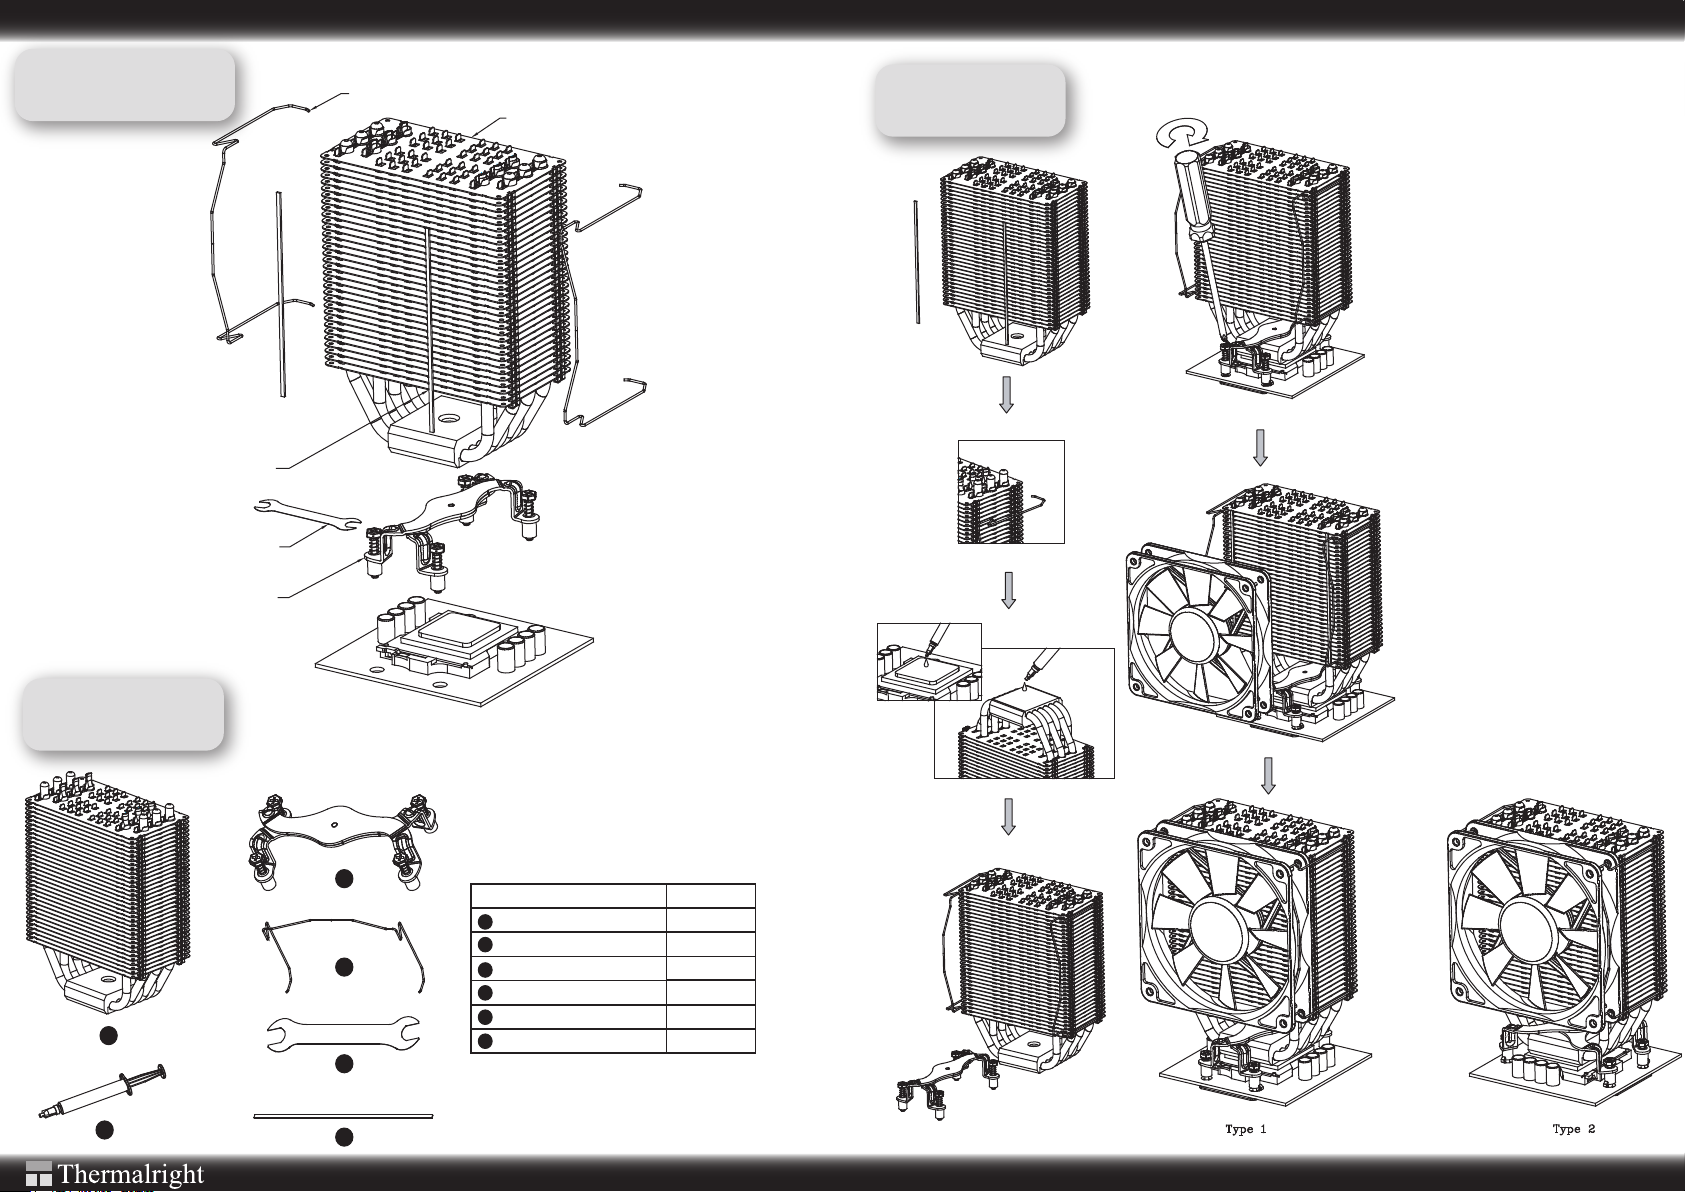
Exploded View
Anti-vibration Strip
Mini Wrench
HR-01 Xeon Heatsink
Fan Wire Clip
HR-01X Heatsink
Important! Before proceeding with installation, please check for the most up-to-date
instructions at www.thermalright.com
Installation
Step 1: Anti-vibration Strip
and Fan Wire Clip
Installation
Stick the anti-vibration strips to the fins
on each side of heatsink. Insert each
end of fan wire clips into the appropriate holes on each side of the heatsink.
Step 2: Thermal Paste
Application
Apply a thin layer of thermal paste to
the bottom of heatsink and to the CPU.
Step 3: Xeon Mounting
Installation
Slide the Xeon bracket mount in
between the heatpipes and place it on
top of heatsink base with the dome part
in the socket. Then secure the heatsink
in place by using a screw driver or the
mini wrench (included) to tighten the
sprint loaded screws.
Xeon Bracket Mount
Component
1
2
Step 4: Fan Installation
Place a 12 cm fan to the heatsink and
pull on the fan wire clips to hook into
the fan mounting holes on the fan.
Note:
The Xeon bracket mount can be
installed in two directions (in a 90
degree fashion). Please refer to
below illustration for Type 1 and Type
2 installation.
3
Parts Name
1
HR-01X Heatsink
2
Thermal Paste
4
5
6
3
Xeon Bracket Mount
4
Fan Wire Clip
5
Mini Wrench
6
Anti-vibration Strip
Piece(s)
1
1
1
2
1
2
The Ultimate Cooling Solutions !
www.thermalright.com
 Loading...