

Page 1
AllClear™ PLUS
UV Pressure Filters with Backush
8
Installation & Maintenance
For Models:
5-YEAR WARRANTY
• AllClear™ PLUS 3600
(Item #120834)
• AllClear™ PLUS 4800
(Item #120835)
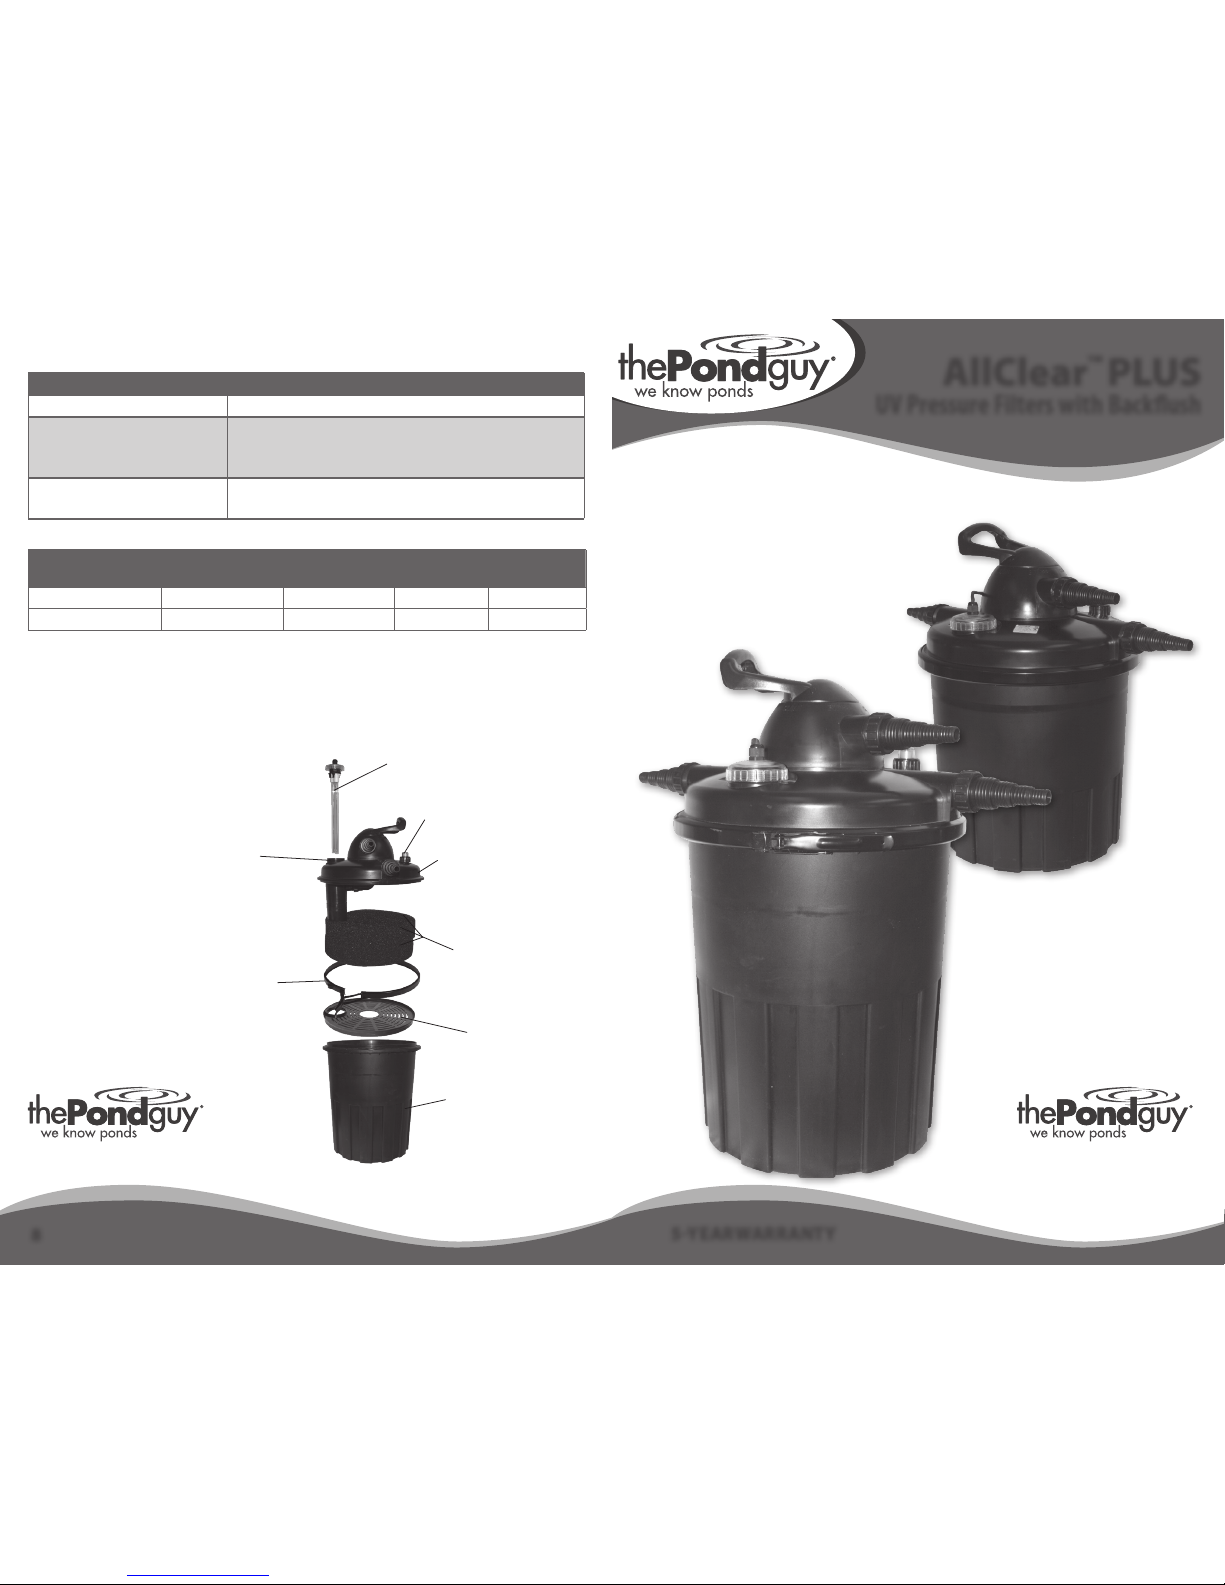
Pressure Indicator
UV Bulb
Access for UV Bulb &
Glass Sleeve Removal
Filter Top
Filter Pads
Clamp
Media Divider
Filter Basin
TROUBLESHOOTING
SYMPTOM POSSIBLE SOLUTIONS
Low water ow coming out of the lter. Filter is needs to be cleaned. Supply pump is plugged or damaged.
Water is not clear.
UV-C bulb is not working correctly or glass tube needs to be cleaned. Clean
lter pads and bio media. Improper water ow will reduce the eectiveness
of the AllClear™. See recommendation for proper water ow on page 2.
Filter is leaking.
Pump is too large for the lter. O-ring is put on incorrectly or missing. Hose
clamp is not secure on tubing. Filter is cracked.
REPLACEMENT PARTS
MODEL UV-C BULB
GLASS TUBE
(QUARTZ SLEEVE)
FILTER PAD MAIN LID O-RING
AllClear™ PLUS 3600 18 Watts – #110212 #120887 #120884 #120886
AllClear™ PLUS 4800 24 Watts – #110801 #120888 #120885 #120886
WARRANTY
The Pond Guy® will repair or replace AllClear™ lters found to be defective within 5 years of the
original purchase date. This limited warranty is ex tended exclusively to the original purchaser
beginning from the date of original receipt. The UV-C bulb and lter sponges are not covered by this
warranty. Abuse or misuse of this product voids all warranty. In case of warranty claims, the product
must be returned to place of purchase accompanied with the original receipt.
www.thepondguy.com
™
www.thepondguy.com
™
Page 2
SAFETY
WARNING: FOR YOUR PROTECTION, ALWAYS UNPLUG THE UNIT FROM THE POWER
SOURCE BEFORE INSTALLING OR SERVICING. SHOULD THE UNIT APPEAR TO NOT
BE WORKING, DO NOT ATTEMPT TO REACH, REMOVE, OR DISASSEMBLE BEFORE
DISCONNECTING IT FROM THE POWER SOURCE.
1. ALWAYS use a properly grounded AC outlet. Do not immerse the lter’s plug in water or attempt
to plug in a wet plug.
2. Provide a “drip loop” for the power cord. This is a loop in the cord below the level of the receptacle
or plug that prevents water from traveling along the cord in the direction of the receptacle.
3. Be sure that a ground fault circuit interrupter (GFCI) is installed in the branch circuit supplying the
pond equipment.
4. NEVER remove the ground pin from the plug.
5. The lter is not suitable for use in swimming pools, swimming ponds, or other situations where
humans may make bodily contact with the water. The lter is made for use outdoors although
should never be submerged in water.
6. The power cable cannot be replaced. If the power cable becomes damaged, the lter should
be discarded.
7. Avoid contact with the UV-C light, Light omitted can be harmful to the eyes and skin. To avoid
overheating do not run the bulb if there is no water passing through the lter.
IMPORTANT: The Pond Guy®, Inc. is not responsible for losses, injury or death resulting
from a failure to follow these safety precautions, misuse or abuse of equipment.
TECHNICAL SPECS
MODEL POWER UV MAX FLOW RATE MAX POND SIZE PLUMBING SIZE
AllClear™ PLUS 3600 120V / 60 Hz 18 Watts 2,600 GPH 3,600 Gallons ¾” , 1”, 1¼”, 1½” - Step Down Barb
AllClear™ PLUS 4800 120V / 60 Hz 24 Watts 2,600 GPH 4,800 Gallons ¾” , 1”, 1¼”, 1½” - Step Down Barb
It is EXTREMELY important NOT to connect this lter to a pump larger then
recommended. If you do so it will damage the lter and will void your warranty. Step
down ttings will ne ed to be cut to match tubing size.
2
AllClear™ PLUS
UV Pressure Filters with Backush
Installation & Maintenance Instructions
WARNING: Risk of electrical shock –
This appliance uses a 3-core cable and
must be earthed. It is supplied with
a grounding-type attachment plug.
To reduce the risk of electric shock be
certain that it is connected only to a
properly grounded, grounding-type
receptacle.
• Prior to installing the unit, check that
the quartz glass sleeve and the UV-C
lamp have not been damaged during
transportation, as the UV lamp and
quartz sleeve are made of glass.
• Do not install or store the appliance
where it will be exposed to
temperatures close to 0° C (32° F)
or below. In freezing conditions,
disconnect the power supply to the
lter and drain water from the lter
canister. In winter, remove and
store the appliance in a sheltered
place.
• This product should not be placed
where it can fall into the water.
WARNING
!
INSTALLATION
These lters are designed to be run 24 hours a day. Operating these units any less may
result in poor water quality.
Choose a suitable site for the lter where the power supply can be safely reached. The lter should
be buried so that you can still remove the lid for maintenance. If you decide not to bury the lter
make sure it is placed on a rm surface and secured so it cannot fall into the pond. When choosing
your lter location, plan for your plumbing. There will be two individual tubing runs. You will run
a water line from a pump in your pond to the lter and then back from the lter to the pond. It is
important that the return water line discharges opposite to the supply pump to ensure adequate
circulation. Once Installed, plug unit into power outlet.
MAINTENANCE
The amount of sh in your pond will determine how frequently you will need to clean your lter. In
general, you will need to clean you lter every other week or when your pressure indicator displays
red and/or when ow is reduced.
Figure A: To clean the lter, you can use the
EasyClean feature by simply pressing down and
turning the easy clean lever to the “clean” setting
allowing the water to pressurize the lter and
compress the lter pads. Run in this position for
about 30-60 seconds. Then turn the lever to the
“bypass” setting which will rinse the lter and
dump water out the bypass hose. Do not dump
back into pond. You will repeat this step until
the water appears clean. At this point, indicator
should read GREEN. If the indicator still shows RED,
a manual clean out will be required.
Figure B: At this point, the pump should be
turned o. Remove the lter top by unlatching the
clamp. Gently lift the top part of the lter away
from the bottom. Rinse the lter pads and bio
media with pond water. DO NOT use chlorinated
tap water to clean lter.
Figures C & D: To replace UV Bulb, unscrew the UV
unit clear cap from the top of the lter. Gently lift UV
unit out of the lter. Carefully remove bulb. When
installing the new bulb, be careful not to touch the
bulb with bare hands. Place the unit back into the
lter and screw the unit securely in place.
Figure E: While your have the lter open, it is
recommended that you clean the glass tube
(quartz sleeve) that protects your UV-C bulb from
coming into contact with water. Buildup on the
glass tube will cause your UV-C to perform poorly.
Also, following these steps you can replace the
UV-C bulb if needed. The UV-C bulb in your lter
will last approximately one season. Although it will
still light up, it will not have the same intensity as it
did when it was new. Replace once a year for best
results. Clean the glass tube with a soft cloth or
sponge. Once complete, carefully reassemble the
unit and ensure a water tight seal is made.
Figure A
Figure C
Figure B
Figure D
Figure E
 Loading...