

Page 1
fitting your sling
Our patented design allows for comfortable all day wear and easy breast-feeding access. No-slip safety strap,
perfectly sized pouch, and padded rails make our sling the safest for you and your baby.
Instruction Manual
ADJUSTABLE
SLING
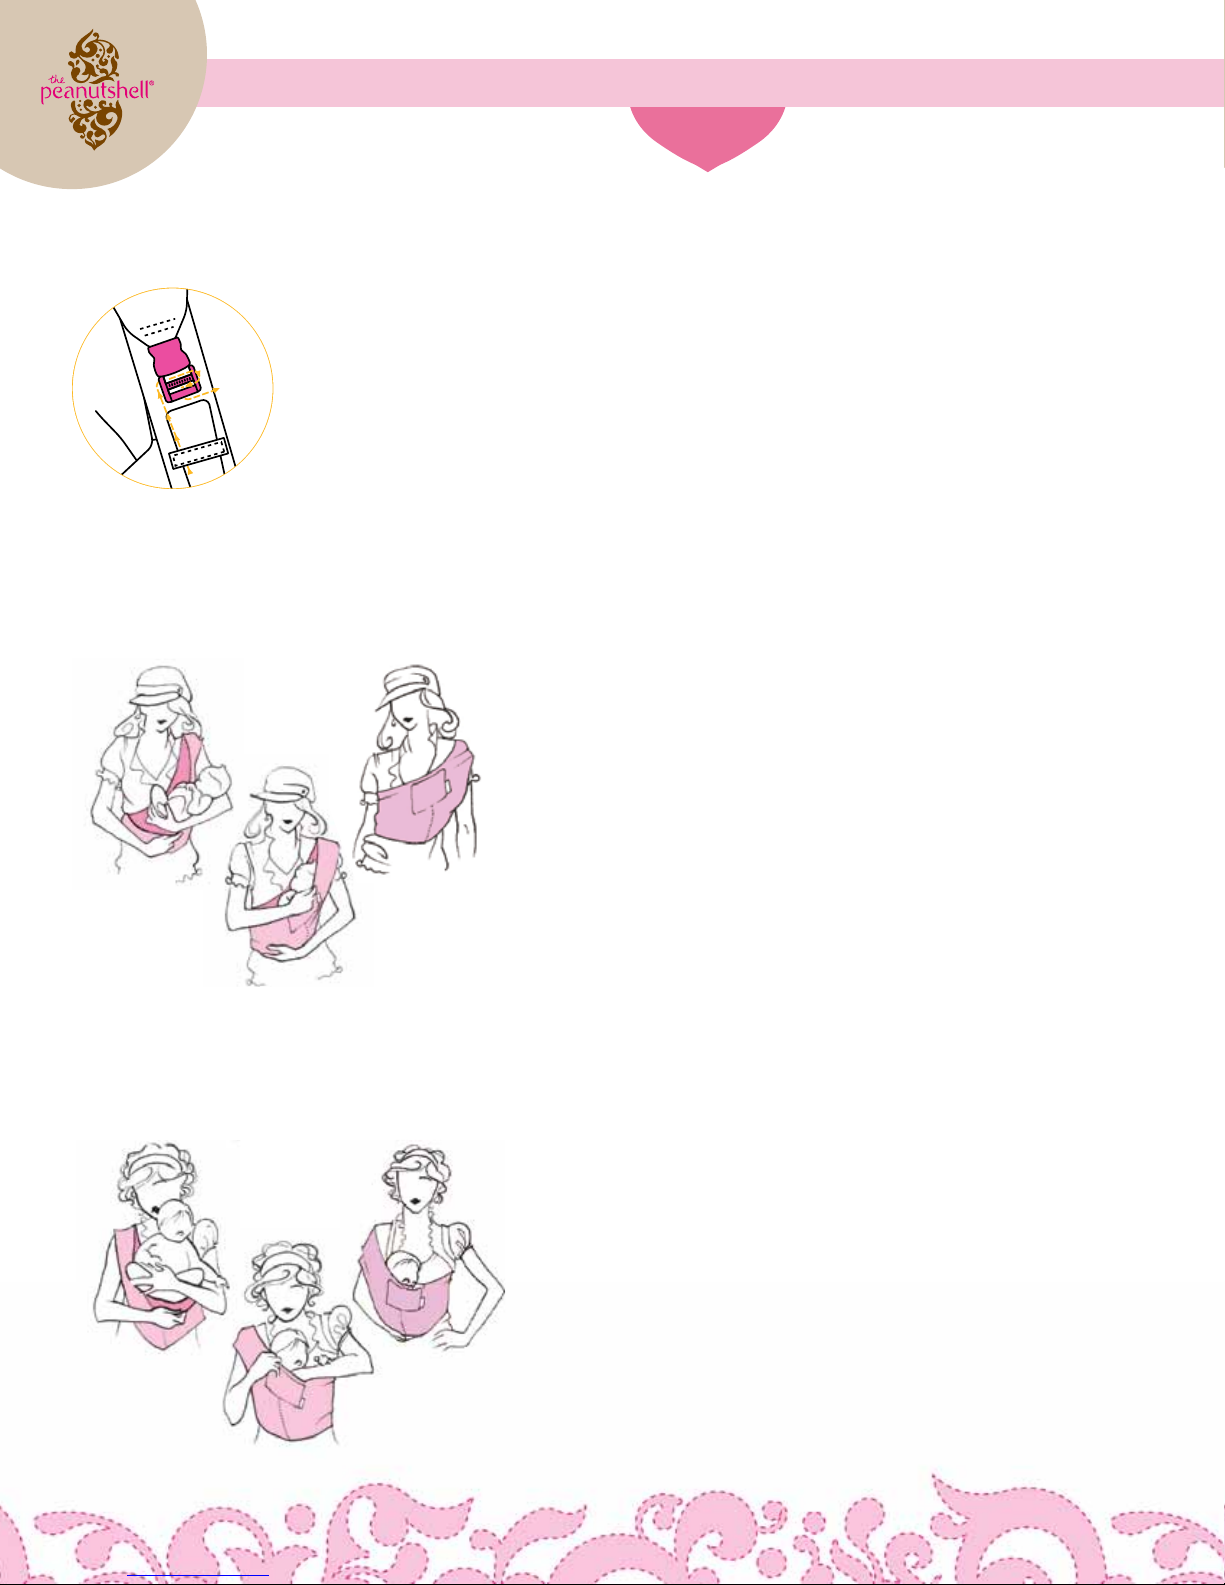
View of buckle from behind
the sling.
cradle carry
NEWBORN - 6 MONTHS
1
2
STEP ONE:
PREPARING THE SLING
Adjust length by tightening or
loosening strap. Make sure buckle is
properly threaded. When buckle is
lying at, the middle bar should be
raised and hidden by fabric. See
illustration above. Make sure clasp is
securely fastened.
STEP ONE
With sling on, hold baby in seated position above the sling against your body (baby
should be sideways against you). Open your Peanut Shell pouch outward with one arm
while you are supporting baby with the other. Pull outside layer of fabric away from your
body to make room for baby.
STEP TWO
In seated position, begin to lower baby into the sling bottom rst (baby’s bottom should
be in line with the seam). Tuck in baby’s legs, then open the pouch enough to allow
3
baby’s head to rest back against you comfortably.
STEP THREE
Pull fabric up on both sides and be sure baby is supported by the sling before you
release your hold.
STEP TWO:
WEARING THE SLING
Hold your sling in one hand with
the brown Peanut Shell label facing
away from the shoulder the sling will
rest on. Slip the pouch up and over
your head, putting the opposite arm
through the sling, keeping the black
safety strap behind you.
Your Peanut Shell® should t snugly
and hit no lower than the top of
your hip bone to give you the most
comfortable carry.
TIP: No matter which position you
are using, your baby’s bottom always
goes on the seam.
Kangaroo/Tummy to tummy carry
4-9 MONTHS
1 3
2
STEP ONE
Hold baby with baby’s back toward you but resting or sitting above the sling. Pull the
bottom of baby’s feet together and knees out, like a little yoga baby (alternatively you
can cross baby’s legs). For tummy to tummy, follow same steps but with baby facing you.
STEP TWO
Open the pouch away from your body (by taking the outer layer of fabric and pulling it
out). Begin to lower baby bottom rst into the sling.
STEP THREE
Adjust the fabric to be sure baby is supported and that baby’s legs are comfortably
crossed in front.
Page 2
hip carry
6 MONTHS +
1
Instruction Manual
ADJUSTABLE
SLING
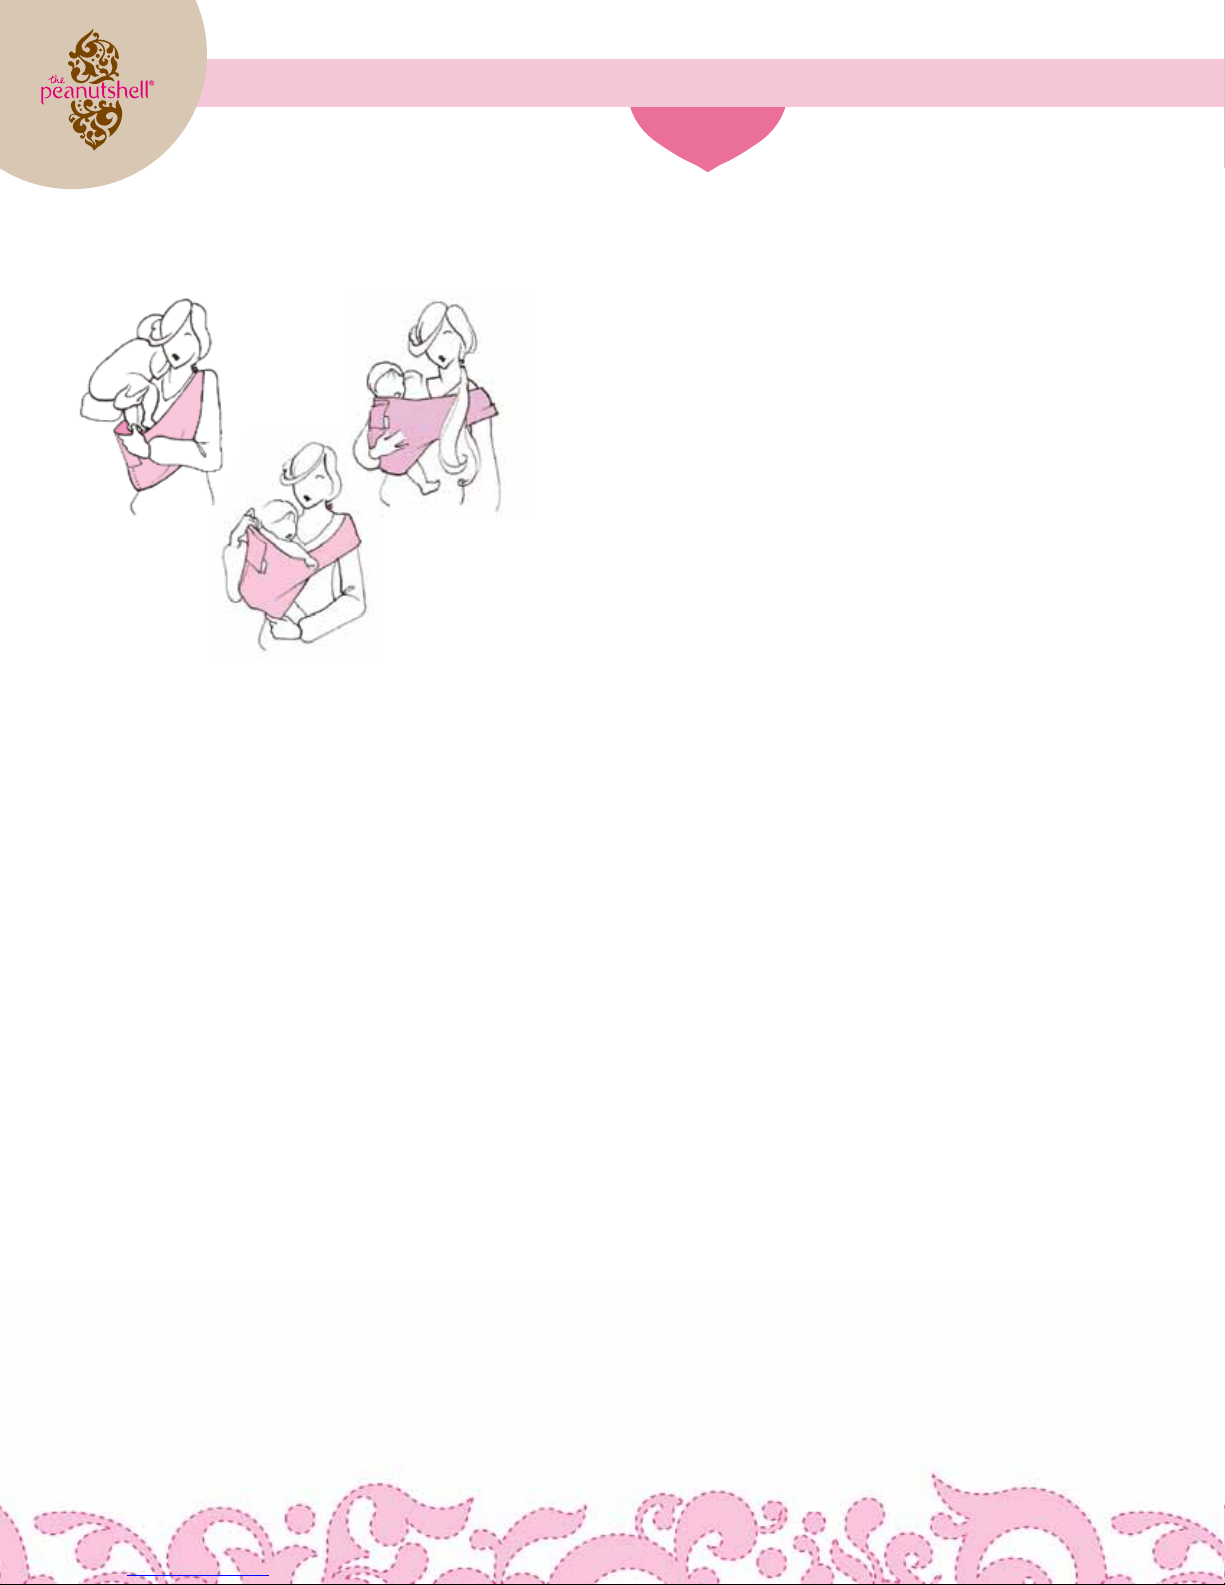
STEP ONE
With sling in place, put baby high onto unslinged shoulder. Move sling completely over
baby’s legs by tucking them into the sling and against
your body.
STEP TWO
Lower baby onto your hip (TIP: Baby’s bottom should be lined with the seam). Find
inside layer of the pouch (the padded edge). Pull INSIDE fabric layer down and under
baby’s bottom to create the deep seat.
3
2
STEP THREE
Pull fabric up on baby’s back for added support and comfort. Do not release your hold
until baby is supported. Be sure the fabric is all the way to the back
of baby’s knees to create a deep seat. Baby’s bottom should be below
baby’s knees.
safety info
WARNING: FALL & SUFFOCATION HAZARD - Failure to adhere to each of the following warnings and instructions of use can result in serious
injury or death.
• Always monitor baby’s breathing and be sure that baby’s chin is not pinned against his chest, which can restrict airow.
• When putting your baby in the sling, always make sure you are fully supporting them at all times until you are certain the sling is in place.
• NEVER leave the child in the carrier unsupervised.
• DO NOT wear sling with baby while cooking, near an open ame or working with sharp or hot objects.
• DO NOT put additional items in the carrier with the child. This poses a suffocation risk.
• Recommended for babies weighing between 8 and 26 lbs.
• Use common sense while wearing the sling and use caution at all times while baby is in the carrier.
• Discontinue use IMMEDIATELY if sling becomes damaged, broken, or seams are unraveling.
Keep this instruction manual as reference for future use.
 Loading...