


U s e r M a n u a l
U s e r M a n u a l
I n s t a l l a t i o n
I n s t a l l a t i o n
M a n u a l
M a n u a l
RES-32XR3/FIO
RES-32XR3/FIO
Front I/O Chassis
Front I/O Chassis
3RU 19” Rack-Mount Rugged Enterprise Server
with X8DAH+-F Motherboard Configuration
/ Two Quad-Core 5500 or Quad/Six-Core 5600 Xeon CPUs

Two Quad-Core 5500 or Quad/Six-Core 5600 Xeon CPUs
Two Quad-Core 5500 or Quad/Six-Core 5600 Xeon CPUs
Two Quad-Core 5500 or Quad/Six-Core 5600 Xeon CPUs
Two Quad-Core 5500 or Quad/Six-Core 5600 Xeon CPUs
Two Quad-Core 5500 or Quad/Six-Core 5600 Xeon CPUs
Two Quad-Core 5500 or Quad/Six-Core 5600 Xeon CPUs
Two Quad-Core 5500 or Quad/Six-Core 5600 Xeon CPUs
Two Quad-Core 5500 or Quad/Six-Core 5600 Xeon CPUs
RES-32XR3/FIO - Front I/O
RES-32XR3/FIO - Front I/O
RES-32XR3/FIO - Front I/O
RES-32XR3/FIO - Front I/O
RES-32XR3/FIO - Front I/O
RES-32XR3/FIO - Front I/O
RES-32XR3/FIO - Front I/O
RES-32XR3/FIO - Front I/O
RES-32XR3/FIO - Front I/O
RES-32XR3/FIO - Front I/O
RES-32XR3/FIO - Front I/O
RES-32XR3/FIO - Front I/O
RES-32XR3/FIO - Front I/O
RES-32XR3/FIO - Front I/O
RES-32XR3/FIO - Front I/O
RES-32XR3/FIO - Front I/O

RES-32XR3/FIO Installation
* SuperMicro Motherboard X8DAH+-F
Manual*
Version 1.0— July 2010
Themis Computer—Americas and Pacific Rim
47200 Bayside Parkway
Fremont, CA 94538
Phone (510) 252-0870
Fax (510) 490-5529
World Wide Web http://www.themis.com
Themis Computer—Rest of World
5 Rue Irene Joliot-Curie
38320 Eybens, France
Phone +33 476 14 77 80
Fax +33 476 14 77 89

Copyright © 2010 Themis Computer, Inc.
ALL RIGHTS RESERVED. No part of this publication may be reproduced in any form, by
photocopy, microfilm, retrieval system, or by any other means now known or hereafter invented without
the prior written permission of Themis Computer.
The information in this publication has been carefully checked and is believed to be accurate. However,
Themis Computer assumes no responsibility for inaccuracies. Themis Computer retains the right to
make changes to this publication at any time without prior notice. Themis Computer does not assume
any liability arising from the application or use of this publicat ion or the product(s) described herein.
RESTRICTED RIGHTS LEGEND: Use, duplication, or disclosure by the United States Government
is subject to the restrictions set forth in DFARS 252.227-7013 (c)(1)(ii) and FAR 52.227-19.
TRADEMARKS and SERVICEMARKS
Themis® is a registered trademark of Themis Computer, Inc.
®
Intel
is a registered trademark of Intel Corporation.
™
Xeon
is a trademark of Intel Corporation.
Red Hat
Linux
All other trademarks, servicemarks, or registered trademarks used in this publication are the property of
their respective owners.
®
is a registered trademark of Red Hat, Inc.
®
is a registered trademark of Linus Torvalds.
CE Marking
This product complies with the European EMC Directive (2004/108/EC) and the European Low Voltage
Safety Directive (2006/95/EC)/.
Safety Precautions
Instructions regarding safety precautions during installation, operation, or maintenance of the equipment
are given in the section entitled “Safety Instructions” on page iv.
WARNINGS and CAUTIONS
The definitions of WARNINGS and CAUTIONS as used in this document are given in the Preface in
the section entitled “Notes, Cautions, Warnings, and Sidebars”.
Themis Customer Support
North America, South America, and Pacific Rim
Telephone: 510-252-0870
Fax: 510-490-5529
E-mail: support@themis.com
Web Site: http://www.themis.com
RES-32XR3/FIO Installation Manual, Version 1.0
July 2010
Part Number: 117611-024

RES-32XR3/FIO Installation Manual
Version Revision History
Ve rsi on 1 .0..............................................................................................July 2010
Themis Computer
iii

RES-32XR3/FIO Installation Manual
Safety Instructions
To maximize user safety and ensure correct device operation, all instructions contained in this section should be read carefully.
Caution: It is important that the user observe all warnings and instructions
that are on the device and contained in this manual.
• The device must be used in accordance with the instructions for use.
• Electrical installations in the room must correspond to the requirements of
respective regulations.
• Take care that there are no cables, particularly mains cables, in areas where
persons can trip over them.
• Do not use a mains connection in sockets shared by a number of other power
consumers. Do not use an extension cable.
• Only use the mains cable supplied.
• The unit is completely disconnected from the power source only when the
power cord is disconnected from the power source. Therefore the power cord
and its connectors must always remain easily accessible.
• Do not set up the device in the proximity of heat sources or in a damp location.
Make sure the device has adequate ventilation.
• All connection cables must be screwed or locked to the chassis housing.
• The device is designed to be used in horizontal position only.
• The device is no longer safe to operate when
— the device has visible damage or
— the device no longer functions.
• In these cases, the device must be shut down and secured against unintentional
operation.
• Repairs may only be carried out by a person authorized by Themis Computer.
• The device may only be opened for the installation and removal of extension
(PCI) cards, memory modules, storage drives, fan housings, power supplies,
iv
Themis Computer

and the lithium battery—all in accordance with the instructions given in this
manual.
• If extensions are made to the device, the legal stipulations and the device specifications must be observed.
• The device must be switched off when removing the top cover; for example,
before installing extension (PCI) cards.
Operation of Laser Source Devices
DVD/CD-ROM drives contain laser light-emitting diodes (classified in accordance
with IEC 825-1:1993: LASER CLASS 1) and, therefore, must not be opened.
If the enclosure of such a drive is opened, invisible laser radiation is emitted. Do
not allow yourself to be exposed to this radiation.
The laser system meets the code of Federal Regulations 21 CFR,1040 for the USA
and Canadian Radiation Emitting Devices Act, REDR C 1370.
RES-32XR3/FIO Installation Manual
Electrostatic Discharge (ESD)
A sudden discharge of electrostatic electricity can destroy static-sensitive devices
or micro-circuitry. Proper packaging and grounding techniques are necessary precautions to prevent damage. Always take the following precautions:
1. Transport boards in static-safe containers such as boxes or bags.
2. Keep electrostatic-sensitive parts in their containers until they arrive at static-
free stations.
3. Always be properly grounded when touching a sensitive board, component, or
assembly.
4. Store electrostatic-sensitive boards in protective packaging or on conductive
foam.
Grounding Methods
Guard against electrostatic damage at workstations by following these steps:
1. Cover workstations with approved anti-static material. Provide a wrist strap
connected to a work surface and properly grounded tools and equipment.
Themis Computer
v

RES-32XR3/FIO Installation Manual
2. Use anti-static mats, heel straps, or air ionizers to give added protection.
3. Handle electrostatic-sensitive components, boards, and assemblies by the case
or the PCB edge.
4. Avoid contact with pins, leads, or circuitry.
5. Turn off power and input signals before inserting and removing connectors or
test equipment.
6. Keep the work area free of non-conductive materials such as ordinary plastic as-
sembly aids and Styrofoam.
7. Use field service tools, such as cutters, screwdrivers, and vacuums that are con-
ductive.
8. Always place drives and boards PCB-assembly-side down on the foam.
Instructions for the Lithium Battery
Systems are equipped with a lithium battery installed on the motherboard. To
replace this battery, please observe the instructions that are described in this manual.
Warning: There is a danger of explosion when the wrong type of battery is used
as a replacement.
vi
Themis Computer

Table of Contents
Table of Contents
.Preface ............................................................................................................................ xix
1. Overview and Specifications ........................................................................................ 1-1
1.1 Overview ................................................................................................................ 1-1
1.2 System LEDs and I/O Connectors ......................................................................... 1-5
1.3 Chipset Overview ................................................................................................ 1-10
1.3.1 Features of the 5500/5600 Processor and the 5520 Chipset .................... 1-10
1.4 Special Features ................................................................................................... 1-11
1.4.1 Recovery from AC Power Loss ............................................................... 1-11
1.5 PC Health Monitoring .......................................................................................... 1-11
1.5.1 Fan Status Monitor with Firmware Control ............................................. 1-11
1.5.2 Environmental Temperature Control ....................................................... 1-11
1.5.3 CPU Fan Auto-Off in Sleep Mode .......................................................... 1-12
1.5.4 System Resource Alert ............................................................................. 1-12
1.6 ACPI Features ...................................................................................................... 1-12
1.6.1 Slow Blinking LED for Suspend-State Indicator .................................... 1-13
1.6.2 Main Switch Override Mechanism .......................................................... 1-13
1.7 Power Supply ....................................................................................................... 1-13
1.8 Super I/O .............................................................................................................. 1-14
1.9 Overview of the Winbond WPCM450 Controller ...............................................1-14
1.10 Specifications ....................................................................................................... 1-15
1.10.1 General ..................................................................................................... 1-15
1.10.2 Electrical .................................................................................................. 1-16
1.10.2.1 System Power ........................................................................... 1-16
1.10.2.2 Output Voltage .......................................................................... 1-17
1.10.3 Environmental .......................................................................................... 1-17
1.10.3.1 Shock ........................................................................................ 1-17
1.10.3.2 Electrostatic Discharge ............................................................. 1-17
1.11 Packaging and Shipping ....................................................................................... 1-18
1.11.1 Accessory Kit ........................................................................................... 1-18
1.11.2 Rack-Mount Slides (Optional) ................................................................. 1-19
2. Installation and Operation ........................................................................................... 2-1
Themis Computer
vii

RES-32XR3/FIO Installation Manual
2.1 Installation Procedures ........................................................................................... 2-1
2.1.1 Remove Protective Top Cover ................................................................... 2-1
2.1.2 Memory Modules ....................................................................................... 2-3
2.1.2.1 Installation ..................................................................................2-4
2.1.3 PCI Cards ................................................................................................... 2-7
2.1.3.1 Installing Cards ........................................................................... 2-7
2.1.4 Lithium Battery .......................................................................................... 2-8
2.1.4.1 Removing the Lithium Battery ................................................... 2-8
2.1.4.2 Installing a Lithium Battery ........................................................ 2-9
2.1.5 SATA Storage Drive .................................................................................. 2-9
2.1.5.1 Storage Drive Removal ............................................................... 2-9
2.1.5.2 Storage Drive Installation ......................................................... 2-10
2.1.6 Removable 120-mm Fan .......................................................................... 2-11
2.1.6.1 Removing and Installing a 120-mm Fan ................................... 2-11
2.1.7 Power Supply ........................................................................................... 2-12
2.1.7.1 Removing a Power Supply ....................................................... 2-12
2.1.7.2 Installing a Power Supply ......................................................... 2-13
2.2 Rack Mounts ........................................................................................................ 2-14
2.2.1 Mounting Brackets ................................................................................... 2-14
2.2.2 Rack-Mount Slides (Optional) ................................................................. 2-15
2.3 Operation ............................................................................................................. 2-15
2.3.1 Plugging in the AC Power Cords ............................................................. 2-15
2.3.2 Getting Started ......................................................................................... 2-16
2.3.2.1 Configuration ............................................................................ 2-16
2.3.2.2 Turning The System On ............................................................ 2-16
2.3.2.3 Linux Installation ...................................................................... 2-16
2.3.3 Turning the System Off ........................................................................... 2-17
3. BIOS Setup Utility ........................................................................................................ 3-1
3.1 Introduction ............................................................................................................ 3-1
3.1.1 Starting BIOS Setup Utility ....................................................................... 3-1
3.1.2 How To Change the Configuration Data ................................................... 3-2
3.1.3 Starting the Setup Utility ...........................................................................3-2
3.2 Main Setup ............................................................................................................. 3-3
3.2.1 System Time/System Date ......................................................................... 3-3
3.2.2 Supermicro X8DAH ..................................................................................3-4
3.2.3 Processor .................................................................................................... 3-4
viii
Themis Computer

Table of Contents
3.2.4 System Memory ......................................................................................... 3-4
3.3 Advanced Setup Configurations ............................................................................ 3-5
3.3.1 Boot Features ............................................................................................. 3-5
3.3.1.1 Quick Boot .................................................................................. 3-5
3.3.1.2 Quiet Boot ................................................................................... 3-5
3.3.1.3 AddOn ROM Display Mode ....................................................... 3-6
3.3.1.4 Bootup Num-Lock ...................................................................... 3-6
3.3.1.5 PS/2 Mouse Support ................................................................... 3-6
3.3.1.6 Wait For 'F1' If Error .................................................................. 3-6
3.3.1.7 Hit 'Del' Message Display ........................................................... 3-6
3.3.1.8 Watch Dog Function ................................................................... 3-6
3.3.1.9 Restore on AC Power Loss ......................................................... 3-6
3.3.1.10 Interrupt 19 Capture .................................................................... 3-6
3.3.2 Processor and Clock Options ..................................................................... 3-7
3.3.2.1 CPU Ratio ................................................................................... 3-7
3.3.2.2 Ratio CMOS Setting
(Available when the item-CPU Ratio is set to Manual) ............. 3-7
3.3.2.3 Clock Spread Spectrum .............................................................. 3-7
3.3.2.4 Hardware Prefetcher (Available when supported by the CPU) .. 3-7
3.3.2.5 Adjacent Cache Line Prefetch
(Available when supported by the CPU) .................................... 3-7
3.3.2.6 Intel® Virtualization Technology
(Available when supported by the CPU) .................................... 3-8
3.3.2.7 Execute-Disable Bit Capability
(Available when supported by the OS and the CPU) ................. 3-8
3.3.2.8 Simultaneous Multi-Threading
(Available when supported by the CPU) .................................... 3-8
3.3.2.9 Active Processor Cores ............................................................... 3-8
3.3.2.10 Intel® EIST Technology ............................................................. 3-8
3.3.2.11 C1E Support ................................................................................ 3-9
3.3.2.12 Intel® C-STATE Tech ................................................................ 3-9
3.3.2.13 C-State package limit setting
(Available when Intel® C-State Tech is enabled) ...................... 3-9
3.3.2.14 C1 Auto Demotion ...................................................................... 3-9
3.3.2.15 C3 Auto Demotion ...................................................................... 3-9
3.3.3 DCA Technology ....................................................................................... 3-9
3.3.3.1 DCA Prefetch Delay ................................................................... 3-9
3.3.4 Advanced Chipset Control ....................................................................... 3-10
3.3.4.1 QPI Links Speed ....................................................................... 3-10
Themis Computer
ix

RES-32XR3/FIO Installation Manual
3.3.4.2 QPI Frequency .......................................................................... 3-10
3.3.4.3 QPI L0s and L1 ......................................................................... 3-10
3.3.4.4 Memory Frequency ................................................................... 3-10
3.3.4.5 Memory Mode ..........................................................................3-10
3.3.4.6 Demand Scrubbing ................................................................... 3-11
3.3.4.7 Patrol Scrubbing ....................................................................... 3-11
3.3.4.8 Throttling - Closed Loop / Throttling - Open Loop .................. 3-11
3.3.4.9 HDA Controller ........................................................................3-12
3.3.4.10 Intel VT-d ................................................................................. 3-12
3.3.4.11 SR-IOV Support ....................................................................... 3-12
3.3.4.12 NUMA Support ......................................................................... 3-13
3.3.4.13 Intel I/OAT ............................................................................... 3-13
3.3.4.14 Active State Power Management .............................................. 3-13
3.3.4.15 Route Port 80h Cycles to .......................................................... 3-13
3.3.4.16 USB Functions .......................................................................... 3-13
3.3.4.17 USB 2.0 Controller ................................................................... 3-13
3.3.4.18 Legacy USB Support ................................................................ 3-13
3.3.5 IDE/Floppy Configuration ....................................................................... 3-13
3.3.5.1 Floppy A ................................................................................... 3-14
3.3.5.2 SATA#1 Configuration ............................................................. 3-14
3.3.5.3 IDE Detect Timeout (sec) ......................................................... 3-14
3.3.5.4 Primary IDE Master/Slave, Secondary IDE Master/Slave,
3.3.6 PCI/PnP Configuration ............................................................................3-17
3.3.6.1 Clear NVRAM .......................................................................... 3-17
3.3.6.2 Plug & Play OS ......................................................................... 3-17
3.3.6.3 PCI Latency Timer .................................................................... 3-17
3.3.6.4 PCI IDE BusMaster .................................................................. 3-17
3.3.6.5 PCI-E I/O Performance ............................................................. 3-17
3.3.6.6 PCI-E Slot 1 x8, PCI-E Slot 2 x16, PCI-E Slot 3 x8,
3.3.6.7 Onboard LAN Option ROM Select ..........................................3-18
3.3.6.8 Load Onboard LAN1 Option ROM/Load Onboard LAN2
3.3.6.9 Boot Graphics Adapter Priority ................................................ 3-18
3.3.7 Super IO Device Configuration ............................................................... 3-18
3.3.7.1 Serial Port1 Address/Serial Port2 Address ............................... 3-18
3.3.7.2 Onboard Floppy Controller ....................................................... 3-19
Third IDE Master, and Fourth IDE Master ............................... 3-14
PCI-E Slot 4 x8 (in x16 slot), PCI-E Slot 5 PCI-E x4
(in x8 slot), PCI-E Slot 6 x16, PCI-E Slot 7 x8. .......................3-18
Option ROM ............................................................................. 3-18
x
Themis Computer

Table of Contents
3.3.8 Remote Access Configuration ................................................................. 3-19
3.3.8.1 Remote Access .......................................................................... 3-19
3.3.8.2 Serial Port Number ................................................................... 3-19
3.3.8.3 Serial Port Mode ....................................................................... 3-19
3.3.8.4 Flow Control ............................................................................. 3-19
3.3.8.5 Redirection After BIOS POST ................................................. 3-19
3.3.8.6 Terminal Type ........................................................................... 3-20
3.3.8.7 VT-UTF8 Combo Key Support ................................................ 3-20
3.3.8.8 Sredir Memory Display Delay .................................................. 3-20
3.3.9 Hardware Health Monitor ........................................................................ 3-20
3.3.9.1 CPU Overheat Alarm ................................................................ 3-20
3.3.9.2 CPU 1 Temperature/CPU 2 Temperature/System Temperature 3-21
3.3.9.3 Voltage Readings ...................................................................... 3-23
3.3.10 ACPI Configuration ................................................................................. 3-23
3.3.10.1 High Performance Event Timer ................................................ 3-23
3.3.10.2 USB Device Wakeup ................................................................ 3-23
3.3.10.3 PS2 KB/MS Wake Up .............................................................. 3-23
3.3.10.4 ACPI Aware O/S ...................................................................... 3-24
3.3.10.5 Suspend Mode ........................................................................... 3-24
3.3.10.6 ACPI APIC Support .................................................................. 3-24
3.3.10.7 APIC ACPI SCI IRQ ................................................................ 3-24
3.3.10.8 Headless Mode .......................................................................... 3-24
3.3.10.9 ACPI Version Features ............................................................. 3-24
3.3.11 Trusted Computing .................................................................................. 3-24
3.3.11.1 TCG/TPM (Trusted Platform Module) Support ....................... 3-24
3.3.12 IPMI Configuration .................................................................................. 3-25
3.3.12.1 IPMI Firmware Revision .......................................................... 3-25
3.3.12.2 Status of BMC .......................................................................... 3-26
3.3.13 View BMC System Event Log ................................................................ 3-26
3.3.13.1 Clear BMC System Event Log ................................................. 3-26
3.3.14 Set LAN Configuration ............................................................................ 3-26
3.3.14.1 Channel Number ....................................................................... 3-27
3.3.14.2 Channel Number Status ............................................................ 3-27
3.3.15 IP Address Source .................................................................................... 3-27
3.3.16 Mac Address ............................................................................................ 3-27
3.3.17 SET PEF Configuration ........................................................................... 3-28
3.3.17.1 PEF Support .............................................................................. 3-28
3.3.17.2 BMC Watch Dog Timer Action ................................................ 3-28
Themis Computer
xi

RES-32XR3/FIO Installation Manual
3.3.18 Event Log Configuration ......................................................................... 3-29
3.3.18.1 View Event Log ........................................................................ 3-29
3.3.18.2 Mark all events as read .............................................................3-29
3.3.18.3 Clear event log .......................................................................... 3-29
3.3.18.4 PCI Error Log ...........................................................................3-29
3.4 Security Settings ..................................................................................................3-30
3.4.1 Supervisor Password ................................................................................ 3-30
3.4.2 User Password .......................................................................................... 3-30
3.4.3 Change Supervisor Password ................................................................... 3-30
3.4.4 User Access Level
(Available when Supervisor Password is set as above) ........................... 3-31
3.4.5 Change User Password (Available when a User Password is installed) .. 3-31
3.4.6 Clear User Password (Available only when User Password is installed) 3-31
3.4.7 Password Check (Available when a password is installed) ..................... 3-31
3.4.8 Boot Sector Virus Protection ................................................................... 3-31
3.5 Boot Configuration .............................................................................................. 3-32
3.5.1 Boot Device Priority ................................................................................ 3-32
3.5.2 Storage Drives .......................................................................................... 3-32
3.5.3 Removable Drives .................................................................................... 3-33
3.5.4 CD/DVD Drives ...................................................................................... 3-33
3.6 Exit Options ......................................................................................................... 3-34
3.6.1 Save Changes and Exit ............................................................................ 3-34
3.6.2 Discard Changes and Exit ........................................................................ 3-34
3.6.3 Discard Changes ...................................................................................... 3-35
3.6.4 Load Optimal Defaults ............................................................................. 3-35
3.6.5 Load Fail-Safe Defaults ........................................................................... 3-35
3.7 BIOS Recovery .................................................................................................... 3-35
3.7.1 Boot Sector Recovery from a USB Device ............................................. 3-36
3.7.2 Boot Sector Recovery from an IDE CD-ROM ........................................ 3-36
3.7.3 Boot Sector Recovery from a Serial Port (“Serial Flash”) ...................... 3-36
3.7.3.1 Requirements ............................................................................ 3-36
3.8 BIOS Error Beep Codes ....................................................................................... 3-40
Appendix A. Connector Pinouts ...................................................................................... A-1
A.1 PS/2 Keyboard and Mouse ................................................................................... A-1
A.2 USB Ports ............................................................................................................. A-2
xii
Themis Computer

Table of Contents
A.3 Serial Port ............................................................................................................. A-2
A.4 VGA Display Port ................................................................................................. A-3
A.5 Gigabit Ethernet LAN Ports ................................................................................. A-4
A.6 IPMI Dedicated LAN Port .................................................................................... A-4
Appendix B. Rack-Mount Slide Installation ...................................................................B-1
Appendix C. Red Hat Enterprise Linux 5 Installation ..................................................C-1
C.1 Introduction ............................................................................................................C-1
C.2 Installation .............................................................................................................C-2
C.2.1 Step 1. ........................................................................................................C-2
C.2.2 Step 2. ........................................................................................................C-2
C.2.3 Step 3 .........................................................................................................C-3
C.2.4 Step 4 .........................................................................................................C-3
C.2.5 Step 5 .........................................................................................................C-4
C.2.6 Step 6 ........................................................................................................C-4
C.2.7 Step 7 ........................................................................................................C-5
C.2.8 Step 8 ........................................................................................................C-6
C.2.9 Step 9 ........................................................................................................C-7
C.2.10 Step 10 ......................................................................................................C-8
C.2.11 Step 11 .......................................................................................................C-9
C.2.12 Step 12 ....................................................................................................C-10
C.2.13 Step 13 ....................................................................................................C-11
C.2.14 Step 14 .....................................................................................................C-12
C.2.15 Step 15 ....................................................................................................C-13
C.2.16 Step 16 ....................................................................................................C-14
C.2.17 Step 17 ....................................................................................................C-15
C.2.18 Step 18 ....................................................................................................C-16
C.2.19 Step 19 ....................................................................................................C-16
C.2.20 Step 20 .....................................................................................................C-17
C.2.21 .Step 21 ....................................................................................................C-18
C.2.22 Step 22 ....................................................................................................C-18
Appendix D. Optional Remote On/Off Switch .............................................................. D-1
D.1 Remote On/Off Configuration .............................................................................. D-1
Themis Computer
xiii

RES-32XR3/FIO Installation Manual
D.2 Remote Only Configuration .................................................................................. D-2
D.3 Ordering the Remote On/Off Switch .................................................................... D-2
Appendix E. Re-Packing Instructions ............................................................................. E-1
E.1 Re-Packaging for Shipment ................................................................................... E-1
E.2 Packing Components .............................................................................................E-1
E.3 Instructions for Re-Packing ...................................................................................E-2
Index ................................................................................................................Index-1
Reader Comment Card
xiv
Themis Computer

Table of Contents
List of Figures
Figure 1 Rugged Enterprise Server Model RES-32XR3/FIO......................................... xix
Figure 1-1 RES-32XR3/FIO.............................................................................................. 1-1
Figure 1-2 X8DAH+-F Motherboard Block Diagram....................................................... 1-3
Figure 1-3 External Features of RES-32XR3/FIO (Front)................................................ 1-4
Figure 1-4 Major Components of RES-32XR3/FIO (Open Top View)............................ 1-6
Figure 1-5 RES-32XR3/FIO System LEDs and I/O Connectors1 .................................... 1-7
Figure 2-1 Remove the RES-32XR3/FIO Protective Access Cover................................. 2-2
Figure 2-2 Remove the Air-Flow Deflector Screws.......................................................... 2-4
Figure 2-3 Memory Module Slot Locations...................................................................... 2-5
Figure 2-4 Memory Module Removal............................................................................... 2-6
Figure 2-5 PCI Card Installation ....................................................................................... 2-7
Figure 2-6 PCI Card Clamp............................................................................................... 2-7
Figure 2-7 The RES-32XR3/FIO Lithium Battery and Socket......................................... 2-8
Figure 2-8 Unlocking the RES-32XR3/FIO Storage Drives (Front Doors Removed)...... 2-9
Figure 2-9 RES-32XR3/FIO Storage Drive Removal..................................................... 2-10
Figure 2-10 The RES-32XR3/FIO 120-mm Fans ............................................................. 2-11
Figure 2-11 The RES-32XR3/FIO Power Supply Locking Mechanism........................... 2-13
Figure 2-12 Right Rack-Mount Bracket............................................................................ 2-14
Figure 2-13 AC Power Socket and LED on the RES-32XR3/FIO.................................... 2-15
Figure 2-14 System Power Button and LED on the RES-32XR3/FIO Front.................... 2-16
Figure 3-1 Main BIOS Setup Screen................................................................................. 3-3
Figure 3-2 Advanced Settings ........................................................................................... 3-5
Figure 3-3 Security Settings ............................................................................................ 3-30
Figure 3-4 Boot Settings.................................................................................................. 3-32
Figure 3-5 Exit Options................................................................................................... 3-34
Figure 3-6 AMI_FLSH HyperTerminal .......................................................................... 3-38
Figure 3-7 ROM File Extraction ..................................................................................... 3-39
Themis Computer
xv

RES-32XR3/FIO Installation Manual
Figure 3-8 Flash Recovery .............................................................................................. 3-39
Figure A-1 USB Connector Pinout.................................................................................... A-2
Figure A-2 COM 1 Serial Connector Pinout..................................................................... A-2
Figure A-3 RES-32XR3/FIO VGA Connector Pinout...................................................... A-3
Figure A-4 Ethernet Connector, Type RJ45...................................................................... A-4
Figure B-1 Screw Locations for Rack-Mount Slides ......................................................... B-1
Figure B-2 RES-32XR3/FIO Rack-Mount Slide Installation ............................................ B-3
Figure C-1 Power On after Linux DVD is Inserted into Drive.......................................... C-2
Figure C-2 Skip Key .......................................................................................................... C-2
Figure C-3 Welcome Screen .............................................................................................. C-3
Figure C-4 Language Selection.......................................................................................... C-3
Figure C-5 Selecting Layout Type..................................................................................... C-4
Figure C-6 Enter Installation Number................................................................................ C-4
Figure C-7 Partitioning....................................................................................................... C-5
Figure C-8 Reviewing Option............................................................................................ C-6
Figure C-9 Creating a Custom Layout............................................................................... C-7
Figure C-10 Setting Up Boot Loader................................................................................... C-8
Figure C-11 Master Boot Record (MBR) ............................................................................ C-9
Figure C-12 Network Devices List .................................................................................... C-10
Figure C-13 Edit Interface Pop-Up Screen ........................................................................ C-11
Figure C-14 Selecting Time Zone...................................................................................... C-12
Figure C-15 Setting Up Root Account and Password........................................................ C-13
Figure C-16 Package Installation Default Screen.............................................................. C-14
Figure C-17 Optional Packages.......................................................................................... C-15
Figure C-18 Option to Review or Continue....................................................................... C-16
Figure C-19 Installation Begins ......................................................................................... C-16
Figure C-20 Installation is Complete ................................................................................. C-17
Figure C-21 Login Screen.................................................................................................. C-18
xvi
Themis Computer

Table of Contents
Figure C-22 Ready to use the Desktop............................................................................... C-18
Figure D-1 Remote On/Off Switch Module...................................................................... D-1
Figure E-1 Packaging Components.................................................................................... E-2
Figure E-2 Order of Assembly........................................................................................... E-3
List of Tables
Table 1 RES-x2XR3 Manual Matrix (AC and DC Power Supplies) ..............................xx
Table 2 RES-x2XR3S / RES-x1XR3 17” Chassis Manual Matrix
(AC and DC Power Supplies) .......................................................................... xxi
Table 3 RES-x2XR3/FIO 16” Chassis Manual Matrix (AC and DC Power Supplies) xxii
Table 1-1 RES-32XR3/FIO Motherboard Options......................................................... 1-2
Table 1-2 RES-32XR3/FIO Major Features ................................................................... 1-2
Table 1-3 Specifications of the RES-32XR3/FIO........................................................... 1-5
Table 1-4 System LEDs .................................................................................................. 1-8
Table 1-5 I/O Connectors................................................................................................ 1-9
Table 1-6 RES-32XR3/FIO General Specifications ..................................................... 1-15
Table 1-7 RES-32XR3/FIO Electrical Specifications................................................... 1-16
Table 1-8 Approximate Weights of the RES Series...................................................... 1-19
Table 2-1 RES-32XR3/FIO Memory Capacity............................................................... 2-3
Table 2-2 RES-32XR3/FIO Optimal Memory Population—Two CPUs Installed......... 2-3
Table A-1 PS/2 Keyboard/Mouse Pinout and Signal Descriptions ................................ A-1
Table A-2 USB Connector Pinout Signal Descriptions.................................................. A-2
Table A-3 COM 1 Serial Connector Pinout Signal Descriptions ................................... A-2
Table A-4 RES-32XR3/FIO VGA Connector-Pin Signals............................................. A-3
Table A-5 RJ45 Ethernet Pinout Signals ........................................................................ A-4
Themis Computer
xvii

RES-32XR3/FIO Installation Manual
xviii
Themis Computer

Preface
This document, entitled RES-32XR3/FIO Installation Manual, provides instructions
on how to install, configure, power up, boot, and perform diagnostics on the Themis
Rugged Enterprise Server RES-32XR3/FIO (see photo), based on two 64-bit Intel
5520 Series Xeon
RES-32XR3/FIO supports the SuperMicro X8DAH+-F motherboard in a 16” chas-
TM
Quad/Dual-Core CPUs with up to 6.4 GT/s each.
sis. (A matrix describing 16” chassis configurations is given in Table 3, page xxii;
for a matrix describing 17” chassis configurations, see Table 2, page xxi; a matrix
describing 20” chassis configurations is in Table 1, page xx.)
Themis Computer
Figure 1. Rugged Enterprise Server Model RES-32XR3/FIO
xix

RES-32XR3/FIO Installation Manual
Table 1. RES-x2XR3 Manual Matrix (AC and DC Power Supplies)
Manual Motherboard
Configuration 1
X8DTH-iF
X8DTH-6F
RES-32XR3
Manual
Part Number
116790-024 1176789-024
RES-22XR3
Manual
Part Number
RES-12XR3
Manual
Part Number
X8DTi
Configuration 2
X8DTi-F
117022-024 117017-024
X8DTi-LN4F
X8DT3
Configuration 3
X8DT3-F
117023-024 117018-024
X8DT3-LN4F
Configuration 4 X8DTN+ 117024-024 117019-024
Configuration 5
X8DAi
X8DA3
117025-024 117020-024
Configuration 6* X8DAH+F 117026-024 117021-024
Configuration 7 X8DTU-F 117280-024 116970-024
Naming Key: X8Dvwxyz z System RES-x2XR3, where x =3, 2, or 1
xx
v: A = Sound chip; no graphics chip
T = Graphics chip; no sound chip
*Configuration 6 motherboard X8DAH+-F supports both audio and video;
however, the naming key does not contain a “T” in the title.
w: H = Two Tylersburg Northbridge chips
blank = One Tylersburg Northbridge chip
U = Motherboard with cutout
x: i=SATA only
3 = SAS 1.0
6 = SAS 2.0
y: LN4 = Extra gigabit Ethernet controller for two extra ports
z: F=IPMI
blank = No IPMI
Themis Computer

Preface
Table 2. RES-x2XR3S / RES-x1XR3 17” Chassis Manual Matrix (AC and DC Power Supplies)
Mother-
board
X8DTL-6F
X8DTL-6
X8DTL-3F
X8DTL-3
X8DTL-iF
X8DTL-i
X8DAL-3
X8DAL-i
CPU
Soc
kets
2 117408-024 117412-024 117416-024
2 117409-024 117413-024 117417-024
2 117410-024 117414-024 117418-024
2 117411-024 117415-024 117419-024
RES-
32XR3S
Manual P/N
RES-
22XR3S
Manual P/N
RES-
12XR3S
Manual P/N
RES-
31XR3
Manual P/N
RES-
21XR3
Manual P/N
X8SAX 1 117420-024 117421-024
X8ST3-F
X8STE
1
117385-024 117422-024
X8STi
X8STi-F
X8STi-LN4
1
X8STi-3F
RES-
11XR3
Manual P/N
117423-024
Naming Key: X8uvwxyz z System RES-x2XR3S and RES-x1XR3, where x =3,
2, or 1
u: D = Double CPU sockets
S = Single CPU socket
v: A = Sound chip; no graphics chip
T = Graphics chip; no sound chip
w: Not applicable
x: i=SATA only
3 = SAS 1.0
6 = SAS 2.0
y: LN4 = Extra gigabit Ethernet controller for two extra ports
z: F=IPMI
blank = No IPMI
Themis Computer
xxi

RES-32XR3/FIO Installation Manual
Table 3. RES-x2XR3/FIO 16” Chassis Manual Matrix (AC and DC Power Supplies)
Mother-
board
X8DAH+-F*2
X8DTU-F 2 117664-024
Naming Key: X8uvwxyz z System RES-x2XR3S and RES-x1XR3, where
x = 3, 2, or 1
*RES-32XR3/FIO motherboard X8DAH+-F supports both audio and video;
however, the naming key does not contain a “T” in the title.
u: D = Double CPU sockets
S = Single CPU socket
v: A = Sound chip; no graphics chip
T = Graphics chip; no sound chip
w: Not applicable
x: i=SATA only
3 = SAS 1.0
6 = SAS 2.0
y: LN4 = Extra gigabit Ethernet controller for two extra ports
z: F=IPMI
blank = No IPMI
CPU
Soc
kets
RES-32XR3/FIO Manual P/N RES-22XR3/FIO Manual P/N
117611-024
xxii
The 3RU-high (5.25”) RES-32XR3/FIO has been designed to fit into a standard 19”
rack and is provided with rack-mount brackets with handles. Optional rack-mount
slides are also available. The RES-32XR3/FIO is rugged enough to withstand
extreme shock (up to 35G), temperature, and EMI as that associated with such
demanding markets as the military, aerospace, and telecommunications industries.
The two quad-core/dual-core Intel Xeon CPUs operate up to 6.4 GT/s (with a 1333MHz front-side system bus) and support up to 192 GigaBytes of DDR3 ECC FBDIMM memory modules. The RES-32XR3/FIO is based on the functionality and
capability of the following Intel chipset:
• Intel 5520 (Tylersburg) chipset
• ICH10R + 2x IOH-36D (Southbridge)
An overview of RES-32XR3/FIO design and specifications is given in Chapter 1,
"Overview and Specifications", of this manual.
Themis Computer

Preface
Website Information
This manual is intended for an experienced system administrator with a knowledge
of both networking and high-speed server systems.
Website Information
Themis Computer corporate and product information may be accessed on the World
Wide Web by browsing the website http://www.themis.com
.
Your Comments are Welcome
We are interested in improving our documentation and welcome your comments and
suggestions. You can email your comments to us at docfeedback@themis.com.
Please include the document part number in the subject line of your email.
Themis Computer
Notes, Cautions, Warnings, and Sidebars
The following icons and formatted text are included in this document for the reasons
described:
Note: A note provides additional information concerning the procedure or action
being described.
xxiii

RES-32XR3/FIO Installation Manual
Caution: A caution describes a procedure or action that may result in damage to
the equipment. This may involve—but is not restricted to—heavy equipment or
sharp objects. To reduce the risk, follow the instructions accompanying this symbol.
Warning: A warning describes a procedure or action that may cause injury or death
to the operator. To reduce the risk, follow the instructions accompanying this symbol.
Sidebar: A “sidebar” adds detail to the section within which it is placed,
but is not absolutely vital to the description or procedure of the section.
xxiv
Themis Computer

General
Section
1.1 Overview
The RES-32XR3/FIO, (see Figure 1-1 below), is a rack-mounted system designed
for above-average shock and vibration environments. The RES-32XR3/FIO supports
single or dual Intel® 1366-pin LGA XeonTM 64-bit processors (each up to 2.33 GHz
with a 1333-MHz system bus), and has many computer- and graphics-intensive and
diverse-I/O capabilities, ideal for a variety of military/aerospace and commercial
telecommunications applications. Motherboard options supported by
RES-32XR3/FIO are listed in Table 1-1 on page 1-2.
Chapter
1RES-32XR3/FIO
Overview and Specifications
Themis Computer
Figure 1-1. RES-32XR3/FIO
1-1

RES-32XR3/FIO Installation Manual
(A block diagram is given in Figure 1-2, page 1-2).
Mother-
board
X8DAH+-F Yes Yes — 18 Yes Yes 3 4
a—SuperMicro Computer, Inc.
IPMI SATA SAS
a
The RES-32XR3/FIO is designed within a 3RU-high (5.25”) form-factor 16” (40.6
cm) deep and 17.07” (43.4 cm) wide (which, with mounting brackets, fits a 19”-wide
rack). Major features of the RES-32XR3/FIO motherboard are listed in Table 1-2.
Table 1-1. RES-32XR3/FIO Motherboard Options
Memory
Slots
Graphics Audio
Table 1-2. RES-32XR3/FIO Major Features
PCI-e Slots
PCI-e
x16
PCI-e
x8
Processors • Two Quad Core Intel® 5600/5500 Series Xeon Proce ssors
• Intel® 5520 (Tylersburg) chipset
Chipset
• ICH10R + 2x IOH-36D
• 18 DIMMs
Memory
• up to 192 GB
• 1333/1066/800 MHz DDR3 ECC Registered Memory
Expansion Slots • 3 (x16) PCI-E 2.0, 4 (x8) PCI-E 2.0
Disk Drive Options
• 6 SATA slots: RAID 0, 1, 5, 10 support (Win), RAID 0,1,10
support (Linux)
• PS/2 Keyboard/Mouse Ports
• 6 USB 2.0 front ports (USB 0 thru USB 5)
plus 1 on motherboard, plus 2 internal headers (3ports)
Total of 10 USB 2.0 compliant ports.
• 1 Serial port (COM 1)
Front I/O
• 2 RJ45 LAN ports (Gigabit Ethernet)—LAN 1 and LAN 2
•VGA port
• Audio: 7.1 HD Audio, mike in, line in, side- and back-surround, CEN/LFE, front.
• IPMI 2.0 with virtual media over LAN and KVM-over-LAN
support via dedicated RJ45 IPMI LAN port
1-2
Themis Computer

Overview and Specifications
Overview
Themis Computer
Figure 1-2. X8DAH+-F Motherboard Block Diagram
1-3

RES-32XR3/FIO Installation Manual
16” (40.6 cm) deep
Dual Power Supplies
Power Supply
Latch Lock
AC Power Socket
(3-prong NEMA 15)
CD-RW/DVD-ROM
Combo Drive
PS1
System Power
ON/OFF Switch
PCI-Express 2.0 x8 slot
PCI-Express 2.0 x8 slot
PCI-Express 2.0 x16 slot
PCI-Express 2.0 x8 slot
Slot 1
5.25”
(3RU)
PS2
Slot 7
I/O Panel (see Figure 1-5, page 1-7
Storage Drives
17.07” (43.4 cm), 19” with Rack Mounts
PCI-Express 2.0 x8 (in x16 slot)
PCI-Express 2.0 x4 (in x8 slot)
PCI-Express 2.0 x16 slot
Figure 1-3. External Features of RES-32XR3/FIO (Front)
The RES-32XR3/FIO front panel houses three removable storage drive bays (see
Figure 1-3). Six SATA drives are supported by the X8DAH+-F motherboard. Additional drives may be supported by an installed PCI-E card.
Drive requirements should be specified at the time the system is purchased.
Also included on the front panel is a reset switch and the system power button and
LEDs (see Figure 1-5 on page 1-7), I/O faceplates for seven PCI cards (graphics,
RAID, NIC, etc.), two AC power supplies with latch locks and power-cord sockets,
and all I/O connectors (see Figure 1-5 on page 1-7).
Major features of the RES-32XR3/FIO are described in Table 1-3. Major internal
components can be seen in the open top view (cover removed) of Figure 1-4 on
page 1-6.
1-4
Themis Computer

Table 1-3. Specifications of the RES-32XR3/FIO
Feature Details
Overview and Specifications
System LEDs and I/O Connectors
Operating temperature
Shock endurance
Dimensions
a
a
z 0° up to 65° C (32° up to 149°F)
z 35G @ 25-msec duration (3 axis)
z 5.25” (3RU) high, 17.07” (43.4 cm) wide (19”/48.3 cm with mounting brack-
ets), 16” (40.6 cm) deep (including clearance for the rear thumb screws)
Rack-mount brackets and
slides
Dual power supplies
z Left and right rack-mount tabs are attached to the chassis
z Left and right rack-mount slides are optional
z 750 watts each, auto-ranging (100–240 VAC)
z Load-sharing N+1 redundant, hot-pluggable
z (Optional) 750 Watts DC power supply (48V and 28V)
a—Specifications are dependent on the configurations specified in this manual.
1.2 System LEDs and I/O Connectors
All RES-32XR3/FIO system LEDs and all I/O connectors are located on the front
panel (see A, Figure 1-5, page 1-7).
Themis Computer
LEDs are described in Table 1-4 on page 1-8; I/O connectors are described in
Table 1-5, page 1-9.
1-5

RES-32XR3/FIO Installation Manual
12 DIMM Memory Modules and 2 CPUs underneath
PCI Slot 1
I/O Slots 1 to 7
(PCI-Express 2.0 x8)
(PCI-Express 2.0 x16)
2
(PCI-Express 2.0 x8)
3
4
(PCI-E 2.0 x8 in x16 slot)
(PCI-E x4 in an x8 slot)
5
6
(PCI-Express 2.0 x16)
7
(PCI-Express 2.0 x8)
Power Supply (1 of 2)
Front
CD/DVD
Combo-Drive
Housing
Lithium Battery
(under cabling)
120-mm Fan (1 of 3)
Figure 1-4. Major Components of RES-32XR3/FIO (Open Top View)
1-6
Themis Computer

Overview and Specifications
System LEDs and I/O Connectors
LEDs
A
B
PS2 Mouse
Drives
IPMI Dedicated LAN
COM 1 Port
Fail
(PS1)
Powe r
Fail
(PS2)
ENET1
<>
NIC1 NIC2Storage
ENET2
<>
C
Overheat/
Fan Fail
Knockout slot
LAN2
Powe rPowe r
CEN/LFE
Back-surround
Line-in
PS2 Keyboard
Figure 1-5. RES-32XR3/FIO System LEDs and I/O Connectors1
Themis Computer
VGA Port
USB0 (top)
USB1 (btm)
USB 2-5
LAN1
Front
Side-surround
Microphone-in
1-7

RES-32XR3/FIO Installation Manual
ENET
Symbol LED Description
Table 1-4. System LEDs
ENET1
<>
2
C
Power
Storage Drive (SD)
a
NIC1
(Gb Ethernet) z Indicates network activity on LAN 1.
NIC2 (Gb Ethernet)
Power Fail
(Lower Power Supply)
Power Fail
(Upper Power Supply)
Overheat/Fan Fail
—Normally OFF
—RED light when tem-
perature limits are exceeded
z Indicates that the system is turned on.
z Indicates SATA storage drive activity.
z Indicates network activity on LAN 2.
z Warns that there is a fa ilure in the lower power
supply.
z Warns that there is a failure in the upper power
supply.
z Warns that the system is exceeding specified
temperature parameters. The CPU overheat
warning function must be enabled in the BIOS,
thus allowing the user to define an overheat
temperature, which—when exceeded—triggers the overheat warning LED.
N/A LAN1 and LAN2
a—NIC = Network Interface Controller.
1-8
Each Ethernet port contains two LEDs:
z The color of the left LED (when facing the port)
indicates the LAN connection speed:
- Off = 10 MHz
- Green = 100 MHz
- Amber = 1 GHz
z The right LED, when lit, indicates LAN activity.
Themis Computer
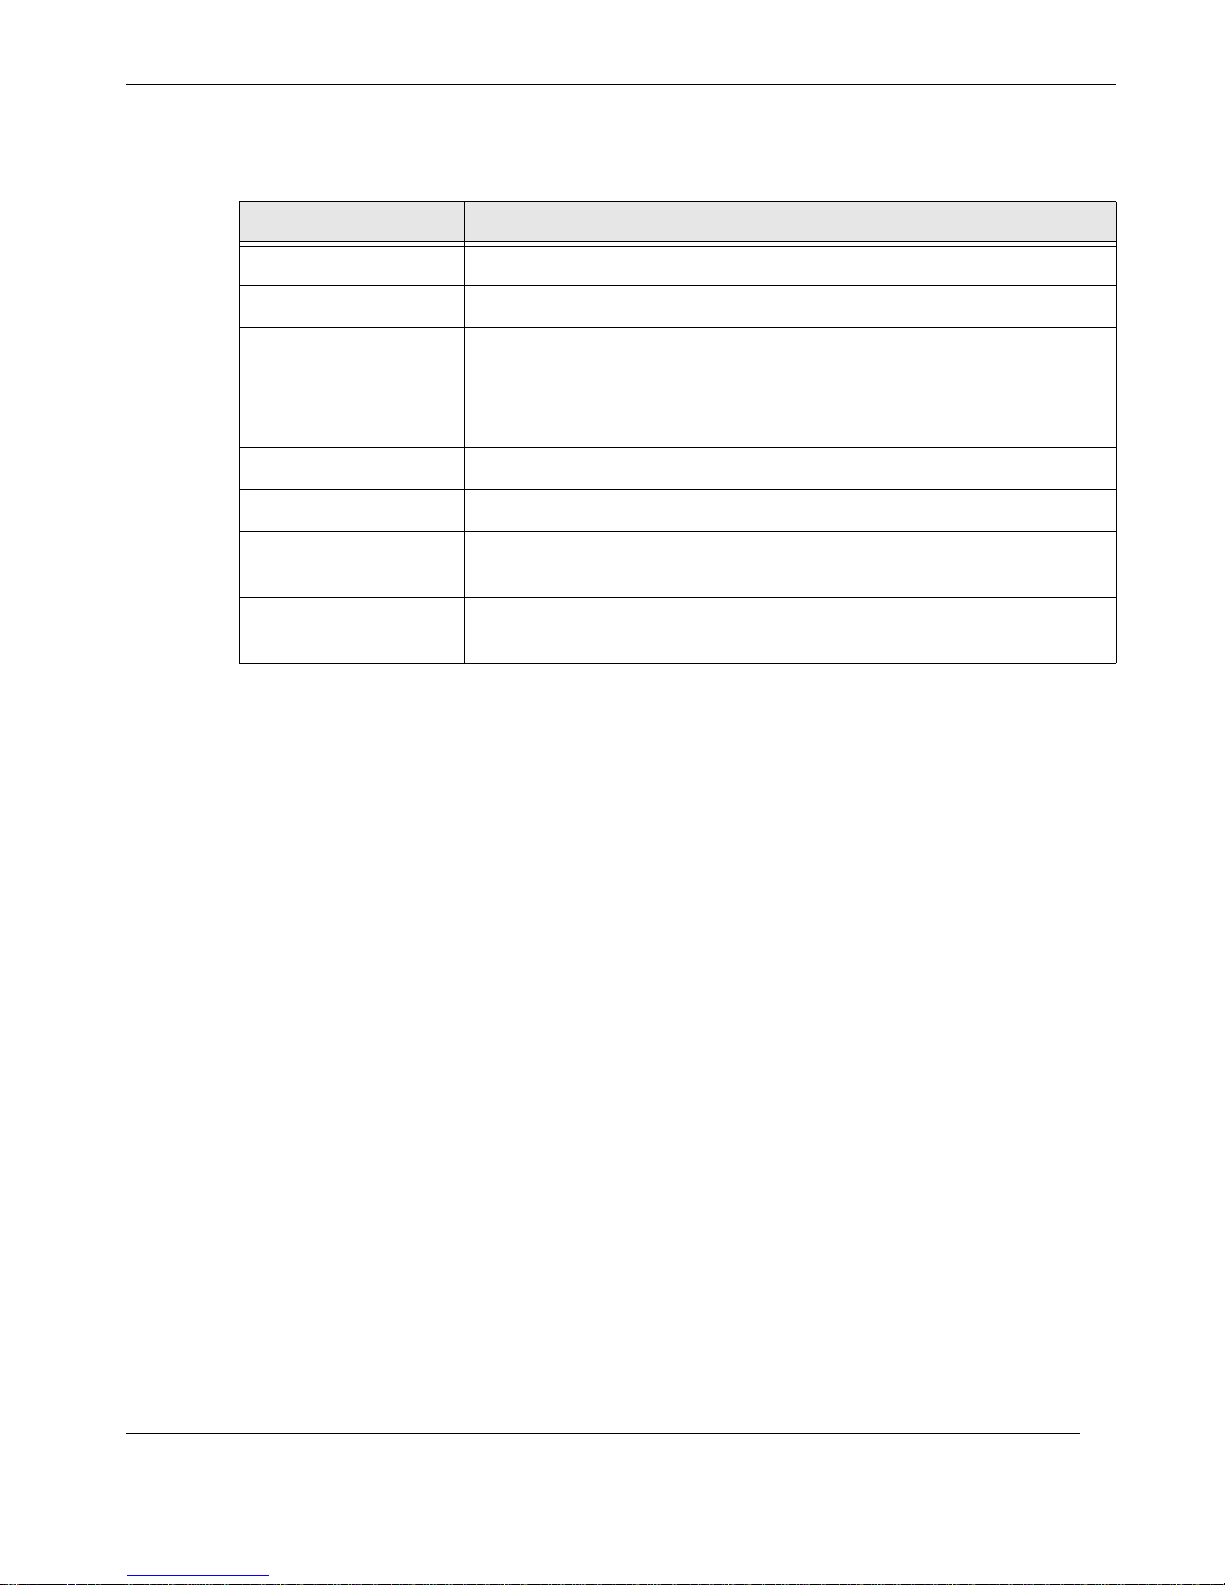
Table 1-5. I/O Connectors
Connector Description
Overview and Specifications
System LEDs and I/O Connectors
PS/2 Mouse
PS/2 Keyboard
USB 0 thru USB 5
Hi-Speed USB 2.0
Serial Ports
COM 1 Serial Port
VGA Port
Ethernet LAN Ports
IPMI Dedicated LAN
Port
z 6-pin mini-DIN (female) connector to attach a PS/2 mouse device.
z 6-pin mini-DIN (female) connector to attach a PS/2 keyboard device.
z Six 4-pin USB connectors to attach seri al devices to USB Port 0 th ru
USB Port 5.
Note: Four additional USB ports can be accessed directly from the
motherboard.
z One DB9 (male) connector to attach a serial device to the COM 1 port
z 15-pin VGA connector to attach a monitor device.
z Stan dard RJ45 connectors to attach o ne or two gigabit Etherne t LAN
line(s)—LAN 1 and LAN 2.
z Standard RJ45 connector to attach a dedicated IPMI LAN line.
Themis Computer
1-9

RES-32XR3/FIO Installation Manual
1.3 Chipset Overview
Built upon the functionality and capability of the Intel 5500/5600 series processor
platform, the RES-32XR3/FIO motherboard provides the performance and feature
sets required for dual-processor/IOH-based high-end systems optimized for High
Performance Computing (HPC)/Cluster platforms. The 5520 chipset consists of the
IOH 36D (I/O Hub), and the ICH10R (South Bridge). With the Intel QuickPath
Interconnect (QPI) controller built in, the 5520 platform offers the next generation
point-to-point system interconnect interface that replaces the current Front Side Bus
Technology, substantially enhancing system performance and scalability.
The IOH-36D connects to each processor through an independent QPI link. Each
link consists of 20 pairs of unidirectional differential lanes for transmission and
receiving in addition to a differential forwarded clock. A full-width QPI link pair
provides 84 signals.
The 5520 chipset supports up to 36 PCI Express Gen2 lanes, peer-to-peer read and
write transactions. The ICH10R provides up to seven PCI-Express ports, six SATA
ports and 10 USB connections. In addition, the 5520 platform also offers a wide
range of RAS (Reliability, Availability and Serviceability) features. These features
include memory interface ECC, x4/x8 Single Device Data Correction (SDDC),
Cyclic Redundancy Check (CRC), parity protection, out-of-band register access via
SMBus, memory mirroring, memory sparing, and Hot-plug support on the PCIExpress Interface.
1.3.1 Features of the 5500/5600 Processor and the 5520
Chipset
• Four processor cores in each processor with 8MB shared cache among cores
• Two full-width Intel QuickPath interconnect links, up to 6.4 GT/s of data transfer
rate in each direction
• Virtualization Technology, Integrated Management Engine supported
• Point-to-point cache coherent interconnect, Fast/narrow unidirectional links, and
Concurrent bi-directional traffic
• Error detection via CRC and Error correction via Link level retry
1-10
Themis Computer

1.4 Special Features
1.4.1 Recovery from AC Power Loss
BIOS provides a setting for you to determine how the system will respond when AC
power is lost and then restored to the system. You can choose for the system to
remain powered off (in which case you must press the power switch to turn it back
on) or for it to automatically return to a power- on state. See the Advanced BIOS
Setup section to change this setting. The default setting is Last State.
1.5 PC Health Monitoring
Overview and Specifications
Special Features
This section describes the PC health monitoring features of the RES-32XR3/FIO
motherboard. All have an onboard System Hardware Monitor chip that supports PC
health monitoring. An onboard voltage monitor will scan these onboard voltages
continuously:
CPU1 Vcore, CPU2 Vcore, CPU1 Vtt, CPU2 Vtt, CPU1 DIMM, CPU2 DIMM,
1.1V, 1.5V, 1.8V, 3.3V, 12V, 5V, 3.3 Vsb, and VBAT.
Once a voltage becomes unstable, a warning is given or an error message is sent to
the screen. Users can adjust the voltage thresholds to define the sensitivity of the
voltage monitor.
1.5.1 Fan Status Monitor with Firmware Control
The PC health monitor can check the RPM status of the cooling fans. The onboard
CPU and chassis fans are controlled by Thermal Management in the BIOS (under
Hardware Monitoring in the Advanced section).
1.5.2 Environmental Temperature Control
The thermal control sensor monitors the CPU temperature in real time and will turn
on the thermal control fan whenever the CPU temperature exceeds a user-defined
threshold. The overheat circuitry runs independently from the CPU. Once it detects
that the CPU temperature is too high, it will automatically turn on the thermal fan
control to prevent any overheat damage to the CPU. The onboard chassis thermal
Themis Computer
1-11

RES-32XR3/FIO Installation Manual
circuitry can monitor the overall system temperature and alert users when the chassis
temperature is too high.
Caution: T o avoid possible system overheating, please be sure to provide adequate
airflow to your system.
1.5.3 CPU Fan Auto-Off in Sleep Mode
The CPU fan becomes active when the power is turned on. It continues to operate
when the system enters the Standby mode. When in the sleep mode, the CPU will
not run at full power, thereby generating less heat.
1.5.4 System Resource Alert
This feature is available when used with Supero Doctor III in the Windows OS environment or used with the Supero Doctor II in Linux. Supero Doctor is used to notify
the user of certain system events. For example, you can also configure Supero Doctor to provide you with warnings when the system temperature, CPU temperatures,
voltages and fan speeds go beyond a pre-defined range.
1.6 ACPI Features
ACPI stands for Advanced Configuration and Power Interface. The ACPI specification defines a flexible and abstract hardware interface that provides a standard way
to integrate power management features throughout a PC system, including its hardware, operating system and application software. This enables the system to automatically turn on and off peripherals such as CD-ROMs, network cards, storage
drives and printers.
In addition to enabling operating system-directed power management, ACPI provides a generic system event mechanism for Plug and Play and an operating systemindependent interface for configuration control. ACPI leverages the Plug and Play
BIOS data structures while providing a processor architecture-independent implementation that is compatible with both Windows 2003 and Windows 2008 Operating
Systems.
1-12
Themis Computer

Overview and Specifications
1.6.1 Slow Blinking LED for Suspend-State Indicator
When the CPU goes into a suspend state, the chassis power LED will start blinking
to indicate that the CPU is in suspend mode. When the user presses any key, the
CPU will wake-up and the LED will automatically stop blinking and remain on.
1.6.2 Main Switch Override Mechanism
When an ATX power supply is used, the power button can function as a system suspend button to make the system enter a SoftOff state. The monitor will be suspended
and the storage drive will spin down. Pressing the power button again will cause the
whole system to wake-up. During the SoftOff state, the ATX power supply provides
power to keep the required circuitry in the system “alive.” In case the system malfunctions and you want to turn off the power, just press and hold the power button
for 4 seconds. This option can be set in the Power section of the BIOS Setup routine.
Power Supply
1.7 Power Supply
As with all computer products, a stable power source is necessary for proper and
reliable operation. It is even more important for processors that have high CPU clock
rates.
The RES-32XR3/FIO motherboard can accommodate 24-pin ATX power supplies.
Although most power supplies generally meet the specifications required by the
CPU, some are inadequate. In addition, the 12V 8-pin power connections are also
required to ensure adequate power supply to the system. Also your power supply
must supply 1.5A for the Ethernet ports.
Caution: To prevent damage to your power supply or motherboard, please use a
power supply that contains a 24-pin and two 8-pin power connectors. Be sure to
connect these power connectors to the 24-pin and the two 8-pin power connectors
on your motherboard for adequate power supply to your system. Failure to do so
will void the manufacturer warranty on your power supply and motherboard.
It is strongly recommended that you use a high quality power supply that meets ATX
power supply Specification 2.02 or above. It must also be SSI compliant (for more
information, please refer to the web site at http://www.ssiforum.org/). Additionally,
in areas where noisy power transmission is present, you may choose to install a line
Themis Computer
1-13

RES-32XR3/FIO Installation Manual
filter to shield the computer from noise. It is recommended that you also install a
power surge protector to help avoid problems caused by power surges.
1.8 Super I/O
The disk drive adapter functions of the Super I/O chip include a floppy disk drive
controller that is compatible with industry standard 82077/765, a data separator,
write pre-compensation circuitry, decode logic, data rate selection, a clock generator, drive interface control logic and interrupt and DMA logic. The wide range of
functions integrated onto the Super I/O greatly reduces the number of components
required for interfacing with floppy disk drives. The Super I/O supports 360 K, 720
K, 1.2 M, 1.44 M or 2.88 M disk drives and data transfer rates of 250 Kb/s, 500 Kb/s
or 1 Mb/s. It also provides two high-speed, 16550 compatible serial communication
ports (UARTs). Each UART includes a 16-byte send/receive FIFO, a programmable
baud rate generator, complete modem control capability and a processor interrupt
system. Both UARTs provide legacy spee d with baud rate of up to 115.2 Kbps as
well as an advanced speed with baud rates of 250 K, 500 K, or 1 Mb/s, which support higher speed modems.
The Super I/O provides functions that comply with ACPI (Advanced Configuration
and Power Interface), which includes support of legacy and ACPI power management through an SMI or SCI function pin. It also features auto power management to
reduce power consumption.Specifications.
1.9 Overview of the Winbond WPCM450 Controller
The Winbond WPCM450 Controller is a Baseboard Management Controller (BMC)
that supports the 2D/VGA-compatible Graphics Core with the PCI interface, Virtual
Media, and Keyboard/Video/Mouse Redirection (KVMR) modules. With blade-oriented Super I/O capability built-in, the WPCM450 Controller is ideal for legacyreduced server platforms.
The WPCM450 interfaces with the host system via a PCI interface to communicate
with the Graphics core. It supports USB 2.0 and 1.1 for remote keyboard/mouse/virtual media emulation. It also provides LPC interface to control Super IO functions.
The WPCM450 is connected to the network via an external Ethernet PHY module.
The WPCM450 communicates with onboard components via six SMBus interfaces,
fan control, and Platform Environment Control Interface (PECI) buses.
1-14
Themis Computer

1.10 Specifications
1.10.1 General
Table 1-6 lists general specifications for the RES-32XR3/FIO.
Table 1-6. RES-32XR3/FIO General Specifications
Parameter Description
Overview and Specifications
Specifications
Dimensions
Weight
19” Rack-Mountable
with Slide capability
Temperature
a
Operating:
Non-Operating:
Relative Humidity
a
Operating:
Non-Operating:
z 5.25” (3RU) high
z 17.07” (43.4 cm) wide (19” rack-mountable)
z 16” (40.6 cm) deep (including clearance for the rear thumb
screws)
z Under 27 pounds (12.3 kg), includes 2 full-length (up to
12.25”) PCI cards, 1 CD-RW/DVD-ROM drive, 2 SATA storage drives, and 2 power supplies
z Add 8.8 pounds (4 kg) for the shipping container and two AC
power cords
z The manual and associated shipping paperwork weighs ap-
proximately 1 lb (0.5 kg)
z Left and right rack-mount tabs attached to chassis
z Left and right rack-mount slides are optional
z 0° up to 65° C (32° up to 149°F)
z -40° to 70° C (-40° to 158° F)
z 8% to 95% (non-condensing)
z 5 to 95% (non-condensing)
Maximum Wet Bulb
Operating:
Non-Operating:
Altitude
a
Operating:
Non-Operating
a—Specifications are dependent upon the configuration in this manual.
Themis Computer
a
z 55°C, non-condensing
z 70°C, non-condensing
z 0 to 10,000 feet above sea level
z 0 to 40,000 feet above sea level
1-15

RES-32XR3/FIO Installation Manual
1.10.2 Electrical
Table 1-7 lists the electrical specifications for the RES-32XR3/FIO.
Parameter
Table 1-7. RES-32XR3/FIO Electrical Specifications
Description
AC (120 volts, 750W) DC (48 volts, 750W) DC (28 volts, 500W)
Input Power (typical)
Input Current
Input Frequency
Input Voltage
Input VA Rating
BTU Rating
Power Factor
Input Leakage Cur-
rent
Plug Type
a—Does not include plug-in PCI cards.
b—NA = Not Applicable.
z 420 watts (typical)
z 3.5 amperes @120
z 47–63 Hertz NA
z 100–265 Vac,
z 425 VA NA NA
z 1447 BTU/hour z 1447 BTU/hour z 1447 BTU/hour
z 0.99 NA NA
z 3.5 mA NA NA
z IEC
Vac
internally fused
a
z 420 watts (typical)
z 13.5 amperes @48
Vdc
b
z 40–72 Vdc,
internally fused
z Y-Type
(SVS5-4 or equivalent)
a
z 450 watts (typical)
z 16 amperes @28 Vdc
b
NA
z 18–36 Vdc,
a
internally fused
z Y-Type
(SVS5-4 or equivalent)
1.10.2.1 System Power
The RES-32XR3/FIO operates with two N+1 redundant AC power supplies of 750watts capacity each that auto-range single-phase AC input from 100 to 240 VAC (47
to 63 Hertz) sources. Filtered and fused (internal) AC is supplied to each power supply from a front-mounted power connection.
Two optional N+1 redundant DC power supplies of 750-watts each may be substituted for the AC power supplies. This should be specified at the time of your order.
1-16
Themis Computer

1.10.2.2 Output Voltage
The RES-32XR3/FIO power supply provides output voltages that are split between
+3.3V, +5V, +5Vsb, +12V, and -12V rails.
1.10.3 Environmental
1.10.3.1 Shock
The RES-32XR3/FIO is designed to survive an elevated shock environment. All
structural components are welded together, enabling the system to survive a maximum 3-axis shock load of 35G at 25-ms duration.
1.10.3.2 Electrostatic Discharge
The RES-32XR3/FIO is designed to tolerate electrostatic pulses up to 15 kilovolts
(KV) with no impact on system operation.
Overview and Specifications
Specifications
Themis Computer
1-17
RES-32XR3/FIO Installation Manual
1.11 Packaging and Shipping
The RES-32XR3/FIO is packaged in a reusable shipping container. Approximate
weight of an empty container and two AC power cords is 8.8 pounds (4 kg).
The approximate weight of a RES-32XR3/FIO (loaded with 2 storage drives, two
PCI cards, a CD-R W/DVD-ROM drive, and two power supplies) is under 27 pounds
(12.3 kg).
The approximate weight of a manual and associated shipping paperwork is one
pound (0.5 kg).
Therefore, both the shipping container and a fully installed RES-32XR3/FIO including power cords, manual, and associated paperwork, weigh under 37 pounds (16.5
kg).
Caution: Do not discard the original packaging in which your system was
shipped.
The original packaging was designed specifically to withstand the stress and rigors
of today’s shipping environment. It will be needed in the event the system must be
shipped back to Themis Computer. For re-packing instructions, see “Re-Packing
Instructions” on page E-1
1.11.1 Accessory Kit
Each RES-32XR3/FIO is packaged with an Accessory Kit, consisting of the following items:
A. A Power-cord Retainer Bracket
B. Two AC Power Cords
C. Two Storage Drive Barrel Keys
When you unpack the RES-32XR3/FIO, please verify that all of these items are
included. If any of these items are missing or not as pictured, please call Themis
Technical Support at 510-252-0870, or send an email to support@themis.com.
To learn how to secure the AC power cords and the power-cord retainer bracket,
refer to Section 2.3.1, “Plugging in the AC Power Cords,” on page 2-15.
1-18
Themis Computer

1.11.2 Rack-Mount Slides (Optional)
Rack-Mount Slides can be mounted on each side of the RES-32XR3/FIO for the purpose of sliding the unit in and out of a rack. Mounting slides are optional and can be
ordered at the time of purchase.
To learn how to install rack-mount slides, refer to Appendix B, “Rack-Mount Slide
Installation”.
Table 1-8. Approximate Weights of the RES Series
Overview and Specifications
Packaging and Shipping
Model
Weight
(Approximate)
CPU
Sockets
Depth Description
RES-12XR3 19.5 lbs (8.9 kg) 2 20” Includes:
z All CPU sockets filled
z 6 DIMMs
RES-12XR3-S 17 lbs (7.7 kg) 2 17”
RES-11XR3 16.5 lbs (7.5 kg) 1 17”
z 2 storage drives
z 2 PCI cards
z 1 CD-RW/DVD-ROM drive
z 2 power supplies
RES-22XR3 25 lbs (11.4 kg) 2 20”
Includes:
RES-22XR3-S 23 lbs (10.4kg) 2 17”
RES-22XR3/FIO 25.3 lbs (11.5kg) 2 16”
z All CPU sockets filled
z 6 DIMMs
z 2 storage drives
z 2 PCI cards
z 1 CD-RW/DVD-ROM drive
z 2 power supplies
RES-21XR3 22.5 lbs (10.2 kg) 1 17”
RES-32XR3 28.5 lbs (12.9 kg) 2 20”
RES-32XR3-S 26.5 lbs (12 kg) 2 17”
RES-32XR3/FIO 29 lbs (13.2 kg) 2 16”
RES-31XR3 26 lbs (11.8 kg) 1 17”
Themis Computer
Includes:
z All CPU sockets filled
z 6 DIMMs
z 2 storage drives
z 2 PCI cards
z 1 CD-RW/DVD-ROM drive
z 2 power supplies
1-19

RES-32XR3/FIO Installation Manual
1-20
Themis Computer

2StorageRES-32XR3/FIO
Installation
Section
This chapter describes:
• How to install a memory module, storage drive, PCI card, 120-mm-fan, power
supply, and lithium battery.
Chapter
2
Installation and Operation
• Rack-mount brackets and slides
• How to turn the RES-32XR3/FIO on and off
2.1 Installation Procedures
Caution: Use industry-standard ESD grounding techniques when handling all
components. Wear an antistatic wrist strap and use an ESD-protected mat. Store
ESD-sensitive components in antistatic bags before placing them on any surface.
Handle all IC cards by the front panel or edges only.
To install or replace a storage drive, fan, or power supply, skip the next section
and proceed directly to page 2-9, page 2-11, or page 2-12, respectively. Replacement
of motherboard components requires removal of the protective cover.
2.1.1 Remove Protective Top Cover
To access a motherboard component, open the RES-32XR3/FIO as follows:
Themis Computer
2-1

RES-32XR3/FIO Installation Manual
1. Loosen the four captive Phillips screws holding the protective top access
2. Both the front and sides of the cover have flat hooks or tabs underneath that
3. Store the cover in a safe place until it is replaced.
cover to the rear of the RES-32XR3/FIO chassis (see A, Figure 2-1).
fit under slots on the chassis top edges (see B, Figur e 2-1). Remove the cover
by sliding it toward the rear until it is free of these chassis slots.
Rear View
2-2
Loosen the 4 captive access-cover screws...
A
Chassis slot
Left-side top edge
... and slide the top cover toward the rear until the top hooks and tabs clear all chassis slots
B
Figure 2-1.
Remove the RES-32XR3/FIO Protective Access Cover
4. Proceed to the appropriate section to install or replace a memory module
(page 2-3), PCI card (page 2-7), or lithium battery (page 2-8).
Chassis slot
Themis Computer

2.1.2 Memory Modules
The RES-32XR3/FIO supports memory according to Table 2-1.
Installation and Operation
Installation Procedures
Table 2-1.
Motherboard
Capacity
X8DAH+-F 144 GB Yes 1333/1066/800 18 240
RES-32XR3/FIO Memory Capacity
Memory Parameters
DDR3
Registered
ECC
Speed (MHz)
Number
of DIMMS
Pins per
DIMM
Caution: Exercise extreme caution when installing or removing FBD Memory
Modules to prevent any possible damage.
Table 2-2. RES-32XR3/FIO Optimal Memory Population—Two CPUs Installed
DIMMs
6 DIMMs1A1B1C 1A1B1C
12 DIMMs1A2A 1B2B 1C2C 1A2A 1B2B 1C2C
18 DIMMs1A2A3A1B2B3B1C2C3C1A2A3A1B2B3B1C2C3C
CPU 1 (To populate P1-DIMMs) CPU 2 (to populate P2-DIMMs)
Branch 0 Branch 1 Branch 2 Branch 0 Branch 1 Branch 2
When installing memory, follow these rules for best memory performance:
• It is strongly recommended that you do not mix memory modules of different
speeds and sizes. If DIMMs of different speeds have been installed, verify that
the BIOS setup is configured for the fastest speed of RAM used.
Themis Computer
2-3

RES-32XR3/FIO Installation Manual
2.1.2.1 Installation
The following procedure explains how to install the DDR3 Memory Modules.
1. Loosen and remove the screws securing the air-flow deflector and PCI card
retainer bracket in the following manner: (see Figure 2-2).
• Screw A—Unscrew the captive screw marked “A” from it’s socket,
remove the PCI card retainer bracket and store it in a safe place.
PCI Card Retainer Brackets
Figure 2-2.
B
B
A
B
B
B
Remove the Air-Flow Deflector Screws
B
B
2-4
Themis Computer

P2 DIMM 1A
Installation and Operation
Installation Procedures
• Screw B—Remove the eight screws marked “B” in Figure 2-2 on
page 2-4, which will free the air-flow diverter so that it can be removed
from the system. After the air-flow diverter has been removed, the memory
module slots will be exposed (see Figure 2-3).
Branch 0
Branch 1
Branch 2
Branch 0
Branch 1
P2 DIMM 2A
P2 DIMM 3A
P2 DIMM 1B
P2 DIMM 2B
P2 DIMM 3B
P2 DIMM 1C
P2 DIMM 2C
P2 DIMM 3C
P1 DIMM 1A
P1 DIMM 2A
P1 DIMM 3A
P1 DIMM 1B
P1 DIMM 2B
P1 DIMM 3B
Branch 2
Themis Computer
P1 DIMM 1C
P1 DIMM 2C
P1 DIMM 3C
Figure 2-3. Memory Module Slot Locations
2. If a module is already seated in the slot you have selected for installation,
remove it by gently pressing down and outward on the latches at both ends of
the slot (see Figure 2-4 on page 2-6), then pulling the old module directly up
from the slot until it is free of the connector (see Figure 2-4 on page 2-6).
2-5

RES-32XR3/FIO Installation Manual
Press latch
downward &
outward at
each end
Figure 2-4. Memory Module Removal
3. Before inserting a new memory module into the vacant slot, make sure that
the two latches are pulled outward away from the center of the slot.
With the latches in the outward position, gently insert the new module verti-
cally into its slot and press firmly downward until it snaps into place.
Note: Make sure the memory module has the proper orientation by aligning the alignment notch at the bottom edge with its counterpart ridge at
the bottom of the slot.
4. When finished replacing memory modules, replace the air flow diverter and
secure it with the seven screws previously removed.
5. Replace the PCI card retainer bracket and secure it with the single captive
screw loosened in Step 1 on page 2-4.
2-6
Themis Computer

2.1.3 PCI Cards
The RES-32XR3/FIO supports seven PCI-Express slots. (see Figure 2-5).
Installation and Operation
Installation Procedures
Slot 1
Slots 1, 3, 5 and 7 are
PCI-Express 2.0 x8
Slots 2,4 and 6 are
PCI-Express 2.0 x16
2.1.3.1 Installing Cards
Perform the following steps to install a PCI card:
1. Locate the empty slot within which a card will be installed (see Figure 2-5).
23
467
5
Figure 2-5. PCI Card Installation
Captive knurled screw PCI card I/O panels (7 total)
Loosen the captive knurled screw...
Themis Computer
. and lift the PCI slot covers clear.
B
Figure 2-6. PCI Card Clamp
2-7

RES-32XR3/FIO Installation Manual
2. Loosen the captive knurled screw on the chosen PCI slot covers and remove
the slot covers. (see Figure 2-6).
3. Install the new card, making sure the I/O panel is aligned with the chassis
opening.
4. Repeat Step 1 and Step 3 until all additional cards have been installed.
5. Attach any internal I/O cables to the installed PCI cards, and carefully fold
and tuck any exposed ribbon cables into the cabinet.
6. If you have no further installations to perform, close the RES-32XR3/FIO
chassis by refastening the top cover removed in Section 2.1.1, “Remove Protective Top Cover,” on page 2-1.
2.1.4 Lithium Battery
2.1.4.1 Removing the Lithium Battery
Battery
Latch
Perform the following steps to remove the lithium battery:
1. Make sure the system is powered off (see “Operation” on page 2-15).
2. Locate the lithium battery socket and squeeze the latch (see A, Figure 2-7)
together until the battery lifts out of its socket.
AB
To release, squeeze battery latch together...
... and remove battery from socket
Figure 2-7. The RES-32XR3/FIO Lithium Battery and Socket
3. Remove the old battery and replace with a new battery (see next section).
2-8
Themis Computer

2.1.4.2 Installing a Lithium Battery
Perform the following steps to insert a new lithium battery:
1. T ilt the replacement battery into the empty socket so that it is angled under the
battery latch (see B, Figure 2-7).
2. Carefully press down on the battery until it clicks firmly into place.
2.1.5 SATA Storage Drive
The accessory kit shipped with your RES-32XR3/FIO contains two barrel lock keys.
This provides you the option of unlocking/locking the storage drives (see Figure
2-8).
Installation and Operation
Installation Procedures
Drive 0
Drive 2
Latch Lock
Button
Figure 2-8.
Unlocking the RES-32XR3/FIO S torage Drives (Front Doors Removed)
2.1.5.1 Storage Drive Removal
Perform the following steps to remove and install a storage drive: (see Figure 2-8).
1. Make sure the system is powered off (see “Operation” on page 2-15).
2. Locate the drive to be removed.
3. Insert the barrel lock key into the storage drive you want to remove, and turn
it 45 degrees clockwise (presuming the storage drive is locked; see A in
Figure 2-9 on page 2-10).
Drive 1
Drive Lock
(one per drive)
Themis Computer
2-9

RES-32XR3/FIO Installation Manual
4. Firmly push in the latch lock until the latch handle releases away from the
5. Grab the latch handle and pull the drive completely away from its slot (see C
Insert key into barrel lock and turn A
45 degrees clockwise,...
drive (see B in Figure 2-9).
in Figure 2-9).
Caution: When pulling the storage drive from the chassis, hold it at the bottom to prevent it from falling and damaging the drive.
B
... push the latch lock,...
C
... and pull drive out with the latch handle
Figure 2-9. RES-32XR3/FIO Storage Drive Removal
2.1.5.2 Storage Drive Installation
To install a storage drive,
1. Make sure the latch handle of the drive to be installed is in the open position.
2. Properly orient the new drive and insert it into the vacant drive slot. If the
drive cannot be inserted into the slot, rotate it 180 degrees.
3. Push the drive toward the rear (DO NOT CLOSE the latch handle while push-
ing) until the drive is flush with the front of the chassis. The handle will swing
closed when it comes into contact with the RES-32XR3/FIO chassis.
Latch
Lock
Latch Handle
2-10
Themis Computer

4. When the drive is fully inserted in its slot, insert the key into the barrel lock
and turn it 45 degrees counter-clockwise. The drive is now locked.
Caution: When in the closed position, the latch handle secures the drive to the
chassis. If the handle is closed before the drive is fully inserted, the latch mechanism
may not fully engage to secure the drive.
2.1.6 Removable 120-mm Fan
The RES-32XR3/FIO contains three high-speed 120-mm fans. All fans are removable for replacement in case of a fan failure.
Note: Since RES-32XR3/FIO fans are “hot-swappable”, it is not necessary to
turn off system power in order to remove and replace a fan, however it may be
necessary to pull the unit from the rack to obtain access to the fans. This may affect a decision whether or not to turn off system power.
Installation and Operation
Installation Procedures
2.1.6.1 Removing and Installing a 120-mm Fan
Perform the following steps to remove and install a 120-mm fan:
1. On the rear of the chassis, locate the four captive thumb screws for the fan to
be replaced. (see Figure 2-10).
2. Unscrew the four captive thumb screws and pull the fan out of the chassis.
120-mm Fan
Captive thumb screws
120-mm Fan
Themis Computer
Figure 2-10. The RES-32XR3/FIO 120-mm Fans
2-11

RES-32XR3/FIO Installation Manual
3. When the fan is removed, its 4-wire connector will automatically disconnect
from the chassis. Insert the replacement fan carefully into the empty fan slot
until it is flush with the second fan. The 4-wire connector will automatically
engage its counterpart connector successfully.
2.1.7 Power Supply
Each 750-watt load-sharing (N+1 redundant) power supply can be hot-swapped
while the system is still on and operational.
2.1.7.1 Removing a Power Supply
Perform the following steps to remove a power supply:
1. Remove the two captive Phillips screws holding the power supply locking
bracket to the chassis. Store the bracket for later use (see A in Figure 2-11).
2. Put the right index finger on the power supply extraction handle and the right
thumb on the bottom side of the power supply locking lever.
3. Squeeze the locking lever toward the pull handle and firmly pull the power
supply from the chassis.
2-12
Themis Computer

Installation and Operation
Installation Procedures
Knurled captive Phillips screw
Power supply locking bracket
sign to C
Knurled captive Phillips screw
A
Remove power supply locking bracket
B
... then disengage locking lever and remove power supply
New De
Phillips Screw Hole
for knurled captive screw
on power supply
locking bracket
o
m
e
Power LED
Push up to release power supply
Power Supply
Locking Lever
Extraction
Handle
AC Receptacle
Figure 2-11. The RES-32XR3/FIO Power Supply Locking Mechanism
Caution: When pulling the power supply from the chassis, hold it at the bot-
tom to prevent it from falling and damaging the unit.
2.1.7.2 Installing a Power Supply
Themis Computer
2-13

RES-32XR3/FIO Installation Manual
Perform the following steps to install a power supply:
1. Insert the replacement power supply into an empty slot with the extraction
handle horizontal, (see Figure 2-11 on page 2-13).
2. Push the power supply carefully into its slot until it is firmly seated (a click
will be heard when the locking lever is securely fastened to the chassis).
3. Replace the power supply locking bracket and tighten the two captive Phillips
screws (see Figure 2-11) to secure both power supplies
2.2 Rack Mounts
2.2.1 Mounting Brackets
The rack-mount brackets (flanges) are used to secure the chassis to the 19” rack (see
Figure 2-12). Handles are used to pull the RES-32XR3/FIO from the rack when
rack-mount slides have been installed on the sides of the chassis (see following section).
Right Mounting
Bracket
2-14
Figure 2-12.
Right Rack-Mount Bracket
Themis Computer

2.2.2 Rack-Mount Slides (Optional)
Rack-Mount Slides can be mounted on each side of the RES-32XR3/FIO for the purpose of sliding the unit in and out of a rack. Mounting slides are optional and should
be ordered at the time your system is purchased.
To learn how to install rack-mount slides, refer to Appendix B, “Rack-Mount Slide
Installation”.
Caution: Any screws used to mount a slide to a RES-32XR3/FIO chassis must not
exceed a length of 3/8” to prevent excessive penetration of the chassis.
2.3 Operation
Installation and Operation
Operation
2.3.1 Plugging in the AC Power Cords
Before powering on the RES-32XR3/FIO, plug in the AC power cords as follows:
• Plug an AC power cord (shipped with unit) into the AC power socket on each
power supply on the front of the RES-32XR3/FIO, (see Figure 2-13).
Power LED
Locking Lever
AC Power Socket
Figure 2-13. AC Power Socket and LED on the RES-32XR3/FIO
Themis Computer
2-15

RES-32XR3/FIO Installation Manual
2.3.2 Getting Started
2.3.2.1 Configuration
1. Make sure all storage drives are installed (see “SATA Storage Drive”, page 2-
9). Drive ID numbers are shown in Figure 2-8 on page 2-9. Changes may be
made through the BIOS.
2. Connect a multiscan monitor to the VGA connector.
3. Attach a PS/2 keyboard and mouse to the appropriate connectors on the front
I/O panel of the RES-32XR3/FIO (see Figure 1-5 on page 1-7)
2.3.2.2 Turning The System On
1. Plug the AC power cord from each of the RES-32XR3/FIO power supplies
into a “live” AC outlet.The LED on each power supply will turn on when AC
power is enabled.
2. On the front of the RES-32XR3/FIO push the system power on/off button (see
Figure 2-14). This will cause the system POWER LED to light (green).
Figure 2-14. System Power Button and LED on the RES-32XR3/FIO Front
2.3.2.3 Linux Installation
Power LED
System Power
On/Off Button
The subject of installing the Linux operating system onto the RES-32XR3/FIO is
detailed in Appendix C, “Red Hat Enterprise Linux 5 Installation”.
2-16
Themis Computer

2.3.3 Turning the System Off
Caution: Before turning your system off, make sure to save all open files, properly
close applications, and broadcast a warning to all users on any active networks.
1. To turn the RES-32XR3/FIO power off, press and hold the system power
on/off button (see Figure 2-14, page 2-16) for at least four (4) seconds. This
will shut down the system and turn off the POWER LED.
As an alternative, a modern operating system (Windows 9x or newer and
Linux, for example) can turn off the system after a graceful OS software
shutdown.
Installation and Operation
Operation
Themis Computer
2-17

RES-32XR3/FIO Installation Manual
2-18
Themis Computer

3RES-32XR3/FIO
Installation
Section
3.1 Introduction
This chapter describes the AMI BIOS Setup Utility for the RES-32XR3/FIO motherboard.
3.1.1 Starting BIOS Setup Utility
Chapter
BIOS Setup Utility
Themis Computer
To enter the AMI BIOS Setup Utility screens, press the <Delete> key while the system is booting up.
Note: In most cases, the <Delete> key is used to invoke the AMI BIOSsetup
screen. There are a few cases when other keys are used, such as <F1>, <F2>, etc.
Each main BIOS menu option is described in this manual. The Main BIOS setup
menu screen has two main frames. The left frame displays all the options that can be
configured. Grayed-out options cannot be configured. Options in blue can be configured by the user. The right frame displays the key legend. Above the key legend is an
area reserved for a text message. When an option is selected in the left frame, it is
highlighted in white. Often a text message will accompany it.
3-1

RES-32XR3/FIO Installation Manual
Note: The AMI BIOS has default text messages built in. Themis retains the option to include, omit, or change any of these text messages.
The AMI BIOS Setup Utility uses a key-based navigation system called “hot keys”.
Most of the AMI BIOS setup utility “hot keys” can be used at any time during the
setup navigation process. These keys include <F1>, <F10>, <Enter>, <ESC>, arrow
keys, etc.
Note: Options printed in Bold are default settings.
3.1.2 How To Change the Configuration Data
The configuration data that determines the system parameters may be changed by
entering the AMI BIOS Setup utility. This Setup utility can be accessed by pressing
<Del> at the appropriate time during system boot.
3.1.3 Starting the Setup Utility
Normally, the only visible Power-On Self-Test (POST) routine is the memory test.
As the memory is being tested, press the <Delete> key to enter the main menu of the
AMI BIOS Setup Utility. From the main menu, you can access the other setup
screens. An AMI BIOS identification string is displayed at the left bottom corner of
the screen below the copyright message.
Caution: Do not upgrade the BIOS unless your system has a BIOS-related issue.
Flashing the wrong BIOS can cause irreparable damage to the system. In no event
shall Themis be liable for direct, indirect, special, incidental, or consequential damages arising from a BIOS update. If you have to update the BIOS, do not shut down
or reset the system while the BIOS is updating. This is to avoid possible boot failure.
3-2
Themis Computer

3.2 Main Setup
When you first enter the AMI BIOS Setup Utility, you will enter the Main setup
screen.You can always return to the Main setup screen by selecting the Main tab on
the top of the screen. The Main BIOS Setup screen is shown below.
BIOS Setup Utility
Main Setup
3.2.1 System Time/System Date
Use this option to change the system time and date. Highlight System T ime or System
Date using the arrow keys. Key in new values through the keyboard and press
<Enter>. Press the <Tab> key to move between fields. The date must be entered in
Day MM/DD/YY format. The time is entered in HH:MM:SS format.
Note: The time is in the 24-hour format. For example, 5:30 P.M. appears as
17:30:00.
Themis Computer
Figure 3-1. Main BIOS Setup Screen
3-3

RES-32XR3/FIO Installation Manual
3.2.2 Supermicro X8DAH
• Version: This item displays the BIOS revision used in your system.
• Build Date: This item displays the date when this BIOS was completed.
3.2.3 Processor
The AMI BIOS will automatically display the status of the processor used in your
system:
• CPU Type: This item displays the type of CPU used in the motherboard.
• Speed: This item displays the speed of the CPU detected by the BIOS.
• Physical Count: This item displays the number of processors installed in your
system as detected by the BIOS.
• Logical Count: This item displays the number of CPU Cores installed in your
system as detected by the BIOS.
3.2.4 System Memory
This displays the size of memory available in the system:
• Populated Size: This item displays the installed memory size detected by the
BIOS.
• Available Size: This item d isplays the available memory detected by the BIOS.
3-4
Themis Computer

3.3 Advanced Setup Configurations
Use the arrow keys to select Advanced Setup and hit <Enter> to access the submenu
items:
BIOS Setup Utility
Advanced Setup Configurations
3.3.1 Boot Features
3.3.1.1 Quick Boot
If Enabled, this option will skip certain tests during POST to reduce the time needed
for system boot. The options are Enabled and Disabled.
3.3.1.2 Quiet Boot
This option allows the bootup screen options to be modified between POST messages or the OEM logo. Select Disabled to display the POST messages. Select
Enabled to display the OEM logo instead of the normal POST messages. The
options are Enabled and Disabled.
Themis Computer
Figure 3-2.
Advanced Settings
3-5

RES-32XR3/FIO Installation Manual
3.3.1.3 AddOn ROM Display Mode
This sets the display mode for Option ROM. The options are Force BIOS and Keep
Current.
3.3.1.4 Bootup Num-Lock
This feature selects the Power-on state for the Numlock key. The options are Off and
On.
3.3.1.5 PS/2 Mouse Support
This feature enables support for the PS/2 mouse. The options are Disabled, Enabled,
and Auto.
3.3.1.6 Wait For 'F1' If Error
This forces the system to wait until the 'F1' key is pressed if an error occurs. The
options are Disabled and Enabled.
3.3.1.7 Hit 'Del' Message Display
This feature displays “Press DEL to run Setup” during POST. The options are
Enabled and Disabled.
3.3.1.8 Watch Dog Function
If enabled, the Watch Dog Timer will allow the system to reboot when it is inactive
for more than 5 minutes. The options are Enabled and Disabled.
3.3.1.9 Restore on AC Power Loss
Use this feature to set the power state after a power outage. Select Power-Off for the
power to remain off after a power loss. Select Power-On for the power to be turned
on after a power loss. Select Last State to allow the system to resume its last state
before a power loss. The options are Power-On, Power-Off and Last State.
3.3.1.10 Interrupt 19 Capture
Interrupt 19 is the software interrupt that handles the boot drive function. When this
item is set to Enabled, the ROM BIOS of the host adaptors will “capture” Interrupt
19 at boot and allow the drives that are attached to these host adaptors to function as
bootable drives. If this item is set to Disabled, the ROM BIOS of the host adaptors
3-6
Themis Computer

will not capture Interrupt 19, and the drives attached to these adaptors will not function as bootable devices. The options are Enabled and Disabled.
3.3.2 Processor and Clock Options
This submenu allows the user to configure the Processor and Clock settings.
3.3.2.1 CPU Ratio
If set to Manual, this option allows the user to set the ratio between the CPU Core
Clock and the FSB Frequency. The options are Auto and Manual.
Note: If an invalid ratio is entered, the AMI BIOS will restore the setting to the
previous state.
BIOS Setup Utility
Advanced Setup Configurations
3.3.2.2 Ratio CMOS Setting (Available when the item-CPU Ratio is set
to Manual)
If CPU Ratio is set to Manual (above), this option allows the user to set the ratio
between the CPU Core Clock and the FSB Frequency .The default setting depends on
the type of CPU installed on the motherboard. The default setting for the CPU
installed in your motherboard is [21]. Press “+” or “-” on your keyboard to change
this value.
3.3.2.3 Clock Spread Spectrum
Select Enable to use the feature of Clock Spectrum, which will allow the BIOS to
monitor and attempt to reduce the level of Electromagnetic Interference caused by
the components whenever needed. The options are Disabled and Enabled.
3.3.2.4 Hardware Prefetcher (Available when supported by the CPU)
If set to Enabled, the hardware prefetcher will prefetch streams of data and instructions from the main memory to the L2 cache in the forward or backward manner to
improve CPU performance. The options are Disabled and Enabled.
3.3.2.5 Adjacent Cache Line Prefetch (Available when supported by
the CPU)
The CPU fetches the cache line for 64 bytes if this option is set to Disabled. The
Themis Computer
3-7

RES-32XR3/FIO Installation Manual
CPU fetches both cache lines for 128 bytes as comprised if Enabled.
3.3.2.6 Intel® Virtualization Technology (Available when supported by
the CPU)
Select Enabled to use the feature of Virtualization Technology to allow one platform
to run multiple operating systems and applications in independent partitions, creating multiple “virtual” systems in one physical computer. The options are Enabled
and Disabled.
Note: If there is any change to this setting, you will need to power off and restart
the system for the change to take effect. Please refer to Intel’s website for detailed
information.
3.3.2.7 Execute-Disable Bit Capability (Available when supported by
the OS and the CPU)
Set to Enabled to enable the Execute Disable Bit which will allow the processor to
designate areas in the system memory where an application code can execute and
where it cannot, thus preventing a worm or a virus from flooding illegal codes to
overwhelm the processor or damage the system during an attack. The default is
Enabled. (Refer to Intel and Microsoft Web Sites for more information.)
3.3.2.8 Simultaneous Multi-Threading (Available when supported by
the CPU)
Set to Enabled to use the Simultaneous Multi-Threading Technology, which will
result in increased CPU performance. The options are Disabled and Enabled.
3.3.2.9 Active Processor Cores
Set to Enabled to use a processor's Second Core and beyond. (Please refer to Intel's
web site for more information.) The options are All, 1 and 2.
3.3.2.10 Intel® EIST Technology
EIST (Enhanced Intel SpeedStep Technology) allows the system to automatically
adjust processor voltage and core frequency in an effort to reduce power consumption and heat dissipation. (Please refer to Intel’s web site for detailed information.)
The options are Disabled and Enabled.
3-8
Themis Computer

BIOS Setup Utility
Advanced Setup Configurations
3.3.2.11 C1E Support
Select Enabled to use the feature of Enhanced Halt State. C1E significantly reduces
the CPU's power consumption by reducing the CPU's clock cycle and voltage during
a “Halt State.” The options are Disabled and Enabled.
3.3.2.12 Intel® C-STATE Tech
If enabled, C-State is set by the system automatically to either C2, C3 or C4 state.
The options are Disabled and Enabled.
3.3.2.13 C-State package limit setting (Available when Intel® C-State
Tech is enabled)
If set to Auto, the AMI BIOS will automatically set the limit on the C-State package
register. The options are Auto, C1, C3, C6 and C7.
3.3.2.14 C1 Auto Demotion
When enabled, the CPU will conditionally demote C3, C6 or C7 requests to C1
based on un-core auto-demote information. The options are Disabled and Enabled.
3.3.2.15 C3 Auto Demotion
When enabled, the CPU will conditionally demote C6 or C7 requests to C3 based on
un-core auto-demote information. The options are Disabled and Enabled.
3.3.3 DCA Technology
This feature accelerates the performance of TOE devices. For this motherboard,
Note: A TOE device is a specialized, dedicated processor that is installed on an
add-on card or a network card to handle some or all packet processing of this addon card.
the TOE device is built inside the ESB 2 South Bridge chip. This feature is supported only by some types of processors (i.e., Intel Nehalem-WS 1S). The options
are Enabled and Disabled.
3.3.3.1 DCA Prefetch Delay
A DCA Prefetch is used with TOE components to prefetch data in order to shorten
Themis Computer
3-9

RES-32XR3/FIO Installation Manual
execution cycles and maximize data processing efficiency. Prefetching too frequently can saturate the cache directory and delay necessary cache accesses. This
feature reduces or increases the frequency the system prefetches data. The options
are [8], [16], [32], [40], [48], [56], [64], [72], [80], [88], [96], [104], [112], [120]
3.3.4 Advanced Chipset Control
The items included in the Advanced Settings submenu are listed below:
QPI & IMC Configuration
3.3.4.1 QPI Links Speed
This feature selects QPI's data tr ansfer speed. The options are Slow-mode, and Full
Speed.
3.3.4.2 QPI Frequency
This selects the desired QPI frequency. The options are Auto, 4.800 GT, 5.866GT,
6.400 GT.
3.3.4.3 QPI L0s and L1
This enables the QPI power state to low power. L0s and L1 are automatically
selected by the motherboard. The options are Disabled and Enabled.
3.3.4.4 Memory Frequency
This feature forces a DDR3 frequency slower than what the system has detected.
The available options are Auto, Force DDR-800, Force DDR-1066, and Force
DDR-1333.
3.3.4.5 Memory Mode
The options are Independent, Channel Mirror, and Lockstep.and Sparing.
• Independent - All DIMMs are available to the operating system.
• Channel Mirror - The motherboard maintains two identical copies of all data
in memory for redundancy.
• Lockstep - The motherboard uses two areas of memory to run the same set of
3-10
Themis Computer

operations in parallel.
• Sparing - A preset threshold of correctable errors is used to tr igger fail-over.
The spare memory is put online and used as active memory in place of the
failed memory.
3.3.4.6 Demand Scrubbing
A memory error-correction scheme where the Processor writes corrected data back
into the memory block from where it was read by the Processor. The options are
Enabled and Disabled.
3.3.4.7 Patrol Scrubbing
A memory error-correction scheme that works in the background looking for and
correcting resident errors. The options are Enabled and Disabled.
BIOS Setup Utility
Advanced Setup Configurations
3.3.4.8 Throttling - Closed Loop / Throttling - Open Loop
Throttling improves reliability and reduces power in the processor by automatic
voltage control during processor idle states. Available options are Disabled and
Enabled. If Enabled, the following items will appear:
Hysteresis Temperature (Closed Loop only)
Temperature Hysteresis is the temperature lag (in degrees Celsius) after the set
DIMM temperature threshold is reached before Closed Loop Throttling begins. The
options are Disabled, 1.5°C, 3.0°C, and 6.0°C.
Guardband Temperature (Closed Loop only)
This is the temperature which applies to the DIMM temperature threshold. Each step
is in 0.5°C increment. The default is [006]. Press “+” or “-” on your keyboard to
change this value.
Inlet Temperature
This is the temperature detected at the chassis inlet. Each step is in 0.5°C increment.
The default is [070]. Press “+” or “-” on your keyboard to change this value.
Themis Computer
3-11

RES-32XR3/FIO Installation Manual
Temperature Rise
This is the temperature rise to the DIMM thermal zone. Each step is in 0.5°C increment. The default is [020]. Press “+” or “-” on your keyboard to change this value.
Air Flow
This is the air flow speed to the DIMM modules. Each step is one mm/sec. The
default is [1500]. Press “+” or “-” on your keyboard to change this value.
Altitude
This feature defines how many meters above or below sea level the system is
located. Options are Sea Level or Below, 1~300, 301~600, 601~900, 901~1200,
1201~1500, 1501~1800, 1801~2100, 2101~2400, 2401~2700, and 2701~3000.
DIMM Pitch
This is the physical space between each DIMM module. Each step is in 1/1000 of an
inch. The default is [400]. Press “+” or “-” on your keyboard to change this value.
3.3.4.9 HDA Controller
Select Enabled to activate the onboard High-Definition Audio controller. The
options are Enabled and Disabled.
3.3.4.10 Intel VT -d
Select Enabled to enable Intel's Virtualization Technology support for Direct I/O
VT-d by reporting the I/O device assignments to VMM through the DMAR ACPI
Tables. This feature offers fully-protected I/O resource-sharing across the Intel platforms, providing the user with greater reliability, security and availability in networking and data-sharing. The settings are Enabled and Disabled.
3.3.4.11 SR-IOV Support
Single Root I/O Virtualization is an industry-standard mechanism that allow devices
to advertise their capability to be simultaneously shared among several virtual
machines. SR-IOV is capable of partitioning a PCI function into several virtual
interfaces for sharing the resources of a PCI Express (PCI-E) device under a virtual
environment. The options are Disabled and Enabled.
3-12
Themis Computer

3.3.4.12 NUMA Support
Select Enabled to use the feature of Non-Uniform Memory Access to improve CPU
performance. The options are Enabled and Disabled.
3.3.4.13 Intel I/OAT
The Intel I/OAT (I/O Acceleration Technology) significantly reduces CPU overhead
by leveraging CPU architectural improvements, freeing resources for other tasks.
The options are Disabled and Enabled.
3.3.4.14 Active State Power Management
Select Enabled to start Active-State Power Management for signal transactions
between L0 and L1 Links on the PCI Express Bus. This maximizes power-saving
and transaction speed. The options are Enabled and Disabled.
BIOS Setup Utility
Advanced Setup Configurations
3.3.4.15 Route Port 80h Cycles to
This feature allows the user to decide which bus to send debug information to. The
options are LPC and PCI.
3.3.4.16 USB Functions
This feature allows the user to decide the number of onboard USB ports to be
enabled. The Options are: Disabled, 2 USB ports, 4 USB ports, 6 USB ports, 8 USB
ports, 10 USB ports and 12 USB ports.
3.3.4.17 USB 2.0 Controller
Select Enabled to activate the onboard USB 2.0 controller. The options are Enabled
and Disabled.
3.3.4.18 Legacy USB Support
Select Enabled to use Legacy USB devices. If this item is set to Auto, Legacy USB
support will be automatically enabled if a legacy USB device is installed on the
motherboard, and vise versa. The settings are Disabled, Enabled and Auto.
3.3.5 IDE/Floppy Configuration
When this submenu is selected, the AMI BIOS automatically detects the presence of
the IDE devices and displays the following items:
Themis Computer
3-13

RES-32XR3/FIO Installation Manual
3.3.5.1 Floppy A
This feature allows the user to select the type of floppy drive connected to the system
as specified. The options are Disabled, 360KB 5 1/4”, 1.2MB 5 1/4”, 720KB 3 1/2”,
1.44MB 3 1/2” and 2.88MB 3 1/2”. The default setting for Floppy A is 1.44MB 3
1/2”, and for Floppy B is Disabled.
3.3.5.2 SATA#1 Configuration
If Compatible is selected, it sets SATA#1 to legacy compatibility mode, while
selecting Enhanced sets SATA#1 to nati ve SATA mode. The options are Disabled,
Compatible and Enhanced.
Configure SATA#1
This feature allows the user to select the drive type for SATA#1. The options are
IDE, RAID and AHCI. (When the option-RAID is selected, the item-ICH RAID
Code Base will appear.
ICH RAID Code Base (This feature is available when the option-RAID is selected)
Select Intel to enable Intel's SATA RAID firmware to configure Intel's SATA RAID
settings. Select Adaptec to enable Adaptec's SATA RAID firmware to configure
Adaptec's SATA RAID settings. The options are Intel and Adaptec.
SATA#2 Configuration (This feature is available when the option-IDE is selected for SATA#1)
Selecting Enhanced will set SATA#2 to native SATA mode. The options are Disabled, and Enhanced.
3.3.5.3 IDE Detect Timeout (sec)
Use this feature to set the time-out value for the BIOS to detect the ATA, ATAPI
devices installed in the system. The options are 0 (sec), 5, 10, 15, 20, 25, 30, and 35.
3.3.5.4 Primary IDE Master/Slave, Secondary IDE Master/Slave, Third
IDE Master, and Fourth IDE Master
These settings allow the user to set the parameters of Primary IDE Master/Slave,
3-14
Themis Computer

BIOS Setup Utility
Advanced Setup Configurations
Secondary IDE Master/Slave, Third and Fourth IDE Master slots. Hit <Enter> to
activate the following submenu screen for detailed options of these items. Set the
correct configurations accordingly. The items included in the submenu are:
Type
Select the type of device connected to the system. The options are Not Installed,
Auto, CD/DVD and ARMD.
LBA/Large Mode
LBA (Logical Block Addressing) is a method of addressing data on a storage drive.
In the LBA mode, the maximum drive capacity is 137 GB. For drive capacities over
137 GB, your system must be equipped with a 48-bit LBA mode addressing. If not,
contact your manufacturer or install an ATA/133 IDE controller card that supports
48-bit LBA mode. The options are Disabled and Auto.
Block (Multi-Sector Transfer)
Block Mode boosts the IDE drive performance by increasing the amount of data
transferred. Only 512 bytes of data can be transferred per interrupt if Block Mode is
not used. Block Mode allows transfers of up to 64 KB per interrupt. Select Disabled
to allow data to be transferred from and to the device one sector at a time. Select
Auto to allow data transfer from and to the device occur multiple sectors at a time if
the device supports it. The options are Auto and Disabled.
PIO Mode
The IDE PIO (Programmable I/O) Mode programs timing cycles between the IDE
drive and the programmable IDE controller. As the PIO mode increases, the cycle
time decreases. The options are Auto 0, 1, 2, 3, and 4.
Select Auto to allow the AMI BIOS to automatically detect the PIO mode. Use this
value if the IDE storage drive support cannot be determined.
Select 0 to allow the AMI BIOS to use PIO mode 0. It has a data transfer rate of 3.3
MBs.
Select 1 to allow the AMI BIOS to use PIO mode 1. It has a data transfer rate of 5.2
MBs.
Select 2 to allow the AMI BIOS to use PIO mode 2. It has a data transfer rate of 8.3
MBs.
Select 3 to allow the AMI BIOS to use PIO mode 3. It has a data transfer rate of 11.1
MBs.
Themis Computer
3-15

RES-32XR3/FIO Installation Manual
Select 4 to allow the AMI BIOS to use PIO mode 4. It has a data transfer bandwidth
of 32-Bits. Select Enabled to enable 32-Bit data transfer.
DMA Mode
Select Auto to allow the BIOS to automatically detect IDE DMA mode when the
IDE storage drive support cannot be determined.
Select SWDMA0 to allow the BIOS to use Single Word DMA mode 0. It has a data
transfer rate of 2.1 MBs.
Select SWDMA1 to allow the BIOS to use Single Word DMA mode 1. It has a data
transfer rate of 4.2 MBs.
Select SWDMA2 to allow the BIOS to use Single Word DMA mode 2. It has a data
transfer rate of 8.3 MBs.
Select MWDMA0 to allow the BIOS to use Multi Word DMA mode 0. It has a data
transfer rate of 4.2 MBs.
Select MWDMA1 to allow the BIOS to use Multi Word DMA mode 1. It has a data
transfer rate of 13.3 MBs.
Select MWDMA2 to allow the BIOS to use Multi-Word DMA mode 2. It has a data
transfer rate of 16.6 MBs.
Select UDMA0 to allow the BIOS to use Ultra DMA mode 0. It has a data transfer
rate of 16.6 MBs. It has the same transfer rate as PIO mode 4 and Multi Word DMA
mode 2.
Select UDMA1 to allow the BIOS to use Ultra DMA mode 1. It has a data transfer
rate of 25 MBs.
Select UDMA2 to allow the BIOS to use Ultra DMA mode 2. It has a data transfer
rate of 33.3 MBs.
Select UDMA3 to allow the BIOS to use Ultra DMA mode 3. It has a data transfer
rate of 66.6 MBs.
Select UDMA4 to allow the BIOS to use Ultra DMA mode 4. It has a data transfer
rate of 100 MBs.
Select UDMA5 to allow the BIOS to use Ultra DMA mode 5. It has a data transfer
rate of 133 MBs.
Select UDMA6 to allow the BIOS to use Ultra DMA mode 6. It has a data transfer
rate of 133 MBs. The options are Auto, SWDMAn, MWDMAn, and UDMAn.
3-16
Themis Computer

S.M.A.R.T. For Storage drives
Self-Monitoring Analysis and Reporting Technology (SMART) can help predict
impending drive failures. Select Auto to allow the AMI BIOS to automatically
detect storage drive support. Select Disabled to prevent the AMI BIOS from using
the S.M.A.R.T. Select Enabled to allow the AMI BIOS to use the S.M.A.R.T. to support storage drives. The options are Disabled, Enabled, and Auto.
32-Bit Data Transfer
Select Enable to enable the function of 32-bit IDE data transfer. The options are
Enabled and Disabled.
3.3.6 PCI/PnP Configuration
3.3.6.1 Clear NVRAM
BIOS Setup Utility
Advanced Setup Configurations
This feature clears the NVRAM during system boot. The options are No and Yes.
3.3.6.2 Plug & Play OS
Selecting Yes allows the OS to configure Plug & Play devices. (This is not required
for system boot if your system has an OS that supports Plug & Play.) Select No to
allow the AMI BIOS to configure all devices in the system.
3.3.6.3 PCI Latency Timer
This feature sets the latency Timer of each PCI device installed on a PCI bus. Select
64 to set the PCI latency to 64 PCI clock cycles. The options are 32, 64, 96, 128,
160, 192, 224 and 248.
3.3.6.4 PCI IDE BusMaster
When enabled, the BIOS uses PCI bus mastering for reading/writing to IDE drives.
The options are Disabled and Enabled.
3.3.6.5 PCI-E I/O Performance
This feature sets the PCI-E maximum payload size. The options are 128B and 256B.
Themis Computer
3-17

RES-32XR3/FIO Installation Manual
3.3.6.6 PCI-E Slot 1 x8, PCI-E Slot 2 x16, PCI-E Slot 3 x8, PCI-E Slot
4 x8 (in x16 slot), PCI-E Slot 5 PCI-E x4 (in x8 slot), PCI-E Slot
6 x16, PCI-E Slot 7 x8.
This feature allows you to Enable or Disable any of the PCI slots. The options are
Enable and Disable.
3.3.6.7 Onboard LAN Option ROM Select
Select the onboard LAN option ROM type. The options are iSCSI and PXE.
3.3.6.8 Load Onboard LAN1 Option ROM/Load Onboard LAN2 Option
ROM
Select Enabled to enable the onboard LAN1 or LAN2 Option ROM. This is to boot
computer using a network interface. The options are Enabled and Disabled.
3.3.6.9 Boot Graphics Adapter Priority
This feature allows the user to select the priority graphics adapter for system boot.
The options are Auto and Onboard VGA.
3.3.7 Super IO Device Configuration
3.3.7.1 Serial Port1 Address/Serial Port2 Address
This option specifies the base I/O port address and the Interrupt Request address of
Serial Port 1 and Serial Port 2. Select Disabled to prevent the serial port from accessing any system resources. When this option is set to Disabled, the serial port physically becomes unavailable. Select 3F8/IRQ4 to allow the serial port to use 3F8 as its
I/O port address and IRQ 4 for the interrupt address. The options for Serial Port 1 are
Disabled, 3F8/IRQ4, 3E8/IRQ4, 2E8/IRQ3. The options for Serial Port 2 are Disabled, 2F8/IRQ3, 3E8/IRQ4, and 2E8 IRQ3.
Serial Port 2 Mode
This feature allows the user to set the mode for Serial Port B. The options are Normal, IR (Infra-Red) and ASK-IR.
3-18
Themis Computer

3.3.7.2 Onboard Floppy Controller
Select Enabled to enable the onboard floppy controller. The options are Disabled
and Enabled.
3.3.8 Remote Access Configuration
3.3.8.1 Remote Access
This allows the user to enable the Remote Access feature. The options are Disabled
and Enabled.
If Remote Access is set to Enabled, the following items will display:
3.3.8.2 Serial Port Number
BIOS Setup Utility
Advanced Setup Configurations
This feature allows the user to decide which serial port to be used for Console Redirection. The options are COM 1 and COM 2.
Base Address, IRQ
This item displays the based address and IRQ of the serial port specified above.
3.3.8.3 Serial Port Mode
This feature allows the user to set the serial port mode for Console Redirection. The
options are 115200 8, n 1; 57600 8, n, 1; 38400 8, n, 1; 19200 8, n, 1; and 9600 8, n,
1.
3.3.8.4 Flow Control
This feature allows the user to set the flow control for Console Redirection. The
options are None, Hardware, and Software.
3.3.8.5 Redirection After BIOS POST
Select Disabled to turn off Console Redirection after Power-On Self-Test (POST).
Themis Computer
3-19

RES-32XR3/FIO Installation Manual
Select Always to keep Console Redirection active all the time after POST.
Note: This setting may not be supported by some operating systems.
Select Boot Loader to keep Console Redirection active during POST and Boot
Loader. The options are Disabled, Boot Loader, and Always.
3.3.8.6 Terminal Type
This feature allows the user to select the target terminal type for Console Redirection. The options are ANSI, VT100, and VT-UTF8.
3.3.8.7 VT-UTF8 Combo Key Support
A terminal keyboard definition that provides a way to send commands from a remote
console. Available options are Enabled and Disabled.
3.3.8.8 Sredir Memory Display Delay
This feature defines the length of time in seconds to display memory information.
The options are No Delay, Delay 1 Sec, Delay 2 Sec, and Delay 4 Sec.
3.3.9 Hardware Health Monitor
This feature allows the user to monitor system health and review the status of each
item as displayed.
3.3.9.1 CPU Overheat Alarm
This option allows the user to select the CPU Overheat Alarm setting which determines when the CPU OH alarm will be activated to provide warning of possible
3-20
Themis Computer

BIOS Setup Utility
Advanced Setup Configurations
CPU overheat.
Caution: 1. Any temperature that exceeds the CPU threshold temperature pre-
defined by the CPU manufacturer may result in CPU overheat or system instability .
When the CPU temperature reaches this predefined threshold, the CPU and system
cooling fans will run at full speed.
2. T o avoid possible system overheating, please be sure to provide adequate airflow
to your system.
The options are:
• The Early Alarm: Select this setting if you want the CPU overheat alarm
(including the LED and the buzzer) to be triggered as soon as the CPU temperature reaches the CPU overheat threshold as predefined by the CPU manufacturer.
• The Default Alarm: Select this setting if you want the CPU overheat alarm
(including the LED and the buzzer) to be triggered when the CPU temperature
reaches about 5oC above the threshold temperature as predefined by the CPU
manufacturer to give the CPU and system fans additional time needed for CPU
and system cooling. In both the alarms above, please take immediate action as
shown below.
3.3.9.2 CPU 1 Temperature/CPU 2 Temperature/System Temperature
This feature displays current temperature readings for the CPUs and the System. The
following items will be displayed for your reference only:
CPU 1 Temperature/ CPU 2 Temperature
The CPU Temperature feature will display the CPU temperature status as detected
by the BIOS:
• Low – This level is considered as the ‘normal’ operating state. The CPU temperature is well below the CPU ‘Temperature Tolerance’. The motherboard
fans and CPU will run normally as configured in the BIOS (Fan Speed Control). User intervention: No action required.
• Medium – The processor is running warmer. This is a ‘precautionary’ level
and generally means that there may be factors contributing to this condition,
but the CPU is still within its normal operating state and below the CPU ‘Temperature Tolerance’. The motherboard fans and CPU will run normally as configured in the BIOS. The fans may adjust to a faster speed depending on the
Themis Computer
3-21

RES-32XR3/FIO Installation Manual
Fan Speed Control settings. User intervention: No action is required. However,
consider checking the fans and the chassis ventilation for blockage.
• High – The processor is running hot. This is a ‘caution’ level since the CPU’s
‘Temperature Tolerance’ has been reached (or has been exceeded) and may
activate an overheat alarm. The system may shut down if it continues for a long
period to prevent damage to the CPU.
User intervention: If the system buzzer and Overheat LED has activated, take action
immediately by checking the system fans, chassis ventilation and room temperature
to correct any problems.
Notes:
1. The CPU thermal technology that reports absolute temperatures (Cel-
sius/Fahrenheit) has been upgraded to a more advanced feature by Intel in its
newer processors. The basic concept is each CPU is embedded by unique temperature information that the motherboard can read. This ‘Temperature
Threshold’ or ‘Temperature Tolerance’ has been assigned at the factory and
is the baseline on which the motherboard takes action during different CPU
temperature conditions (i.e., by increasing Fan speed, triggering the Overheat
Alarm, etc.). Since CPUs can have different ‘Temperature Tolerances’, the
installed CPU can now send information to the motherboard what its ‘Temperature Tolerance’ is, and not the other way around. This results in better
CPU thermal management.
3-22
Supermicro has leveraged this feature by assigning a temperature status to
certain thermal conditions in the processor (Low, Medium and High). This
makes it easier for the user to understand the CPU’s temperature status,
rather than by just simply seeing a temperature reading (i.e., 25°C). The
information provided above is for your reference only. For more information
on thermal management, please refer to Intel’s Web site at www.Intel.com.
System Temperature:
The system temperature will be displayed (in degrees in Celsius and Fahrenheit) as it
is detected by the BIOS.
Fan Speed Readings
This feature displays the fan speed readings from Fan1 through Fan8.
Themis Computer

Fan Speed Control Modes
This feature allows the user to decide how the system controls the speeds of the
onboard fans. The CPU temperature and the fan speed are correlative. When the
CPU on-die temperature increases, the fan speed will also increase, and vice versa.
Select Workstation if your system is used as a Workstation. Select Server if your
system is used as a Server. Select Full Speed to disable the fan speed control function and allow the onboard fans to constantly run at full speed. The Options are: Full
Speed, Server, Workstation/Desktop, and Super Quiet.
3.3.9.3 Voltage Readings
The following voltage readings will be displayed.
CPU0 Vcore, CPU1 Vcore, 1.5V, 5V, 5VSB, 12V, 3.3Vcc, 3.3Vsb, and VBAT and
Vtt.
BIOS Setup Utility
Advanced Setup Configurations
3.3.10 ACPI Configuration
Use this feature to configure Advanced Configuration and Power Interface (ACPI)
power management settings for your system.
3.3.10.1 High Performance Event Timer
Select Enabled to activate the High Performance Event Timer (HPET) that produces
periodic interrupts at a much higher frequency than a Real-time Clock (R TC) does in
synchronizing multimedia streams, providing smooth playback and reducing the
dependency on other timestamp calculation devices, such as an x86 RDTSC Instruction embedded in the CPU. The High Performance Event Timer is used to replace
the 8254 Programmable Interval Timer. The options are Enabled and Disabled.
3.3.10.2 USB Device Wakeup
Select Enable to “wake-up” the system via a USB device when the system is in S3
(Sleep) or S4 (Hibernate) State. The options are Enabled and Disabled.
3.3.10.3 PS2 KB/MS Wake Up
Select Enable to “wake-up” the system using either the PS2 keyboard or mouse (if
equipped) when the system is in S3 or S4 state. The options are Enabled and Dis-
abled.
Themis Computer
3-23

RES-32XR3/FIO Installation Manual
3.3.10.4 ACPI Aware O/S
Enable ACPI support if it is supported by the OS to control ACPI through the Operating System. Otherwise, disable this feature. The options are Yes and No.
3.3.10.5 Suspend Mode
This option is used to select the ACPI State that is used for system suspend. The
options are S1 (POS), S3 (STR) and Auto.
S1 (POS) - All processor caches are erased, and stops executing instructions. Power
to the CPU(s) and RAM is maintained, but RAM is refreshed.
S3 (STR) - The CPU has no power and the power supply goes on reduced power
mode. However, main memory (RAM) is still powered.
3.3.10.6 ACPI APIC Support
Select Enabled to include the ACPI APIC Table Pointer in the RSDT (Root System
Description Table) pointer list. The options are Enabled and Disabled.
3.3.10.7 APIC ACPI SCI IRQ
When this item is set to Enabled, APIC ACPI SCI IRQ is supported by the system.
The options are Enabled and Disabled.
3.3.10.8 Headless Mode
This feature is used to enable the system to function without a keyboard, monitor
and/or mouse attached The options are Enabled and Disabled.
3.3.10.9 ACPI Version Features
The options are ACPI v1.0, ACPI v2.0 and ACPI v3.0. Please refer to ACPI's website for further explanation: http://www.acpi.info/.
3.3.11 Trusted Computing
3.3.11.1 TCG/TPM (Trusted Platform Module) Support
Select Yes on this item and enable the TPM jumper on the motherboard to enable
TCG (TPM 1.1/1.2)/TPM support in order to improve data integrity and network
3-24
Themis Computer

BIOS Setup Utility
Advanced Setup Configurations
security. The options are No and Yes. If this feature is set to Yes, the following items
will display:
Indicate Physical
Enables indication of physic al presence to TPM device each time the system starts.
The options are Yes and No.
TPM Deactivated
Use this feature to Set or Clear the TPM device. The options are Set, Clear and
Don't Change.
TPM Owner
Use this feature to Install or Clear the TPM ownership. The options are Don't
Change, Enable Install, Disable Install and Clear.
Execute TPM Command
Select Enabled to allow the user to change executable TPM commands and TPM settings. Select Don't Change to keep the current TPM settings. The options are Don't
Change, Enabled, and Disabled.
• TPM Enable/Disable Status
This item displays the status of TPM Enabled/Disabled state.
• TPM Owner Status
This item displays the status of TPM Ownership
3.3.12 IPMI Configuration
Intelligent Platform Management Interface (IPMI) is a set of common interfaces that
IT administrators can use to monitor system health and to manage the system as a
whole. For more information on the IPMI specifications, please visit Intel's website
at www.intel.com.
3.3.12.1 IPMI Firmware Revision
This item displays the current IPMI firmware revision.
Themis Computer
3-25

RES-32XR3/FIO Installation Manual
3.3.12.2 Status of BMC
Baseboard Management Controller (BMC) manages the interface between system
management software and platform hardware. This is an informational feature which
returns the status code of the BMC micro controller.
3.3.13 View BMC System Event Log
This feature displays the BMC System Event Log (SEL). It shows the total number
of entries of BMC System Events. To view an event, select an Entry Number and
press <Enter> to display the information as shown in the screen.
• Total Number of Entries
• SEL Entry Number
• SEL Record ID
• SEL Record Type
• Timestamp, Generator ID
• Event Message Format User
• Event Sensor Type
• Event Sensor Number
• Event Dir Type
• Event Data
3.3.13.1 Clear BMC System Event Log
Select OK and press the <Enter> key to clear the BMC system log. Select Cancel to
keep the BMC System log. The options are OK and Cancel.
Caution: Any cleared information is unrecoverable. Make absolutely sure that you
no longer need any data stored in the log before clearing the BMC Event Log.
3.3.14 Set LAN Configuration
Set this feature to configure the IPMI LAN adapter with a network address as shown
in the following graphics.
3-26
Themis Computer

3.3.14.1 Channel Number
Enter the channel number for the SET LAN Config command. This is initially set to
[01]. Press “+” or “-” on your keyboard to change the Channel Number.
3.3.14.2 Channel Number Status
This feature returns the channel status for the Channel Number selected above:
Channel Number is “OK” or “Wrong Channel Number”.
3.3.15 IP Address Source
Select the source of this machine's IP address. If Static is selected, you will need to
know and enter manually the IP address of this machine below. If DHCP is selected,
the BIOS will search for a DHCP (Dynamic Host Configuration Protocol) server in
the network it is attached to, and request the next available IP address. The options
are DHCP and Static.
BIOS Setup Utility
Advanced Setup Configurations
The following items are assigned IP addresses automatically if DHCP is selected
under IP Address Source above:
IP Address
Enter the IP address for this machine. This should be in decimal and in dotted quad
form, (i.e., 192.168.10.253). The value of each three-digit number separated by dots
should not exceed 255 as shown in the screen below.
Subnet Mask
Subnet masks tell the network which subnet this machine belongs to. The value of
each three-digit number separated by dots should not exceed 255.
Gateway Address
This is the IP address of the gateway in the network. This is usually a router.
3.3.16 Mac Address
The BIOS will automatically enter the Mac address of this machine; however it may
be over-ridden. Mac addresses are 6 two-digit hexadecimal numbers (Base 16, 0 ~ 9,
A, B, C, D, E, F) separated by dots. (i.e., 00.30.48.D0.D4.60).
Themis Computer
3-27

RES-32XR3/FIO Installation Manual
3.3.17 SET PEF Configuration
3.3.17.1 PEF Support
Select Enabled to enable the function of Platform Event Filter (PEF) which will
interpret BMC events and perform actions based on pre-determined settings or
events, and performs actions based on pre-determined settings or 'traps' under IPMI
1.5 specifications. For example, powering the system down or sending an alert when
a triggering event is detected. The default is Disabled.
The following items will display if this item is set to Enabled.
PEF Action Global Control (Available if PEF Support is enabled)
These are the different actions based on BMC events. The options are Alert, Power
Down, Reset System, Power Cycle, OEM Action, Diagnostic Interface.
Alert Startup Delay (Available if PEF Support is enabled)
This feature inserts a delay during startup for PEF alerts. The options are Enabled
and Disabled.
Startup Delay (Available if PEF Support is enabled)
This feature enables or disables startup delay. The options are Enabled and Disabled.
Event Message for PEF Action (Available if PEF Support is enabled)
This enables or disables Event Messages for PEF action. Refer to Table 24.6 of the
IPMI 1.5 Specification for more information at www.intel.com. The options are Dis-
abled and Enabled.
3.3.17.2 BMC Watch Dog Timer Action
This feature allows the BMC to reset or power down the system if the OS hangs or
crashes. The options are Disabled, Reset System, Power Down, Power Cycle.
3-28
Themis Computer

BMC Watch Dog TimeOut [Min:Sec]
This option appears if BMC Watch Dog Timer Action (above) is enabled. This is a
timed delay in minutes or seconds, before a system power down or reset after an
operating system failure is detected. The options are [5 Min.], [1 Min.], [30 Sec], and
[10 Sec].
3.3.18 Event Log Configuration
3.3.18.1 View Event Log
Use this option to view the System Event Log.
3.3.18.2 Mark all events as read
This option marks all events as read. The options are OK and Cancel.
BIOS Setup Utility
Advanced Setup Configurations
3.3.18.3 Clear event log
This option clears the Event Log memory of all messages. The options are OK and
Cancel.
3.3.18.4 PCI Error Log
Use this option to enable PCI error (PERR) logging. The options are Yes and No.
Themis Computer
3-29

RES-32XR3/FIO Installation Manual
3.4 Security Settings
The AMI BIOS provides a Supervisor and a User password. If you use both passwords, the Supervisor password must be set first.
Figure 3-3.
3.4.1 Supervisor Password
This item indicates if a Supervisor password has been entered for the system. “Not
Installed” means a Supervisor password has not been used.
3.4.2 User Password
This item indicates if a user password has been entered for the system. “Not
Installed” means that a user password has not been used.
3.4.3 Change Supervisor Password
Select this feature and press <Enter> to access the submenu, and then type in a new
3-30
Security Settings
Themis Computer

BIOS Setup Utility
Security Settings
Supervisor Password.
3.4.4 User Access Level (Available when Supervisor
Password is set as above)
Available options are Full Access: grants full User read and write access to the
Setup Utility, View Only: allows access to the Setup Utility but the fields cannot be
changed, Limited: allows only limited fields to be changed such as Date and Time,
No Access: prevents User access to the Setup Utility.
3.4.5 Change User Password (Available when a User
Password is installed)
Select this feature and press <Enter> to access the submenu, and then type in a new
User Password.
3.4.6 Clear User Password (Available only when User
Password is installed)
This item allows you to clear a user password after it has been entered.
3.4.7 Password Check (Available when a password is installed)
This item forces the system to prompt for a password only when entering BIOS
setup or during each bootup. The options are Setup and Always.
3.4.8 Boot Sector Virus Protection
When Enabled, the AMI BIOS displays a warning when any program (or virus)
issues a Disk Format command or attempts to write to the boot sector of the storage
drive. The options are Enabled and Disabled.
Themis Computer
3-31

RES-32XR3/FIO Installation Manual
3.5 Boot Configuration
Figure 3-4. Boot Settings
Use this feature to configure boot settings.
3.5.1 Boot Device Priority
This feature allows the user to specify the sequence of priority for the Boot Device.
The settings are 1st boot device, 2nd boot device, 3rd boot device, 4th boot device,
5th boot device and Disabled.
• 1st Boot Device - [USB: XXXXXXXXX]
• 2nd Boot Device - [CD/DVD: XXXXXXXXX]
3.5.2 Storage Drives
This feature allows the user to specify the boot sequence from all available storage
drives. The settings are Disabled and a list of all storage drives that have been
3-32
Themis Computer

detected (i.e., 1st Drive, 2nd Drive, 3rd Drive, etc).
• 1st Drive - [SATA: XXXXXXXXX]
3.5.3 Removable Drives
This feature allows the user to specify the boot sequence from available Removable
Drives. The settings are 1st boot device, 2nd boot device, and Disabled.
• 1st Drive - [USB: XXXXXXXXX]
• 2nd Drive
3.5.4 CD/DVD Drives
This feature allows the user to specify the boot sequence from available CD/DVD
Drives (i.e., 1st Drive, 2nd Drive, etc.).
BIOS Setup Utility
Boot Configuration
Themis Computer
3-33

RES-32XR3/FIO Installation Manual
3.6 Exit Options
Select the Exit tab from the AMI BIOS Setup Utility screen to enter the Exit BIOS
Setup screen.
Figure 3-5.
3.6.1 Save Changes and Exit
When you have completed the system configuration changes, select this option to
leave the BIOS Setup Utility and reboot the computer, so the new system configuration parameters can take effect. Select Save Changes and Exit from the Exit menu
and press <Enter>.
3.6.2 Discard Changes and Exit
Select this option to quit the BIOS Setup without making any permanent changes to
the system configuration, and reboot the computer. Select Discard Changes and Exit
from the Exit menu and press <Enter>.
3-34
Exit Options
Themis Computer

3.6.3 Discard Changes
Select this option and press <Enter> to discard all the changes and return to the AMI
BIOS Utility Program.
3.6.4 Load Optimal Defaults
To set this feature, select Load Optimal Defaults from the Exit menu and press
<Enter>. Then, select OK to allow the AMI BIOS to automatically load Optimal Defaults to the BIOS Settings. The Optimal settings are designed for maximum system
performance, but may not work best for all computer applications.
3.6.5 Load Fail-Safe Defaults
To set this feature, select Load Fail-Safe Defaults from the Exit menu and press
<Enter>. The Fail-Safe settings are designed for maximum system stability, but not
for maximum performance.
BIOS Setup Utility
BIOS Recovery
3.7 BIOS Recovery
Caution: Do not upgrade the BIOS unless your system has a BIOS-related issue.
Flashing the wrong BIOS can cause irreparable damage to the system. In no event
shall Themis be liable for direct, indirect, special, incidental, or consequential damages arising from a BIOS update. If you need to update the BIOS, do not shut down
or reset the system while the BIOS is updating. This is to avoid possible boot failure.
How to Recover the AMIBIOS Image (Main BIOS Block)
An AMIBIOS flash chip consists of a boot sector block, and a main BIOS code
block (a main BIOS image). The boot sector block contains critical BIOS code,
including memory detection and recovery code to be used to flash a new BIOS
image if the original BIOS Image is corrupted. When the system is powered on, the
boot sector code executes first. Once it is completed, the main BIOS code will continue with system initialization and complete the bootup process.
Note: BIOS Recovery described below is used when the main BIOS block crashes. However, when the BIOS Boot sector crashes, you will need to send the motherboard back to Supermicro for RMA repairs.
Themis Computer
3-35

RES-32XR3/FIO Installation Manual
3.7.1 Boot Sector Recovery from a USB Device
This feature allows the user to recover a BIOS image using a USB device without
additional utilities needed. A user can download the BIOS image into a USB flash
device, and name the file “SUPER.ROM” for the recovery process to load the file. A
USB flash device such as a USB Flash Drive, a USB CDROM or a USB CDRW
device can be used for this purpose:
1. Insert the USB device that contains the new BIOS image (the ROM files)
saved in a root directory into your USB drive.
2. While turning the power on, press and hold <Ctrl> and <Home> at the same
time until the USB Access LED Indicator comes on. This might take a few
seconds.
3. Once the USB drive LED is on, release the <Ctrl> and <Home> keys. AMI-
BIOS will issue beep codes to indicate that the BIOS ROM file is being
updated.
4. When BIOS flashing is completed, the computer will reboot. Do not interrupt
the flashing process until it is completed.
3.7.2 Boot Sector Recovery from an IDE CD-ROM
This process is almost identical to the process of Boot Sector Recovery from a USB
device, except that the BIOS image file is loaded from a CD-ROM. Use a CD-R or
CD-RW drive to burn a CD with the BIOS image file in it, and name the file
“SUPER.ROM” for the recovery process to load the file.
3.7.3 Boot Sector Recovery from a Serial Port (“Serial
Flash”)
This process, also known as “Serial Flash,” allows the user to use a serial port to load
a BIOS image for Boot Sector recovery. This feature is usually used for embedded
systems that rely on a serial port for remote access and debugging.
3.7.3.1 Requirements
In order to use Serial Flash for Boot Sector Recovery, you will need to meet the following requirements.
• The “Target system,” the system that needs BIOS updates, must have a serial
3-36
Themis Computer
 Loading...