

The Eltron Company LP2122, LP2042, LP2022, LP2142 User Manual

LP/LP+ Series
User’s Manual
Models:
LP2022, LP2042
LP2122, LP2142
User’s Manual No. 980008-001
©1995 Eltron International Inc.
Rev. B


FOREWORD
This manual provides installation and operation information for LP & LP+ Series printers
manufactured by Eltron International Incorporated, Simi Valley, California. The contents
includes installation & operation instructions.
TECHNICAL SUPPORT
If for any reason you require product technical support, please contact the Distributor where
you first purchased your equipment. If they cannot help you or at their direction, Eltron
Technical Support can be reached at:
Eltron International Incorporated Eltron International, Europe
41 Moreland Road Unit 2, Rose Kiln Lane
Simi Valley, CA. 93065 Reading, Berkshire, RG2 OHP England
(800) 344-4003 +44 (0) 1734 752 024
FAX (805) 579-1808 FAX: +44 (0) 1734 752 005
e-mail: eltron@eltron.com
BBS: (805) 579-3445
Return Materials Authorization
Before returning any equipment to Eltron for in warranty or out of warranty repair, contact
Repair Administration for a Return Materials Authorization (RMA) number. Repack the
equipment in the original packing material and mark theRMA numberclearly onthe outside.
Ship the equipment, freight prepaid, to the address listed below.
Eltron Repair Adminstration
41 Moreland Road
Simi Valley, CA 93065-1692
(805) 579-1800
FAX (805) 579-1808
COPYRIGHT NOTICE
This document contains information proprietary to Eltron International Incorporated. This
document and the information contained within is copyright by Eltron International Incorporated and may not be duplicated in fullorinpart by anyperson without prior writtenapproval
of Eltron. While every effort has been made to keep the information contained within current
and accurate as of the dateof publication, no guaranteeis given or implied that the document
is error-free or that it is accurate with regard to any specification. Eltron reserves the right to
make changes, for the purpose of product improvement, at any time.
TRADEMARKS
LP Series and LP+Series are service marks and Eltron is a trademark of Eltron International
Incorporated. Windows & MS-DOS are registered trademarks of Microsoft Corp. All other
marks are trademarks or registered trademarks of their respective holders.
980008-002 Rev. B
iii

WARRANTY INFORMATION
We Need To Hear From You!
To establish your warranty period and provide access to Technical Support,
Send Us Your Product Registration Card Today!
Eltron warrants the mechanism, control electronics and power supply, under normal use and
service, to be free from defects in material and workmanship for a period of twelve months
from the date of purchase by the end user. Eltron warrants the printhead, under normal use
and service, to be free from defects in material and workmanship for a period of90 daysfrom
the date of purchase by the end user. Proof of purchase or product registration is required.
If proof of purchase or product registration cannot be established,shipmentdate to the original
buyer (dealer or distributor) will be be used to establish warranty period.
Failure to exercise caution to protect the equipment from electrostatic discharge damage,
adverse temperature and humidity conditions or physical abuse may void the warranty.Eltron
will, at it’s option, repair or replace the equipment or any parts which are determined to be
defective within this warrantyperiod and whichare returned to Eltron F.O.B. factory of origin.
The warranty set forth above is exclusive and no other warranty, whether written or oral, is
expressed or implied. Eltron specifically disclaims the implied warranties of merchantability
and fitness for a particular purpose.
FCC Notice:
This equipment has been tested and found to comply with the limits of a Class A digital device, pursuant to Part 15 of the
FCC Rules. These limits are designed to provide reasonable protection against harmful interference when the equipment is
operated in a commercial environment.. Thisequipment generates,uses and can radiateradio frequencyenergy and, if not
installed and used in accordance withthe instructions, maycause harmfulinterference to radio communications. However,
there is no guarantee that interference will not occur in a particular installation. Operation of this equipment in a residential
area is likely to cause harmful interference in which case the user will be required to correct the interference in which case
the user will be required to correct the interference at his own expense.
CSA Notice:
This equipment does notexceedClassAlimitsperradio noise emissionsfordigitalapparatusset out in theRadioInterference
Regulation of the Canadian Department of Communications. Operation in a residential area may cause unacceptable
interference to radio and TV reception requiring the owner or operator to take whatever steps are necessary to correct the
interference.
Cet equipment ne depasse pas les limites de Classe A d’emission de bruits radioelectriques pour les appareils numerriques
tells queperscrites par leReglement sur lebrouillageredioelectrique etabli parle ministere desCommunicationsdu Canada.
L’exploitationfaiteenmilieuresidentielpeutentrainer lebrouillagedes receptionsradioettele,cequiobligerait leproprietaire
ou l’operateur a pendre les dispositions necessaires pour en eliminer les causes.
CE Notice
This equipment has been tested and found to comply with the European Council Directives only when used with a double
shielded parallel interface cable such as Eltron part number 300058-006. Use of a lower grade interface cable may result in
RF emissions thatcauseunacceptableinterferenceto radioandTV receptionrequiringthe owneroroperatortotakewhatever
steps are necessary to correct the interference.
iv
980008-002 Rev. B

Table Of Contents
Getting Started
Introduction . . . . . . . . . . . . . . . . . . . . . . . . . . 1
Unpacking the Printer . . . . . . . . . . . . . . . . . . . . . . 2
Parts Check List . . . . . . . . . . . . . . . . . . . . . . . . 3
Installation . . . . . . . . . . . . . . . . . . . . . . . . . . . 4
Operation
Controls & Indicators . . . . . . . . . . . . . . . . . . . . . . 9
Loading Labels or Tags . . . . . . . . . . . . . . . . . . . . . 12
Threading The Label Dispenser . . . . . . . . . . . . . . . . . 17
AutoSense Gap Sensor Adjustment . . . . . . . . . . . . . . . 19
Cleaning The Print Head . . . . . . . . . . . . . . . . . . . . 20
Replacing the Printer Memory Backup Battery (LP+ Only) . . . 21
Appendix A - Troubleshooting . . . . . . . . . . . . . . . . 25
Appendix B - Supplies and Accessories . . . . . . . . . . . 37
Appendix C - Windows Printer Driver . . . . . . . . . . . . 39
980008-002 Rev. B
v

vi
980008-002 Rev. B

1
Getting Started
This section provides information on the installation of the printer and software.
Introduction
Features
The LP Series and LP+ Series printers are low
cost direct thermal printers specifically designed for printing labels, tags or continuous
receipts (with or without bar codes) from any
DOS™or Windows™ or ASCII based compatible computer.
• Direct thermal printing for reliability.
• Supports over 13 types of bar code sym-
bologies.
• High resolution print head for sharp graphics
and text.
• Download forms, fonts and graphics perma-
nently to removable memory cartridges
(LP+ Series).
980008-001 Rev. B
1
Getting Started
Unpacking the
Printer
The printer is shipped in a carton and protective bag. Keep all packing material in case you
need to move or re-ship the printer. Avoid
touching the electrical connectors to prevent
Electro-Static Discharge damage while setting
up the printer.
The discharge of electrostatic energy that accumulates on the surface of the human body or
other surfaces can damage or destroy the print
head or electronic components used in this
device.
2
980008-001 Rev. B
Getting Started
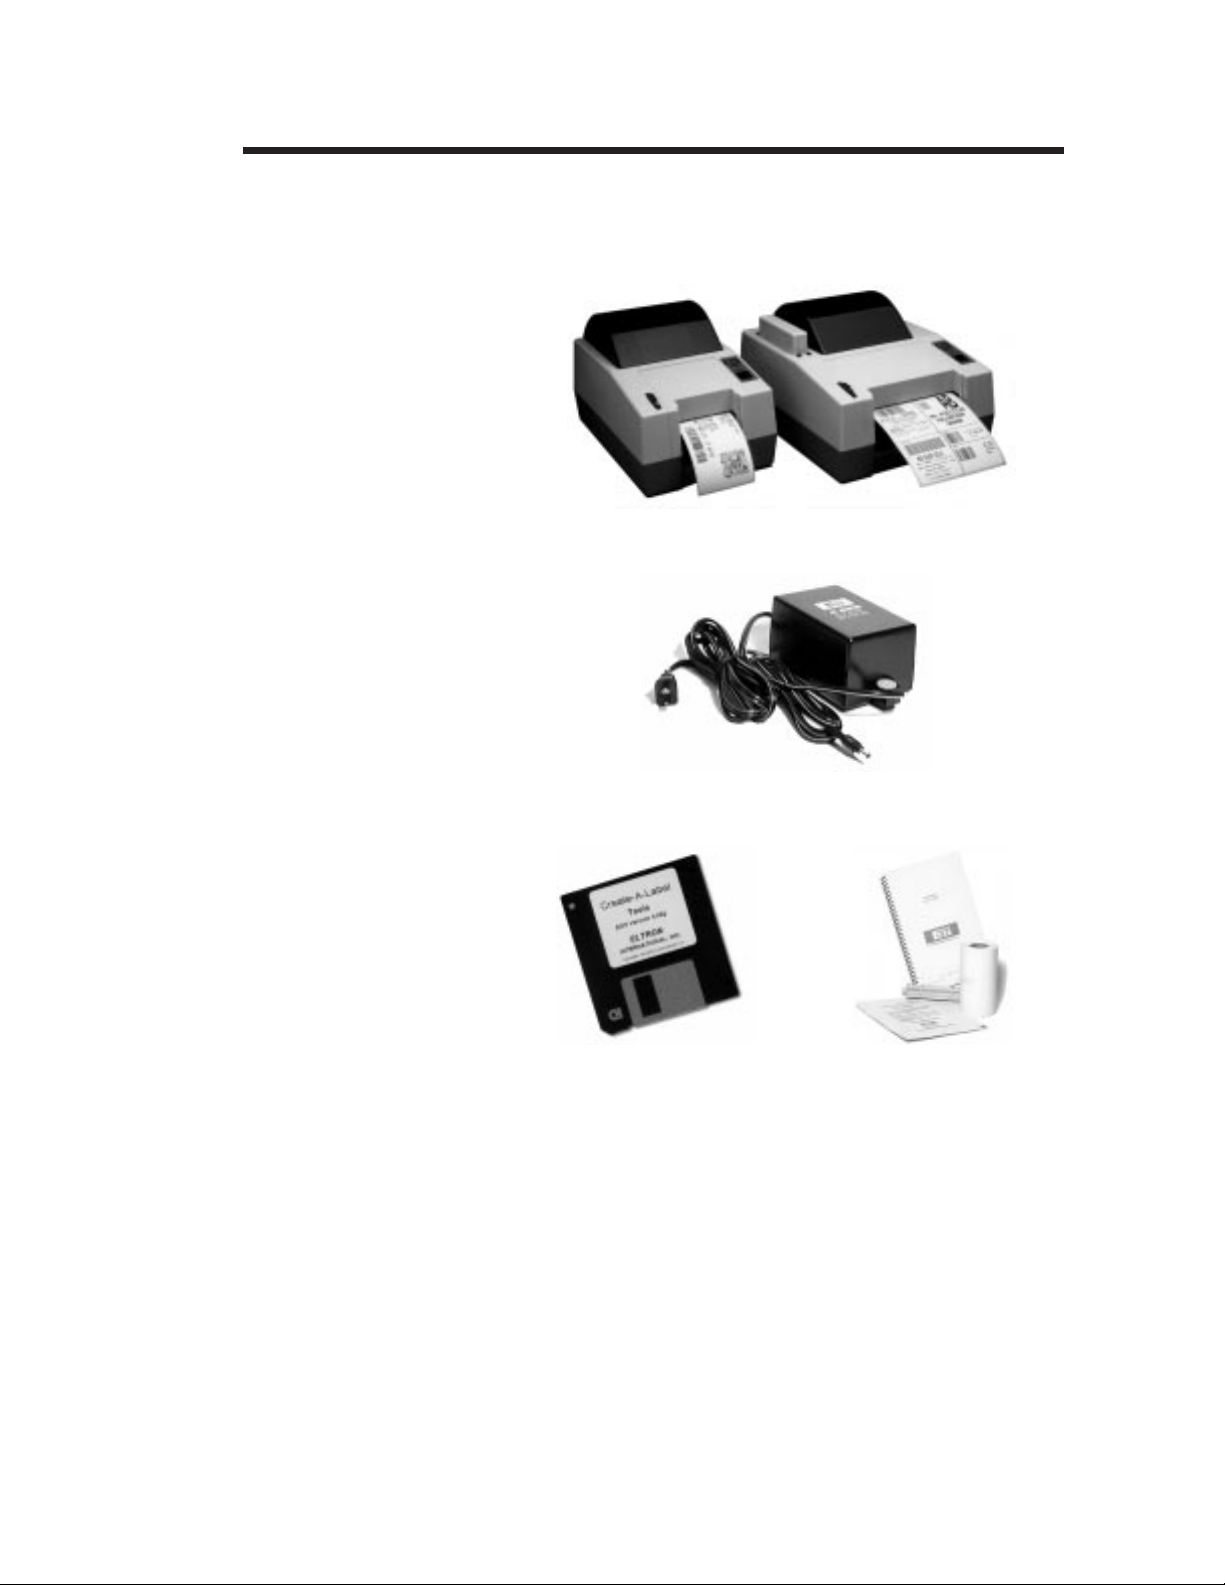
Parts Check List
Your printer kit should contain the items listed
below.
• The LP or LP+printer.
• The printer Power Supply.
• Create-A-Label Tools software disk & man-
ual (LP+ only).
• Printer User’s Guide (this manual).
• 1 roll of Sample Labels and Spool.
• 1 printer Cleaning Card.
If any items are missing, contact your dealer for
replacement parts.
980008-001 Rev. B
3
Getting Started
Installation
Step ➊
Attach Power
Supply
The following sections will step you through the
installation of the printer and Create-A-Label
Tools software.
Place the printer in a suitable location that
allows easy access to printed labels. The printer
should never be operated while resting on it’s
side or upside down. Place the power supply
in a suitable location, preferably on the floor
near an electrical outlet. Check that the printer
power switch is in the OFF (0) position. Attach
the printer power cable to the jack at the rear
of the printer,near the power switch. Check the
label on the power supply for input voltage
requirements. Attach the power supply line
cord to an electrical outlet of the proper voltage.
The printer and power supply should never be
operated in a location where either one can get
wet. Personal injury could result.
4
980008-001 Rev. B
Getting Started
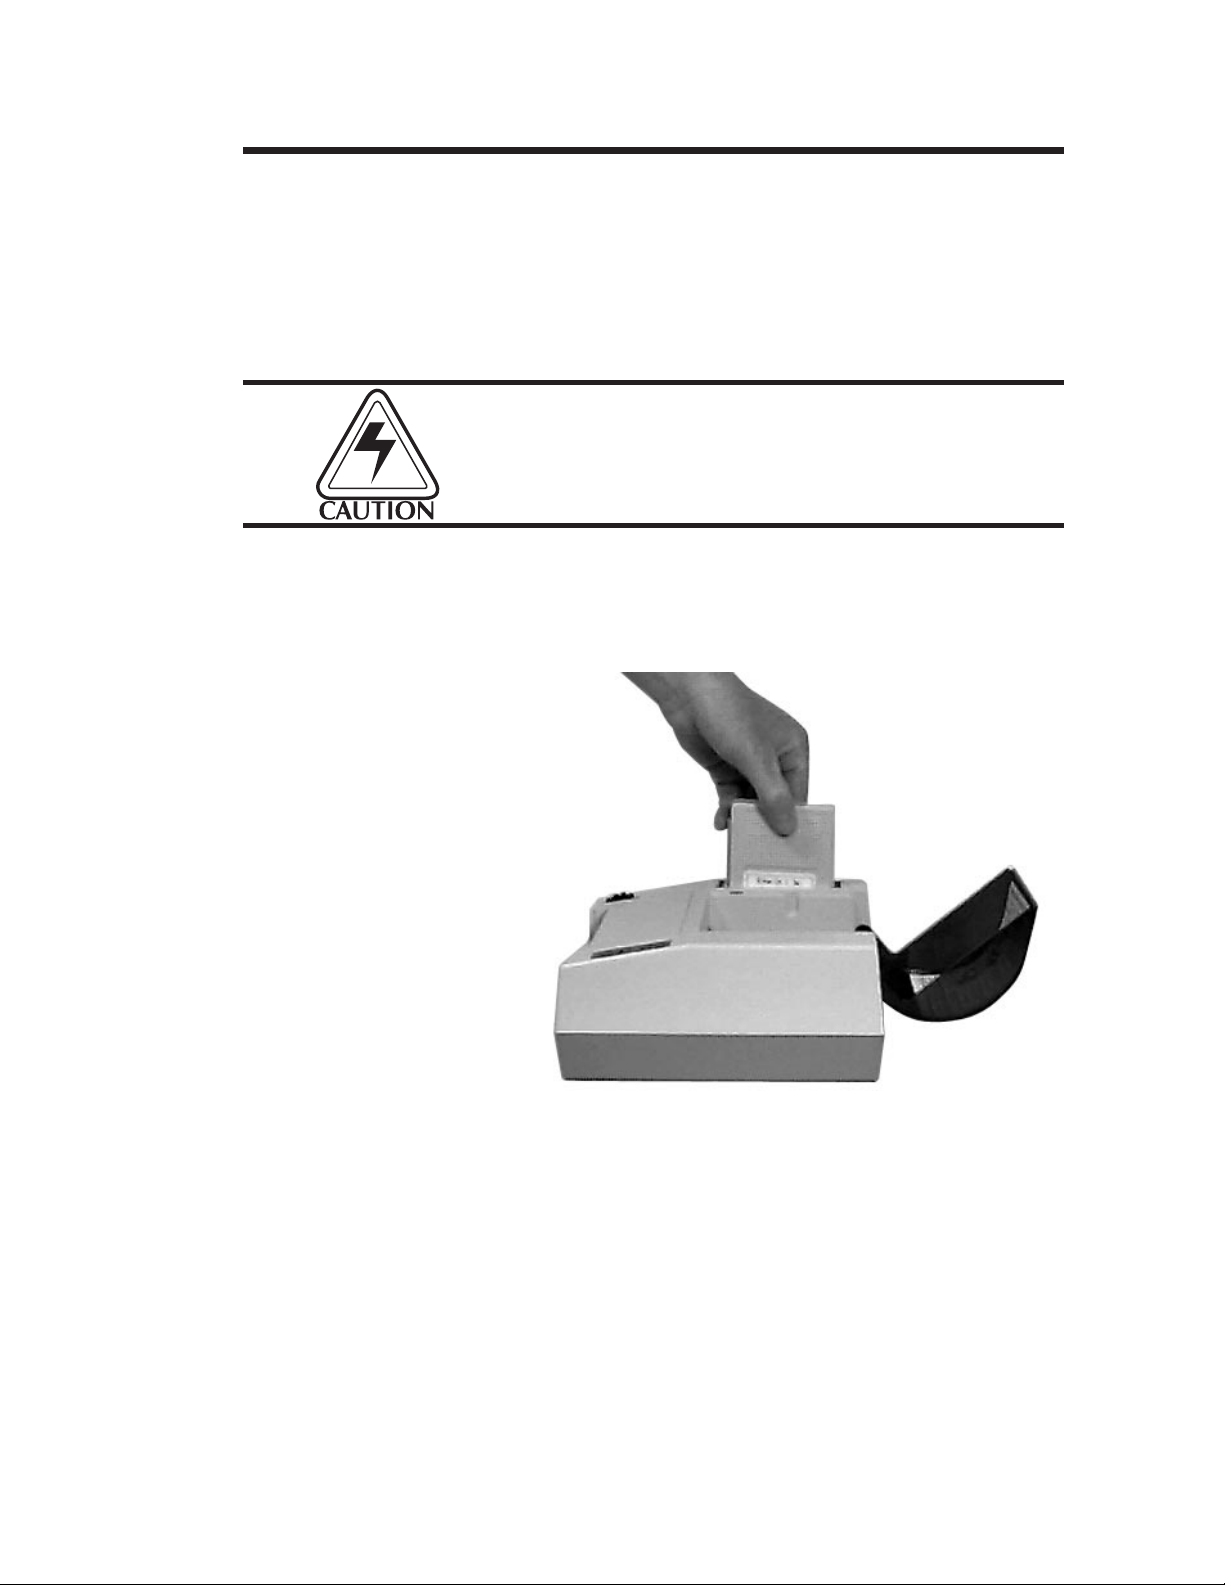
Step ➋
Insert Memory
Cartridge
(LP+ Only)
The memory /real-time clock cartridge provides permanent storage for downloaded
forms and time/date information. Cartridges
are available in four upgradable memory configurations: 128KB, 256KB, 384KB & 512KB.
The memory cartridge can be damaged if
plugged in or unplugged while the printer
power is ON(1).
Insert the memory cartridge with the label side
facing the label roll holder. Push firmly to engage the cartridge.
980008-001 Rev. B
Before the additional memory can be accessed, the printer memory must be repartitioned. Refer to the EPL2 Programming
manual for more information on the M command.
5
Getting Started
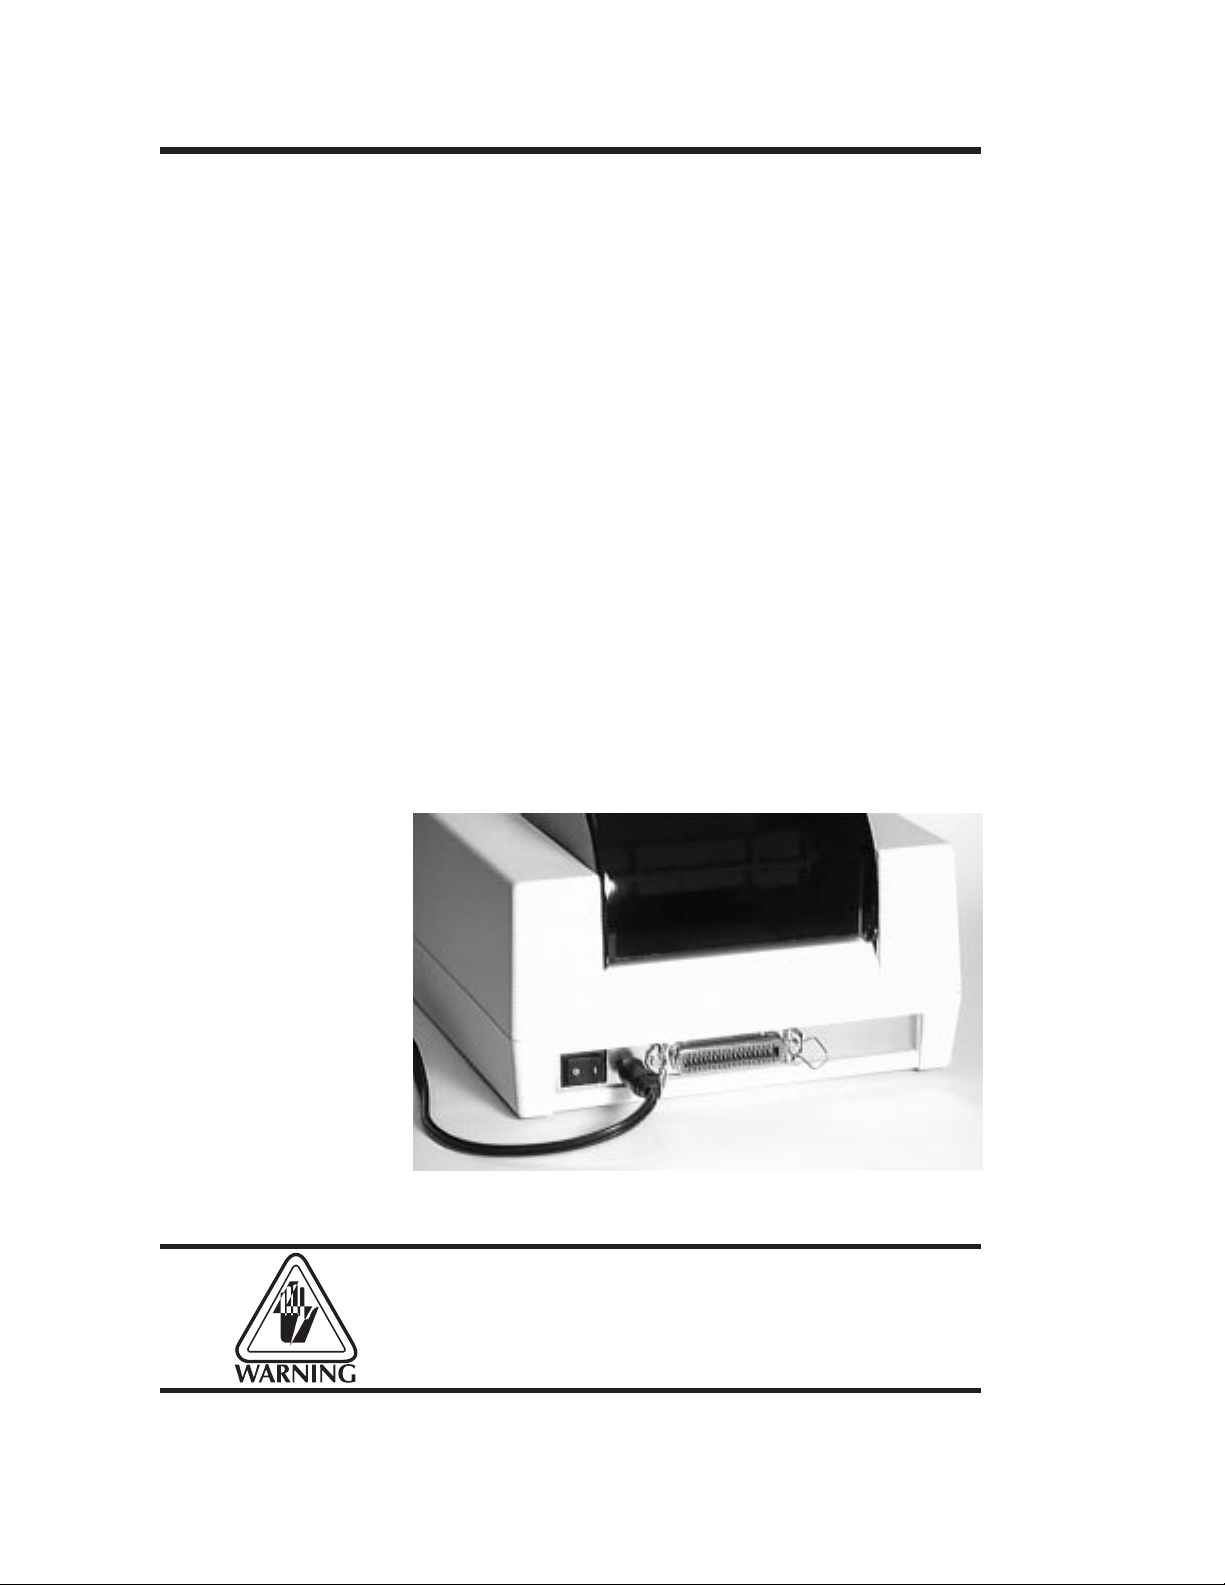
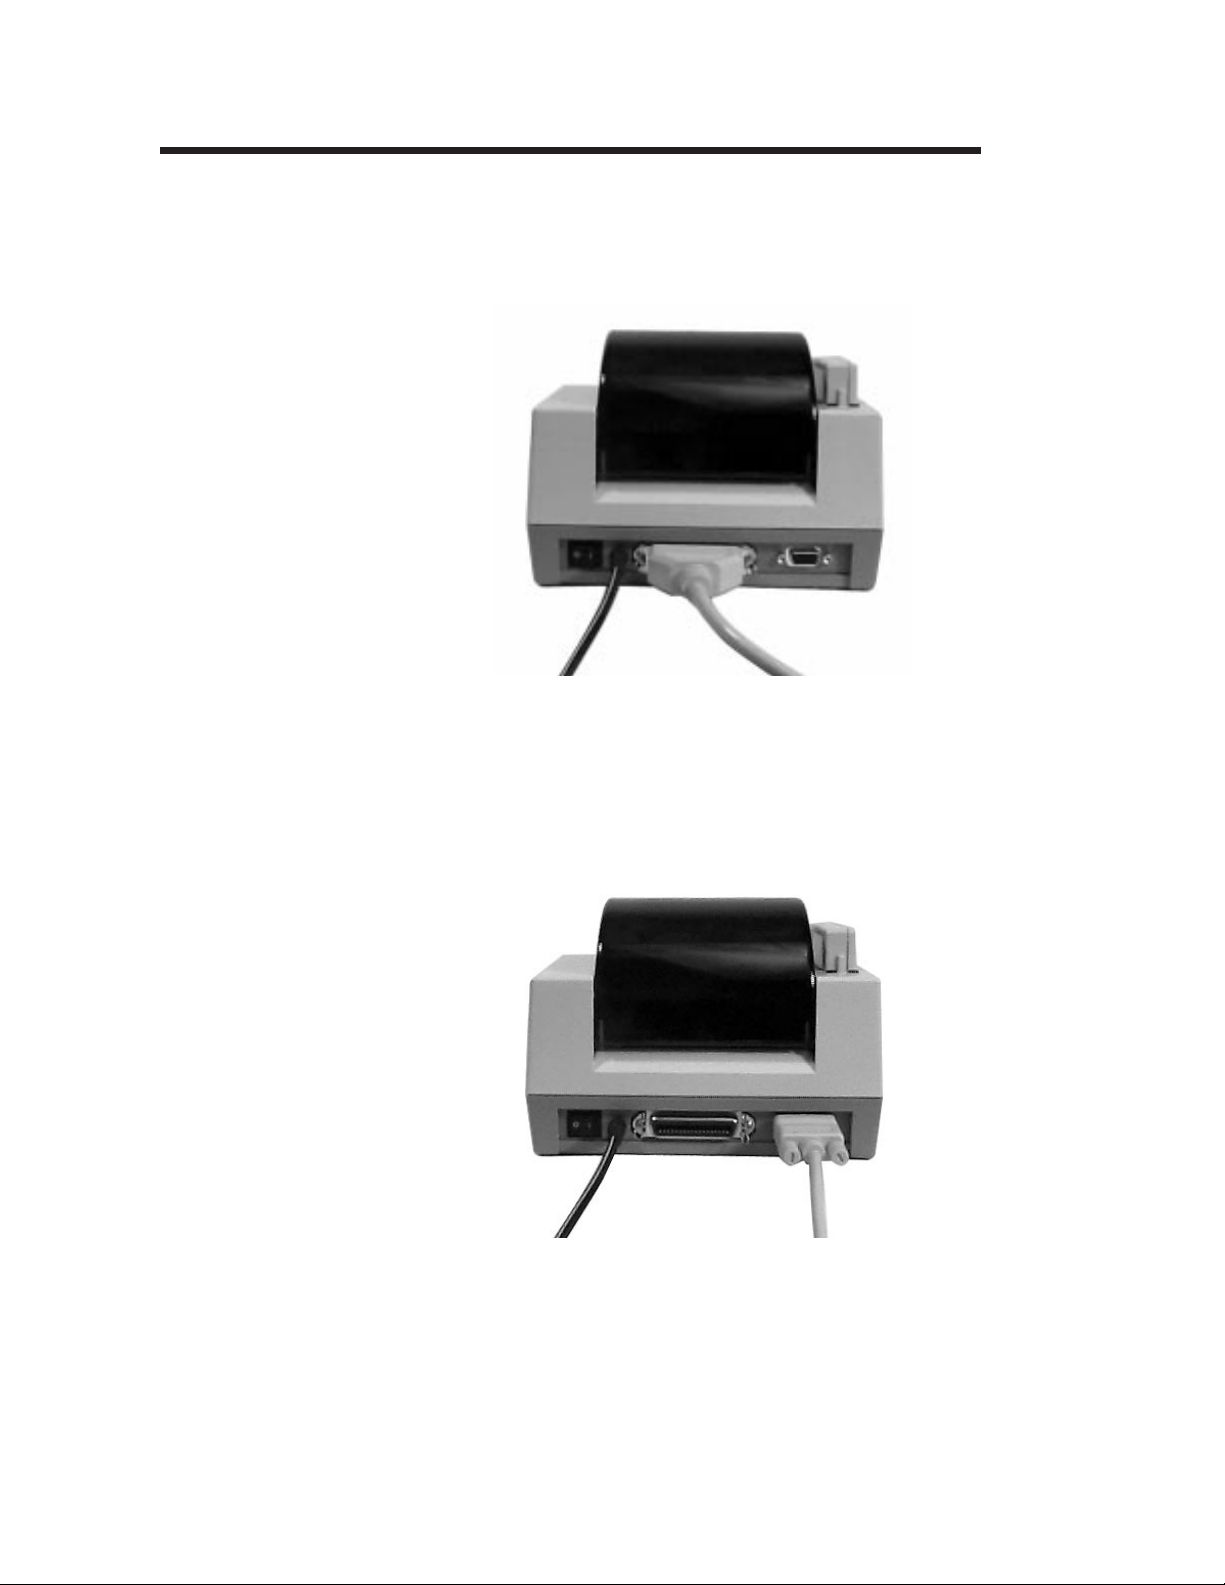
Step ➌
Attach Interface
Cable
Parallel Interface
Attach a suitable parallel printer cable from the
computer to the Centronics interface connector
on the rear of the printer.
Serial Interface
Attach a suitable serial printer cable from the
computer to the DB-9 RS-232 Serial interface
connector at the back of the printer. For additional information on serial cable wiring, refer
to Appendix A - Trouble Shooting.
When the power switch is moved to the ON (1)
position, the Power Indicator should light Red
indicating that the printer is out of paper. If the
indicator fails to light, refer to Appendix A Trouble Shooting.
6
980008-001 Rev. B

Getting Started
Step ➍
Install Software
(LP+ Only)
Start your computer. After DOS has loaded,
insert the Creat-A-Label Tools diskette into
your floppy disk drive. From the DOS prompt,
enter B:INSTALL (or A:INSTALL if you placed
the diskette in drive A). Press the Enter key.
Follow the installation instructions on the
screen to install the software.
Refer to Section 2 - Operation, for information
on loading labels and using your printer.
980008-001 Rev. B
7

Getting Started
8
980008-001 Rev. B

2
Operation
This section provides information on the operation of the LP and LP+ printers.
Controls &
Indicators
The printer’s power switch is located on the
rear of the unit near the power cord. Placing
this switch in the “1" (ON) position will apply
power to the printer. Place this switch in the ”0"
(OFF) position to remove power when you
have finished using your printer.
The printer is equipped with one front panel
control switch, labeled FEED and one indicator
light labeled POWER. Refer to Figure 2-1.
980008-001 Rev. B
9
 Loading...