


IRIS HD VIDEO CAMERA
USER GUIDE
VERSION 1.0


www.tharium.com
Contents
Specifications 4
Unboxing 5
IRIS Overview 6
Installation 7
Focal Length 8
Connecting Your IRIS HD Video Camera 9
IRIS HD Video Camera Software 10
Shutdown Camera 11
Capture Image 12
Record Video 13
Eject USB Drive 14
Freeze Frame 15
Horizontal Flip 16
Vertical Flip 17
Show Grid 18
Contrast 21
Brightness 22
Toggle B/W 23
White Balance 24
Saturation 27
Sharpness 28
Zoom 29
Load Image 30
Picture in Picture 31
Transparency 32
Filters 33
Reset Settings 36
Menu Scroll Bar 37
3

www.tharium.com
Specifications
4
Sensor Type
CMOS
Optical Size
¼”
Resolution
5MP
Frame Rate
30FPS
50/60Hz
Automatic
luminance detection
Pixel Size
1.4µm
x 1.4µm (high sensitivity, low
noise, low crosstalk)
Color
RGB (with individual adjustments)
White
Balance
Auto
and manual
Exposure
Auto and manual
Contrast
Manual
Capture Modes
Manual and trigger
(option)
External
Memory
USB 2.0 (4 ports)
Network
Connectivity
Gigabit
Ethernet (Zeus upgrade)
Cross
Hair Grid
4 vertical and 4 horizontal, configured
individually
Lens Mount
C
-mount thread
Powe r
5V
, 2A over micro USB connector
Camera
Size
Camera
Weight
Te m p e ra t u r
e Range (Non Cond.)
0 to 70ºC
IR Filter
Integral to camera

www.tharium.com
Unboxing
5
The IRIS HD Video Camera system contains the following items.
Please let us know immediately if you’re missing anything.
1. IRIS HD Video Camera
2. Wireless USB Mouse (batteries not included)
3. AC power adapter – 5V USB adapter
4. HDMI-to-HDMI Cable

www.tharium.com
IRIS Overview
6
ETHERNET
4 USB 2.0
PORTS
C-MOUNT
HMDI VIDEO
OUTPUT
POWER
CONNECTOR
COLLING
VENT – DON’T
COVER
POWER LED
INDICATOR

www.tharium.com
Installation
7
The IRIS HD Video Camera can be installed in a wide range of
applications. If using a Tharium Macro or Micro lens, please
connect the lens directly to IRIS. In case of using a Tharium
trinocular microscope, please use a video coupler to attach IRIS
to the microscope. A spacer may be necessary depending on
the focal length of the lens you use, as seen on the next section.

www.tharium.com
Focal Length
As seen in the above diagram, the relationship between the
sensor and the focal distance of the lens used is critical to
achieve the correct focusing of the IRIS HD Video Camera. We
placed the sensor as close as possible to the C-Mount thread
to give you the widest range of options. That also means that in
some cases you might need to add a spacer to move the lens
away from the sensor. C-Mount spacers of different sizes are
widely available, please consult your Tharium representative for
more information.
8

www.tharium.com
Connecting Your IRIS HD Video Camera
9
1. Connect the 5V power supply to the wall and then to IRIS HD Video Camera.
Make sure to follow the voltage limits marked on the power adapter.
2. Powe r the 24” monitor included with your IRIS system.
3. Conned the HDMI cable from IRIS to the HDMI input of your monitor.
4. Plug the USB dongle of the wireless mouse to a USB port of the IRIS camera.
5. Insert batteries in the wireless mouse. Make sure batteries are new and charged.
6. The IRIS camera is now ready to use! You should see an image on the screen.
HMDI CABLE
POWER CABLE
WIRELESS USB
DONGLE

www.tharium.com
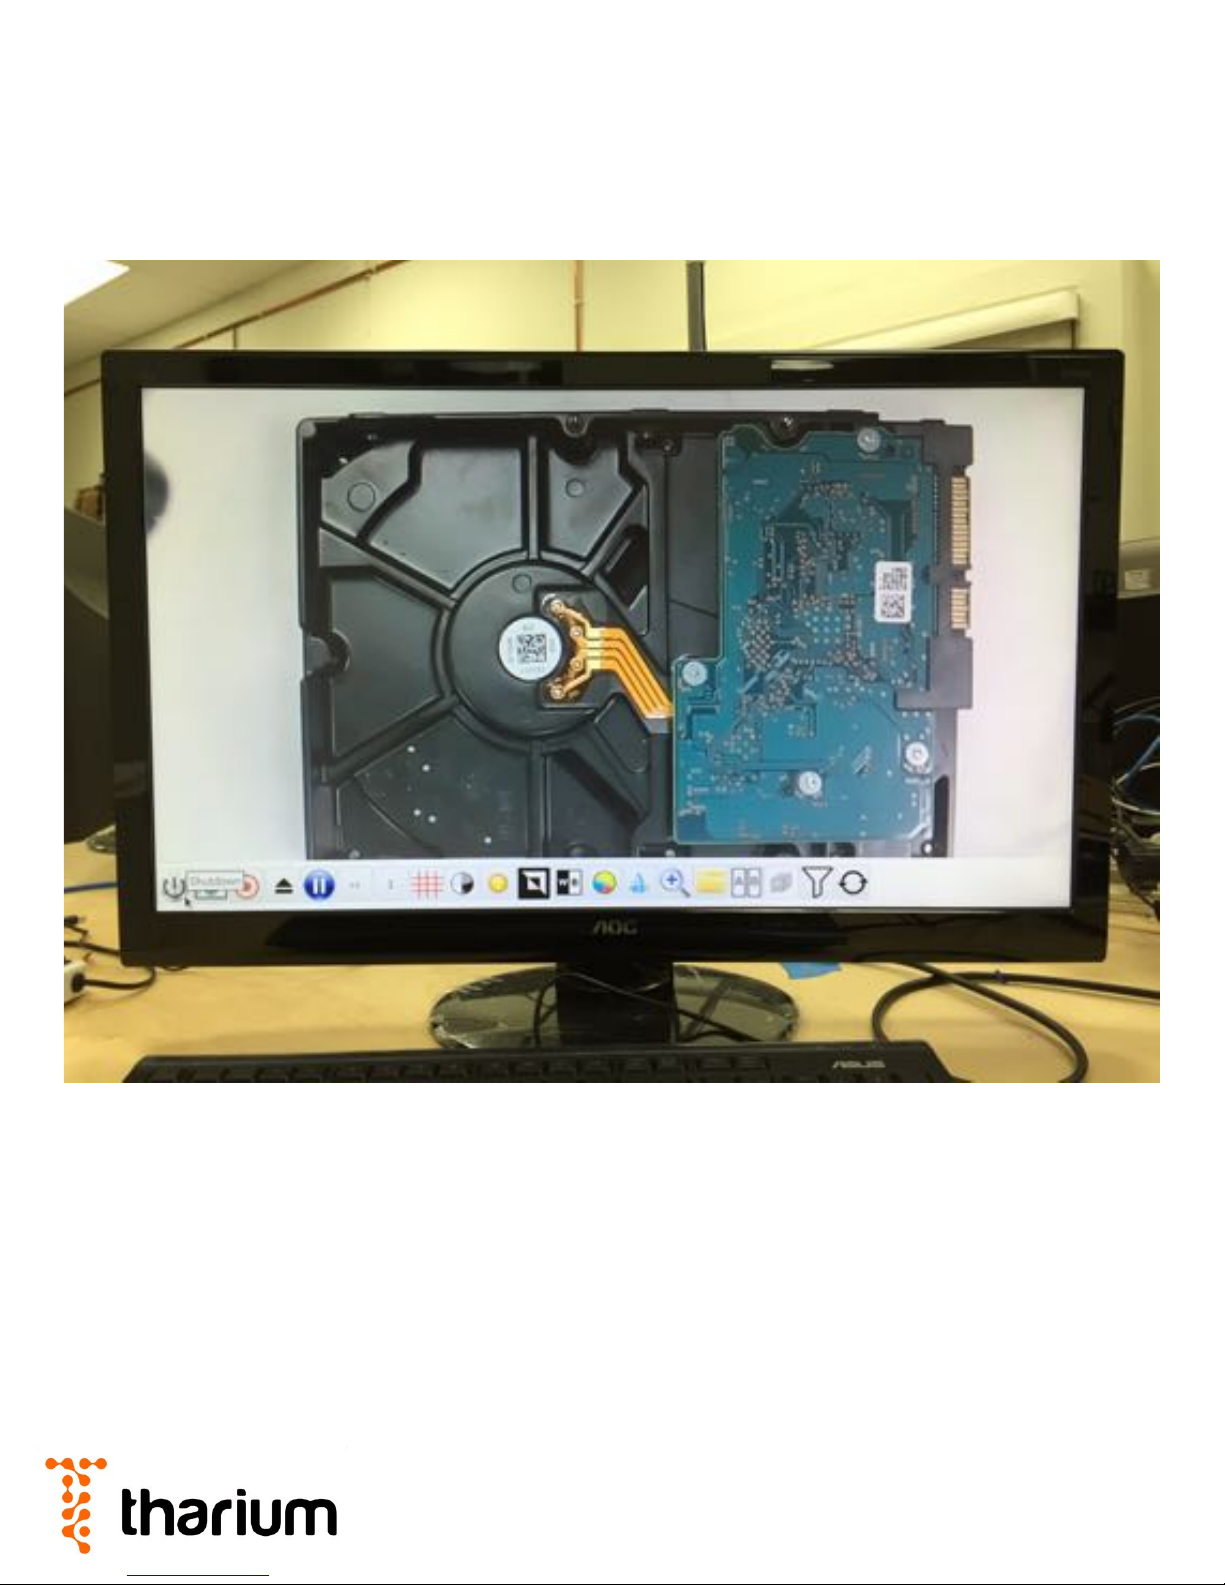
IRIS HD Video Camera Software
10
The live feed image is shown upon connecting the monitor to
the IRIS camera and powering the system. To display the IRIS
system menu, please move the mouse to the bottom of the
display. The menu will automatically appear.
www.tharium.com
Shutdown Camera
11
Press the shutdown button on the left corner of the menu to
turn off your IRIS camera. The software will be properly
shutdown, however, the motherboard of the camera will
continue to be powered. To turn IRIS back on, please unplug
and plug the USB power supply.

www.tharium.com
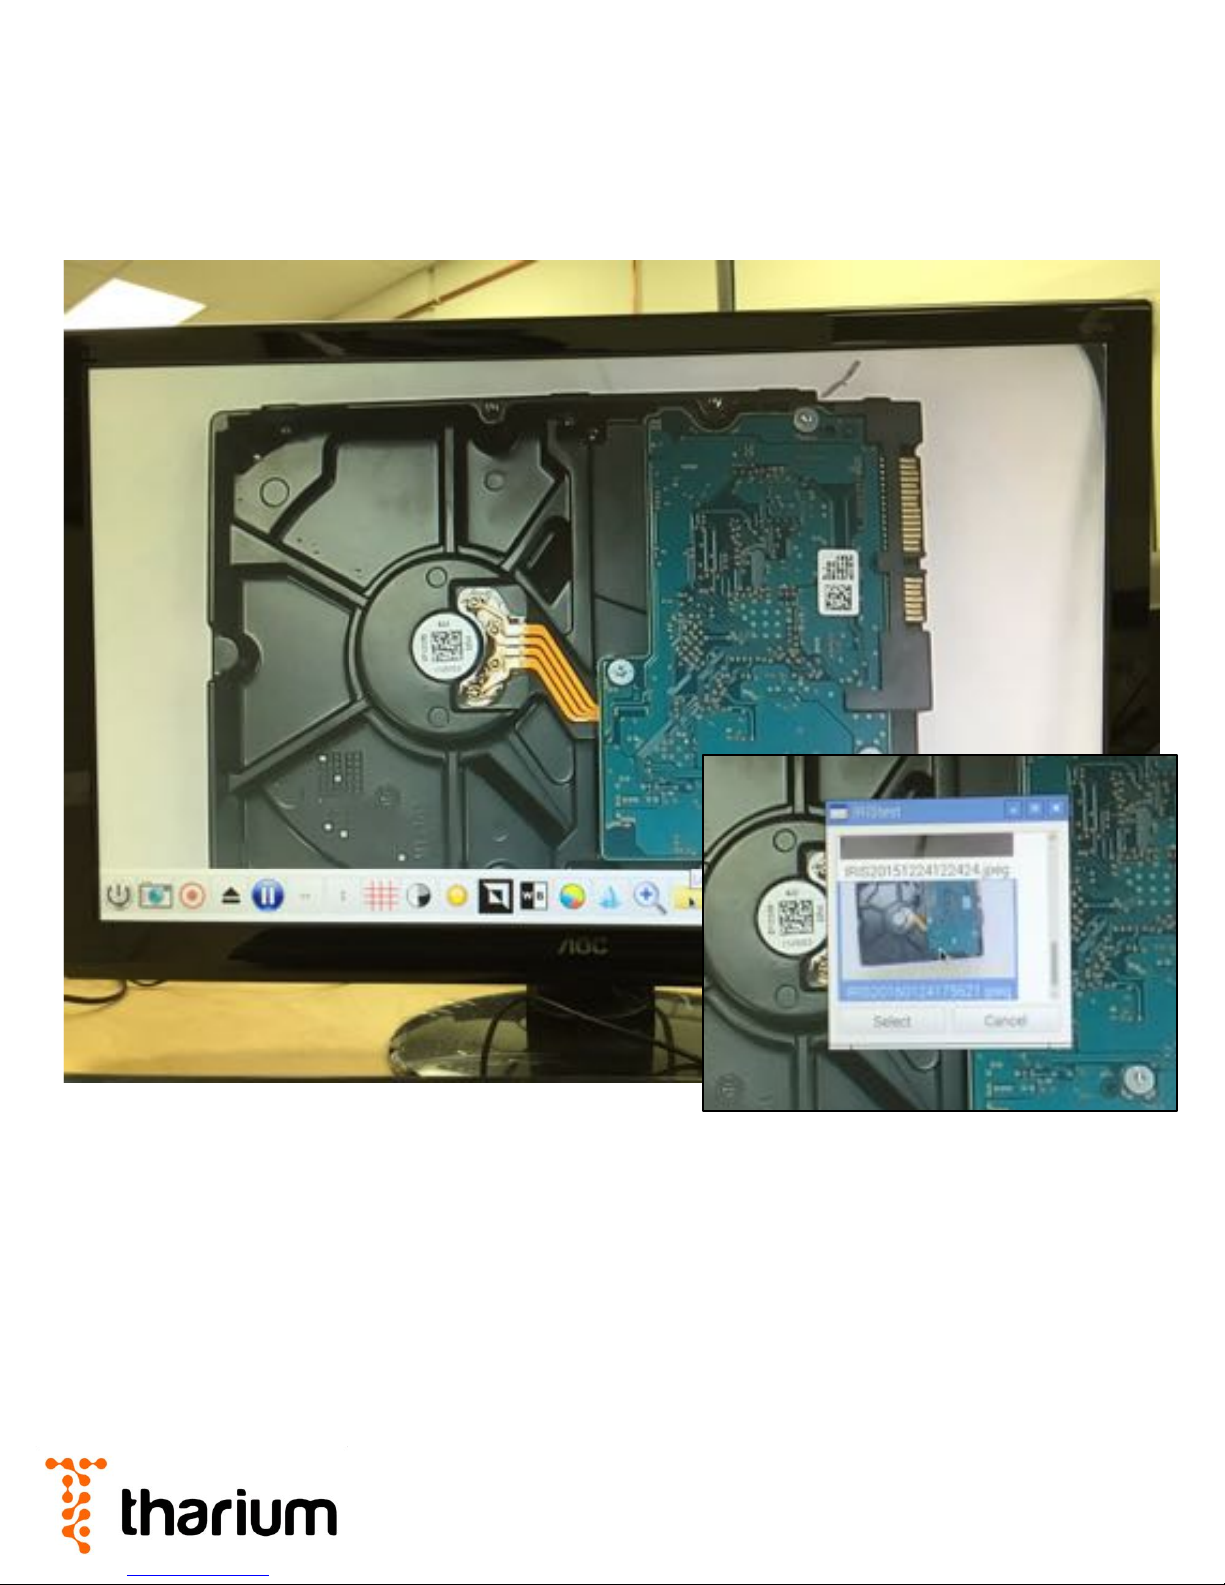
Capture Image
12
Once a properly formatted USB memory stick is inser ted into
one of the USB por ts of the IRIS camera (see inser t), the
“Capture Image” button will be enabled. To r e c o r d t h e l i v e
image to the USB drive, please click on “Capture Image”. The
image is saved in 1080p jpeg format.

www.tharium.com
Record Video
13
The “Record” button allows you to record the live feed of the
camera to the USB drive inserted into a USB port of the IRIS
camera (see insert). Please make sure the USB drive has
enough space for the video. To stop recording, please click on
the same icon again. It takes a few seconds to the video to
complete recording, so wait until clicking on the icon again.

www.tharium.com
Eject USB Drive
14
Upon completing recording videos or images in the USB drive,
please eject the disk by clicking the “Eject” button. Once the
“Capture” and “Record” buttons are grayed out it is safe to
remove the USB drive (see insert).

www.tharium.com
Freeze Frame
15
The “Freeze Frame” button freezes the image on the screen,
but it does not capture the image into the USB drive.

www.tharium.com
Horizontal Flip
16
Mirrors the image relative to the ver tical (y) axis.

www.tharium.com
Ver tical Flip
17
Mirrors the image relative to the horizontal (x) axis.

www.tharium.com
Show Grid
18
Click on the “Show Grid” button to enable the drawing of
alignment crosshairs onto the screen.

www.tharium.com
Show Grid – Select Crosshair
19
Upon clicking the “Show Grid” button, a list of vertical and
horizontal crosshair options are available. To add a crosshair to
the screen, please click on the desired alignment crosshair on
the menu.

www.tharium.com
Show Grid – Place Crosshair
20
After selecting the desired crosshair on the menu, please click
on the location where you want the crosshair placed. The IRIS
software allows you to add/remove crosshairs as desired.

www.tharium.com
Contrast
21
Upon clicking on the “Contrast” button, please use the slider to
adjust the desired level of contrast of the image.
TIP:% Y ou%can% use%the%
scroll%button% of%the%
mouse%to%move%the%
slider%selection

www.tharium.com
Brightness
22
Upon clicking on the “Brightness” button, please use the slider
to adjust the desired level of brightness of the image.
TIP:% Y ou%can% use%the%
scroll%button% of%the%
mouse%to%move%the%
slider%selection

www.tharium.com
To g g l e B / W
23
The ”Toggle B/W” button allows you to toggle between the
default color image and its black and white version of the live
feed image (see insert).

www.tharium.com
White Balance
24
By default the automatic white balance is selected in your IRIS
camera.

www.tharium.com
White Balance Menu
25
The white balance menu has several different options for
presets, including ”cloudy”, “flash”, “fluorescent”, “horizon”,
“incandescent”, ”shade”, “sunlight”, and “tungsten”. To manually
calibrate the white balance of your IRIS camera, please select
“off ” and proceed to use the slider bars.

www.tharium.com
White Balance – Manual Mode
26
To m a n u a l l y s e l e c t t h e w h i t e b a l a n c e o f y o u r I R I S c a m e r a ,
please select the “off” option in the white balance menu. The
left slider adjusts the red of the image while the right slider
adjusts the blue components of the image.
TIP:% Y ou%can% use%the%
scroll%button% of%the%
mouse%to%move%the%
slider%selection

www.tharium.com
Saturation
27
The “Saturation” button lets you simultaneously adjust the hue,
saturation, and lightness of all colors in the image.
TIP:% Y ou%can% use%the%
scroll%button% of%the%
mouse%to%move%the%
slider%selection

www.tharium.com
Sharpness
28
Upon selecting the “Sharpness” button, the slider allows you
the determine the amount of sharpness filtering applied to the
live image of the IRIS camera.
TIP:% Y ou%can% use%the%
scroll%button% of%the%
mouse%to%move%the%
slider%selection

www.tharium.com
Zoom
29
The “Zoom” button allows you to digitally increase and
decrease the magnification of the image.
TIP:% Y ou%can% use%the%
scroll%button% of%the%
mouse%to%move%the%
slider%selection
www.tharium.com
Load Image
30
The “Load Image” button opens the image browser, and seen in
the insert. The image selected in this window will be used in the
“Picture in Picture” and “Transparency” features.

www.tharium.com
Picture in Picture
31
The ”Picture in Picture” feature splits the monitor in half. The
left side displays the image initially loaded in the system, while
the right side of the monitor maintains the live video feed from
IRIS. The two sliders by the “Picture in Picture” button are used
to scroll the images horizontally.
TIP:% See%“Load%Image”%to%
learn % how%to%select% the%
image%to%place%on%the%side%
of%the%live%video%feed.

www.tharium.com
Transparency
32
The ”Transparency” button allows you to change the
transparency of the selected image as it lays on top of the live
video feed. This feature is very useful when the IRIS system is
used to align samples to a reference image – or to compare
parts to a golden sample previously recorded.
TIP:% See%“Load%Image”%to%
learn % how%to%select% the%
image%to%overlay%on%top%
of%the%live%video%feed.

www.tharium.com
Transparency App: Par t Ali gnment
33
In this example we recorded the reference image using the
emboss filter. After that, we loaded the reference image from
the USB drive and used it as an overlay. By adjusting the
transparency of the reference image, we can quickly identify
discrepancies between the two parts - thus quickly determining
any problems with the parts under inspection

www.tharium.com
Filters
34
The “Filters” feature offers a powerful set of image processing
algorithms that emphasize difference aspects of your sample, as
seen in the following exmaples.

www.tharium.com
Filter Menu and Examples
35
The filter menu offers a wide range of processing options of
the live video feed. Among the options available are “car toon”,
“color balance”, “color swap”, “denoise”, “emboss”, “negative”,
“posterize”, “sketch”, “solarize”, and “watercolor”. We
recommend you try these filters to determine which better
matches your application.
EMBOSS FILTER SKETCH FILTER
FILTER MENU
www.tharium.com
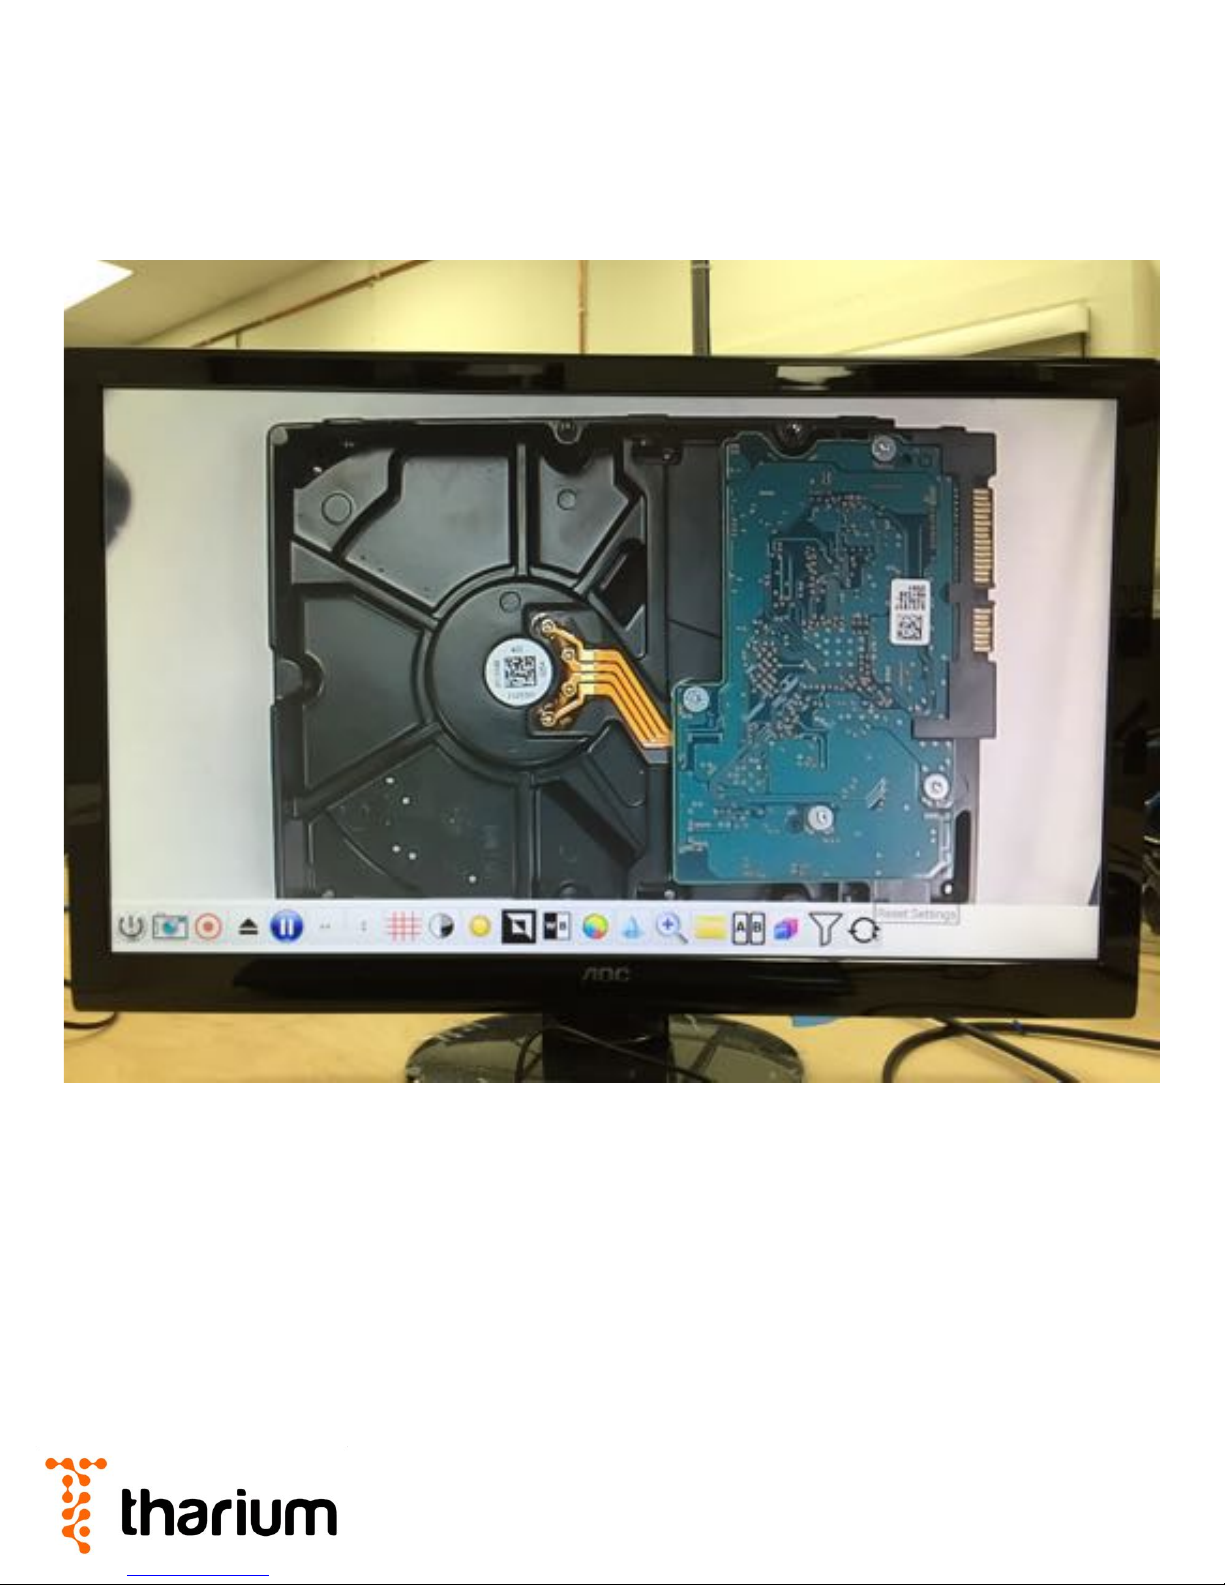
Reset Settings
36
The “Reset Settings” button resets all settings of the live video
feed.

www.tharium.com
Menu Scroll Bar
37
The active menus of IRIS automatically expand their size to
display further options. If a number of these options are
displayed, the IRIS software automatically creates a horizontal
bar that allows you to scroll left and right to properly visualize
all controls of the system.

www.tharium.com
Information in this user guide can chance without notice.
Please contact us if you have any questions.
 Loading...