

Page 1
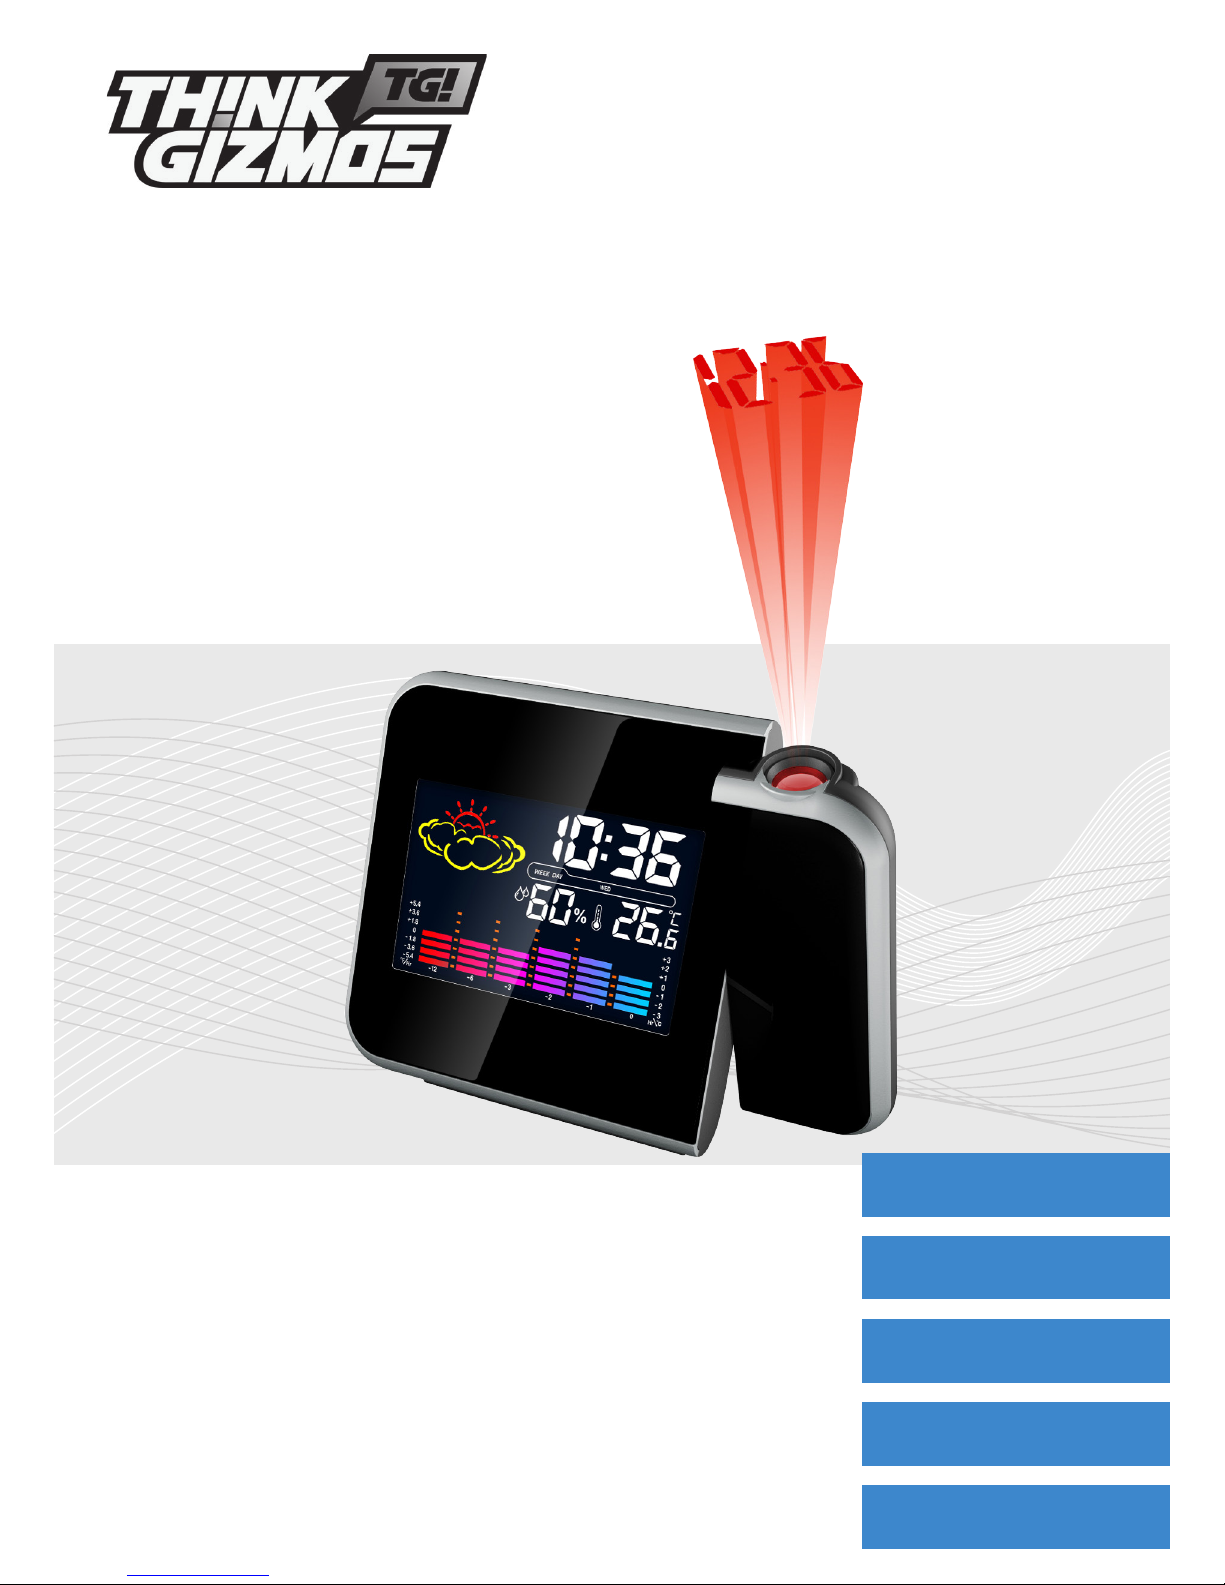
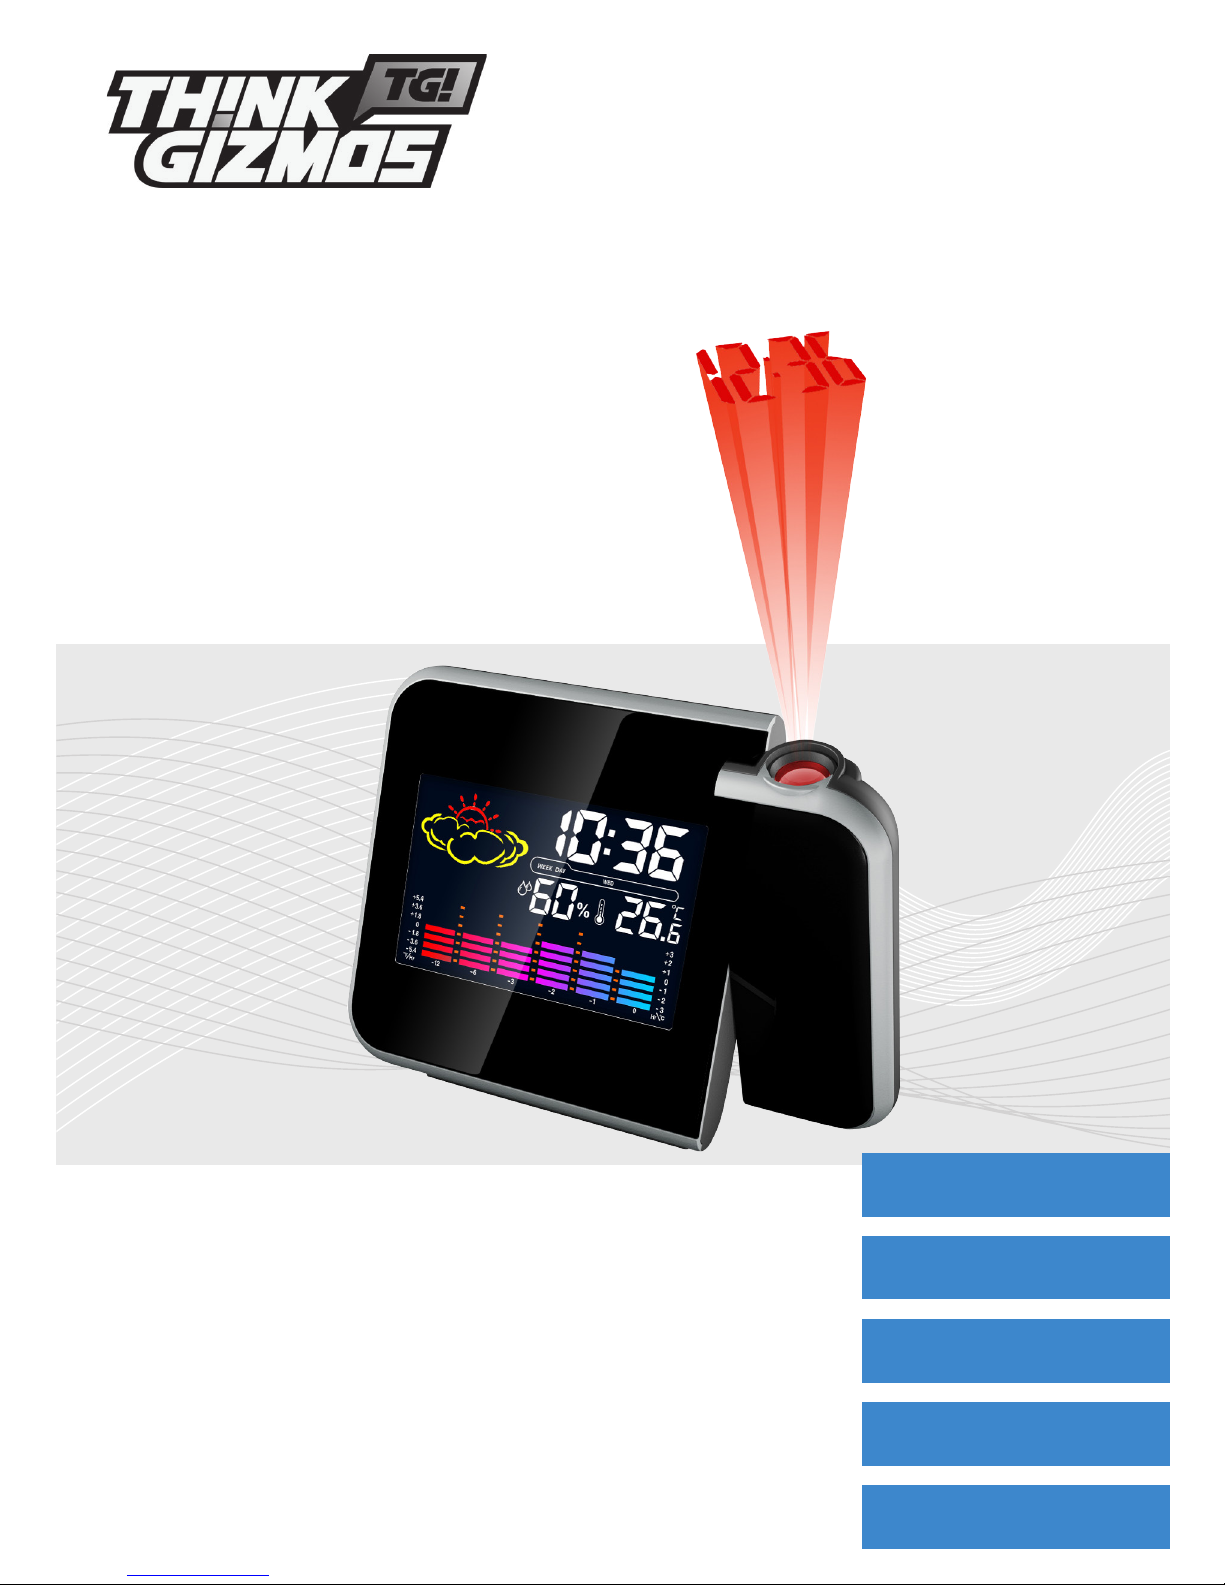
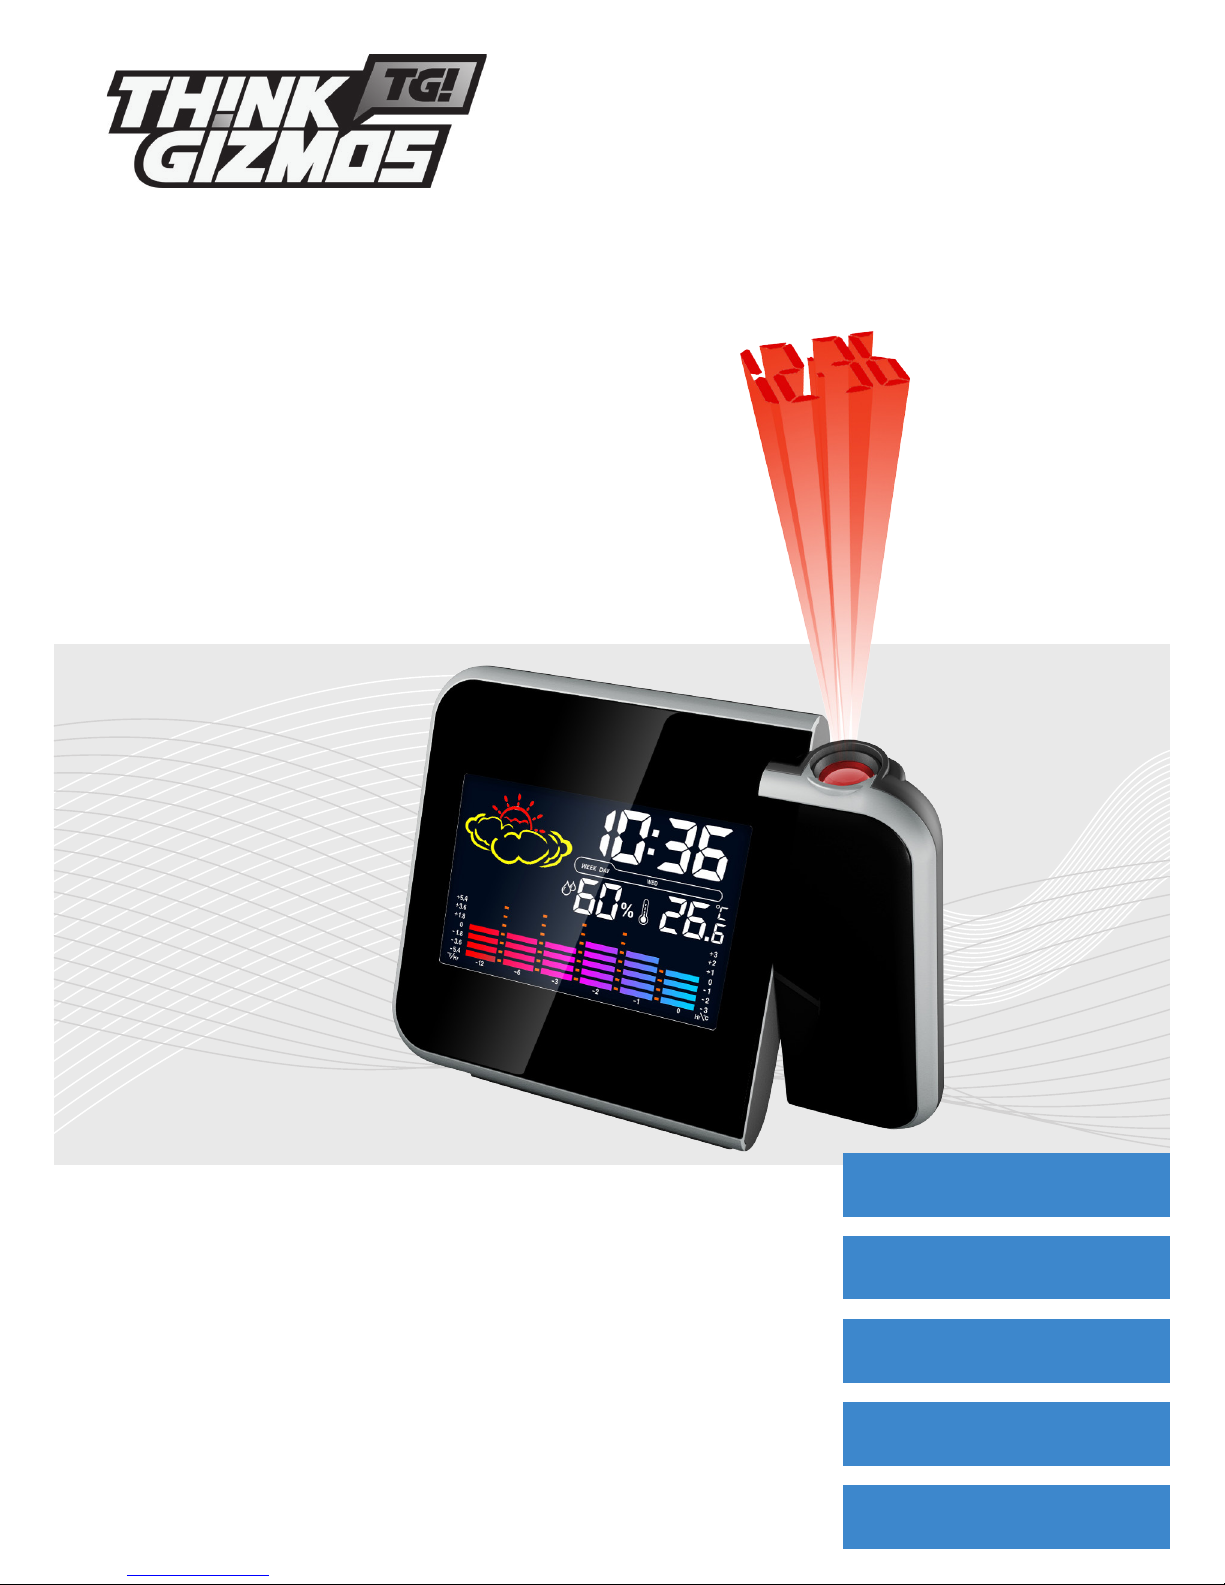
TG505 PROJECTION CLOCK
CONGRATULATIONS ON PURCHASING THE THINK GIZMOS PROJECTION CLOCK,
PLEASE FOLLOW THESE INSTRUCTIONS CAREFULLY AND KEEP THIS INSTRUCTION BOOKLET
FOR FUTURE REFERENCE.
User Manual
English p 2
Deutsch p 9
Francais p 17
Italiano p 25
Español p 33
WEATHER FORECASTER
Page 2

ENGLISH MANUAL - CONTENTS
1.
2.
3.
4.
1.1 Projection Clock Features ................................................................................... 3
3.1 Time Setting ......................................................................................................... 5
3.2 Calendar Setting .................................................................................................. 5
2.1 Battery Precautions ............................................................................................ 4
2.2 Battery Installation ............................................................................................. 4
2.3 Reset Function .................................................................................................... 4
4.1 Setting the Alarm ................................................................................................. 6
4.2 Activating and Deactivating the Alarms ............................................................ 6
4.3 Snooze Function .................................................................................................. 6
4.4 Stopping the Alarm ............................................................................................. 6
PROJECTION CLOCK FEATURES
TIME AND CALENDAR SETTINGS
IMPORTANT INFORMATION
ALARM SETTINGS
2
5.
5.1 °C/°F Temperature Display ................................................................................ 7
5.2 Min / Max Temperature / Relative Humidity ................................................... 7
TEMPERATURE / HUMIDITY INFORMATION
6.
7.
6.1 Weather Symbols ................................................................................................ 7
WEATHER FORECAST
8.
7.1 Projection Clock and Backlight .......................................................................... 7
7.2 Continuous Projection ...................................................................................... 7
PROJECTION AND BACKLIGHT
8.1 Warranty Information ....................................................................................... 8
WARRANTY
Page 3

1. PROJECTION CLOCK FEATURES
3
1.1 Projection Clock Features
● Date and day of week display.
● Perpetual calendar: 2001-2099.
● Snooze Alarm Clock.
● Weather Symbol: Sunny, Slightly Cloudy, Cloudy, Rainy.
● Temperature display in °C/°F.
● Thermometer:
Indoor measurement ranges 0°C to +50 °C.
● Temperature trend display.
● Indoor Hygrometer range: 20% - 95% RH.
● Max/Min memory for hygrometer & thermometer.
● LED back light display with projection (auto o after 5 seconds when using batteries).
● Battery: 2 x AAA 1.5V (Not included).
● DC power supply 4.5VDC 200mA for continuous projection (Included).
Page 4

2. IMPORTANT INFORMATION
4
2.1 Battery Precautions
● Alkaline batteries recommended.
● Do not use rechargeable batteries.
● New and used batteries should not to be mixed.
● Only batteries of the same or equivalent type as recommended are to be used.
● Batteries are to be inserted with the correct polarity.
● Keep batteries away from children.
● Dispose of exhausted batteries according to local legal requirements. Do not dispose of
them by throwing away with normal household rubbish.
2.2 Battery Installation
● Gently open the battery compartment located on the rear side of the unit.
● Insert 2 X 1.5V AAA batteries observing the correct polarity, as marked inside the
compartment.
● Replace the battery compartment door.
2.3 Reset Function
If the clock is not working properly or does not respond to your input press the “RESET”
button located at the rear of the clock. All settings will clear. You must set the correct time,
date and alarm settings again.
Page 5

3. TIME AND CALENDAR SETTINGS
5
3.1 Time Setting
● In normal time display, press and hold “up” button for 3 seconds to toggle 12/24 hour
display.
● In normal time mode press and hold the “MODE” button for two seconds, the hour digits
will ash.
● Press the “UP” or “DOWN” button to set the hour.
● Press the “MODE” to conrm your setting, the minute digits starts to ash.
● Press the “UP” or “DOWN” button to set the minutes.
● Finally press the “MODE” button to conrm your setting.
3.2 Calendar Setting
● In normal time mode press the “MODE” button once to enter the calendar setting mode.
● Press and hold the “MODE” button for 2 seconds and the year digits will ash.
● Press the “UP” or “DOWN” button to set the correct year.
● Press “MODE” to conrm your setting, the month digit starts to ash.
● Press the “UP” or “DOWN” button to set the correct month.
● Press “MODE” to conrm your setting, the date digits start to ash.
● Press the “UP” or “DOWN” button to set the correct date.
● Finally press the “MODE” button to conrm your setting.
Page 6

4. ALARM SETTING
6
4.1 Setting the Alarm
Note: While setting the alarm, if no button is pressed for 10 seconds the display will
automatically switch to the normal time display.
● In normal time mode press the “MODE” button twice to enter the alarm mode.
● Press and hold the “MODE” button for two seconds, the hour digits start to ash.
● Press the “UP” or “DOWN” button to set the hour.
● Press the “MODE” button to conrm your setting.
● The minute digits start to ash, press the “UP” or “DOWN” button to set the minutes.
● Press the “MODE” button to conrm your setting.
● Press the” MODE” button to return to the normal time display or the display will
automatically return to normal time display after 10 seconds.
4.2 Activating and Deactivating the Alarm
Press the “UP” button to activate or deactivate the alarm, if the alarm is activated the alarm
symbol (bell icon) will be displayed on the screen.
4.3 Snooze Function
● When the alarm sounds press the “SNOOZE/LIGHT” button to enter snooze mode.
● The alarm will sound again after every 8 minutes.
● During the snooze interval the bell symbol will blink.
● The snooze function can be stopped by pressing any button on the back, apart from the
“SNZ” button.
4.4 Stopping the Alarm
● When the alarm is sounding press any button on the back, apart from the “SNZ” button,
to stop the alarm.
● The alarm will automatically stop sounding after 2 minutes.
Page 7
5. TEMPERATURE / HUMIDITY INFORMATION
7
5.1 °C/°F Temperature Display
The temperature is displayed either in °C/°F, in normal time mode press the “DOWN” button
to switch between °C/°F display.
5.2 Max / Min Temperature / Relative Humidity
To toggle indoor max / min temperature & humidity data, press the “MAX/MIN” button:
● Once to show the maximum temperature and humidity values.
● Twice to show the minimum temperature and humidity values.
● Three times to return to the current temperature and humidity levels.
6. WEATHER FORECAST
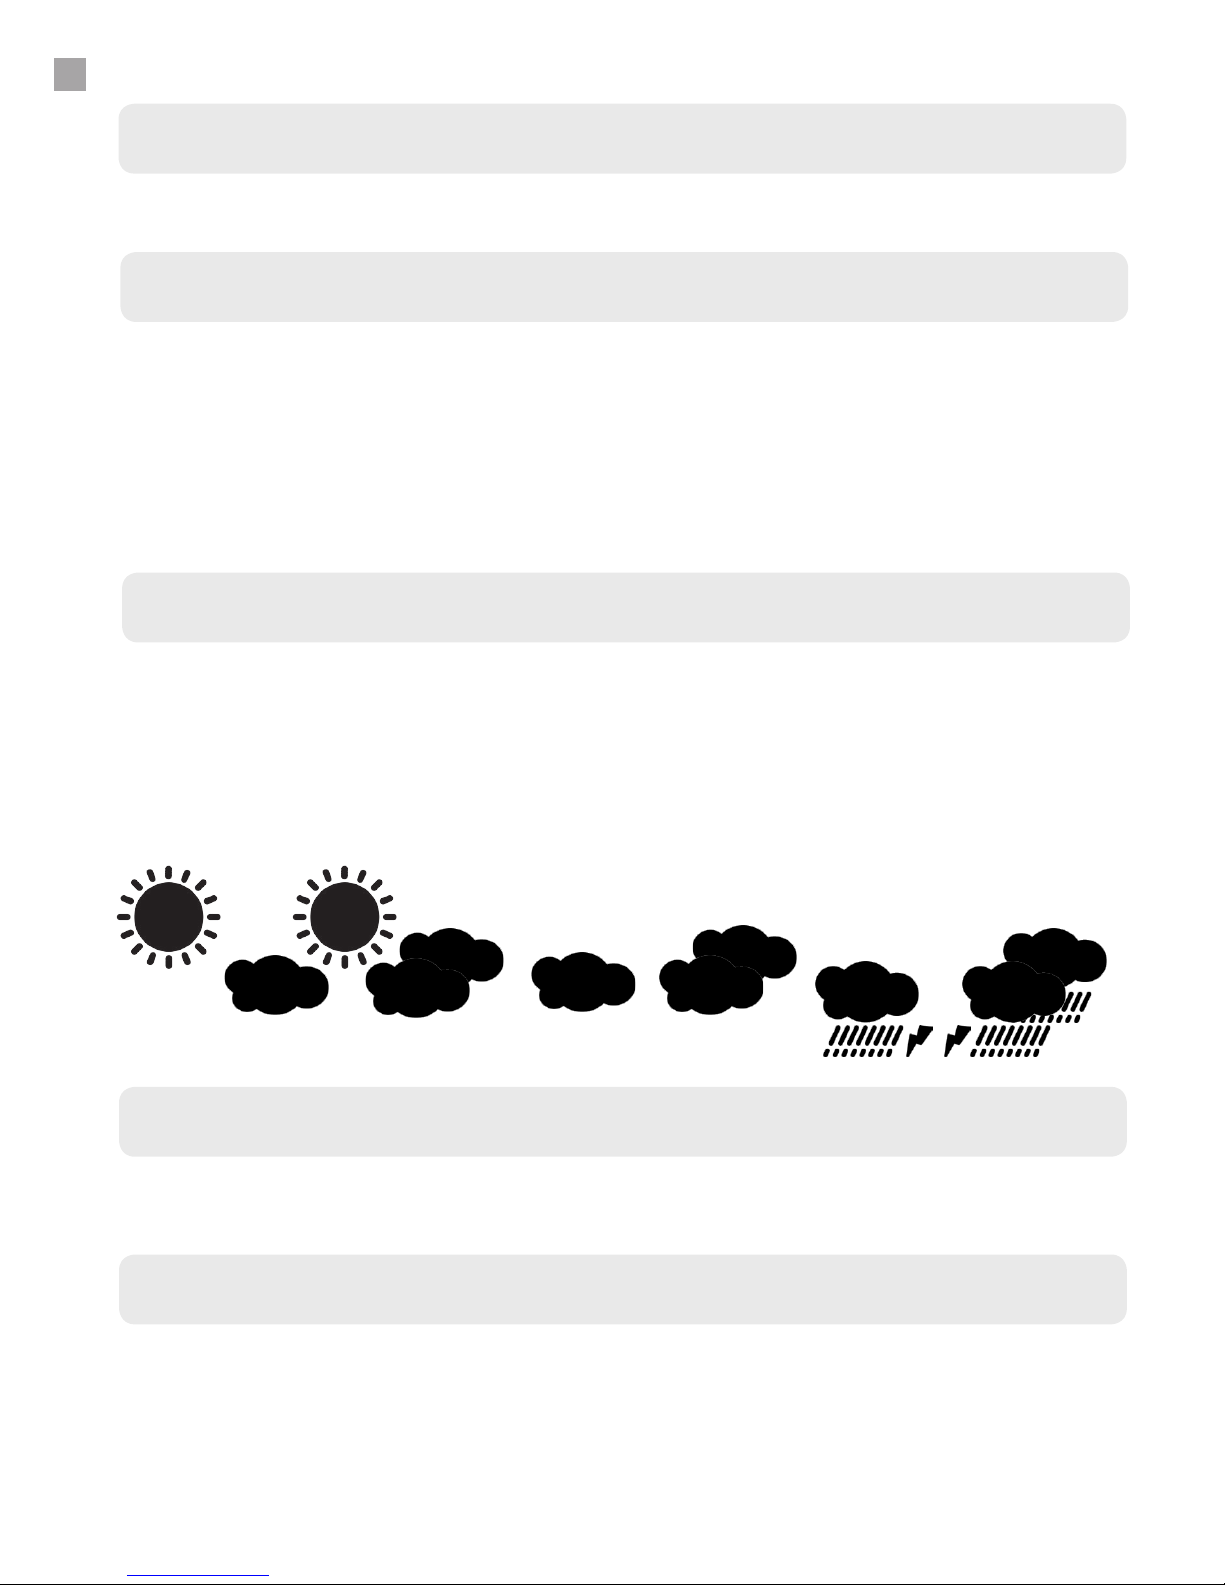
6.1 Weather Symbols
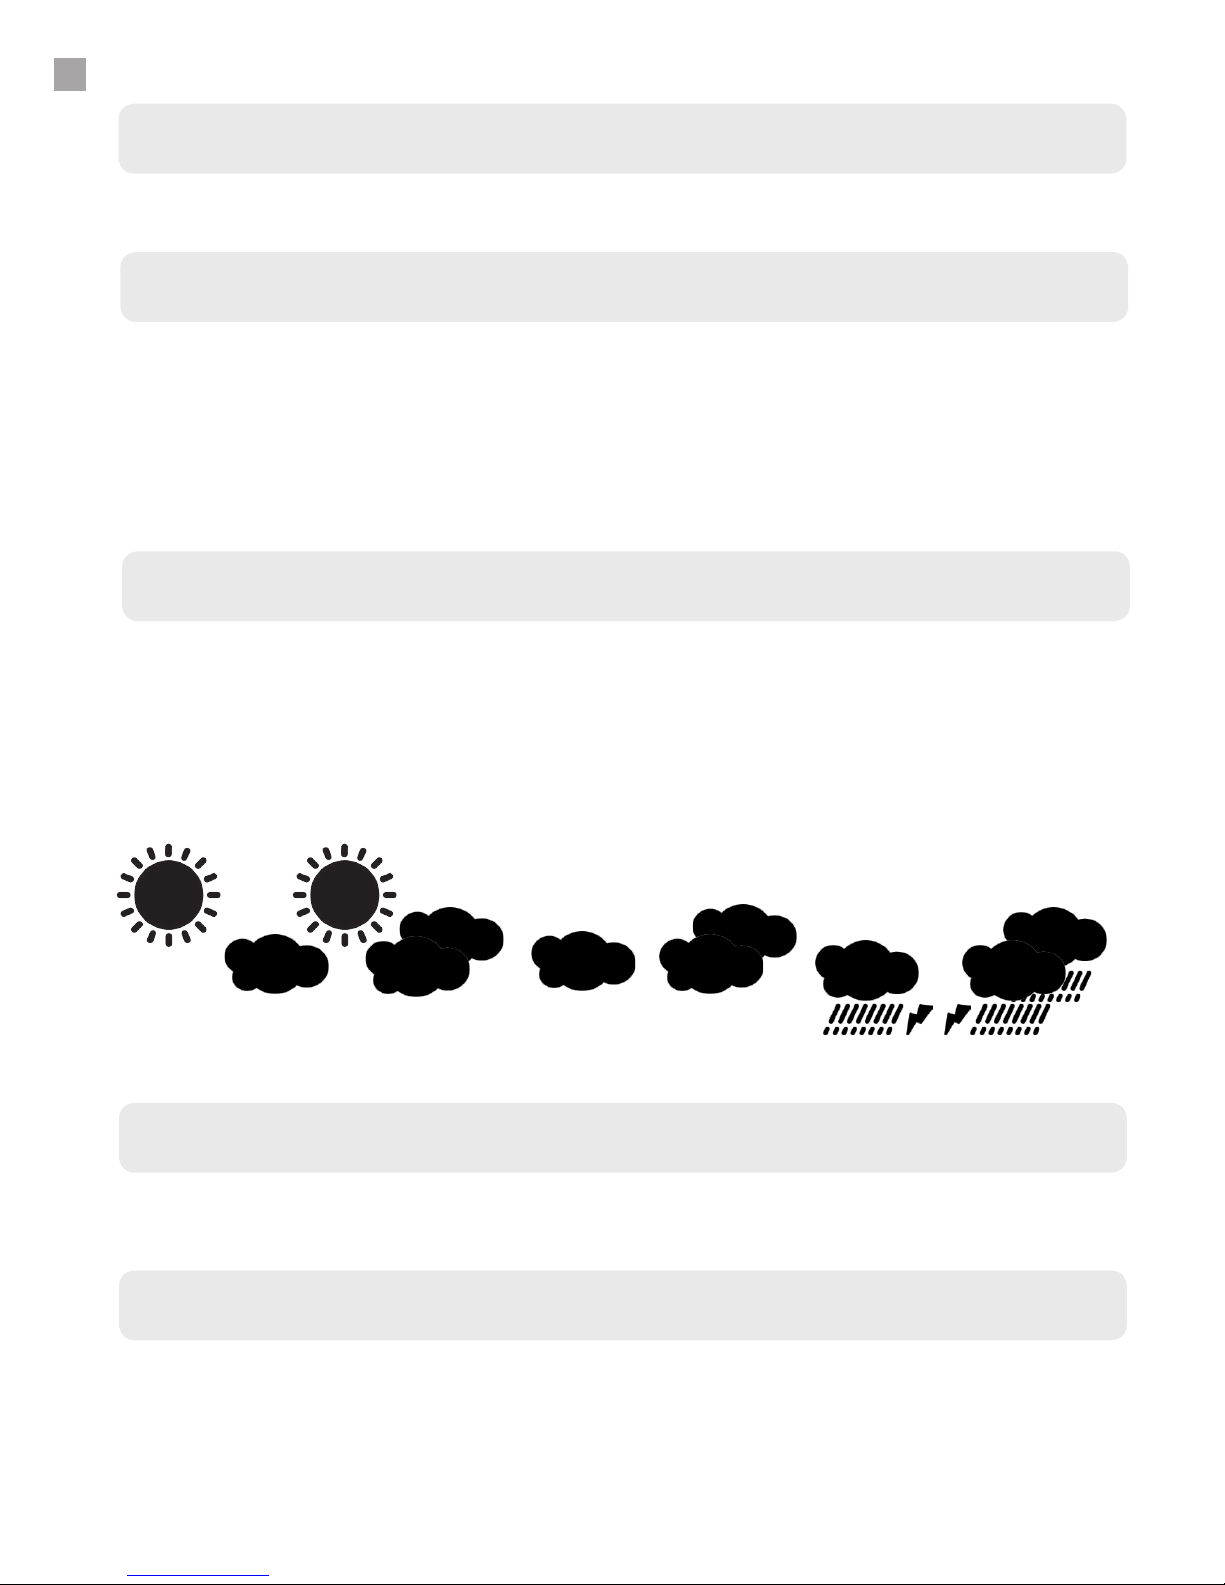
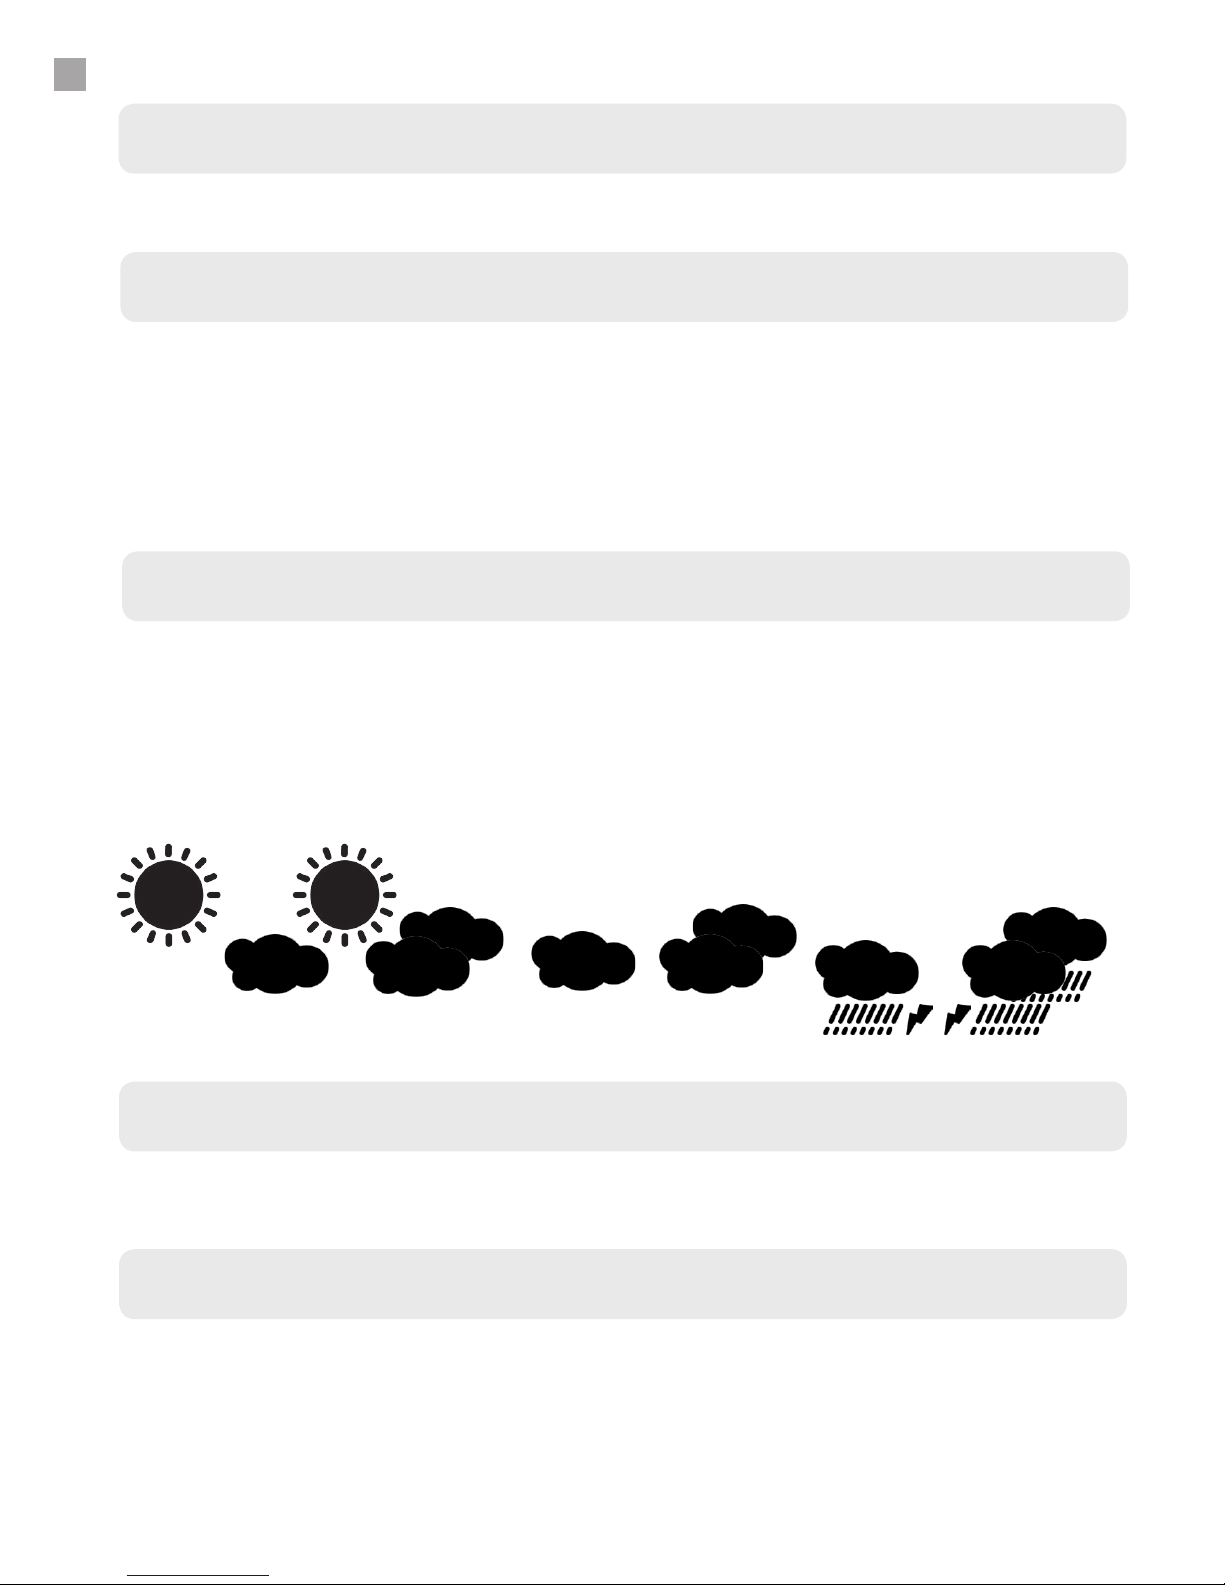
You will nd a weather symbol (as shown below) on the clock face. This is purely an
indicator of the weather created by a hygrometer which reacts to the indoor humidity. This
is meant as a fun addition to the clock as the reading is aected by indoor conditions such
as air conditioning and central heating which will aect the accuracy. There are 4 possible
weather symbols shown below:
Sunny Slightly Cloudy Cloudy
Rainy
7. PROJECTION AND BACKLIGHT
7.1 Projection Clock and Backlight
7.2 Continuous Projection
Briey press the “SNOOZE/LIGHT” button to activate the display lighting for 5 seconds, also
the displayed time will be projected onto the surface the projection arm is pointed at the
same time
The continuous projection function can only be used by plugging in the supplied AC-DC
adaptor. Insert the AC-DC adaptor (4.5V DC 200mA included) jack into the back of the
clock and plug the other end into a mains socket. This will enable the clock to project time
continuously on the wall or ceiling. Use the adjustable projection arm to display onto
appropriate wall or ceiling. Use the focus key to adjust the focus of the projected display.
Page 8

8. WARRANTY
8.1 Warranty Information
Think Gizmos, Unit 19, Lawson Hunt Industrial Park,
Broadbridge Heath, West Sussex, RH12 3JR
Tel.: +44/(0)203 384 8304
[email protected] ● www.thinkgizmos.com
What is Covered:
This warranty covers any defects in materials or workmanship, with the exceptions stated
below.
How Long Coverage Lasts:
This warranty runs for 1 Year from the date your Projection Clock is delivered.
What is not covered:
Any problem that is caused by abuse, misuse, or an act of God (such as a ood) are not
covered.
What We Will Do:
If the Product proves defective during the warranty period, we will provide you with the
instructions for the return, and we will take one of the following actions: (i) replace the
Product with a product that is the same or equivalent to the Product you purchased; (ii)
repair the Product; or (iii) refund to you the whole of or part of the purchase price of the
Product.
How To Get Service:
To obtain instructions on how to obtain service under this warranty, contact our customer
service by phone or email. You will nd the contact details of our customer service below.
Customer service may ask you questions to determine your eligibility under this warranty,
and if you are eligible you’ll be given instructions for returning the defective Product. If
we send you a replacement or repair your Product, we will pay the cost of delivering the
replacement or repaired Product to you.
Do not return the item to the original place of purchase, please contact Think
Gizmos direct.
8
Page 9
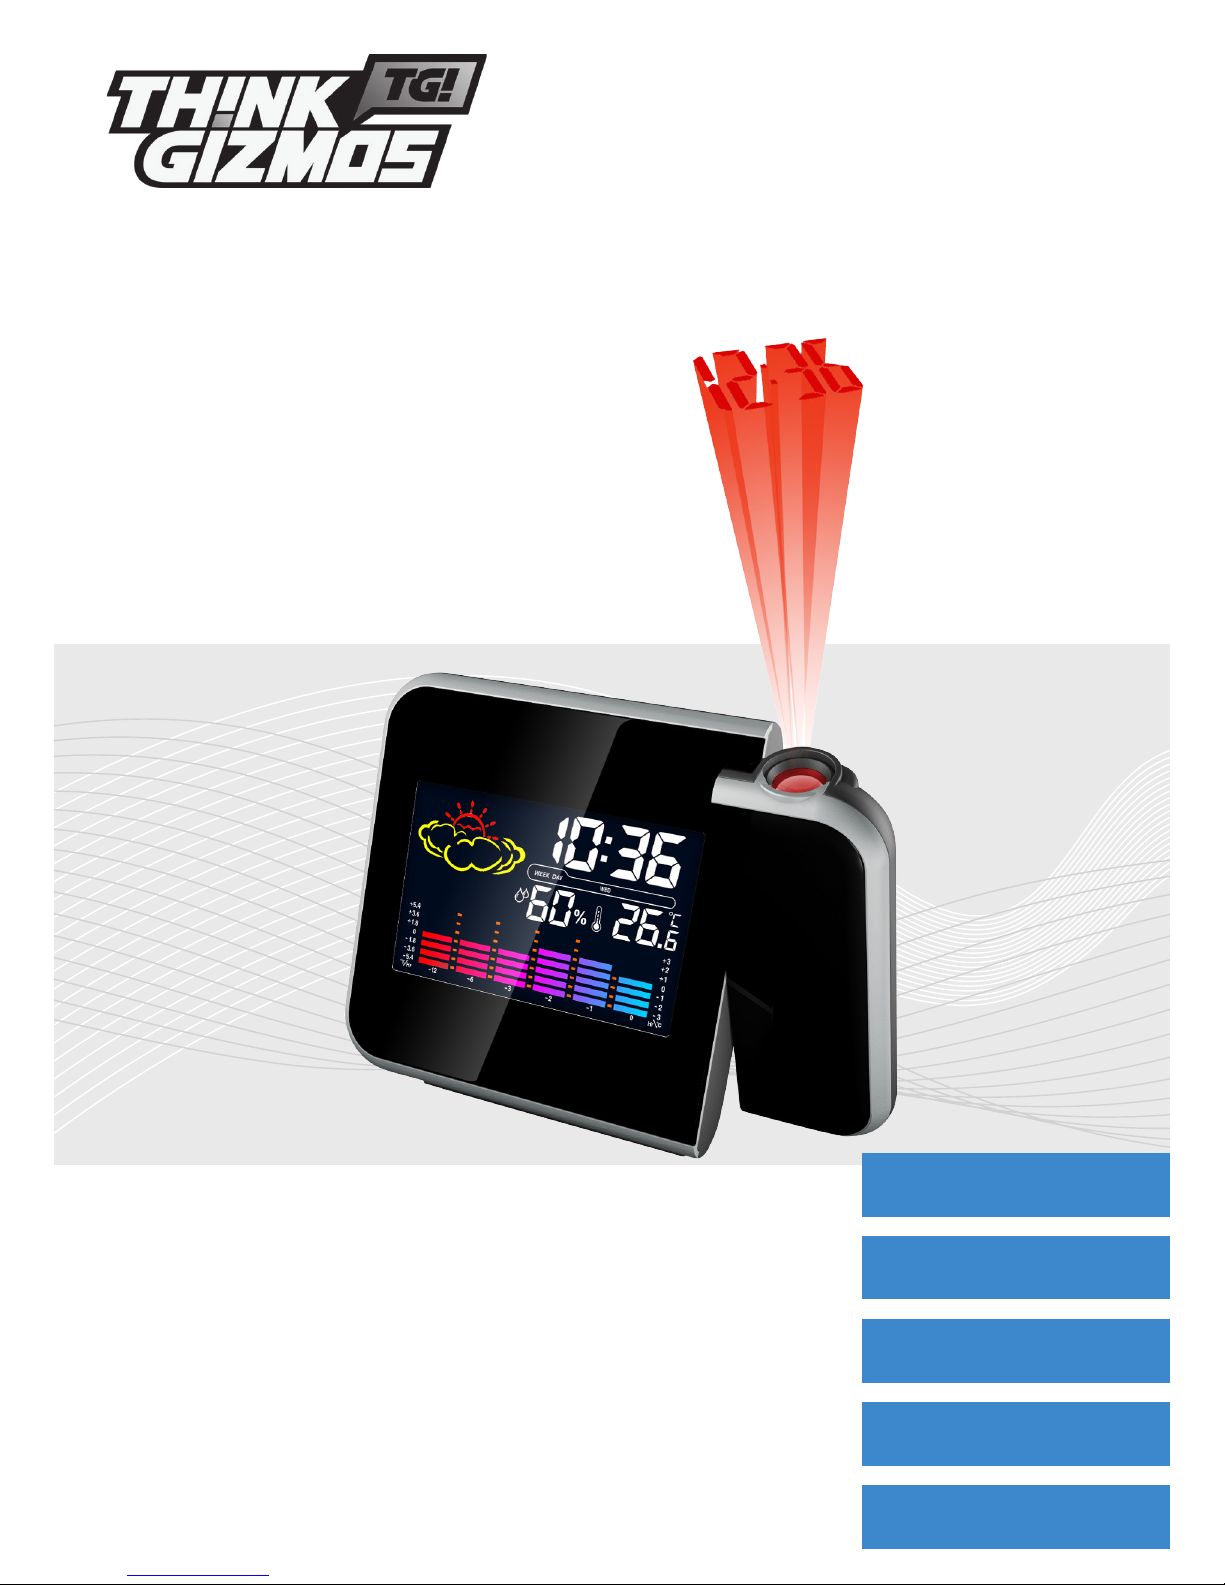
TG505 PROJEKTIONS-TAKTGEBER
HERZLICHEN GLUCKWUNSCH ZUM KAUF DES THINK GIZMOS PROJEKTION-TAKTGEBER.
BITTE BEFOLGEN SIE DIESE SORGFÄLTIG DURCH UND BEWAHREN DIESE ANLEITUNG ZUM
SPÄTEREN NACHSCHLAGEN.
Bedienungsanleitung
English p 2
Deutsch p 9
Francais p 17
Italiano p 25
Español p 33
WETTERVORHERSAGE
Page 10

DEUTSCH MANUAL - INHALTSVERZEICHNIS
1.
2.
3.
4.
1.1 Projektions-Taktgeber Funktionen ..................................................................11
3.1 Zeiteinstellung ................................................................................................... 13
3.2 Kalendereinstellung .......................................................................................... 13
2.1 Batterie Vorsichtsmaßnahmen ........................................................................ 12
2.2 Einlegen der Batterien ..................................................................................... 12
2.3 Reset Funktion .................................................................................................. 12
4.1 Einstellung des Weckers ................................................................................... 14
4.2 Aktivieren und deaktivieren des Weckers ...................................................... 14
4.3 Schlummerfunktion: ......................................................................................... 14
4.4 Den Wecker ausschalten ................................................................................. 14
PROJEKTIONS-TAKTGEBER FUNKTIONEN
ZEIT UND KALENDER EINSTELLUNGEN
WICHTIGE INFORMATION
ALARMEINSTELLUNGEN
10
5.
5.1 °C / °F Temperaturanzeige .............................................................................. 15
5.2 Max / Min Temperatur / relative Luftfeuchtigkeit ........................................ 15
TEMPERATUR / FEUCHTIGKEIT INFORMATIONEN
6.
7.
6.1 Wettersymbol: ................................................................................................... 15
WETTERVORHERSAGE
8.
7.1 Projektion Uhr & Hintergrundbeleuchtung ....................................................15
7.2 Ständige Projektion ......................................................................................... 15
PROJEKTIONS UND HINTERGRUNDBELEUCHTUNG
8.1 Garanieinformation ......................................................................................... 16
GARANTIE
Page 11

1. PROJEKTIONS-TAKTGEBER FUNKTIONEN
11
1.1 Projektions-Taktgeber Funktionen
● Datums- und Wochentagsanzeige
● Ewiger Kalender: 2001-2099
● Wecker mit Schlummerfunktion
● Wettersymbol: sonnig, leicht bewölkt, bewölkt, regnerisch
● Temperaturanzeige in °C / °F
● Thermometer: Raumtemperaturbereich 0 °C - +50 °C
● Temperaturtrendanzeige
● Raumluftfeuchtigkeitsbereich: 20% - 95% RH
● Max / Min Speicher für Hygrometer und Thermometer
● LED beleuchtetes Display mit Projektion (schaltet sich nach 5 Sekunden automatisch aus,
wenn Batterien verwendet werden)
● Batterie: 2x AAA 1.5V (nicht enthalten)
● DC Stromversorgung 4.5VDC 200mA für ständige Projektion (enthalten)
Page 12

2. WICHTIGE INFORMATION
12
2.1 Batterie Vorsichtsmaßnahmen
● Alkali Batterien empfohlen.
● Verwenden Sie keine wiederauadbaren Batterien.
● Neue und alte Batterien sollten nicht gleichzeitig verwendet werden.
● Nur Batterien des gleichen Typs sollten verwendet werden.
● Batterien sollten richtig herum eingelegt werden.
● Bewahren Sie Batterien außerhalb der Reichweite von Kindern auf.
● Entsorgen Sie leere Batterien entsprechend der gesetzlichen Bestimmungen. Entsorgen
Sie sie nicht im Hausmüll.
2.2 Einlegen der Batterien
● Önen Sie das Batteriefach, das sich an der Rückseite des Produkts bendet.
● Legen Sie 2x 1.5V AAA Batterien richtig herum ein.
● Schließen Sie die Batterieabdeckung.
2.3 Reset Funktion
Wenn die Uhr nicht richtig funktioniert oder auf Ihre Eingaben reagiert, drücken Sie den
“Reset” Knopf, der sich auf der Rückseite der Uhr bendet. Alle Einstellungen werden
gelöscht. Sie müssen die richtige Zeit, das Datum und die Weckeinstellungen erneut
eingeben.
Page 13

3. ZEIT UND KALENDER EINSTELLUNGEN
13
3.1 Zeiteinstellung
● Im normalen Zeitdisplay drücken und halten Sie den “UP” Knopf für 3 Sekunden, um auf
das 12-24 Stunden Display umzuschalten.
● Im normalen Zeitmodus drücken und halten Sie den “MODE” Knopf für 2 Sekunden, die
Stundenanzeige fängt an zu blinken.
● Drücken Sie den “UP” oder “DOWN” Knopf, um die Stunden einzustellen.
● Drücken Sie den “MODE” Knopf, um die Eingabe zu bestätigen, die Minutenanzeige fängt
an zu blinken.
● Drücken Sie den “UP” oder “DOWN” Knopf, um die Minuten einzustellen.
● Drücken Sie abschließend auf den “MODE” Knopf, um die Eingabe zu bestätigen.
3.2 Kalendereinstellung
● Im normalen Zeitmodus drücken Sie einmal auf den “MODE” Knopf, um in den Modus
zur Kalendereinstellung zu gelangen.
● Drücken und halten Sie den “MODE” Knopf für 2 Sekunden, und die Jahreszahl fängt an
zu blinken.
● Drücken Sie den “UP” oder “DOWN” Knopf, um das richtige Jahr einzustellen.
● Drücken Sie den “MODE” Knopf, um Ihre Eingabe zu bestätigen, die Monatszahl fängt an
zu blinken.
● Drücken Sie den “UP” oder “DOWN” Knopf, um den richtigen Monat einzustellen.
● Drücken Sie den “MODE” Knopf, um die Eingabe zu bestätigen, die Datumszahlen fangen
an zu blinken.
● Drücken Sie den “UP” oder “DOWN” Knopf, um das korrekte Datum einzustellen.
● Drücken Sie abschließend auf den “MODE” Knopf, um die Eingabe zu bestätigen.
Page 14

4. ALARMEINSTELLUNGEN
14
4.1 Einstellung des Weckers
Bemerkung: Wenn Sie während des Einstellens des Alarms 10 Sekunden lang keinen Knopf
drücken, schaltet das Display automatisch auf die normale Zeitanzeige um.
● Im normalen Zeitmodus, drücken Sie 2x auf den “MODE” Knopf, um in den Weckmodus
zu gelangen.
● Drücken und halten Sie den “MODE” Knopf für 2 Sekunden, die Stundenanzeige beginnt
zu blinken.
● Drücken Sie den “UP” oder “DOWN” Knopf, um die Stunden einzustellen.
● Drücken Sie den “MODE” Knopf, um die Eingabe zu bestätigen, die Minutenanzeige fängt
an zu blinken.
● Drücken Sie den “UP” oder “DOWN” Knopf, um die Minuten einzustellen.
● Drücken Sie auf den “MODE” Knopf, um die Eingabe zu bestätigen.
● Drücken Sie auf den “MODE” Knopf, um zur normalen Zeitanzeige zurück zu gelangen,
oder das Display schaltet nach 10 Sekunden automatisch auf die normale Zeitanzeige
zurück.
4.2 Aktivieren und deaktivieren des Weckers
Drücken Sie den “UP” Knopf, um den Wecker zu aktivieren oder deaktivieren. Wenn der
Wecker aktiviert ist, erscheint das Wecksymbol (eine Glocke) auf dem Display.
4.3 Schlummerfunktion
● Wenn der Wecker klingelt, drücken Sie den “SNOOZE/LIGHT” Knopf, um in den
Schlummermodus zu gelangen.
● Der Wecker klingelt erneut alle acht Minuten.
● Während dem Schlummerintervall blinkt das Glockensymbol.
● Die Schlummerfunktion kann ausgeschaltet werden, indem ein beliebiger Knopf auf der
Rückseite gedrückt wird, mit Ausnahme des “SNZ” Knopfes.
4.4 Den Wecker ausschalten
● Wenn der Wecker klingelt, drücken Sie einen beliebigen Knopf auf der Rückseite, mit
Ausnahme des “SNZ” Knopfes, um den Wecker auszuschalten.
● Der Wecker schaltet sich nach 2 Minuten automatisch aus.
Page 15
5. TEMPERATUR / FEUCHTIGKEIT INFORMATIONEN
15
5.1 °C / °F Temperaturanzeige
Die Temperatur wird wahlweise in °C / °F angezeigt. Im normalen Zeitmodus drücken Sie
auf den “DOWN” Knopf, um zwischen der °C / °F Anzeige zu wechseln.
5.2 Max / Min Temperatur / relative Luftfeuchtigkeit
Um zwischen der Max / Min Temperatur- und Luftfeuchtigkeitsanzeige zu wechseln,
drücken Sie den “MAX / MIN” Knopf:
● 1x, um die maximale Temperatur und Luftfeuchtigkeit anzuzeigen.
● 2x, um die minimale Temperatur und Luftfeuchtigkeit anzuzeigen.
● 3x, um zu den aktuellen Temperatur- und Luftfeuchtigkeitswerten zurückzukehren.
6. WETTERVORHERSAGE
6.1 Wettersymbol
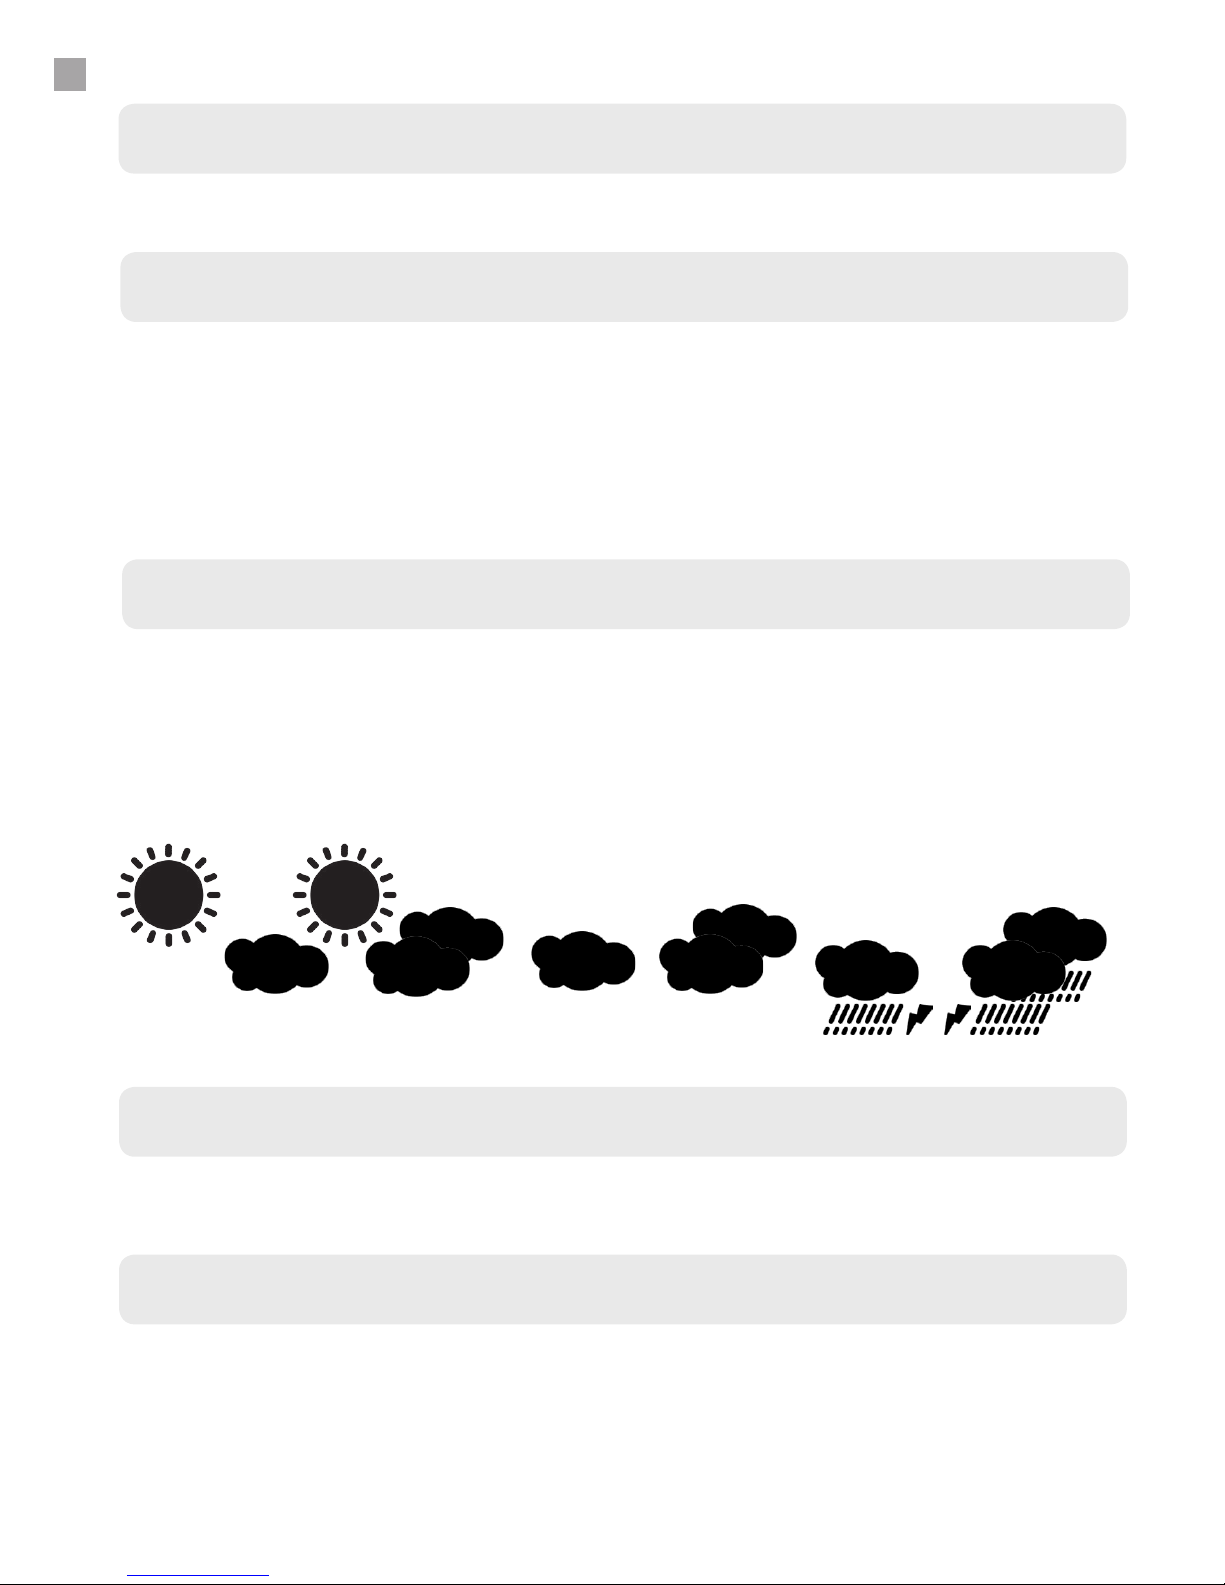
Auf der Uhr nden Sie ein Wettersymbol (wie unten gezeigt). Dies ist nur ein Anhaltspunkt,
der darauf basiert, wie das Hygrometer auf die Luftfeuchtigkeit im Raum reagiert. Dies ist
eine lustige Zusatzfunktion der Uhr, da die Messung durch die Raumverhältnisse, wie z.B.
Klimaanlage und Zentralheizung beeinusst wird, was die Genauigkeit beeinusst. Es gibt
vier mögliche Wettersymbole:
Sonnig Leicht bewölkt Bewölkt
Regnerisch
7. PROJEKTIONS UND HINTERGRUNDBELEUCHTUNG
7.1 Projektion Uhr & Hintergrundbeleuchtung
7.2 Ständige Projektion
Drücken Sie kurz auf den “SNOOZE/LIGHT” Knopf, um die Displaybeleuchtung für 5
Sekunden zu aktivieren. Die angezeigte Zeit wird gleichzeitig auf die Oberäche projiziert,
auf die der Projektionsarm gerichtet ist.
Die ständige Projektionsfunktion kann nur dann genutzt werden, wenn der mitgelieferte
AC-DC Adapter eingesteckt ist. Stecken Sie den AC-DC Adapter (4.5VDC 200mA enthalten)
Stecker in die Rückseite der Uhr und stecken Sie das andere Ende in eine Steckdose.
Dies ermöglicht es der Uhr die Zeit ständig an eine Wand oder die Decke zu projizieren.
Verwenden Sie den verstellbaren Projektionsarm, um an eine geeignete Wand oder Decke
zu projizieren. Verwenden Sie die Fokustaste, um die Schärfe der Projektion zu verstellen.
Page 16

8. GARANTIE
8.1 Garantieinformation
Think Gizmos, Unit 19, Lawson Hunt Industrial Park,
Broadbridge Heath, West Sussex, RH12 3JR
Tel.: +44/(0)203 384 8304
[email protected] ● www.thinkgizmos.com
Was ist abgedeckt:
Die Garantie deckt alle Defekte von Materialien und der Verarbeitung, mit Ausnahme der
unten angeführten Fälle.
Wie lange die Garantie gilt:
Die Garantie gilt für ein Jahr ab dem Lieferdatum Ihrer Projektions-Taktgeber.
Was nicht abgedeckt ist:
Jedes Problem das durch Missbrauch oder höhere Gewalt (wie Überschwemmung) entsteht
ist nicht gedeckt.
Was wir tun werden:
Sollte das Produkt innerhalb der Laufzeit der Garantie als defekt befunden werden,
erhalten Sie Anweisungen für die Rückgabe und wir werden eine der folgenden Handlungen
vornehmen: (i) wir tauschen das Produkt gegen ein gleiches oder gleichwertiges Produkt
um, (ii) wird reparieren das Produkt, oder (iii) wir erstatten Ihnen den vollen oder einen
Teilbetrag des Kaufpreises des Produkts zurück.
Wie man Service in Anspruch nehmen kann:
Kontaktieren Sie unseren Kundendienst per Telefon oder E-Mail, um Anweisungen zu
erhalten wie Sie eine Serviceleistung unter diesen Garantiebestimmungen erhalten. Sie
nden die Kontaktdaten unseres Kundendienstes weiter unten. Unser Kundendienst kann
Ihnen Fragen stellen, um festzustellen, ob es sich um einen Garantiefall handelt. Sollte dies
der Fall sein, erhalten Sie Anweisungen zur Rücksendung des defekten Produkts. Sollten wir
Ihnen einen Ersatz schicken oder das Produkt reparieren, übernehmen wir die Lieferkosten.
Schicken Sie den Artikel nicht an den Händler zurück bei dem Sie ihn erworben
haben, sondern kontaktieren Sie bitte Think Gizmos direkt.
16
Page 17
TG505 HORLOGE DE PROJECTION
FELICITATIONS POUR L’ACHAT DU THINK GIZMOS HORLOGE DE PROJECTION,
S’IL VOUS PLAÎT SUIVRE CES INSTRUCTIONS ATTENTIVEMENT ET CONSERVER CE LIVRET
D’INSTRUCTIONS POUR RÉFÉRENCE FUTURE.
Manuel de l’utilisateur
English p 2
Deutsch p 9
Francais p 17
Italiano p 25
Español p 33
PRÉVISIONNISTE MÉTÉO
Page 18

MANUEL FRANÇAIS - CONTENTS
1.
2.
3.
4.
1.1 Horloge De Projection Caractéristiques .........................................................19
3.1 Reglage De L’Heure .......................................................................................... 21
3.2 Reglage Du Calendrier ...................................................................................... 21
2.1 Precaution D’Usage Pour Les Puiles ............................................................... 20
2.2 Installation Des Piles ........................................................................................ 20
2.3 Fonction De Reinitialisation ............................................................................. 20
4.1 Reglage De L’Alarme .......................................................................................... 22
4.2 Activer Et Desactiver L’Alarme ......................................................................... 22
4.3 Fonction Report De Sonnerie (Snooze) ........................................................... 22
4.4 Comment Arreter L’Alarme ..............................................................................22
HORLOGE DE PROJECTION CARACTÉRISTIQUES
HEURE ET LE CALENDRIER REGLAGES
INFORMATIONS IMPORTANTES
REGLAGES D’ALARME
18
5.
5.1 Achage De La Temperature °C/°F ................................................................ 23
5.2 Temperature Max / Min / Humidite Relative ................................................. 23
TEMPÉRATURE / INFORMATIONS HUMIDITÉ
6.
7.
6.1 Symbole Du Temps .......................................................................................... 23
PRÉVISIONS MÉTÉOROLOGIQUES
8.
7.1 Projection Et Retro-Eclairage Du Reveil ...........................................................23
7.2 Projection Continue ......................................................................................... 23
PROJECTION ET ECLAIRAGE
8.1 Informations sur la garantie ............................................................................ 24
GARANTIE
Page 19

1. HORLOGE DE PROJECTION CARACTÉRISTIQUES
19
1.1 Horloge De Projection Caractéristiques
● Achage de la date et du jour de la semaine.
● Calendrier perpétuel 2001- 2099.
● Réveil avec bouton de report de sonnerie.
● Symbole météo : Ensoleillé, légèrement nuageux, nuageux, pluvieux.
● Achage de la température en °C ou °F.
● Thermomètre :
Echelle de mesure en intérieur : 0°C 0 +50°C.
● Achage des tendances de la température.
● Echelle d’hygromètre en intérieur : 20% - 95% RH.
● Mémoire Max/Min pour l’hygromètre & le thermomètre.
● Achage en rétro- éclairage LED avec projection (s’éteint automatiquement après 5
secondes lorsqu’il est utilisé avec les piles).
● Pile : 2 x AAA 1.5V (Non inclus).
● Cordon d’alimentation DC 4.5VDC 200mA pour une projection en continue (inclus).
Page 20

2. INFORMATIONS IMPORTANTES
20
2.1 Precaution D’Usage Pour Les Puiles
● Les piles alcalines sont recommandées.
● Ne pas utiliser de piles rechargeables.
● Ne pas mélanger des piles neuves avec des piles usagées.
● Seulement des piles de type équivalent sont recommandées pour l’utilisation.
● Les piles doivent être insérées dans la bonne polarité.
● Gardez les piles à l’écart des enfants.
● Séparez-vous des piles selon les recommandations légales en vigueur. Ne les jetez pas
dans les ordures ménagères.
2.2 Installation Des Piles
● Ouvrez avec précaution le compartiment à piles situé en dessous de l’appareil.
● Insérez 2 piles AAA x 1.5 V en observant la polarité qui est inscrite à l’intérieur du
compartiment.
● Refermez le couvercle du compartiment à piles.
2.3 Fonction De Reinitialisation
Si le réveil ne fonctionne pas correctement ou ne réagit pas à vos actions, appuyez sur le
bouton ‘RESET’ situé à l’arrière du réveil. Tous les paramètres seront eacés. Vous devrez
à nouveau procéder aux paramétrages de l’heure, de la date, et de l’alarme. Merci de
conserver ces instructions pour une consultation ultérieure.
Page 21

3. HEURE ET LE CALENDRIER REGLAGES
21
3.1 Reglage De L’Heure
● En achage normal du temps, appuyez et maintenez le bouton ‘UP’ pendant 3 secondes
pour basculer en achage 12/24 heure.
● En mode normal du temps, appuyez et maintenez le bouton ‘MODE’ pendant deux
secondes, les chires des heures s’acheront.
● Appuyez sur le bouton ‘UP’ ou ‘DOWN’ pour régler l’heure.
● Appuyez sur le bouton ‘MODE’ pour conrmer votre réglage, et les chires des minutes
commenceront à s’allumer.
● Appuyez sur le bouton ‘UP’ ou ‘DOWN’ pour régler les minutes.
● Enn, appuyez sur le bouton ‘MODE’ pour conrmer votre réglage.
3.2 Reglage Du Calendrier
● En mode normal de l’heure, appuyez sur le bouton ‘MODE’ une fois pour entrer le
réglage du calendrier.
● Appuyez et maintenez le bouton ‘MODE’ pendant 2 secondes et les chires de l’année
s’allumeront.
● Appuyez sur le bouton ‘UP’ ou ‘DOWN’ pour régler l’année.
● Appuyez sur le bouton ‘MODE’ pour conrmer votre réglage et les chires du mois
s’allumeront.
● Appuyez sur le bouton ‘UP’ ou ‘DOWN’ pour régler le mois.
● Appuyez sur le bouton ‘MODE’ pour conrmer votre réglage et les chires de la date
s’allumeront.
● Appuyez sur le bouton ‘UP’ ou ‘DOWN’ pour régler la bonne date.
● Enn, appuyez sur le bouton ‘MODE’ pour conrmer votre réglage.
Page 22

4. REGLAGES D’ALARME
22
4.1 Reglage De L’Alarme
Remarque : Lorsque vous réglez l’alarme, si vous ne maintenez pas le bouton appuyé
pendant 10 secondes, l’achage se remettra automatiquement à la normale.
● En mode normal de l’heure, appuyez 2 fois sur le bouton ‘MODE’ pour entrer dans le
mode alarme.
● Appuyez et maintenez le bouton ‘MODE’ pendant 2 secondes, et les chires des heures
vont commencés à s’allumer.
● Appuyez sur le bouton ‘UP’ ou ‘DOWN’ pour régler l’heure.
● Appuyez sur le bouton ‘MODE’ pour conrmer votre réglage.
● Appuyez sur le bouton ‘MODE’ pour retourner à l’achage normal de l’heure ou
l’achage retournera automatiquement à la normale après 10 secondes.
4.2 Activer Et Desactiver L’Alarme
Appuyez sur le bouton ‘UP’ pour activer ou désactiver l’alarme ; si l’alarme est activée, le
symbole de l’alarme (l’icône de la cloche) s’achera sur l’écran.
4.3 Fonction Report De Sonnerie (Snooze)
● Lorsque que l’alarme sonne, appuyez sur le bouton ‘SNOOZE/LIGHT’ pour entrer en
mode report de sonnerie.
● L’alarme sonnera de nouveau après 8 minutes.
● Lors du report de sonnerie, l’icône de la cloche clignotera.
● La fonction report de sonnerie pourra être arrêtée en appuyant sur n’importe quel
bouton à l’arrière, à l’exception du bouton ‘SNZ’.
4.4 Comment Arreter L’Alarme
● Lorsque l’alarme sonne, appuyez sur n’importe quel bouton à l’arrière, sauf le bouton
‘SNZ’, pour stopper l’alarme.
● L’alarme s’arrêtera de sonner automatiquement après 2 minutes.
Page 23
5. TEMPÉRATURE / INFORMATIONS HUMIDITÉ
23
5.1 Achage De La Temperature °C/°F
La température sera achée soit en °C ou°F, en fonctionnement normal, appuyez sur le
bouton ‘DOWN’ pour basculer l’achage en °C ou °F.
5.2 Temperature Max / Min / Humidite Relative
Pour basculer entre les données de température min/max & d’humidité, appuyez sur le
bouton ‘MIN/MAX’:
● Une fois pour acher les valeurs maximales de température et d’humidité.
● Deux fois pour acher les valeurs minimales de température et d’humidité.
● Trois fois pour retourner au niveau de la température et de l’humidité actuelles.
6. PRÉVISIONS MÉTÉOROLOGIQUES
6.1 Symbole Du Temps
Vous trouverez un symbole du temps (comme montré ci- dessous) sur le devant du réveil.
C’est parfaitement un indicateur du temps créé par l’hygromètre qui réagit à l’humidité
intérieure. Cela donne un ajout divertissant au réveil puisque la lecture est aectée par
les conditions intérieures telles que l’air conditionné et le chauage central qui peuvent
inuencer sur la précision. Il y a 4 symboles de temps possiblesmontrés ci- dessous:
ensoleillé légèrement nuageux nuageux
pluvieux
7. PROJECTION ET ECLAIRAGE
7.1 Projection Et Retro-Eclairage Du Reveil
7.2 Projection Continue
Appuyez brièvement sur le bouton ‘SNOOZE/LIGHT’ pour activer l’achage de l’éclairage
pendant 5 secondes, et l’heure achée sera également projetée au même moment sur la
surface visée par le bras de projection.
La fonction de projection continue peut seulement être utilisée que si l’appareil est branché
au cordon d’alimentation AC- DC (4.5VDC 200mA inclue) à l’arrière du réveil et branché
de l’autre côté dans la prise de courant. Cela permettra au réveil de projeter l’heure en
continue sur le mur ou au plafond. Utilisez le bras de projection réglable an d’acher
sur le mur ou au plafond. Appuyez sur la touche de l’objectif an de régler l’objectif sur
l’achage projeté.
Page 24

8. GARANTIE
8.1 Informations sur la garantie
Think Gizmos, Unit 19, Lawson Hunt Industrial Park,
Broadbridge Heath, West Sussex, RH12 3JR
Tel.: +44/(0)203 384 8304
[email protected] ● www.thinkgizmos.com
Ce qui est couvert:
Cette garantie couvre tout défaut de matériaux ou de fabrication, sous réserve des
exceptions mentionnées ci-après.
Combien de temps dure la garantie:
Cette garantie dure 1 an à partir de la date à laquelle votre Horloge De Projection est livré.
Quelle ne est pas couvert:
N’importe quel problème qui est causé par l’abus, mauvaise utilisation ou une catastrophe
naturelle (par exemple une inondation) ne sont pas couverts.
What we will do:
Si le produit s’avère défectueux pendant la période de garantie, nous vous fournirons les
instructions pour le retour, et nous prendrons les actions suivantes: (i) remplacer le produit
par un produit identique ou équivalent au produit que vous avez acheté; (ii) réparer le
produit; ou (iii) rembourse tout ou partie du prix d’achat du produit.
Comment obtenir le Service:
Pour obtenir des instructions sur la façon d’obtenir le service sous garantie, contactez notre
service à la clientèle par téléphone ou par courriel. Vous trouverez les coordonnées de
notre service à la clientèle ci-dessous. Service à la clientèle peut vous poser des questions
pour déterminer votre admissibilité aux termes de cette garantie, et si vous êtes admissible
vous recevrez les instructions pour retourner le produit défectueux. Si nous vous enverrons
un remplacement ou réparation de votre produit, nous paiera le coût de la prestation de
remplacement ou réparer le produit pour vous.
Ne pas retourner l’article à l’endroit original d’achat, S’il vous plaît contacter Think
Gizmos.
24
Page 25
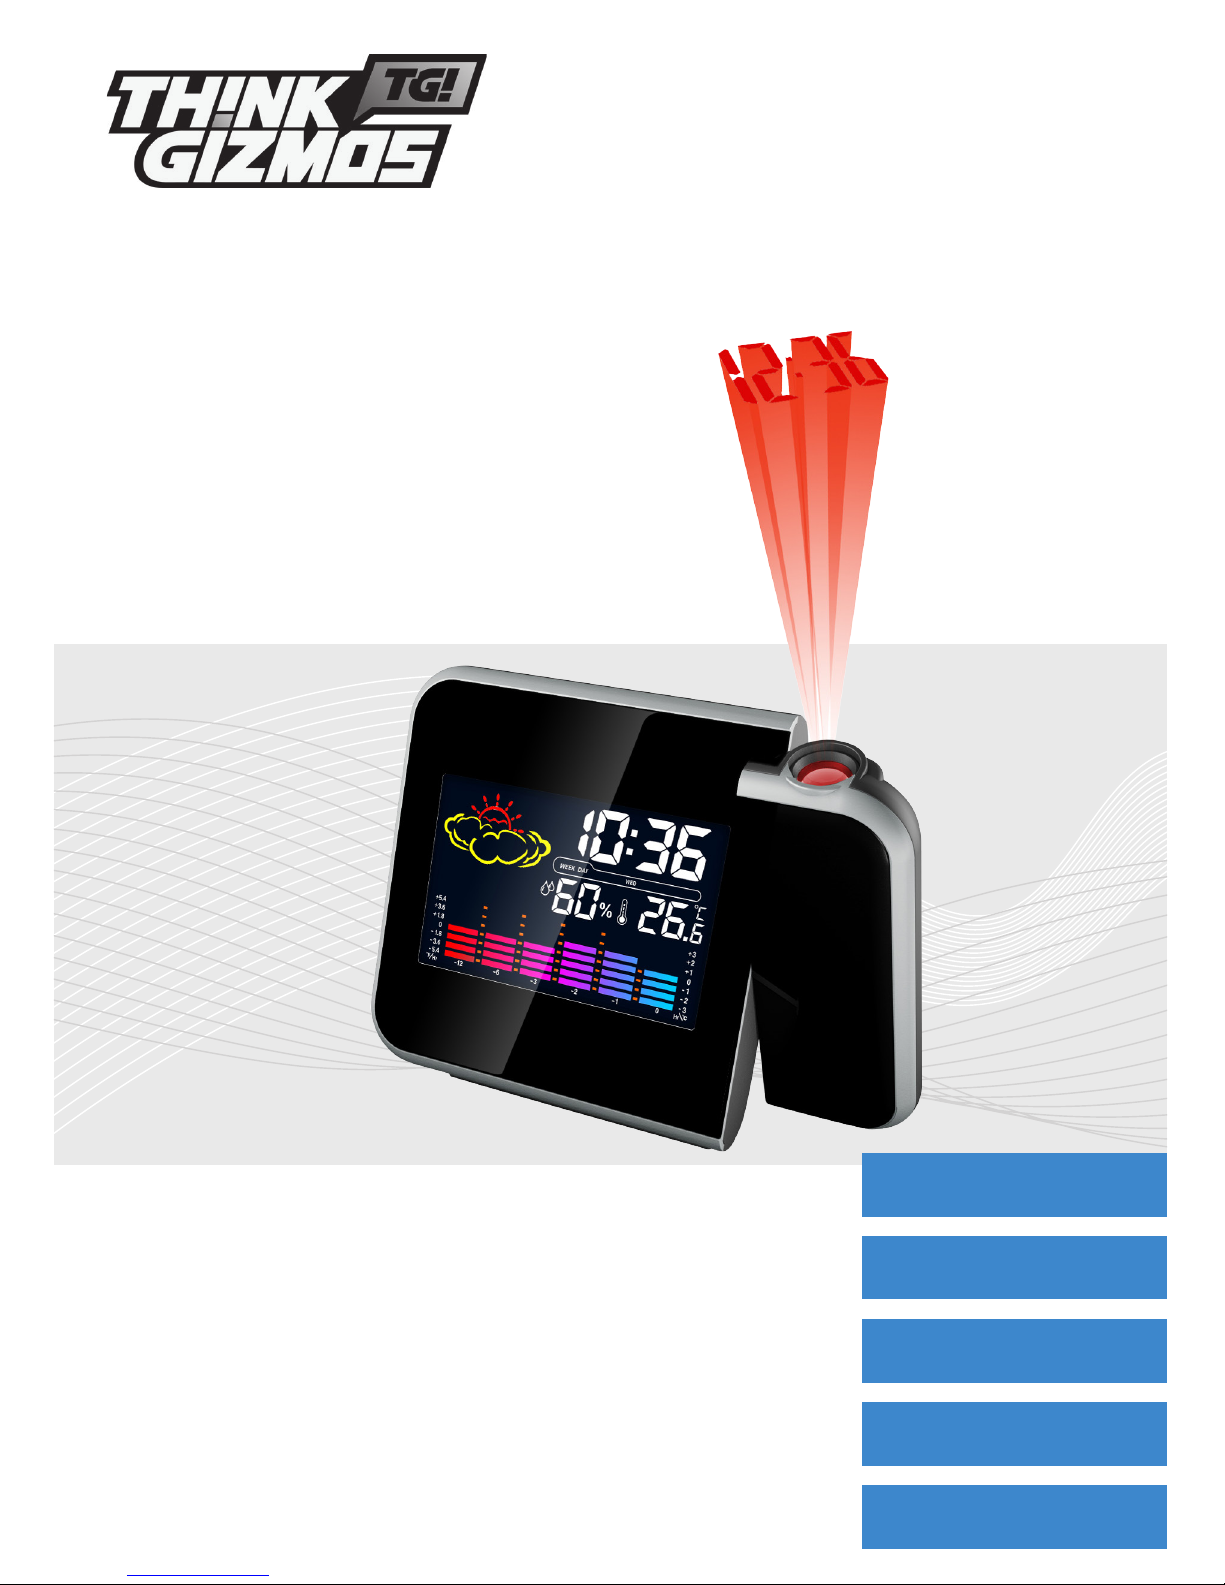
TG505 PROIEZIONE OROLOGIO
CONGRATULAZIONI PER AVER ACQUISTATO LA THINK GIZMO PROIEZIONE OROLOGIO.
SEGUI QUESTE ISTRUZIONI ATTENTAMENTE E CONSERVARE IL LIBRETTO ISTRUZIONI PER
FUTURE..
Manuale di Istruzioni
English p 2
Deutsch p 9
Francais p 17
Italiano p 25
Español p 33
PREVISIONI DEL TEMPO
Page 26

MANUALE ITALIANO - INDICE
1.
2.
3.
4.
1.1 Caratteristiche Proiezione Orologio ................................................................27
3.1 Impostare l’orario ............................................................................................. 29
3.2 Impostare la data .............................................................................................. 29
2.1 Precauzioni per l’uso della batteria ................................................................ 28
2.2 Inserimento delle batterie ............................................................................... 28
2.3 Funzione di Reset ............................................................................................. 28
4.1 Impostazione della sveglia ............................................................................... 30
4.2 Attivare e Disattivare la Sveglia ........................................................................ 30
4.3 Funzione snooze ................................................................................................ 30
4.4 Come spegnere la sveglia ................................................................................ 30
CARATTERISTICHE PROIEZIONE OROLOGIO
ORA E IL CALENDARIO IMPOSTAZIONI
INFORMAZIONI IMPORTANTI
IMPOSTAZIONI ALLARME
26
5.
5.1 Display con la temperatura in C° / F° ............................................................. 31
5.2 Temperatura/Umidità Relativa Massima/Minima ........................................ 31
TEMPERATURA / UMIDITA ‘INFORMAZIONI
6.
7.
6.1 Simboli Meteo ................................................................................................... 31
PREVISIONI DEL TEMPO
8.
7.1 Proiezione dell’Ora & Illuminazione del Display ............................................31
7.2 Proiezione Continua ......................................................................................... 31
PROIEZIONE E RETROILLUMINAZIONE
8.1 Informazi oni sul la garanzia ........................................................................... 32
GARANZIA
Page 27

1. CARATTERISTICHE PROIEZIONE OROLOGIO
27
1.1 Caratteristiche Proiezione Orologio
● Display con data e giorno della settimana.
● Calendario perpetuo: 2001-2099.
● Sveglia con funzione snooze.
● Simboli Meteo: Soleggiato, Parzialmente, Nuvoloso, Nuvoloso, Piovoso.
● Display con la temperatura in C°/F°.
● Termometro:
Temperatura Interna: da 0° a -+50°.
● Display con tendenze della temperatura.
● Misurazione Igrometro Interno: da 20% a 95% RH.
● Memoria Massima/Minima per igrometro e termometroo.
● Display con proiezione e luce posteriore LED (spegnimento automatico dopo 5 secondi
quando sono utilizzate le batterie).
● Batterie: 2 x AAA 1,5V (Non incluse).
● Fonte di alimentazione DC 4,5 VDC 200mA per una proiezione continua (Inclusa).
Page 28

2. INFORMAZIONI IMPORTANTI
28
2.1 Precauzioni per l’uso della batteria
● Si consiglia l’uso di batterie alcaline.
● Non utilizzare batterie ricaricabili.
● Batterie nuove e usate non dovrebbero essere mescolate.
● Si consiglia di utilizzare batterie dello stesso tipo o equivalenti.
● Le batterie devono essere inserite con la corretta polarità.
● Tieni le batterie al di fuori dalla portata dei bambini.
● Smaltisci le batterie scariche rispettando le procedure stabilite dalla legge. Non smaltirle
gettandole con la spazzatura normale.
2.2 Inserimento delle batterie
● Gentilmente apri lo scomparto delle batterie, situato sul lato posteriore del dispositivo.
● Inserisci 2 batterie AAA da 1,5V rispettando le polarità, come indicato nello scomparto.
● Copri le batterie con il coperchio.
2.3 Funzione di Reset
Se il dispositivo non sta funzionando correttamente o non risponde a uno dei tuoi comandi,
premi il pulsante “RESET”, situato sul retro del dispositivo. Tutte le impostazioni saranno
portate allo stato di partenza. Dovrai reinserire l’ora e la data esatte, e reimpostare la
sveglia.
Page 29

3. ORA E IL CALENDARIO IMPOSTAZIONI
29
3.1 Impostare l’orario
● Sul normale display con l’indicazione dell’orario, tieni premuto il pulsante “Up” per 3
secondi, per visualizzare il display per impostare l’orario a 12-24 ore.
● Nella modalità normale dell’orario, tieni premuto il pulsante “MODE” (MODALITA’) per 2
secondi, le cifre dell’ora inizieranno a lampeggiare.
● Premi il pulsante “UP” (Su) o “DOWN” (Giù) per impostare l’ora.
● Premi il pulsante “MODE” per confermare le tue impostazioni, e le cifre dei minuti
inizieranno a lampeggiare.
● Premi il pulsante “UP” o “DOWN” per impostare i minuti.
● Inne, premi il pulsante “MODE” per confermare questa impostazione.
3.2 Impostare la data
● Nella modalità normale in cui si visualizza l’ora premi il pulsante “MODE” una volta per
entrare nella modalità per impostare la data.
● Tieni premuto il pulsante “MODE” per 2 secondi e le cifre dell’ora inizieranno a
lampeggiare.
● Premi il pulsante “UP” o “DOWN” per impostare l’anno corretto.
● Premi il pulsante “MODE” per confermare queste impostazioni, e le cifre del mese
inizieranno a lampeggiare.
● Premi il pulsante “UP” o “DOWN” per impostare il mese corretto.
● Premi il pulsante “MODE” per confermare queste impostazioni, e le cifre della data
inizieranno a lampeggiare.
● Premi il pulsante “UP” o “DOWN” per impostare la data corretta.
● Inne, premi il pulsante “MODE” per confermare questa impostazione.
Page 30

4. IMPOSTAZIONI ALLARME
30
4.1 Impostazione della sveglia
Attenzione: Mentre imposti la sveglia, se non premi alcun pulsante per 10 secondi il display
passerà automaticamente al normale display con l’orario.
● Ella normale modalità con l’orario, premi due volte il pulsante “MODE” per entrare in
modalità sveglia.
● Tieni premuto il pulsante “MODE” per due secondi, le cifre dell’ora inizieranno a
lampeggiare.
● Premi il pulsante “UP” o “DOWN” per impostare l’ora.
● Premi il pulsante “MODE” per confermare questa impostazione.
● Le cifre dei minuti inizieranno a lampeggiare, premi il pulsante “UP” o “DOWN” per
impostare i minuti.
● Press the “MODE” button to conrm your setting.
● Press the” MODE” button to return to the normal time display or the display will
automatically return to normal time display after 10 seconds.
4.2 Attivare e Disattivare la Sveglia
Premi il pulsante “UP” per attivare o disattivare l’allarme, se l’allarme è attivo apparirà il suo
simbolo (una campanella) sul display.
4.3 Funzione snooze
● Quando suona la sveglia, premi il pulsante “SNOOZE/LIGHT” (SNOOZE/LUCE) per entrare
in modalità snooze.
● La sveglia suonerà nuovamente ogni 8 minuti.
● Durante l’intervallo snooze il simbolo della campanella continuerà a lampeggiare.
● La funzione snooze può essere disattivata premendo qualsiasi pulsante dietro il
dispositivo, tranne il pulsante “SNZ”.
4.4 Come spegnere la sveglia
● Mentre la sveglia sta suonando, premi qualsiasi pulsante dietro il dispositivo tranne il
pulsante “SNZ”.
● La sveglia, in ogni caso, smetterà automaticamente di suonare dopo 2 minuti.
Page 31
5. TEMPERATURA / UMIDITA ‘INFORMAZIONI
31
5.1 Display con la temperatura in C° / F°
La temperatura può essere visualizzata in C° o in F°: nella normale modalità dell’orario,
premi il pulsante “DOWN” per passare da uno dei display con la temperatura all’altro.
5.2 Temperatura/Umidità Relativa Massima/Minima
Per visualizzare i valori massimi e minimi di temperatura & umidità, premi il pulsante “MAX/
MIN”
● Una volta per visualizzare i valori massimi della temperatura e dell’umidità.
● Due volte per visualizzare i valori minimi della temperatura e dell’umidità.
● Tre volte per visualizzare i valori correnti della temperatura e dell’umidità.
6. PREVISIONI DEL TEMPO
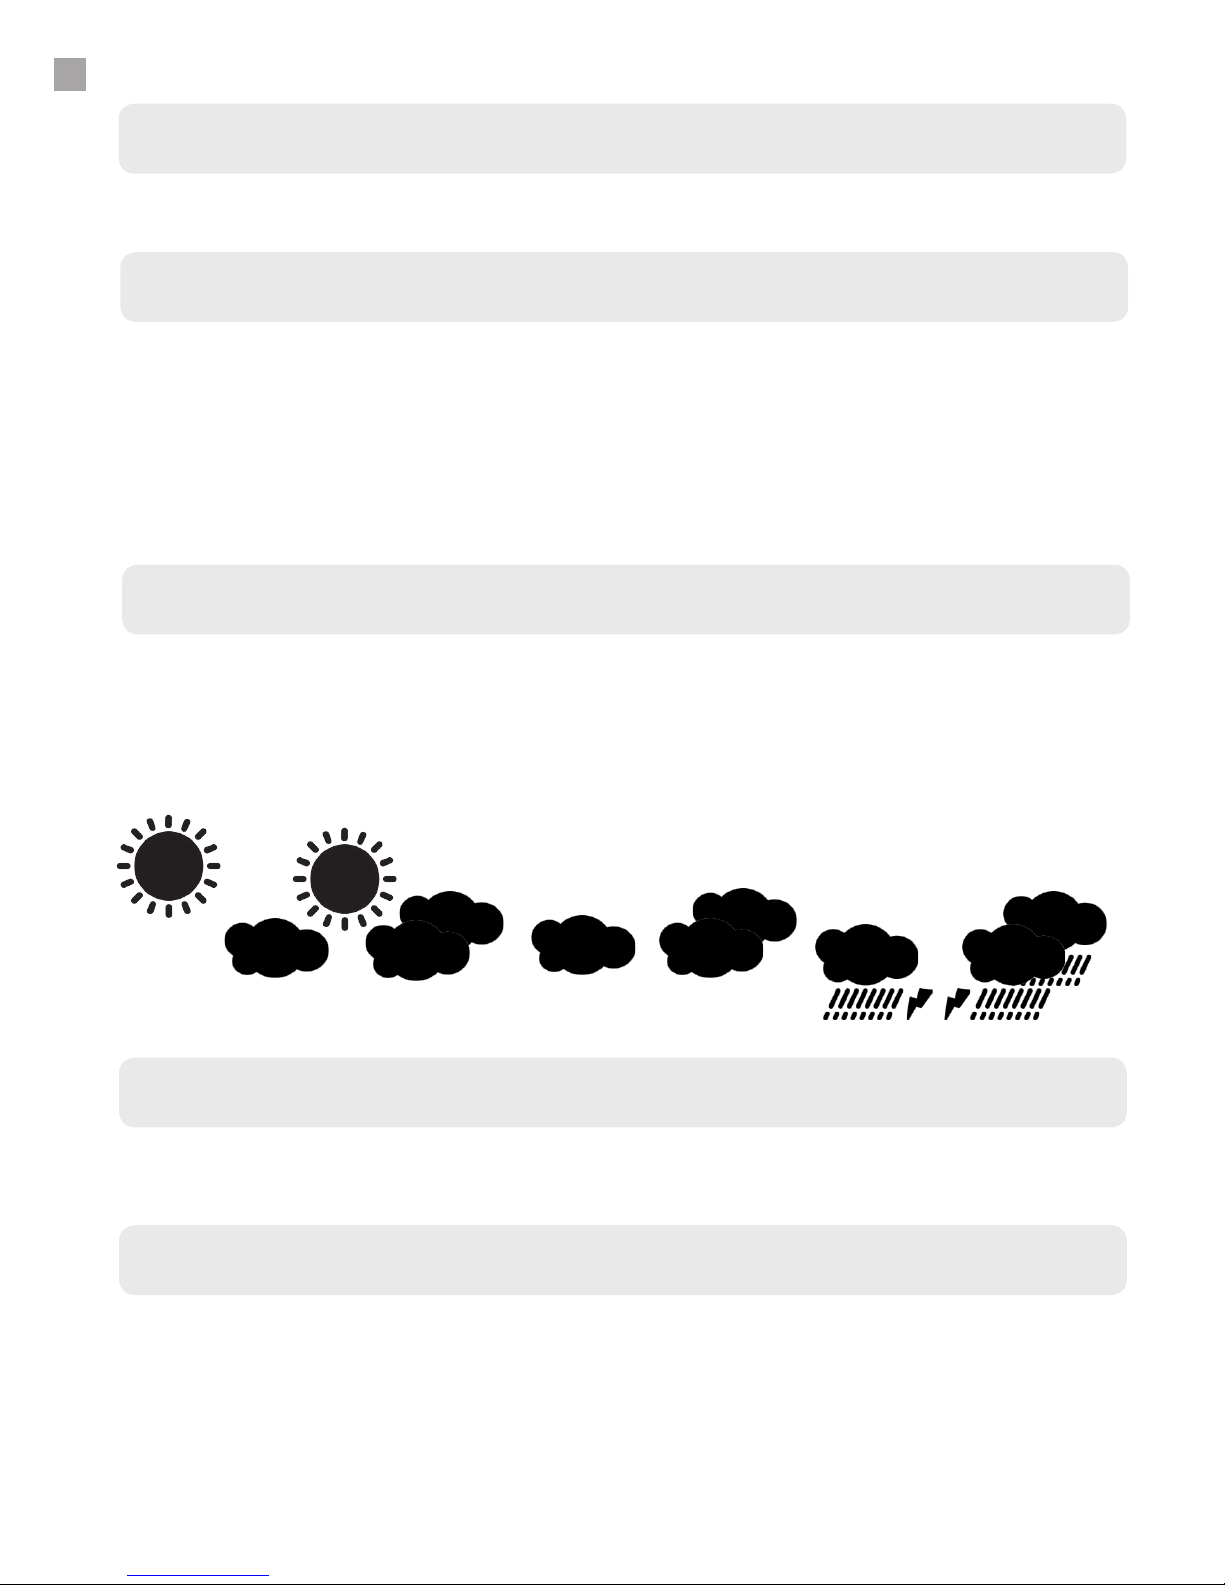
6.1 Simboli Meteo
Sulla facciata della sveglia troverai i simboli delle condizioni climatiche (che puoi vedere
anche qui in basso). E’ da considerare un’aggiunta divertente alla sveglia, in quanto la
lettura delle condizioni climatiche è inuenzata dalla presenta dell’aria condizionata o del
riscaldamento, che possono rendere l’informazione meno precisa. I simboli sono 4, illustrati
qui in basso:
Soleggiato
Parzialmente
Nuvoloso
Nuvoloso
Piovoso
7. PROIEZIONE E RETROILLUMINAZIONE
7.1 Proiezione dell’Ora & Illuminazione del Display
7.2 Proiezione Continua
Premi velocemente il pulsante “SNOOZE/LIGHT” per attivare l’illuminazione del display per
5 secondi, allo stesso tempo l’ora sarà proiettata sulla supercie verso cui il braccio del
proiettore è rivolto.
La funzione di proiezione continua può essere attivata solo collegando il dispositivo
all’adattatore AC-DC da noi fornito. Collega il jack dell’adattatore AC-DC (4,5VDC 200mA
incluso) alla parte posteriore del dispositivo e collega l’altra estremità ad una presa
elettrica. Questo consentirà al dispositivo di proiettare l’ora sul muro o sul sotto in
modo continuativo. Regola la posizione del braccio del proiettore per dirigerlo verso una
supercie appropriata, come un muro o il sotto. Metti a fuoco il più possibile la proiezione
del display.
Page 32

8. GARANZIA
8.1 Informazioni sulla garanzia
Think Gizmos, Unit 19, Lawson Hunt Industrial Park,
Broadbridge Heath, West Sussex, RH12 3JR
Tel.: +44/(0)203 384 8304
[email protected] ● www.thinkgizmos.com
Che cosa è coperto:
Questa garanzia copre tutti i difetti di materiale o di lavorazione, con le eccezioni di seguito
indicate.
Quanto dura la garanzia:
Questa garanzia è valida per 1 anno a partire dalla data in cui il Reloj De Proyeccion viene
consegnato.
Che cosa non è coperto:
Qualsiasi problema causato da un atto di Dio (come un diluvio), uso improprio o abuso non
è coperto.
Che cosa faremo noi:
Se il prodotto risulta difettoso durante il periodo di garanzia, noi vi forniremo le istruzioni
per eettuare la restituzione, e adottiamo una delle seguenti soluzioni: (i) sostituire il
prodotto con un prodotto uguale o equivalente al prodotto che avete acquistato; (ii) riparare
il prodotto; o (iii) rimborsare al cliente l’intera o parte del prezzo d’acquisto del prodotto.
Come ottenere il servizio:
Per ottenere istruzioni su come richiedere questo servizio durante il periodo di garanzia,
contattare il nostro servizio clienti via telefono o e-mail. Troverete i recapiti del nostro
servizio clienti qui sotto. I nostri operatori ti faranno domande speciche per determinare la
tua idoneità a questa garanzia, e se sei idoneo ti verranno dato istruzioni per la restituzione
del prodotto difettoso. Se ti inviamo una sostituzione o ti ripariamo il prodotto, pagheremo
anche le spese di spedizione della sostituzione o del prodotto riparato al tuo indirizzo.
Non restituire il prodotto al luogo di acquisto originale, ti preghiamo di contattare
direttamente Think Gizmos.
32
Page 33
TG505 RELOJ DE PROYECCION
FELICITACIONES POR LA COMPRA LA THINK GIZMOS RELOJ DE PROYECCION,
SIGA ESTAS INSTRUCCIONES CUIDADOSAMENTE Y GUÁRDELO ESTE MANUAL DE INSTRUCCIONES PARA FUTURA REFERENCIA.
Manual de usuario
English p 2
Deutsch p 9
Francais p 16
Italiano p 23
Español p 42
PRONÓSTICO DEL TIEMPO
Page 34

MANUAL ESPAÑOL - CONTENIDO
1.
2.
3.
4.
1.1 Características del reloj de proyección ...........................................................35
3.1 Conguración de Hora ..................................................................................... 37
3.2 Conguración de Calendario ........................................................................... 37
2.1 Precauciones con las Pilas ............................................................................... 36
2.2 Instalación de las Pilas ..................................................................................... 36
2.3 Función de Reinicio .......................................................................................... 36
4.1 Conguración de Alarma .................................................................................. 38
4.2 Activar y Desactivar la Alarma .......................................................................... 38
4.3 Función Modo Repetición ................................................................................. 38
4.4 Como parar la alarma ....................................................................................... 38
CARACTERÍSTICAS DEL RELOJ DE PROYECCION
HORA Y EL CALENDARIO AJUSTES
INFORMACIÓN IMPORTANTE
AJUSTES DE ALARMA
34
5.
5.1 Pantalla de temperatura ºC/ºF ........................................................................ 39
5.2 Temperatura/Humedad relativa Max /Min ................................................... 39
TEMPERATURA / HUMEDAD INFORMACIÓN
6.
7.
6.1 Símbolo Meteorológico .................................................................................... 39
PRONOSTICO DEL TIEMPO
8.
7.1 Proyección del Reloj y Luz Trasera .................................................................39
7.2 Proyección Continua ....................................................................................... 39
PROYECCIÓN Y LUZ DE FONDO
8.1 Información de la Garantía ............................................................................ 40
GARANTÍA
Page 35

1. CARACTERÍSTICAS DEL RELOJ DE PROYECCION
35
1.1 Características del reloj de proyección
● Pantalla con fecha y día de la semana.
● Calendario perpetuo: 2001-2099.
● Despertador con repetición de alarma.
● Símbolos meteorológicos: Soleado, Ligeramente nublado, Nublado, Lluvioso.
● Pantalla de temperatura en ºC / ºF.
● Termómetro:
La Temperatura interior oscila entre: 0ºC~+50ºC.
● Pantalla con tendencia de Temperatura.
● Rango del Higrómetro Interior: 20% - 95% RH.
● Memoria Max/Min del Higrómetro & Termómetro.
● Pantalla con luz de fondo LED con proyección (auto apagado tras 5 segundos cuando se
usan pilas).
● Pilas: 2 x AAA 1.5V (No incluidas).
● Suministro de alimentación DC 4.5DC 200mA para proyección continua (incluido).
Page 36

2. INFORMACIÓN IMPORTANTE
36
2.1 Precauciones con las Pilas
● Se recomienda el uso de pilas alcalinas.
● No usar pilas recargables.
● No se deben mezclar pilas usadas con pilas nuevas.
● Solo deben usarse pilas recomendadas o equivalentes.
● Batteries are to be inserted with the correct polarity.
● Mantenga las pilas fuera del alcance de los niños.
● Deshágase de las pilas usadas según el reglamento de leyes locales. No las tire con la
basura normal.
2.2 Instalación de las Pilas
● Abra con cuidado el compartimento para pilas ubicado en la parte de posteior de esta
unidad.
● Instale 2 pilas 1.5V AAA observando la polaridad correcta tal como se indica dentro del
compartimento.
● Vuelva a colocar la tapa del compartimento.
2.3 Función de Reinicio
Si el reloj no funciona correctamente o no responde a su entrada pulse el botón “RESET”
ubicado en la parte posteror del reloj. Todas las conguraciones se borraran. Debe
congurar la hora, fecha y alarma otra vez.
Page 37

3. HORA Y EL CALENDARIO AJUSTES
37
3.1 Conguración de Hora
● En la pantalla normal de hora, mantenga pulsado el botón “UP” durante 3 segundos para
alternar la pantalla 12/24 horas.
● En modo normal de hora, mantenga pulsado el botón “MODE” durante dos segundos,
los dígitos de hora parpadearan.
● Pulse el botón “UP” o “DOWN” para congurar la hora.
● Pulse el botón “MODE” para conrmar la conguración, los dígitos de minutos
parpadearan.
● Pulse los botones “UP” o “DOWN” para congurar los minutos.
● Finalmente pulse el botón “MODE” para conrmar la conguración.
3.2 Conguración de Calendario
● En modo normal de hora, pulse el botón “MODE” una vez para entrar en el modo de
conguración de calendario.
● Mantenga pulsado el botón “MODE” durante dos segundos y los dígitos de año
parpadearan.
● Pulse los botones “UP” o “DOWN” para congurar el año.
● Pulse el botón “MODE” para conrmar la conguración, los dígitos de mes parpadearan.
● Pulse los botones “UP” o “DOWN” para congurar el mes.
● Pulse el botón “MODE” para conrmar la conguración, los dígitos de día parpadearán.
● Pulse el botón “UP” o “DOWN” para conrmar la conguración de fecha correcta.
● Finalmente pulse el botón “MODE” para conrmar la conguración.
Page 38

4. AJUSTES DE ALARMA
38
4.1 Conguración de Alarma
Nota: Mientras esté congurando la alarma, si no pulsa algún botón durante 10 segundos la
pantalla volverá automáticamente a mostrar la pantalla de hora normal.
● En la pantalla normal de hora, pulse el botón “MODE” dos veces para entrar en el modo
alarma.
● Mantenga pulsado el botón “MODE” durante dos segundos, los dígitos de hora
parpadearan.
● Pulse el botón “UP” o “DOWN” para congurar la hora.
● Pulse el botón “MODE” para conrmar la conguración, los dígitos de minutos
parpadearan.
● Pulse los botones “UP” o “DOWN” para congurar los minutos.
● Pulse el botón “MODE” para conrmar la conguración.
● Pulse el botón “MODE” para volver a la pantalla normal de hora o la pantalla volverá
automáticamente a mostrar la pantalla de hora normal tras 10 segundos.
4.2 Activar y Desactivar la Alarma
Pulse el botón “UP” para activar la alarma, si la alarma está activada el símbolo de alarma
(icono de campana) aparecerá en la pantalla.
4.3 Función Modo Repetición
● Cuando suene la alarma pulse el botón “SNOOZE/LIGHT” para entrar en el modo
repetición.
● La alarma sonará otra vez cada 8 minutos.
● Durante el intervalo repetición el símbolo de la campana parpadeará.
● La función repetición puede pararse pulsando cualquier botón de la parte posterior,
aparte del botón “SNZ”.
4.4 Como parar la alarma
● Cuando la alarma esta sonando presione cualquier botón de la parte posterior, aparte
del botón “SNZ”, para parar la alarma.
● La alarma dejará de sonar automáticamente tras 2 segundos.
Page 39
5. TEMPERATURA / HUMEDAD INFORMACIÓN
39
5.1 Pantalla de temperatura ºC/ºF
La temperatura se muestra tanto en ºC/ºF, en modo normal de hora pulse el botón “DOWN”
para seleccionar ºC/ºF en la pantalla.
5.2 Max / Min Temperature / Relative Humidity
Para alternar los datos de temperatura & humedad relativa max/min en el interior, pulse el
botón “MAX/MIN”:
● Una vez para mostrar los valores de temperatura y humedad máxima.
● Dos veces para mostrar los valores de temperatura y humedad mínima.
● Tres veces para volver a los niveles de temperatura y humedad actuales.
6. PRONOSTICO DEL TIEMPO
6.1 Símbolo Meteorológico
Encontrará un símbolo meteorológico (tal como se muestra abajo) en la cara del reloj.
Esto es puramente un indicador de tiempo creado por un higrómetro que reacciona
a la humedad interior. Está pensado como un efecto divertido añadido al reloj ya que
las condiciones de interior como aire acondicionado y calefacción afectan a la lectura y
precisión. Hay 4 símbolos posibles de tiempo que se muestran a continuación:
Soleado ligeramente nublado nublado
lluvioso
7. PROYECCIÓN Y LUZ DE FONDO
7.1 Proyección del Reloj y Luz Trasera
7.2 Proyección Continua
Brevemente pulse el botón “SNOOZE/LIGHT” para activar la iluminación de la pantalla
durante 5 segundos, la hora visualizada también se proyectará en la supercie hacia la que
apunte el brazo de proyección al mismo tiempo.
La función de proyección continua solo se puede usar enchufando el adaptador AC
DC suministrado. Inserte la toma del adaptador AC-DC (4.5VDC 200mA incluida) en la
parte trasera del reloj y enchufe el otro extremo a la red eléctrica. Esto permitirá al reloj
proyectar la hora continuamente en la pared o en el techo. Use el brazo ajustable de
proyección para visualizar en la pared o en el techo deseados. Use la tecla de enfoque para
ajustar la visualización proyectada.
Page 40

8. GARANTÍA
8.1 Información acerca de la Garantía
Think Gizmos, Unit 19, Lawson Hunt Industrial Park,
Broadbridge Heath, West Sussex, RH12 3JR
Tel.: +44/(0)203 384 8304
[email protected] ● www.thinkgizmos.com
Lo que cubre:
Esta garantía cubre cualquier defecto de materiales o mano de obra, con las excepciones
que se indican a continuación
Duración de la cobertura:
Esta garantía tiene una duración de 1 año a partir de la fecha de entrega de su reloj de
proyección.
Lo que no cubre:
No cubre ningún problema causado por mal uso, trato indebido, o un acto de Dios (como
una inundación).
Lo que haremos:
Si el producto resulta defectuoso durante el período de garantía, nosotros le
proporcionaremos las instrucciones para devolverlo, y seguiremos una de las siguientes
acciones: (i) sustituir el producto por uno igual o equivalente; (ii) reparar el producto; o (iii)
reembolsarle el precio de compra total o parcial del producto.
Cómo obtener servicio:
Para obtener indicaciones acerca de cómo obtener servicio cubierto por esta garantía,
póngase en contacto con nuestro servicio de atención al cliente por teléfono o correo
electrónico. Encontrará los datos de contacto con nuestro servicio de atención al cliente a
continuación. El servicio de atención al cliente puede hacerle preguntas para determinar su
derecho por esta garantía, y si usted tiene derecho se le darán instrucciones para devolver
el producto defectuoso. Si sustituimos o reparamos el producto, nosotros le pagaremos los
gastos de envío de la sustitución o reparación del producto.
No devuelva el artículo al lugar original de compra, por favor póngase en contacto
con Think Gizmos direct.
40
Page 41

“CE” marking states that the product is compliant to European Directives
2014J35/EU Low Voltage Directive (LVD)
2004/108/EC EMC Directive
It is possible to request a full copy of Declaration of compliance from the
Distributor:
This product complies with the rules of RoHS Directive(2011/651EU)
This product complies with the rules of Eup Directive(2009/125/EC)
Thinkgizmos is a registered trademark of Paramount Zone Ltd
Meaning of the ‘Dustbin’ Symbol:
To protect our environment, do not dispose of electrical equipment in with domestic waste.
Please return any electrical equipment that you will no longer use to the collection points
provided for their disposal.
This helps to avoid the potential eects of incorrect disposal on the environment and human
health.
This will contribute to the recycling and other forms of reutilisation of electrical and electronic
equipment.
Information concerning where the equipment can be disposed of can be obtained from your
local authority.
 Loading...