

TFC 097A User Manual

Advanced Programmable Thermostat
User Manual
Cat No. : 097A

T able of Content
TABLE OF CONTENT..………………….................1
INTRODUCTION……………………..…...........2-3
INSTALLATION ……………..………...............3-11
SETTING CLOCK …………………………......…..12
SETTING CONTROL TEMPERATURE …..…12-13
SETTING PROGRAM ……………...............13-16
TEMPORARY OVERRIDE ……………................17
ANTI-FREEZING MODE ……………………... 17
BATTERY REPLACEMENT……………….....…...18
SPECIFICATION …………………………...……...19
1
INTRODUCTION
This thermostat can replace most common residential thermostat and is designed to be used with electric, gas or oil heating
control system or cooling system.
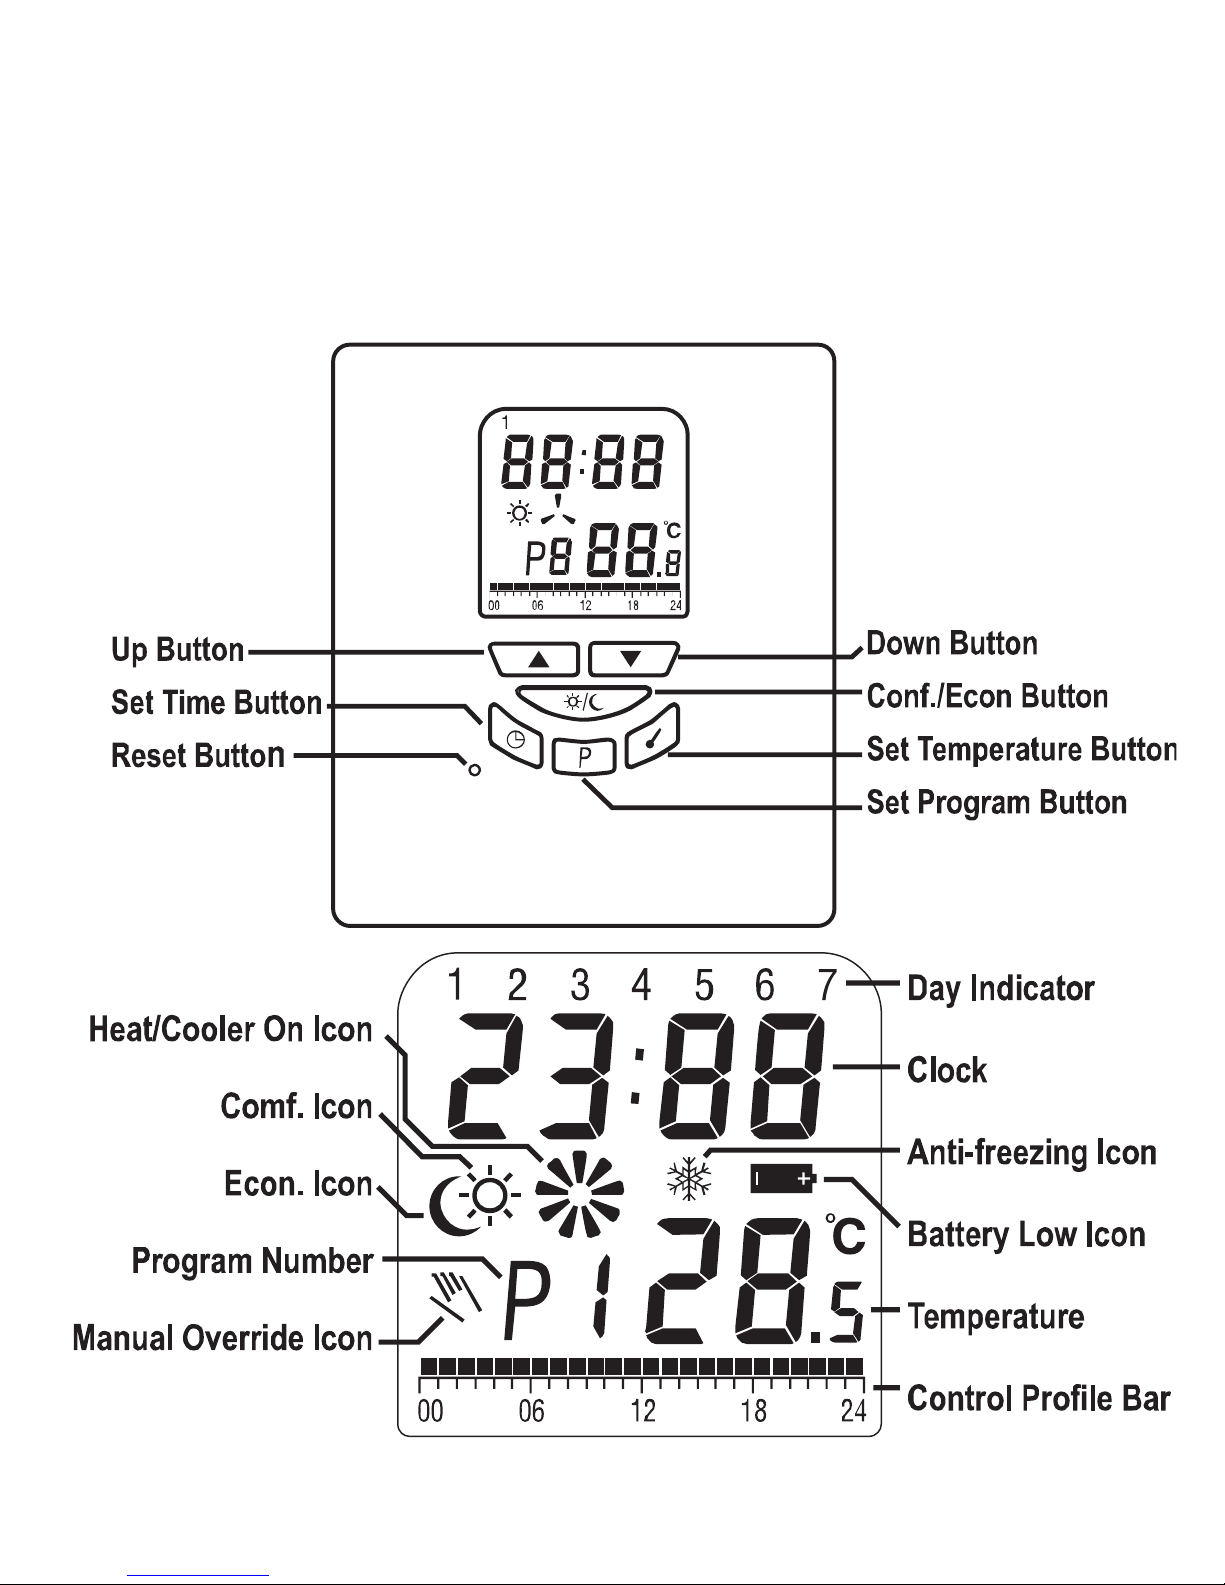
Outlook
LCD
2

Features
Several useful function and operating modes have been incorporated to adapt a variety of customer needs besides all the features
associated with the state of the art programmable thermostat.
-LCD shows the need to know information only, which is more easy
to understand.
-Real time clock with day of the week display.
-Room temperature display.
-Control profile display.
-Simplified temperature adjustment.
-Simplified programming procedure.
-6 pre-defined control profiles, 3 user programmable control profiles.
-A protection against freezing.
-Temporary override set-temperature.
-User selectable temperature span.
-User selectable heater/cooler operation mode.
-Battery level detection.
-2 AA size alkaline batteries (not included).
-Slim housing design.
INSTALLATION
This thermostat has been designed for simple and quick installation
requiring only a few tools
3

Required Material
Hammer
Masking tape
Drill and 3/16” drill bit
Screwdriver
Removing your old thermostat
CAUTION : to avoid electric shock, turn off the power of the heating/cooling system at the main power box in your home. Read the
following instructions carefully before disconnecting the wires.
1.Turn off your old thermostat.
2.Remove the cover from the old thermostat. You may have to pull
extra hard.
3.Unscrew the old thermostat from the wall plate.
4.Now find the screws attaching the wall plate to the wall, and
remove them. You should now be able to pull the wall plate a small
distance from the wall. Do not disconnect any wire yet, simply locate
the wires.
WARNING: After removing the wall plate, if you find that it is mounted on a junction box (e.g. a box similar to one behind a light switch
or electric outlet), high voltage circuit may be present and there is
a danger of electric shock. Please consult a qualified electrician.
4

Wire Labeling
1.Disconnect and identify each wire.
2.You may wish to tape the wires to the wall to keep them from slip-
ping through the hole in the wall. If the hole in the wall is larger than
necessary, fill it in order to prevent hot or cold air to penetrate the
thermostat. In this manner, the thermostat will behave perfectly.
Choosing a Location
Note: for a new installation, choose a mounting location about five
feet (1.5 meter) above the floor in an area with good air circulation
and away from.
1.Drafts of dead air sports.
2.Air ducts.
3.Radiant heat from the sun or appliances.
4.Concealed pipes and chimneys.
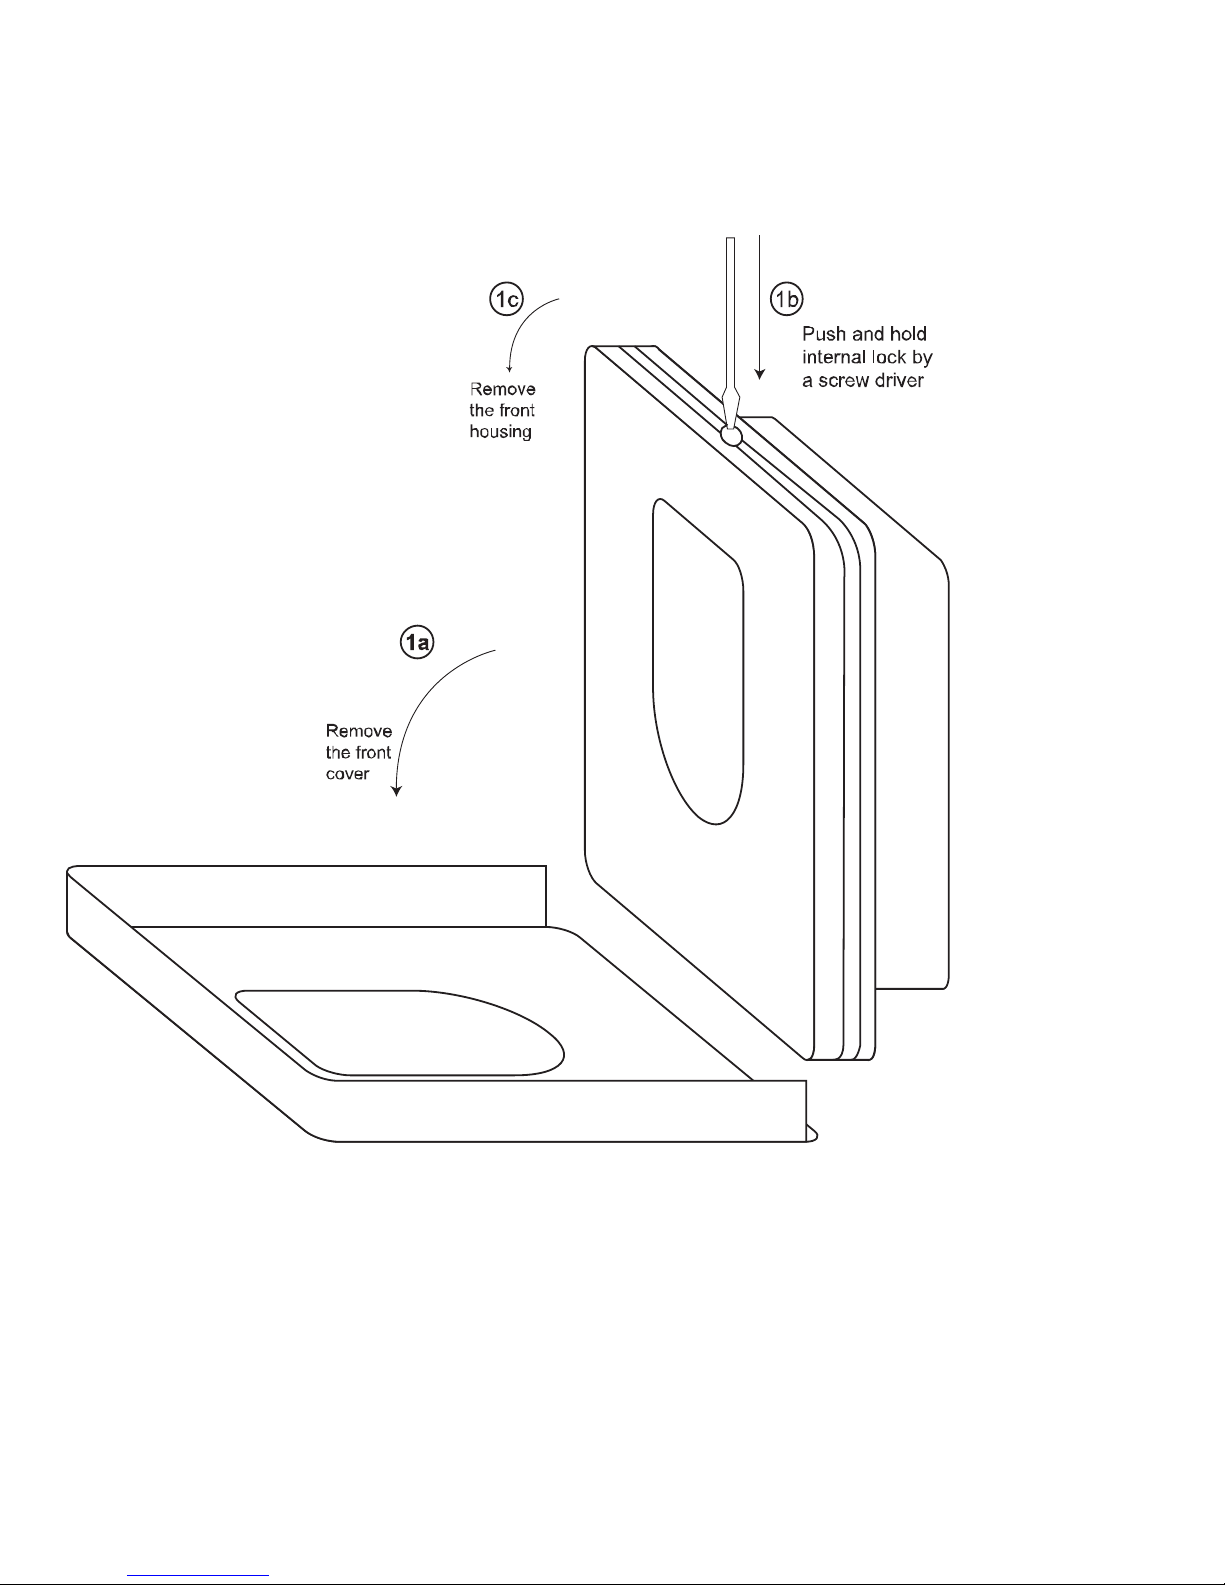
Mounting
Mounting the thermostat onto the wall
1.Remove completely the front housing of the thermostat.
5
6
 Loading...