

Page 1
Achtung!
Bitte entsorgen Sie Altgeräte und leere Batterien nicht
über den Hausmüll. Geben Sie diese bitte zur umweltgerechten Entsorgung beim Handel oder entsprechenden
Sammelstellen gemäß nationaler oder lokaler Bestimmungen ab.
Attention!
Please do not dispose of old electronic devices and
empty batteries in household waste. To protect the
environment, take them to your retail store or to appropriate collection sites according to national or local
regulations.
Attention!
Les vieux appareils électroniques et piles usagées ne
doivent pas être jetées avec les ordures ménagères.
Dans le souci de protéger l'environnement veuillez les
emmener dans un site approprié de récupération ou
chez votre revendeur selon les spécifications nationales
et locales.
Attenzione!
Le batterie scariche e apparecchi elettrici smessi non
devono essere smaltiti insieme all'immondizia domestica, bensì dovranno essere riconsegnate al negoziante o
ad altri enti preposti per il riciclo in conformità alle
vigenti disposizioni nazionali o locali.
¡Atención!
El aparato y las baterías usadas no deben ser depositadas con los residuos normales de la casa. Por favor
deposítelas en el comercio especializado o bien en los
centros de recogida y reciclaje previstos para ello según
el reglamento nacional o local.
Let op!
Batterijen en technische apparaten mogen niet met het
huisvuil worden weggegooid. Breng ze naar de inzamelplaatsen of bij uw detaillist naar de daarvoor bestemde
containers volgens de nationale of lokale bepalingen.
Kat. Nr. 98.1024
Bedienungsanleitung
Operating Instructions
Mode d’emploi
Istruzioni
Instrucciones
Gebruiksaanwijzing
ROHS
TFA Anleit_No. 98.1024_11/07 21.11.2007 16:38 Uhr Seite 1
Page 2
Funktionen
• Lichtwürfel mit wechselnden Farben
• Ständiger oder stündlicher Farbwechsel
(12 Farben)
• Anzeige von Uhrzeit, Datum, Wochentag und
Weckzeit
• Weckalarm mit farbigen Lichteffekten
• Ideal als Nachtlicht
• Mit Netzstecker
oder 4 x AAA Batterien (nicht enthalten)
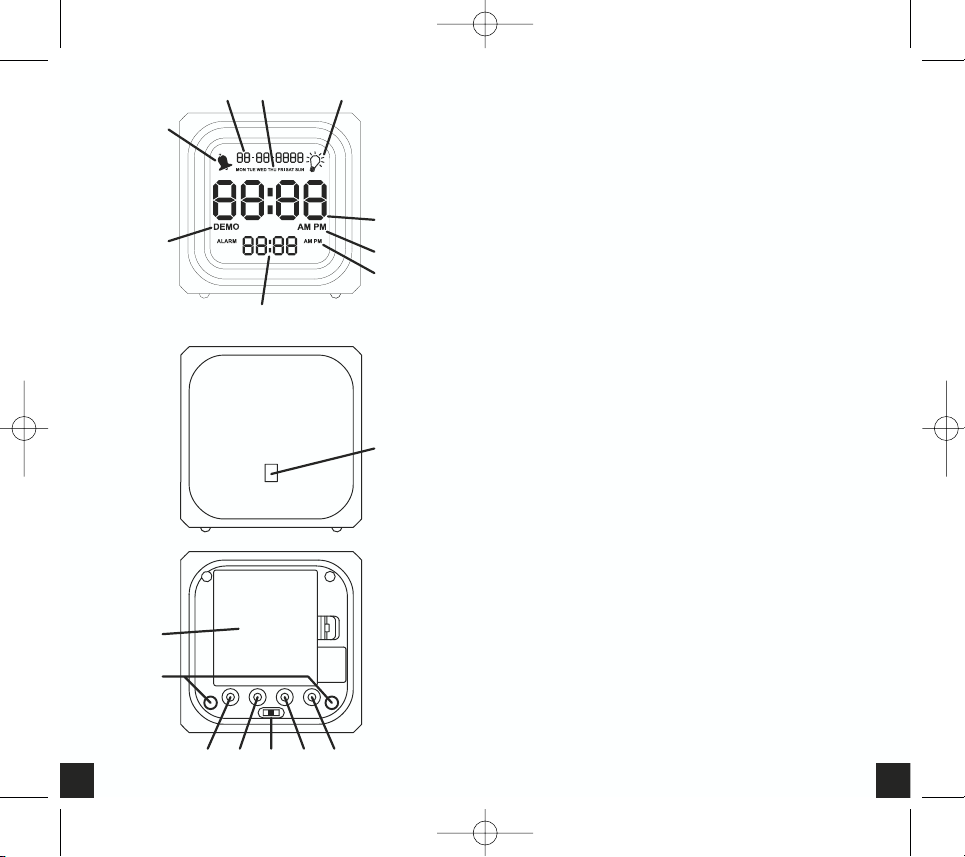
Display
1. DATUM
2. WOCHENTAG
3. INDIKATOR „LICHT AN“
4. UHRZEIT
5. UHRZEIT AM/PM ANZEIGE
6. ALARMZEIT AM / PM ANZEIGE
7. ALARMZEIT
8. INDIKATOR „DEMO-MODUS AN“
9. INDIKATOR „ALARM AN“
Unterseite
A. NETZSTECKER - ANSCHLUSS
B. LICHT AN / ALARMSTOPP-KONTAKTE
C. ALARM-KNOPF
D. UHRZEIT / KALENDER-EINSTELLKNOPF
E. LICHT-MODUS SCHALTER
F. ZEIT- EINSTELLKNOPF DOWN
G. ZEIT- EINSTELLKNOPF UP
H. BATTERIEFACH
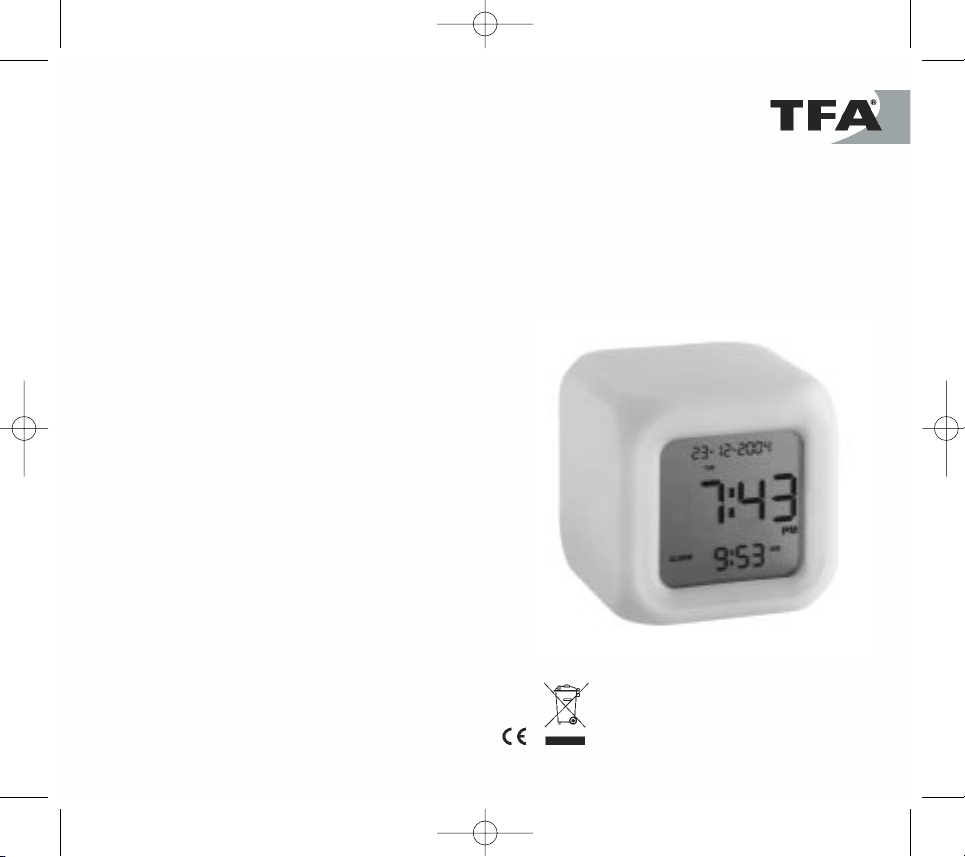
LIGHT CUBE – Digitalwecker
A
32
TFA Anleit_No. 98.1024_11/07 21.11.2007 16:38 Uhr Seite 2
12 3
9
4
8
7
5
6
H
B
G
EF
C
D
Page 3

Aktivieren / Deaktivieren des Alarms
• Drücken Sie kurz den ALARM-Knopf (C). Das AlarmSymbol erscheint links oben im Display. Die AlarmFunktion ist aktiviert. Zum Deaktivieren der AlarmFunktion drücken Sie wieder den ALARM-Knopf (C).
Das Alarm-Symbol auf dem Display verschwindet.
Abschalten des Alarms
• Wenn der Wecker klingelt, leuchten nacheinander
alle 12 Farben für 30 Sekunden auf. Beenden Sie
den Alarm durch Antippen der Würfeloberseite.
Lichtmodus
Mit dem Schalter E können drei Licht-Einstellungen gewählt werden:
1. Position ON: Stündlicher Farbwechsel (12 Farben)
2. Position OFF: Farbiges Licht durch Antippen der
Würfeloberseite für 30 Sekunden.
3. Position DEMO: Ständiger Farbwechsel. Aktivierung
wird durch Indikator „DEMO“ (8) auf dem Display
angezeigt.
Instandhaltung
• Setzen Sie das Gerät keinen extremen Temperaturen, Vibrationen und Erschütterungen aus.
• Reinigen Sie das Gerät mit einem weichen, leicht
feuchten Tuch. Keine Scheuer- oder Lösungsmittel
verwenden!
• Bitte unternehmen Sie keine eigenen Reparaturversuche. Bei Reklamationen wenden Sie sich an Ihren
Händler. Bei Öffnung oder unsachgemäßer Behandlung erlischt die Garantie.
Bedienung
Stecken Sie den Anschlussstecker in den Anschluss (A)
und schließen Sie das Gerät mit dem Netzstecker am
Stromnetz an. Das Gerät ist jetzt betriebsbereit.
Wichtig! Stellen Sie sicher, dass Ihre Netzspannung nicht
mehr als 230 V beträgt! Andere Netzspannungen können zur Beschädigung des Instrumentes führen.
Der Light Cube kann auch mit 4 x AAA Batterien betrieben werden (nicht enthalten). Um die Batterielebensdauer zu verlängern, schaltet sich die Lichtfunktion nach
30 sec. aus. Um die Lichteffekte zu nutzen verwenden
Sie bitte den mitgelieferten Netzadapter.
Einstellmodus Datum / Uhrzeit / Alarmzeit
• Durch Drücken des SET-Knopfes (D) gelangen Sie in
den Einstellmodus. Sie können jetzt nacheinander
sämtliche Einstellungen anwählen.
• Wenn die Ziffern blinken, stellen Sie mit dem UP- (G)
und DOWN-Knopf (F) jeweils die gewünschte Zeit
ein. Für einen Schnelldurchlauf halten Sie den
Knopf gedrückt.
SET 1. Kalender Jahres-Anzeige
SET 2. Kalender Monats-Anzeige
SET 3. Kalender Datums-Anzeige
SET 4. Uhrzeit Stunden-Anzeige
Das 12- und 24-Stundensystem läuft
nacheinander durch. Im 12-Stunden-
Zeitsystem wird AM und PM angezeigt.
SET 5. Uhrzeit Minuten-Anzeige
SET 6. Alarmzeit Minuten-Anzeige
SET 7. Alarmzeit Stunden-Anzeige
SET 8. Verlassen des Einstellmodus
• Der Wochentag wird automatisch berechnet.
54
TFA Anleit_No. 98.1024_11/07 21.11.2007 16:38 Uhr Seite 3
Page 4

Operation
Insert the adapter into the jack (A). Connect the power
adapter to a wall socket. The unit is now ready to use.
Important!
Make sure that your household voltage is 230V! Otherwise your clock may be damaged.
The Light Cube can be operated with 4 x AAA batteries
(not included). In order to conserve battery life the
lights will time out after 30 seconds. To use the light
effect, please utilise the mains adapter supplied.
Setting Mode Calender / Clock / Alarm time
• Press SET button (D) to enter setting mode. Now
you can select all settings one after the other.
• When the digits are flashing set the desired time by
pressing UP- (G) and DOWN (F) button. Hold and
press the buttons for a fast count.
SET 1. Calendar Years
SET 2. Calendar Month
SET 3. Calendar Date
SET 4. Time Hours
12- and 24-hour system will pass
one after another. In 12-hour
format, AM or PM will appear on
the display.
SET 5. Time Minutes
SET 6. Alarm Hours
SET 7. Alarm Minutes
SET 8. Exit setting mode
• The weekday is calculated automatically
Features
• With changing colours
• Permanent or hourly colour change (12 colours)
• Indication of time, date, weekday and alarm time
• Alarm with multi-coloured flashing light
• Ideal as nightlight
• With power adapter
or 4 x AAA batteries (not included)
Display
1. DATE
2. DAY
3. 'LIGHT ON' INDICATOR
4. TIME
5. TIME AM/PM INDICATOR
6. ALARM AM / PM INDICATOR
7. ALARM TIME
8. 'DEMO MODE ON' INDICATOR
9. 'ALARM ON' INDICATOR
Parts key
A. JACK FOR POWER ADAPTER
B. TAP BUTTONS
C. 'ALARM' SET BUTTON
D. FUNCTION 'SET' BUTTON
E. LIGHTING MODE SWITCH
F. 'DOWN' BUTTON
G. 'UP' BUTTON
H. BATTERY DOOR
LIGHT CUBE – Digital alarm clock
76
TFA Anleit_No. 98.1024_11/07 21.11.2007 16:38 Uhr Seite 4
Page 5

Fonctions
• Cube lumineux avec différentes couleurs
• Changement de couleur permanent ou par l’heure
(12 couleurs)
• Affichage de l’heure, date, jour et heure d’alarme
• Alarme avec effets de lumière multicouleurs
• Idéal comme veilleuse
• Avec adaptateur secteur
ou 4 x AAA batteries (ne sont pas incluses)
Display
1. DATE
2. JOUR
3. INDICATEUR LUMIERE
4. HEURE
5. HEURE INDICATEUR AM/PM
6. HEURE D’ALARME INDICATEUR AM/PM
7. HEURE D’ALARME
8. INDICATEUR DEMO MODE
9. INDICATEUR ALARME
Dessous
A. PRISE POUR ADAPTEUR AC / DC
B. BOUTONS DE CONTACT LUMIERE / ARRET ALARM
C. BOUTON ALARM
D. REGLAGE HEURE / CALENDRIER
E. COMMUTATEUR MODE LUMIERE
F. BOUTON DE REGLAGE DOWN
G. BOUTON DE REGLAGE UP
H. COMPARTIMENT DE BATTERIE
LIGHT CUBE – Réveil digital
Alarm on and off
• Press the ALARM button (C) shortly. The alarm symbol appears on the display and the alarm function is
activated. To turn off the alarm function, press the
ALARM button (C) again. The alarm symbol disappears.
Alarm stop
• When the alarm starts to ring, the clock will flash
scrolling through all 12 colours for 30 seconds. Tap
the cube top to stop the alarm.
Light mode
You can choose 3 light settings by switch E:
1. Position ON: Hourly colour change
2. Position OFF: Coloured light for 30 seconds when
tapping the cube top
3. Position DEMO: Permanent colour change. “DEMO
mode on” indicator (8) appears on the display.
Maintenance
• Do not expose the instrument to extreme temperatures, vibration or shock
• Clean it with a soft damp cloth. Do not use solvents
or scouring agents.
• Please do not try to repair the unit. Contact the original point of purchase. No guarantee if the instrument is handled or opened improperly.
98
TFA Anleit_No. 98.1024_11/07 21.11.2007 16:38 Uhr Seite 5
Page 6

Activer / Désactiver l’alarme
• Appuyez sur la touche ALARM (C) brièvement. Le
symbole alarme apparaît à gauche en haut sur
l´affichage. La fonction alarme est activée. Pour
désactiver l’alarme appuyer encore sur la touche
ALARM. Le symbole alarme disparaît.
Arrêter l’alarme
• Si le réveil sonne, toutes les 12 couleurs différentes
s’allument l’un après l’autre pour 30 secondes.
• Pour arrêter l’alarme taper au supérieur du dé.
Mode Lumière
Avec le commutateur E en peux sélectionner 3 réglages
différents:
1. Position ON: Changement de couleur par l’heure
(12 couleurs).
2. Position OFF: Lumière colorée en tapant au supérieur du dé pour 30 secondes.
3. Position DEMO: Changement de couleur permanent. L’indicateur DEMO (8) apparaît sur l´affichage.
Entretien
• Evitez d’exposer l’appareil à des températures extrêmes, vibrations ou chocs.
• Pour le nettoyage utilisez un chiffon doux humide.
N’utilisez pas de dissolvants ou d´agents abrasifs
• N’effectuez en aucun cas des réparations par vos
propres moyens. Rapportez l’appareil au point de
vente. Nous déclinons toute responsabilité en cas de
manipulation incompétente ou d´ouverture de
l´appareil.
Opération
Brancher l'adaptateur à la prise (A) et connecter l'adaptateur AC/DC à une prise murale. L’instrument est maintenant prêt à fonctionner.
Important! S'assurer que le voltage de secteur est 230V!
Dans le cas contraire, le réveil pourrait être endommagé.
Le réveil peut être alimenté par 4 x AAA batteries (ne
pas incluses). Pour prolonger la durée de vie de la batterie la fonction de lumière s’arrête automatiquement au
bout de 30 secondes. Pour profiter des effets lumineux,
utiliser l'adaptateur secteur fourni.
Mode de réglage Calendrier / Heure / Alarme
• Appuyez sur la touche SET pour arriver au mode de
réglage. Sélectionnez les données que vous voulez
régler l’un après l’autre.
• Dès que les chiffres commencent à clignoter, vous
pouvez donner les valeurs demandées avec les touches UP (G) et DOWN (F). Si vous maintenez la touche appuyée, la valeur augmentera plus vite.
Touche SET 1. Calendrier an
Touche SET 2. Calendrier mois
Touche SET 3. Calendrier jour
Touche SET 4. Heure heure
Le systèmes de temps à 12 heures ou
24 heures passent successivement.
En système de temps à 12 heures
AM et PM apparaît sur le display.
Touche SET 5. Heure minutes
Touche SET 6. Alarme heure
Touche SET 7. Alarme minutes
Touche SET 8. Quitter le mode de réglage
• Le jour de la semaine est calculé automatiquement.
1110
TFA Anleit_No. 98.1024_11/07 21.11.2007 16:38 Uhr Seite 6
Page 7

Uso
Inserire l'adattatore nello spinotto e collegare l'adattatore ad una presa a terra. Ora l’ apparecchio è pronto
per il funzionamento.
Avvertenza importante! Controllare che il voltaggio
della vostra abitazione sia 230V, perché altrimenti l'apparecchio potrebbe essere danneggiato.
Il Light Cube può essere alimentato per breve tempo
anche con 4 batterie AAA (non comprese). Per prolungare la durata della batteria la funzione di luce di
spegne automaticamente dopo 30 secondi. Per poter
utilizzare gli effetti di luce, impiegare l'alimentatore
fornito in dotazione.
Modalità di impostazione Calendario / Ora / Sveglia
• Premere il tasto SET (D) per arrivare alla modalità di
impostazione. Selezionare i dati che si vogliono
impostare uno dopo l’altro.
• Appena le cifre iniziano a lampeggiare, si possono
aumentare i valori con il tasto UP (G) e DOWN (F).
Tenendo premuto il tasto il valore aumenta più
velocemente.
Tasto SET 1. Calendario anno
Tasto SET 2. Calendario mese
Tasto SET 3. Calendario giorno
Tasto SET 4. Ora ore
Si può scegliere il sistema orario di
12 o 24 ore uno dopo l’altro.
Nel sistema 12 ore, AM e PM
compare sul display.
Tasto SET 5. Ora minuti
Tasto SET 6. Sveglia ore
Tasto SET 7. Sveglia minuti
Tasto SET 8. Uscire dalla modalità di
impostazione
Funzioni
• Cubo luminoso con colori variabili
• Cambio di colore (12 colori) continuo o ad ogni ora
• Indicazione dell’ora, data, giorno della settimana
ed ora della sveglia
• Sveglia con effetti luminosi colorati
• Ideale come luce per la notte
• Con collegamento alla rete
o 4 x batterie AAA (non comprese)
Display
1. DATA
2. GIORNO DELLA SETTIMANA
3. INDICATORE “LUCE”
4. ORA
5. ORA INDICAZIONE AM/PM
6. ORA DELLA SVEGLIA INDICAZIONE AM / PM
7. ORA DELLA SVEGLIA
8. INDICATORE “DEMO”
9. INDICATORE DELLA SVEGLIA
Parte inferiore
A. SPINOTTO COLLEGAMENTO ALLA RETE
B. CONTATTI LUCE/ SPEGNIMENTO DELLA SVEGLIA
C. TASTO DELLA SVEGLIA
D. TASTO IMPOSTAZIONE ORA / CALENDARIO
E. INTERRUPTOR MODO DE LUZ
F. TASTO IMPOSTAZIONE DOWN
G. TASTO IMPOSTAZIONE UP
H. VANO BATTERIE
LIGHT CUBE – Orologio sveglia digitale
1312
TFA Anleit_No. 98.1024_11/07 21.11.2007 16:38 Uhr Seite 7
Page 8

Funciones
• Dado luminoso con cambio de colores
• Cambio de colores permanente o cada hora
(12 colores)
• Visualización de la hora, la fecha, día de la semana
y hora de alarma
• Alarma de despertador con efectos de luces de
colores
• Ideal como luz de noche
• Con sector de red
o pilas 4 X AAA (no contenidas).
Display
1. FECHA
2. DÍA DE LA SEMANA
3. INDICADOR „LUZ“
4. HORA
5. HORA INDICADOR AM / PM
6. HORA DE ALARMA INDICADOR AM/PM
7. HORA DE ALARMA
8. INDICADOR MODO „DEMO“
9. INDICADOR „ALARMA”
Lado inferior
A. CONEXIÓN SECTOR DE RED
B. CONTACTOS LUZ/PARAR ALARMA
C. BOTÓN ALARMA
D. BOTÓN DE AJUSTE HORA / CALENDARIO
E. CONMUTADOR MODO DE LUZ
F. BOTÓN DE AJUSTE DOWN
G. BOTÓN DE AJUSTE UP
H. COMPARTIMIENTO DE PILAS
LIGHT CUBE – Reloj despertador digital
• L’apparecchio calcola il giorno della settimana automaticamente.
Attivazione / disattivazione della sveglia
• Premere brevemente il tasto ALARM (C). Il simbolo
di sveglia compare in alto a sinistra sul display. La
funzione sveglia è attivata. Per disattivare la funzione sveglia, premere nuovamente il tasto ALARM
(C). Il simbolo di sveglia sul display scompare.
Spegnimento della sveglia
• Quando la sveglia suona, tutti i 12 colori si illuminano uno dopo l’altro per 30 secondi. Fate cessare
la sveglia sfiorando il lato superiore del cubo.
Modalità illuminazione
Con il commutatore E si possono scegliere 3 regolazioni
di illuminazione:
1. Posizione ON: cambio di colore ad ogni ora (12 colori)
2. Posizione OFF: luce colorata tramite sfioramento del
lato superiore del cubo per 30 secondi.
3. Posizione DEMO: cambio di colore continuo. L’attivazione viene visualizzata sul display attraverso l’indicatore „DEMO“ (8).
Manutenzione
• Evitare di posizionare gli apparecchi in zone soggette a temperatura estrema, a vibrazioni e a urti.
• Quando si pulisce il display e l'involucro, usare solo
un panno soffice inumidito con acqua. Non usare
solventi o abrasivi.
• Non effettuare riparazioni sugli apparecchi. Per
favore riportarli al punto vendita originale. Nel caso
di uso scorretto o di apertura dell'apparecchio non
assumiamo alcuna garanzia.
1514
TFA Anleit_No. 98.1024_11/07 21.11.2007 16:38 Uhr Seite 8
Page 9

Activar / desactivar del alarma
• Pulse brevemente el botón ALARM (C). El símbolo
de alarma aparece a la izquierda arriba en el display. La función de alarma está activada. Para desactivar la función de alarma pulse de nuevo el botón
de ALARMA (C). El símbolo de alarma en el display
desaparece.
Desconectar el alarma
• Cuando toca el despertador, alumbran los 12 colores
por 30 segundos. Finalice el alarma pulsando la
parte superior del alarma.
Modo de luz
Con el interruptor E pueden seleccionarse tres ajustes
de luz:
1. Posición ON: cambio de colores cada hora (12 colores)
2. Posición OFF: luz de colores por pulsación del lado
superior de dado por 30 segundos.
3. Posición DEMO: Cambio de colores permanente. La
activación se visualiza por el indicador “ DEMO” (8)
en el display.
Conservación
• No exponga el aparato a temperaturas, vibraciones
y sacudidas extremas.
• Limpie el aparato con un trapo suave, ligeramente
humectado. ¡No utilizar ningún medio abrasivo o
disolvente!
• Por favor, no emprenda ningún intento propio de
reparaciones. En caso de reclamaciones diríjase a su
comerciante. En caso de abertura o trato inadecuado expirará la garantía.
Manejo
Conecte el adaptador en la toma en la base del instrumento (A). Conecte el adaptador de AC-DC a un enchufe
de la pared. El aparato está ahora listo para el servicio.
¡Importante! ¡Asegúrese que su voltaje familiar es 230V!
De otra forma puede producir daño a su instrumento.
El Light Cube puede gestionarse por breve tiempo también con pilas 4 X AAA (no contenidas). Para prolongar
la vida de las pilas, la función de luz se desconecta
automáticamente después de 30 segundos.
Para usar los efectos de luz, utilice el adaptador de red
suministrado.
Modo de ajuste hora / calendario / alarma:
• Pulse el botón SET (D) para llegar al modo de ajuste.
Seleccione los datos que usted quiera ajustar uno
tras otro.
• Mientras parpadeen las cifras, podrá ajustar el valor
con el botón UP (G) y DOWN (F). Si mantiene pulsada el botón cambia el valor más rápidamente.
SET 1. Calendario año
SET 2. Calendario mes
SET 3. Calendario fecha
SET 4. Horario horas
Podrá seleccionar el sistema de horario
de 12 o de 24 horas uno tras otro. En el
sistema de horario de 12 horas aparece
“PM” o “AM” en el display.
SET 5. Horario minutos
SET 6. Alarma horas
SET 7. Alarma minutos
SET 8. Salir del modo de ajuste
• El reloj calcula automáticamente el día de la semana
1716
TFA Anleit_No. 98.1024_11/07 21.11.2007 16:38 Uhr Seite 9
Page 10

Bediening
Steek de adapter in de ingang aan de onderkant van
de klok (A). Stop de adapter in een stopcontact. Het
apparaat is nu bedrijfsgereed.
Belangrijk! Verzeker u ervan dat het voltage van het
lichtnet 230V is, anders kan de klokbeschadigd raken!
De Light Cube kan tijdelijk ook met 4 X AAA batterijen
worden gebruikt (niet inbegrepen). Om de levensduur
van de batterij te verlengen, schakelt het toestel de
lichteffecten na 30 seconden automatisch uit. Gebruik
de bijgeleverde netadapter om de lichteffecten te
activeren.
Instelmodus Kalender / Tijd / Alarm
• Druk op de SET-toets (D) om in de instelmodus te
komen. Kies de gegevens achtereen, die u wilt
instellen.
• Zodra de cijfers knipperen kunt u de waarde met de
UP (G) en DOWN-toets (F) verhogen. Als u de toets
ingedrukt houdt wordt de waarde sneller verhoogd.
SET- toets 1. Kalender jaar
SET- toets 2. Kalender maand
SET- toets 3. Kalender datum
SET- toets 4. Tijd uren
U kunt het 12- of 24-uurs-tijdsysteem achtereen selecteren.
In het 12-uurs-tijdsysteem verschijnt
“AM” en “PM“ op de display.
SET- toets 5. Tijd minuten
SET- toets 6. Alarm uren
SET- toets 7. Alarm minuten
SET- toets 8. Instelmodus verlaten
• Weekdag kan het apparaat automatisch berekenen.
Functies
• Lichtkubus met wisselende kleuren
• Doorlopende kleurverandering of om het uur
(12 kleuren)
• Aanduiding van tijd, datum, weekdag en wektijd
• Wekalarm met kleurige lichteffecten
• Ideaal als nachtlicht
• Met stroomadapter
op 4 X AAA batterijen (niet inbegrepen)
Display
1. DATUM
2. WEEKDAG
3. INDICATOR „LICHT“
4. TIJD
5. TIJD AM / PM AANDUIDING
6. WEKTIJD AM/PM AANDUIDING
7. WEKTIJD
8. INDICATOR „DEMO“
9. INDICATOR „WEKALARM“
Onderkant
A. ADAPTER AANSLUITING
B. CONTACT LICHT/UITSCHAKELEN VAN HET ALARM
C. ALARM-KNOP
D. INSTELKNOP TIJD/KALENDER
E. LICHTMODUS SCHAKELAAR
F. INSTELKNOP DOWN
G. INSTELKNOP UP
H. BATTERIJVAK
LIGHT CUBE – Digitaal alarmklok
1918
TFA Anleit_No. 98.1024_11/07 21.11.2007 16:38 Uhr Seite 10
Page 11

Activeren / deactiveren van het alarm
• Druk kort op de ALARM-knop (C). Het alarmsymbool verschijnt links boven op de display. De alarmfunctie is geactiveerd. Om de alarmfunctie te deactiveren weer op de ALARM-knop (C) drukken. Het
alarmsymbool op de display verdwijnt.
Uitschakelen van het alarm
• Als de wekker afloopt beginnen achter elkaar alle
12 kleuren 30 seconden te lichten. Beëindig het
alarm door de bovenzijde van de kubus even aan te
raken.
Lichtmodus
Met schakelaar E kunnen drie lichtinstellingen worden
gekozen:
1. Positie ON: kleurverandering om het uur
(12 kleuren)
2. Positie OFF: kleurig licht door de bovenzijde van de
kubus 30 seconden even aan te raken.
3. Positie DEMO: doorlopende kleurverandering. Activering wordt door de indicator „DEMO“ (8) op de
display aangegeven.
Instandhouding
• Stel het apparaat niet aan extreme temperaturen,
trillingen en schokken bloot.
• Maak het apparaat met een zachte, enigszins vochtige doek schoon. Geen schuur- of oplosmiddelen
gebruiken!
• Voer geen eigen reparatiepogingen uit. Bij reclamaties dient u zich tot uw dealer te richten. Bij het
openen of onvakkundige behandeling vervalt de
garantie.
2120
TFA Anleit_No. 98.1024_11/07 21.11.2007 16:38 Uhr Seite 11
Page 12

2322
A
TFA Anleit_No. 98.1024_11/07 21.11.2007 16:38 Uhr Seite 12
9
8
12 3
4
5
6
7
H
B
G
EF
C
D
 Loading...