

Page 1
SERVICE MANUAL
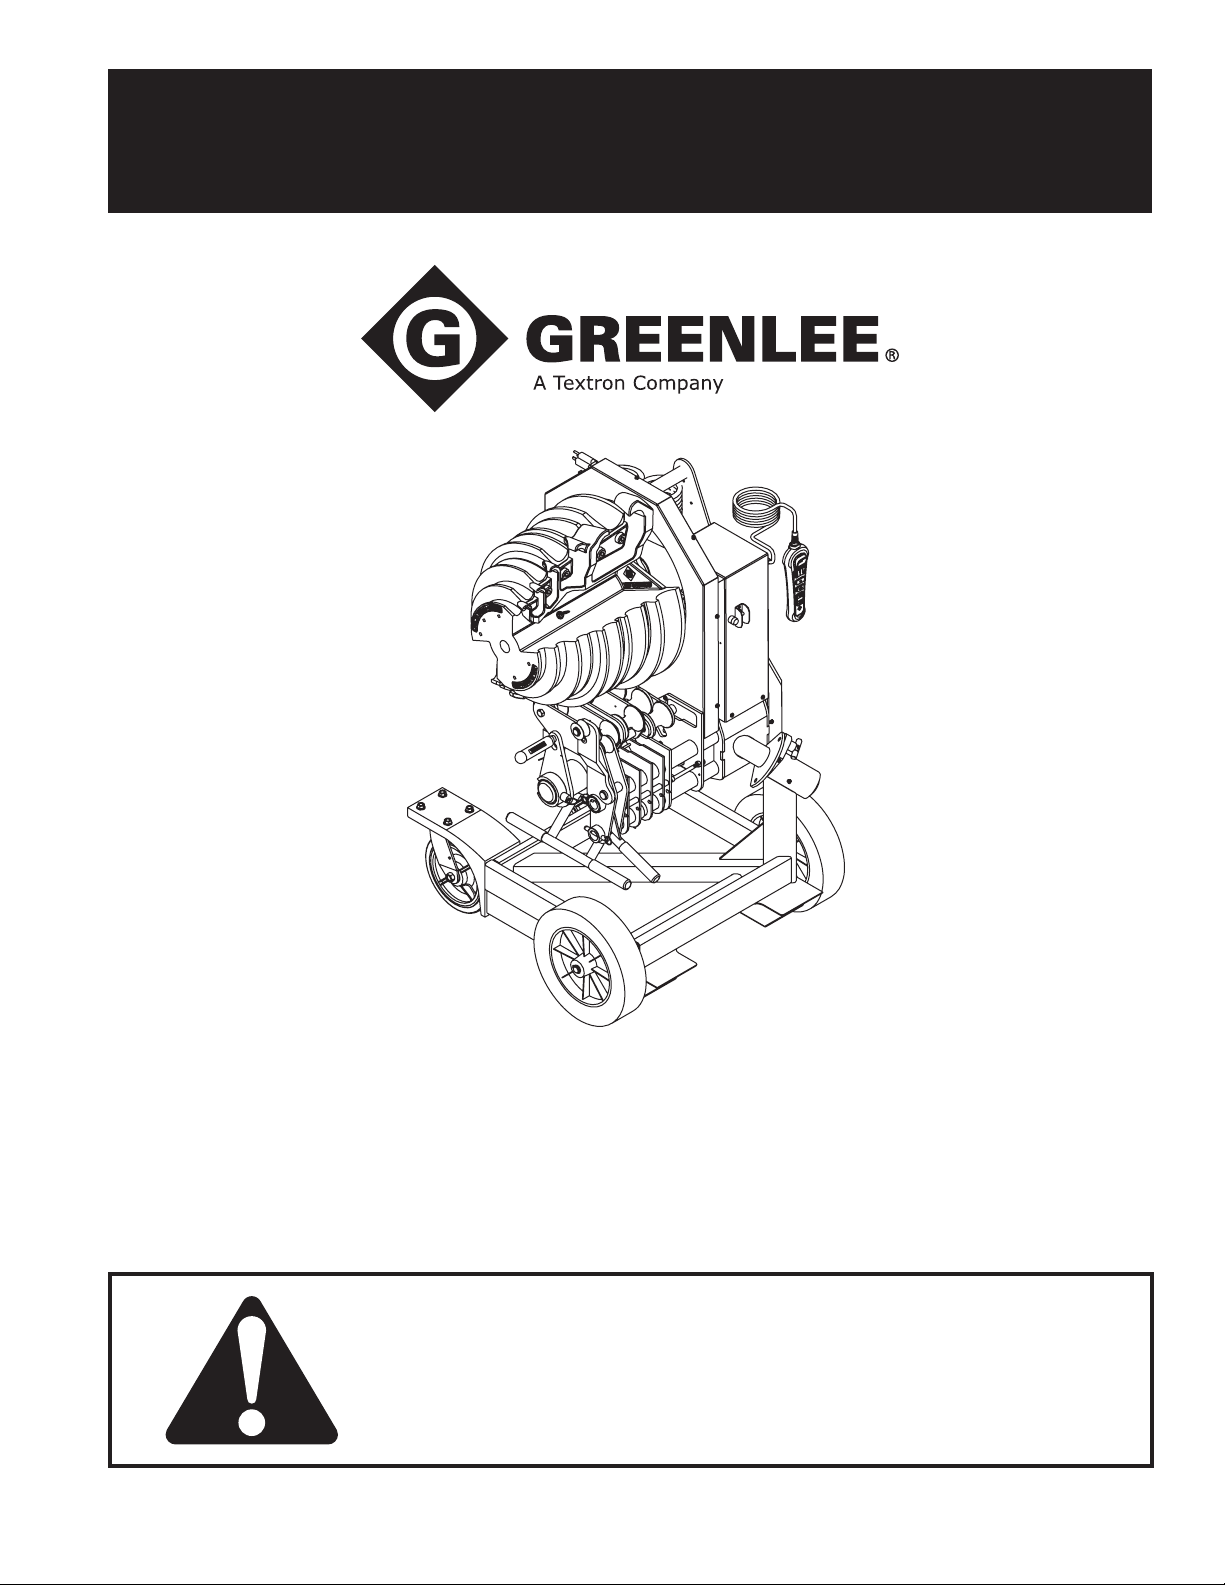
854DX
Electric Bender
Read and understand all of the instructions and
safety information in this manual before operating
or servicing this tool.
Register this product at www.greenlee.com
52067682 © 2014 Greenlee Textron Inc. 5/14
Page 2

854DX Electric Bender
Table of Contents
Safety ............................................................................ 2
Purpose of this Manual ................................................. 2
Other Publications ......................................................... 2
Important Safety Information .....................................3–5
Service Instructions ..................................................6–14
Illustrations .............................................................15–17
Parts List ................................................................18–23
Bending Attachments .............................................24–25
Wiring Diagram ............................................................ 26
Safety
Safety is essential in the use and maintenance of
Greenlee tools and equipment. This manual and any
markings on the tool provide information for avoiding
hazards and unsafe practices related to the use of this
tool. Observe all of the safety information provided.
Purpose of this Manual
This manual is intended to familiarize authorized
Greenlee service center personnel with the safe
operation and maintenance procedures for the
Greenlee˛854DX Electric Bender.
Keep this manual available to all personnel.
Replacement manuals are available upon request at no
charge at www.greenlee.com.
Other Publications
Instruction Manual: Publication 52067681
Do not discard this product or throw away!
For recycling information, go to www.greenlee.com.
All specications are nominal and may change as design
improvements occur. Greenlee Textron Inc. shall not be liable for
damages resulting from misapplication or misuse of its products.
KEEP THIS MANUAL
Greenlee / A Textron Company 4455 Boeing Dr. • Rockford, IL 61109-2988 USA • 815-397-7070
2
Page 3

IMPORTANT SAFETY INFORMATION
SAFETY
ALERT
SYMBOL
This symbol is used to call your attention to hazards
or unsafe practices which could result in an injury or
property damage. The signal word, dened below,
indicates the severity of the hazard. The message
after the signal word provides information for preventing or avoiding the hazard.
Immediate hazards which, if not avoided, WILL result
in severe injury or death.
854DX Electric Bender
Electric shock hazard:
• Inspect the power cord before
use. Repair or replace the cord if
damaged.
• Connect the power cord to a
120 volt, 20 amp receptacle on a
ground fault protected circuit only.
Refer to “Grounding Instructions.”
• Do not modify the power cord or
plug.
• Disconnect the unit from power
before servicing.
Failure to observe this warning could
result in severe injury or death.
Hazards which, if not avoided, COULD result in
severe injury or death.
Hazards or unsafe practices which, if not avoided,
MAY result in injury or property damage.
Read and understand all of the
instructions and safety information
in this manual before operating or
servicing this tool. Refer also to the
Instruction Manual, which is listed
under “Other Publications.”
Failure to observe this warning will
result in severe injury or death.
Do not use this tool in a hazardous
environment. Hazards include ammable liquids, gases, or other materials. Using this tool in a hazardous
environment can result in a re or
explosion.
Failure to observe this warning will
result in severe injury or death.
For continued protection against risk of re and
electric shock, replace ONLY with same manufacturer,
type, and rating of fuse. Refer to the “Maintenance”
section of the Instruction Manual, which is listed
under “Other Publications.”
Failure to observe this warning could result in severe
injury or death.
• Do not use in dangerous environment. Do not use power tools in
damp or wet locations, or expose
them to rain. Keep work area well
lighted.
• Do not immerse the pendant switch
in water or any other liquid.
Failure to observe these warnings
could result in severe injury or death.
Always use safety glasses. Everyday
glasses only have impact resistant
lenses; they are NOT safety glasses.
When using in dusty environment, use
face or dust mask.
Failure to wear eye protection could
result in serious eye injury from ying
debris.
Greenlee / A Textron Company 4455 Boeing Dr. • Rockford, IL 61109-2988 USA • 815-397-7070
3
Page 4
854DX Electric Bender
IMPORTANT SAFETY INFORMATION
• Keep guards in place and in
working order.
• Remove any tools from bender
before operating. Form habit of
checking to see that all tools are
removed from bender before
turning it on.
Failure to observe these warnings
could result in severe injury or death.
Extension cords:
• Use only three-wire, 12 AWG extension cords that have three-prong
grounding-type plugs and threehole receptacles that accept the
tool’s plug.
• Do not use extension cords that are
longer than 30 m (100').
• Repair or replace damaged extension cords.
Failure to observe these warnings
could result in severe injury or death.
Pinch points:
• Keep hands away from bending
shoe, rollers, and conduit when
bender is in use.
• Support conduit when unloading.
Conduit can become loose and fall
if not properly supported.
Failure to observe these warnings
could result in severe injury or death.
• Reduce the risk of unintentional starting. Make sure
switch is in off position before plugging in.
• Never leave tool running unattended. Turn power
off. Do not leave tool until it comes to a complete
stop.
• Disconnect tools before servicing and when changing accessories such as shoes, rollers, and the like.
Accidental start-up could result in serious injury.
Failure to observe these warnings could result in
severe injury or death.
• Never stand on tool. Serious injury could occur if
the tool is tipped.
• Do not overreach. Keep proper footing and balance
at all times.
Failure to observe these warnings could result in
severe injury or death.
Adjust fork spacing to match fork tubes on bender.
Ensure front wheel brakes are engaged before inserting forks into fork tubes.
Failure to observe this warning could result in severe
injury or death.
• Select the appropriate shoe groove and support
roller for the type and size of conduit before
bending.
• Do not bend conduit over 96 degrees. Overbending
could result in the other shoe hook colliding with
the conduit.
Failure to observe these precautions may result in
injury or property damage.
Greenlee / A Textron Company 4455 Boeing Dr. • Rockford, IL 61109-2988 USA • 815-397-7070
4
Page 5

854DX Electric Bender
IMPORTANT SAFETY INFORMATION
• Conduit moves rapidly as it is bent. The path of
the conduit must be clear of obstructions. Be sure
clearance is adequate before starting the bend.
• Wear proper apparel. Do not wear loose clothing,
gloves, neckties, rings, bracelets, or other jewelry
which may get caught in moving parts. Nonslip
footwear is recommended. Wear protective hair
covering to contain long hair.
• Do not force rollers or alter tool. It will do the
job better and safer at the rate for which it was
designed.
• Use right tool. Do not force tool or attachment to do
a job for which it was not designed.
• Use this tool for the manufacturer’s intended
purpose only. Use other than that which is
instructed in this manual can result in injury or
property damage.
Failure to observe these precautions may result in
injury or property damage.
• Keep work area clean. Cluttered areas and benches
invite accidents.
• Keep children away. All visitors should be kept safe
distance from work area.
• Make workshop kid proof with padlocks, master
switches, or by removing starter keys.
Failure to observe these precautions may result in
injury or property damage.
• Inspect the bender before use. Replace worn,
damaged, or missing parts with Greenlee replacement parts. A damaged or improperly assembled component could break and strike nearby
personnel.
• Maintain tools with care. Keep tool clean for best
and safest performance. Follow instructions for
lubricating and changing accessories.
• Check damaged parts. Before further use of the
tool, a guard or other part that is damaged should
be carefully checked to determine that it will
operate properly and perform its intended function. Check for alignment of moving parts, binding
of moving parts, breakage of parts, mounting, and
any other conditions that may affect its operation.
A guard or other part that is damaged should be
properly repaired or replaced.
• Use recommended accessories. Consult the
instruction manual for recommended accessories.
The use of improper accessories may cause risk of
injury to persons.
• Some bender parts and accessories are heavy
and may require more than one person to lift and
assemble.
Failure to observe these precautions may result in
injury or property damage.
Note: Keep all decals clean and legible, and replace
when necessary.
Greenlee / A Textron Company 4455 Boeing Dr. • Rockford, IL 61109-2988 USA • 815-397-7070
5
Page 6
Service Instructions
854DX Electric Bender
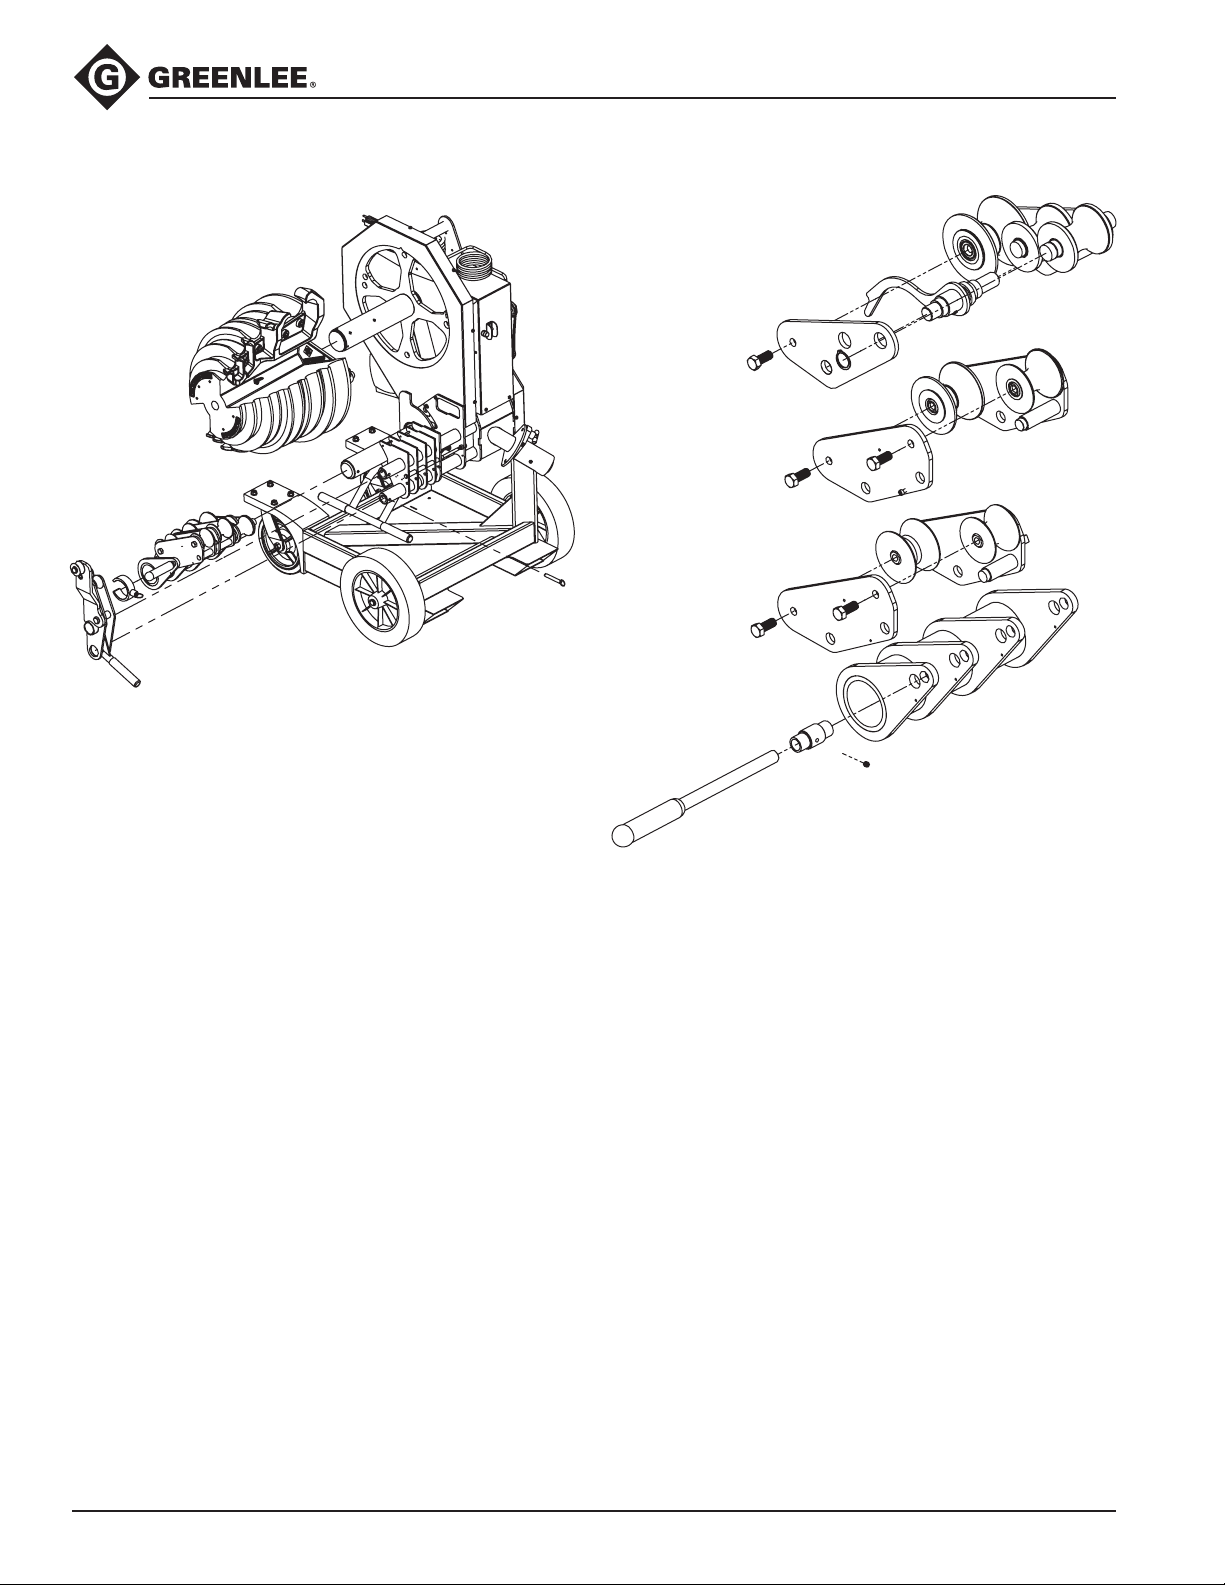
Roller Assembly Removal
1. Position the bender head in the vertical position.
2. Pull the ring of the lock pin in the shoe, and while
pulling the lock pin slide the shoe off the main
spindle.
3. Remove the detent pin and the 1/2" to 1" roller
support along with the lifting handle.
4. Disconnect the roller return spring from the roller
arm weldment.
5. Disconnect the spring from the 1-1/2" rollers group.
6. Slide the roller assembly and the roller support
assembly outward together about an inch until the
2" tail roller shaft is free from the slot in the roller
stop plate.
7. Remove the lock collar that retains the roller
assembly.
8. Rotate the roller assembly counterclockwise until
the roller plates are clear of the support plates.
9. Slide the roller assembly out to remove.
10. Reassemble in reverse order noting the following:
When sliding the roller assembly onto the support
shaft, keep the arm weldment between the 12 and
1o’clock position to prevent damaging the arm
position switch.
Roller Assembly Disassembly
1. Loosen the set screw on the collar that secures the
roller engagement handle, and pull out the handle,
1-1/4" roller group, and 1-1/2" roller group.
2. Loosen the set screw on the cam release mechanism, pull or drive out the pivot shaft, and remove
the 2" roller group.
3. Disassemble the 1-1/4" roller group.
a. Remove the two hex screws securing the outer
plate and the outer plate.
b. Remove the two rollers.
c. Reassemble in reverse order noting the
following:
• The slightly larger diameter roller mounts to
the left.
• Apply molybdenum grease to the roller shafts.
Greenlee / A Textron Company 4455 Boeing Dr. • Rockford, IL 61109-2988 USA • 815-397-7070
6
Page 7
Service Instructions (cont’d)
4. Disassemble the 1-1/2" roller group.
a. Remove the two hex screws securing the outer
plate and the outer plate.
b. Remove the tail roller.
c. Remove the O-rings, pivot balls, split rollers, and
belleville washers noting their orientation.
d. Reassemble in reverse order noting the
following:
• Assemble the Belleville washers so they form a
“V” open outward.
• Place the O-rings between the split rollers until
both screws have been tightened and then slip
them over the split rollers so they form a seal
between the rollers and the pivot ball.
• Apply molybdenum grease to the tail roller
shaft and pivot balls.
5. Disassemble the 2" roller group.
a. Remove the hex screw, retaining ring, and outer
plate.
b. Remove the middle roller, middle shaft, tail roller,
and tail shaft.
c. Remove the O-rings, pivot balls, split rollers, and
spacer.
d. Reassemble in reverse order noting the
following:
• Place the O-rings between the split rollers until
the screw has been tightened and then slip
them over the split rollers so they form a seal
between the rollers and the pivot ball.
• Apply molybdenum grease to the middle roller
shaft and pivot balls.
6. Reassemble the full assembly in reverse order
noting the following:
a. The end of the 2" pivot shaft should be ush
outside of the adjacent arm.
b. The end of the engagement handle should be
ush with the inside of the same arm.
c. The cam release mechanism should be installed
with the spring on the inboard side of the lever.
d. The tail of the 1-1/4" roller group must be
trapped below the tail of the 1-1/2" roller group.
854DX Electric Bender
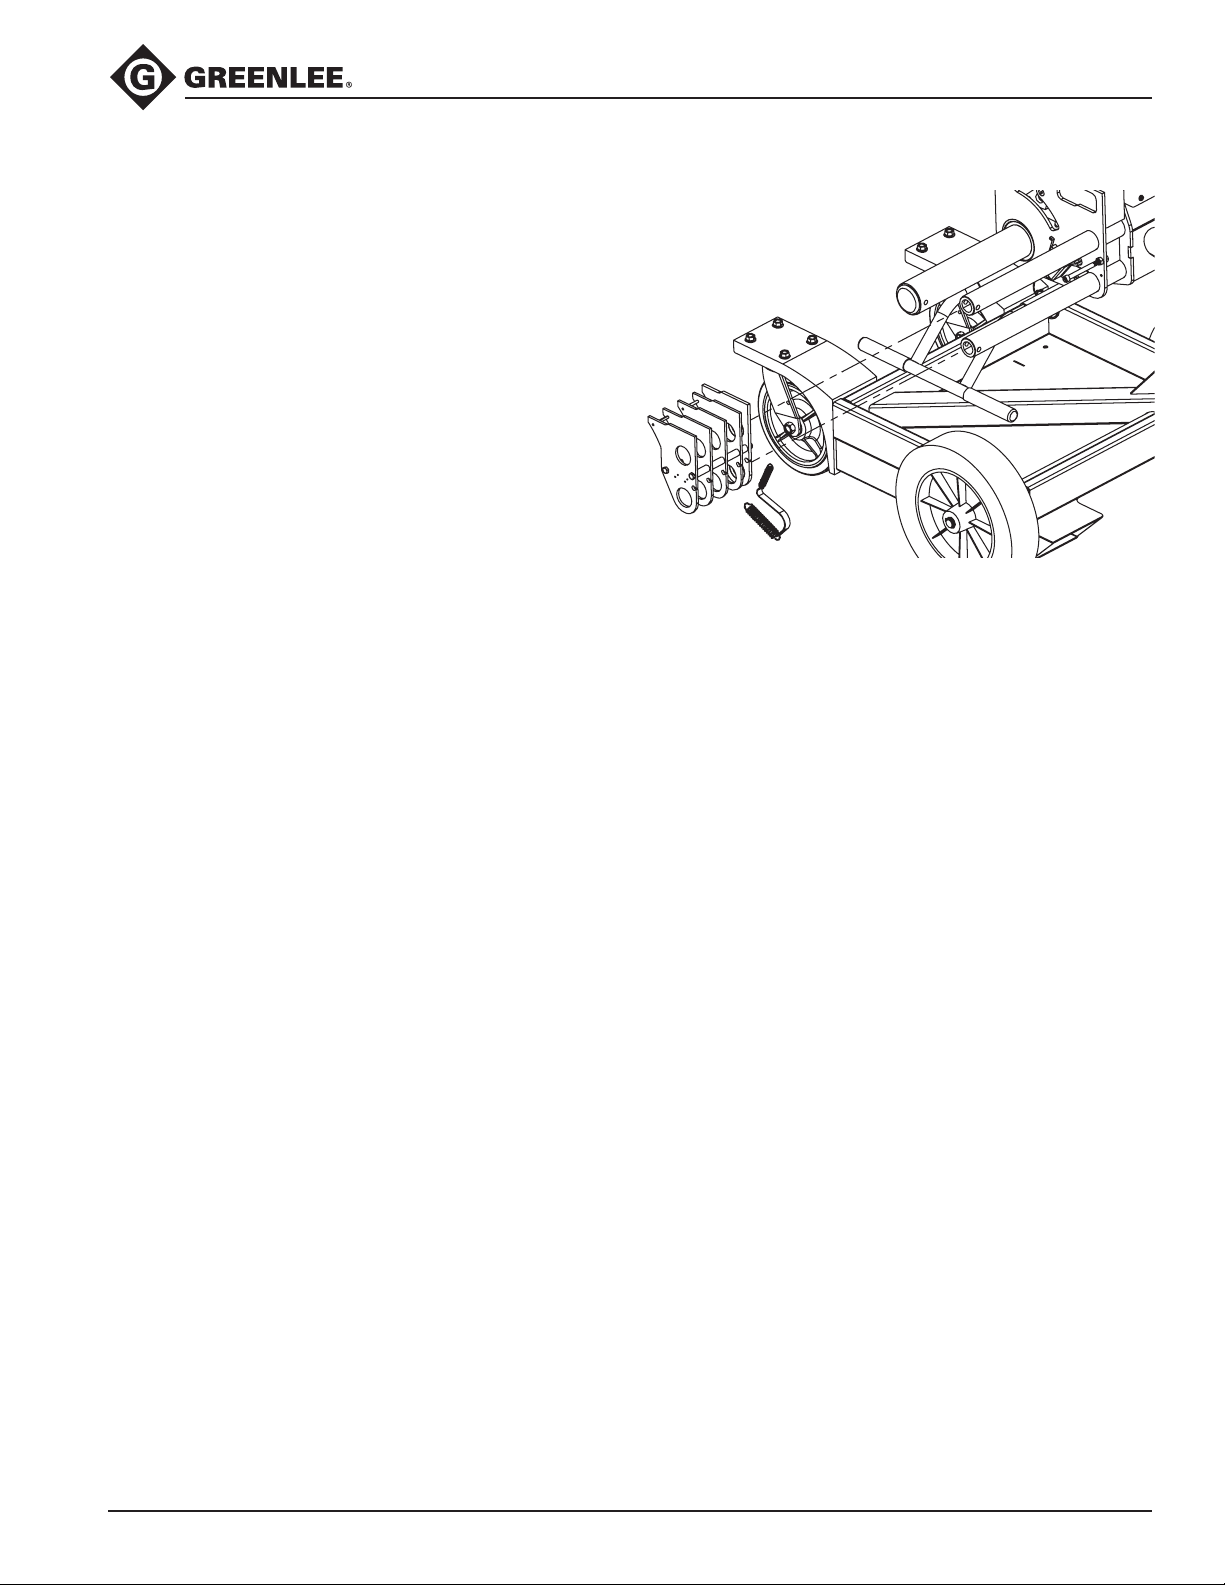
Roller Support Assembly Removal
1. Remove the roller assembly (refer to previous
instruction).
2. Slide the roller support assembly off the frame
tubes.
3. Reassemble in reverse order noting the following:
Fit the spring retainer with the two springs over the
lower frame tube between the second and third
support plates (as counted from the outside).
Greenlee / A Textron Company 4455 Boeing Dr. • Rockford, IL 61109-2988 USA • 815-397-7070
7
Page 8
Service Instructions (cont’d)
854DX Electric Bender
Roller Support Assembly Disassembly
1. Remove the two hex nuts securing all the support
plates.
2. Remove the rst plate and two short spacers.
3. Pry the plate from the rollpin, and remove the
second plate and two long spacers.
4. Remove the third plate and two long spacers.
5. Pry the plate from the rollpin, and remove the fourth
plate and two long spacers.
6. Remove the screws from the last support plate.
7. Reassemble in reverse order noting the following:
a. Slip joint pliers can be used to press the spring
anchor rollpins into the support plates by
squeezing the plates together over the rollpin.
b. Slide the completed assembly onto the frame
tubes with the nuts loose and tighten on the
frame to ease mounting and future removal.
c. With the assembly fully pushed in, the tip of the
right side 6" screw should t inside the hex head
of the 5/16" screw attached to the roller stop
plate.
Eccentric Roller Shaft
1. Remove the roller assembly (refer to previous
instruction).
2. Remove the ber thrust washer from the front of the
shaft.
3. Remove seven screws and rear chain guard.
4. Remove two screws securing squeeze adjuster and
the retainer on the top screw. Note which hole the
lower screw is in.
5. Remove the adjuster.
6. Remove the rollpins by driving them into the ID of
the shaft.
7. Pull out the shaft from the front and the rear eccentric from the rear.
8. Remove the front eccentric same as the rear if
needed.
9. Reassemble in reverse order noting the following:
a. Slide the front eccentric over the shaft so the
3/16" holes are closest to the rear.
b. Drive the rollpins into the holes so that they do
not protrude.
c. Lubricate the eccentrics with molybdenum
grease.
d. Insert the shaft into the frame from the front.
e. Insert the rear eccentric into the frame and over
the shaft so the 3/16" holes are visible.
f. Align the holes in the eccentric and shaft
together, making sure that thick part of both
eccentrics are oriented together.
Greenlee / A Textron Company 4455 Boeing Dr. • Rockford, IL 61109-2988 USA • 815-397-7070
8
Page 9

Service Instructions (cont’d)
g. Drive the rollpins into the holes leaving 1/4" pro-
truding on both sides.
h. Orient the shaft so that the thick part of the
eccentric is at 3 o’clock as viewed from the rear
of the bender.
i. Place the adjuster over the rear eccentric so that
the original hole used is on the right side.
j. Insert the hex screw through the retainer so
screw head abuts the ange and screw into the
top hole.
k. Insert the second screw into the original hole
and rotate the shaft until the screw can be
threaded into its hole.
854DX Electric Bender
Roller Stop Plate
1. Remove the roller assembly (refer to previous
instruction).
2. Remove the roller support assembly (refer to
previous instruction).
3. Remove the two screws securing the roller stop
plate.
4. Disconnect the trip switch cable.
5. Slide the roller stop plate off the shafts.
6. Remove the cam spring.
7. Remove the at head screw, nut, washer, spacer,
and cam.
8. Reassemble in reverse order.
Greenlee / A Textron Company 4455 Boeing Dr. • Rockford, IL 61109-2988 USA • 815-397-7070
Outer Control Box
1. Remove the two screws at the bottom front of the
control box (right side of bender).
2. Remove the two screws at the top rear of the
control box and remove the wire cover.
3. Lift the outer control box up and outward.
4. Pull off the two motor leads from the circuit board
noting their orientation.
5. Pull off the encoder cable from the circuit board.
6. Pull off the trip switch wire harness.
7. Reassemble in reverse order noting the following:
Connect motor leads to same tabs as removed
from.
9
Page 10

Service Instructions (cont’d)
854DX Electric Bender
Front Drive Chain
1. Remove the roller stop plate (refer to previous
instruction).
2. Remove the seven screws and the front guard.
3. Position the chain master link between the 10 and
11 o’clock position.
4. Remove the plastic chain stay roller.
5. Remove the two center screws securing the chain
guard stiffener along with the three screws securing
the back guard, and remove back guard.
6. Remove the master link and chain.
7. Reassemble in reverse order noting the following:
a. Use new cotter pins to attach the drive chain.
b. A new chain will be tight. Place one end of the
chain at 10–11 o’clock position and wrap the
remainder over the top of the big sprocket,
down and around the drive sprocket, and back
up to the big sprocket. Ensure that there is no
slack anywhere and hold the chain against the
outside of the sprocket. Force the chain into the
sprocket teeth at the point where it rst contacts
the sprocket. (A rubber hammer may be used to
persuade the chain.) While holding the chain in
the sprocket teeth, t the rest of the chain onto
the sprocket. Fit the connecting link.
Inner Control Box
1. Remove or loosen roller stop plate (refer to previous
instruction for removal or to pull roller assembly and
roller support assembly outward about an inch).
2. Remove outer control box (refer to previous
instruction).
3. Remove seven screws and rear chain guard.
4. Remove seven screws and front chain guard.
5. Remove the conduit nut securing the SealTite
conduit to the control box.
6. Pull the encoder and trip switch cables out through
the bushing.
7. Remove the hex nut inside the chain guard, and
back out the screws holding the control box.
8. Slide out the inner control box.
9. Reassemble in reverse order.
Greenlee / A Textron Company 4455 Boeing Dr. • Rockford, IL 61109-2988 USA • 815-397-7070
10
Page 11

Service Instructions (cont’d)
854DX Electric Bender
Front Sprocket Assembly
1. Remove the front drive chain (refer to previous
instruction).
2. Screw in the three set screws securing the spindle
cap about four turns and pull off the cap.
3. Push the sprocket fully inward to gain access to the
retaining ring.
4. Remove the retaining ring and large washer.
5. Slide the sprocket weldment off the bender.
6. Reassemble in reverse order noting the following:
a. With the sprocket pushed back against the
frame, press the outer part of the torque arm into
the slot of the spindle cap along the axis of the
spindle. Slide the sprocket fully outward while
tting the cap into the spindle.
b. Do not tighten the set screws so they protrude
beyond the outer diameter of the spindle.
Encoder Assembly
1. Remove front sprocket assembly (refer to previous
instruction).
2. Remove the outer control box (refer to previous
instruction).
3. Disconnect the encoder cable and pull cable out of
inner control box bushing.
4. Screw in the three set screws securing the encoder
mount about four turns and pull out the mount
complete with encoder and cable. Feed the cable
through the spindle while pulling the encoder mount
out.
5. Pull off the encoder cable.
6. Remove the encoder cover by prying out the plastic
locking tabs.
7. Remove the two socket head screws securing the
encoder case.
8. Pull the encoder magnet off the shaft.
9. Loosen the set screw securing the torque arm and
remove it and the thrust washer.
10. Pull out the encoder shaft.
11. Reassemble in reverse order noting the following:
a. Press the magnet onto the shaft 0.002" from the
base.
b. After securing the torque arm to the shaft,
ensure that the shaft turns freely.
c. Pry the decorative cap from the rear end of
the spindle shaft to gain access for feeding
the encoder cable through the grommet to the
control box.
Greenlee / A Textron Company 4455 Boeing Dr. • Rockford, IL 61109-2988 USA • 815-397-7070
11
Page 12

Service Instructions (cont’d)
d. Re-zero the bender after bender assembly is
complete minus the shoe:
• Position the drive sprocket so that the spoke
with two holes is around the 3 o’clock position.
• Accurately align the hole now at the 12 o’clock
position with the round centering hub behind
the sprocket.
• Set the zero point to memory by pressing and
holding the CLEAR button on the pendant and
then pressing the JOG button simultaneously.
Motor
1. Remove the outer control box (refer to previous
instruction).
2. Pull off the two motor leads from the circuit board
noting their orientation.
3. Disconnect the SealTite connector at the motor.
4. Remove the four screws attaching the motor to
the gearbox. (If access to the front inside screw is
not attainable with a 7/16" ex socket or stubby
wrench, access can be gained by removing the front
sprocket assembly and the front guard backing
plate.)
5. Pull off the motor while feeding the motor leads out
of the SealTite conduit.
6. Reassemble in reverse order noting the following:
a. Fitting the keyway between the motor and
gearbox may require staking it to keep it in
place.
b. For easiest tting of the SealTite connector,
rotate the motor into the connector before tting
the motor mounting screws.
854DX Electric Bender
Gearbox (Option 1)
1. Remove seven screws and rear chain guard.
2. Remove connecting link and rear chain.
3. Loosen the two set screws securing the drive
sprocket on the gearbox and push the sprocket
inward.
4. Slide the collar inward and pry off the C clip.
5. Remove the collar and sprocket.
6. Loosen the four screws securing the gearbox to the
frame.
7. Slide the gearbox downward (gravity may have
already done this) and remove it by pulling the
screw heads through the keyholes in the frame.
8. Reassemble in reverse order noting the following:
Slide the gearbox fully upward after installing the
chain and tighten the mounting screws to tension
the chain.
Note: The gearbox and motor can be removed as a unit
by removing the two inner motor mounting screws and
following the instructions for disconnecting the motor at
the control box.
Gearbox (Option 2)
1. Remove seven screws and rear chain guard.
2. Remove connecting link and rear drive chain.
3. Loosen the two set screws securing the drive
sprocket on the gearbox and push the sprocket
inward.
4. Slide the collar inward and pry off the C clip.
5. Remove the collar and sprocket.
6. Remove the inner chain guard (refer to previous
instruction).
7. Support the gearbox, remove the four screws securing the gearbox, and remove it.
Greenlee / A Textron Company 4455 Boeing Dr. • Rockford, IL 61109-2988 USA • 815-397-7070
12
Page 13

Service Instructions (cont’d)
854DX Electric Bender
8. Reassemble in reverse order noting the following:
Slide the gearbox fully upward after installing the
chain and tighten the mounting screws to tension
the chain.
Note: The gearbox and motor can be removed as a unit
by following the instructions for disconnecting the motor
at the control box.
Countershaft
1. Remove seven screws and rear chain guard.
2. Remove connecting link and rear drive chain.
3. Remove the front drive chain (refer to previous
instruction).
4. Remove a retaining ring from the countershaft.
5. Pull off the sprocket, key, and thrust washer.
6. Pull out the countershaft from the opposite side.
7. Remove the other thrust washer, sprocket, and key.
8. Reassemble in reverse order.
3. Remove the retaining ring at the end of the bender
pivot shaft.
4. Use a hoist to lift the bender head while sliding the
wheeled base off the pivot shaft.
5. Set the bender head down gently on the transport handle receptacle tubes using wood 2x4s for
support.
6. Reassemble in reverse order noting the following:
Apply molybdenum grease to the pivot shaft.
Wheeled Base Disassembly
1. Pull off the pivot detent bracket by loosening one
set screw.
2. Remove a retaining ring from the axle and pull off
the wheel axle and second wheel.
3. Remove the four screws and nuts for each swivel
caster and the caster wheels.
4. Reassemble in reverse order noting the following:
The bender head can be leveled using the two
set screws on the pivot detent bracket. One turn
approximates 1°.
Wheeled Base Removal
1. Remove the bending shoe.
2. Remove the transport handle.
Greenlee / A Textron Company 4455 Boeing Dr. • Rockford, IL 61109-2988 USA • 815-397-7070
13
Page 14

Service Instructions (cont’d)
854DX Electric Bender
Control Board Unit
1. Remove outer control box (refer to previous
instruction).
2. Disconnect the power connections to the board
from the circuit breaker and power cord.
3. Disconnect the pendent receptacle cable.
4. Remove the three button head screws attaching
the control board assembly to the enclosure, and
remove the control board assembly.
5. Reassemble in reverse order.
Pendant Switch
1. Remove three screws holding the housing halves
together and separate.
2. Unplug the pendant cord from the circuit board and
remove strain relief from housing.
3. Remove the three screws and the circuit board.
4. Unplug the keypad from the circuit board.
5. Remove the three screws from the bottom housing
to remove the magnets.
6. Peel the keypad membrane from the top housing.
7. Reassemble in reverse order noting the following:
Clean all residue from the mounting surface.
Greenlee / A Textron Company 4455 Boeing Dr. • Rockford, IL 61109-2988 USA • 815-397-7070
14
Page 15

Illustration
854DX Electric Bender
16B
23B
41C
41
41B
23
41C
19B
47
19
19A
48
16D
16
15A
16A
16C
23C
16C
16D
52
17A
16B
17
40A
40D
40
40C
55
40E
40F
5
40B
22
22A
22B
4B
21
2C
21D
21B
21C
21A
16B
2D
42
43
12D
18
18A
2C
19C
23B
24
24A
25A
12F
43
4B
4
4A
3C
3A
44
23A
8AD
25
23D
23C
41A
3B
3
3D
1A
46
1B
45
1
2
2B
2A
20D
51
Greenlee / A Textron Company 4455 Boeing Dr. • Rockford, IL 61109-2988 USA • 815-397-7070
15
20
20C
20B
20A
Page 16

Illustration —Base
854DX Electric Bender
5E
5D
5F
6B
7
Illustration —Control Box
5C
5G
6C
7A
5Q
6A
5A
50
14
8Y
8N
8AE
8
8O
8J
10
8P
8AC
8K
8S
8B
8R
8W8AD8AB
8AF
8A
8L
8V
8X
8Z
11
49
Greenlee / A Textron Company 4455 Boeing Dr. • Rockford, IL 61109-2988 USA • 815-397-7070
16
Page 17

854DX Electric Bender
Illustration
31F
31B
31C
31J
34G
34D
31A
31
34
34A
34H
34E
34I
31G
31I
34C
36D
35E
34F
36E
31H
23C
34B
36B
31J
36C
36
36G
36F
36A
38
38A
37F
38C
64
66
68
37E
12E
65
38B
61
59
62
56
56
31D
31E
31D
30
31B
30A
31C
31L,31M,
31K
or 31N
29E*
35E
35D
12B
35A
26A
26C
26B
26
56
57
35
30G
30H
35C
30I**
17
35B
to threads.
* Tighten to 40–45 ft-lb torque.
** Apply Loctite 242 adhesive
33D 33A
33E
33B
33C
33E
33F
56
32B
32
32A
39A
33G
33
30B
29F
30F
30B
29E*
30D
30C
29A
29
29B
Greenlee / A Textron Company 4455 Boeing Dr. • Rockford, IL 61109-2988 USA • 815-397-7070
30D
29C
30E
29D
29G
Page 18

854DX Electric Bender
Parts List
Group Key Part No. Description Qty
1 52056409 Cap kit, motor
1A Cap, motor ................................................................................................................ 1
1B Screw, #10-32 x 5/16, hex head slotted ...................................................................3
2 52067860 Guard kit, front main sprocket
2A Guard, front chain ..................................................................................................... 1
2B Decal, stub and offset .............................................................................................. 1
2C Screw, #10-16 x 1/2, thread-forming ........................................................................ 7
2D Decal, bend angle chart ............................................................................................ 1
3 52056411 Sprocket kit, gearbox output
3A Sprocket, #40-13 tooth ............................................................................................. 1
3B Collar ......................................................................................................................... 1
3C Ring, retaining, round ................................................................................................1
3D Key, square, .249 x 1.06............................................................................................1
4 52056624 Sprocket kit, main
4A Sprocket weldment ................................................................................................... 1
4B Bearing, berglide .....................................................................................................2
5 52067871 Base kit
5A Decal, fork lifting ....................................................................................................... 1
5Q Decal, bender pivot ................................................................................................... 1
5C Trunnion weldment .................................................................................................... 1
6A Axle ........................................................................................................................... 1
5D Caster, 8" w/side lock ...............................................................................................2
5E Screw, ange, 3/8-16 x 1.00 ..................................................................................... 8
5F Nut, lock, hex, 3/8-16 ............................................................................................... 8
7A Wheel, rubber (12 x 3) ............................................................................................... 2
6B Ring, retaining, .750 Truarc #5160 EX ....................................................................... 2
5G Fitting, grease, 1/4 alemite #1743-B ......................................................................... 1
6C Washer, .81 x 1.50 x .14 ............................................................................................ 4
6 52056626 Axle kit, wheel
6A Axle ........................................................................................................................... 1
6B Ring, retaining, .750 Truarc #5160 EX ....................................................................... 2
6C Washer, .81 x 1.50 x .14 ............................................................................................ 4
7 52056417 Wheel kit, replacement
7A Wheel, rubber (12 x 3) ............................................................................................... 2
8 52067872 Box kit, control
8A Control board assembly ............................................................................................ 1
8B Cover, box ................................................................................................................. 1
8J Screw, 1/4-20 x .50 btn head skt .............................................................................. 3
8K Receptacle unit, cannon .......................................................................................... 1
8L Guard, switch ............................................................................................................ 1
8N Bushing, strain relief .................................................................................................. 1
8O 91863856 Circuit breaker ........................................................................................................... 1
8P Screw, 4-40 x .50 at head, Taptite II ........................................................................ 2
8R Locknut, 1/2" conduit steel ....................................................................................... 1
8S Cord unit, power ....................................................................................................... 1
Greenlee / A Textron Company 4455 Boeing Dr. • Rockford, IL 61109-2988 USA • 815-397-7070
18
Page 19

854DX Electric Bender
Parts List (cont’d)
Group Key Part No. Description Qty
8V Washer, lock, internal, #6 .......................................................................................... 2
8W Screw, #6-32 x 3/8 phillips pan head ........................................................................1
8X Nut, #6-32 nylon lock ................................................................................................ 1
8Y Strap, velcro .............................................................................................................. 1
8Z Wire assembly ........................................................................................................... 1
8AB Decal, identication ................................................................................................... 1
8AC Decal, operating instructions ....................................................................................1
8AD Screw, #10-32 x 5/16, hex head slotted ................................................................... 2
8AE Holder, fuse ............................................................................................................... 1
8AF 52056934 Fuse (package consisting of 5 fuses) ........................................................................ 1
10 52067873 Assembly kit, control board
8A Control board assembly ............................................................................................ 1
8J Screw, cap, 1/4-20 x .50 btn skt head ...................................................................... 3
11 52056422 Screw kit, ground
8Z Wire assembly (ground) ............................................................................................ 1
8W Screw, #6-32 x 3/8 phillips pan head machine .........................................................1
8X Nut, hex, #6-32 lock .178 thk zp ............................................................................... 1
8V Washer (#6 star, intern, CZ/ST) ................................................................................. 2
12 52067874 Decal kit
5A Decal, fork lifting ....................................................................................................... 1
12B Decal, engage rollers ................................................................................................ 1
8AC Decal, operating instructions ....................................................................................1
8AB Decal, identication ................................................................................................... 1
5Q Decal, bender pivot ................................................................................................... 1
12D Decal, squeeze ..........................................................................................................1
12E Decal, cam release .................................................................................................... 1
12F Decal, lifting .............................................................................................................. 1
2B Decal, stub and offset .............................................................................................. 1
2D Decal, bend angle chart ............................................................................................ 1
29G Decal, cam ................................................................................................................ 1
13 8O 91863856 Breaker, circuit ........................................................................................................1
14 52056426 Cord unit, power
8S Power cord unit ......................................................................................................... 1
8N Bushing, strain relief .................................................................................................. 1
8Y Strap, velcro .............................................................................................................. 1
8R Nut, lock, 1/2" conduit .............................................................................................. 1
15 52056427 Bearing kit
15A Bearing, phenolic ...................................................................................................... 2
4B Bearing, berglide ..................................................................................................... 2
16 52056428 Sprocket kit, #40B60
16A Sprocket, #40 60T (includes 2 set screws) ...............................................................1
16B Ring, retaining, 1.50 Truarc #5100 EX .......................................................................1
16C Key, countershaft ......................................................................................................1
16D Bearing, thrust, 1.50 x 2.62 x .093 ............................................................................ 1
Greenlee / A Textron Company 4455 Boeing Dr. • Rockford, IL 61109-2988 USA • 815-397-7070
19
Page 20

854DX Electric Bender
Parts List (cont’d)
Group Key Part No. Description Qty
17 52056429 Sprocket kit, #60BS14
17A Sprocket, #60 14T (includes 2 set screws) ...............................................................1
16B Ring, retaining, 1.50 Truarc #5100 EX .......................................................................1
16C Key, countershaft ......................................................................................................1
16D Bearing, thrust, 1.50 x 2.62 x .093 ............................................................................ 1
18 52056631 Guard kit, rear chain
18A Guard, rear ................................................................................................................ 1
2C Screw, thread-forming, #10-16 x .50 ........................................................................7
12D Decal, squeeze arrow ................................................................................................ 1
19 52056431 Adjustment kit, squeeze cam
19A Adjuster, squeeze ...................................................................................................... 1
19B Screw, cap, 1/4-20 x 1.00 hex head ......................................................................... 2
19C Guide, adjuster .......................................................................................................... 1
20 52056432 Handle kit, replacement
20A Handle weldment ...................................................................................................... 1
20B Grip ........................................................................................................................... 2
20C Pin, safety snap......................................................................................................... 2
20D Lanyard ..................................................................................................................... 1
21 52056433 Encoder kit
21A Encoder, sub-assembly ............................................................................................1
21B Cap, encoder ............................................................................................................ 1
21C Screw, set, 1/4-20 x .375 skt ....................................................................................3
16B Ring, retaining, 1.50 Truarc #5100 EX .......................................................................1
21D Retainer ..................................................................................................................... 1
22 52056434 Idler kit, chain
22A Stay, chain .................................................................................................................1
22B Washer, at, 2.50 x 3.00 x .031 ber .........................................................................1
23 52056633 Rear guard kit, main sprocket
23A Guard, chain, back .................................................................................................... 1
23B Screw, cap, 1/4-20 x .750 hex head ......................................................................... 3
23C Nut, hex, 1/4-20 ........................................................................................................ 1
23D Hub, centering .......................................................................................................... 1
24 52056436 Back guard kit, rear chain
24A Guard, back, rear ......................................................................................................1
23C Nut, hex, 1/4-20 ........................................................................................................ 2
23B Screw, cap, 1/4-20 x .750 hex head ......................................................................... 3
25 52056437 Guard kit, top frame
25A Cover, wire ................................................................................................................1
8AD Screw, #10-32 x 5/16, hex head slotted ................................................................... 2
26 52067875 Spring kit, roller
26A Spring, lever .............................................................................................................. 1
26B Spring, return ............................................................................................................ 1
26C Anchor, spring ...........................................................................................................1
Greenlee / A Textron Company 4455 Boeing Dr. • Rockford, IL 61109-2988 USA • 815-397-7070
20
Page 21

854DX Electric Bender
Parts List (cont’d)
Group Key Part No. Description Qty
29 52056635 Roller assembly kit, 1-1/4"
29A Support weldment, 1-1/4" ........................................................................................1
29B Roller, lead, 1-1/4" ....................................................................................................1
29C Roller, tail, 1-1/4" ......................................................................................................1
29D Shaft, support, 1-1/4" ............................................................................................... 1
29E Screw, cap, hex head, 7/16-14 x 1.00 ......................................................................2
29F Plate, 1-1/2" outer roller ............................................................................................ 1
29G Decal, cam ................................................................................................................ 1
30 52056636 Roller assembly kit, 1-1/2"
30A Support weldment, 1-1/2" ........................................................................................1
30B O-ring, 1.50 x 1.62 x .062 nitrile ................................................................................ 2
30C Ball, half, 1-1/2" ........................................................................................................ 2
30D Roller, 1-1/2" .............................................................................................................2
30E Washer, belleville, .803 x 1.362 x .043 ...................................................................... 2
30F Roller, 1-1/2" IMC .....................................................................................................1
30G Shaft, support, 1-1/2" ............................................................................................... 1
30H Plate, 1-1/2" outer roller ............................................................................................ 1
29E Screw, cap, hex head, 7/16-14 x 1.00 ......................................................................2
30I Screw, cap, #8-32 x .500 skt head ...........................................................................1
31 52056637 Roller assembly kit, 2"
31A Support weldment, 2" ............................................................................................... 1
31B Ball, 2" half ................................................................................................................ 2
31C O-ring, 1.75 x 1.87 x .062 nitrile ................................................................................ 2
31D Roller, 2" .................................................................................................................... 2
31E Spacer, roller, 2" ........................................................................................................ 1
29E Screw, cap, hex head, 7/16-14 x 1.00 ......................................................................1
31F Shaft, 2" middle roller ............................................................................................... 1
31G Roller, 2" tail .............................................................................................................. 1
31H Shaft, tail, 2".............................................................................................................. 1
31I Roller unit, 2" ............................................................................................................ 1
31J Ring, retaining, .875 .................................................................................................. 2
31K Plate, 2" outer roller ..................................................................................................1
31L Washer, shim, 1.00 x 1.50 x .032 steel ..................................................................... 1
31M Washer, at, .625 x 1.00 x .031 (shim) ...................................................................... 1
31N Washer, at, .625 x 1.00 x .062 (shim) ...................................................................... 1
32 52056638 Handle kit, lift
32A Handle weldment, grab ............................................................................................ 1
32B Grip .......................................................................................................................... 1
33 52067876 Roller kit, 1/2"–1" EMT, IMC, rigid
33A Support weldment, 1" ............................................................................................... 1
33B Arm weldment ........................................................................................................... 1
33C Roller, 1/2".................................................................................................................1
33D Roller, 3/4".................................................................................................................1
33E Retaining ring, Truarc #5100-75 EX ..........................................................................2
33F Retaining ring, Truarc #5160-87 EX ..........................................................................1
33G Wave washer ............................................................................................................. 1
Greenlee / A Textron Company 4455 Boeing Dr. • Rockford, IL 61109-2988 USA • 815-397-7070
21
Page 22

854DX Electric Bender
Parts List (cont’d)
Group Key Part No. Description Qty
34 52056640 Cam kit
34A Cam ........................................................................................................................... 1
34B Screw, cap, 1/4-20 x .750 skt at head .................................................................... 1
34C Nut, hex, #8-32 ......................................................................................................... 2
34D Screw, button head, 8-32 x 3/8 ................................................................................1
34E Spring, cam ............................................................................................................... 1
34F Washer, at, .253 x .725 x .070 .................................................................................1
34G Nut, hex, 1/4-20 jam zp ............................................................................................ 1
34H Screw, cap, #8-32 x .750 skt head ...........................................................................1
34I Bushing ..................................................................................................................... 1
35 52056641 Arm kit, roller
35A Arm weldment ........................................................................................................... 1
35B Grip, rubber ............................................................................................................... 1
35C Handbar .................................................................................................................... 1
35D Sleeve, pivot, 1-1/2" ................................................................................................. 1
35E Screw, set, 1/4-28 x .250 skt ....................................................................................1
12B Decal, engage rollers ................................................................................................ 1
12E Decal, cam release .................................................................................................... 1
36 52055878 Lever assembly, release
36A Lever ......................................................................................................................... 1
36B Spring, clutch ............................................................................................................ 1
36C Collar ......................................................................................................................... 1
36D Ring, retaining, 1.00 Truarc #5100 EX ....................................................................... 1
36E Spacer ....................................................................................................................... 1
35E Screw, set, 1/4-28 x .250 skt ....................................................................................1
36F Washer, at #10.........................................................................................................1
36G Screw, #10-32 x .375 skt btn head cap .................................................................... 1
38 52056644 Stop kit, roller
38A Plate, switch .............................................................................................................. 1
38B Screw, cap, 1/4-20 x 3.500 hex head ....................................................................... 2
38C Guard, lower spacer .................................................................................................. 1
23C Nut, hex, 1/4-20 ........................................................................................................ 2
39 52056645 Hardware kit, roller
39A Screw, cap, 1/4-20 x 6.00 hex head ......................................................................... 2
29E Screw, cap, hex head, 7/16-14 x 1.00 ......................................................................5
38B Screw, cap, 1/4-20 x 3.500 hex head ....................................................................... 2
23C Nut, hex , 1/4-20 ....................................................................................................... 4
37E Screw, 5/16-18 x 4 skt head cap ..............................................................................1
37F Nut, hex , 5/16-18 full ............................................................................................... 2
Greenlee / A Textron Company 4455 Boeing Dr. • Rockford, IL 61109-2988 USA • 815-397-7070
22
Page 23

854DX Electric Bender
Parts List (cont’d)
Group Key Part No. Description Qty
40 52056642 Release kit, pivot
40A Bracket weldment, detent ......................................................................................... 1
40B Screw, 3/8-24 x 1 oval point set ...............................................................................2
40C Handle, detent........................................................................................................... 1
40D Piston, trunnion lock ................................................................................................. 1
40E Pin, roll, .125 x .500 .................................................................................................. 1
40F Spring, comp, .502 x .600 x .625 .............................................................................. 1
41 52067877 Bar kit, guard stiffener
41A Bar, guard stiffener .................................................................................................... 1
41B Screw, 1/4-20 x 5/8 button head cap .......................................................................2
41C Screw, 1/4-20 x 3/8 button head cap .......................................................................2
Individual Items
42 52044514 Lock collar assembly, small ......................................................................................1
43 52047945 Cap, plastic, 2" ......................................................................................................... 2
44 90523881 Reductor ................................................................................................................... 1
45 52057563 Motor, 120V, bender .................................................................................................. 1
46 91864208 Brushes ..................................................................................................................... 2
47 90542509 Chain, roller, #60 (92 pitches) with connecting link ...................................................1
48 52055855 Chain, #40 (86 pitches) with connecting link ............................................................ 1
49 52055021 Switch unit, pendant ................................................................................................. 1
50 52054423 Cord assembly .......................................................................................................... 1
51 52067789 Shoe unit ................................................................................................................... 1
52 52020192 Pin, hitch, short ......................................................................................................... 1
55 90544625 Ring, retaining, Truarc #5100-200 .............................................................................1
56 52044547 Support, tail roller ...................................................................................................... 4
57 52044526 Spacer ....................................................................................................................... 6
59 52044527 Spacer, short ............................................................................................................. 2
61 52055238 Cover, switch .............................................................................................................1
62 52044548 Support, 2" tail roller ................................................................................................. 1
64 52056594 Switch unit, sensor .................................................................................................... 1
65 52055436 Plate, switch retainer ................................................................................................. 1
66 Screw, #4-40 x 1-1/4 socket head cap .....................................................................2
68 52044584 Shaft, release ............................................................................................................ 1
Greenlee / A Textron Company 4455 Boeing Dr. • Rockford, IL 61109-2988 USA • 815-397-7070
23
Page 24

Bending Attachments
Shoe Group for 1/2" to 2" EMT, IMC, and Rigid Conduit
72B
854DX Electric Bender
74
75
73A
72A
Key Part No. Description Qty Key Part No. Description Qty
51 52067789 Shoe unit, 1/2"–2" EMT, IMC, rigid
72 52067881 Hook kit, 1/2"–2" EMT
72A Hook, 1/2"–2" EMT ............................... 1
72B Shoulder screw, ø.75 x 1.50 x 5/8-11 ... 4
73 52067882 Hook kit, 1/2"–2" IMC/rigid
73A Hook, 1/2"–2" IMC/rigid .......................1
72B Shoulder screw, ø.75 x 1.50 x 5/8-11 ... 4
76
77
74 Screw, 1/2-13 x .625 skt hd cap ...........4
75 Cap, shoe stud .....................................1
76 52067880 Plunger, spring ...................................... 1
77 Decal, EMT grooves ..............................1
78 Decal, IMC/rigid grooves
(not shown) ...........................................1
72B
Greenlee / A Textron Company 4455 Boeing Dr. • Rockford, IL 61109-2988 USA • 815-397-7070
24
Page 25

854DX Electric Bender
Bending Attachments (cont’d)
02840 Shoe Group for 1/2" to 2" 40 Mil PVC-Coated Rigid Conduit
4A
74
1
72B
75
5A
4B
2
3G
3E
3
3J
3F
3L
3M
3N
3K
3H
3D
3B
3C
3T
3R
3A
Key Part No. Description Qty Key Part No. Description Qty
1 52067878 Shoe unit, 1/2"–2" PVC-coated rigid
4 52065323 Hook kit, 1/2"–1-1/4" PVC
4A Hook, 1/2"–1-1/4" PVC .........................1
4B Screw, 3/8-16 x 1-1/4 skt hd cap .........4
5 52065324 Hook kit, 1-1/2"–2" PVC
5A Hook, 1-1/2"–2" PVC ............................1
72B Shoulder screw, ø.75 x 1.50 x 5/8-11 ... 3
74 Screw, 1/2-13 x .625 skt hd cap ...........4
75 Cap, shoe stud .....................................1
2 52044571 Lock collar unit ................................... 1
3 52067879 Roller support, 1/2"–1-1/4"
3A Support weldment ................................1
3B Pivot pin ................................................ 1
3C Retaining ring, Truarc #5160-42 EX ..... 2
3D Roller support weldment....................... 1
3E Axle, 1-1/4" roller ..................................1
3F Roller, 1-1/4" .........................................1
3G Axle, 1" roller .........................................1
3H Roller, 1"................................................1
3J Axle, 3/4" roller .....................................1
3K Roller, 3/4" ............................................1
3L Axle, 1/2" roller ..................................... 1
3M Roller, 1/2 ..............................................1
3N Retaining ring, Truarc #5150-50 EX ...... 5
3P Cam ......................................................1
3Q Screw, shoulder, 3/8 x 3/8 x 1/4-20 ...... 1
3R Nut, 1/4-20 lock .................................... 1
3S O-ring, .375 x .562 x .093 .....................1
3T Rollpin, ø.187 x 1.62 ............................. 1
3P
3S
3Q
Greenlee / A Textron Company 4455 Boeing Dr. • Rockford, IL 61109-2988 USA • 815-397-7070
25
Page 26

Wiring Diagram
ENCODER
SWITCH
LINE
LOAD
FUSE
BLACK
BLACK
GREEN
854DX Electric Bender
GROUND
POWER CORD
GREEN
WHITE
PENDANT
RECEPTACLE
ROLLER
SWITCH
J14
J1
J20
MOTOR BLACK
J18
J11 J12
WHITE
J3
J9
BLACK
J6
J8 J5
RED
YELLOW
4455 Boeing Drive • Rockford, IL 61109-2988 • USA • 815-397-7070
An ISO 9001 Company • Greenlee Textron Inc. is a subsidiary of Textron Inc.
www.greenlee.com
USA Tel: 800-435-0786
Fax: 800-451-2632
Canada Tel: 800-435-0786
Fax: 800-524-2853
International Tel: +1-815-397-7070
Fax: +1-815-397-9247
 Loading...