

Texsport 01323 User Manual
INSTRUCTIONS
Item 01323
Sequoia Pass 3-Room Family Cabin Tent
Thank you for purchasing this Texsport tent. Please read and understand each step of the set-up instructions. We encourage you to set-up this tent
at least once prior to your camping trip, ensuring that you have a satisfactory understanding of the set-up process. We hope you enjoy your new
tent and that it will give you many years of camping pleasure.
Do not apply excessive force to this product.
A
B
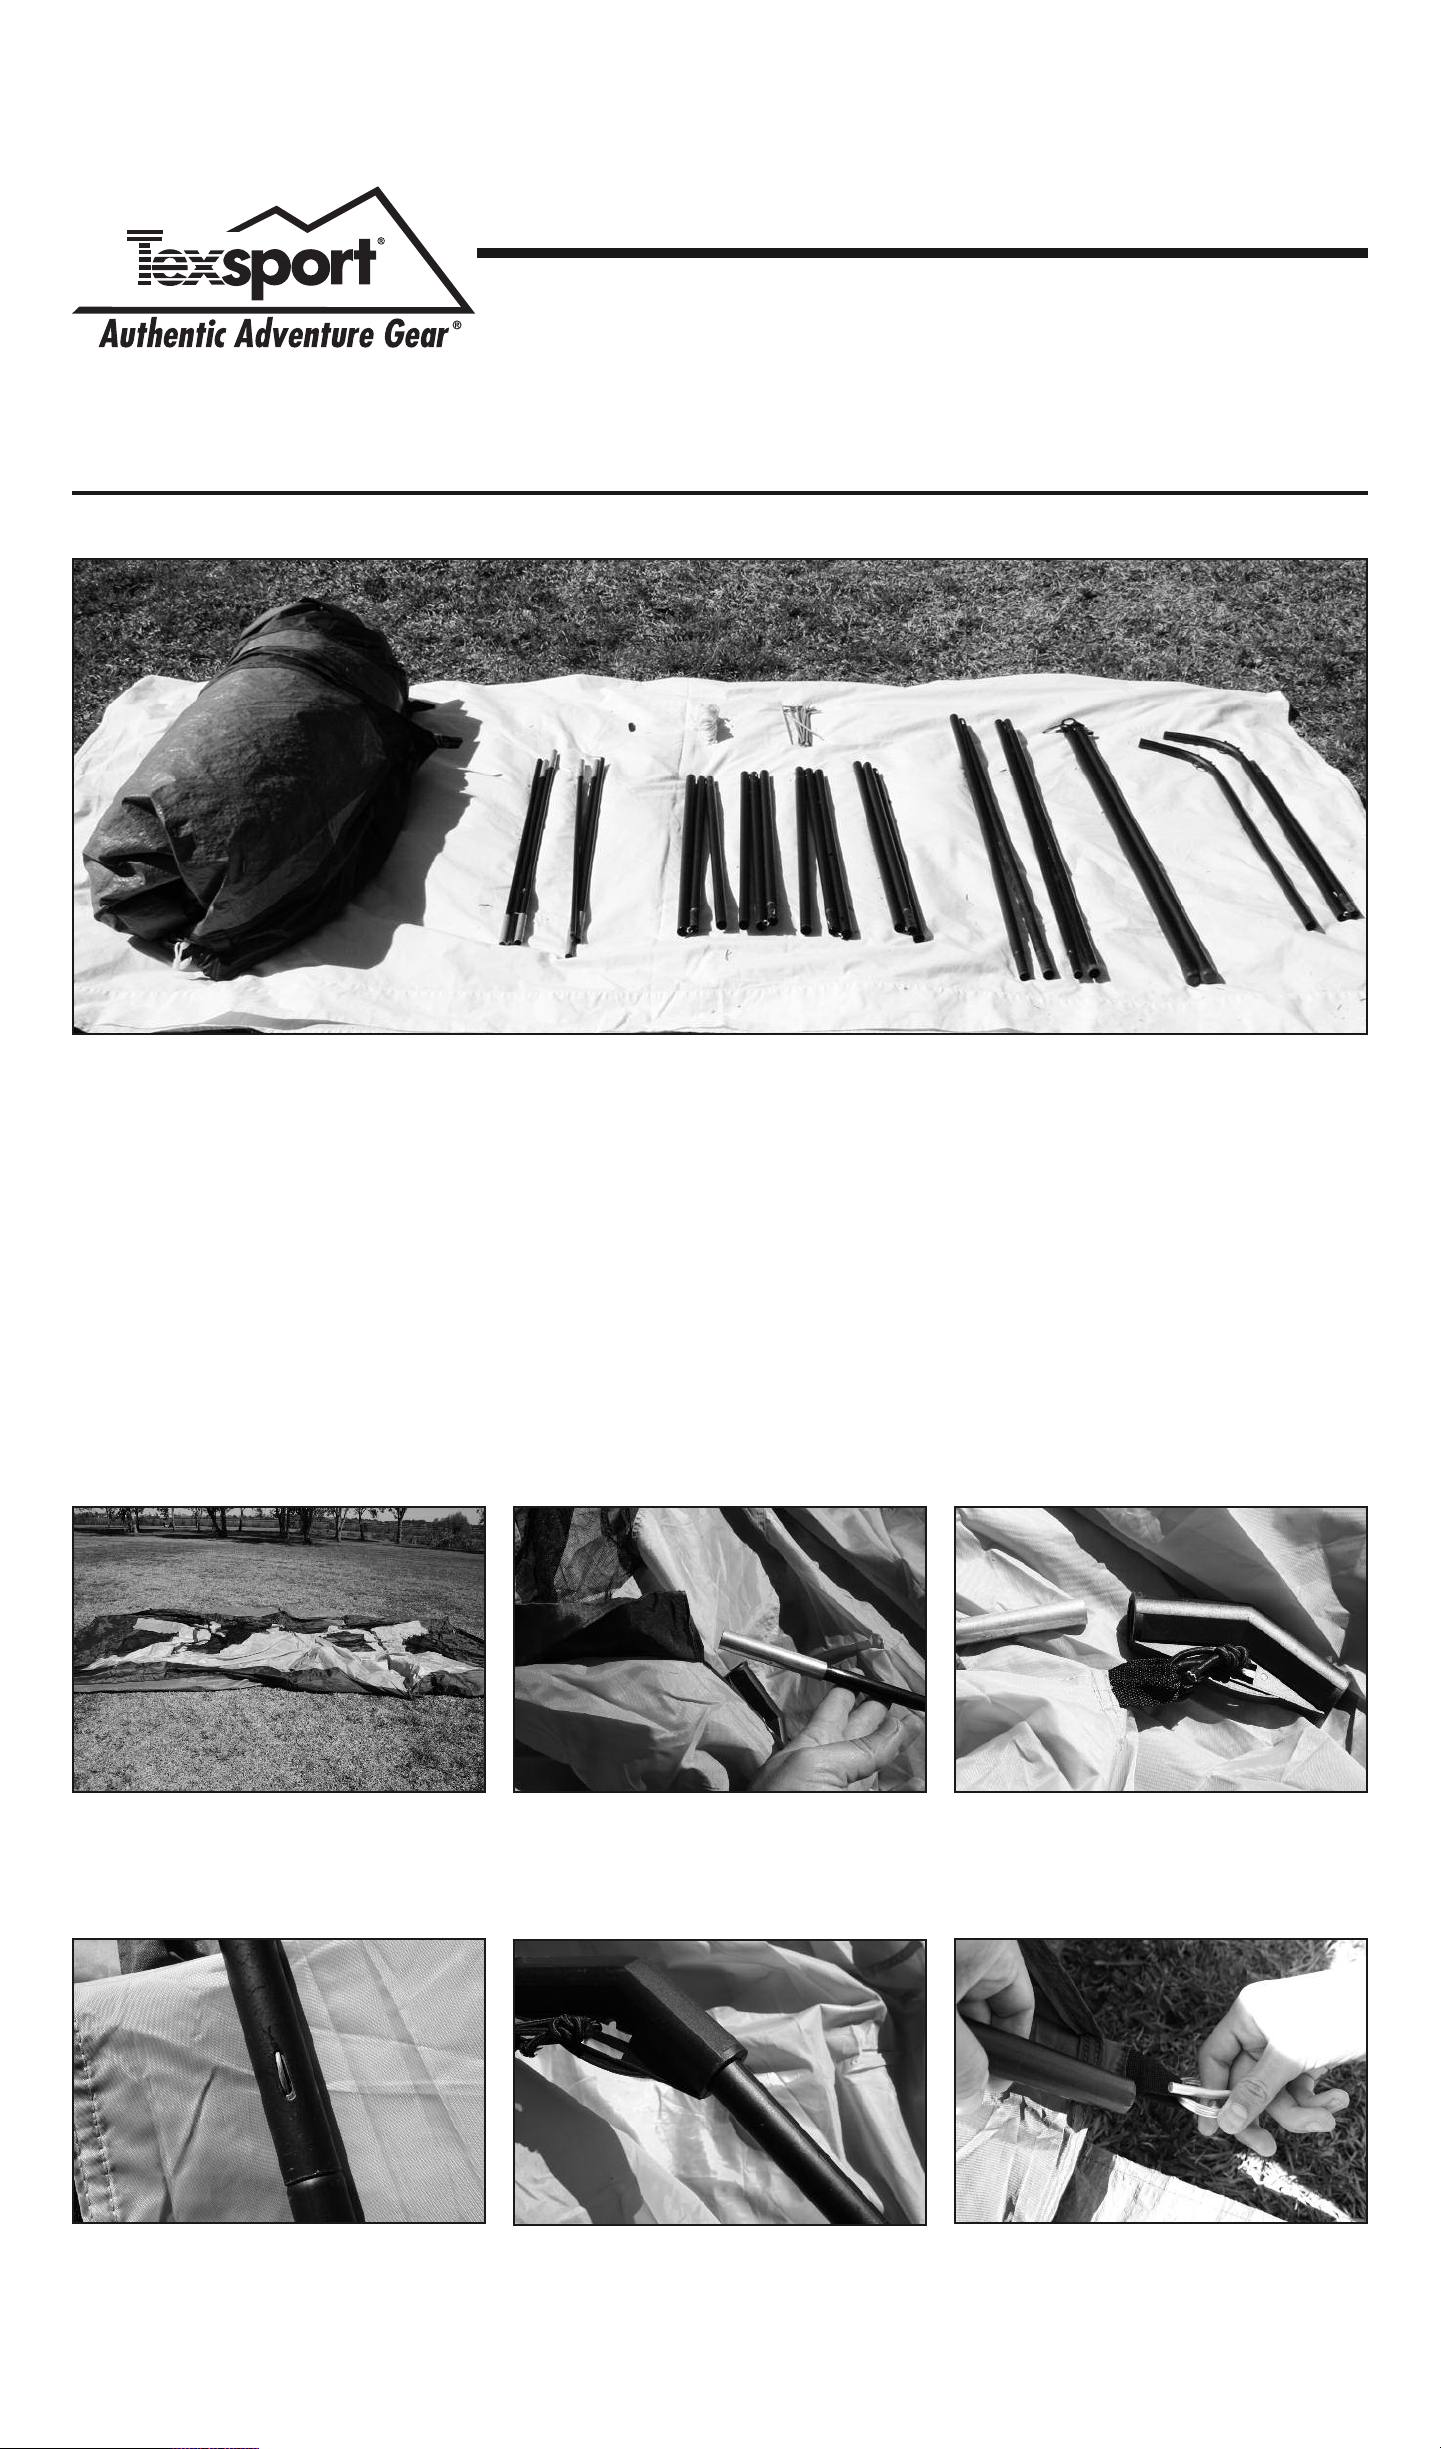
PARTS LIST:
A......Tent skin
B......2 Sets eave poles
C......4 Sets of short chain-corded side
H
F
G
C
D
E......2 Long adjustable base poles
F......1 Curved roof pole
G......1 Curved chain-corded roof pole
H......Stakes, clews, and guy rope
E
leg poles
D......2 Sets of long chain-corded center
leg poles
STEP 1 - Spread out tent skin. STEP 2 - Assemble the tent poles (B)
and insert through the side eave
sleeves.
NOTE:
Prepare your camp site by removing all sharp
stones, twigs, etc. The site should be flat and have
no depressions that could collect rain water.
STEP 3 - Insert the eave pole (B) into
the small opening of the attached
molded joint on both ends.
STEP 4 - All chain-corded poles have a
locking tab. Make sure when assem-
bling the poles the locking tab is in
place as shown above.
STEP 5 - Assemble a short chain-corded
side leg pole (C) and insert into the
opening of the attached molded joint.
Make sure the small hole on the pole is
at the top.
STEP 6 - Insert the pin and ring into the
side leg poles on all 4 sides.
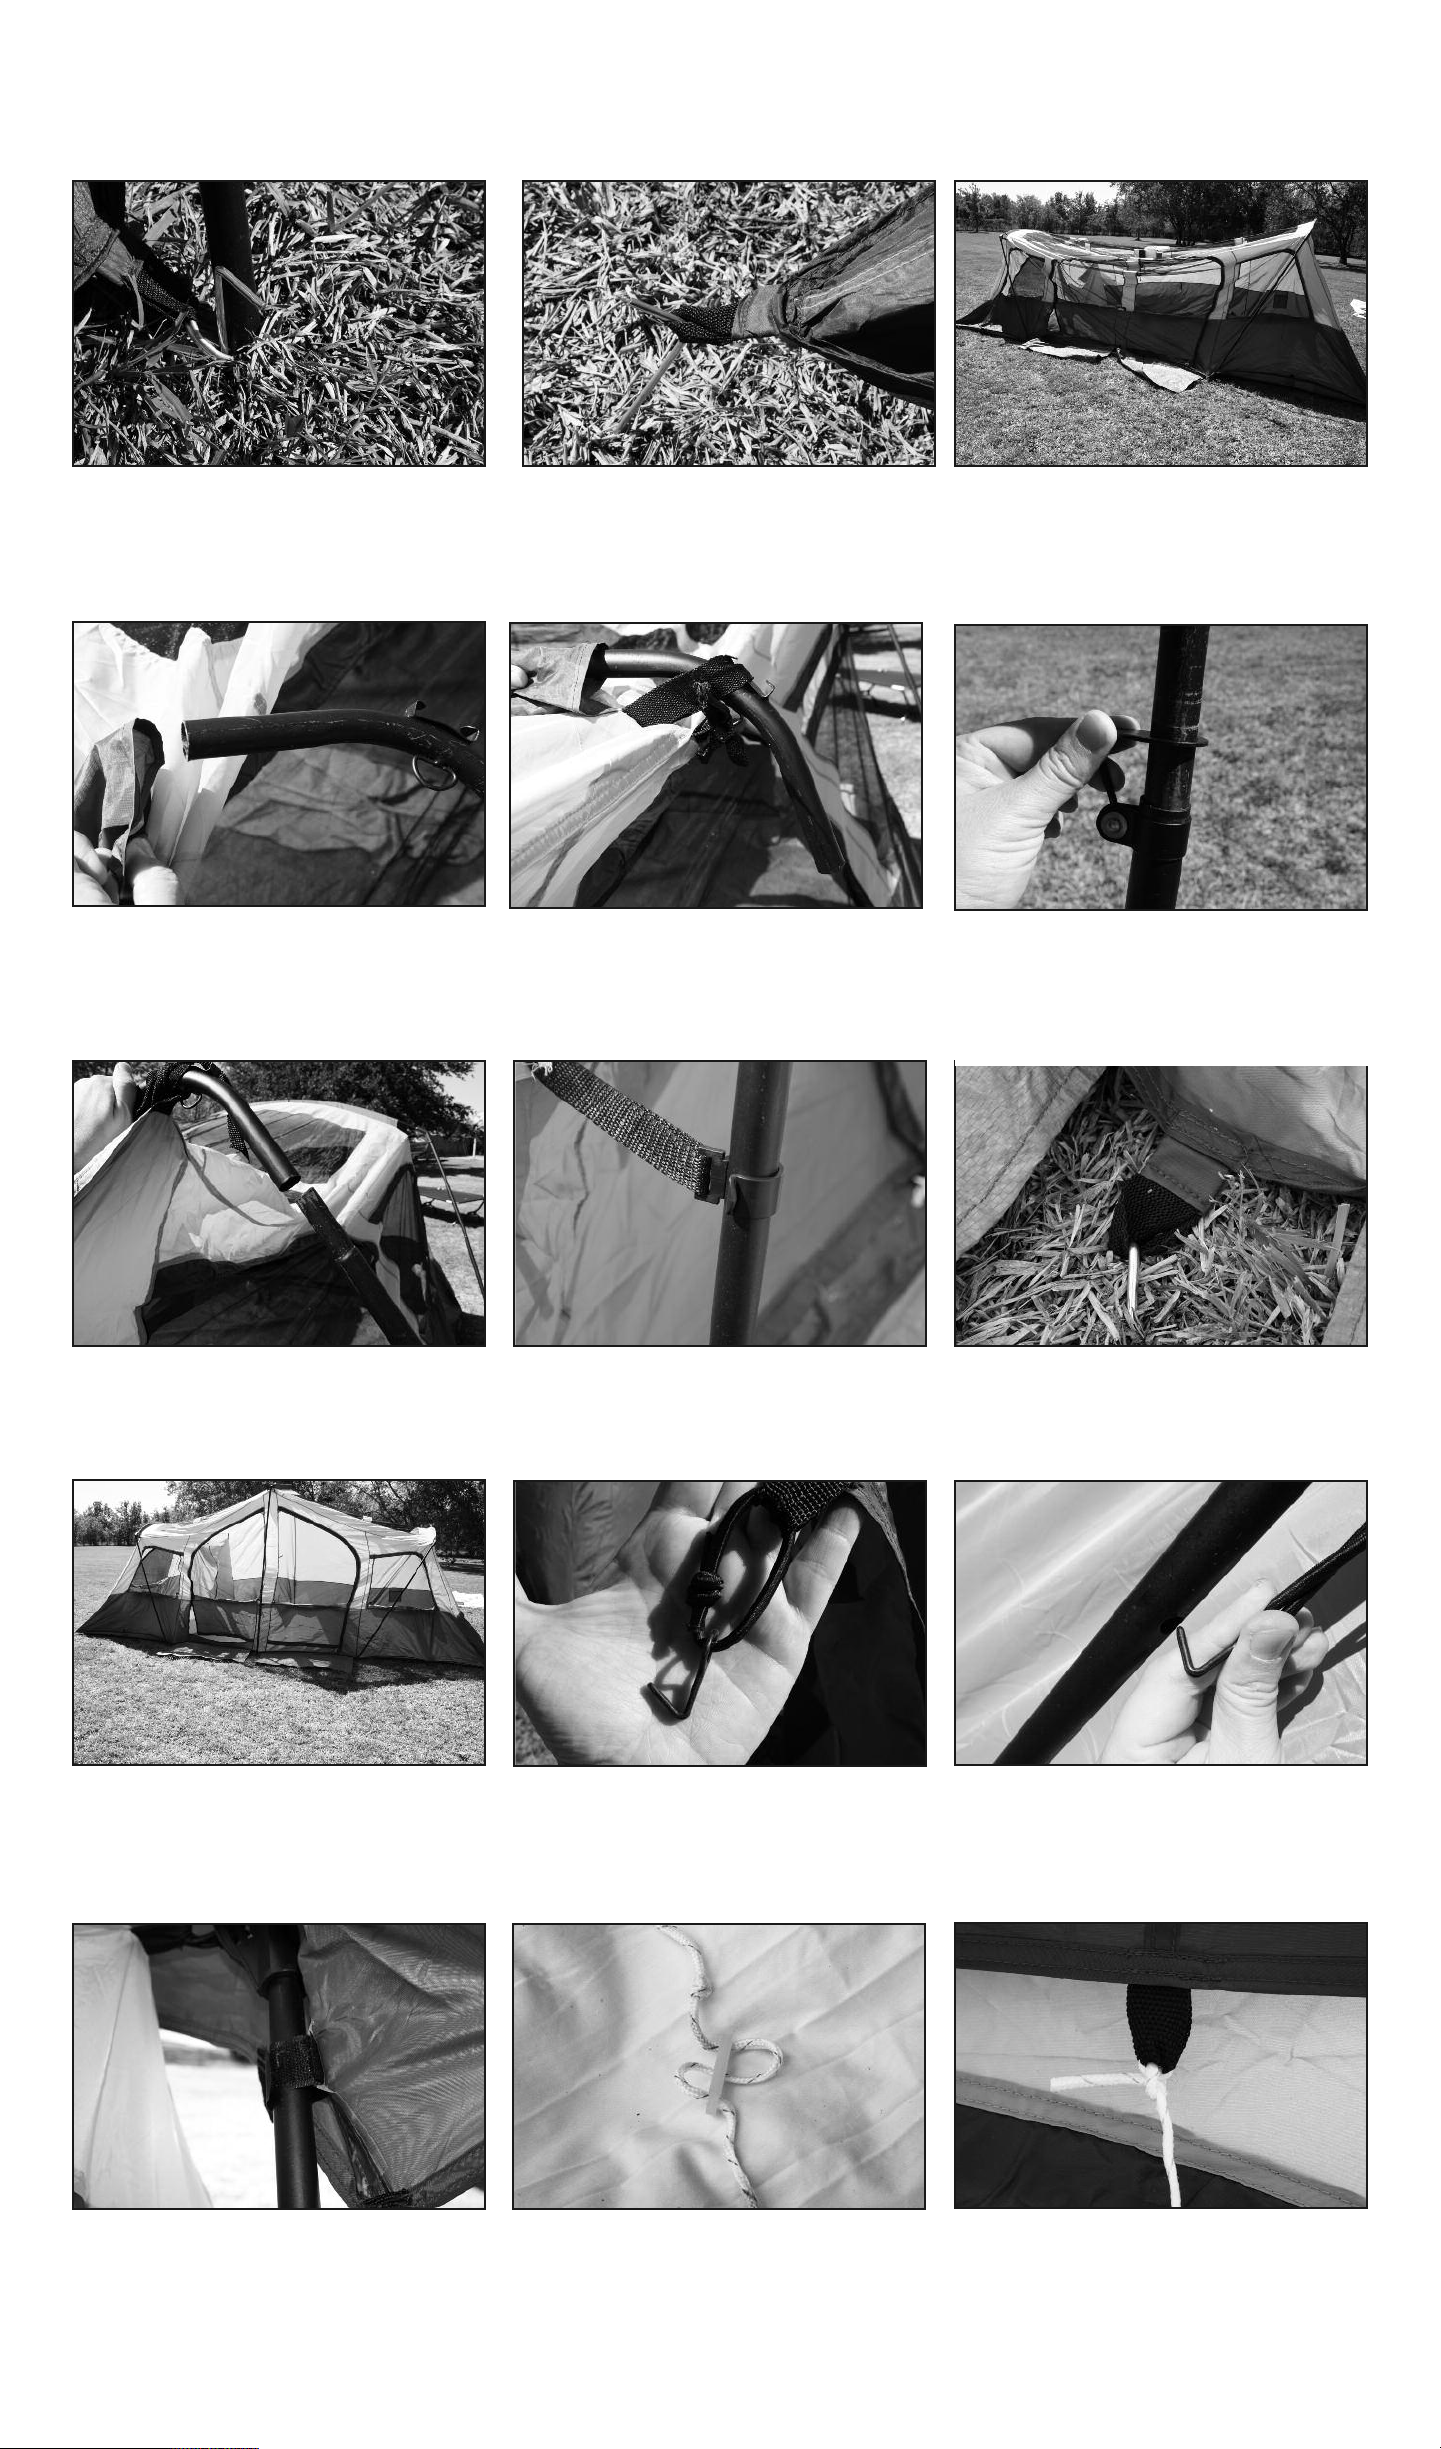
STEP 7 - Stake down at the pin and
ring. Repeat steps 2 - 6 for the other
tent eave.
STEP 8 - Stake down the tabs at the
side doors.
STEP 9 - This is what your tent should
like at this point.
STEP 10 - Assemble the curved chaincorded roof poles (G) and (F) and
insert it through the roof sleeve.
STEP 13 - Insert the assembled leg
pole into the center roof pole. Now
adjust the center pole to make the tent
tight.
STEP 11 - Loop the web straps to the
poles and tie to secure as shown
above.
STEP 14 - Attach speed clips to center
leg poles.
STEP 12 - Assemble the long chaincorded center leg poles (D) and insert
into the long adjustable base pole.
Extend only half way.
STEP 15 - Stake down all the other
tabs around the tent and mud mats.
STEP 16 - This is what your tent should
look like.
STEP 19 - Raise center leg poles so tent
is tight again, and secure the rainfly
with attached velcro to side legs.
STEP 17 - To attach the rainfly, locate
the attached hooks.
STEP 20 - It is recommended in windy
weather to secure your tent with guy
ropes. Insert the guy rope into clew as
shown above.
STEP 18 - Lower center leg poles and
drape the rainfly over the tent and insert the hooks into the small holes of
the side legs.
STEP 21 - Tie the other end of the guy
rope to the tabs on the fly.
 Loading...